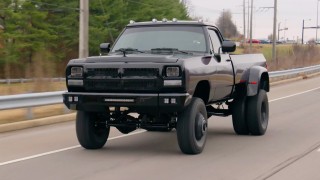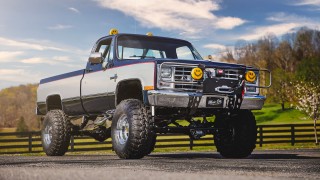

In This Episode
- 0:01 Introduction to the project
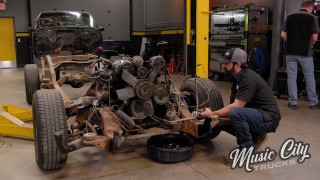
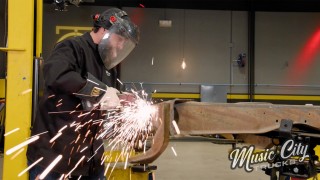
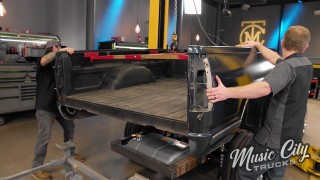
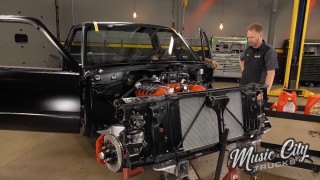
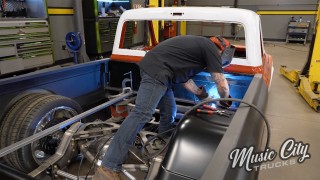
- 0:30 Carving out the cab and trimming the bed
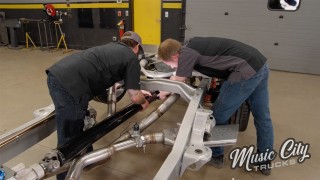
- 2:19 Fabricating a new exhaust system
- 3:15 Cutting holes for shifter and fuel tank
- 4:34 Installing the suspension and fitting the cab
- 6:06 Marking and cutting the bed for suspension and fuel tank
- 8:10 Installing the steering shaft and improving steering system
- 10:08 Fabricating custom headers
- 14:59 Preventing oxidation and creating stronger welds
- 18:31 Fabricating the rest of the exhaust system
Video Transcript
[Mike] You're watching Powernation.
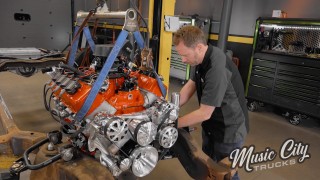
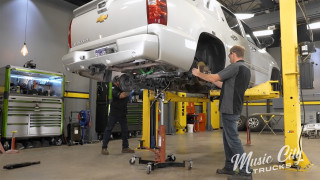
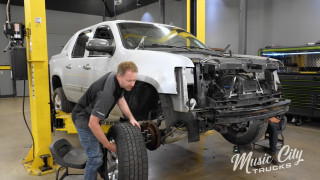
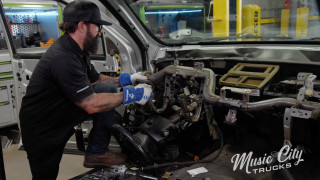
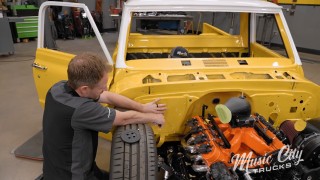
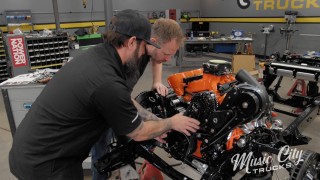
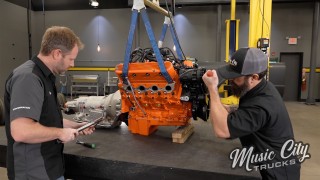
[Mike] Today on Music City Trucks we start carving out our cab to make room for our gear banging six speed. Plus we trim some fat off our bed to accommodate the rear suspension and the fuel tank. [Anthony] Then we'll fabricate a new exhaust system and give you some tips on how to build some custom headers. [ Music ] [Mike] Come on down with that. Get this thing down close to these body mounts and see how far we can go. [Anthony] You think it's gonna clear the firewall with that big block Chevy sitting in there? [Mike] These things came with a big block from the factory. The valve covers were a little bit different. That's the big thing to me. It might give us a little clearance problem, these tall valve covers, but the block itself, the heads, should clear the firewall. Getting closer to these body mounts. Get it all down there. See how close we can get, and right about there looks good. Welcome to Music City Trucks. We're hard at work on our 632 SS project and today we're gonna focus on the exhaust system, but before we can make those custom set of headers we need to see what kind of real estate we've got between the cab and the frame rail. [Anthony] First things first, what we've got to do is since this truck originally came with an automatic transmission we have to figure out our shifter location and get a hole cut so we can be banging gears on this six speed. Then we're gonna move to the back and we've got to clearance some of the cross seals on the bed to fit with our new RideTech suspension. Also mark and figure out the location for our filler neck on our new fuel tank. [Mike] Let's get that marked and cut out. Roll under here and mark this shifter. Shove my head in the crossmember first. That's nice and comfortable. Right about here. Back side. And around the front. Slide around the other side. That general location will work. Get out of here and get it cut out. [Anthony] You ready to go up Mike? [Mike] Go ahead and send it up. [ mechanical humming ] [ Music ]
[Anthony] How high you want this thing? [Mike] That looks good. [ Music ] Climb up in here again. Cover up the trans and keep all the metal shavings out. Yep, that'll work. Here we go! [ drill humming ] [ Music ]
There we go. We'll connect the dots from the top. [ Music ] [Anthony] Now that Mike's got these holes cut what I'm gonna do is make some lines here so I have something to cut to. Hit it with a cutoff wheel. I wanted to use a jigsaw but ours ended up in the trash. So I'm gonna use a cutoff wheel today and we'll get this all cut out. [ Music ]
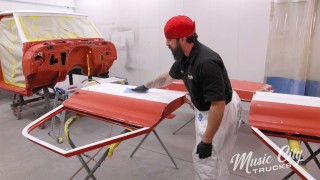
Good enough! [ saw buzzing ] [ Music ] We'll clean that up with a grinder and a file, and then we should be ready to drop this cab down on the frame. [ grinder buzzing ] [ metal scraping ] [Anthony] Should be good to go. [Mike] With that hole in there it's time for the moment of truth. [Anthony] Let's see how I did. [Mike] Coming down. [Anthony] I think that's pretty good. Fits like a glove. [Mike] Looks like it was made for it, perfect! [Anthony] That's another thing checked off the list. [Mike] Get everything done. [ mechanical humming ] [Anthony] Let's try not to batter ram the back of the cab. [ Music ] [Mike] Here we go! [ Music ] So our suspension system runs into the bottom of the bed, the cross seals. So I'm just gonna go in here and mark where it's at along with the fuel tank in the bottom of the bed are spots where we need to trim it back. Mark right there. Then on our fuel tank up here. Give us a little bit more room. About that area. Perfect! Filler neck and that's it. [ torch hissing ] [Anthony] Now with our marks here I'm gonna go ahead and use our plasma cutter with a straight edge. Get these all cut out so we can get this bed on the chassis. [ torch hissing ] [ Music ] [ torch hissing ]
[ grinder buzzing ] [ Music ]
[Mike] Coming up, we gain access to the fuel tank and get our Chevy steering in the right direction.
[Mike] Hey guys, welcome back. We've got our area marked for our filler neck and it lined up right where we want it. Not really, it's in a pretty bad spot. For our hole saw here to open up I'm gonna go ahead and drill a hole first. It's right there in the seam. That makes it really tough. Get that opened up and then cut the big hole out. [ drill humming ] [ Music ]
Bingo! [ metal scraping ] There we go! Set this thing down. [Anthony] See what we got. [ Music ] Hold on. Alright. [ Music ] [Mike] There she is. That looks good. [Anthony] Looks pretty good to me. [Mike] Now before we can make our custom set of headers for this truck we have to install one more piece and that is the steering shaft. Now it lies right in the area of where we make those headers. Our truck uses factory steering box right here that utilizes the parallelogram style steering system that you had a drag link, idler arm, pitman arm. They work fine over the years but there's been some improvements in that technology. [Anthony] One of those improvements was this trick piece from Flaming River. We got this. All it does is bolts right into the chassis and it's gonna give us a lot more room to clear those headers. What do you say we get this installed? [Mike] Yeah, I'm gonna get this stuff out of here. Get it bolted in. [ Music ] [ drill humming ] [Mike] Now we get this bracket off of here and separate these two to make it a little bit easier to install. [Anthony] Let's see if we can get this thing up in here. [Mike] Slide that back and hold this up here. [ Music ] Now this rack and pinion kit from Flaming River bolts right into your '88 to '98 1500 Chevy truck. Eliminates all that unnecessary sloppy feel from the factory linkage system and provides a tight steering response. [ drill humming ] [Mike] And then your same tie rods lock into place. [ Music ]
Get the steering shaft on here. [ Music ] Somewhere, there it goes there. Then we slide it up here. This extends out. Once we install this for good we'll take all these out, put a flat on our shaft, tighten that up, tighten those jamb nuts, and be good to go. If you remember the days as a kid building puzzles and you saw that picture on the box and said that's a really cool puzzle. I want to put that together until you open up the box, dump out all the pieces, and you see, wow, what did I get myself into. That's kinda what we got going on here with our exhaust system. When you fabricate an exhaust system from the headers all the way back to the tailpipes you've got a lot going on. But take it one piece at a time and you'll end up with a really nice fitting exhaust system. So let's start building that puzzle. When we talk about building our own set of headers it might bring up a lot of headaches for some of you. Don't worry, it does me too, but take it one tube at a time and you'll end up with a really nice piece that you can be proud of. First thing we need to do. We've already got our exhaust flange attached to the cylinder head. That's Point-A and then Point-B is gonna be our collector. So we're gonna get our collector fixed in a spot that we think it's gonna be happy for the set and then we'll just connect the dots. Sounds simple right! Let's get to it. [Anthony] Fabricating custom headers can be puzzling but we'll give you some techniques to fit all the pieces together.
[Mike] Guys welcome back. While you were away we went ahead and got our collectors underneath the truck tacked in place where we think they're gonna land. That'll give us a fixed point between the flange and the collector on that bottom side of the truck so we can match up those pipes. Now you might be thinking, why do you have to build a custom set of headers? Well this is 632 cubic inches of big block power. It's moving a lot of air. There are some companies that make headers for big blocks in this chassis but they're a little small on the primary tube diameter, about an inch and three quarter. We're going with two inches on our primary tube diameter. That might be a little small for this one as well but we have to compromise with the real estate that we have and the capability of the engine. So now what we have to do is I already took this one pipe and started cutting it up. Kinda getting an eyeball of where she's gonna land. It's just a matter of doing some cuts on the band saw, fitting up a couple of other pieces, tack them into place. One by one they'll fall together. [ Music ] Let's see how far that needs to stick out. That looks good. Keep an eye on that spot right there. [ Music ]
[ saw buzzing ] [ Music ]
[ grinder buzzing ] [ Music ]
[Mike] With this piece cut for the collector and this one for our flange coming out of the cylinder now we just need to get it down in there and see what the length is on this one and then the angle we have to cut on this one to make it match up. [ Music ]
Got it marked where she needs to be. Now it's time to make the cut. [Anthony] Speaking of cuts there's a couple of tricks that you want to pay attention to when you're dealing with radiuses and the stuff that I have to deal with on this side to get around the steering column. When you're working on the band saw you're gonna be dealing with different radiuses, whether it's 180s, 45s, 90s. You've just got to make sure when you're cutting these that you stay on the tangent of the radius. That means say you want to take a pie out of here you want to make sure you're cutting straight to the center line of that radius. That way you're not gonna have to deal with any oblong shapes, anything oval in the tube that's gonna mess up your fit up. Another thing you want to pay attention to is you want to make sure you're clean on both the inside and the outside. That way when you go to weld it up you're not gonna deal with any porosity. You're gonna get a nice, clean weld. Let's see how this one fits up in here. Let's see what we're looking like here. Mike you want to give me a mark here? [Mike] Sure! What you got? [Anthony] Go ahead and mark that right there. [Mike] Oh yeah. [Anthony] Alright, I think we're good. Let's go ahead, get this thing out of here, get it tacked up, and see if we have any more fitting to do. So we got these fit up. Let's go ahead and tack them. We'll line up our lines that we've got marked and then we'll get it tacked up. [ Music ] So we got that all tacked up. Let's go fit it up again in the truck and make sure it fits. Let's see how we're fitting here. [ Music ] Looks like I've got something to work with here. We'll start back at the collector now, figure out my angle, and get another piece in there. We'll do that process about 15 to 60 more times and we should have a complete set of headers by then. [ saw buzzing ] [ Music ]
[ grinder buzzing ] [ Music ]
[ welder hissing ] [ Music ] [Mike] Like it was made for it! Tack it up. We got all our pieces fit and where we like them. [Anthony] Only thing we've got left to do is get them off the truck, get them on the table, and get it welded up. [Mike] This looks so go. If we don't ever start the engine we can just leave it like this. [Anthony] Be a lot easier that way. Up next, we show you how to prevent oxidation and create stronger welds while fabricating headers. [Mike] Then we'll finish building our double duty exhaust system.
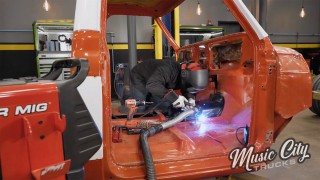
[Anthony] Now that we have our headers all fabricated it's almost time to start welding but there's a couple of steps we're gonna have to take to ensure that we're getting a good weld, and one of those steps is called "back purging". All back purging is is taking whatever gas that you're using, in our case is 100 percent Argon, and filling the inside of whatever tube you're welding with that gas. That's gonna ensure that you're getting a good solid weld with no cracking issues. You want your weld to have the same surface area on the outside and on the inside. So that's gonna make sure that you're getting a nice, clean weld on in there. The way that we did it here is on this side we took a piece of aluminum and figured out our flange bolt pattern and bolted this to it. Now there's a few companies that make silicone plugs but we don't have those. So we just decided to do that. Now down here I'm gonna use a couple of inexpensive household items that'll serve the same purpose as those plugs. The first of those I'm gonna use is a piece of aluminum foil. You go ahead and you rip your piece off right here. You want to make sure you triple it up. Make it nice and thick just like that. So we'll do that. Get your piece of cardboard that you already cut out to the diameter of whatever you're trying to purge. So we'll stick that on there like this. Get it up. Wrap it just like that. Make sure it's nice and tight and flat. Then take your hose clamp and stick right on there like that. [ Music ] That should be good. So now we've got a nice, sealed surface here. We've got a nice, sealed surface here. We'll go ahead and insert our argon line right into here and we'll be ready to weld. What you're gonna want to do is have a hole here so that your argon line can thread into the cardboard. I already drilled one. So I'm just gonna open that up right there, grab my line, and start threading it in. So when you're threading these in you want to make sure you're not going too crazy cause it is cardboard and it will pull out. I like to wrap aluminum foil tape around this. We don't have any and this thing's holding pretty tight. So we're good to go there. Another tip I got for you is you've got to keep your tungsten sharp and clean, and the way I like to do that is with this Piranha-III here from Diamond Ground Products. It's a real nice machine. All you do is turn it on here, get your tungsten in the right size hole, put it in, spin it, and we're ready to rock n' roll. It's nice, sharp tungsten. It'll keep our welds nice and clean. Only thing left I've got to do is turn that argon on and we'll get to burning. One of the most important things when you're welding is to be comfortable. If you're not comfortable the weld's not gonna come out good. [ welder hissing ] [ Music ]
[Mike] Now that we have our headers installed it's time to fabricate the rest of this exhaust system. The exhaust is a key area to provide the personality of a vehicle. For me there's nothing better than a mid-'90s stock car ripping around Daytona at full song. We may not be hitting the high banks any time soon but we can emulate that sound. We're gonna do that with this X-pipe and these boom tubes from Spin Tech Mufflers. When we don't want it to be so loud we're gonna have an option to have a dual personality setup with these exhaust cutouts. That's the subject of today's Summit Tech Tip. These exhaust cutouts that we got from Summit Racing have actually been around for a long time. In fact a lot of newer cars have a type of system like called adaptive exhaust. When you want to be discreet on the street the exhaust is gonna come out this direction through the mufflers and out the tailpipes. But when it's time to open up and let that big block sing these valves open and the exhaust comes out our boom tube. This whole kit is very simple, very easy to install, and it comes with everything you need. We have a switch, the wiring harness, and all the hardware included. All we have to do is provide power and ground, hit the switch. [ Music ] Now we're making all the noise out the boom tube. When we pull in that drive-thru and need to quiet it down a little bit we close it right back up. This whole kit is very simple. You can get a set of these at Summit Racing. For us we need to fabricate the rest of our exhaust system. [ Music ]
[ drill humming ] [ Music ] [Mike] Yeah, we get that roll pan on there that exhaust will be tucked up nice and tight behind it. [Anthony] It's gonna be hiding real nice back there. I've got a little bit more welding to do but if you guys like what you saw today go over to Powernation TV and check some more out. [Mike] See you guys next time.
Show Full Transcript
[Mike] Today on Music City Trucks we start carving out our cab to make room for our gear banging six speed. Plus we trim some fat off our bed to accommodate the rear suspension and the fuel tank. [Anthony] Then we'll fabricate a new exhaust system and give you some tips on how to build some custom headers. [ Music ] [Mike] Come on down with that. Get this thing down close to these body mounts and see how far we can go. [Anthony] You think it's gonna clear the firewall with that big block Chevy sitting in there? [Mike] These things came with a big block from the factory. The valve covers were a little bit different. That's the big thing to me. It might give us a little clearance problem, these tall valve covers, but the block itself, the heads, should clear the firewall. Getting closer to these body mounts. Get it all down there. See how close we can get, and right about there looks good. Welcome to Music City Trucks. We're hard at work on our 632 SS project and today we're gonna focus on the exhaust system, but before we can make those custom set of headers we need to see what kind of real estate we've got between the cab and the frame rail. [Anthony] First things first, what we've got to do is since this truck originally came with an automatic transmission we have to figure out our shifter location and get a hole cut so we can be banging gears on this six speed. Then we're gonna move to the back and we've got to clearance some of the cross seals on the bed to fit with our new RideTech suspension. Also mark and figure out the location for our filler neck on our new fuel tank. [Mike] Let's get that marked and cut out. Roll under here and mark this shifter. Shove my head in the crossmember first. That's nice and comfortable. Right about here. Back side. And around the front. Slide around the other side. That general location will work. Get out of here and get it cut out. [Anthony] You ready to go up Mike? [Mike] Go ahead and send it up. [ mechanical humming ] [ Music ]
[Anthony] How high you want this thing? [Mike] That looks good. [ Music ] Climb up in here again. Cover up the trans and keep all the metal shavings out. Yep, that'll work. Here we go! [ drill humming ] [ Music ]
There we go. We'll connect the dots from the top. [ Music ] [Anthony] Now that Mike's got these holes cut what I'm gonna do is make some lines here so I have something to cut to. Hit it with a cutoff wheel. I wanted to use a jigsaw but ours ended up in the trash. So I'm gonna use a cutoff wheel today and we'll get this all cut out. [ Music ]
Good enough! [ saw buzzing ] [ Music ] We'll clean that up with a grinder and a file, and then we should be ready to drop this cab down on the frame. [ grinder buzzing ] [ metal scraping ] [Anthony] Should be good to go. [Mike] With that hole in there it's time for the moment of truth. [Anthony] Let's see how I did. [Mike] Coming down. [Anthony] I think that's pretty good. Fits like a glove. [Mike] Looks like it was made for it, perfect! [Anthony] That's another thing checked off the list. [Mike] Get everything done. [ mechanical humming ] [Anthony] Let's try not to batter ram the back of the cab. [ Music ] [Mike] Here we go! [ Music ] So our suspension system runs into the bottom of the bed, the cross seals. So I'm just gonna go in here and mark where it's at along with the fuel tank in the bottom of the bed are spots where we need to trim it back. Mark right there. Then on our fuel tank up here. Give us a little bit more room. About that area. Perfect! Filler neck and that's it. [ torch hissing ] [Anthony] Now with our marks here I'm gonna go ahead and use our plasma cutter with a straight edge. Get these all cut out so we can get this bed on the chassis. [ torch hissing ] [ Music ] [ torch hissing ]
[ grinder buzzing ] [ Music ]
[Mike] Coming up, we gain access to the fuel tank and get our Chevy steering in the right direction.
[Mike] Hey guys, welcome back. We've got our area marked for our filler neck and it lined up right where we want it. Not really, it's in a pretty bad spot. For our hole saw here to open up I'm gonna go ahead and drill a hole first. It's right there in the seam. That makes it really tough. Get that opened up and then cut the big hole out. [ drill humming ] [ Music ]
Bingo! [ metal scraping ] There we go! Set this thing down. [Anthony] See what we got. [ Music ] Hold on. Alright. [ Music ] [Mike] There she is. That looks good. [Anthony] Looks pretty good to me. [Mike] Now before we can make our custom set of headers for this truck we have to install one more piece and that is the steering shaft. Now it lies right in the area of where we make those headers. Our truck uses factory steering box right here that utilizes the parallelogram style steering system that you had a drag link, idler arm, pitman arm. They work fine over the years but there's been some improvements in that technology. [Anthony] One of those improvements was this trick piece from Flaming River. We got this. All it does is bolts right into the chassis and it's gonna give us a lot more room to clear those headers. What do you say we get this installed? [Mike] Yeah, I'm gonna get this stuff out of here. Get it bolted in. [ Music ] [ drill humming ] [Mike] Now we get this bracket off of here and separate these two to make it a little bit easier to install. [Anthony] Let's see if we can get this thing up in here. [Mike] Slide that back and hold this up here. [ Music ] Now this rack and pinion kit from Flaming River bolts right into your '88 to '98 1500 Chevy truck. Eliminates all that unnecessary sloppy feel from the factory linkage system and provides a tight steering response. [ drill humming ] [Mike] And then your same tie rods lock into place. [ Music ]
Get the steering shaft on here. [ Music ] Somewhere, there it goes there. Then we slide it up here. This extends out. Once we install this for good we'll take all these out, put a flat on our shaft, tighten that up, tighten those jamb nuts, and be good to go. If you remember the days as a kid building puzzles and you saw that picture on the box and said that's a really cool puzzle. I want to put that together until you open up the box, dump out all the pieces, and you see, wow, what did I get myself into. That's kinda what we got going on here with our exhaust system. When you fabricate an exhaust system from the headers all the way back to the tailpipes you've got a lot going on. But take it one piece at a time and you'll end up with a really nice fitting exhaust system. So let's start building that puzzle. When we talk about building our own set of headers it might bring up a lot of headaches for some of you. Don't worry, it does me too, but take it one tube at a time and you'll end up with a really nice piece that you can be proud of. First thing we need to do. We've already got our exhaust flange attached to the cylinder head. That's Point-A and then Point-B is gonna be our collector. So we're gonna get our collector fixed in a spot that we think it's gonna be happy for the set and then we'll just connect the dots. Sounds simple right! Let's get to it. [Anthony] Fabricating custom headers can be puzzling but we'll give you some techniques to fit all the pieces together.
[Mike] Guys welcome back. While you were away we went ahead and got our collectors underneath the truck tacked in place where we think they're gonna land. That'll give us a fixed point between the flange and the collector on that bottom side of the truck so we can match up those pipes. Now you might be thinking, why do you have to build a custom set of headers? Well this is 632 cubic inches of big block power. It's moving a lot of air. There are some companies that make headers for big blocks in this chassis but they're a little small on the primary tube diameter, about an inch and three quarter. We're going with two inches on our primary tube diameter. That might be a little small for this one as well but we have to compromise with the real estate that we have and the capability of the engine. So now what we have to do is I already took this one pipe and started cutting it up. Kinda getting an eyeball of where she's gonna land. It's just a matter of doing some cuts on the band saw, fitting up a couple of other pieces, tack them into place. One by one they'll fall together. [ Music ] Let's see how far that needs to stick out. That looks good. Keep an eye on that spot right there. [ Music ]
[ saw buzzing ] [ Music ]
[ grinder buzzing ] [ Music ]
[Mike] With this piece cut for the collector and this one for our flange coming out of the cylinder now we just need to get it down in there and see what the length is on this one and then the angle we have to cut on this one to make it match up. [ Music ]
Got it marked where she needs to be. Now it's time to make the cut. [Anthony] Speaking of cuts there's a couple of tricks that you want to pay attention to when you're dealing with radiuses and the stuff that I have to deal with on this side to get around the steering column. When you're working on the band saw you're gonna be dealing with different radiuses, whether it's 180s, 45s, 90s. You've just got to make sure when you're cutting these that you stay on the tangent of the radius. That means say you want to take a pie out of here you want to make sure you're cutting straight to the center line of that radius. That way you're not gonna have to deal with any oblong shapes, anything oval in the tube that's gonna mess up your fit up. Another thing you want to pay attention to is you want to make sure you're clean on both the inside and the outside. That way when you go to weld it up you're not gonna deal with any porosity. You're gonna get a nice, clean weld. Let's see how this one fits up in here. Let's see what we're looking like here. Mike you want to give me a mark here? [Mike] Sure! What you got? [Anthony] Go ahead and mark that right there. [Mike] Oh yeah. [Anthony] Alright, I think we're good. Let's go ahead, get this thing out of here, get it tacked up, and see if we have any more fitting to do. So we got these fit up. Let's go ahead and tack them. We'll line up our lines that we've got marked and then we'll get it tacked up. [ Music ] So we got that all tacked up. Let's go fit it up again in the truck and make sure it fits. Let's see how we're fitting here. [ Music ] Looks like I've got something to work with here. We'll start back at the collector now, figure out my angle, and get another piece in there. We'll do that process about 15 to 60 more times and we should have a complete set of headers by then. [ saw buzzing ] [ Music ]
[ grinder buzzing ] [ Music ]
[ welder hissing ] [ Music ] [Mike] Like it was made for it! Tack it up. We got all our pieces fit and where we like them. [Anthony] Only thing we've got left to do is get them off the truck, get them on the table, and get it welded up. [Mike] This looks so go. If we don't ever start the engine we can just leave it like this. [Anthony] Be a lot easier that way. Up next, we show you how to prevent oxidation and create stronger welds while fabricating headers. [Mike] Then we'll finish building our double duty exhaust system.
[Anthony] Now that we have our headers all fabricated it's almost time to start welding but there's a couple of steps we're gonna have to take to ensure that we're getting a good weld, and one of those steps is called "back purging". All back purging is is taking whatever gas that you're using, in our case is 100 percent Argon, and filling the inside of whatever tube you're welding with that gas. That's gonna ensure that you're getting a good solid weld with no cracking issues. You want your weld to have the same surface area on the outside and on the inside. So that's gonna make sure that you're getting a nice, clean weld on in there. The way that we did it here is on this side we took a piece of aluminum and figured out our flange bolt pattern and bolted this to it. Now there's a few companies that make silicone plugs but we don't have those. So we just decided to do that. Now down here I'm gonna use a couple of inexpensive household items that'll serve the same purpose as those plugs. The first of those I'm gonna use is a piece of aluminum foil. You go ahead and you rip your piece off right here. You want to make sure you triple it up. Make it nice and thick just like that. So we'll do that. Get your piece of cardboard that you already cut out to the diameter of whatever you're trying to purge. So we'll stick that on there like this. Get it up. Wrap it just like that. Make sure it's nice and tight and flat. Then take your hose clamp and stick right on there like that. [ Music ] That should be good. So now we've got a nice, sealed surface here. We've got a nice, sealed surface here. We'll go ahead and insert our argon line right into here and we'll be ready to weld. What you're gonna want to do is have a hole here so that your argon line can thread into the cardboard. I already drilled one. So I'm just gonna open that up right there, grab my line, and start threading it in. So when you're threading these in you want to make sure you're not going too crazy cause it is cardboard and it will pull out. I like to wrap aluminum foil tape around this. We don't have any and this thing's holding pretty tight. So we're good to go there. Another tip I got for you is you've got to keep your tungsten sharp and clean, and the way I like to do that is with this Piranha-III here from Diamond Ground Products. It's a real nice machine. All you do is turn it on here, get your tungsten in the right size hole, put it in, spin it, and we're ready to rock n' roll. It's nice, sharp tungsten. It'll keep our welds nice and clean. Only thing left I've got to do is turn that argon on and we'll get to burning. One of the most important things when you're welding is to be comfortable. If you're not comfortable the weld's not gonna come out good. [ welder hissing ] [ Music ]
[Mike] Now that we have our headers installed it's time to fabricate the rest of this exhaust system. The exhaust is a key area to provide the personality of a vehicle. For me there's nothing better than a mid-'90s stock car ripping around Daytona at full song. We may not be hitting the high banks any time soon but we can emulate that sound. We're gonna do that with this X-pipe and these boom tubes from Spin Tech Mufflers. When we don't want it to be so loud we're gonna have an option to have a dual personality setup with these exhaust cutouts. That's the subject of today's Summit Tech Tip. These exhaust cutouts that we got from Summit Racing have actually been around for a long time. In fact a lot of newer cars have a type of system like called adaptive exhaust. When you want to be discreet on the street the exhaust is gonna come out this direction through the mufflers and out the tailpipes. But when it's time to open up and let that big block sing these valves open and the exhaust comes out our boom tube. This whole kit is very simple, very easy to install, and it comes with everything you need. We have a switch, the wiring harness, and all the hardware included. All we have to do is provide power and ground, hit the switch. [ Music ] Now we're making all the noise out the boom tube. When we pull in that drive-thru and need to quiet it down a little bit we close it right back up. This whole kit is very simple. You can get a set of these at Summit Racing. For us we need to fabricate the rest of our exhaust system. [ Music ]
[ drill humming ] [ Music ] [Mike] Yeah, we get that roll pan on there that exhaust will be tucked up nice and tight behind it. [Anthony] It's gonna be hiding real nice back there. I've got a little bit more welding to do but if you guys like what you saw today go over to Powernation TV and check some more out. [Mike] See you guys next time.