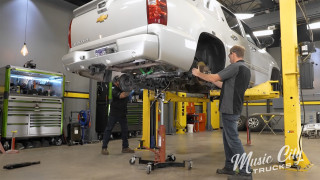
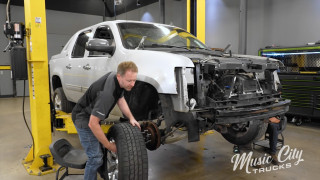
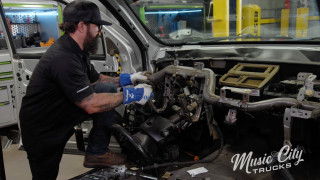
In This Episode
- 0:01 Introduction to Music City Trucks
- 0:35 Final Stages of Assembly
- 1:11 Sound Dampening Installation
- 5:24 Brake System Upgrade
- 6:19 Heating and Cooling System Installation
- 11:29 Master Cylinder Installation
- 15:02 Brake Pedal and Steering Column Installation
- 18:00 Wiring Harness Upgrade
- 20:16 Battery Cable Crimping
- 20:22 Wheel and Tire Combination
Video Transcript
You're watching Power Nation.
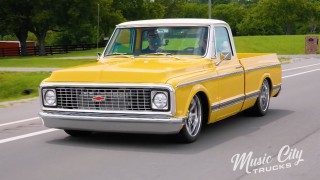
Today on Music City Trucks, we're taking our C10 custom cruiser one step closer to the ride it deserves.
We're dialing down the noise with some sticky sound dampening,
and we'll also bring comfort to every mile with a new heating and cooling system. Plus, give us the confidence to stop on a dime with a brand new manual brake setup.
It's all about making this truck feel as good as it looks.
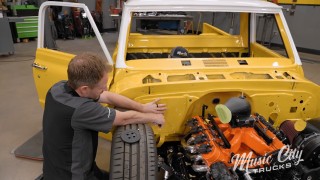
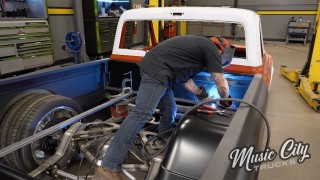
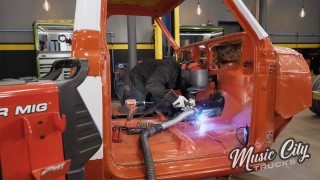
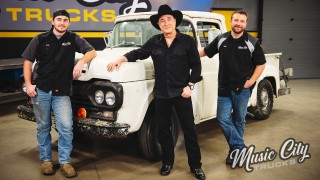
Hey guys, welcome to Music City Trucks. Well, we're in the final stages of assembly, an old project Cream Puff here,
and the last time you saw it, it was a rolling chassis. Since then, we've added the bed
and the cab to get this thing closer to the finish line. And I'll tell you what, this thing's finally starting to look like a truck,
but you know what they say, that last 10%.
Takes 90% of the time.
We still have a lot of work to do on this truck,
and you know what I like to say?
Devil's in the details, and this is where it counts.
Yeah,
so hopefully by the end of the day we'll have some air conditioning wrapped up
and some of the wiring and any other little details that we can pop in.
Yeah,
and we also got to get some sound deadeners thing. So what do you say?
Let's get to it.
All right,
so before we can get to any carpet or any other components on top,
well, we're gonna need to take care of this underlayment here and what happened to the painting all of it?
What do you mean?
Uh,
we've got some yellow, some red.
No,
we ran out of paint.
Oh, yeah, when you had a little accident.
What are you talking about? When I fell out of the truck?
Yeah. Spilled the paint all over the floor?
Right.
Yeah, let's move on from that.
So needless to say, we ran out of paint,
but, uh,
we got all the important stuff covered, so there's already paint here,
so it's not like it's bare metal, so we're fine, yeah,
yeah,
so that's fine there on that surface,
but yeah, this is gonna be a cruiser,
you know, we're gonna have air conditioning in this thing and be going up and down the road. We wanna have a nice interior, so we want kind of quiet on the inside
so you can cruise in peace is what it is. We don't wanna get too hot as well. We want, you know, these old trucks,
they were farm trucks and they weren't really sealed from the factory,
so we wanna try to.
Bring a little of the 21st century into this truck.
Yeah,
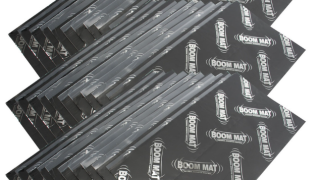
so to do that we're gonna use this boom mat here from Design Engineering.
It's gonna help,
like you said,
some of that thermal control and also the acoustics, the sound in there.
Now this stuff,
it has an adhesive backing there so.
So before we stick this down,
we need to clean this up and that's the good stuff. It's got Bele on the back,
not asphalt,
so it's gonna be
real nice clean install.
Yeah,
it'll form up really nice. So
we'll get this thing wiped down, blown out,
and get the sticking.
All right, I'll grab the air.
All right,
we'll get our mat installed here.
Now
this stuff, you don't have to cover every square inch of the panel for it to work.
No,
you just kind of wanna focus on the spots that you think are gonna be the noisiest or,
you know,
take the most heat from the bottom.
Yeah, I think they say.
25 to 50% coverage,
uh, it gives you the same effect there so and it's also a good idea to wear some gloves, you know, at the end of it you don't wanna look like
Edward Scissorhands's face on your hands. I hear you, but I'm gonna do my best,
yeah, I'm gonna try to.
This
much done with one full piece before I had to start trimming things out,
so and I like to
peel just a little bit of it,
you know,
and then just
while you're working it,
go ahead and peel because this stuff is super sticky.
Yeah, I just gotta watch the edges there because that's metal it will cut you.
Pull that back a little bit.
All right,
that one down.
You take your little roller here.
And really.
The
Oh, look at that
lined up perfectly.
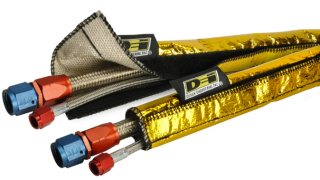
Now, DEI has also sent us a selection of their heat shroud,
and we're gonna use that to protect our lines,
hoses, and wires from heat and abrasions.
Now you could either do 25% coverage
or 100% coverage like Anthony has done here.
Either way, that's gonna keep our cab quiet and comfortable heading down the road.
The best technique for this is when you're rolling it, you just wanna be real mad at it you gotta get angry.
Get that rage in you.
Then it lays down
just right.
All right,
before we head to break, I wanna talk about the brakes on the front of the truck.
Now we've showed you the big rotors and 6 piston calipers we got from EBC brakes
and our hard line we installed up and down the frame rail,
but you have to have some type of flexible line to connect the two.
So most of your factory vehicles run a rubber style brake line,
which is fine until you get into a hard braking event.
They tend to swell and that will reduce the brake pedal, giving you a softer brake pedal feel. That's no good when you wanna stop the vehicle.
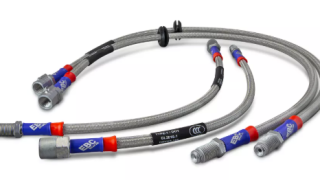
So what you can do is upgrade those to a braided stainless steel one like this one from EBC brakes.
Now what that's gonna do.
is when you hit the brakes really hard, they're not gonna swell, they're gonna keep the shape and they're gonna transfer that
pressure
all the way to the calipers,
letting you stop the vehicle.
Now, EBC takes these,
they'll assemble them in-house,
pressure test each one,
and they're also DOT approved.
So if you want to upgrade your ride,
check out EBC and their brake lines.
Coming up,
we reveal a compact customizable heating and cooling system
that brings modern comfort to your classic ride.
Now our truck came from the factory with air conditioning, but the last time we had it out,
it didn't work,
and those factory systems underneath the hood were pretty ugly with all the hoses and wires all over the place.
Also, there's been a lot of advancements to these systems over the years,
so we're gonna upgrade our heat and air conditioning with this kit from Old Air Products.
Now they've sent us everything we need to install this on our truck
all the way from the cooling fans at the radiator to the condenser and even these little trash guards underneath.
The cow there.
Now, whether your truck is equipped with factory AC or it's just a heater style truck,
they have everything you need to convert to a modern AC system.
And if you're not sure how air conditioning works,
well, let's take a look at it.
The main objective of the AC system is to remove the heat from inside the cabin
and send it outside, and that starts with the compressor,
the heart of the system.
The compressor sucks in warm refrigerant vapor and discharges a high temperature,
high-pressure vapor.
The refrigerant in its gaseous state enters the condenser where it.
Transfers heat from the refrigerant to the tubes and fins.
Then the cooler ambient air passes across the tubes and fins where it absorbs the heat as heat always transfers from hot to cold.
So much heat is removed from the refrigerant that it condenses to a liquid state.
That high-pressure liquid refrigerant leaves the condenser, cooler, and enters the receiver filter dryer where the refrigerant passes through a desiccant to remove moisture and a filter.
Once it leaves the dryer, it moves to an expansion valve or metering device.
This.
The restriction in the system that allows pressure change.
The refrigerant leaves the valve as a low pressure,
low temperature, liquid or mist that enters the evaporator, which is inside the cab.
The warm air from the cab passes across the tubes and fins and transfers its heat to the cooler refrigerant.
The air leaves cooler and the liquid refrigerant evaporates to a gaseous state as it absorbs the heat from the cab and heads back to the compressor.
That cool air leaves the vents and keeps us cruising comfortably down the road.
Now, let's get the evaporator.
Assembly installed.
Now the mounting bracket that comes with the kit is already black,
but we went ahead and painted it to match our truck.
So we'll get this on here. And
another thing here is when you get this on,
notice this opening. We went ahead and cut that before we did our bodywork.
So we'll slide this on and
Anthony's gonna slide that evaporator assembly
from the inside out. We'll get all the four lines poked through here.
I'll start with this black hose here,
yeah, the drain tube there.
Perfect.
Got it through.
You know, I like how small this unit is.
It really tucks up in here nice and tight.
Yeah, that's the beauty about this unit. It's got the evaporator. It's got the heater core,
uh, and the blower motor all contained in that one unit right there. You're still off in the stud here on the bottom.
Can you pull that hose?
Looks like it needs to go up. Hold on.
Mhm.
Go ahead,
pull it.
Oh,
there you go.
Yeah, just get those nuts on there and leave it,
uh, let it
could have about a quarter inch of wiggle room
so we can get this grommet on there.
Got them all started.
They're all started.
All right,
let's see here.
This will be a fun part.
it.
You can do it,
Mike.
E.
Almost there.
Round and 3rd,
yep.
Pop this in the backside of that.
All right,
got that in there when we get it tightened up,
and then also we have a block off plate for the old blower motor.
Uh,
once we get the radiator support installed, the radiator on, the condenser,
uh, then we can run our lines and finish up that,
uh, but that's everything out here,
I think. Next we can do the wiring. Yeah, we're, uh,
pretty wide open underneath this dash. I think it's about time we start getting,
getting this wiring conquered.
Yeah, we'll start slinging some wires.
There's a lot to it.
I'm gonna get these tightened up.
Another cool feature about this kit from Old Air Products is they utilize your factor control panel, but they convert all the signals electronically with these potentiometers
that way it gets rid of all those push and pull cables. So let's get this guy installed here.
And a couple of screws.
All right.
We boost our braking power and clean up that engine bay with a sleek new master cylinder
that transforms both form and function.
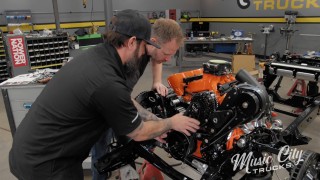
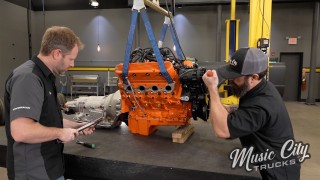
So now that we've added this go fast goodie on top of our 427,
we got to make sure that the truck can stop.
We also want to clean up the firewall a little bit,
get rid of that factory bulky power brake setup.
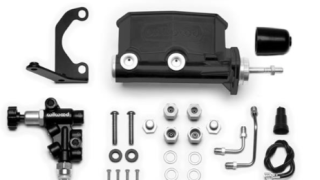
So what we did is we hit up Summit Racing and they sent us over this Willwood compact tandem master cylinder.
This is a nice small package that features both the front and rear circuits
all combined.
Now we also hit up Level 7 Motorsports, and they sent us over their build aluminum firewall adapter.
Now this cleans up the firewall and it also gives us a nice sturdy mounting point for the master cylinder.
So let's go ahead and let's get it on the truck.
Alright,
so first up we'll get the master cylinder in.
Now we're running the factory brake pedal along with the bracket,
so it has a nice long stud on it.
Next up we're gonna go ahead and throw our Willwood proportioning valve that we also got from Summit
on next, but make sure you're putting your two black billet aluminum washers they give you in the kit
first before you put the valve on.
Get that on.
And
go ahead and get her nuts on.
This one over here is a little.
It's
nice and fun to get to,
but we'll get it.
Get it tightened up
All right, up next we'll get the fittings in the master cylinder.
Uh, just make sure you have the crush washer on it before you install it
because you don't wanna have to take it all, all the way back apart if you don't have that on.
Now when you go to tighten the lines,
it'll snug them up more. I'm just trying to get them started.
It should be good.
Now they give you two different lines here.
One's a kind of an S turn and then one's a 90.
The S turn goes towards the front.
Get our line wrench,
give them a nice little tighten.
It's nice they give you this because.
Sometimes making these little ones can be a bear.
All right,
so we got our lines all buttoned up, uh, master cylinders mounted to the firewall.
Now another cool feature here on this proportioning valve is this pressure sensor that Will would already has it mounted on.
Uh, it gives you a place to hook up your brake lights or whatever else you're gonna need it for.
All right, so that's all done.
Let's move to the inside and we'll show you how to hook up your brake pedal to the master cylinder.
All right, so now that we're back in the truck, we can go ahead and get the brake pedals actually working with the piston on the master cylinder.
Uh, there's a couple of things we have to pay attention to when converting a truck from, uh, power brakes to manual,
and one of those is called the motion ratio of the pedal.
And so what that is, it's a measurement from your pivot point at the top to the center of the pedal,
and then it's going to be another measurement from the pivot point to the mounting location.
To where it's contacting
the piston rod,
you're going to take those two measurements. You're going to divide the
long number by the short number, and that's going to give you your pedal ratio.
We want to be about 6 to 1 to 7 to 1 for a manual brake truck.
For power brakes, you want to be somewhere from 4 to 1 to 5 to 1.
I've already drilled our hole,
so I've already kind of done this, and we're about 6 6.2 to 1.
Which is gonna be perfect for what we're trying to get accomplish with this.
Now there's one other thing you have to pay attention to with the master cylinder from Willwood,
and that that stroke on that has to be,
has to go to the end of the stroke, which is 1.1 inches.
You have to get the full travel of it,
so that way if you have one circuit go bad,
you're still gonna be able to get to the second circuit and you're still gonna have brakes in your truck.
All right,
so let's go ahead and I'll show you how to get this mounted up.
Now with a little help from this Will Wood adapter kit,
I'm gonna go ahead and use a piece of this all thread.
Along with this Clevis since this is just a flat bar brake pedal, it makes it nice and simple.
Get that in there just like so.
Now you wanna be careful you don't cross thread this because it'll be easy to do.
All right, so now what we touched base on earlier was this needs to have at least 1.1 inches of travel.
Now you need to double check that, make sure you're getting that full travel,
and then, but other than that,
I mean this thing is installed.
And it looks like it's good to go.
Up next,
a simple, reliable way to get electrical connections you can trust.
So with the brake pedal and the bracket installed in the truck, I went ahead and installed our steering column.
And for the steering column, we went to Flaming River and they sent us over one of their 2-inch stainless steel columns.
Now we got ours with a column shift and in black powder coat.
They also sent us over one of their 2-inch swivel ball floor mounts.
Now they're made.
The 67 through 72 trucks, so it dropped right into place.
And to cap all that off, we went ahead with one of their waterfall steering wheels.
It's wrapped in premium Italian leather and it comes in a few different colors.
The only thing I got to do is get this thing connected from the rack
to the column
and then get this thing wired up and we'll be ready to rip.
Speaking of wiring, whenever you introduce modern electronics to these older trucks like our fuel injection computer there,
you open yourself up to electrical gremlins with that old wiring. So we're gonna update our wiring harness with this kit from Payless Performance Products.
Now these kits are made specifically for these trucks, and they allow you to convert from your old glass tube fuses to these modern,
safer blade style fuses,
and they take all the guesswork out of this because each one of these wires is.
Labeled as to where they go,
so it really takes the guesswork out of it.
Now these kits come with everything. You can add some loom to it,
dress them up,
and also the zip ties and the electrical tape as well.
And then they don't leave you hanging. They give you a nice electrical diagram booklet here to answer all your questions and solve those electrical problems there.
But what you don't see here are the battery cables and a lot of these custom trucks you have to make your own cables and terminate them correctly,
and that's the subject of today's Summit tech tip.
When it comes to crimping wires, it's critical that you get a solid crimp in order to make a safe, reliable electrical connection.
And it's especially important on battery cables
using the right tools.
And these two tools you see in front of me,
well, these are going to do the job for you.
And these both came from Summit Racing,
and this one on my left here, this is a 7.5 ton hydraulic crimer.
It's gonna do anything from 6 gauge all the way up to 40.
And then over here on the right, we got a good hammer style crimer
that's gonna do the same gauges.
Let's go ahead,
smash this down.
Just like so now this already made.
I mean,
look at that crimp.
That ain't too bad for a nice relatively inexpensive tool.
Now over here this one's a little bit more
in depth but still pretty simple to do.
So we'll go ahead,
we'll loosen up the piston,
come back.
Slide our lug in there, tighten the valve back up.
Go
ahead and
start closing.
Now you wanna make sure
that your wire is staying pressed against the lug.
During the whole operation,
now another good thing about these is that you can do these on the vehicle.
All right,
go ahead, get that till it stops.
That should be good.
Go ahead, loosen the valve.
And then we got two different styles of crimps that both get the job done,
nice solid connection, and that's what we're looking for.
If you like these tools,
go over to Summit Racing and check them out.
All right.
Now you guys have seen this wheel and tire combination in the background for a while now, but we haven't really addressed it.
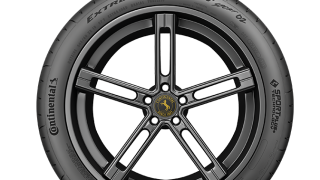
For our tires, we're going with Continental's Extreme Contact Sport 02s, and up front it's the 25,540 ZR20.
Now we've used these tires on a lot of different projects here at Power Nation and had great success with this all-season tread.
We have these sticky Continentals wrapped around a set of beautiful shot fuel deconcave wheels.
Now we're running a 20 by 9 up front and a 20 by 12 out back to handle those big.
Big 335 tires.
Now we're running their 3 point knockoff center caps.
They have a few different options if you don't like those.
Plus you can get these in basically any color you'd ever want on a set of wheels.
And man,
they really set this truck off.
Yeah, I really like that deep dish package there in the back. It's really nice.
But I mean,
we've gotten a lot done today.
But
yeah,
next time
on Music City truck,
well, we hit the dyno, we hit the road, and we also finish up Project Cream Puff.
You wanna grab a set of fenders so you can't get them hung.
Show Full Transcript
Today on Music City Trucks, we're taking our C10 custom cruiser one step closer to the ride it deserves.
We're dialing down the noise with some sticky sound dampening,
and we'll also bring comfort to every mile with a new heating and cooling system. Plus, give us the confidence to stop on a dime with a brand new manual brake setup.
It's all about making this truck feel as good as it looks.
Hey guys, welcome to Music City Trucks. Well, we're in the final stages of assembly, an old project Cream Puff here,
and the last time you saw it, it was a rolling chassis. Since then, we've added the bed
and the cab to get this thing closer to the finish line. And I'll tell you what, this thing's finally starting to look like a truck,
but you know what they say, that last 10%.
Takes 90% of the time.
We still have a lot of work to do on this truck,
and you know what I like to say?
Devil's in the details, and this is where it counts.
Yeah,
so hopefully by the end of the day we'll have some air conditioning wrapped up
and some of the wiring and any other little details that we can pop in.
Yeah,
and we also got to get some sound deadeners thing. So what do you say?
Let's get to it.
All right,
so before we can get to any carpet or any other components on top,
well, we're gonna need to take care of this underlayment here and what happened to the painting all of it?
What do you mean?
Uh,
we've got some yellow, some red.
No,
we ran out of paint.
Oh, yeah, when you had a little accident.
What are you talking about? When I fell out of the truck?
Yeah. Spilled the paint all over the floor?
Right.
Yeah, let's move on from that.
So needless to say, we ran out of paint,
but, uh,
we got all the important stuff covered, so there's already paint here,
so it's not like it's bare metal, so we're fine, yeah,
yeah,
so that's fine there on that surface,
but yeah, this is gonna be a cruiser,
you know, we're gonna have air conditioning in this thing and be going up and down the road. We wanna have a nice interior, so we want kind of quiet on the inside
so you can cruise in peace is what it is. We don't wanna get too hot as well. We want, you know, these old trucks,
they were farm trucks and they weren't really sealed from the factory,
so we wanna try to.
Bring a little of the 21st century into this truck.
Yeah,
so to do that we're gonna use this boom mat here from Design Engineering.
It's gonna help,
like you said,
some of that thermal control and also the acoustics, the sound in there.
Now this stuff,
it has an adhesive backing there so.
So before we stick this down,
we need to clean this up and that's the good stuff. It's got Bele on the back,
not asphalt,
so it's gonna be
real nice clean install.
Yeah,
it'll form up really nice. So
we'll get this thing wiped down, blown out,
and get the sticking.
All right, I'll grab the air.
All right,
we'll get our mat installed here.
Now
this stuff, you don't have to cover every square inch of the panel for it to work.
No,
you just kind of wanna focus on the spots that you think are gonna be the noisiest or,
you know,
take the most heat from the bottom.
Yeah, I think they say.
25 to 50% coverage,
uh, it gives you the same effect there so and it's also a good idea to wear some gloves, you know, at the end of it you don't wanna look like
Edward Scissorhands's face on your hands. I hear you, but I'm gonna do my best,
yeah, I'm gonna try to.
This
much done with one full piece before I had to start trimming things out,
so and I like to
peel just a little bit of it,
you know,
and then just
while you're working it,
go ahead and peel because this stuff is super sticky.
Yeah, I just gotta watch the edges there because that's metal it will cut you.
Pull that back a little bit.
All right,
that one down.
You take your little roller here.
And really.
The
Oh, look at that
lined up perfectly.
Now, DEI has also sent us a selection of their heat shroud,
and we're gonna use that to protect our lines,
hoses, and wires from heat and abrasions.
Now you could either do 25% coverage
or 100% coverage like Anthony has done here.
Either way, that's gonna keep our cab quiet and comfortable heading down the road.
The best technique for this is when you're rolling it, you just wanna be real mad at it you gotta get angry.
Get that rage in you.
Then it lays down
just right.
All right,
before we head to break, I wanna talk about the brakes on the front of the truck.
Now we've showed you the big rotors and 6 piston calipers we got from EBC brakes
and our hard line we installed up and down the frame rail,
but you have to have some type of flexible line to connect the two.
So most of your factory vehicles run a rubber style brake line,
which is fine until you get into a hard braking event.
They tend to swell and that will reduce the brake pedal, giving you a softer brake pedal feel. That's no good when you wanna stop the vehicle.
So what you can do is upgrade those to a braided stainless steel one like this one from EBC brakes.
Now what that's gonna do.
is when you hit the brakes really hard, they're not gonna swell, they're gonna keep the shape and they're gonna transfer that
pressure
all the way to the calipers,
letting you stop the vehicle.
Now, EBC takes these,
they'll assemble them in-house,
pressure test each one,
and they're also DOT approved.
So if you want to upgrade your ride,
check out EBC and their brake lines.
Coming up,
we reveal a compact customizable heating and cooling system
that brings modern comfort to your classic ride.
Now our truck came from the factory with air conditioning, but the last time we had it out,
it didn't work,
and those factory systems underneath the hood were pretty ugly with all the hoses and wires all over the place.
Also, there's been a lot of advancements to these systems over the years,
so we're gonna upgrade our heat and air conditioning with this kit from Old Air Products.
Now they've sent us everything we need to install this on our truck
all the way from the cooling fans at the radiator to the condenser and even these little trash guards underneath.
The cow there.
Now, whether your truck is equipped with factory AC or it's just a heater style truck,
they have everything you need to convert to a modern AC system.
And if you're not sure how air conditioning works,
well, let's take a look at it.
The main objective of the AC system is to remove the heat from inside the cabin
and send it outside, and that starts with the compressor,
the heart of the system.
The compressor sucks in warm refrigerant vapor and discharges a high temperature,
high-pressure vapor.
The refrigerant in its gaseous state enters the condenser where it.
Transfers heat from the refrigerant to the tubes and fins.
Then the cooler ambient air passes across the tubes and fins where it absorbs the heat as heat always transfers from hot to cold.
So much heat is removed from the refrigerant that it condenses to a liquid state.
That high-pressure liquid refrigerant leaves the condenser, cooler, and enters the receiver filter dryer where the refrigerant passes through a desiccant to remove moisture and a filter.
Once it leaves the dryer, it moves to an expansion valve or metering device.
This.
The restriction in the system that allows pressure change.
The refrigerant leaves the valve as a low pressure,
low temperature, liquid or mist that enters the evaporator, which is inside the cab.
The warm air from the cab passes across the tubes and fins and transfers its heat to the cooler refrigerant.
The air leaves cooler and the liquid refrigerant evaporates to a gaseous state as it absorbs the heat from the cab and heads back to the compressor.
That cool air leaves the vents and keeps us cruising comfortably down the road.
Now, let's get the evaporator.
Assembly installed.
Now the mounting bracket that comes with the kit is already black,
but we went ahead and painted it to match our truck.
So we'll get this on here. And
another thing here is when you get this on,
notice this opening. We went ahead and cut that before we did our bodywork.
So we'll slide this on and
Anthony's gonna slide that evaporator assembly
from the inside out. We'll get all the four lines poked through here.
I'll start with this black hose here,
yeah, the drain tube there.
Perfect.
Got it through.
You know, I like how small this unit is.
It really tucks up in here nice and tight.
Yeah, that's the beauty about this unit. It's got the evaporator. It's got the heater core,
uh, and the blower motor all contained in that one unit right there. You're still off in the stud here on the bottom.
Can you pull that hose?
Looks like it needs to go up. Hold on.
Mhm.
Go ahead,
pull it.
Oh,
there you go.
Yeah, just get those nuts on there and leave it,
uh, let it
could have about a quarter inch of wiggle room
so we can get this grommet on there.
Got them all started.
They're all started.
All right,
let's see here.
This will be a fun part.
it.
You can do it,
Mike.
E.
Almost there.
Round and 3rd,
yep.
Pop this in the backside of that.
All right,
got that in there when we get it tightened up,
and then also we have a block off plate for the old blower motor.
Uh,
once we get the radiator support installed, the radiator on, the condenser,
uh, then we can run our lines and finish up that,
uh, but that's everything out here,
I think. Next we can do the wiring. Yeah, we're, uh,
pretty wide open underneath this dash. I think it's about time we start getting,
getting this wiring conquered.
Yeah, we'll start slinging some wires.
There's a lot to it.
I'm gonna get these tightened up.
Another cool feature about this kit from Old Air Products is they utilize your factor control panel, but they convert all the signals electronically with these potentiometers
that way it gets rid of all those push and pull cables. So let's get this guy installed here.
And a couple of screws.
All right.
We boost our braking power and clean up that engine bay with a sleek new master cylinder
that transforms both form and function.
So now that we've added this go fast goodie on top of our 427,
we got to make sure that the truck can stop.
We also want to clean up the firewall a little bit,
get rid of that factory bulky power brake setup.
So what we did is we hit up Summit Racing and they sent us over this Willwood compact tandem master cylinder.
This is a nice small package that features both the front and rear circuits
all combined.
Now we also hit up Level 7 Motorsports, and they sent us over their build aluminum firewall adapter.
Now this cleans up the firewall and it also gives us a nice sturdy mounting point for the master cylinder.
So let's go ahead and let's get it on the truck.
Alright,
so first up we'll get the master cylinder in.
Now we're running the factory brake pedal along with the bracket,
so it has a nice long stud on it.
Next up we're gonna go ahead and throw our Willwood proportioning valve that we also got from Summit
on next, but make sure you're putting your two black billet aluminum washers they give you in the kit
first before you put the valve on.
Get that on.
And
go ahead and get her nuts on.
This one over here is a little.
It's
nice and fun to get to,
but we'll get it.
Get it tightened up
All right, up next we'll get the fittings in the master cylinder.
Uh, just make sure you have the crush washer on it before you install it
because you don't wanna have to take it all, all the way back apart if you don't have that on.
Now when you go to tighten the lines,
it'll snug them up more. I'm just trying to get them started.
It should be good.
Now they give you two different lines here.
One's a kind of an S turn and then one's a 90.
The S turn goes towards the front.
Get our line wrench,
give them a nice little tighten.
It's nice they give you this because.
Sometimes making these little ones can be a bear.
All right,
so we got our lines all buttoned up, uh, master cylinders mounted to the firewall.
Now another cool feature here on this proportioning valve is this pressure sensor that Will would already has it mounted on.
Uh, it gives you a place to hook up your brake lights or whatever else you're gonna need it for.
All right, so that's all done.
Let's move to the inside and we'll show you how to hook up your brake pedal to the master cylinder.
All right, so now that we're back in the truck, we can go ahead and get the brake pedals actually working with the piston on the master cylinder.
Uh, there's a couple of things we have to pay attention to when converting a truck from, uh, power brakes to manual,
and one of those is called the motion ratio of the pedal.
And so what that is, it's a measurement from your pivot point at the top to the center of the pedal,
and then it's going to be another measurement from the pivot point to the mounting location.
To where it's contacting
the piston rod,
you're going to take those two measurements. You're going to divide the
long number by the short number, and that's going to give you your pedal ratio.
We want to be about 6 to 1 to 7 to 1 for a manual brake truck.
For power brakes, you want to be somewhere from 4 to 1 to 5 to 1.
I've already drilled our hole,
so I've already kind of done this, and we're about 6 6.2 to 1.
Which is gonna be perfect for what we're trying to get accomplish with this.
Now there's one other thing you have to pay attention to with the master cylinder from Willwood,
and that that stroke on that has to be,
has to go to the end of the stroke, which is 1.1 inches.
You have to get the full travel of it,
so that way if you have one circuit go bad,
you're still gonna be able to get to the second circuit and you're still gonna have brakes in your truck.
All right,
so let's go ahead and I'll show you how to get this mounted up.
Now with a little help from this Will Wood adapter kit,
I'm gonna go ahead and use a piece of this all thread.
Along with this Clevis since this is just a flat bar brake pedal, it makes it nice and simple.
Get that in there just like so.
Now you wanna be careful you don't cross thread this because it'll be easy to do.
All right, so now what we touched base on earlier was this needs to have at least 1.1 inches of travel.
Now you need to double check that, make sure you're getting that full travel,
and then, but other than that,
I mean this thing is installed.
And it looks like it's good to go.
Up next,
a simple, reliable way to get electrical connections you can trust.
So with the brake pedal and the bracket installed in the truck, I went ahead and installed our steering column.
And for the steering column, we went to Flaming River and they sent us over one of their 2-inch stainless steel columns.
Now we got ours with a column shift and in black powder coat.
They also sent us over one of their 2-inch swivel ball floor mounts.
Now they're made.
The 67 through 72 trucks, so it dropped right into place.
And to cap all that off, we went ahead with one of their waterfall steering wheels.
It's wrapped in premium Italian leather and it comes in a few different colors.
The only thing I got to do is get this thing connected from the rack
to the column
and then get this thing wired up and we'll be ready to rip.
Speaking of wiring, whenever you introduce modern electronics to these older trucks like our fuel injection computer there,
you open yourself up to electrical gremlins with that old wiring. So we're gonna update our wiring harness with this kit from Payless Performance Products.
Now these kits are made specifically for these trucks, and they allow you to convert from your old glass tube fuses to these modern,
safer blade style fuses,
and they take all the guesswork out of this because each one of these wires is.
Labeled as to where they go,
so it really takes the guesswork out of it.
Now these kits come with everything. You can add some loom to it,
dress them up,
and also the zip ties and the electrical tape as well.
And then they don't leave you hanging. They give you a nice electrical diagram booklet here to answer all your questions and solve those electrical problems there.
But what you don't see here are the battery cables and a lot of these custom trucks you have to make your own cables and terminate them correctly,
and that's the subject of today's Summit tech tip.
When it comes to crimping wires, it's critical that you get a solid crimp in order to make a safe, reliable electrical connection.
And it's especially important on battery cables
using the right tools.
And these two tools you see in front of me,
well, these are going to do the job for you.
And these both came from Summit Racing,
and this one on my left here, this is a 7.5 ton hydraulic crimer.
It's gonna do anything from 6 gauge all the way up to 40.
And then over here on the right, we got a good hammer style crimer
that's gonna do the same gauges.
Let's go ahead,
smash this down.
Just like so now this already made.
I mean,
look at that crimp.
That ain't too bad for a nice relatively inexpensive tool.
Now over here this one's a little bit more
in depth but still pretty simple to do.
So we'll go ahead,
we'll loosen up the piston,
come back.
Slide our lug in there, tighten the valve back up.
Go
ahead and
start closing.
Now you wanna make sure
that your wire is staying pressed against the lug.
During the whole operation,
now another good thing about these is that you can do these on the vehicle.
All right,
go ahead, get that till it stops.
That should be good.
Go ahead, loosen the valve.
And then we got two different styles of crimps that both get the job done,
nice solid connection, and that's what we're looking for.
If you like these tools,
go over to Summit Racing and check them out.
All right.
Now you guys have seen this wheel and tire combination in the background for a while now, but we haven't really addressed it.
For our tires, we're going with Continental's Extreme Contact Sport 02s, and up front it's the 25,540 ZR20.
Now we've used these tires on a lot of different projects here at Power Nation and had great success with this all-season tread.
We have these sticky Continentals wrapped around a set of beautiful shot fuel deconcave wheels.
Now we're running a 20 by 9 up front and a 20 by 12 out back to handle those big.
Big 335 tires.
Now we're running their 3 point knockoff center caps.
They have a few different options if you don't like those.
Plus you can get these in basically any color you'd ever want on a set of wheels.
And man,
they really set this truck off.
Yeah, I really like that deep dish package there in the back. It's really nice.
But I mean,
we've gotten a lot done today.
But
yeah,
next time
on Music City truck,
well, we hit the dyno, we hit the road, and we also finish up Project Cream Puff.
You wanna grab a set of fenders so you can't get them hung.
More 1972 C10 Cream Puff Episodes
Music City Trucks Featured Projects
Music City Trucks Builds
Want more content like this?
Join the PowerNation Email NewsletterParts Used In This Episode
Flaming River
1967-72 C-10 Truck Swivel Floor Mount
Flaming River
30" Column Shift Tilt Column with Neutral Safety Switch - Black Powdercoat Finish
Flaming River
Waterfall Wheel - Black
Level 7 Motorsports
Manual Brake Master Finish Plate 1967-72 C10
Old Air Products
Hurricane Complete Package (A/C Kit)
Painless Performance
Wire Harness Kit
Schott Wheels
Fuel D.Concave | Cover-Loc Wheels