In This Episode
Video Transcript
You're watching Power Nation.
Alright,
here we go.
12.
Watch your toes.
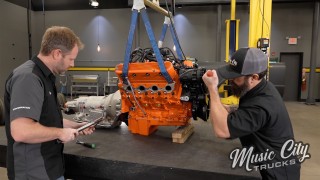
Today on Music City Trucks, we start tearing into our 6.2 L LS.
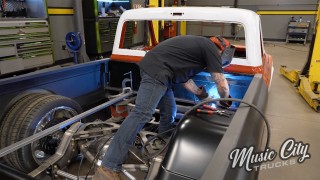
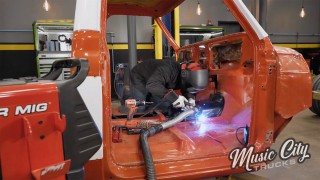
Then we turn our attention to the front suspension,
replacing tired, worn out parts with upgraded components all the way over here.
Oh,
look at that.
That will help our avalanche sit right,
handle better,
and hook harder on the street and at the drag strip.
Well, hey guys,
welcome to Music City Trucks, and as you can see behind me,
well, we got old Project Drag a lynch
completely torn down,
and that includes ripping this old 6.2 L bullet
out of her.
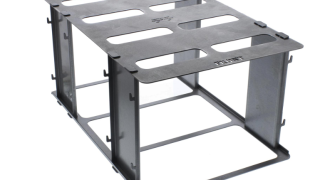
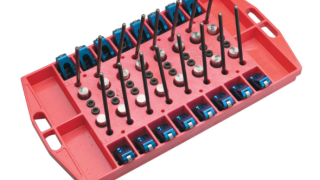
Yeah, when it comes to tearing down engines, well, you always wanna keep your parts and pieces organized, so I got a couple of trays here from Summit Racing
that's gonna help keep our pieces organized with the valve train and the rods and pistons. So let's go ahead and get this thing tore down. Let's get to it.
Now these Chevrolet Avalanche models were originally equipped with 5.3 L or 6 L, and our particular one has a 6.2 L telling us that it's been swapped somewhere along the line.
Yeah, they come off easy.
Hmmm,
yeah.
Got some l in it. Got oil in it.
It's good.
Faster
00
misfire.
All right,
let's see what's behind door number one.
Here you can use that.
Thank you.
Yee,
got it.
All right,
time for inspection.
Didn't look too bad.
As far as like.
You know,
oil buildup or varnish or anything like that?
All the springs are there, nothing broken.
No,
mine looks the same.
OK.
So now we'll go through
and take our rockers off.
We can take the ones that are off that the valves are closed and we'll turn the engine to take the pressure off,
spring pressure off and take those off.
But yeah, if you uh
plan on reusing any of this stuff you wanna keep it in order where it came off
we're changing a lot of this stuff, but,
uh, good,
good practice to keep it organized as well. Yeah,
I think throughout the entire build is probably good practice.
All right,
rotate this over.
All right, let's see here.
All right,
those are good.
All right.
All righty.
Ah.
Oh, that sounds like money right there,
yep,
how's she looking?
Looks like the inside of the LS engine
yeah so those are the pedestals for the
uh.
Active lifters and where it shuts off cylinders there, yeah, on my, on my LS3, I went ahead and
riveted all these yep,
yeah, we'll probably end up plugging those off
as well.
All right,
now I'll get the cylinder heads off.
Heehaw.
Since we're keeping the block, I don't want the impact to
booger up the threads in the block.
It's a good practice.
There we go.
Oh, it's so loud.
There we go.
Oh,
come on,
you little baby.
These are old torque to yield
one time use.
So you're saying don't use them again then we will not be reusing these bolts.
All right.
All right, let's see here.
You know
there's your landing spot.
All right,
initial impressions here,
well,
obviously got some carbon build up, that's, that's pretty typical though,
uh, but I'm looking at the pistons,
uh, looking for any marks. My,
my big concern is if it's already been rebuilt once,
maybe the cylinder's been bored out because you can only have to do so much with these liners and these aluminum blocks here.
So
let's see, uh,
get a
calipers, do a quick check.
There
and
yeah so other than that little ridge at the top that looks like a stock boar that's what we're looking for
so now let's get the lifter trays and lifters out.
Keep
going, yeah,
yeah,
we finished the tear down of our LS getting it one step closer to a rebuild.
Yep.
All right, moment of truth to see if this is
suffering from any of the typical LS
lifter issues here.
There's one.
They don't have the AFM active fuel management lifters, and, so somebody swapped them at some point in time,
yeah.
just a complete Frankenstein.
Oh yeah,
money.
How's it looking up here Mike?
It's very janky,
very janky.
It's just the way I like it.
All right.
Or power.
My finger was in there. It's OK.
It's OK.
It's just a piston and ain't gonna
come on.
All right, let's try the impact over, OK.
All right, let's see if we can tear something up this way,
see what you got.
Look at that.
No, it's coming.
There it is.
Whoop,
right, we'll
turn this thing over.
Well, let's go the other way.
Spin it the right direction.
You get the oil pan off of it there in the front cover.
Oh, we got some residuals,
a little bit of coolant,
and you're like, Oh, there we go. We got probably some oil,
yep, cue the oil, cube coolant number 2.
All right,
now we got the oil pan in our teeth. We can get it off there.
Hopefully there's no surprises under here.
Yeah, you never know.
didn't didn't sound like there was gonna be any surprises, so,
so everybody says.
Oh,
just your typical
color discolored from the uh
oil,
but other than that I don't see anything no metal,
no floating objects.
Screen looks good.
Still there.
It's not,
it's not
trash and pickup screen,
nothing like that, yeah,
still there and pick up.
All right, well, uh, let's get the
front rear covers off,
go from there.
Don't need this gasket anymore.
You don't wanna reuse it? No, I'm not gonna reuse it.
Zippity doo da.
Alright
Oh yeah.
Oh
Looks good,
nice,
yep.
Poor guy.
A ring,
OK.
Ah.
There it is,
stock fasteners.
Uh,
not after market. The stock passengers there.
Caps are marked 54321.
So
par for the course.
This will pump off.
Yep.
Alright,
so
I think we're gonna
push the tensioner.
There should be a little slot. If it pushes back and put a pin through here, that little hole,
take the tension off that,
and then take this bolt out right here
and then that'll get the cam gear off and we can take the chain cam gear off and then slide the camshaft out.
There it is.
Alright,
get a little push.
Yeah, I'm gonna push the backside here so you can grab it
there.
As far as I can,
I can help you there,
keep coming.
There she is.
There you go.
One bump stick coming up.
Ready to drop some slugs? Yeah,
yeah, we'll go ahead and get these,
uh, rod caps off. I'll catch them down here.
There you go.
Keep going,
yeah,
yeah,
ah, crowned,
got it.
Yep.
There you go.
Let's see that cap right there.
So if you look at these, these connecting rods,
they're actually powdered metal
rods.
And so when they make the cap,
they actually break the cap away from the rod. So it gives it a unique pattern if you look at it real close, you can see how it's got like peaks and valleys.
So that cap will only made up to that rod
that kind of gives it the strength right there.
I never knew that. Yeah,
that's pretty cool.
All right.
And then when you pull this pistons out,
same things to look for,
you know, your rings right here, see if they move freely
see that oil ring as I try to spin it that's oil ring it's pretty tight.
It's got all that carbon built up in it, so it's not sealing.
The best as it can right there.
So there's your little telltale sign. Do some inspections there,
uh, on how things are running. But yeah, that oil ring is
not moving.
It's a lot of build up there, but
your top two compression rings look good,
um,
skirt wear,
nothing, nothing excessive there.
Right,
bearings.
They look really well yeah.
All right.
On to the next.
The side mains out.
OK.
All right.
So time for a pretty cool tool here.
Yeah, so these main caps right here on some blocks, probably most of them,
they're pretty tight fitting to the block,
so.
They don't just pop right out, right?
So
a couple of ways you can get those out.
Got this cool
tool here from SummitRacing.
It drops in and it'll help get those caps out,
all right.
So you kind of slide it underneath like that. It sits on the deck here
and then
evenly
like that
and then you should be able to
pull it right up.
Just put your hand there. Don't let it fall down.
You don't wanna be dropping it on the crank.
So
they're already marked, you know,
they got from the factory. This is number 354321.
Can't miss them out.
Very cool,
go down the line.
Doesn't get much easier than that, right?
Look at our main bearings there got a little bit of wear, but uh no copper showing so
it's good.
Alright, last piece of the puzzle.
All right, so we got this 6-2 all torn down and
surprisingly it's in really good shape.
It's gonna be a good foundation for what we wanna do with this avalanche.
Um,
get a few measurements and then we're gonna get down to Pat and Frankie, right?
Yeah,
they're gonna do a little bit of machining on it,
hone the cylinders out,
uh, and then she'll be ready to reassemble.
Oh, I can't wait. That'll be fun,
yep.
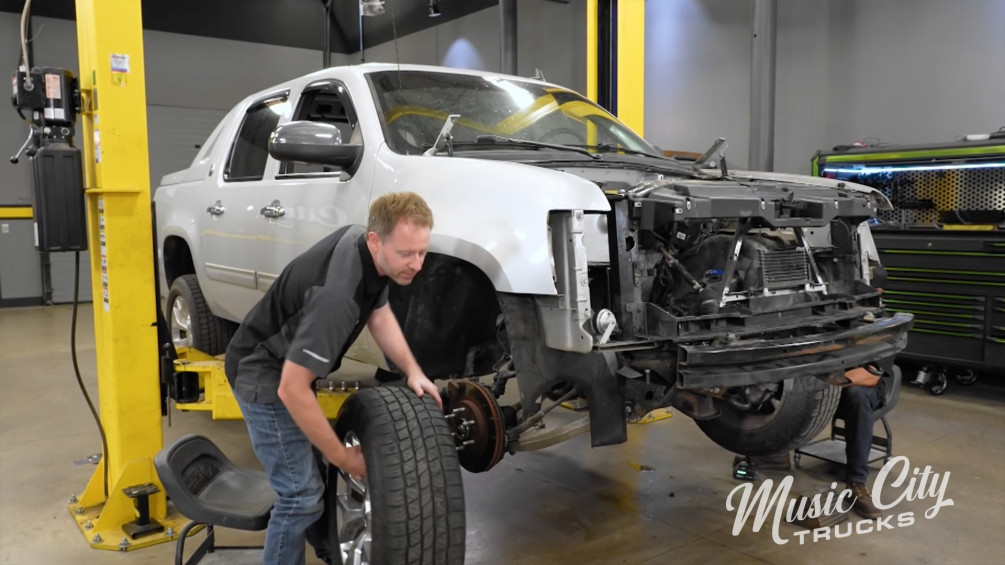
The Avalanche's front suspension has seen better days.
We're tearing it all out to make room for upgraded components that will deliver the handling and performance it needs.
Alright,
got it.
Well, with our engine disassembled and the block down to engine power
for a good old home job, well, we're gonna jump on the front end of this truck
and get it rebuilt.
And what we're gonna rebuild is all of our steering components along with our suspension.
We're gonna put new brakes on this old heavy Chevy to get her slowed down at the racetrack,
but before we can do any of that,
we gotta get all the old stuff off.
First thing we'll do is get the brakes off it.
Go
ahead and just set that right
there.
Oh,
look at that
money.
All right,
next we'll get our CV axle out.
All right, I'm gonna knock these tie rods off. We're not reusing these, so I'm not worried if they get damaged.
Got it.
If I fall,
will you let me down easy.
Can it come to me?
Alright, got it.
All right,
now we'll get this axle out finally.
There she goes.
I'm just waiting for this to follow me to.
Mhm.
Ready, 12.
Just like that,
just like that.
Harry,
come to Papa.
All the way over here. Oh look at that.
That would have been a strike if I was bowling.
There,
all right,
here we go.
12.
Watch your toes.
There they are.
Oh
Well, with everything out,
it's time to get it cleaned up and get those new parts bolted on.
With the old parts out of the way, it's time to install our new performance components and begin the suspension overhaul.
All right, well, now we got our frame rails all cleaned up. We're ready to get some new parts on here.
Now this thing's gonna be a four-wheel drive drag racing vehicle, so there's gonna be extra stress
on the front end components to keep this thing straight as we're going down the track. Any slop in those wear items,
well, it's gonna be wobbling all over the place.
So we're gonna step this thing up with some new control arms, all of our bushings, ball joints, things like that
with these from
Duralast right here.
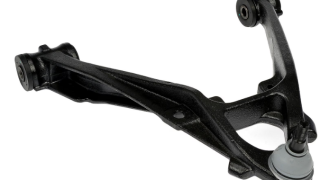
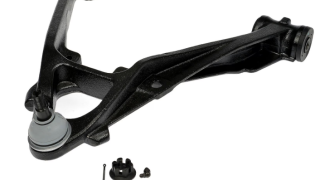
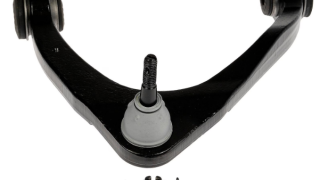
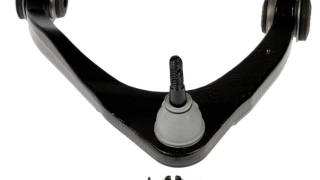
Now this is our upper control arms. It's got all new bushings,
ball joints already installed.
We'll get it bolted on the truck.
Now this control arm offers a forged heavy duty steel with enlarged cross section to increase the impact durability,
and the ball joint itself, well, it's induction hardened ball stud with integrated bearing and larger ball improves weight distribution.
To top it off, these control arms offer a corrosion resistant coating
which enhances the rust protection and, well,
looks a little bit better.
So these lower bolts here,
uh, the nuts on the backside for the lowers and the uppers,
uh, we're just gonna get them snug for now.
We'll get it at ride height to get the weight on the vehicle,
then we'll go through and
torque those up to spec and then also set that there,
and we'll get our alignment done as well.
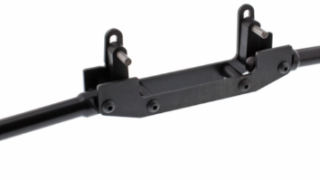
All right, so next up we're gonna get these trick little struts here from Beltech on the truck.
Now these are cool because they're double adjustable and it's also like a true coil over where we can adjust it with a spanner wrench.
That's gonna go ahead and let us get this thing dialed in,
get it to the right height we want it.
So let's go ahead and get them on the truck.
Alright,
so now that we've got the strut already mounted on the trunk, it's time to get the spindle on there,
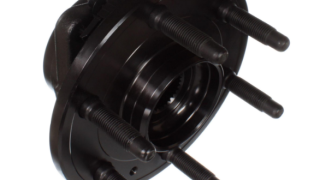
and you can see I already got my hub assembly here. This is another Durlas gold piece,
drops right into place,
and it's sitting on a max track 2-inch drop spindle.
Now it's gonna get us the right height that we're looking for when we're heading down the track, so let's go ahead,
get it on the truck.
I.
All right, as we continue mocking up the front end of our truck, we're going ahead and tackle the brakes.
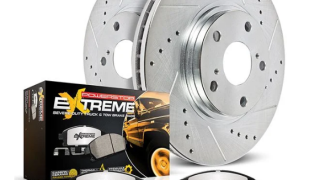
Now these brake rotors are from Power Stop. It's their cross drilled and slotted rotors.
They're the same diameter as a stock one,
but these are gonna provide a much smoother surface there
for our brand new pads.
These are their extreme severe.
Dear duty tow and truck brake pad and it's a Z36 carbon fiber ceramic formula
and what that means is it's not gonna provide a lot of brake dust on the wheels. I don't know about y'all, but I hate brake dust building up on my wheels. This looks ugly.
So we're gonna drop these in
and get our caliper on
and then that will complete the mock up of our front end there.
Let's see.
All right,
well, we got all of our new parts and pieces on. It looks good. No interference issues, man. I'll tell you what, we got a lot done today.
We really did. I mean, we got the engine out of the truck, got it torn apart.
It's over at engine power getting worked on.
Got that front suspension mocked up.
I mean,
now we just gotta what,
build the rest of the truck, Build the rest of the truck. Next thing you know, we'll be heading down a drag strip near you.
I'm excited. All that's next time on Mute City Trucks.
Show Full Transcript
Alright,
here we go.
12.
Watch your toes.
Today on Music City Trucks, we start tearing into our 6.2 L LS.
Then we turn our attention to the front suspension,
replacing tired, worn out parts with upgraded components all the way over here.
Oh,
look at that.
That will help our avalanche sit right,
handle better,
and hook harder on the street and at the drag strip.
Well, hey guys,
welcome to Music City Trucks, and as you can see behind me,
well, we got old Project Drag a lynch
completely torn down,
and that includes ripping this old 6.2 L bullet
out of her.
Yeah, when it comes to tearing down engines, well, you always wanna keep your parts and pieces organized, so I got a couple of trays here from Summit Racing
that's gonna help keep our pieces organized with the valve train and the rods and pistons. So let's go ahead and get this thing tore down. Let's get to it.
Now these Chevrolet Avalanche models were originally equipped with 5.3 L or 6 L, and our particular one has a 6.2 L telling us that it's been swapped somewhere along the line.
Yeah, they come off easy.
Hmmm,
yeah.
Got some l in it. Got oil in it.
It's good.
Faster
00
misfire.
All right,
let's see what's behind door number one.
Here you can use that.
Thank you.
Yee,
got it.
All right,
time for inspection.
Didn't look too bad.
As far as like.
You know,
oil buildup or varnish or anything like that?
All the springs are there, nothing broken.
No,
mine looks the same.
OK.
So now we'll go through
and take our rockers off.
We can take the ones that are off that the valves are closed and we'll turn the engine to take the pressure off,
spring pressure off and take those off.
But yeah, if you uh
plan on reusing any of this stuff you wanna keep it in order where it came off
we're changing a lot of this stuff, but,
uh, good,
good practice to keep it organized as well. Yeah,
I think throughout the entire build is probably good practice.
All right,
rotate this over.
All right, let's see here.
All right,
those are good.
All right.
All righty.
Ah.
Oh, that sounds like money right there,
yep,
how's she looking?
Looks like the inside of the LS engine
yeah so those are the pedestals for the
uh.
Active lifters and where it shuts off cylinders there, yeah, on my, on my LS3, I went ahead and
riveted all these yep,
yeah, we'll probably end up plugging those off
as well.
All right,
now I'll get the cylinder heads off.
Heehaw.
Since we're keeping the block, I don't want the impact to
booger up the threads in the block.
It's a good practice.
There we go.
Oh, it's so loud.
There we go.
Oh,
come on,
you little baby.
These are old torque to yield
one time use.
So you're saying don't use them again then we will not be reusing these bolts.
All right.
All right, let's see here.
You know
there's your landing spot.
All right,
initial impressions here,
well,
obviously got some carbon build up, that's, that's pretty typical though,
uh, but I'm looking at the pistons,
uh, looking for any marks. My,
my big concern is if it's already been rebuilt once,
maybe the cylinder's been bored out because you can only have to do so much with these liners and these aluminum blocks here.
So
let's see, uh,
get a
calipers, do a quick check.
There
and
yeah so other than that little ridge at the top that looks like a stock boar that's what we're looking for
so now let's get the lifter trays and lifters out.
Keep
going, yeah,
yeah,
we finished the tear down of our LS getting it one step closer to a rebuild.
Yep.
All right, moment of truth to see if this is
suffering from any of the typical LS
lifter issues here.
There's one.
They don't have the AFM active fuel management lifters, and, so somebody swapped them at some point in time,
yeah.
just a complete Frankenstein.
Oh yeah,
money.
How's it looking up here Mike?
It's very janky,
very janky.
It's just the way I like it.
All right.
Or power.
My finger was in there. It's OK.
It's OK.
It's just a piston and ain't gonna
come on.
All right, let's try the impact over, OK.
All right, let's see if we can tear something up this way,
see what you got.
Look at that.
No, it's coming.
There it is.
Whoop,
right, we'll
turn this thing over.
Well, let's go the other way.
Spin it the right direction.
You get the oil pan off of it there in the front cover.
Oh, we got some residuals,
a little bit of coolant,
and you're like, Oh, there we go. We got probably some oil,
yep, cue the oil, cube coolant number 2.
All right,
now we got the oil pan in our teeth. We can get it off there.
Hopefully there's no surprises under here.
Yeah, you never know.
didn't didn't sound like there was gonna be any surprises, so,
so everybody says.
Oh,
just your typical
color discolored from the uh
oil,
but other than that I don't see anything no metal,
no floating objects.
Screen looks good.
Still there.
It's not,
it's not
trash and pickup screen,
nothing like that, yeah,
still there and pick up.
All right, well, uh, let's get the
front rear covers off,
go from there.
Don't need this gasket anymore.
You don't wanna reuse it? No, I'm not gonna reuse it.
Zippity doo da.
Alright
Oh yeah.
Oh
Looks good,
nice,
yep.
Poor guy.
A ring,
OK.
Ah.
There it is,
stock fasteners.
Uh,
not after market. The stock passengers there.
Caps are marked 54321.
So
par for the course.
This will pump off.
Yep.
Alright,
so
I think we're gonna
push the tensioner.
There should be a little slot. If it pushes back and put a pin through here, that little hole,
take the tension off that,
and then take this bolt out right here
and then that'll get the cam gear off and we can take the chain cam gear off and then slide the camshaft out.
There it is.
Alright,
get a little push.
Yeah, I'm gonna push the backside here so you can grab it
there.
As far as I can,
I can help you there,
keep coming.
There she is.
There you go.
One bump stick coming up.
Ready to drop some slugs? Yeah,
yeah, we'll go ahead and get these,
uh, rod caps off. I'll catch them down here.
There you go.
Keep going,
yeah,
yeah,
ah, crowned,
got it.
Yep.
There you go.
Let's see that cap right there.
So if you look at these, these connecting rods,
they're actually powdered metal
rods.
And so when they make the cap,
they actually break the cap away from the rod. So it gives it a unique pattern if you look at it real close, you can see how it's got like peaks and valleys.
So that cap will only made up to that rod
that kind of gives it the strength right there.
I never knew that. Yeah,
that's pretty cool.
All right.
And then when you pull this pistons out,
same things to look for,
you know, your rings right here, see if they move freely
see that oil ring as I try to spin it that's oil ring it's pretty tight.
It's got all that carbon built up in it, so it's not sealing.
The best as it can right there.
So there's your little telltale sign. Do some inspections there,
uh, on how things are running. But yeah, that oil ring is
not moving.
It's a lot of build up there, but
your top two compression rings look good,
um,
skirt wear,
nothing, nothing excessive there.
Right,
bearings.
They look really well yeah.
All right.
On to the next.
The side mains out.
OK.
All right.
So time for a pretty cool tool here.
Yeah, so these main caps right here on some blocks, probably most of them,
they're pretty tight fitting to the block,
so.
They don't just pop right out, right?
So
a couple of ways you can get those out.
Got this cool
tool here from SummitRacing.
It drops in and it'll help get those caps out,
all right.
So you kind of slide it underneath like that. It sits on the deck here
and then
evenly
like that
and then you should be able to
pull it right up.
Just put your hand there. Don't let it fall down.
You don't wanna be dropping it on the crank.
So
they're already marked, you know,
they got from the factory. This is number 354321.
Can't miss them out.
Very cool,
go down the line.
Doesn't get much easier than that, right?
Look at our main bearings there got a little bit of wear, but uh no copper showing so
it's good.
Alright, last piece of the puzzle.
All right, so we got this 6-2 all torn down and
surprisingly it's in really good shape.
It's gonna be a good foundation for what we wanna do with this avalanche.
Um,
get a few measurements and then we're gonna get down to Pat and Frankie, right?
Yeah,
they're gonna do a little bit of machining on it,
hone the cylinders out,
uh, and then she'll be ready to reassemble.
Oh, I can't wait. That'll be fun,
yep.
The Avalanche's front suspension has seen better days.
We're tearing it all out to make room for upgraded components that will deliver the handling and performance it needs.
Alright,
got it.
Well, with our engine disassembled and the block down to engine power
for a good old home job, well, we're gonna jump on the front end of this truck
and get it rebuilt.
And what we're gonna rebuild is all of our steering components along with our suspension.
We're gonna put new brakes on this old heavy Chevy to get her slowed down at the racetrack,
but before we can do any of that,
we gotta get all the old stuff off.
First thing we'll do is get the brakes off it.
Go
ahead and just set that right
there.
Oh,
look at that
money.
All right,
next we'll get our CV axle out.
All right, I'm gonna knock these tie rods off. We're not reusing these, so I'm not worried if they get damaged.
Got it.
If I fall,
will you let me down easy.
Can it come to me?
Alright, got it.
All right,
now we'll get this axle out finally.
There she goes.
I'm just waiting for this to follow me to.
Mhm.
Ready, 12.
Just like that,
just like that.
Harry,
come to Papa.
All the way over here. Oh look at that.
That would have been a strike if I was bowling.
There,
all right,
here we go.
12.
Watch your toes.
There they are.
Oh
Well, with everything out,
it's time to get it cleaned up and get those new parts bolted on.
With the old parts out of the way, it's time to install our new performance components and begin the suspension overhaul.
All right, well, now we got our frame rails all cleaned up. We're ready to get some new parts on here.
Now this thing's gonna be a four-wheel drive drag racing vehicle, so there's gonna be extra stress
on the front end components to keep this thing straight as we're going down the track. Any slop in those wear items,
well, it's gonna be wobbling all over the place.
So we're gonna step this thing up with some new control arms, all of our bushings, ball joints, things like that
with these from
Duralast right here.
Now this is our upper control arms. It's got all new bushings,
ball joints already installed.
We'll get it bolted on the truck.
Now this control arm offers a forged heavy duty steel with enlarged cross section to increase the impact durability,
and the ball joint itself, well, it's induction hardened ball stud with integrated bearing and larger ball improves weight distribution.
To top it off, these control arms offer a corrosion resistant coating
which enhances the rust protection and, well,
looks a little bit better.
So these lower bolts here,
uh, the nuts on the backside for the lowers and the uppers,
uh, we're just gonna get them snug for now.
We'll get it at ride height to get the weight on the vehicle,
then we'll go through and
torque those up to spec and then also set that there,
and we'll get our alignment done as well.
All right, so next up we're gonna get these trick little struts here from Beltech on the truck.
Now these are cool because they're double adjustable and it's also like a true coil over where we can adjust it with a spanner wrench.
That's gonna go ahead and let us get this thing dialed in,
get it to the right height we want it.
So let's go ahead and get them on the truck.
Alright,
so now that we've got the strut already mounted on the trunk, it's time to get the spindle on there,
and you can see I already got my hub assembly here. This is another Durlas gold piece,
drops right into place,
and it's sitting on a max track 2-inch drop spindle.
Now it's gonna get us the right height that we're looking for when we're heading down the track, so let's go ahead,
get it on the truck.
I.
All right, as we continue mocking up the front end of our truck, we're going ahead and tackle the brakes.
Now these brake rotors are from Power Stop. It's their cross drilled and slotted rotors.
They're the same diameter as a stock one,
but these are gonna provide a much smoother surface there
for our brand new pads.
These are their extreme severe.
Dear duty tow and truck brake pad and it's a Z36 carbon fiber ceramic formula
and what that means is it's not gonna provide a lot of brake dust on the wheels. I don't know about y'all, but I hate brake dust building up on my wheels. This looks ugly.
So we're gonna drop these in
and get our caliper on
and then that will complete the mock up of our front end there.
Let's see.
All right,
well, we got all of our new parts and pieces on. It looks good. No interference issues, man. I'll tell you what, we got a lot done today.
We really did. I mean, we got the engine out of the truck, got it torn apart.
It's over at engine power getting worked on.
Got that front suspension mocked up.
I mean,
now we just gotta what,
build the rest of the truck, Build the rest of the truck. Next thing you know, we'll be heading down a drag strip near you.
I'm excited. All that's next time on Mute City Trucks.
Music City Trucks Featured Projects
Music City Trucks Builds

Want more content like this?
Join the PowerNation Email NewsletterParts Used In This Episode
Duralast
Duralast Gold Suspension Control Arm & Ball Joint Assembly_Lower Driver
Duralast
Duralast Gold Suspension Control Arm & Ball Joint Assembly_Lower Front Passenger
Duralast
Duralast Gold Suspension Control Arm & Ball Joint Assembly_Upper Driver
Duralast
Duralast Gold Suspension Control Arm & Ball Joint Assembly_Upper Front Passenger
KW Automotive North America Inc. Belltech
Struts



