Video Transcript
[Mike] You're watching Powernation!
[Mike] Project Cream Puff is in the final stages of fabrication, engine, transmission and some plumbing. [Anthony] Plus, we'll show you how to make precise cuts on custom exhaust systems. All that and more coming up on Music City trucks. [ Music ]
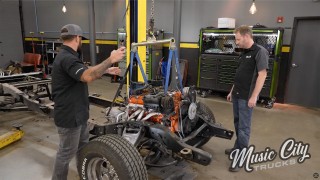
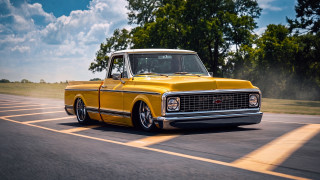
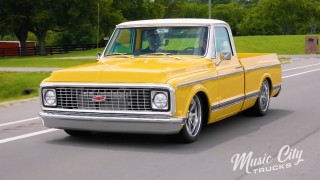
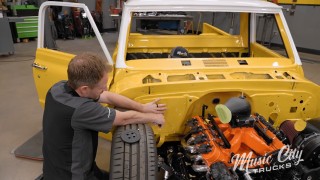
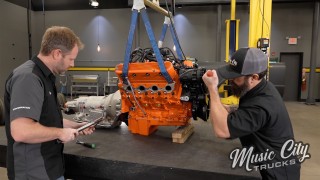
[Anthony] Hey, welcome to Music City Trucks. And as you can see sitting over here we've got our Project Cream Puff C-10 in the shop today. We got it stripped down to its bare frame to knock a few things off our checklist. [Mike] So we finally got the real engine for this beast. Now we've got to get rid of the fake engine that we used to mockup some things. So let's get the transmission out of here and then we'll get that bolted to that engine back there. All right, here we go. -Let's do it. -Get this on that table over there, separated. Oh, second gear! [ Music ] That looks good. Come on this way. [ Music ] -Having a hoist is nice. -All right, down on the table. Going down! [ Hoist - humming ]
That'll work. -I'll go grab the other engine. -Yep, grab that and I'll get this separated. [ Music ]
[ ratchet clicking ] [ Music ]
-Three hours later. -Now for the transmission you've already seen this in between the frame rails already but I wanted to go ahead and talk to you about it a little bit. This is a 4L80E 4-speed transmission, automatic, from GearStar Performance Transmissions. Now this particular one is what they call a level four. So this one will handle 800 horsepower. Now we've matched it up with a Yank torque converter. 2,800 stall on that torque converter. Be perfect for that engine there. They actually run this on a transmission dyno. Make sure everything works great, and they'll send you the video of your transmission on the dyno. See if Anthony's got that engine ready to go. -We got a 427 coming your way. Let's see if we can't get this thing together. [ Music ]
-Get some tension off this thing here and get it off the stand. That'll work! [ impact driver humming ] [ Music ]
-Freebird! -Going up. -Get it up here on the table and we'll get these two together. [ Music ]
All right. [ Music ]
Do-si-do. Down she go. [ Music ]
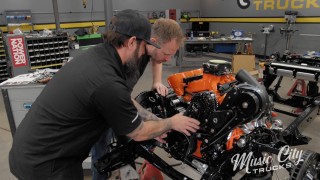
Now before we mate up our transmission to the engine a couple things we've got to check. Now one thing, our torque converter is already installed. If yours is not it's very simple. You'll take the torque converter, slide it on the input shaft, and typically feel like three distinct clunks as the splines mash up. And then the end of the hub of the torque converter, make sure it's engaged into the pump of the transmission. Make sure it's set back far enough. Then another thing is the hub on the back side of the torque converter here, make sure this diameter is the same, or that should be a little bit smaller than in the back of your crankshaft so it'll slide inside of it. That's what locates and holds the front of that torque converter there. Now we've already got our flex plate here from Summit Racing. This flex plate is SFI approved. It's a billet steel flex plate. So it's going to be strong enough for our application here. Let's just slide it together and get it bolted up. -Ready to rip. [ Music ]
-Let's get it up on the dowels there. All right, that's started. [ Music ]
[ ratchet clicking ]
Torque to 37 foot pounds. Now GearStar offers a three year, 36,000 mile warranty on their transmissions. Once you register it with them and provide one critical measurement down here, the torque converter to the flex plate clearance. Right now the torque converter is all the way into the pump and it's not up against that flex plate. There's a gap there. We have to measure that and record that. If it's too much of a gap, what happens when you tighten it up to that flex plate it's going to disengage from the pump and cause premature failure. So we're going to go ahead to get this measured. A couple of ways you could do that. With some feeler gauges to measure that gap. If you don't have feeler gauges you could take a couple of drill bits. We've got a 3/16ths and an eighth inch drill bit. So it's kind of like a go-no go gauge. Most of you have some drill bits you can slide up in that gap and see how much you got there. So I've got our feeler gauges set up right here. I can get that measurement from the back side. Right between that pad right there okay. Take that and you can add them all up or just take some calipers and measure it out. And that puts us right there at 125 on the small side. So we're good on our measurements. Now we'll go ahead and get it bolted up to the flex plate. And now the next part. We got to attach the torque converter to the flex plate, and it can be a little bit tricky because the only access to it is where the starter would be in this general area. So you have to make sure the starter's off. You get access to that bolt whole. We'll take our bolts. I already put some red thread locker on there. We'll get them started. I don't like to tighten them one at a time. I get them all started and then we'll go back and tighten them. It's always good to have an extra set of hands as you can work here and your buddy can turn the engine over like Anthony. Go ahead and turn to the next one there pal. -I got you bro. -You can see that there. So there we go. We'll just go ahead and get them all started. Then we'll go back and torque them. Go ahead. [ ratchet clicking ] [ Music ]
Okay, grab the torque wrench. We'll set this to 46 foot pounds. Why 46? That's just what they say. I'm not going to argue with them. -Don't argue. [ ratchet clicking ] It helps having that wobble extension on it I would imagine. -On this little angle, yeah. [ torque wrench clicks ] [ Music ] [ ratchet clicking ] [ Music ]
[ torque wrench clicks ] -With all that bolted up, tightened up, she's ready to get back in the frame rails there. -You want to slap that starter on first? -Yeah, I'll grab the starter. You want to grab another strap for the transmission. [ Music ] Coming up, we turn this tubing into a functional fluid transfer system.
[Mike] Now another thing we need to tackle on our truck is the plumbing. Now this truck had a lot of options on it but the kitchen sink wasn't one of them. Now the plumbing that we're talking about is the fuel and brake lines. And anytime you're plumbing the whole vehicle from front to back you want to run hard line as much as possible to give you that strength there and that protection. Now the materials for your hard line can vary. You could get steel. You could do stainless steel like this one right here. That's going to provide a lot of strength, a lot of corrosion resistance, but it's very hard to work with. It's hard to bend and shape the way you want it, and it's also hard to flare the ends of it so you make your connections. Now a good option here is our Ni-cop or nickel copper alloy line. This provides that strength but is also able to work with it and able to flare it a whole lot easier than that stainless steel. So that's what we're going to use on our project is that Ni-cop line? Now when it comes to flaring the ends of these you've got two different flares. It depends on what you're working with. You've got a 45-degree flare and a 37-degree flare. Now all of your AN style fittings are going to be a 37-degree flare right there. Then when it comes to your brake lines like your inverted flare or your double flares like this, that's a 45-degree flare. So depending on what one you're working on that's going to dictate which flare you use. Now to make that flare that's the subject of today's Summit Tech Tip.
Now I just cut a section of this tubing out to show you as an example on how to do these flares here. Now the biggest thing you need to pay attention to is when you make the cut on these is the treatment of the end of the tubing before you flare it. So you take your deburr tool. This one's really nice. It can go on the inside here. We can clean up that inside edge. Then if you flip this over we can clean up the outside edge as well. So that is the key in making a proper flare is getting that edge taken care of. And once we've done that we can get our flaring tool out. For our flaring tool we've got from Summit Racing Equipment their Pro Flaring Tool Kit. We've got this guy right here. We'll get it set up on our vise. And then the next thing you need to do is figure out which die you need to use. So I got four different dies in here. This particular one right here is for three-eighths, and on one end is 45-degree. The other end is 37-degrees. So that takes care of both for us there. So put this in. Got it set up for 37-degrees. Set this down here. [ Music ]
Flip that over. Flip this over. Take our stop here. Thread that on. [ Music ]
Get that snug. And then we need to pick our appropriate die right here. Now we've got a 37-degree and our 45-degree. Once again we're doing 37. So this is the one we're going to use. Snap that down. And then on top here we've got all of our operations listed. So op zero, the first one, is getting the tube square into the die fixture there. Now I haven't tightened this down all the way. It could still move a little bit. So I like to set that down and let that tube pop out. And then we're going to move this in. And that's going to bottom out right there. Can't go any further. So it's bottomed out. And now I'll tighten this up all the way so it's got a good grip on that tube right there. Then our next step, it depends on what type of flare you're going to do. If you do a double flare or single flare. This particular one we're going to do a single flare for 37-degrees. So we'll look at the operation for three eights, for operation two, which is going to be that single flare. We'll spin this around. And then I like to put a little bit of lube on those dies there. Try to keep the durability of it there, but make it last a long time. So this is tight. We've got our die there. Now all we have to do is push this in. What it's going to do is take that tube and make our flare. [ Music ]
It stops? Pull that back out. Now we can loosen this up and open that. Pull it out of our dyes, and there you go. We've got a nice flare. Now this is the point where most of you seasoned technicians say, oh man, that looks really good. Oh, but you forget about the tube nut and the ferrule. I've done it a lot myself. You get so excited about doing the flares that you forget to slide this over the end first. Now lucky for us we just have a small section right here. Let's slide that on like that. And then we can hook that up to our fitting and we're ready to go. So that's how you can make your flares. Like I said that one was for 37-degree, a single flare. We can flip that around to 45-degree. We change the dies out if we want to do a double flare, which we'll use for our brake lines. So next time you need to get some flaring tools check out Summit Racing Equipment and all their options. [Anthony] Think getting a straight cut on exhaust tubing is impossible. We'll show you an easy trick to give you clean and precise cuts, making for a better fitment.
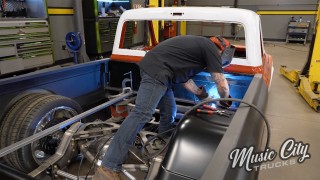
[Mike] Now I've got most of our fuel lines and brake lines fabbed up and installed on the truck. I added a couple of plates to give us a mounting point for the bulkheads. What that's going to do is allow us to break the line up a little bit to so we can navigate through all these components, like our crossmember and the brackets here from where we shortened the chassis. So it makes a little bit easier to make those lines. So we got one more to do up front, but now we're going to kick it over to the exhaust. [Anthony] And the exhaust is going to start with these headers you see sitting right here. Now normally you don't see a long tube header like this in these extreme lowered trucks, but Jason VanNatta over at VanNatta Fab actually turned us on this little trick here using these Doug's headers made for a '64 through '72 A-body GM car. Now they fit really well. They tuck in between the frame rails. They don't get too high and they don't hang too low, which can be a real problem with these lower trucks. So they're going to be a good starting point for our exhaust system. -I love to have the exhaust within the frame rails of the vehicle so they're not underneath. They don't look too ugly. -With the truck being this low you have to. -Exactly right, but then on the back of the truck we've got a lot going on with the airbags, the trailing arms. The rear end's gonna have a lot of movement between lowered and that ride height position. -Not to mention, we have so much stuff back there. It's just going to be a nightmare to try to get back. -So we don't really have a lot of real estate for tailpipes out the back. So we're going to go with a little bit shorter exhaust system. Kind of go right behind the cab, dump it down. I think that'll work out fine. The engine, it doesn't have much compression. So it's not going to be very loud you know. -Yeah we got this little bullet style muffler we're going to put right here. Go underneath this crossmember. Our driveline angle has kind of dictated where this crossmember had to be, and of course it had to be right in the middle of the frame rail. So we got it. But I have a couple tricks that I want to show you though here over at the table to get your exhaust system cut right and fit nice and tight. So I'm going to head over there. -I'm gonna get this other header on. -So whenever you're building a custom exhaust system you're going to deal with a kit that comes with a lot of different bends, and you have to make sure that you cut each one of these bands right or you're going to end up fighting yourself when you go to weld it. So this is 180 degree bend and what we need to find on this is what we call the center line radius. That's going to be directly in the middle of whatever bend you're using, whether it's a 45, a 90, or a 180 like this. And so I have it drawn out here on a manila folder and I'll show you what I'm talking about. So, each one of these bends is going to have some kind of straight leg on it. We're going to find where that straight leg starts and we're going to make a line across just like so. And then we're going to find the center line of that bend, and we're going to make another line. And then where those intersect is what's going to give us the straight cut that we need for whatever angle that we're going to be running. So say we want to do something like that. And this is how the guys that are doing the pie cuts, this is how they do it. They find the center line radius and then they just incrementally go around it and that's what gives them their pie cut. So we'll set like this, and right there in that intersection put the point on it. Draw a line, and that's going to give you a nice, straight cut. And so if you didn't do that and you cut it at an angle to the center line radius and it was running more vertically like that it's going to look like a football. And when you go to weld that you're going to have a big gap on the top and the bottom, and it's going to be a nightmare to weld. So you don't want to do that. So now what we have to do over here on the truck is we had to get underneath that crossmember. So I already cut these up here and basically all I did was take a piece out of the bottom of that u-bend and did that just like so. And then I figured out this is about a 45 degree angle, and that got us underneath of that crossmember. And it gives us a nice, straight line from the header over here to get us to the back of the truck on this side. So let's get this back over on the truck. We'll get this tacked up and we'll show you what it looks like. We start fabricating our exhaust, turning it into a welded work of art or at least something that won't fall off on the first test drive.
[Anthony] We'll slide this in here. Now as you can see this is a little bit above the frame rail. So I kinda gotta angle this down a little bit so I get nice and flush with the top of the frame rail. Looks pretty good right about there. [ Music ]
So you just want to tack it in one spot so you're able to move it around.
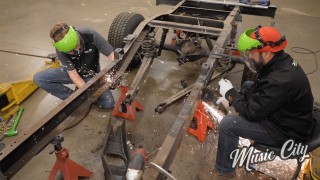
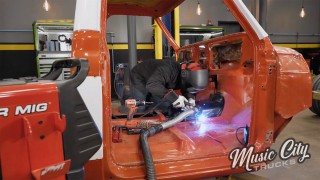
All right, get our piece here. See how we're looking. Now I'm trying to give a little bit of clearance under the crossmember because I don't want anything actually touching. So when we go back and we put our brackets on we've got some space. So I think I'm gonna need to use rod on this. Hey Mike, can you give me a hand over here? [Mike] Okay. What you got? -Just hold that. I got to use rod. Something nice and tight. Oh, you're brave man not using gloves. I'll do my best. -Don't make sparks. -Ready? [ tig welder hissing ] [ Music ]
-We'll get this tacked. Now it's a good rule of thumb to make sure that both the inside and outside of whatever tube you're welding is nice and clean, especially with stainless. [ tig welder hissing ]
-All right, let's get our little bullet muffler in here. See how we're looking. All right, come on down a little bit. Yeah, I think that'll be good. [ Music ] Well, to close our exhaust system out I'm going to break one of the rules that we just talked about. And instead of going to my center line radius I'm actually going to run parallel to it. So that creates our turn down. Now I got one more little trick here to find your center line radius and that's just using any old hose clamp. You put that on, tighten it down, and it's going to keep square and it's going to find your center line radius without you having to do anything. Now you do enough of these exhaust systems and it kind of just becomes second nature and you'll be able to mark it out. Let's go ahead and let's get this thing cut out. [ Music ] [ saw buzzing ] [ Music ]
-Well, all right. As you can see now we have a nice turn down for the end of our exhaust. And it doesn't matter that this is going to be oblong because it's the tip. So let's go get this thing back on the truck and we're going to be about done with this. Let's see what we're looking like here. [ Music ] Look at that. Nice and simple. Nice and easy. I think honestly we should do all the exhaust like this. -Keep it short and simple like that. -Just kiss it. -Maybe it would have been a little bit neater to go out the back and different sound. -We did that on the OBS. You know that was a really complicated exhaust system. So it's nice to get a little break. -This will be a lot simpler. It gets the job done. -We'll probably put a heat shield over there to protect all the lines. Got to get some hangers on it and obviously get the other side done. -Knock out the other side, but once we do that that's pretty much all the fab work. -Then we're basically ready to go to powder coat. -Strip it all down. Get it sandblasted and get it coated and then back for reassembly. That's all we have time for today. If you want to follow the progress on this build between episodes check out our Instagram page, Music City Trucks. We'll catch you guys next time. Let me help you get this welded up. Get rolling!
Show Full Transcript
[Mike] Project Cream Puff is in the final stages of fabrication, engine, transmission and some plumbing. [Anthony] Plus, we'll show you how to make precise cuts on custom exhaust systems. All that and more coming up on Music City trucks. [ Music ]
[Anthony] Hey, welcome to Music City Trucks. And as you can see sitting over here we've got our Project Cream Puff C-10 in the shop today. We got it stripped down to its bare frame to knock a few things off our checklist. [Mike] So we finally got the real engine for this beast. Now we've got to get rid of the fake engine that we used to mockup some things. So let's get the transmission out of here and then we'll get that bolted to that engine back there. All right, here we go. -Let's do it. -Get this on that table over there, separated. Oh, second gear! [ Music ] That looks good. Come on this way. [ Music ] -Having a hoist is nice. -All right, down on the table. Going down! [ Hoist - humming ]
That'll work. -I'll go grab the other engine. -Yep, grab that and I'll get this separated. [ Music ]
[ ratchet clicking ] [ Music ]
-Three hours later. -Now for the transmission you've already seen this in between the frame rails already but I wanted to go ahead and talk to you about it a little bit. This is a 4L80E 4-speed transmission, automatic, from GearStar Performance Transmissions. Now this particular one is what they call a level four. So this one will handle 800 horsepower. Now we've matched it up with a Yank torque converter. 2,800 stall on that torque converter. Be perfect for that engine there. They actually run this on a transmission dyno. Make sure everything works great, and they'll send you the video of your transmission on the dyno. See if Anthony's got that engine ready to go. -We got a 427 coming your way. Let's see if we can't get this thing together. [ Music ]
-Get some tension off this thing here and get it off the stand. That'll work! [ impact driver humming ] [ Music ]
-Freebird! -Going up. -Get it up here on the table and we'll get these two together. [ Music ]
All right. [ Music ]
Do-si-do. Down she go. [ Music ]
Now before we mate up our transmission to the engine a couple things we've got to check. Now one thing, our torque converter is already installed. If yours is not it's very simple. You'll take the torque converter, slide it on the input shaft, and typically feel like three distinct clunks as the splines mash up. And then the end of the hub of the torque converter, make sure it's engaged into the pump of the transmission. Make sure it's set back far enough. Then another thing is the hub on the back side of the torque converter here, make sure this diameter is the same, or that should be a little bit smaller than in the back of your crankshaft so it'll slide inside of it. That's what locates and holds the front of that torque converter there. Now we've already got our flex plate here from Summit Racing. This flex plate is SFI approved. It's a billet steel flex plate. So it's going to be strong enough for our application here. Let's just slide it together and get it bolted up. -Ready to rip. [ Music ]
-Let's get it up on the dowels there. All right, that's started. [ Music ]
[ ratchet clicking ]
Torque to 37 foot pounds. Now GearStar offers a three year, 36,000 mile warranty on their transmissions. Once you register it with them and provide one critical measurement down here, the torque converter to the flex plate clearance. Right now the torque converter is all the way into the pump and it's not up against that flex plate. There's a gap there. We have to measure that and record that. If it's too much of a gap, what happens when you tighten it up to that flex plate it's going to disengage from the pump and cause premature failure. So we're going to go ahead to get this measured. A couple of ways you could do that. With some feeler gauges to measure that gap. If you don't have feeler gauges you could take a couple of drill bits. We've got a 3/16ths and an eighth inch drill bit. So it's kind of like a go-no go gauge. Most of you have some drill bits you can slide up in that gap and see how much you got there. So I've got our feeler gauges set up right here. I can get that measurement from the back side. Right between that pad right there okay. Take that and you can add them all up or just take some calipers and measure it out. And that puts us right there at 125 on the small side. So we're good on our measurements. Now we'll go ahead and get it bolted up to the flex plate. And now the next part. We got to attach the torque converter to the flex plate, and it can be a little bit tricky because the only access to it is where the starter would be in this general area. So you have to make sure the starter's off. You get access to that bolt whole. We'll take our bolts. I already put some red thread locker on there. We'll get them started. I don't like to tighten them one at a time. I get them all started and then we'll go back and tighten them. It's always good to have an extra set of hands as you can work here and your buddy can turn the engine over like Anthony. Go ahead and turn to the next one there pal. -I got you bro. -You can see that there. So there we go. We'll just go ahead and get them all started. Then we'll go back and torque them. Go ahead. [ ratchet clicking ] [ Music ]
Okay, grab the torque wrench. We'll set this to 46 foot pounds. Why 46? That's just what they say. I'm not going to argue with them. -Don't argue. [ ratchet clicking ] It helps having that wobble extension on it I would imagine. -On this little angle, yeah. [ torque wrench clicks ] [ Music ] [ ratchet clicking ] [ Music ]
[ torque wrench clicks ] -With all that bolted up, tightened up, she's ready to get back in the frame rails there. -You want to slap that starter on first? -Yeah, I'll grab the starter. You want to grab another strap for the transmission. [ Music ] Coming up, we turn this tubing into a functional fluid transfer system.
[Mike] Now another thing we need to tackle on our truck is the plumbing. Now this truck had a lot of options on it but the kitchen sink wasn't one of them. Now the plumbing that we're talking about is the fuel and brake lines. And anytime you're plumbing the whole vehicle from front to back you want to run hard line as much as possible to give you that strength there and that protection. Now the materials for your hard line can vary. You could get steel. You could do stainless steel like this one right here. That's going to provide a lot of strength, a lot of corrosion resistance, but it's very hard to work with. It's hard to bend and shape the way you want it, and it's also hard to flare the ends of it so you make your connections. Now a good option here is our Ni-cop or nickel copper alloy line. This provides that strength but is also able to work with it and able to flare it a whole lot easier than that stainless steel. So that's what we're going to use on our project is that Ni-cop line? Now when it comes to flaring the ends of these you've got two different flares. It depends on what you're working with. You've got a 45-degree flare and a 37-degree flare. Now all of your AN style fittings are going to be a 37-degree flare right there. Then when it comes to your brake lines like your inverted flare or your double flares like this, that's a 45-degree flare. So depending on what one you're working on that's going to dictate which flare you use. Now to make that flare that's the subject of today's Summit Tech Tip.
Now I just cut a section of this tubing out to show you as an example on how to do these flares here. Now the biggest thing you need to pay attention to is when you make the cut on these is the treatment of the end of the tubing before you flare it. So you take your deburr tool. This one's really nice. It can go on the inside here. We can clean up that inside edge. Then if you flip this over we can clean up the outside edge as well. So that is the key in making a proper flare is getting that edge taken care of. And once we've done that we can get our flaring tool out. For our flaring tool we've got from Summit Racing Equipment their Pro Flaring Tool Kit. We've got this guy right here. We'll get it set up on our vise. And then the next thing you need to do is figure out which die you need to use. So I got four different dies in here. This particular one right here is for three-eighths, and on one end is 45-degree. The other end is 37-degrees. So that takes care of both for us there. So put this in. Got it set up for 37-degrees. Set this down here. [ Music ]
Flip that over. Flip this over. Take our stop here. Thread that on. [ Music ]
Get that snug. And then we need to pick our appropriate die right here. Now we've got a 37-degree and our 45-degree. Once again we're doing 37. So this is the one we're going to use. Snap that down. And then on top here we've got all of our operations listed. So op zero, the first one, is getting the tube square into the die fixture there. Now I haven't tightened this down all the way. It could still move a little bit. So I like to set that down and let that tube pop out. And then we're going to move this in. And that's going to bottom out right there. Can't go any further. So it's bottomed out. And now I'll tighten this up all the way so it's got a good grip on that tube right there. Then our next step, it depends on what type of flare you're going to do. If you do a double flare or single flare. This particular one we're going to do a single flare for 37-degrees. So we'll look at the operation for three eights, for operation two, which is going to be that single flare. We'll spin this around. And then I like to put a little bit of lube on those dies there. Try to keep the durability of it there, but make it last a long time. So this is tight. We've got our die there. Now all we have to do is push this in. What it's going to do is take that tube and make our flare. [ Music ]
It stops? Pull that back out. Now we can loosen this up and open that. Pull it out of our dyes, and there you go. We've got a nice flare. Now this is the point where most of you seasoned technicians say, oh man, that looks really good. Oh, but you forget about the tube nut and the ferrule. I've done it a lot myself. You get so excited about doing the flares that you forget to slide this over the end first. Now lucky for us we just have a small section right here. Let's slide that on like that. And then we can hook that up to our fitting and we're ready to go. So that's how you can make your flares. Like I said that one was for 37-degree, a single flare. We can flip that around to 45-degree. We change the dies out if we want to do a double flare, which we'll use for our brake lines. So next time you need to get some flaring tools check out Summit Racing Equipment and all their options. [Anthony] Think getting a straight cut on exhaust tubing is impossible. We'll show you an easy trick to give you clean and precise cuts, making for a better fitment.
[Mike] Now I've got most of our fuel lines and brake lines fabbed up and installed on the truck. I added a couple of plates to give us a mounting point for the bulkheads. What that's going to do is allow us to break the line up a little bit to so we can navigate through all these components, like our crossmember and the brackets here from where we shortened the chassis. So it makes a little bit easier to make those lines. So we got one more to do up front, but now we're going to kick it over to the exhaust. [Anthony] And the exhaust is going to start with these headers you see sitting right here. Now normally you don't see a long tube header like this in these extreme lowered trucks, but Jason VanNatta over at VanNatta Fab actually turned us on this little trick here using these Doug's headers made for a '64 through '72 A-body GM car. Now they fit really well. They tuck in between the frame rails. They don't get too high and they don't hang too low, which can be a real problem with these lower trucks. So they're going to be a good starting point for our exhaust system. -I love to have the exhaust within the frame rails of the vehicle so they're not underneath. They don't look too ugly. -With the truck being this low you have to. -Exactly right, but then on the back of the truck we've got a lot going on with the airbags, the trailing arms. The rear end's gonna have a lot of movement between lowered and that ride height position. -Not to mention, we have so much stuff back there. It's just going to be a nightmare to try to get back. -So we don't really have a lot of real estate for tailpipes out the back. So we're going to go with a little bit shorter exhaust system. Kind of go right behind the cab, dump it down. I think that'll work out fine. The engine, it doesn't have much compression. So it's not going to be very loud you know. -Yeah we got this little bullet style muffler we're going to put right here. Go underneath this crossmember. Our driveline angle has kind of dictated where this crossmember had to be, and of course it had to be right in the middle of the frame rail. So we got it. But I have a couple tricks that I want to show you though here over at the table to get your exhaust system cut right and fit nice and tight. So I'm going to head over there. -I'm gonna get this other header on. -So whenever you're building a custom exhaust system you're going to deal with a kit that comes with a lot of different bends, and you have to make sure that you cut each one of these bands right or you're going to end up fighting yourself when you go to weld it. So this is 180 degree bend and what we need to find on this is what we call the center line radius. That's going to be directly in the middle of whatever bend you're using, whether it's a 45, a 90, or a 180 like this. And so I have it drawn out here on a manila folder and I'll show you what I'm talking about. So, each one of these bends is going to have some kind of straight leg on it. We're going to find where that straight leg starts and we're going to make a line across just like so. And then we're going to find the center line of that bend, and we're going to make another line. And then where those intersect is what's going to give us the straight cut that we need for whatever angle that we're going to be running. So say we want to do something like that. And this is how the guys that are doing the pie cuts, this is how they do it. They find the center line radius and then they just incrementally go around it and that's what gives them their pie cut. So we'll set like this, and right there in that intersection put the point on it. Draw a line, and that's going to give you a nice, straight cut. And so if you didn't do that and you cut it at an angle to the center line radius and it was running more vertically like that it's going to look like a football. And when you go to weld that you're going to have a big gap on the top and the bottom, and it's going to be a nightmare to weld. So you don't want to do that. So now what we have to do over here on the truck is we had to get underneath that crossmember. So I already cut these up here and basically all I did was take a piece out of the bottom of that u-bend and did that just like so. And then I figured out this is about a 45 degree angle, and that got us underneath of that crossmember. And it gives us a nice, straight line from the header over here to get us to the back of the truck on this side. So let's get this back over on the truck. We'll get this tacked up and we'll show you what it looks like. We start fabricating our exhaust, turning it into a welded work of art or at least something that won't fall off on the first test drive.
[Anthony] We'll slide this in here. Now as you can see this is a little bit above the frame rail. So I kinda gotta angle this down a little bit so I get nice and flush with the top of the frame rail. Looks pretty good right about there. [ Music ]
So you just want to tack it in one spot so you're able to move it around.
All right, get our piece here. See how we're looking. Now I'm trying to give a little bit of clearance under the crossmember because I don't want anything actually touching. So when we go back and we put our brackets on we've got some space. So I think I'm gonna need to use rod on this. Hey Mike, can you give me a hand over here? [Mike] Okay. What you got? -Just hold that. I got to use rod. Something nice and tight. Oh, you're brave man not using gloves. I'll do my best. -Don't make sparks. -Ready? [ tig welder hissing ] [ Music ]
-We'll get this tacked. Now it's a good rule of thumb to make sure that both the inside and outside of whatever tube you're welding is nice and clean, especially with stainless. [ tig welder hissing ]
-All right, let's get our little bullet muffler in here. See how we're looking. All right, come on down a little bit. Yeah, I think that'll be good. [ Music ] Well, to close our exhaust system out I'm going to break one of the rules that we just talked about. And instead of going to my center line radius I'm actually going to run parallel to it. So that creates our turn down. Now I got one more little trick here to find your center line radius and that's just using any old hose clamp. You put that on, tighten it down, and it's going to keep square and it's going to find your center line radius without you having to do anything. Now you do enough of these exhaust systems and it kind of just becomes second nature and you'll be able to mark it out. Let's go ahead and let's get this thing cut out. [ Music ] [ saw buzzing ] [ Music ]
-Well, all right. As you can see now we have a nice turn down for the end of our exhaust. And it doesn't matter that this is going to be oblong because it's the tip. So let's go get this thing back on the truck and we're going to be about done with this. Let's see what we're looking like here. [ Music ] Look at that. Nice and simple. Nice and easy. I think honestly we should do all the exhaust like this. -Keep it short and simple like that. -Just kiss it. -Maybe it would have been a little bit neater to go out the back and different sound. -We did that on the OBS. You know that was a really complicated exhaust system. So it's nice to get a little break. -This will be a lot simpler. It gets the job done. -We'll probably put a heat shield over there to protect all the lines. Got to get some hangers on it and obviously get the other side done. -Knock out the other side, but once we do that that's pretty much all the fab work. -Then we're basically ready to go to powder coat. -Strip it all down. Get it sandblasted and get it coated and then back for reassembly. That's all we have time for today. If you want to follow the progress on this build between episodes check out our Instagram page, Music City Trucks. We'll catch you guys next time. Let me help you get this welded up. Get rolling!