
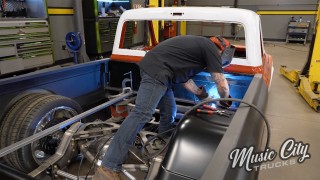
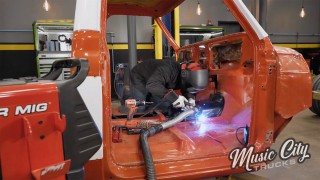
In This Episode
- 0:00 Introduction and Overview
- 0:32 Painting and Powder Coating
- 1:17 Suspension Installation
- 1:23 Brake System Installation
- 5:00 Parking Brake Assembly Installation
- 6:00 Intermediate Bracket and Brake Rotors
- 7:02 Caliper Installation and Adjustment
- 9:04 Suspension Components and Brakes
- 10:03 Wheels and Tires Installation
- 10:37 Fuel System Installation
- 13:26 Driveshaft Installation
- 14:09 Clutch and Brake System Wrap-up
- 17:42 Radiator and Cooling Fans Installation
Video Transcript
[Mike] You're watching Powernation!
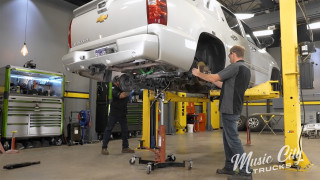
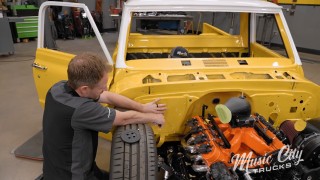
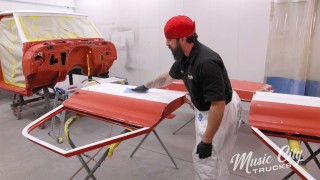
[Anthony] Today on Music City Trucks we get our black beast of an OBS back in the shop all painted and powder coated. [Mike] We get an ultra-high performance brake kit installed. Then I'll address the fuel system that'll feed our thirsty big block. [Anthony] Then we'll wrap it all up by installing our radiator and cooling fans to keep this 632 nice and cool. Stay tuned! [ Music ] [Anthony] Hey guys, welcome to Music City Trucks. As you can see we've been making quite a bit of progress on our Project 632 SS build. We've got all of our sheet metal in our black satin paint and we got this piece of eye candy sitting right here. If you remember the last time you saw this it was a little more rust colored but we took this over to our friends from Blast from the Past and they put this beautiful silver metallic powder coat on it. They immediately got the chassis off the trailer and into the sandblast booth and stripped down that 30 plus years of grime and rust that was sitting on this chassis. They then moved it over to the powder coat side of things and sprayed this beautiful Bengal Silver Metallic that you see here. As you can see this thing turned out absolutely beautiful. It's really gonna pop when we get that satin black body down on the chassis. We've already got our RideTech suspension installed in it. We've shown you how to do it. We have a few more things to do and that's gonna start with the brakes. [Mike] For the brake system we reached out to our friends at Baer Brakes and they hooked us up with this 14-inch Extreme Plus package. It's got six piston calipers on all four corners. To get this installed the first thing we've got to do is start with this axle and axle seal. [ Music ] [ hammer tapping ] Now we already showed you our rear axle housing here from Quick Performance. They also sent us these axle shafts. Now these are 35 spline axles that they've matched up with our power level. You can also custom order your links. I actually made this housing about an inch narrower than stock so we can get the biggest tire possible between our control arm and that fender on the bed. So I put a little assembly lube on our seal, on our splines, and down here on the bearing. Now we've just got to slide it in. [ Music ]
Alright, let's get the rest of those brakes on there. Our next piece is the parking brake assembly, which also doubles as the bearing retainer. We've just got to get this shoe off here. Set that down and this is gonna slide up on the back side and retain that bearing. I also like to put a little bit of silicone for an extra step or an extra level of protection there to keep it from leaking out. [ Music ]
Now this plate just slides up. This little opening here allows us to go up over the axle shaft. [ Music ] Up over here. [ Music ] Take our T-bolts back. Put some red thread locker along with a lock washer. Make sure she don't come out. [ Music ]
The neat thing about these axles here. This opening if you're concerned what's that big hole for. Well that gives us access to tighten up these nuts for these retaining bolts. I'll run these down. Get them snug. Then all I have to do is spin this around to the next one. Tighten them all down. We're gonna tighten them to 30 foot pounds. Get my torque wrench here once we snug these up. Now we'll torque them all down. [ Music ]
Click! Now we can get our parking brake shoe on here. This just slides right over that axle flange there. [ Music ] Just gotta make sure you get the ends of that shoe down into the adjustor in the bottom. Blue thread locker cause that's going into aluminum. That's my little judge on strengthness there with the colors. Two screws in there and that would be installed. [ Music ] Now we're gonna torque them down to 120 inch pounds. [ Music ] Alright. Now's a good time to double check all your clearances between the flange, the wheel studs, the T-bolts. Make sure there's nothing hitting because you've got a lot of custom pieces here. All that clears. Our shoe is centered. Move on to the next step. This intermediate bracket here gives you a chance to customize your braking system. Ours is gonna be set up for a trailing. Now a leading brake system the caliper would be mounted up front. Ours is gonna be mounted to the back. They also have a few different provisions where if you wanted to clock it at a different angle. We're just gonna go with the old 90-degree nine o'clock position. Right now we're just gonna tighten these up by hand. Get them snug because we've got to make some adjustments to this position for shimming I'll show a little bit later. Next is our brake rotors. This one right here is 14 inches in diameter, and any time you can increase the diameter of your brake rotor it gives you more leverage and more stopping power there. Put some lug nuts on here to keep that thing flush as we adjust the calipers. Next piece is our calipers. Now this is the heart of the system here. Six piston caliper. It's machined out of one piece of aluminum. That gives it all the strength and rigidity compared to a lot of stock setups. So we've got to get this on here and then we've got to measure for some shims to get it centered with the rotor. [ Music ] Just so you know your caliper is installed the right direction make sure your bleed screws are facing up. Now to center our rotor in the caliper. You can see the difference in the gap right here. We've got these shims that we have to install between our intermediate plate. We'll take our calipers here. Take that measurement. We've got 905, and then on this side we've got 830. We'll subtract those two, divide it in half, and that'll tell us the amount of shim to move this back and forth. We measured at the top of the caliper and at the bottom of the caliper on both sides of the rotor and the difference was 70 thousandths. So we take that 70, divide it by two, that gives us 35 thousandths. That means two of these little shims comes out to 32 thousandths and that's within our five thousandths window that they're looking for. We'll get these shims installed between the intermediate plate and that backing plate. Then we can put the brake pads in and button it up. [Anthony] Up next, we add some new suspension components and finish our brakes. [Mike] Then we install the high volume fuel system letting the juice flow to our big block Chevy.
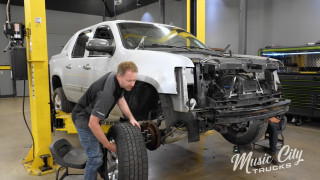
[Anthony] While Mike's been busy finishing up the rear I've been working on the front. With this RideTech kit, and the 14 inch rotors, and the six piston Baer brakes that we're running their spindle that they send with the kit isn't gonna work for us. So what we did is called up AZ Pro Performance and got one of their React two inch modular drop spindles. That allows us to run this Baer setup. We also installed a speed sensor up here that we're gonna touch base on a little bit later. Then to get us steering in the right direction we're gonna replace our steering components up front here. The first thing we started with was this turnbuckle from RideTech. Now they don't send this in the kit. That's something you're gonna have to buy extra because they want you to utilize your factory steering components. Ours are in pretty bad shape. So we're gonna go ahead and replace that. The next thing we're gonna replace are these tie rod ends from Duralast. These Duralast tie rod ends, they're built to meet or exceed OEM quality fit, form, and function. They're a real nice piece. It's gonna really tighten up the steering. Let's go ahead and get this installed. Now Duralast thoroughly tests all their components to give you extreme longevity and performance, and these tie rod ends are no exception. That's why we're putting them on the truck. [ Music ] The only thing we're gonna have left to do after this is get the rotor, get the caliper on, and then we're gonna be able to mount up the wheels and tires and get this thing down on the ground. [ ratchet clicking ] [Anthony] Alright I'll get this last nut torqued up and this front end's gonna be ready to rip. I think it's about time we get some wheels and tires on this bad boy. [Mike] For the wheels we reached out to Summit Racing and they sent us this US Mag wheel. It's kind of a tribute to the 454 SS wheel back in the day. That was in a 15 inch but this is in a 20 inch. We wrapped it in this Continental Extreme Contact Sport 02s. That is an ultra high performance summer tire and gives you great traction whether it's dry or wet. That'll be perfect for our application here whether it's on the track or on the street. So let's get them wrapped up, put them on the truck, and have us a roller. This tire comes complete with Sport Plus technology, which provides track proven performance and extended tread life. Before we could drop the bed onto our chassis we've got to finish up our fuel system, and that starts with our fuel pump. Now this one right here is from Holley. It's a 525 liter per hour unit that will support over 1,200 horsepower on a fuel injected system. This kit comes for a variety of fuel tank depths. So what we have to do is measure our fuel tank and we have to trim our supply hose, the return hose, and the mounting bracket so we can get at the right spot in the tank. Looks like nine and three quarter at the top of the tank. Now once you've got your tank depth measurement refer to Holley's instructions to let you know how much you need to cut off your tubes here. For us it's two and a quarter inches. So I'll pull out my tape measure. We'll mark it right there and that's where we'll make our cut. [ Music ] Now both your supply and your return hose get cut at the same length. [ Music ]
Next we need to trim our fuel mount bracket. We'll take that over to the band saw. [ Music ] The fuel pump mounting bracket has a different measurement than the tubes. Refer to your instructions to know how much you need to cut off. Ours is an inch and a quarter. Now with our pieces trimmed up we've just got to put it together. Gasket off here. Slide that into there. [ Music ] Now we'll get our pump installed. [ Music ] Slide it over the barb and tighten up our clamp. Now with our hose clamps installed along with the hydramat at the bottom of the pump we've just gotta get it in the tank. [ Music ]
[ ratchet clicking ] [ Music ] We'll finish tightening them out by torquing them to 60 inch pounds. Go in a star pattern here. [ Music ] Now with the fuel pump installed we've got a couple more components in our fuel system. The fuel filter and the fuel pressure regulator. Now this is gonna be mounted up on the firewall real close to the engine. So we'll get to that later. Now we're gonna get the fuel filter and I'm thinking we're gonna install it somewhere in this general area. So I just whipped up a little bracket to mount our fuel filter to. Now I've just got to put it on the frame. We'll attach it to the frame using these ARP fasteners. We got our 10 micron filter installed. We got the pump in the tank. Now we've just got to connect everything. We like to use Earl's for their fittings and their hose to get the job done. [Anthony] Hey Mike, this thing's all welded up. Where do you want me to put it? [Mike] Uh, on the truck. [Anthony] I guess we've got to put the motor in it don't we? [Mike] Yep, yep! [Anthony] That might help. [Mike] Coming up, we convert our brakes to a manual setup. Then add that manly third pedal making driving our sport truck a little more spicy.
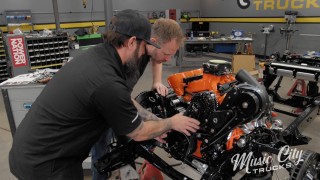
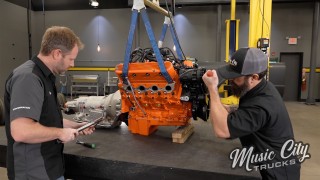
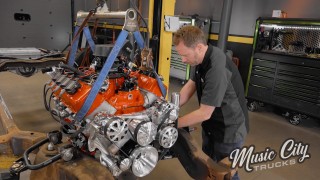
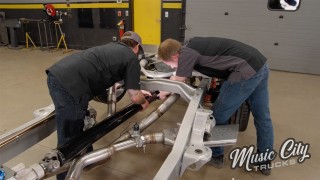
[Anthony] Hey guys, welcome back. As you can see we've come a long way on this 632 SS chassis. We've got the engine and trans in its final spot. We've got our exhaust hung, and we ran our fuel and brake lines. Now we have one more thing left to do and that's install the driveshaft. [Mike] So we sent all of our specs down to Chattanooga Driveline and this is what they sent us. It's a four inch diameter steel tube driveshaft. That's gonna be strong enough to handle all the horsepower that engine's making. Now we've just got to get it installed. [ Music ]
[Anthony] She's home! [ Music ]
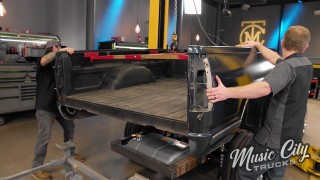
[Mike] There we go! Now that our chassis' a roller we can get it underneath the cab, lower it down, and then get the bed back on it so it looks like a truck again. Now that we've got the bed and the cab installed we can wrap up the clutch and brake system on the truck. For our brake master cylinder we're going with this unit from Baer. Now it's matched with the rest of our brake system and the calipers as well. We're gonna ditch that power brake booster. Get rid of that ugly thing off that firewall and we're going with manual brakes. You may be thinking why would you want to go with manual brakes? When you properly engineer the entire brake system you'll get a great pedal feel. What they do is they'll engineer the size of your calipers along with the bore here of the master cylinder to get you that great pedal effort there. And it'll look nice on that firewall. Now we've just got to bleed this thing on the bench and get it hung on that firewall. [ Music ]
Get it on the truck. [ Music ] [ ratchet clicking ] [ Music ] [Mike] Got that on there. Anthony's gonna make us some hard lines to connect the two. I'm gonna jump inside and work on the clutch pedal. [ Music ] Now we showed you the manual transmission that we're going with from American Powertrain but they also sent us this clutch pedal and master cylinder setup that bolts right in to these trucks. Like I said, it's got the master cylinder attached and they've got all the geometry laid out engineered perfectly. It just sandwiches the factory bracket. Now we've just gotta bolt it in place. [ Music ]
[ ratchet clicking ] [ Music ] [ ratchet clicking ] [ Music ] Alright, now that we've got the clutch pedal master cylinder installed it shows another issue. The clearance between the clutch pedal and the brake pedal because this one was for an automatic transmission. They're typically built wider. So we're gonna take this brake arm out, trim that pedal down a little bit, redrill the pivot point for the push rod that goes in the master cylinder and that's gonna wrap up this installation. [Anthony] We crack the case on how to keep our 632 super chilled by adding a new aluminum radiator and a duel fan setup.
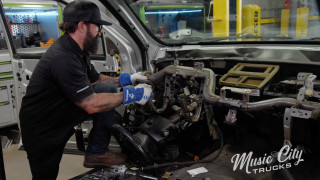
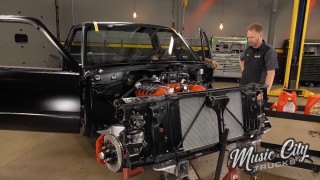
[Anthony] While Mike's finishing up our master cylinder install I'm gonna move forward and get our radiator mounted up. Now we went to Cold Case Products for this and it's 100 percent tig welded polished aluminum piece and it's made to fit any '88-'98 GM pickup truck. There's a couple of steps you've gotta do before you can get it in the truck, and that first step is mounting these fans on this shroud. So let's go ahead and show you how to do that. [ Music ]
So now that we got that blue wrap off of it we can go ahead and get these mocked up. Now they give you four riv-nuts per side already mounted in the shroud. It'll give you a bunch of different ways you can clock these. We're gonna get this so the wires point in the middle clocked down. That way we can run them with the frame rails and be tucked up nice and tight. Get it out of the way. First step, gonna get these clips. You slide them down into these little receiving areas. There's four per fan. Now that we've got all the clips in we can start running some bolts down to it. They also send you a complete wiring kit that comes with it. It comes with the relay and then a thermostatically controlled switch. It already has a bunch welded into the radiator. Now we're not gonna be using that switch since we're running the Terminator-X system and that's gonna control our fans. If you were to use this it would have the fans turn on at about 190 degrees. It makes it real nice that you already have that option to be able to run that. [ Music ]
Some of them are a little tight. So you may have to tug on it in one direction or another to get them to go. So far they're all in. [ Music ] We'll get this last one snugged up and she's ready to mount on the radiator. When you're mounting it you've got to make sure that you're mounting it on the right side. These fans are gonna pull not push. So we're gotta put it on the back side of the radiator, which is this side. [ Music ]
So we're gonna use bolts in this case. They have slots here on these top rails and on the bottom ones. Go ahead and slap those in there. [ ratchet clicking ] [ Music ] Alright, this thing's all snugged up and ready to drop in the truck. [ Music ] Let's see what we're looking like here. Now we're utilizing the factory lower radiator rubbers. Now these trucks originally came with a mechanical fan setup that included a radiator shroud that also served as the top mount. We're not running that any more. So I whipped up this quick bracket. It's gonna go ahead and lock this radiator nice and tight and it's gonna clean up the top of the core support. Go ahead and drop this thing in here. That looks pretty nice. [Mike] When it comes to that radiator I think that's case closed. We got a lot done today but we're so close to firing this thing up. [Anthony] I can't wait to hear this beast. It's gonna be nasty! [Mike] We'll get to that next time on Music City Trucks. I think for the hoses we'll have to come off this way. Our upper hose like that. [Anthony] Probably gonna have to paint this I think.
Show Full Transcript
[Anthony] Today on Music City Trucks we get our black beast of an OBS back in the shop all painted and powder coated. [Mike] We get an ultra-high performance brake kit installed. Then I'll address the fuel system that'll feed our thirsty big block. [Anthony] Then we'll wrap it all up by installing our radiator and cooling fans to keep this 632 nice and cool. Stay tuned! [ Music ] [Anthony] Hey guys, welcome to Music City Trucks. As you can see we've been making quite a bit of progress on our Project 632 SS build. We've got all of our sheet metal in our black satin paint and we got this piece of eye candy sitting right here. If you remember the last time you saw this it was a little more rust colored but we took this over to our friends from Blast from the Past and they put this beautiful silver metallic powder coat on it. They immediately got the chassis off the trailer and into the sandblast booth and stripped down that 30 plus years of grime and rust that was sitting on this chassis. They then moved it over to the powder coat side of things and sprayed this beautiful Bengal Silver Metallic that you see here. As you can see this thing turned out absolutely beautiful. It's really gonna pop when we get that satin black body down on the chassis. We've already got our RideTech suspension installed in it. We've shown you how to do it. We have a few more things to do and that's gonna start with the brakes. [Mike] For the brake system we reached out to our friends at Baer Brakes and they hooked us up with this 14-inch Extreme Plus package. It's got six piston calipers on all four corners. To get this installed the first thing we've got to do is start with this axle and axle seal. [ Music ] [ hammer tapping ] Now we already showed you our rear axle housing here from Quick Performance. They also sent us these axle shafts. Now these are 35 spline axles that they've matched up with our power level. You can also custom order your links. I actually made this housing about an inch narrower than stock so we can get the biggest tire possible between our control arm and that fender on the bed. So I put a little assembly lube on our seal, on our splines, and down here on the bearing. Now we've just got to slide it in. [ Music ]
Alright, let's get the rest of those brakes on there. Our next piece is the parking brake assembly, which also doubles as the bearing retainer. We've just got to get this shoe off here. Set that down and this is gonna slide up on the back side and retain that bearing. I also like to put a little bit of silicone for an extra step or an extra level of protection there to keep it from leaking out. [ Music ]
Now this plate just slides up. This little opening here allows us to go up over the axle shaft. [ Music ] Up over here. [ Music ] Take our T-bolts back. Put some red thread locker along with a lock washer. Make sure she don't come out. [ Music ]
The neat thing about these axles here. This opening if you're concerned what's that big hole for. Well that gives us access to tighten up these nuts for these retaining bolts. I'll run these down. Get them snug. Then all I have to do is spin this around to the next one. Tighten them all down. We're gonna tighten them to 30 foot pounds. Get my torque wrench here once we snug these up. Now we'll torque them all down. [ Music ]
Click! Now we can get our parking brake shoe on here. This just slides right over that axle flange there. [ Music ] Just gotta make sure you get the ends of that shoe down into the adjustor in the bottom. Blue thread locker cause that's going into aluminum. That's my little judge on strengthness there with the colors. Two screws in there and that would be installed. [ Music ] Now we're gonna torque them down to 120 inch pounds. [ Music ] Alright. Now's a good time to double check all your clearances between the flange, the wheel studs, the T-bolts. Make sure there's nothing hitting because you've got a lot of custom pieces here. All that clears. Our shoe is centered. Move on to the next step. This intermediate bracket here gives you a chance to customize your braking system. Ours is gonna be set up for a trailing. Now a leading brake system the caliper would be mounted up front. Ours is gonna be mounted to the back. They also have a few different provisions where if you wanted to clock it at a different angle. We're just gonna go with the old 90-degree nine o'clock position. Right now we're just gonna tighten these up by hand. Get them snug because we've got to make some adjustments to this position for shimming I'll show a little bit later. Next is our brake rotors. This one right here is 14 inches in diameter, and any time you can increase the diameter of your brake rotor it gives you more leverage and more stopping power there. Put some lug nuts on here to keep that thing flush as we adjust the calipers. Next piece is our calipers. Now this is the heart of the system here. Six piston caliper. It's machined out of one piece of aluminum. That gives it all the strength and rigidity compared to a lot of stock setups. So we've got to get this on here and then we've got to measure for some shims to get it centered with the rotor. [ Music ] Just so you know your caliper is installed the right direction make sure your bleed screws are facing up. Now to center our rotor in the caliper. You can see the difference in the gap right here. We've got these shims that we have to install between our intermediate plate. We'll take our calipers here. Take that measurement. We've got 905, and then on this side we've got 830. We'll subtract those two, divide it in half, and that'll tell us the amount of shim to move this back and forth. We measured at the top of the caliper and at the bottom of the caliper on both sides of the rotor and the difference was 70 thousandths. So we take that 70, divide it by two, that gives us 35 thousandths. That means two of these little shims comes out to 32 thousandths and that's within our five thousandths window that they're looking for. We'll get these shims installed between the intermediate plate and that backing plate. Then we can put the brake pads in and button it up. [Anthony] Up next, we add some new suspension components and finish our brakes. [Mike] Then we install the high volume fuel system letting the juice flow to our big block Chevy.
[Anthony] While Mike's been busy finishing up the rear I've been working on the front. With this RideTech kit, and the 14 inch rotors, and the six piston Baer brakes that we're running their spindle that they send with the kit isn't gonna work for us. So what we did is called up AZ Pro Performance and got one of their React two inch modular drop spindles. That allows us to run this Baer setup. We also installed a speed sensor up here that we're gonna touch base on a little bit later. Then to get us steering in the right direction we're gonna replace our steering components up front here. The first thing we started with was this turnbuckle from RideTech. Now they don't send this in the kit. That's something you're gonna have to buy extra because they want you to utilize your factory steering components. Ours are in pretty bad shape. So we're gonna go ahead and replace that. The next thing we're gonna replace are these tie rod ends from Duralast. These Duralast tie rod ends, they're built to meet or exceed OEM quality fit, form, and function. They're a real nice piece. It's gonna really tighten up the steering. Let's go ahead and get this installed. Now Duralast thoroughly tests all their components to give you extreme longevity and performance, and these tie rod ends are no exception. That's why we're putting them on the truck. [ Music ] The only thing we're gonna have left to do after this is get the rotor, get the caliper on, and then we're gonna be able to mount up the wheels and tires and get this thing down on the ground. [ ratchet clicking ] [Anthony] Alright I'll get this last nut torqued up and this front end's gonna be ready to rip. I think it's about time we get some wheels and tires on this bad boy. [Mike] For the wheels we reached out to Summit Racing and they sent us this US Mag wheel. It's kind of a tribute to the 454 SS wheel back in the day. That was in a 15 inch but this is in a 20 inch. We wrapped it in this Continental Extreme Contact Sport 02s. That is an ultra high performance summer tire and gives you great traction whether it's dry or wet. That'll be perfect for our application here whether it's on the track or on the street. So let's get them wrapped up, put them on the truck, and have us a roller. This tire comes complete with Sport Plus technology, which provides track proven performance and extended tread life. Before we could drop the bed onto our chassis we've got to finish up our fuel system, and that starts with our fuel pump. Now this one right here is from Holley. It's a 525 liter per hour unit that will support over 1,200 horsepower on a fuel injected system. This kit comes for a variety of fuel tank depths. So what we have to do is measure our fuel tank and we have to trim our supply hose, the return hose, and the mounting bracket so we can get at the right spot in the tank. Looks like nine and three quarter at the top of the tank. Now once you've got your tank depth measurement refer to Holley's instructions to let you know how much you need to cut off your tubes here. For us it's two and a quarter inches. So I'll pull out my tape measure. We'll mark it right there and that's where we'll make our cut. [ Music ] Now both your supply and your return hose get cut at the same length. [ Music ]
Next we need to trim our fuel mount bracket. We'll take that over to the band saw. [ Music ] The fuel pump mounting bracket has a different measurement than the tubes. Refer to your instructions to know how much you need to cut off. Ours is an inch and a quarter. Now with our pieces trimmed up we've just got to put it together. Gasket off here. Slide that into there. [ Music ] Now we'll get our pump installed. [ Music ] Slide it over the barb and tighten up our clamp. Now with our hose clamps installed along with the hydramat at the bottom of the pump we've just gotta get it in the tank. [ Music ]
[ ratchet clicking ] [ Music ] We'll finish tightening them out by torquing them to 60 inch pounds. Go in a star pattern here. [ Music ] Now with the fuel pump installed we've got a couple more components in our fuel system. The fuel filter and the fuel pressure regulator. Now this is gonna be mounted up on the firewall real close to the engine. So we'll get to that later. Now we're gonna get the fuel filter and I'm thinking we're gonna install it somewhere in this general area. So I just whipped up a little bracket to mount our fuel filter to. Now I've just got to put it on the frame. We'll attach it to the frame using these ARP fasteners. We got our 10 micron filter installed. We got the pump in the tank. Now we've just got to connect everything. We like to use Earl's for their fittings and their hose to get the job done. [Anthony] Hey Mike, this thing's all welded up. Where do you want me to put it? [Mike] Uh, on the truck. [Anthony] I guess we've got to put the motor in it don't we? [Mike] Yep, yep! [Anthony] That might help. [Mike] Coming up, we convert our brakes to a manual setup. Then add that manly third pedal making driving our sport truck a little more spicy.
[Anthony] Hey guys, welcome back. As you can see we've come a long way on this 632 SS chassis. We've got the engine and trans in its final spot. We've got our exhaust hung, and we ran our fuel and brake lines. Now we have one more thing left to do and that's install the driveshaft. [Mike] So we sent all of our specs down to Chattanooga Driveline and this is what they sent us. It's a four inch diameter steel tube driveshaft. That's gonna be strong enough to handle all the horsepower that engine's making. Now we've just got to get it installed. [ Music ]
[Anthony] She's home! [ Music ]
[Mike] There we go! Now that our chassis' a roller we can get it underneath the cab, lower it down, and then get the bed back on it so it looks like a truck again. Now that we've got the bed and the cab installed we can wrap up the clutch and brake system on the truck. For our brake master cylinder we're going with this unit from Baer. Now it's matched with the rest of our brake system and the calipers as well. We're gonna ditch that power brake booster. Get rid of that ugly thing off that firewall and we're going with manual brakes. You may be thinking why would you want to go with manual brakes? When you properly engineer the entire brake system you'll get a great pedal feel. What they do is they'll engineer the size of your calipers along with the bore here of the master cylinder to get you that great pedal effort there. And it'll look nice on that firewall. Now we've just got to bleed this thing on the bench and get it hung on that firewall. [ Music ]
Get it on the truck. [ Music ] [ ratchet clicking ] [ Music ] [Mike] Got that on there. Anthony's gonna make us some hard lines to connect the two. I'm gonna jump inside and work on the clutch pedal. [ Music ] Now we showed you the manual transmission that we're going with from American Powertrain but they also sent us this clutch pedal and master cylinder setup that bolts right in to these trucks. Like I said, it's got the master cylinder attached and they've got all the geometry laid out engineered perfectly. It just sandwiches the factory bracket. Now we've just gotta bolt it in place. [ Music ]
[ ratchet clicking ] [ Music ] [ ratchet clicking ] [ Music ] Alright, now that we've got the clutch pedal master cylinder installed it shows another issue. The clearance between the clutch pedal and the brake pedal because this one was for an automatic transmission. They're typically built wider. So we're gonna take this brake arm out, trim that pedal down a little bit, redrill the pivot point for the push rod that goes in the master cylinder and that's gonna wrap up this installation. [Anthony] We crack the case on how to keep our 632 super chilled by adding a new aluminum radiator and a duel fan setup.
[Anthony] While Mike's finishing up our master cylinder install I'm gonna move forward and get our radiator mounted up. Now we went to Cold Case Products for this and it's 100 percent tig welded polished aluminum piece and it's made to fit any '88-'98 GM pickup truck. There's a couple of steps you've gotta do before you can get it in the truck, and that first step is mounting these fans on this shroud. So let's go ahead and show you how to do that. [ Music ]
So now that we got that blue wrap off of it we can go ahead and get these mocked up. Now they give you four riv-nuts per side already mounted in the shroud. It'll give you a bunch of different ways you can clock these. We're gonna get this so the wires point in the middle clocked down. That way we can run them with the frame rails and be tucked up nice and tight. Get it out of the way. First step, gonna get these clips. You slide them down into these little receiving areas. There's four per fan. Now that we've got all the clips in we can start running some bolts down to it. They also send you a complete wiring kit that comes with it. It comes with the relay and then a thermostatically controlled switch. It already has a bunch welded into the radiator. Now we're not gonna be using that switch since we're running the Terminator-X system and that's gonna control our fans. If you were to use this it would have the fans turn on at about 190 degrees. It makes it real nice that you already have that option to be able to run that. [ Music ]
Some of them are a little tight. So you may have to tug on it in one direction or another to get them to go. So far they're all in. [ Music ] We'll get this last one snugged up and she's ready to mount on the radiator. When you're mounting it you've got to make sure that you're mounting it on the right side. These fans are gonna pull not push. So we're gotta put it on the back side of the radiator, which is this side. [ Music ]
So we're gonna use bolts in this case. They have slots here on these top rails and on the bottom ones. Go ahead and slap those in there. [ ratchet clicking ] [ Music ] Alright, this thing's all snugged up and ready to drop in the truck. [ Music ] Let's see what we're looking like here. Now we're utilizing the factory lower radiator rubbers. Now these trucks originally came with a mechanical fan setup that included a radiator shroud that also served as the top mount. We're not running that any more. So I whipped up this quick bracket. It's gonna go ahead and lock this radiator nice and tight and it's gonna clean up the top of the core support. Go ahead and drop this thing in here. That looks pretty nice. [Mike] When it comes to that radiator I think that's case closed. We got a lot done today but we're so close to firing this thing up. [Anthony] I can't wait to hear this beast. It's gonna be nasty! [Mike] We'll get to that next time on Music City Trucks. I think for the hoses we'll have to come off this way. Our upper hose like that. [Anthony] Probably gonna have to paint this I think.
More Chevy OBS 632 SS Episodes

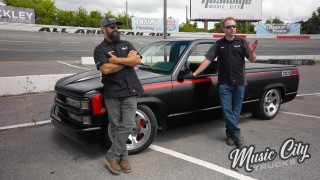
Music City Trucks Featured Projects
Music City Trucks Builds

Want more content like this?
Join the PowerNation Email NewsletterParts Used In This Episode


American Powertrain Systems
Clutch Pedal & Master Cylinder
AZ Pro Performance
React 2" Modular Drop Spindles
Blast From the Past
Sandblasting & Powder Coating
Chattanooga Driveline Service
4" Steel Driveshaft
Cold Case Radiators
Aluminum Radiator
Quick Performance
35-Spline Axle Shafts
RideTech
Billet Tie Rod Adjusters



