Video Transcript
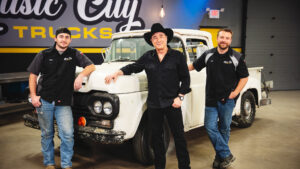
[Mike] You're watching Powernation.
[Anthony] Project Cream Puff's new stance has created some issues for our body. We'll carve out some room in our C-10 so our transmission will fit. [Mike] Plus, trim out the fenders to accommodate bigger tires up front. All that and more today on Music City trucks. [ Music ] [Anthony] See what we're looking like here.
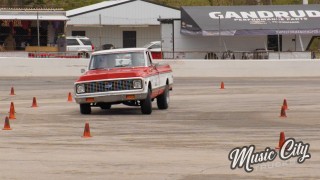
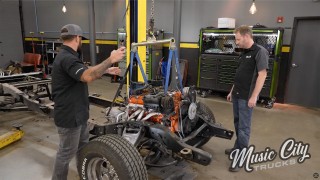
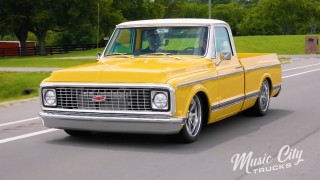
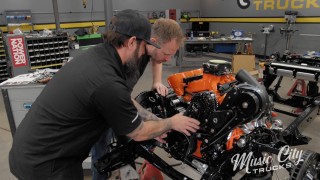
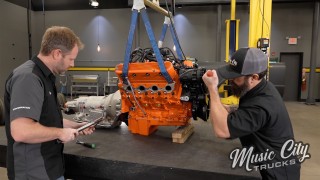
Don't scratch. [Mike] No, no. -Well, hey, guys. We got the C-10 in the shop here and we're installing this pretty new drive shaft from Chattanooga Driveline. We're going to get this cab down, mocked up. See what kind of floor modifications we have to make but if you're just tuning in let us show you how we got to this point. We picked up this '72 C-10 Super Cheyenne that we could tell was well taken care of. We naturally had to run it through the wringer by taking it to a truck competition to show us what we had to start with. After a couple of rips around the autocross track it was clear to see we needed to take Paw paw's Chevy and give it some much needed performance upgrades. -Once in the shop we devised a plan of attack to up the power and give it an aggressive stance. Quickly we tore into our C-10, stripping it down to the rolling chassis. Next we plucked the tired 350 small block and dated turbo 350 automatic transmission. The suspension was next on our to do list. That stock high elevation suspension was gutted for PB Fab drop members front and back. We also sliced and diced on the 54 year old frame to achieve our desired short bed status. Well now that you guys are up to speed on our project we've got to get the frame up off the ground. So what we've done is we've run some air lines here to hook up to our shop air to air up the bag so we can move it around the shop. -Yeah it's hard to get these things rolling when they're laying on the ground. [ Music ] -After setting our pinion and transmission angles we sent off our measurements to Chattanooga Driveline and this 3.5 inch shaft is what they sent us. It's in steel. It clears everything except one more thing we've got to check is that cab. So let's go ahead and get this thing rolled up underneath it. We're going to lower the cab down and see what we're working with. [ tires squeaking ] See what we're looking like. [ Music ] All right, talk to me Goose. -Send that thing down, and it looks like the lift is all the way down but we're not making contact yet. So let's put some more air in the bags and raise the chassis. [ air hissing ] A little bit more. [ air hissing ] -Oh, that's it. -What's it look like up there? -Looks like we're hitting on the back of the trans. That seam on the tunnel. -Okay. Let's jump inside and see what we can do. Well to achieve the correct driveline angle on our lowered chassis we had to take the transmission and move it up from its factory mounting point. Well the downside of that is its run into the bottom of the floor pan here. Now these trucks were originally equipped with either a low hump floor pan like ours or a high hump floor pan like you'll see on some four wheel drive models. -Luckily for us Brothers Trucks sells just about every piece of sheet metal you're ever going to need for these old C-10s including this high hump you see here. Now what this is gonna allow us to do is take our low hump truck and make it a high hump. Now what we'll do here is lay it down like this. We'll mark out these holes and then we'll take it off, cut around pretty much to the edge of these holes all the way around here and that's going to hopefully give us the clearance we need to get this trans right. -So let's get this marked out. We'll get it cut out and see how much more room we got. -I'll grab a marker. So I'm keeping pressure on this thing to kind of keep it in place. Not that it's super critical but aim small miss small. That should be good. We'll take this off, trace our outline, and then get to cutting. So we're going to make our line, our cut line, here on this factory stamping. Right on the inside. So we know the outside of the tunnel's over here. This is our hole. So I'm just going to stay on the inside of that. I don't really necessarily need to mark it but it's always good just to have an extra visual. That way you don't get lost while you're cutting. Something like this. Stay on this line right here. Something like that. So the way I'm going to cut it. I mean, if you have a plasma cutter you can use a plasma. I'll probably just end up using a cut off. And then we'll grind it smooth with a flap disc. Should be good to go. [ saw buzzing ] [ Music ]
[ saw buzzing ]
It's good to go. Slide this thing under. See how we're looking. -Check our clearance Clarance. [ Music ] -Got it? You good? -From the front. Drop her down. -Still going down. -It's going down! I'm yelling timber! No, not that song? -No! -Okay. Almost there. All right, stop! Lift is all the way down. We're not on the mount yet. -Gotta air up? -So let's air it up. I think that's right there. Check it out and see. -Let's see what we're looking like in here. Well it looks like the trans problem went away, which is a good thing. But I looked under the truck and I can already see it here with a single piece drive shaft running we're going to run into issues with the floor and the back of the cab. So the chassis is all the way up right now but when we lay out that driveshaft's gonna be coming way up. So I think we're going to be cutting that floor. -Yeah the cab's over all the way down on the lift but it's still not sitting on the body mount yet because it's obviously hitting on something right there with that U-joint of the drive shaft. But yeah, when we let the air out of the system, the airbags, it's definitely going to be hitting the back of the floor. -So I think what we do is I want to try to save this, the top of this. Maybe we just put a piece over here. Put a piece down there, weld it all in, and cut the back of the cab. I think we'll be good then. -We'll just try to remove as little as possible cause then you get up in the bottom of the seat with clearance issues and things like that. So we'll go ahead and get that cut out and then get started making a new piece to cover that up. -We sliced up the floor in our old Chevy to make room for our driveshaft.
[ welder crackling ]
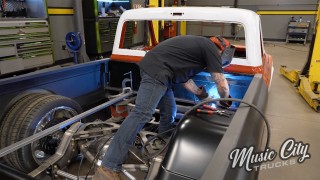
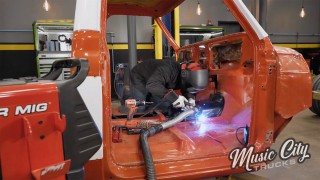
[Anthony] All right guys. So as you can see we're already starting to weld in our high hump here from Brothers. The way we did it is we went ahead and used the existing holes in the hump that they give you. There's a couple different ways you could do it. You could drill them in. Weld some nuts on the back. Or you could do what we're doing here and go ahead and just plug weld them in. And ultimately the best way to do it would be to cut this all out and butt weld this in. We're a little limited on time. So we're just going to go ahead and do this. And then after we're done we'll go ahead and cover everything in some seam sealer and it'll be good to go. Also I already went ahead and cut out what we needed to get out of here for the trans tunnel and the drive shaft. And so what I did is basically just free handed it with a plasma cutter. Then we went back over it. Hit it with a flap disc to clean up the edges. Now I've already got my templates made up. So I'm going to go ahead and finish burning this in. Then we'll go over to the brake and go bend some metal. [ welder crackling ] [ Music ] Well now that we have that hump welded into the truck I'm going to go ahead and start filling that hole in the floor. So I already whipped up a couple of templates here and the material I like to use are just your run of the mill standard manila folders. I like using this a little bit better than cardboard because cardboard is kind of a pain in the butt to cut. So this stuff cuts a lot easier and you can bend it and it kinda stays. So what I'll do now is I got my piece of metal here already cut out to a rough size. I already laid it out here and taped it down. I marked my bend lines and I marked it. I'm going to make it a little bit bigger. Since it's a pretty simple bend. It's just two 90s, and if I have to trim up a little bit under the floor I can do it that way. I'm not trying to get too crazy with it. So now what I'm going to do. I'm going to clamp it to the table. We can use a cut off wheel to cut this out since the shear is down right now. So we'll just do it the old school way. So let's get to cutting. [ saw buzzing ]
All right, clean that up with a flap disc and we'll be ready to bend it up. [ grinder buzzing ]
All right, got this thing roughed in. Looks pretty good. Let's go ahead and head over to the brake. We'll go ahead and slap this thing up in the brake. All right, we're all lined out here. We'll go ahead and clamp it down. Now a pretty good rule to live by whenever you're using a brake is you got to set this top leaf to a certain distance from the braking edge. Usually if you're within four gauges of the maximum thickness that you got to be double the thickness of the material. So that's about where I'm at. I'm almost maxed out for this machine since it's a 16 gauge. So it's just going to give us a little bit bigger of a radius. But I've already laid that out and calculated that in my measurements. So we should be good to go. So we'll go ahead and start breaking this thing. I'm going to go to 90. Maybe a little less. Go a little bit past 90. Not too much, but it should be good. [ Music ]
Well that looks pretty good. So I went ahead and I hit the edges. Kind of went to my lines that I had for my template. So it's pretty close right now. Now in here I'm going to go ahead and I'm going to fill all these. Once I get this piece in I'm gonna tie everything together, and then we'll seam seal everything after we're done welding everything in. So let's go ahead. We'll get a couple tacks on this and get it in place. So we got these tacked. I've still got to pound some metal a little bit. Get everything to fit really good, but we should be almost ready to weld. I gotta make one more piece here to tie all this together and to fill this hole here, but we're almost there and we can almost get this cab back down on the chassis. [Mike] Coming up, we massage our fenders to give us better clearance for our lowered posture.
[Anthony] Let's see how this little piece is looking here Mike. I think that's going to work out pretty good. [Mike] That'll be perfect. I'm glad we really didn't have to cut out too much of that floor to make this work. -Yeah, we kept the rigidity here. Whenever I'm chopping into a floor, body, or anything I like to keep it as stock appearing as possible. That way you double look at it and you're like, did they mess with that or did they not? -Yeah, not too heavily modified. When we lower this thing out and let all the air out of that suspension there, that driveshaft was just touching the floor. But this way we got some clearance. There won't be any interference. -Trans clears, driveshaft clears. So I think we're about ready to burn this thing in. -The other good thing is it's not too high for the seat inside here. So when we do the interior you can have that same stock looking seat. -Yeah we're no higher than this right here. - I'll let you burn that in. I'm gonna work on these fenders. -Sounds like a plan. -So like we said, we're going to have air ride on this chassis. Meaning we gonna let this thing down to the ground. The body and the frame is going to get pretty low. Now in a factory set up the inner fenders would collide with the tires if we try to do that. -So we went ahead and went with the slosh tubs. This is a fiberglass inner fender. It's made to give you more clearance between that tire and the inner fender underneath the hood. And plus they just look a whole lot nicer than that stock setup. Now to get these mounted up you've got to clearance a little bit of the fenders there. Now they send you this template on what to cut out of your fenders. So this template, I'm going to lay it down right here. We'll go up to this edge. We'll get it marked out. The other thing too. So this area is going to get cut out. So this is where the hood hinge mounts. So unfortunately we're going to relocate that hood hinge onto the cowl. So to get this going I'm going to get my little permanent marker and get this drawn out and we'll get ready to go. [ Music ]
Now there's a few ways you can cut this out. I'm going to use a body saw. [ saw buzzing ] [ Music ] [ grinder buzzing ] [ Music ] Now before we can test fit our inner fender we've got to drill some holes to mount it up to it. Now the neat thing about slosh tubs here is he goes ahead and gives you a little mark for all your holes that you need to drill out. So that takes the guesswork out it. We'll go ahead and get those drilled out. [ drill humming ] [ Music ] With our holes drilled it's time to test our fitment. [ Music ]
Now this is a point where you might have to do some fine tuning for your fender and application. This fender right here is not a GM Fender. It's an aftermarket fender. We saw the made in Taiwan stamping on it. So need a little bit different tune up there. [ Music ]
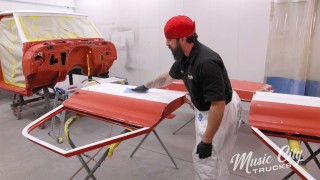
I like to start in the middle with the bolts and just kind of let it work its way in and they send you brand new bolts with these inner fenders as well. All right, let's see how that looks right there. Perfect, fits real good. Now you'll notice there's a little bit of a gap right in here. Some dead space. Now what he does. He make some filler panels that will clean up that area. Now I've already done that on our passenger side fender right here. These panels right here. He's got one for the front and one for the back. Now you can take these and fine tune them the way you want to your inner fender. How you want to butt them up to the previous fender there. So we've already got these fit. They're ready for bodywork right there but there's one more thing we're going to do to these fender to clean them up. Hello America. Notice this big old hole we got right here on the side of our fender? Well that's for the side marker lights. Now these came standard on the '68 and up trucks but '67 didn't have this. So this was smooth and clean, and it looked really nice. So we're going to fill that hole just like that with these side filler panels we got from LS Fabrication. Now they make it real nice. They fit up easy. Weld them in and you can have a nice, clean fender just like that. [ Music ] All right, with it flipped over you can see what we're working with now. Set that piece right in there, weld it in place. A little bodywork and should be good to go. First step, get all that paint off there. [ grinder buzzing ] All right, so the key with welding this in is controlling the heat. We don't want to pour a bunch of heat to it because what it's going to do to this fender is going to move it all around. It's going to create more work for us down the road. So I'm gonna take my time and go a little bit at a time, cool it off, and try to keept the temperature down. [ compressed air hissing ] [ Music ]
All right, we got it all welded up. Unfortunately we did get a little bit of movement there in a panel. So a little hammer and dolly work and she'll be good to go. -With relocating our fuel tank from the inside the cab leaves us with some holes to fill.
[Anthony] While Mike's busy cranking away on our fender over there I'm going to tackle one more job here on the cab. Now what I'm going to do today is fill this hole where the gas cap filler would normally be on a stock truck. Now these trucks originally came with the fuel tank behind the seat but we're getting rid of that. So we got this nice little piece here from LS Fab. 16 gauge, it's metal finished, and it's got the right radius for the cap. So I'm going to go ahead, clean this all up, and we'll get to tacking it in. I'm just going to use a little scotch-brite pad here and knock all this old paint off. Now it's important you want to make sure you get everything off, especially when you're tig welding like I'm going to do, because a little bit of paint, a little bit of whatever's in there, it's going to affect the weld and you're going to be chasing porosity the whole time. It's no fun. I'm gonna get the inside with an end grinder and a flap disc. I'm going real light because I don't want to dig into the metal. I'm just trying to get the paint off. I'll just take a little bit of sandpaper now by hand and get the rest off. I think that's pretty good. We're going to hit it with a little acetone and then we'll get to welding. It fits pretty good. It's going to need a little bit of fitment. You know these trucks, you could have taken two of them back to back off the assembly line and they would be different. And especially a truck, who knows. This could have been used on a farm and beat to death. I don't think this truck was but there's going to be variance in a truck to truck and it's going to take a little bit of fitting no matter what piece of new sheet metal you're putting on it. And that's the exact same in our case. It's a little big. So I'm going to go grind a little bit off and get tacked into the truck. So I went ahead and took a flap disc on a grinder and just knocked a little bit off here and just rounded these radiuses on the little notch down here on the bottom. Now they fit really good. I didn't have to do a lot to them. So let's check it out and see how we're looking. I can already tell I'm going to be able to work with that. I may have to do a little hammer work while I'm welding but we'll just get to that point when we get there. So whenever I'm working on body panels that's thin sheet metal I like to tack around it. I'll basically tack little tacks, maybe an inch apart, maybe a little bit less, half inch and just go all the way around it before I ever start welding. You want to make sure you keep it at nice and cool with a with either some water if you don't have air, but air is the best way to do it. I don't want to let anything get too hot because that's when stuff starts moving. So I got this thing roughed in. I got it tacked in a bunch of spots. What I'm going to do next. I'm going to run around. I'm going to stitch weld it in maybe three quarters of an inch and then move. I'll do it opposite ends, kind of like a star pattern, just to try to control the heat. After every single pass I'm going to hit it with air. Letting it cool down nice and quick so it doesn't move to the areas around here and create a big old mess. Try to keep that under control. I mean, it's inevitable. I'm going to have to slather a little bit of filler but I'm trying to keep the filler to a minimum. [ compressed air hissing ] [Mike] Well, how'd it turn out? -Well I think it looks pretty good. You know a little hammer/dolly work and a swipe of filler and it's going to be ready to rip. -You definitely did a good job filling in that hole right there. -I've been filling gap for years. I get better every time I do it. -The more time that you spend on the foundation like the metal work of it the easier it gets down the road when it comes to the filler, and the sanding, and the paint. -Yeah practice makes perfect. I like tig welding bodies, body panels, stuff like that. It's more malleable when you go to do the hammer and dolly work than a mig weld's gonna be. So I try to take as much as I possibly can on the body. -We've got a few more spots on the cab we've gotta do. Like have to fill in the holes and on the bed as well before we can get this thing over into body and to paint. But that's going to be for another episode. Thanks for tuning in and Music City Trucks. Check out this fender road. I hope they sell new ones. -It's that bad?
Show Full Transcript
[Anthony] Project Cream Puff's new stance has created some issues for our body. We'll carve out some room in our C-10 so our transmission will fit. [Mike] Plus, trim out the fenders to accommodate bigger tires up front. All that and more today on Music City trucks. [ Music ] [Anthony] See what we're looking like here.
Don't scratch. [Mike] No, no. -Well, hey, guys. We got the C-10 in the shop here and we're installing this pretty new drive shaft from Chattanooga Driveline. We're going to get this cab down, mocked up. See what kind of floor modifications we have to make but if you're just tuning in let us show you how we got to this point. We picked up this '72 C-10 Super Cheyenne that we could tell was well taken care of. We naturally had to run it through the wringer by taking it to a truck competition to show us what we had to start with. After a couple of rips around the autocross track it was clear to see we needed to take Paw paw's Chevy and give it some much needed performance upgrades. -Once in the shop we devised a plan of attack to up the power and give it an aggressive stance. Quickly we tore into our C-10, stripping it down to the rolling chassis. Next we plucked the tired 350 small block and dated turbo 350 automatic transmission. The suspension was next on our to do list. That stock high elevation suspension was gutted for PB Fab drop members front and back. We also sliced and diced on the 54 year old frame to achieve our desired short bed status. Well now that you guys are up to speed on our project we've got to get the frame up off the ground. So what we've done is we've run some air lines here to hook up to our shop air to air up the bag so we can move it around the shop. -Yeah it's hard to get these things rolling when they're laying on the ground. [ Music ] -After setting our pinion and transmission angles we sent off our measurements to Chattanooga Driveline and this 3.5 inch shaft is what they sent us. It's in steel. It clears everything except one more thing we've got to check is that cab. So let's go ahead and get this thing rolled up underneath it. We're going to lower the cab down and see what we're working with. [ tires squeaking ] See what we're looking like. [ Music ] All right, talk to me Goose. -Send that thing down, and it looks like the lift is all the way down but we're not making contact yet. So let's put some more air in the bags and raise the chassis. [ air hissing ] A little bit more. [ air hissing ] -Oh, that's it. -What's it look like up there? -Looks like we're hitting on the back of the trans. That seam on the tunnel. -Okay. Let's jump inside and see what we can do. Well to achieve the correct driveline angle on our lowered chassis we had to take the transmission and move it up from its factory mounting point. Well the downside of that is its run into the bottom of the floor pan here. Now these trucks were originally equipped with either a low hump floor pan like ours or a high hump floor pan like you'll see on some four wheel drive models. -Luckily for us Brothers Trucks sells just about every piece of sheet metal you're ever going to need for these old C-10s including this high hump you see here. Now what this is gonna allow us to do is take our low hump truck and make it a high hump. Now what we'll do here is lay it down like this. We'll mark out these holes and then we'll take it off, cut around pretty much to the edge of these holes all the way around here and that's going to hopefully give us the clearance we need to get this trans right. -So let's get this marked out. We'll get it cut out and see how much more room we got. -I'll grab a marker. So I'm keeping pressure on this thing to kind of keep it in place. Not that it's super critical but aim small miss small. That should be good. We'll take this off, trace our outline, and then get to cutting. So we're going to make our line, our cut line, here on this factory stamping. Right on the inside. So we know the outside of the tunnel's over here. This is our hole. So I'm just going to stay on the inside of that. I don't really necessarily need to mark it but it's always good just to have an extra visual. That way you don't get lost while you're cutting. Something like this. Stay on this line right here. Something like that. So the way I'm going to cut it. I mean, if you have a plasma cutter you can use a plasma. I'll probably just end up using a cut off. And then we'll grind it smooth with a flap disc. Should be good to go. [ saw buzzing ] [ Music ]
[ saw buzzing ]
It's good to go. Slide this thing under. See how we're looking. -Check our clearance Clarance. [ Music ] -Got it? You good? -From the front. Drop her down. -Still going down. -It's going down! I'm yelling timber! No, not that song? -No! -Okay. Almost there. All right, stop! Lift is all the way down. We're not on the mount yet. -Gotta air up? -So let's air it up. I think that's right there. Check it out and see. -Let's see what we're looking like in here. Well it looks like the trans problem went away, which is a good thing. But I looked under the truck and I can already see it here with a single piece drive shaft running we're going to run into issues with the floor and the back of the cab. So the chassis is all the way up right now but when we lay out that driveshaft's gonna be coming way up. So I think we're going to be cutting that floor. -Yeah the cab's over all the way down on the lift but it's still not sitting on the body mount yet because it's obviously hitting on something right there with that U-joint of the drive shaft. But yeah, when we let the air out of the system, the airbags, it's definitely going to be hitting the back of the floor. -So I think what we do is I want to try to save this, the top of this. Maybe we just put a piece over here. Put a piece down there, weld it all in, and cut the back of the cab. I think we'll be good then. -We'll just try to remove as little as possible cause then you get up in the bottom of the seat with clearance issues and things like that. So we'll go ahead and get that cut out and then get started making a new piece to cover that up. -We sliced up the floor in our old Chevy to make room for our driveshaft.
[ welder crackling ]
[Anthony] All right guys. So as you can see we're already starting to weld in our high hump here from Brothers. The way we did it is we went ahead and used the existing holes in the hump that they give you. There's a couple different ways you could do it. You could drill them in. Weld some nuts on the back. Or you could do what we're doing here and go ahead and just plug weld them in. And ultimately the best way to do it would be to cut this all out and butt weld this in. We're a little limited on time. So we're just going to go ahead and do this. And then after we're done we'll go ahead and cover everything in some seam sealer and it'll be good to go. Also I already went ahead and cut out what we needed to get out of here for the trans tunnel and the drive shaft. And so what I did is basically just free handed it with a plasma cutter. Then we went back over it. Hit it with a flap disc to clean up the edges. Now I've already got my templates made up. So I'm going to go ahead and finish burning this in. Then we'll go over to the brake and go bend some metal. [ welder crackling ] [ Music ] Well now that we have that hump welded into the truck I'm going to go ahead and start filling that hole in the floor. So I already whipped up a couple of templates here and the material I like to use are just your run of the mill standard manila folders. I like using this a little bit better than cardboard because cardboard is kind of a pain in the butt to cut. So this stuff cuts a lot easier and you can bend it and it kinda stays. So what I'll do now is I got my piece of metal here already cut out to a rough size. I already laid it out here and taped it down. I marked my bend lines and I marked it. I'm going to make it a little bit bigger. Since it's a pretty simple bend. It's just two 90s, and if I have to trim up a little bit under the floor I can do it that way. I'm not trying to get too crazy with it. So now what I'm going to do. I'm going to clamp it to the table. We can use a cut off wheel to cut this out since the shear is down right now. So we'll just do it the old school way. So let's get to cutting. [ saw buzzing ]
All right, clean that up with a flap disc and we'll be ready to bend it up. [ grinder buzzing ]
All right, got this thing roughed in. Looks pretty good. Let's go ahead and head over to the brake. We'll go ahead and slap this thing up in the brake. All right, we're all lined out here. We'll go ahead and clamp it down. Now a pretty good rule to live by whenever you're using a brake is you got to set this top leaf to a certain distance from the braking edge. Usually if you're within four gauges of the maximum thickness that you got to be double the thickness of the material. So that's about where I'm at. I'm almost maxed out for this machine since it's a 16 gauge. So it's just going to give us a little bit bigger of a radius. But I've already laid that out and calculated that in my measurements. So we should be good to go. So we'll go ahead and start breaking this thing. I'm going to go to 90. Maybe a little less. Go a little bit past 90. Not too much, but it should be good. [ Music ]
Well that looks pretty good. So I went ahead and I hit the edges. Kind of went to my lines that I had for my template. So it's pretty close right now. Now in here I'm going to go ahead and I'm going to fill all these. Once I get this piece in I'm gonna tie everything together, and then we'll seam seal everything after we're done welding everything in. So let's go ahead. We'll get a couple tacks on this and get it in place. So we got these tacked. I've still got to pound some metal a little bit. Get everything to fit really good, but we should be almost ready to weld. I gotta make one more piece here to tie all this together and to fill this hole here, but we're almost there and we can almost get this cab back down on the chassis. [Mike] Coming up, we massage our fenders to give us better clearance for our lowered posture.
[Anthony] Let's see how this little piece is looking here Mike. I think that's going to work out pretty good. [Mike] That'll be perfect. I'm glad we really didn't have to cut out too much of that floor to make this work. -Yeah, we kept the rigidity here. Whenever I'm chopping into a floor, body, or anything I like to keep it as stock appearing as possible. That way you double look at it and you're like, did they mess with that or did they not? -Yeah, not too heavily modified. When we lower this thing out and let all the air out of that suspension there, that driveshaft was just touching the floor. But this way we got some clearance. There won't be any interference. -Trans clears, driveshaft clears. So I think we're about ready to burn this thing in. -The other good thing is it's not too high for the seat inside here. So when we do the interior you can have that same stock looking seat. -Yeah we're no higher than this right here. - I'll let you burn that in. I'm gonna work on these fenders. -Sounds like a plan. -So like we said, we're going to have air ride on this chassis. Meaning we gonna let this thing down to the ground. The body and the frame is going to get pretty low. Now in a factory set up the inner fenders would collide with the tires if we try to do that. -So we went ahead and went with the slosh tubs. This is a fiberglass inner fender. It's made to give you more clearance between that tire and the inner fender underneath the hood. And plus they just look a whole lot nicer than that stock setup. Now to get these mounted up you've got to clearance a little bit of the fenders there. Now they send you this template on what to cut out of your fenders. So this template, I'm going to lay it down right here. We'll go up to this edge. We'll get it marked out. The other thing too. So this area is going to get cut out. So this is where the hood hinge mounts. So unfortunately we're going to relocate that hood hinge onto the cowl. So to get this going I'm going to get my little permanent marker and get this drawn out and we'll get ready to go. [ Music ]
Now there's a few ways you can cut this out. I'm going to use a body saw. [ saw buzzing ] [ Music ] [ grinder buzzing ] [ Music ] Now before we can test fit our inner fender we've got to drill some holes to mount it up to it. Now the neat thing about slosh tubs here is he goes ahead and gives you a little mark for all your holes that you need to drill out. So that takes the guesswork out it. We'll go ahead and get those drilled out. [ drill humming ] [ Music ] With our holes drilled it's time to test our fitment. [ Music ]
Now this is a point where you might have to do some fine tuning for your fender and application. This fender right here is not a GM Fender. It's an aftermarket fender. We saw the made in Taiwan stamping on it. So need a little bit different tune up there. [ Music ]
I like to start in the middle with the bolts and just kind of let it work its way in and they send you brand new bolts with these inner fenders as well. All right, let's see how that looks right there. Perfect, fits real good. Now you'll notice there's a little bit of a gap right in here. Some dead space. Now what he does. He make some filler panels that will clean up that area. Now I've already done that on our passenger side fender right here. These panels right here. He's got one for the front and one for the back. Now you can take these and fine tune them the way you want to your inner fender. How you want to butt them up to the previous fender there. So we've already got these fit. They're ready for bodywork right there but there's one more thing we're going to do to these fender to clean them up. Hello America. Notice this big old hole we got right here on the side of our fender? Well that's for the side marker lights. Now these came standard on the '68 and up trucks but '67 didn't have this. So this was smooth and clean, and it looked really nice. So we're going to fill that hole just like that with these side filler panels we got from LS Fabrication. Now they make it real nice. They fit up easy. Weld them in and you can have a nice, clean fender just like that. [ Music ] All right, with it flipped over you can see what we're working with now. Set that piece right in there, weld it in place. A little bodywork and should be good to go. First step, get all that paint off there. [ grinder buzzing ] All right, so the key with welding this in is controlling the heat. We don't want to pour a bunch of heat to it because what it's going to do to this fender is going to move it all around. It's going to create more work for us down the road. So I'm gonna take my time and go a little bit at a time, cool it off, and try to keept the temperature down. [ compressed air hissing ] [ Music ]
All right, we got it all welded up. Unfortunately we did get a little bit of movement there in a panel. So a little hammer and dolly work and she'll be good to go. -With relocating our fuel tank from the inside the cab leaves us with some holes to fill.
[Anthony] While Mike's busy cranking away on our fender over there I'm going to tackle one more job here on the cab. Now what I'm going to do today is fill this hole where the gas cap filler would normally be on a stock truck. Now these trucks originally came with the fuel tank behind the seat but we're getting rid of that. So we got this nice little piece here from LS Fab. 16 gauge, it's metal finished, and it's got the right radius for the cap. So I'm going to go ahead, clean this all up, and we'll get to tacking it in. I'm just going to use a little scotch-brite pad here and knock all this old paint off. Now it's important you want to make sure you get everything off, especially when you're tig welding like I'm going to do, because a little bit of paint, a little bit of whatever's in there, it's going to affect the weld and you're going to be chasing porosity the whole time. It's no fun. I'm gonna get the inside with an end grinder and a flap disc. I'm going real light because I don't want to dig into the metal. I'm just trying to get the paint off. I'll just take a little bit of sandpaper now by hand and get the rest off. I think that's pretty good. We're going to hit it with a little acetone and then we'll get to welding. It fits pretty good. It's going to need a little bit of fitment. You know these trucks, you could have taken two of them back to back off the assembly line and they would be different. And especially a truck, who knows. This could have been used on a farm and beat to death. I don't think this truck was but there's going to be variance in a truck to truck and it's going to take a little bit of fitting no matter what piece of new sheet metal you're putting on it. And that's the exact same in our case. It's a little big. So I'm going to go grind a little bit off and get tacked into the truck. So I went ahead and took a flap disc on a grinder and just knocked a little bit off here and just rounded these radiuses on the little notch down here on the bottom. Now they fit really good. I didn't have to do a lot to them. So let's check it out and see how we're looking. I can already tell I'm going to be able to work with that. I may have to do a little hammer work while I'm welding but we'll just get to that point when we get there. So whenever I'm working on body panels that's thin sheet metal I like to tack around it. I'll basically tack little tacks, maybe an inch apart, maybe a little bit less, half inch and just go all the way around it before I ever start welding. You want to make sure you keep it at nice and cool with a with either some water if you don't have air, but air is the best way to do it. I don't want to let anything get too hot because that's when stuff starts moving. So I got this thing roughed in. I got it tacked in a bunch of spots. What I'm going to do next. I'm going to run around. I'm going to stitch weld it in maybe three quarters of an inch and then move. I'll do it opposite ends, kind of like a star pattern, just to try to control the heat. After every single pass I'm going to hit it with air. Letting it cool down nice and quick so it doesn't move to the areas around here and create a big old mess. Try to keep that under control. I mean, it's inevitable. I'm going to have to slather a little bit of filler but I'm trying to keep the filler to a minimum. [ compressed air hissing ] [Mike] Well, how'd it turn out? -Well I think it looks pretty good. You know a little hammer/dolly work and a swipe of filler and it's going to be ready to rip. -You definitely did a good job filling in that hole right there. -I've been filling gap for years. I get better every time I do it. -The more time that you spend on the foundation like the metal work of it the easier it gets down the road when it comes to the filler, and the sanding, and the paint. -Yeah practice makes perfect. I like tig welding bodies, body panels, stuff like that. It's more malleable when you go to do the hammer and dolly work than a mig weld's gonna be. So I try to take as much as I possibly can on the body. -We've got a few more spots on the cab we've gotta do. Like have to fill in the holes and on the bed as well before we can get this thing over into body and to paint. But that's going to be for another episode. Thanks for tuning in and Music City Trucks. Check out this fender road. I hope they sell new ones. -It's that bad?