Video Transcript
[Anthony] You're watching Powernation!
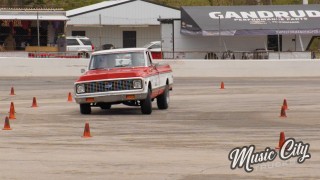
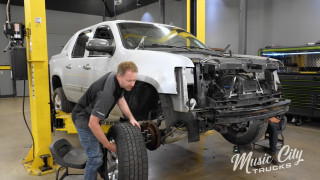
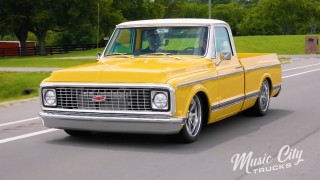
[Mike] Well Project Cream Puff is back in the shop and we bring our hood hinges into the modern era. [Anthony] Plus we build a new bed floor to accommodate our new wheel tubs and our lowered stance. All that and more Music City trucks. [ Music ]
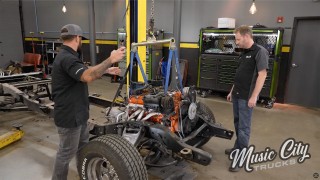
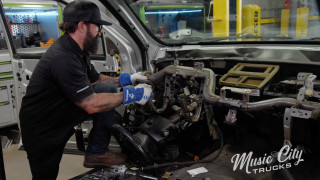
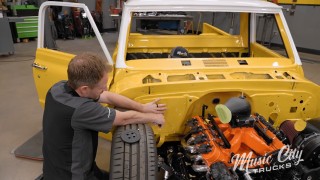
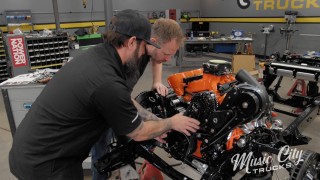
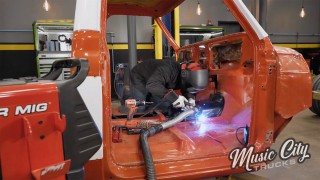
- Hey guys, welcome to Music City Truck. - And as you can see behind us we got the old C-10 in the shop and it's looking a little bit more like a truck than the last time you saw it. We went ahead and mocked up our bed in the back. We welded up our trans tunnel and our high hump, and then we also installed our front clip. There's one more thing we got to do up here today and that's install the hood. - When we put those slosh tub inner fenders on there we had to cut out the area where the factory hood hinge attached. So we relocated it here on the cowl area. Now these brackets work really nice. All we got to do is take this piece here. We're going to attach it and then get the hood back on it, lined up where we like, and weld it on together. - I think you drew the short straw on that one. So I think that's going to be you climbing in that hole. - It's going to be a little awkward to get up in there but we'll take care of it. - We'll get her done. - I'll get the hood back on. - Let's see what she's looking like. Get my fingers out of there. - Check this latch. Perfect. Check the gaps here. - Like it was made for. - Now's the opportunity where you want to go through and spend a little extra time getting all your gaps where you want, how you like it, before we weld it in for good. - You don't necessarily need to have it locked down tight to where final is going to be because after paint stuff's gonna move. You want to get it close. That way you know that you're gonna be close after paint. - So now I'm gonna grab the welder and then crawl up in there and get them welded on. - Let's get her done. [ Music ]
- All right, let's see. Yeah, somewhere back there. Spray and pray, right? I'll do another one for good measure here. There we go. [ Music ]
[ welder crackling ] All right, let me give it one more little tack back here in the corner and we can get out of this awkward position here. Somewhere right in there. That's good enough. [ welder crackling ] I think that'll stick. [ ratchet clicking ] [ Music ]
- Got her all glued up? - I think so. See what we got. [ Music ] Do-si-do. [ Music ]
- Look at that. - Let's get it welded on for good. - Burn it in.
Now that Mike's got these hinge plates tacked to the hood I can go ahead and start welding them up. I'm gonna give them a little bit of a hand because he's at the chiropractor right now after crawling out of that engine bay. That was a bit of a tight fit in there. So I'm going to use my trusty Tig welder and we'll get these things burned in. [ Music ] Now since we're welding to the brace and not the actual hood you could actually do this job with a painted hood. I would still put some protection between the brace and the hood but it can be done. [ Music ]
Now with these hood plates being so much thicker than the sheet metal it's a good idea to keep your heat concentrated on the thicker plate. That way you're not burning through that thin sheet metal. [ Music ]
[ impact driver humming ] - Yours tight? - I'm looking pretty good over here. - Go ahead and run it down and we'll check it out. - See what we got. [ hood clicks shut ] - Well gaps look even. - Nice and straight. Looks pretty good. A little adjustment here when we're after paint. - Pop it up. - See what we got. - Smooth, not binding. That's perfect. - What's next on the list? - Well we got that checked off. So head to the back. - Let's go. - We'll take you to a creative interior shop that is making it easy to get an affordable custom interior.
[Mike] When we tore this thing apart one of the first things we did is we took the interior and headed up north to Kentucky to our friends at Auto Customs. [Anthony] Where they got a cool little shop and a good group of guys. Check this out. [ Music ]
[ sewing machine vibrating ] [ Music ]
-When it comes to transforming classic trucks into rolling works of art few names stand out like Auto Customs. Founded in 2015 by Jonas Taulbee and Erik Demonbreun, this award winning team has spent over a decade turning raw ideas into stunning custom interiors. Driven by a shared passion of old iron and unmatched craftsmanship, they built a reputation for creating one of a kind masterpieces that celebrate both tradition and innovation. [Jonas] We started out just doing pretty much any custom, hot rods, classics, but we've kind of went into a niche of just sticking with trucks. We're getting known for doing that. We do a lot of the '48 to '50 Ford 3100s and of course all the C-10s, mainly square bodies. [Eric] We're kind of on the same page when it comes to the things that we like. And that's across the board with like music, and art, and these cars and stuff like that. So when it comes to designing we just plug right in and make it happen and usually kill it. Knock it out of the park. It seems we have a pretty good following because of our designs. I mean obviously there's better designs and there's worse designs, but people really love ours. So we're pretty blessed with that. [Anthony] Today Auto Customs is still doing full one off interiors but is streamlining its process by introducing custom made to order interiors designed for budget conscious DIY enthusiasts. These interiors fit 1947 to '91 GM trucks with a special emphasis on the ever popular GM square body. -So we're trying to get away from doing the full custom stuff and trying to do more of a production line. So the do it yourself guy can just order something and install it themselves. We have nine patterns right now, but we're mainly going to release three just right off to see how it goes. And then we can go more after that. -Over the years we've done a lot of interiors for square body trucks. So since we saw such a need for that and a need for a reasonably priced interior, we decided to make a pattern set for those trucks and start kind of offering a way for somebody to have a cool interior but without having to spend a fortune on it, like on a one off interior like we also do. We just came up with some designs that seem to be popular that people really liked that we were doing before we did that, and we just kind of dialed them in and made a pattern set. Yeah, we definitely did it to help the consumer. The custom interior prices have gone up quite a bit. All of us, you know, all the shops that are good at what they do they've got a 2 or 3 year waiting list. And some people can't afford that. Some people don't want to wait that long, or both. So that's why I kind of why we created something that was different than some of the other products that are on the market that is more affordable but also somewhat custom. So that's kind of what we were after. -This may be the coolest building I've ever seen an interior shop in. -I know, right. This place has got a lot of character. -Yeah, I like that brick. You got the door there, buddy? -Yep. -Thank you sir. Afternoon, fellas! -What's up? -You must be Eric. -I'm Eric. -Hey, Anthony Serrano, Music City Truck. -What's up Anthony? -Mike. -What's up Mike. -I heard you boys are the ones to come to for truck interiors. -We certainly are. -Awesome. -We got that truck part for you. -Jonas? -Mike. -Anthony. -Nice to meet you. -We got some C-10 stuff here, huh? -Yes we do. I'm thinking hopefully you guys can set us up with a good looking interior. -I think we can handle that. -That's where the trucks go. -That looks pretty nice sitting over there. What's that all about? -Yeah, that's one of our square body sets we do. We actually specialize in square body stuff for the DIY guy. People can send in their interior and they can send all their parts to us. We could wrap them, get them ready to go. We could build them a cover. Ship them cover. They can install themselves. But this is actually a little bit more of a custom version of what we would offer, but it's totally doable. -Well it's beautiful man. As somebody that builds trucks for myself, that seems like a really good solution that you're always looking for. It's hard to find interior parts. -For sure. We saw there was kind of a need for that. So we decided to build a pattern system and make something for those guys, you know. -It's beautiful. I like the patterns. Do you have any more patterns we could check out? -Yeah, we actually have a card right. -Oh, look at that. So you can pick different stitching for different stuff, and then you can also pick inserts. -Yeah those are our nine patterns. Then you can customize them however you want. Like that one over there for instance. It would be our custom pattern with a different top on it. But you can do different stitching. And this was actually before we got that big, beautiful machine over there. So we have all kinds of options that we can do now on the inserts. -So what do you have for the options on those gray areas? -So we've got plenty of options on those. Got all these sew outs right here. -Oh man, you weren't lying. -Look at that. -That's pretty cool. -There's lots of options. -Yeah you definitely come up with some different designs over the years and makes it interesting. -And we can come up with anything off the fly too. -You got to love technology, right? -Logos and things like that. -And that's like a Porsche pattern. -With that double stitching there. -Yeah, that one's pretty wild. -I kind of like something that wide look for that truck. -Yeah that's pretty nice. A little radius. -Because we can do this in the headliner insert too. -And then obviously you can do any color stitching. -Any color. -What do you think, purple? -I like purple. -We have a nice rainbow color too. -Although yellow and purple. I don't know about the basketball fans. -Like a Lakers deal. -It's just finding something that fits the truck for what you're going for. -Options are endless. -So we're going to be here a while I feel like. -Most people come in with an idea what they want, and then when they leave. -It's completely different. Well cool man. We've got some more stuff in the truck. Why don't you let us go grab it? You boys can get to work. -All right, sounds good. [ saw buzzing ] -Our lowered stance is creating some issues for our bed. We'll show you how to fabricate a new frame for your wood floor.
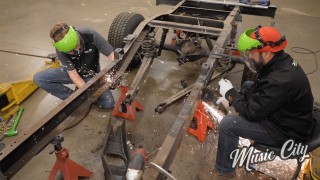
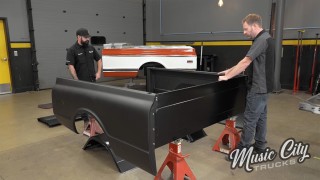
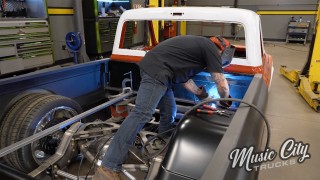
[Mike] Now previously we've shown y'all the new bed panels we got from Brothers Trucks, but because of the stepped notch in the frame set up we can't use that factory floor. So we've got to do a little bit of engineering of our own to make it work. [Anthony] Yeah, a little engineering or a lot, depending on how you want to look at it. Now with the rear drop member that we got from Porterbuilt they give you frame rails that allow you to use the existing rear cross seal mounting locations. So we went ahead and did that back here, but up front we had to do something just a little bit different. And the way I like to do these trucks is I run a piece of two by one rectangular tubing that's in the front bed panel here, and then I'll build a couple of brackets that hang down and mount to the stock locations. That just seems to be the easiest way to get that front mounted to the frame. You know, it was a little tricky getting with this. This is for the air tank and for the ECU, and for all the air ride. But we got it figured out and it's locked down now. So now what we got to do today is we got to figure out all our pieces for raising this wood bed floor. Now the wheel wells are going to come into play. There's going to be a lot of stuff while we're going in and cutting everything that we have to figure out, kind of on the fly, but we have a general idea of what we want to do. You want to get to it? -Yeah, so pretty much like you're saying this is the factory spot for the old floor, and we've got to bring it up somewhere around this area to clear that notch right there. So we just got to get some tubing and make a little frame. And next thing you know, we'll be finished with that. -Let's get to cutting. Let's see what we got here. Now first thing we're going to do is go ahead and slap this wheel tub up on the bed here. Now we already knew that we're going to have to cut a little bit of the top out to match the radius on the inside of the bed here since we're going up a little bit higher. -I got that piece of wood there on the frame that's going to be the same thickness as the bed wood kit. So that'll be a good starting point there. -And that's all we're looking for right now. A visual idea of where we want to be. Now we've already spit balled and we've figured that we're going to start our piece of one by right on the top of this bead roll here. And what that's going to do is give us a little bit of breathing room between the frame rails and the underside of this bed frame. I think it's going to be pretty good there. -That'd be a good place to do it. -So what I'm going to do here first is tube out the entire perimeter of this and then I'll go back through. That's going to set our height. Then we'll go ahead and we'll get all the inner frame around the wheels and our structure going across so that when we put the bed wood in we have somewhere to bolt. -Yeah, the attachment point. That sounds good. So let's get to cutting some tubing there. -I'll go fire up that old job chop saw. With our front and rear width measurements taken we'll kick things off by cutting a couple of pieces of two by one rectangular tubing. [ saw buzzing ] We'll tack those in place using some vertical tubing cut to the right height so it clears those step notches on the frame. [ welder crackling ] Once the front and rear are tacked into place I'll drop in two lateral pieces to tie them together making sure the wheel tub flanges land right where they should. After that we'll cut a few shorter pieces to tie into the bedsides. That'll give us a solid mounting point for the front and rear tub flanges while adding rigidity. [ Music ]
[ welder crackling ]
Finally, we'll box in the rest of the framework along the bedside. That's going to beef up the strength and give us plenty of spots to mount the bed wood strips. [ welder crackling ] [ Music ] That's all she wrote. -We finish up the floor on our bed and relocate the battery boxes to give us a clean look.
[Anthony] So now that we have our perimeter all tacked into place our frame's basically done. We can go ahead and start putting in our pieces that actually hold the wood down to the bed. And so what we're using is from Bedwood are these hidden fastener stainless strips. And basically what it is, it's just a T-bolt that attaches to this track inside, and this is what actually mounts the wood down to the bed frame. But I got to put a couple pieces horizontally to actually get it to mount, and I've also got to put some in the corners here. I'm going to do that diagonally. A couple 45s on each end and we should be good. So I got a couple more measurements to get. So I'm going to get to that right now and we'll get her done. First thing I'm going to do is find the center of our opening here, and then I'm going to pull three measurements off that and we'll get to the saw. [ Music ]
Now that we have our measurements I'll cut out our pieces using some one by one square tubing. This will give us the ability to shave a little weight on the bed frame as well as giving us ample room to attach our bed wood strips. Once cut, I'll remove our wheel tubs and clamp some support pieces to our bed frame making sure our tubing is on the same plane. [ Music ]
Then we can tack them into place. [ welder crackling ] [ Music ]
-Well how's it going back here? -Well I got her tacked up. We've just got to yank this thing off and weld it up, but I think you've got to put some batteries in first, right? -Yeah, this would be a good time to access the area to put the batteries in because we are going to put the batteries in the back of the truck. Y'all liked it so much on the 632 SS. I built this brace right here. We can stack them right on top of the wood. Maybe run the cables along the seams. -Right, no bed cover. We'll just let them be out there in the wide open like that. -Easily accessible. -Easy to get to know. We're just kidding on that. We are going to mount the batteries in the back but they've got a nice location to go to on this frame. Let me get help you get out of here. -Yeah, I would love to get out of here. I've had enough of it. -All right, and then for those battery boxes we got these boxes here from Porterbuilt. They're actually made for this kit on that chassis there. They'll bolt right up to the provisions. So we're going to get this bolted on and get our batteries in. [ Music ]
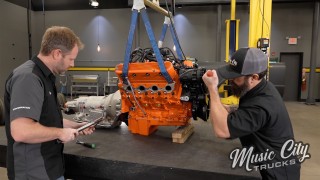
Now like I said before, we're going to use two batteries on this truck to give us plenty of juice to spin over that beast behind me, and also power for our Air Ride system for all the compressors and whatnot. Now this one, we're going to go with Duralast. Their gold series of batteries right here. Now this one is rated at 650 cold cranking amps. That's measured at zero degrees Fahrenheit. The other numbers can be a little bit larger. 810, that's cranking amps, and that's actually measured at 32°F. So you might wonder, how do you figure out what size battery is going to work for your application? Well it's pretty simple for us. I took that battery tray down to our AutoZone. Started picking them out. See which one would fit and this is the one that would fit with the most cold cranking amps. -Looks like you've got this all finished up. Looking good. -Yeah, we're moving right along. -You think you can give me a hand with these wheel tubs? I gotta get them back in so I can mock them up a little bit and get a couple tacks, and we can get this thing welded up. -That's all we got time for today on Music City trucks. -If you want to see a little bit more of this build go check us out on Instagram at Music City Trucks. I was really hoping you were going to put them batteries on that wood floor. I think that would look real nice. -Be more natural, right? [ metal clanging ]
Show Full Transcript
[Mike] Well Project Cream Puff is back in the shop and we bring our hood hinges into the modern era. [Anthony] Plus we build a new bed floor to accommodate our new wheel tubs and our lowered stance. All that and more Music City trucks. [ Music ]
- Hey guys, welcome to Music City Truck. - And as you can see behind us we got the old C-10 in the shop and it's looking a little bit more like a truck than the last time you saw it. We went ahead and mocked up our bed in the back. We welded up our trans tunnel and our high hump, and then we also installed our front clip. There's one more thing we got to do up here today and that's install the hood. - When we put those slosh tub inner fenders on there we had to cut out the area where the factory hood hinge attached. So we relocated it here on the cowl area. Now these brackets work really nice. All we got to do is take this piece here. We're going to attach it and then get the hood back on it, lined up where we like, and weld it on together. - I think you drew the short straw on that one. So I think that's going to be you climbing in that hole. - It's going to be a little awkward to get up in there but we'll take care of it. - We'll get her done. - I'll get the hood back on. - Let's see what she's looking like. Get my fingers out of there. - Check this latch. Perfect. Check the gaps here. - Like it was made for. - Now's the opportunity where you want to go through and spend a little extra time getting all your gaps where you want, how you like it, before we weld it in for good. - You don't necessarily need to have it locked down tight to where final is going to be because after paint stuff's gonna move. You want to get it close. That way you know that you're gonna be close after paint. - So now I'm gonna grab the welder and then crawl up in there and get them welded on. - Let's get her done. [ Music ]
- All right, let's see. Yeah, somewhere back there. Spray and pray, right? I'll do another one for good measure here. There we go. [ Music ]
[ welder crackling ] All right, let me give it one more little tack back here in the corner and we can get out of this awkward position here. Somewhere right in there. That's good enough. [ welder crackling ] I think that'll stick. [ ratchet clicking ] [ Music ]
- Got her all glued up? - I think so. See what we got. [ Music ] Do-si-do. [ Music ]
- Look at that. - Let's get it welded on for good. - Burn it in.
Now that Mike's got these hinge plates tacked to the hood I can go ahead and start welding them up. I'm gonna give them a little bit of a hand because he's at the chiropractor right now after crawling out of that engine bay. That was a bit of a tight fit in there. So I'm going to use my trusty Tig welder and we'll get these things burned in. [ Music ] Now since we're welding to the brace and not the actual hood you could actually do this job with a painted hood. I would still put some protection between the brace and the hood but it can be done. [ Music ]
Now with these hood plates being so much thicker than the sheet metal it's a good idea to keep your heat concentrated on the thicker plate. That way you're not burning through that thin sheet metal. [ Music ]
[ impact driver humming ] - Yours tight? - I'm looking pretty good over here. - Go ahead and run it down and we'll check it out. - See what we got. [ hood clicks shut ] - Well gaps look even. - Nice and straight. Looks pretty good. A little adjustment here when we're after paint. - Pop it up. - See what we got. - Smooth, not binding. That's perfect. - What's next on the list? - Well we got that checked off. So head to the back. - Let's go. - We'll take you to a creative interior shop that is making it easy to get an affordable custom interior.
[Mike] When we tore this thing apart one of the first things we did is we took the interior and headed up north to Kentucky to our friends at Auto Customs. [Anthony] Where they got a cool little shop and a good group of guys. Check this out. [ Music ]
[ sewing machine vibrating ] [ Music ]
-When it comes to transforming classic trucks into rolling works of art few names stand out like Auto Customs. Founded in 2015 by Jonas Taulbee and Erik Demonbreun, this award winning team has spent over a decade turning raw ideas into stunning custom interiors. Driven by a shared passion of old iron and unmatched craftsmanship, they built a reputation for creating one of a kind masterpieces that celebrate both tradition and innovation. [Jonas] We started out just doing pretty much any custom, hot rods, classics, but we've kind of went into a niche of just sticking with trucks. We're getting known for doing that. We do a lot of the '48 to '50 Ford 3100s and of course all the C-10s, mainly square bodies. [Eric] We're kind of on the same page when it comes to the things that we like. And that's across the board with like music, and art, and these cars and stuff like that. So when it comes to designing we just plug right in and make it happen and usually kill it. Knock it out of the park. It seems we have a pretty good following because of our designs. I mean obviously there's better designs and there's worse designs, but people really love ours. So we're pretty blessed with that. [Anthony] Today Auto Customs is still doing full one off interiors but is streamlining its process by introducing custom made to order interiors designed for budget conscious DIY enthusiasts. These interiors fit 1947 to '91 GM trucks with a special emphasis on the ever popular GM square body. -So we're trying to get away from doing the full custom stuff and trying to do more of a production line. So the do it yourself guy can just order something and install it themselves. We have nine patterns right now, but we're mainly going to release three just right off to see how it goes. And then we can go more after that. -Over the years we've done a lot of interiors for square body trucks. So since we saw such a need for that and a need for a reasonably priced interior, we decided to make a pattern set for those trucks and start kind of offering a way for somebody to have a cool interior but without having to spend a fortune on it, like on a one off interior like we also do. We just came up with some designs that seem to be popular that people really liked that we were doing before we did that, and we just kind of dialed them in and made a pattern set. Yeah, we definitely did it to help the consumer. The custom interior prices have gone up quite a bit. All of us, you know, all the shops that are good at what they do they've got a 2 or 3 year waiting list. And some people can't afford that. Some people don't want to wait that long, or both. So that's why I kind of why we created something that was different than some of the other products that are on the market that is more affordable but also somewhat custom. So that's kind of what we were after. -This may be the coolest building I've ever seen an interior shop in. -I know, right. This place has got a lot of character. -Yeah, I like that brick. You got the door there, buddy? -Yep. -Thank you sir. Afternoon, fellas! -What's up? -You must be Eric. -I'm Eric. -Hey, Anthony Serrano, Music City Truck. -What's up Anthony? -Mike. -What's up Mike. -I heard you boys are the ones to come to for truck interiors. -We certainly are. -Awesome. -We got that truck part for you. -Jonas? -Mike. -Anthony. -Nice to meet you. -We got some C-10 stuff here, huh? -Yes we do. I'm thinking hopefully you guys can set us up with a good looking interior. -I think we can handle that. -That's where the trucks go. -That looks pretty nice sitting over there. What's that all about? -Yeah, that's one of our square body sets we do. We actually specialize in square body stuff for the DIY guy. People can send in their interior and they can send all their parts to us. We could wrap them, get them ready to go. We could build them a cover. Ship them cover. They can install themselves. But this is actually a little bit more of a custom version of what we would offer, but it's totally doable. -Well it's beautiful man. As somebody that builds trucks for myself, that seems like a really good solution that you're always looking for. It's hard to find interior parts. -For sure. We saw there was kind of a need for that. So we decided to build a pattern system and make something for those guys, you know. -It's beautiful. I like the patterns. Do you have any more patterns we could check out? -Yeah, we actually have a card right. -Oh, look at that. So you can pick different stitching for different stuff, and then you can also pick inserts. -Yeah those are our nine patterns. Then you can customize them however you want. Like that one over there for instance. It would be our custom pattern with a different top on it. But you can do different stitching. And this was actually before we got that big, beautiful machine over there. So we have all kinds of options that we can do now on the inserts. -So what do you have for the options on those gray areas? -So we've got plenty of options on those. Got all these sew outs right here. -Oh man, you weren't lying. -Look at that. -That's pretty cool. -There's lots of options. -Yeah you definitely come up with some different designs over the years and makes it interesting. -And we can come up with anything off the fly too. -You got to love technology, right? -Logos and things like that. -And that's like a Porsche pattern. -With that double stitching there. -Yeah, that one's pretty wild. -I kind of like something that wide look for that truck. -Yeah that's pretty nice. A little radius. -Because we can do this in the headliner insert too. -And then obviously you can do any color stitching. -Any color. -What do you think, purple? -I like purple. -We have a nice rainbow color too. -Although yellow and purple. I don't know about the basketball fans. -Like a Lakers deal. -It's just finding something that fits the truck for what you're going for. -Options are endless. -So we're going to be here a while I feel like. -Most people come in with an idea what they want, and then when they leave. -It's completely different. Well cool man. We've got some more stuff in the truck. Why don't you let us go grab it? You boys can get to work. -All right, sounds good. [ saw buzzing ] -Our lowered stance is creating some issues for our bed. We'll show you how to fabricate a new frame for your wood floor.
[Mike] Now previously we've shown y'all the new bed panels we got from Brothers Trucks, but because of the stepped notch in the frame set up we can't use that factory floor. So we've got to do a little bit of engineering of our own to make it work. [Anthony] Yeah, a little engineering or a lot, depending on how you want to look at it. Now with the rear drop member that we got from Porterbuilt they give you frame rails that allow you to use the existing rear cross seal mounting locations. So we went ahead and did that back here, but up front we had to do something just a little bit different. And the way I like to do these trucks is I run a piece of two by one rectangular tubing that's in the front bed panel here, and then I'll build a couple of brackets that hang down and mount to the stock locations. That just seems to be the easiest way to get that front mounted to the frame. You know, it was a little tricky getting with this. This is for the air tank and for the ECU, and for all the air ride. But we got it figured out and it's locked down now. So now what we got to do today is we got to figure out all our pieces for raising this wood bed floor. Now the wheel wells are going to come into play. There's going to be a lot of stuff while we're going in and cutting everything that we have to figure out, kind of on the fly, but we have a general idea of what we want to do. You want to get to it? -Yeah, so pretty much like you're saying this is the factory spot for the old floor, and we've got to bring it up somewhere around this area to clear that notch right there. So we just got to get some tubing and make a little frame. And next thing you know, we'll be finished with that. -Let's get to cutting. Let's see what we got here. Now first thing we're going to do is go ahead and slap this wheel tub up on the bed here. Now we already knew that we're going to have to cut a little bit of the top out to match the radius on the inside of the bed here since we're going up a little bit higher. -I got that piece of wood there on the frame that's going to be the same thickness as the bed wood kit. So that'll be a good starting point there. -And that's all we're looking for right now. A visual idea of where we want to be. Now we've already spit balled and we've figured that we're going to start our piece of one by right on the top of this bead roll here. And what that's going to do is give us a little bit of breathing room between the frame rails and the underside of this bed frame. I think it's going to be pretty good there. -That'd be a good place to do it. -So what I'm going to do here first is tube out the entire perimeter of this and then I'll go back through. That's going to set our height. Then we'll go ahead and we'll get all the inner frame around the wheels and our structure going across so that when we put the bed wood in we have somewhere to bolt. -Yeah, the attachment point. That sounds good. So let's get to cutting some tubing there. -I'll go fire up that old job chop saw. With our front and rear width measurements taken we'll kick things off by cutting a couple of pieces of two by one rectangular tubing. [ saw buzzing ] We'll tack those in place using some vertical tubing cut to the right height so it clears those step notches on the frame. [ welder crackling ] Once the front and rear are tacked into place I'll drop in two lateral pieces to tie them together making sure the wheel tub flanges land right where they should. After that we'll cut a few shorter pieces to tie into the bedsides. That'll give us a solid mounting point for the front and rear tub flanges while adding rigidity. [ Music ]
[ welder crackling ]
Finally, we'll box in the rest of the framework along the bedside. That's going to beef up the strength and give us plenty of spots to mount the bed wood strips. [ welder crackling ] [ Music ] That's all she wrote. -We finish up the floor on our bed and relocate the battery boxes to give us a clean look.
[Anthony] So now that we have our perimeter all tacked into place our frame's basically done. We can go ahead and start putting in our pieces that actually hold the wood down to the bed. And so what we're using is from Bedwood are these hidden fastener stainless strips. And basically what it is, it's just a T-bolt that attaches to this track inside, and this is what actually mounts the wood down to the bed frame. But I got to put a couple pieces horizontally to actually get it to mount, and I've also got to put some in the corners here. I'm going to do that diagonally. A couple 45s on each end and we should be good. So I got a couple more measurements to get. So I'm going to get to that right now and we'll get her done. First thing I'm going to do is find the center of our opening here, and then I'm going to pull three measurements off that and we'll get to the saw. [ Music ]
Now that we have our measurements I'll cut out our pieces using some one by one square tubing. This will give us the ability to shave a little weight on the bed frame as well as giving us ample room to attach our bed wood strips. Once cut, I'll remove our wheel tubs and clamp some support pieces to our bed frame making sure our tubing is on the same plane. [ Music ]
Then we can tack them into place. [ welder crackling ] [ Music ]
-Well how's it going back here? -Well I got her tacked up. We've just got to yank this thing off and weld it up, but I think you've got to put some batteries in first, right? -Yeah, this would be a good time to access the area to put the batteries in because we are going to put the batteries in the back of the truck. Y'all liked it so much on the 632 SS. I built this brace right here. We can stack them right on top of the wood. Maybe run the cables along the seams. -Right, no bed cover. We'll just let them be out there in the wide open like that. -Easily accessible. -Easy to get to know. We're just kidding on that. We are going to mount the batteries in the back but they've got a nice location to go to on this frame. Let me get help you get out of here. -Yeah, I would love to get out of here. I've had enough of it. -All right, and then for those battery boxes we got these boxes here from Porterbuilt. They're actually made for this kit on that chassis there. They'll bolt right up to the provisions. So we're going to get this bolted on and get our batteries in. [ Music ]
Now like I said before, we're going to use two batteries on this truck to give us plenty of juice to spin over that beast behind me, and also power for our Air Ride system for all the compressors and whatnot. Now this one, we're going to go with Duralast. Their gold series of batteries right here. Now this one is rated at 650 cold cranking amps. That's measured at zero degrees Fahrenheit. The other numbers can be a little bit larger. 810, that's cranking amps, and that's actually measured at 32°F. So you might wonder, how do you figure out what size battery is going to work for your application? Well it's pretty simple for us. I took that battery tray down to our AutoZone. Started picking them out. See which one would fit and this is the one that would fit with the most cold cranking amps. -Looks like you've got this all finished up. Looking good. -Yeah, we're moving right along. -You think you can give me a hand with these wheel tubs? I gotta get them back in so I can mock them up a little bit and get a couple tacks, and we can get this thing welded up. -That's all we got time for today on Music City trucks. -If you want to see a little bit more of this build go check us out on Instagram at Music City Trucks. I was really hoping you were going to put them batteries on that wood floor. I think that would look real nice. -Be more natural, right? [ metal clanging ]