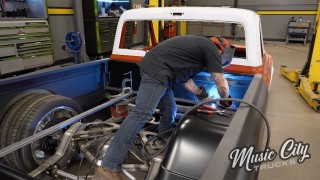
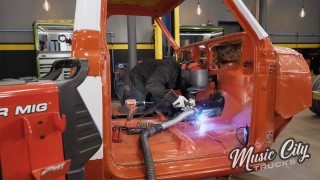
In This Episode
- 0:01 Introduction to Music City Trucks
- 0:34 Final Assembly of Chassis
- 1:24 Installation of Steering Rack and Pinion
- 1:57 Installation of Air Ride Suspension
- 3:01 Installation of AccuAir System
- 4:32 Installation of E-Level Plus System
- 10:01 Installation of Supercharger
- 13:01 Installation of Water Pump and Accessories
- 16:01 Installation of Supercharger Kit
- 18:27 Installation of Alternator and Air Conditioning Compressor
- 20:46 Conclusion and Future Plans
Video Transcript
[Mike] You're watching Powernation.
[Anthony] Today on Music City Trucks were messing with air in all the right ways. Our C-10 gets an air ride suspension so it can sit low, roll smooth, and rise to any occasion. [Mike] Then we pack on some serious boost by adding a supercharger to our 427, cranking up the smiles per gallon. [ Music ]
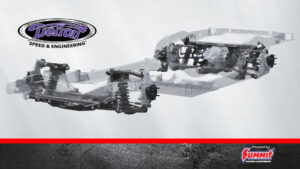
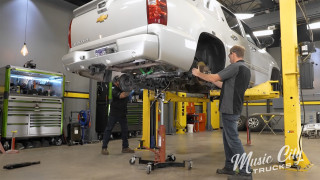
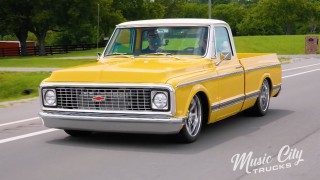
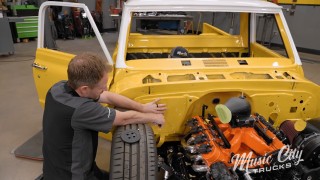
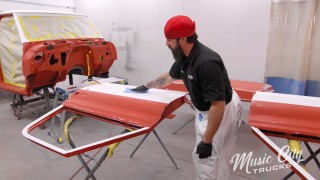
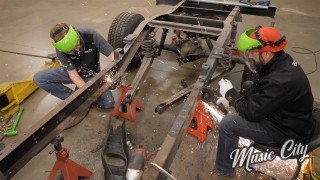
-Hey guys, welcome to Music City Trucks. We've got a great show in store for you today and it's all about compressed air from the engine to the suspension. And if you remember last time we were with you ole Cream Puff. We had it in the body shop doing all the paint and body work. We're able to knock out this House of Kolor Galactic Sand Yellow and the white combination and make that pearl really pop. Now it's time for final assembly. -And final assembly is actually already started on our chassis. You can probably tell it's a different color than the last time you saw it. So we sent this thing over to Blast from the Past. They went through it, sandblasted everything, and put this beautiful gloss black powder on it. Now this is actually a two stage powder. So they go through it and they spray the black and then they put a clear coat on top of it. Makes it extremely durable and it gives it the sheen that you see sitting here. And then up front we got a couple other things we're going to be doing here. It's going to help us steer and get this thing stopping. -For the steering rack right here we went with this Duralast unit. Now this is a power steering rack and pinion setup. It's going to bring this truck in the modern age as far as the steering on it as well. Now this Duralast steering rack, it's been subject to extreme testing and advanced engineering which will make it perfect for our C-10. Now the beauty of this one is it's just a simple Mustang two front steering rack, and it works perfectly with that drop member from PorterBuilt. Now that Duralast power rack and pinion setup is going to keep this truck going in the right direction, but for the elevation well Anthony is going to walk you through that. -The first part of that elevation equation is our PorterBuilt drop members we have in the front rear. Now the second part comes from Summit Racing in this AccuAir E-level kit that they sell is one part number. Gives you everything you need to control our air ride, and it's going to start with this tank. So this is AccuAir's Endo-VT tank, and what makes this really trick is the valves are actually inside the air tank. Makes it very simple to install with all the push to connect connectors you need on the tank already, along with your solenoid control valves and a pretty trick piece on here that's called flow control. So when you have an air ride vehicle the back is usually going to be lighter than the front given that the engine's in the front and it's going to go up and down at different rates. What that flow control allows you to do is actually slow down the rear so that it goes up and down at the same rate. Now we have to install a few things on here, and that's going to start with the compressors and the ECU. All right up next we'll grab the ECU here. Slide that out. There should be a pressure sensor right here. So this little pretty black box you see here, this is the brains of this complete AccuAir system. This controls the valves that's inside the tank. It controls the pressure sensor on the side of the tank, and it controls another little goodie that we're going to be putting on here in a minute. It's fully RGB lit. So you can change it to any color that your truck is, and it's also Bluetooth. So you can control it by the AccuAir app. So let's go ahead and get this thing installed on the truck. We'll go ahead and get this mounted up with these threaded holes in the billet body. So we got this thing mounted, which you probably already noticed is a pretty trick piece for PB Fab. It's actually a bed riser and it serves a dual purpose that you can mount the tank, two compressors, and an ECU in. I haven't had to drill any holes. It's a really nice piece. So next up we're going to go ahead and grab the compressors. So our kit comes with Viair's 485-C compressor. Now it's a 100 percent duty cycle at 200 psi which is what this tank is rated for. So it's the perfect fit. Now you gotta have really small fingers to get in there but we'll make it work. [ Music ] So we got our ECU in. We got our compressors all tightened. That's the main heart of the system. We're almost there. We're actually not going to plumb or wire any of this together yet. We're going to wait until we get the bed and the cab on. That way we can make sure everything's tidy and nice and clean. Now there is one more piece you got to put into this tank and that's a pressure sensor here. I'm going to go ahead and get to that and then we can move on to the next. We finish up the installation of our air ride system, ensuring that perfect stance for the street or at the show.
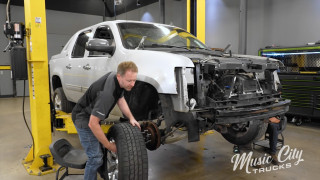
[Anthony] With the meat and potatoes already installed in the rear of our chassis it's time to move on to the front and put the cherry on top of this air ride system. And we're going to be doing that by installing AccuAir's E-level plus system. Now it includes these ride height sensors that you mount at each corner. And what these do is it moves with the wheel travel and it's going to send information back to the ECU telling where it is and it wheel travel, sending air to it or taking air out, giving you a nice, level ride no matter what kind of weight you have in it or what you're doing on the road. Another cool thing it does, it gives you three programable heights that you can set it. You can have it all the way laid out. So if you want to drive around to show, just cruise around, you can have it in ride height. And then the third one where I put my truck is if I'm loaded on the trailer I'll set that on that so I can just hit that button. It goes up and I put it on the trailer. So let's go ahead and get these on the chassis. So first things first, we got to figure out where we want to have our sensor mounted, and that looks to be about where I'm going to have it. Now we already have these brackets here. We got these from PorterBuilt and they mount to the control arm. If you don't have those you could also tap into the control arm but this is a much cleaner way to do it. So we know we want to be about right there. I'm going to throw a piece of tape up here. What this tape is going to do is allow us to make some marks and kind of get some measurements to keep them right in front of our face so we can't mess up. So we'll get a general idea of where we want this. I'm thinking somewhere right there. It's always good practice to keep these sensor pointed down. That way if water ever gets down. If you had these mounted up water be getting down in there, and it's no good for your sensors and electrical stuff. So we put a mark here right in the center or where the mounting holes are going to be, and that just gives us an idea of where this is going to live. So the next thing you want to do is we're going to have to take a couple measurements. So we're going to have to get it into full bump, and then we're gonna have to have it in full droop. And we're going to have to measure from this point down to our mark here. So I'm just going to sight it over and that way we can get our numbers. So now that we're at full bump we can go ahead and take a measurement from here down to this line and that's going to give us our full bump measurement. We'll write that down on our piece of tape. So now we'll let the jack down and get it in full droop. It's always a good idea to just press down and make sure you're actually in full droop, which we are. And so we'll do that same thing. Measure from our linkage mounting point from here to this line, and we'll write that number down. Looks like four and a half. So four and a half. So we're going to subtract these two numbers which gives us two inches of difference. So now that we got our numbers of travel on the control arm we're going to go ahead and we're going to mount our sensor onto the frame with some two sided tape. Now the reason we got those numbers is it dictates which hole we're going to use on this arm. So the first hole on this it gives you one inch of travel. The second hole gives you two inches and then the third and fourth so on and so forth. We know that we have two inches. So I'm going to most likely be using this second hole, but the only way to truly know this and to not break the sensor is by using the two sided tape. So let's go ahead and get that mounted on the frame. I'm putting it right back in the middle of my line. Get it stuck on nice and good because we're going to actually cycle the suspension with it taped up here. So the next thing we want to do is get our linkage arm and bolt it up to our mounting point. So we went ahead and we put this at full bump. So we're going to put this arm all the way up to where it mimics where it's going to be at full bump. Then we're going to take a measurement to the center of our hole and that's where the end of the eyelet's going to be. So then we'll go ahead and we'll put the heim back on here where the eyelet is right at our mark, and we'll cut it to wherever we need it to be. So we got our linkage rod and we got it all marked. Now we've got to make sure we're cutting in the right spot, and the spot has to be in the center of this heim joint since it's in the center of that arm is where I measured to. So we're going to go ahead and put that right on the center of that line. Make another mark here so that we're getting full thread engagement into the heim joint, and that should be the spot we're cutting to. Let's get it cut. So we got that all cut up. We got our heim threaded on to our rod. Now you want to make sure when you're doing this that these times aren't getting overextended in any direction. You know they have a limited amount that they actually swivel. So you just got to pay attention to that. Make sure you're not putting it in a bind. So AccuAir sends all the hardware with it and they even send these little standoffs. Again remember we're putting it in a second hole here, which is two inches. Bolt through the heim. We'll let it fall to full droop, cycle it back to full bump and make sure there's no binding, and we should be good to go. We're back at full bump. Everything seems to be pretty happy. I'd say that we're good to go ahead and use a transfer punch, punch a couple holes here, and get this thing mounted to the front. [ Music ]
So we got this all buttoned up. All of our sensors are in. I got to run some air lines, finish up the electrical, and then this thing's going to be good to go. [Mike] We stir things up by force feeding our 427 with a supercharger, making for more excitement.
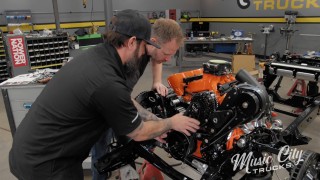
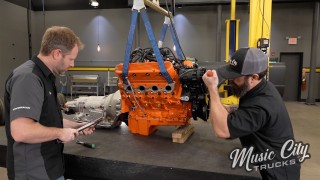
[Mike] When it comes to building these hot rods there's a few items that really have to stand out to put the truck over the top, and for me it's the engine. For us and our C-10 we're going with this 427 cubic inch LS based engine that our buddies down in Engine Power put together. Once you get through watching this show you can tune into their episode on all the details for this engine right here. But at the end of the day they built it for boost, and that's what we're going to do today is add a supercharger starting with this harmonic balancer. Let's get it installed. I've got a little oil on the end of it here for the seal and some copper slip to slide right onto that crankshaft hub there. Make sure our key is lined up. I like to put the crankshaft at 12 o'clock. Now this specific harmonic balancer matches up with the Pro Charger accessory drive. That's why we have a pulley on the inside of the hub, and it will get attached here. Now these balancers, you need to press them on. You don't want to use the bolt to draw it on. So you can get a fancy tool that goes on there and presses it on, or you can make something as simple as this right here with some threaded rod, a little bearing, a little nut on the end, welded it up, press that on and that's what we're going to use. Just get threaded in here. That's the same size the crankshaft threads there. We're going to run this all the way in. Tighten the nut up on this bearing. I'm going to hold this one. Then we'll tighten this one. [ Music ]
All right, she stopped right there. That's not bottomed out. So that's good. Now we'll just back this off and then take this out. [ Music ] Time for the crank bolt. I'm gonna put a little silicone on the face of this washer right here to keep any oil from seeping out over time. Then our ARP lube on the threads and the other face. Where's the little stick? Guess I gotta use my finger. [ Music ]
Then when we tighten this up it's always nice to have a friend to hold the back of the engine from rotating. [Anthony] Is that my cue there, Mike? Coming on in, brother. -We'll run this up by hand and then we'll get the torque wrench out. [ Music ] We'll torque this up to a whopping 235 foot-pounds. All right, she's good to go. Now the heart of our dampener we got here from Summit Racing is this outer shell. Now the main thing is you have to get this clocked correctly on the hub. If you notice, they put a little dot that I hit with a silver Sharpie, and then they put a mark right here on the outside. You have to line those up to get them clocked correctly there. So slide this on. Now we'll get our hardware in. Now we've got multiple levels of hardware here. Some that go for just the hub, some that go back to this pulley as well, but each hole has to have some hardware in it so it's balanced correctly. And then these long ones go through here, and they attach the back pulley right here. [ ratchet clicking ] [ Music ] Now we'll torque these to 16 foot-pounds. And the last piece is a supercharger pulley. We'll put it on here and make sure you get some red thread locker around on bolts as well. And we'll torque these 18 foot-pounds. So the next piece to our Pro Charger puzzle is the water pump here. Now if you ever notice on water pump you'll see this little hole right that's called the weep hole and that should stay dry. If you ever see water or coolant coming out of that weep hole that tells you the bearings and the seals inside your water pump are starting to fail and it's time to replace it. So a little tale tell there. Got my gaskets on. Let's set this up here. Now these are just temporary bolts as we'll pull these out and get the other brackets on here that gets sandwiched all together. We'll run these down. Now we're here we'll put that pully on. I've got some red thread locker on these. Make sure they don't ever back out. While we're over here we're going to get our thermostat installed. Now this one's from Duralast. It's a 180 degree thermostat but the unique thing about this one is this little guy right here. That's called your jiggle valve. The purpose of that is to allow any air that may be trapped in to bypass when the thermostat is closed. So the important part, when you have a jiggle valve on your thermostat is to mount it at the 12 o'clock position. That's the only way the air is going to leak past it. So we're going to go ahead and set this in here. And then our water neck goes over here. [ ratchet clicking ] [ Music ]
Next is the power steering pump bracket followed by the power steering pump. Next we have to install our power steering pump pulley. Now this is a press fit design. So you want your pump already on it, and how deep we press this it's going to be dependent on lining it up with the other pulley on the crankshaft. Now to do this you really need a tool like this to press that on. That'll go into the center there. If you don't have one you can go down to your local parts store. They have these where you can rent. I'm always renting tools when I'm working on stuff at home. I'm going to push this on until it lines up with our inner pulley. All right, passes the eye test. Get the belt on. One accessory down, three more to go. We finish up the install of our supercharger, cranking up the power to our 427.
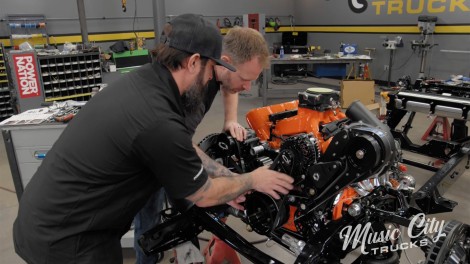
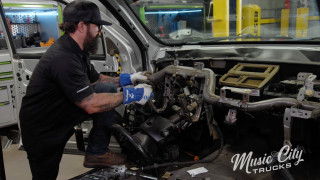
[Mike] We're powering through our Pro Charger package today. We've already got our harmonic balancer installed, our water pump, and our power steering pump all set up from our kit from Pro Charger. Now they've provided us all these accessories to go on our engine. Now more than likely for your application you can reuse your accessories, but this kit is actually designed for a first gen Camaro because we worked with them. That's the beauty of working with Pro Charger on the measurements, the design, everything. The layout of your engine bay to match up to what you need specifically. As we keep on going next bracket here is going to go right up here on the cylinder head. We'll get that installed. With the bolts and spacers on there. Get this guy on the bracket. [ Music ] Now the heart of our Pro Charger kit right here is a centrifugal supercharger. This is their D1X head unit. It will put out over 1,000 horsepower and up to 32 pounds of boost. Now that's way more than what we're trying to achieve. If I can get about eight pounds that'd be perfect for us. Now we've already got the main bracket attached to the engine. Let's get this on. Now when doing these custom applications you always run into roadblocks or unintended consequences. For us the first one here with this supercharger set up are these tall valve covers. Had a little interference. So went in and cleared that out, and then we'll address that later. [ Music ] And to spin that supercharger we'll get our belt on here. I think I'm going to need another hand. Anthony want to give me a hand. [Anthony] You need a hand? -Yeah, putting this belt on here. -Let's see what you got going on. Pull that, and then we got to remove that tensioner. So hold that belt right there and I'll hold the tensioner. Well just, there we go. Yep, right, yep. So that's as far as we can go there. Boom, look good? -Yeah. -Release the tension. -Well that was easy. That's all you needed? -That's all we needed. -I'm out of here. -Now we've got our air conditioning compressor, alternator. That's all we got left to do. With our temporary bolts removed from the water pump we can get our lower alternator mount on here mounted loosely. Then we get the alternator installed. For our alternator we got this one from Summit Racing. It's a Power Master unit for 220 amps. That should be plenty to keep up with our electrical demands. There we go. Next one. Now we can tighten all that down. [ Music ] [ ratchet clicking ] [ Music ] Now the next piece to go on is our air conditioning compressor. A little tip here for you on these. Well you've got your compressor clutch coil down here and you send power to it to energize it. Well to complete the electrical circuit you need power and ground, and the way that grounds out is through the case of the compressor back to the block. So whenever you have these special coatings like the black stuff we have here you're gonna knock that off all the way back to the block. So it has a good ground circuit. Now get this on this bracket on the engine. [ Music ]
We'll tie all these accessories together. Hey, give me a hand before you sit down over there. -You talking to me? What you got going on? -Let's get this belt and see if you can guide it around that water pump there. Now the crank looks good. Pull this tensioner back. -I'm gonna try not to lose a finger. -I know it's a real pinch point right here. [ Music ] -We are grooving. -Groove and perfect. That looks good. All we got left there is the oil and the supercharger unit right there. Don't forget about that. And then we need to connect the two points. -What are we talking about, intercooler? -Yes, we're going to add an intercooler to this. That's going to run in front of the radiator support right there. But we got a lot of work to get to that point. -We'll probably put the core support on. We need to start getting some body panels on this thing. -I agree with you. But with the Pro Charger unit right there there's nothing more that you can do to your vehicle to give it such a big change. -You get all the power and all the right noises. -I actually about 20 years ago put one of these on one of my Mustangs. I had to save up a few different paychecks cause they're not cheap, but it made a huge difference on that car. -I mean, I know all about saving. I try to put the best parts on my car. Sometimes it takes me a little longer to build them because I gotta save. -Well we got a whole lot more to do on this truck but you'll see that next time on. -Music City Trucks. -Take care. Thanks.
Show Full Transcript
[Anthony] Today on Music City Trucks were messing with air in all the right ways. Our C-10 gets an air ride suspension so it can sit low, roll smooth, and rise to any occasion. [Mike] Then we pack on some serious boost by adding a supercharger to our 427, cranking up the smiles per gallon. [ Music ]
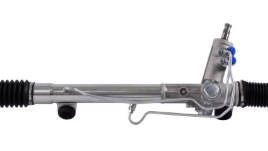
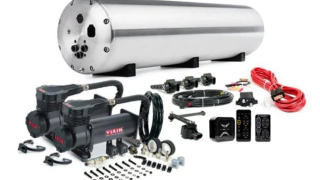
-Hey guys, welcome to Music City Trucks. We've got a great show in store for you today and it's all about compressed air from the engine to the suspension. And if you remember last time we were with you ole Cream Puff. We had it in the body shop doing all the paint and body work. We're able to knock out this House of Kolor Galactic Sand Yellow and the white combination and make that pearl really pop. Now it's time for final assembly. -And final assembly is actually already started on our chassis. You can probably tell it's a different color than the last time you saw it. So we sent this thing over to Blast from the Past. They went through it, sandblasted everything, and put this beautiful gloss black powder on it. Now this is actually a two stage powder. So they go through it and they spray the black and then they put a clear coat on top of it. Makes it extremely durable and it gives it the sheen that you see sitting here. And then up front we got a couple other things we're going to be doing here. It's going to help us steer and get this thing stopping. -For the steering rack right here we went with this Duralast unit. Now this is a power steering rack and pinion setup. It's going to bring this truck in the modern age as far as the steering on it as well. Now this Duralast steering rack, it's been subject to extreme testing and advanced engineering which will make it perfect for our C-10. Now the beauty of this one is it's just a simple Mustang two front steering rack, and it works perfectly with that drop member from PorterBuilt. Now that Duralast power rack and pinion setup is going to keep this truck going in the right direction, but for the elevation well Anthony is going to walk you through that. -The first part of that elevation equation is our PorterBuilt drop members we have in the front rear. Now the second part comes from Summit Racing in this AccuAir E-level kit that they sell is one part number. Gives you everything you need to control our air ride, and it's going to start with this tank. So this is AccuAir's Endo-VT tank, and what makes this really trick is the valves are actually inside the air tank. Makes it very simple to install with all the push to connect connectors you need on the tank already, along with your solenoid control valves and a pretty trick piece on here that's called flow control. So when you have an air ride vehicle the back is usually going to be lighter than the front given that the engine's in the front and it's going to go up and down at different rates. What that flow control allows you to do is actually slow down the rear so that it goes up and down at the same rate. Now we have to install a few things on here, and that's going to start with the compressors and the ECU. All right up next we'll grab the ECU here. Slide that out. There should be a pressure sensor right here. So this little pretty black box you see here, this is the brains of this complete AccuAir system. This controls the valves that's inside the tank. It controls the pressure sensor on the side of the tank, and it controls another little goodie that we're going to be putting on here in a minute. It's fully RGB lit. So you can change it to any color that your truck is, and it's also Bluetooth. So you can control it by the AccuAir app. So let's go ahead and get this thing installed on the truck. We'll go ahead and get this mounted up with these threaded holes in the billet body. So we got this thing mounted, which you probably already noticed is a pretty trick piece for PB Fab. It's actually a bed riser and it serves a dual purpose that you can mount the tank, two compressors, and an ECU in. I haven't had to drill any holes. It's a really nice piece. So next up we're going to go ahead and grab the compressors. So our kit comes with Viair's 485-C compressor. Now it's a 100 percent duty cycle at 200 psi which is what this tank is rated for. So it's the perfect fit. Now you gotta have really small fingers to get in there but we'll make it work. [ Music ] So we got our ECU in. We got our compressors all tightened. That's the main heart of the system. We're almost there. We're actually not going to plumb or wire any of this together yet. We're going to wait until we get the bed and the cab on. That way we can make sure everything's tidy and nice and clean. Now there is one more piece you got to put into this tank and that's a pressure sensor here. I'm going to go ahead and get to that and then we can move on to the next. We finish up the installation of our air ride system, ensuring that perfect stance for the street or at the show.
[Anthony] With the meat and potatoes already installed in the rear of our chassis it's time to move on to the front and put the cherry on top of this air ride system. And we're going to be doing that by installing AccuAir's E-level plus system. Now it includes these ride height sensors that you mount at each corner. And what these do is it moves with the wheel travel and it's going to send information back to the ECU telling where it is and it wheel travel, sending air to it or taking air out, giving you a nice, level ride no matter what kind of weight you have in it or what you're doing on the road. Another cool thing it does, it gives you three programable heights that you can set it. You can have it all the way laid out. So if you want to drive around to show, just cruise around, you can have it in ride height. And then the third one where I put my truck is if I'm loaded on the trailer I'll set that on that so I can just hit that button. It goes up and I put it on the trailer. So let's go ahead and get these on the chassis. So first things first, we got to figure out where we want to have our sensor mounted, and that looks to be about where I'm going to have it. Now we already have these brackets here. We got these from PorterBuilt and they mount to the control arm. If you don't have those you could also tap into the control arm but this is a much cleaner way to do it. So we know we want to be about right there. I'm going to throw a piece of tape up here. What this tape is going to do is allow us to make some marks and kind of get some measurements to keep them right in front of our face so we can't mess up. So we'll get a general idea of where we want this. I'm thinking somewhere right there. It's always good practice to keep these sensor pointed down. That way if water ever gets down. If you had these mounted up water be getting down in there, and it's no good for your sensors and electrical stuff. So we put a mark here right in the center or where the mounting holes are going to be, and that just gives us an idea of where this is going to live. So the next thing you want to do is we're going to have to take a couple measurements. So we're going to have to get it into full bump, and then we're gonna have to have it in full droop. And we're going to have to measure from this point down to our mark here. So I'm just going to sight it over and that way we can get our numbers. So now that we're at full bump we can go ahead and take a measurement from here down to this line and that's going to give us our full bump measurement. We'll write that down on our piece of tape. So now we'll let the jack down and get it in full droop. It's always a good idea to just press down and make sure you're actually in full droop, which we are. And so we'll do that same thing. Measure from our linkage mounting point from here to this line, and we'll write that number down. Looks like four and a half. So four and a half. So we're going to subtract these two numbers which gives us two inches of difference. So now that we got our numbers of travel on the control arm we're going to go ahead and we're going to mount our sensor onto the frame with some two sided tape. Now the reason we got those numbers is it dictates which hole we're going to use on this arm. So the first hole on this it gives you one inch of travel. The second hole gives you two inches and then the third and fourth so on and so forth. We know that we have two inches. So I'm going to most likely be using this second hole, but the only way to truly know this and to not break the sensor is by using the two sided tape. So let's go ahead and get that mounted on the frame. I'm putting it right back in the middle of my line. Get it stuck on nice and good because we're going to actually cycle the suspension with it taped up here. So the next thing we want to do is get our linkage arm and bolt it up to our mounting point. So we went ahead and we put this at full bump. So we're going to put this arm all the way up to where it mimics where it's going to be at full bump. Then we're going to take a measurement to the center of our hole and that's where the end of the eyelet's going to be. So then we'll go ahead and we'll put the heim back on here where the eyelet is right at our mark, and we'll cut it to wherever we need it to be. So we got our linkage rod and we got it all marked. Now we've got to make sure we're cutting in the right spot, and the spot has to be in the center of this heim joint since it's in the center of that arm is where I measured to. So we're going to go ahead and put that right on the center of that line. Make another mark here so that we're getting full thread engagement into the heim joint, and that should be the spot we're cutting to. Let's get it cut. So we got that all cut up. We got our heim threaded on to our rod. Now you want to make sure when you're doing this that these times aren't getting overextended in any direction. You know they have a limited amount that they actually swivel. So you just got to pay attention to that. Make sure you're not putting it in a bind. So AccuAir sends all the hardware with it and they even send these little standoffs. Again remember we're putting it in a second hole here, which is two inches. Bolt through the heim. We'll let it fall to full droop, cycle it back to full bump and make sure there's no binding, and we should be good to go. We're back at full bump. Everything seems to be pretty happy. I'd say that we're good to go ahead and use a transfer punch, punch a couple holes here, and get this thing mounted to the front. [ Music ]
So we got this all buttoned up. All of our sensors are in. I got to run some air lines, finish up the electrical, and then this thing's going to be good to go. [Mike] We stir things up by force feeding our 427 with a supercharger, making for more excitement.
[Mike] When it comes to building these hot rods there's a few items that really have to stand out to put the truck over the top, and for me it's the engine. For us and our C-10 we're going with this 427 cubic inch LS based engine that our buddies down in Engine Power put together. Once you get through watching this show you can tune into their episode on all the details for this engine right here. But at the end of the day they built it for boost, and that's what we're going to do today is add a supercharger starting with this harmonic balancer. Let's get it installed. I've got a little oil on the end of it here for the seal and some copper slip to slide right onto that crankshaft hub there. Make sure our key is lined up. I like to put the crankshaft at 12 o'clock. Now this specific harmonic balancer matches up with the Pro Charger accessory drive. That's why we have a pulley on the inside of the hub, and it will get attached here. Now these balancers, you need to press them on. You don't want to use the bolt to draw it on. So you can get a fancy tool that goes on there and presses it on, or you can make something as simple as this right here with some threaded rod, a little bearing, a little nut on the end, welded it up, press that on and that's what we're going to use. Just get threaded in here. That's the same size the crankshaft threads there. We're going to run this all the way in. Tighten the nut up on this bearing. I'm going to hold this one. Then we'll tighten this one. [ Music ]
All right, she stopped right there. That's not bottomed out. So that's good. Now we'll just back this off and then take this out. [ Music ] Time for the crank bolt. I'm gonna put a little silicone on the face of this washer right here to keep any oil from seeping out over time. Then our ARP lube on the threads and the other face. Where's the little stick? Guess I gotta use my finger. [ Music ]
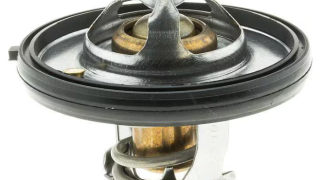
Then when we tighten this up it's always nice to have a friend to hold the back of the engine from rotating. [Anthony] Is that my cue there, Mike? Coming on in, brother. -We'll run this up by hand and then we'll get the torque wrench out. [ Music ] We'll torque this up to a whopping 235 foot-pounds. All right, she's good to go. Now the heart of our dampener we got here from Summit Racing is this outer shell. Now the main thing is you have to get this clocked correctly on the hub. If you notice, they put a little dot that I hit with a silver Sharpie, and then they put a mark right here on the outside. You have to line those up to get them clocked correctly there. So slide this on. Now we'll get our hardware in. Now we've got multiple levels of hardware here. Some that go for just the hub, some that go back to this pulley as well, but each hole has to have some hardware in it so it's balanced correctly. And then these long ones go through here, and they attach the back pulley right here. [ ratchet clicking ] [ Music ] Now we'll torque these to 16 foot-pounds. And the last piece is a supercharger pulley. We'll put it on here and make sure you get some red thread locker around on bolts as well. And we'll torque these 18 foot-pounds. So the next piece to our Pro Charger puzzle is the water pump here. Now if you ever notice on water pump you'll see this little hole right that's called the weep hole and that should stay dry. If you ever see water or coolant coming out of that weep hole that tells you the bearings and the seals inside your water pump are starting to fail and it's time to replace it. So a little tale tell there. Got my gaskets on. Let's set this up here. Now these are just temporary bolts as we'll pull these out and get the other brackets on here that gets sandwiched all together. We'll run these down. Now we're here we'll put that pully on. I've got some red thread locker on these. Make sure they don't ever back out. While we're over here we're going to get our thermostat installed. Now this one's from Duralast. It's a 180 degree thermostat but the unique thing about this one is this little guy right here. That's called your jiggle valve. The purpose of that is to allow any air that may be trapped in to bypass when the thermostat is closed. So the important part, when you have a jiggle valve on your thermostat is to mount it at the 12 o'clock position. That's the only way the air is going to leak past it. So we're going to go ahead and set this in here. And then our water neck goes over here. [ ratchet clicking ] [ Music ]
Next is the power steering pump bracket followed by the power steering pump. Next we have to install our power steering pump pulley. Now this is a press fit design. So you want your pump already on it, and how deep we press this it's going to be dependent on lining it up with the other pulley on the crankshaft. Now to do this you really need a tool like this to press that on. That'll go into the center there. If you don't have one you can go down to your local parts store. They have these where you can rent. I'm always renting tools when I'm working on stuff at home. I'm going to push this on until it lines up with our inner pulley. All right, passes the eye test. Get the belt on. One accessory down, three more to go. We finish up the install of our supercharger, cranking up the power to our 427.
[Mike] We're powering through our Pro Charger package today. We've already got our harmonic balancer installed, our water pump, and our power steering pump all set up from our kit from Pro Charger. Now they've provided us all these accessories to go on our engine. Now more than likely for your application you can reuse your accessories, but this kit is actually designed for a first gen Camaro because we worked with them. That's the beauty of working with Pro Charger on the measurements, the design, everything. The layout of your engine bay to match up to what you need specifically. As we keep on going next bracket here is going to go right up here on the cylinder head. We'll get that installed. With the bolts and spacers on there. Get this guy on the bracket. [ Music ] Now the heart of our Pro Charger kit right here is a centrifugal supercharger. This is their D1X head unit. It will put out over 1,000 horsepower and up to 32 pounds of boost. Now that's way more than what we're trying to achieve. If I can get about eight pounds that'd be perfect for us. Now we've already got the main bracket attached to the engine. Let's get this on. Now when doing these custom applications you always run into roadblocks or unintended consequences. For us the first one here with this supercharger set up are these tall valve covers. Had a little interference. So went in and cleared that out, and then we'll address that later. [ Music ] And to spin that supercharger we'll get our belt on here. I think I'm going to need another hand. Anthony want to give me a hand. [Anthony] You need a hand? -Yeah, putting this belt on here. -Let's see what you got going on. Pull that, and then we got to remove that tensioner. So hold that belt right there and I'll hold the tensioner. Well just, there we go. Yep, right, yep. So that's as far as we can go there. Boom, look good? -Yeah. -Release the tension. -Well that was easy. That's all you needed? -That's all we needed. -I'm out of here. -Now we've got our air conditioning compressor, alternator. That's all we got left to do. With our temporary bolts removed from the water pump we can get our lower alternator mount on here mounted loosely. Then we get the alternator installed. For our alternator we got this one from Summit Racing. It's a Power Master unit for 220 amps. That should be plenty to keep up with our electrical demands. There we go. Next one. Now we can tighten all that down. [ Music ] [ ratchet clicking ] [ Music ] Now the next piece to go on is our air conditioning compressor. A little tip here for you on these. Well you've got your compressor clutch coil down here and you send power to it to energize it. Well to complete the electrical circuit you need power and ground, and the way that grounds out is through the case of the compressor back to the block. So whenever you have these special coatings like the black stuff we have here you're gonna knock that off all the way back to the block. So it has a good ground circuit. Now get this on this bracket on the engine. [ Music ]
We'll tie all these accessories together. Hey, give me a hand before you sit down over there. -You talking to me? What you got going on? -Let's get this belt and see if you can guide it around that water pump there. Now the crank looks good. Pull this tensioner back. -I'm gonna try not to lose a finger. -I know it's a real pinch point right here. [ Music ] -We are grooving. -Groove and perfect. That looks good. All we got left there is the oil and the supercharger unit right there. Don't forget about that. And then we need to connect the two points. -What are we talking about, intercooler? -Yes, we're going to add an intercooler to this. That's going to run in front of the radiator support right there. But we got a lot of work to get to that point. -We'll probably put the core support on. We need to start getting some body panels on this thing. -I agree with you. But with the Pro Charger unit right there there's nothing more that you can do to your vehicle to give it such a big change. -You get all the power and all the right noises. -I actually about 20 years ago put one of these on one of my Mustangs. I had to save up a few different paychecks cause they're not cheap, but it made a huge difference on that car. -I mean, I know all about saving. I try to put the best parts on my car. Sometimes it takes me a little longer to build them because I gotta save. -Well we got a whole lot more to do on this truck but you'll see that next time on. -Music City Trucks. -Take care. Thanks.
More 1972 C10 Cream Puff Episodes
Music City Trucks Featured Projects

Music City Trucks Builds


Want more content like this?
Join the PowerNation Email NewsletterParts Used In This Episode
Summit Racing
AccuAir Suspension Ultimate On-Board Air Compressor System
Blast From the Past
Sandblasting & Powder Coating
House of Kolor
Paint: Galactic Sand & White
PB FAB
Drop Members: Front & Back
ProCharger SuperCharger
Accessory Drive Kit
ProCharger SuperCharger
D-1X Supercharger