
Video Transcript
You're watching Power Nation.
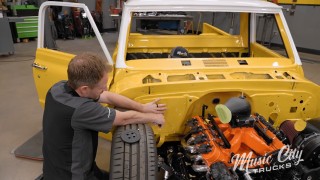
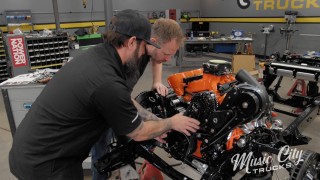
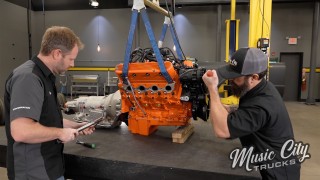
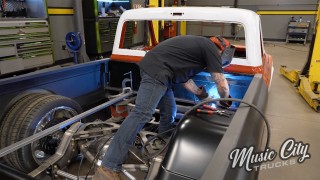
Today on Music CD Trucks we clean up the engine bay by taking that battery and moving it to the back.
Some of our interior pieces are in good shape,
but they're not gonna work with our updated interior.
I'll show you an inexpensive way to refurbish your old plastic,
bringing it back to life.
Plus we had some upgrades to our old Chevy to keep that power planted into the ground.
Hey guys,
welcome back to Music City Trucks.
Well, as you can see, we're starting to see the light at the end of the tunnel on our 632 SS project.
While it's a little dim at this point,
hopefully after today,
it'll be a little brighter, we can check some stuff off our list.
Yeah,
we're talking about lists when it comes to this stage of the project, you're always gonna think of little small things to do, so it's always a good idea to make you a little list and check those things out.
We got a couple of things going.
First thing we gotta do is get the battery
installed and we're not putting it under the hood. We're actually gonna relocate that to the bed.
So
let's go ahead and get it dropped in.
Alright,
so similar to the fuel tank situation we're gonna move the battery to the bed to give us a better weight balance to clean up that engine bay and also try to get some more weight towards the back, get a little bit more traction because we're gonna need it with that big engine.
So
to move the battery back here we've got this battery box kit.
That we've got from Mr. Gasket
and what we're gonna do, we're gonna mount that back here. The biggest obstacle is the ribs in the bed so I try to straddle these two here that gives it enough surface area to hold that down.
So now
I think I'm just gonna mark a couple of holes
to drill right about
here
and one on the backside
and that'll have the bolts that go down to hold the battery down so let's get them drilled out.
All
righty.
Looks about right.
Now let's get the battery and some hardware.
So for this battery right here, I just went on the AutoZone pro website and sorted them all by the dimensions because I wanted to get the biggest battery that would fit in our battery box with the most cold cranking amps that way it's got enough juice to turn over that big block Chevy.
Now let's get it dropped in the box here.
OK, now the way that this box works, we've got a little clamp that goes across the top of the battery
and then we've got these two bolts here
and drop in the holes that we just drilled.
Got one
on this side and we'll have one on the back side here
got a bolt.
It was in,
go ahead and put our hardware on.
Hold that.
And then the one on the back side, same thing.
That's gonna go there and then on the bottom side we'll slide underneath the bed
and then I made a little bracket here that's going to go in between both of those threaded studs that dropped to the bottom there and it's gonna sandwich the bottom of the bed, the floor there to give it a lot more strength
than just a nut on the bottom of that at the bottom of the bed so we'll slide on the bottom slide this up,
get the nuts on,
and then we gotta run some cable.
All right,
do a little paint on our bracket and we'll.
Get it up here,
get some hardware on it.
All right, with the battery securely fastened,
now we get our,
get our cables run through the bed floor
and drill some holes. I'm gonna mark
right in this area here where it lines up.
With the posts.
Mhm.
Grommet's in here.
Now our battery box kit comes with this sweet yellow battery cable that we can trim down to fit
and that's what I've done here with the negative.
All right,
we're gonna run this
right through
our provision
and it's gonna go down to the frame.
OK,
that over and tighten it down.
And then the positive, it needs to be long enough to get to the front of the truck, so that's why we've got a lot of length here with that.
I'm gonna leave that out
till I can get on the bottom side so I don't make sure they don't touch together, but once that's through there then we got a lid.
That'll go on top of this.
Nice clearance for it and then a strap goes around the top buttons it up
so we can check that off the list.
Our sun faded interior pieces get a fresh look and a new beginning.
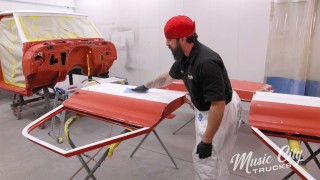
Hey guys, well, as you can see, we're in the prep booth today and I'm starting to scuff some of our hard plastic interior pieces.
Now, in the 80s and 90s,
most of the car manufacturers like to use this hard plastic and it was known to get easily sun damaged.
Um, ours is in pretty good shape,
but it's the wrong color. We're going with a black interior on our 632 project,
so we're gonna scuff it,
shoot some black paint on it,
and we should be good to go.
So
let's get to it.
All right, now that we got these all hit with the gray scuff pad, we can go ahead and start wiping them down with our wax and grease remover.
Now basically what I'm doing is just spraying a direct to metal hot rod black over all this,
but you gotta make sure that whatever you're using,
it works with plastic because you don't want any of the solvents to be reacting and and mess up all your pretty plastic.
So we'll get this all wiped down.
Give it a nice hit with tack cloth and then we should be good to spray.
All right, now that we've got this all wiped down with our wax and grease remover,
we're gonna do another step, and we're gonna put a plastic adhesion promoter on our panels.
Now we've already given it a mechanical
tooth to it with our scuff pads.
This is gonna give us some chemical tooth and it's gonna help our paint stick to this nice hard plastic.
So
we'll go ahead and start spraying this out.
Now you're just gonna put a couple
light coats on it,
and with this stuff, they want you to spray it pretty quickly. We got to wait about 10 minutes and
no more than that. So we got to pretty much start spraying our paint directly after we spray this.
So we're gonna do these 4 panels for now
and then
we'll get to the rest of them so that way we're not rushing to try to get everything done.
And you don't want to cake this stuff on, you just want to do nice light coats.
All right, with our adhesion promoter on the pieces, we can go now and mix our paint and get to spraying these.
Well,
uh, Anthony gets the interior parts painted. I'm gonna get these doors assembled. We'll put new seals on them. We've reached out to steel rubber products and they sent us all the weather strip we need to freshen up this truck.
We're gonna start with this belt line molding right here.
It's on the outside of the window.
We'll get it popped in place.
Here.
All
right.
Now the inner window felt, well, it staples to the top of the door panel, so we'll attach that later on.
Now let's get the window channel in
and this they make it really nice in the mold,
they put an L and an R so you don't get confused on which side it goes.
It's gonna pop right into that groove.
Just a little patience
working it into that groove.
There she goes, that looks a lot better.
But
All right. Next, we'll get our weather strip in. This goes around the perimeter of the door.
Let's see here,
the direction.
Yep,
that right there.
Started down here at the bottom because that's where our seal plate is.
This stuff is really easy to install just slides right over that channel right there
rubber's got little teeth that hold on to it.
Now
back in the day they had a lot of
weather strip adhesive that you could put a little glue in there
you could still do that, but these things hold so tight I'm not gonna worry about putting any glue on these
factory didn't have any glue,
so we'll leave these
just like that.
Just gotta work it,
work it.
Right in there.
And without trimming it any,
that lines up perfect.
All right, one last piece
is this upper seal.
Get it out.
Goes around this top edge right here
between the door and the roof.
So
we'll start over here.
Same thing it just pops in that channel.
Beemus,
all right,
like it's that in there looks good.
We still got a lot of clean up to do in the cab, so don't get your panties in a wad.
Hey,
Mikey,
yeah,
got this hot off the press.
Turned out pretty good.
Yeah, I'll see how it matches up.
I'll tell you what,
that works out pretty good.
Yeah,
we got about 20 more pieces to do.
Well,
let's go get to working on them. Let's get it on.
Coming up we add some modern technology to our OBS to keep that power glued to the pavement.
Oh hey guys,
welcome back. Well, you've probably seen a lot of modern vehicles trash control or stability control. Well,
manufacturers utilize this to keep the car under control and keep you safe
going down the road,
but on the motor sports side of things,
traction control is typically deemed illegal as it's a performance advantage,
but that hasn't stopped many teams from trying to.
Get it on the car.
One of the most clever ways I've heard about traction control being installed is with this permanent marker. Yeah, the car goes through tech inspection. It's clean,
but when the driver goes through sign some autographs, he jumps into the car, he hooks this up, and now they've got that performance advantage.
Now we're gonna try to hook that up on our truck today. Let me show you how that's done.
For the system to work, the computer needs to see front wheel speed and rear wheel speed. Now the way that we're gonna do that, we've got these high quality hall effect sensors that we made a little bracket attached to the spindle, and it's gonna pick up the backside of the lug stud.
So as it spins, it's gonna create a signal and send that to the computer.
Now we know the sensor is working correctly because we've got some lights on the backside here that as you spin that it starts flashing that letting you know it's got a signal and then on the back of the truck for the rear wheel speed,
well, we've got that same type of sensor set up on the pinion it's gonna give us a good signal to the computer.
Now our Holly Terminator X wiring harness already has a pigtail for inputs and outputs,
sensor power and ground, and that's how we're gonna connect those sensors to the system here. Now we just got to go in.
To the software and identify those
first thing we're gonna do is go to the toolbox and add an individual config
and scroll down to traction
and that'll populate a tab up here. We'll get that that's for a trash control set up.
Now we're going with a wheel slip method that this is kind of like the entry level set up.
There are some more trash control softwares out there that you could buy that are much more sophisticated
that react really quick and then give you more options to control the engine,
but for what we're doing this will be fine.
Now we'll go over to our inputs and outputs
and identify these terminals
that the sensors are coming into the computer for so front wheel speed, rear wheel speed, it's a digital frequency,
and we've named the pins that they're connected to.
Then we can go back to the traction control and go to our wheel.
Slip
and click on timing.
Now what this does traction control, it's gonna look at the front wheel speed versus the rear wheel speed
and when there's a difference, like say the rear wheels are spinning a lot faster than the front,
well, it's gonna take timing, ignition timing out of the engine in an effort to slow it down to keep the car under
under control there so.
You can set up how much timing,
how quick you want it to react.
So what I've done is I've got 10 degrees of ignition timing to come out at max right there to help bring that engine down
so we can get traction again.
And you can like I've said, like I said, you can ramp this up,
uh, depending on how much you want, how quick you want it there. So
what we're gonna do now is let's go ahead and connect
to the computer here and we're gonna verify that the front wheel is hooked up there. So Anthony, go ahead and
spin that thing.
Uh, that front wheel
to see what we've got. Let's see here. Let me go over here to our gauges
and we gotta add the front wheel speed so we'll find that and bring that to this tab here
and OK,
and don't say that it populates right there. So let's see if it spins right there. Go ahead and spin it.
1787 6 1011 miles an hour. Oh yeah, that's, that's top speed of the meat right there so.
Now that we've verified that that works, what we gotta do is drive this thing down the road
and do some calibration between the front and rear, make sure those sensors are reading accurately and we can fine tune that. So
for now we're good to go.
Up next, with our dash looking brand new,
our gauge cluster needs to match with the classic design and modern performance.
Hey guys, welcome back.
Well,
before we get too far with assembly, we've got a little summit tech tip for you.
When it comes to reassembly, there's gonna be a lot of tightening of bolts and nuts, and you wanna make sure they're tight to the right spec.
Well,
use a torque wrench. Well,
sometimes that torque wrench needs to be checked.
So to do that, we've got this intercom torque checker that we got from SummitRacing. We're gonna see how close this torque wrench really is.
Now I've got it set to 85 ft pounds here
and we'll turn it on.
I'll let it zero out.
OK,
got it there
and
put this on and we're gonna creep up on it.
See how close to 85 we are.
For clicks
All right, and try it again.
I got it about 83 that time.
Let's see here,
65,
70.
5.
8181.
So
between 81, 83, that's about 34 pounds off,
so we can
calibrate that or we can recheck that or just keep that in mind. But every once in a while, you need to check these to make sure they're right.
Well guys, as you can see, we got our dash out of the paint booth, and man, it turned out really good.
It's one more piece of the puzzle we got install and that's our gauge cluster.
And before that we went to Classic Instruments and got one of their 88 to 94 OBS gauge clusters.
Now they give you all the sending units you need to make it run in your factory engine.
Obviously the engine in this truck 8 factories.
So we went with one of their Zeus link, uh, interfaces, and that allows us to directly connect to our Terminator X.
Now they also make one where You can plug it directly into your OBD 2 port and it'll work on the factory ECU.
Now we have an '89, obviously this truck's an '89, and then we have this style of gauge cluster,
so
they want you to reuse your factory diffuser and your lens. So we had to do some modifications to ours to make it work with the newer style gauge cluster.
So all I did was use a cutoff wheel,
cut this all out,
and cleaned it up.
So now all we got to do is get it in the dash so we can get it back in that truck.
So let's do it.
Now another thing to note with this lens, I had to drill this hole here for this post and that's what calibrates the uh new gauge set up.
Now, if you have later model gauges, it already has that hole drilled, so you won't have to worry about it,
but if you have the style of gauges we have, you're gonna have to drill a hole.
Now another way to uh set up the system is if you're using the Zeus link set up, then you just use the app, makes it nice and easy.
All right,
last piece of the puzzle here.
We'll get this thing tightened down and then this dash ready to go back in the truck.
I'm excited to see it in there.
All right,
well, we're dangerously close to getting this thing fired up and we're just itching to hear it run.
I got enough of the vitals hooked up that we can crank this thing over.
Last thing we need to do is put some oil in this
big block. So what we're gonna do here, we've got this Schafer's Supreme
7000
synthetic plus.
Now
we're using this stuff just because of the engine is combination here, it's gonna be what we need for the protection
and it's also recommended by our buddies down the street,
Pat and Frankie.
Now this is gonna give a superior film strength for extra protection against wear.
It has proven performance against thermal breakdown while suppressing the formation of deposits, sludge, and varnish.
plus with its friction modifiers will provide a strong barrier against scuffing and abrasion.
All right, well, there's a lot of good information I could tell you about engine oil, but one little nugget I'll drop the W in a multi-grade oil that stands for winter,
not weight as a lot of people think right there.
What do you say we get this breather on, put some fire into some holes.
I'm ready to hear this thing run.
Let's see, we'll get this pop back in here.
Yeah, we got enough of our
management system hooked up to where we can fire this thing up and see what it sounds like.
All right, that looks good.
Hit the key.
Come on baby.
Good,
yep.
I think that's a success, brother.
That sounds great.
Yeah,
ain't nothing like a big block Chevy.
Yeah, well, we still got a whole lot of work to do as you can see, so we're gonna get back to work,
catch you guys next time on Music City Trucks.
Show Full Transcript
Today on Music CD Trucks we clean up the engine bay by taking that battery and moving it to the back.
Some of our interior pieces are in good shape,
but they're not gonna work with our updated interior.
I'll show you an inexpensive way to refurbish your old plastic,
bringing it back to life.
Plus we had some upgrades to our old Chevy to keep that power planted into the ground.
Hey guys,
welcome back to Music City Trucks.
Well, as you can see, we're starting to see the light at the end of the tunnel on our 632 SS project.
While it's a little dim at this point,
hopefully after today,
it'll be a little brighter, we can check some stuff off our list.
Yeah,
we're talking about lists when it comes to this stage of the project, you're always gonna think of little small things to do, so it's always a good idea to make you a little list and check those things out.
We got a couple of things going.
First thing we gotta do is get the battery
installed and we're not putting it under the hood. We're actually gonna relocate that to the bed.
So
let's go ahead and get it dropped in.
Alright,
so similar to the fuel tank situation we're gonna move the battery to the bed to give us a better weight balance to clean up that engine bay and also try to get some more weight towards the back, get a little bit more traction because we're gonna need it with that big engine.
So
to move the battery back here we've got this battery box kit.
That we've got from Mr. Gasket
and what we're gonna do, we're gonna mount that back here. The biggest obstacle is the ribs in the bed so I try to straddle these two here that gives it enough surface area to hold that down.
So now
I think I'm just gonna mark a couple of holes
to drill right about
here
and one on the backside
and that'll have the bolts that go down to hold the battery down so let's get them drilled out.
All
righty.
Looks about right.
Now let's get the battery and some hardware.
So for this battery right here, I just went on the AutoZone pro website and sorted them all by the dimensions because I wanted to get the biggest battery that would fit in our battery box with the most cold cranking amps that way it's got enough juice to turn over that big block Chevy.
Now let's get it dropped in the box here.
OK, now the way that this box works, we've got a little clamp that goes across the top of the battery
and then we've got these two bolts here
and drop in the holes that we just drilled.
Got one
on this side and we'll have one on the back side here
got a bolt.
It was in,
go ahead and put our hardware on.
Hold that.
And then the one on the back side, same thing.
That's gonna go there and then on the bottom side we'll slide underneath the bed
and then I made a little bracket here that's going to go in between both of those threaded studs that dropped to the bottom there and it's gonna sandwich the bottom of the bed, the floor there to give it a lot more strength
than just a nut on the bottom of that at the bottom of the bed so we'll slide on the bottom slide this up,
get the nuts on,
and then we gotta run some cable.
All right,
do a little paint on our bracket and we'll.
Get it up here,
get some hardware on it.
All right, with the battery securely fastened,
now we get our,
get our cables run through the bed floor
and drill some holes. I'm gonna mark
right in this area here where it lines up.
With the posts.
Mhm.
Grommet's in here.
Now our battery box kit comes with this sweet yellow battery cable that we can trim down to fit
and that's what I've done here with the negative.
All right,
we're gonna run this
right through
our provision
and it's gonna go down to the frame.
OK,
that over and tighten it down.
And then the positive, it needs to be long enough to get to the front of the truck, so that's why we've got a lot of length here with that.
I'm gonna leave that out
till I can get on the bottom side so I don't make sure they don't touch together, but once that's through there then we got a lid.
That'll go on top of this.
Nice clearance for it and then a strap goes around the top buttons it up
so we can check that off the list.
Our sun faded interior pieces get a fresh look and a new beginning.
Hey guys, well, as you can see, we're in the prep booth today and I'm starting to scuff some of our hard plastic interior pieces.
Now, in the 80s and 90s,
most of the car manufacturers like to use this hard plastic and it was known to get easily sun damaged.
Um, ours is in pretty good shape,
but it's the wrong color. We're going with a black interior on our 632 project,
so we're gonna scuff it,
shoot some black paint on it,
and we should be good to go.
So
let's get to it.
All right, now that we got these all hit with the gray scuff pad, we can go ahead and start wiping them down with our wax and grease remover.
Now basically what I'm doing is just spraying a direct to metal hot rod black over all this,
but you gotta make sure that whatever you're using,
it works with plastic because you don't want any of the solvents to be reacting and and mess up all your pretty plastic.
So we'll get this all wiped down.
Give it a nice hit with tack cloth and then we should be good to spray.
All right, now that we've got this all wiped down with our wax and grease remover,
we're gonna do another step, and we're gonna put a plastic adhesion promoter on our panels.
Now we've already given it a mechanical
tooth to it with our scuff pads.
This is gonna give us some chemical tooth and it's gonna help our paint stick to this nice hard plastic.
So
we'll go ahead and start spraying this out.
Now you're just gonna put a couple
light coats on it,
and with this stuff, they want you to spray it pretty quickly. We got to wait about 10 minutes and
no more than that. So we got to pretty much start spraying our paint directly after we spray this.
So we're gonna do these 4 panels for now
and then
we'll get to the rest of them so that way we're not rushing to try to get everything done.
And you don't want to cake this stuff on, you just want to do nice light coats.
All right, with our adhesion promoter on the pieces, we can go now and mix our paint and get to spraying these.
Well,
uh, Anthony gets the interior parts painted. I'm gonna get these doors assembled. We'll put new seals on them. We've reached out to steel rubber products and they sent us all the weather strip we need to freshen up this truck.
We're gonna start with this belt line molding right here.
It's on the outside of the window.
We'll get it popped in place.
Here.
All
right.
Now the inner window felt, well, it staples to the top of the door panel, so we'll attach that later on.
Now let's get the window channel in
and this they make it really nice in the mold,
they put an L and an R so you don't get confused on which side it goes.
It's gonna pop right into that groove.
Just a little patience
working it into that groove.
There she goes, that looks a lot better.
But
All right. Next, we'll get our weather strip in. This goes around the perimeter of the door.
Let's see here,
the direction.
Yep,
that right there.
Started down here at the bottom because that's where our seal plate is.
This stuff is really easy to install just slides right over that channel right there
rubber's got little teeth that hold on to it.
Now
back in the day they had a lot of
weather strip adhesive that you could put a little glue in there
you could still do that, but these things hold so tight I'm not gonna worry about putting any glue on these
factory didn't have any glue,
so we'll leave these
just like that.
Just gotta work it,
work it.
Right in there.
And without trimming it any,
that lines up perfect.
All right, one last piece
is this upper seal.
Get it out.
Goes around this top edge right here
between the door and the roof.
So
we'll start over here.
Same thing it just pops in that channel.
Beemus,
all right,
like it's that in there looks good.
We still got a lot of clean up to do in the cab, so don't get your panties in a wad.
Hey,
Mikey,
yeah,
got this hot off the press.
Turned out pretty good.
Yeah, I'll see how it matches up.
I'll tell you what,
that works out pretty good.
Yeah,
we got about 20 more pieces to do.
Well,
let's go get to working on them. Let's get it on.
Coming up we add some modern technology to our OBS to keep that power glued to the pavement.
Oh hey guys,
welcome back. Well, you've probably seen a lot of modern vehicles trash control or stability control. Well,
manufacturers utilize this to keep the car under control and keep you safe
going down the road,
but on the motor sports side of things,
traction control is typically deemed illegal as it's a performance advantage,
but that hasn't stopped many teams from trying to.
Get it on the car.
One of the most clever ways I've heard about traction control being installed is with this permanent marker. Yeah, the car goes through tech inspection. It's clean,
but when the driver goes through sign some autographs, he jumps into the car, he hooks this up, and now they've got that performance advantage.
Now we're gonna try to hook that up on our truck today. Let me show you how that's done.
For the system to work, the computer needs to see front wheel speed and rear wheel speed. Now the way that we're gonna do that, we've got these high quality hall effect sensors that we made a little bracket attached to the spindle, and it's gonna pick up the backside of the lug stud.
So as it spins, it's gonna create a signal and send that to the computer.
Now we know the sensor is working correctly because we've got some lights on the backside here that as you spin that it starts flashing that letting you know it's got a signal and then on the back of the truck for the rear wheel speed,
well, we've got that same type of sensor set up on the pinion it's gonna give us a good signal to the computer.
Now our Holly Terminator X wiring harness already has a pigtail for inputs and outputs,
sensor power and ground, and that's how we're gonna connect those sensors to the system here. Now we just got to go in.
To the software and identify those
first thing we're gonna do is go to the toolbox and add an individual config
and scroll down to traction
and that'll populate a tab up here. We'll get that that's for a trash control set up.
Now we're going with a wheel slip method that this is kind of like the entry level set up.
There are some more trash control softwares out there that you could buy that are much more sophisticated
that react really quick and then give you more options to control the engine,
but for what we're doing this will be fine.
Now we'll go over to our inputs and outputs
and identify these terminals
that the sensors are coming into the computer for so front wheel speed, rear wheel speed, it's a digital frequency,
and we've named the pins that they're connected to.
Then we can go back to the traction control and go to our wheel.
Slip
and click on timing.
Now what this does traction control, it's gonna look at the front wheel speed versus the rear wheel speed
and when there's a difference, like say the rear wheels are spinning a lot faster than the front,
well, it's gonna take timing, ignition timing out of the engine in an effort to slow it down to keep the car under
under control there so.
You can set up how much timing,
how quick you want it to react.
So what I've done is I've got 10 degrees of ignition timing to come out at max right there to help bring that engine down
so we can get traction again.
And you can like I've said, like I said, you can ramp this up,
uh, depending on how much you want, how quick you want it there. So
what we're gonna do now is let's go ahead and connect
to the computer here and we're gonna verify that the front wheel is hooked up there. So Anthony, go ahead and
spin that thing.
Uh, that front wheel
to see what we've got. Let's see here. Let me go over here to our gauges
and we gotta add the front wheel speed so we'll find that and bring that to this tab here
and OK,
and don't say that it populates right there. So let's see if it spins right there. Go ahead and spin it.
1787 6 1011 miles an hour. Oh yeah, that's, that's top speed of the meat right there so.
Now that we've verified that that works, what we gotta do is drive this thing down the road
and do some calibration between the front and rear, make sure those sensors are reading accurately and we can fine tune that. So
for now we're good to go.
Up next, with our dash looking brand new,
our gauge cluster needs to match with the classic design and modern performance.
Hey guys, welcome back.
Well,
before we get too far with assembly, we've got a little summit tech tip for you.
When it comes to reassembly, there's gonna be a lot of tightening of bolts and nuts, and you wanna make sure they're tight to the right spec.
Well,
use a torque wrench. Well,
sometimes that torque wrench needs to be checked.
So to do that, we've got this intercom torque checker that we got from SummitRacing. We're gonna see how close this torque wrench really is.
Now I've got it set to 85 ft pounds here
and we'll turn it on.
I'll let it zero out.
OK,
got it there
and
put this on and we're gonna creep up on it.
See how close to 85 we are.
For clicks
All right, and try it again.
I got it about 83 that time.
Let's see here,
65,
70.
5.
8181.
So
between 81, 83, that's about 34 pounds off,
so we can
calibrate that or we can recheck that or just keep that in mind. But every once in a while, you need to check these to make sure they're right.
Well guys, as you can see, we got our dash out of the paint booth, and man, it turned out really good.
It's one more piece of the puzzle we got install and that's our gauge cluster.
And before that we went to Classic Instruments and got one of their 88 to 94 OBS gauge clusters.
Now they give you all the sending units you need to make it run in your factory engine.
Obviously the engine in this truck 8 factories.
So we went with one of their Zeus link, uh, interfaces, and that allows us to directly connect to our Terminator X.
Now they also make one where You can plug it directly into your OBD 2 port and it'll work on the factory ECU.
Now we have an '89, obviously this truck's an '89, and then we have this style of gauge cluster,
so
they want you to reuse your factory diffuser and your lens. So we had to do some modifications to ours to make it work with the newer style gauge cluster.
So all I did was use a cutoff wheel,
cut this all out,
and cleaned it up.
So now all we got to do is get it in the dash so we can get it back in that truck.
So let's do it.
Now another thing to note with this lens, I had to drill this hole here for this post and that's what calibrates the uh new gauge set up.
Now, if you have later model gauges, it already has that hole drilled, so you won't have to worry about it,
but if you have the style of gauges we have, you're gonna have to drill a hole.
Now another way to uh set up the system is if you're using the Zeus link set up, then you just use the app, makes it nice and easy.
All right,
last piece of the puzzle here.
We'll get this thing tightened down and then this dash ready to go back in the truck.
I'm excited to see it in there.
All right,
well, we're dangerously close to getting this thing fired up and we're just itching to hear it run.
I got enough of the vitals hooked up that we can crank this thing over.
Last thing we need to do is put some oil in this
big block. So what we're gonna do here, we've got this Schafer's Supreme
7000
synthetic plus.
Now
we're using this stuff just because of the engine is combination here, it's gonna be what we need for the protection
and it's also recommended by our buddies down the street,
Pat and Frankie.
Now this is gonna give a superior film strength for extra protection against wear.
It has proven performance against thermal breakdown while suppressing the formation of deposits, sludge, and varnish.
plus with its friction modifiers will provide a strong barrier against scuffing and abrasion.
All right, well, there's a lot of good information I could tell you about engine oil, but one little nugget I'll drop the W in a multi-grade oil that stands for winter,
not weight as a lot of people think right there.
What do you say we get this breather on, put some fire into some holes.
I'm ready to hear this thing run.
Let's see, we'll get this pop back in here.
Yeah, we got enough of our
management system hooked up to where we can fire this thing up and see what it sounds like.
All right, that looks good.
Hit the key.
Come on baby.
Good,
yep.
I think that's a success, brother.
That sounds great.
Yeah,
ain't nothing like a big block Chevy.
Yeah, well, we still got a whole lot of work to do as you can see, so we're gonna get back to work,
catch you guys next time on Music City Trucks.
More Chevy OBS 632 SS Episodes

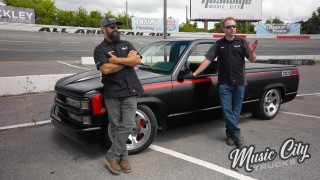
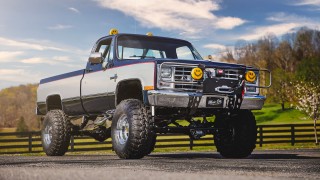
Music City Trucks Featured Projects




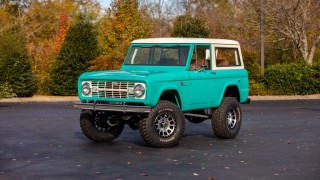
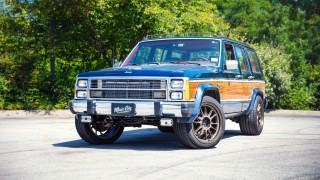
Music City Trucks Builds


Want more content like this?
Join the PowerNation Email NewsletterParts Used In This Episode


Schaeffer Specialized Lubricants
Schaeffer's Supreme 7000 Synthetic Plus Racing Oil
Classic Instruments
1988-94 OBS Chevy Truck Package (Gauge Set)
Classic Instruments
Zeus-Link Gauge Interface Module
Steele Rubber Products
Door & Window Weatherstrip



