Video Transcript
[Eric] You're watching Powernation!
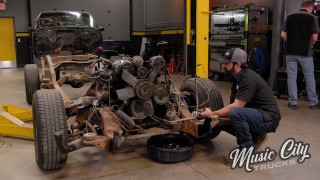
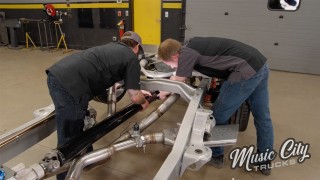
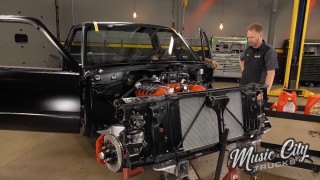
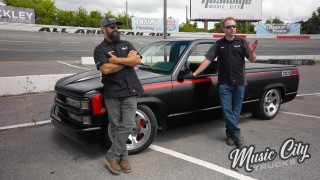
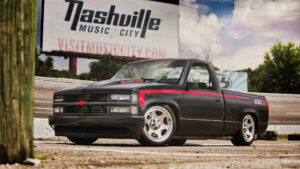
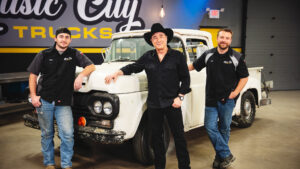
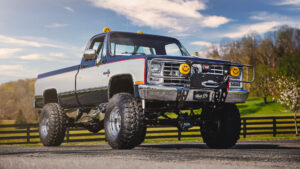
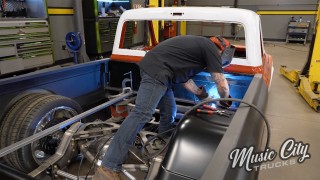
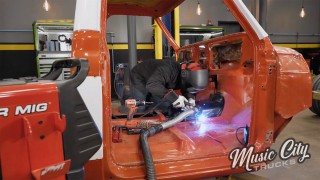
[Anthony] Today on Music City Trucks. [Mike] I'm gonna cut and grind on you. Give you a performance suspension. Get you close to the ground. Make you handle like your on rails. In the back half give you a C-notch. We'll get that rear end tucked up nice and tight. Then I'm gonna give you a big block. Give you 500 more horsepower you hear me. [Anthony] Mike, what are you doing man? [Mike] Uh, nothing! [ Music ] Hey y'all, welcome to Music City Trucks. Today we got our 1989 Chevy back in the shop. [Anthony] Well what's left of it. We got it stripped down to a bare chassis. Let us show you how we got there. We bought this '89 Silverado with a big plan in mind. We gave it a little shakedown run to check to see what we had to work with. The truck was running and driving but it had a few issues to say the least. [Mike] We then took it over to the guys over at Engine Power and strapped it to the dyno to see how much horsepower was left in this tired old small block. The 200 horses wasn't gonna cut it for our expectations. So we got her in the shop and like Luke Bryan says, we stripped it down to the bare bones. [Anthony] So now that we have a bare frame it's a good opportunity to go ahead and check for stress cracks. Make sure everything's straight and true so that the foundation that we're starting with is good to go. We're also gonna take this time to go ahead and mockup the front and rear suspension. So that way after the truck gets back from powder coat we're not gonna have to do any drilling, any welding, or any kind of fabrication on it. So we're not messing up any of that pretty new powder coat. [Mike] For the suspension we got this RideTech kit from Summit Racing. I've got our stock components laid out to give you a good visual on the comparison there. RideTech calls these their Strong Arm system. Not only are they stronger than the factory stamped steel unit but they're also lighter. Any time you can reduce the weight of the vehicle it's gonna be quicker and a lot more fun to drive. They also utilize these Delrin bushings that are gonna provide a firmer feel versus the stock rubber bushings. Moving on we've got these spindles here. These are a two inch drop spindle. So that gets that front stance down low like we like it. Then over on the coil over this is a coil over shock and spring setup. It also provides another level of adjustability from the ride height to this knob on the top that controls the firmness. We can drive this down the road. If it's a little firm, a little soft, we can make an adjustment by turning this knob and it changes the feel of that ride. All this stuff can be put on in a weekend by anybody. You don't necessarily have to have this thing down to the frame. But because we're down at the frame let's go ahead and get this bolted on. Now this kit is about 89.3 percent bolt on but there are a couple of modifications. The first one we have to open up this shock mount to accept this bushing. [Anthony] In order to do that we're gonna use a three quarter inch uni-bit. I like to wrap a little bit of electrical tape to the depth that I'm gonna be drilling. So that way I don't make the hole bigger than I want to. [ Music ] [ drill humming ] [ Music ]
[ drill humming ] [Mike] Alright, got that one done? [Anthony] She's all hollared out. [Mike] Our next modification you may or may not have to do depending on your frame. This is our upper shock mount. We're gonna put this down in here. We've gotta take this and the opening, they need to line up. Notice they don't. Yours may be the same way. To fix that we've got to cut the fingers that locate the spring on the bottom side. To show you we're gonna flip it over so you can get a better view. [ Music ]
With our frame upside down now you can get a better view of these fingers that locate that stock spring, and that's what we've got to cut out. Appartently we flipped upside down the life of some little mouse or squirrel. So we're gonna go ahead and get that cleaned out and cut it out. Hit that button for me Anthony. [Anthony] Got it! [ vacuum humming ] [ Music ]
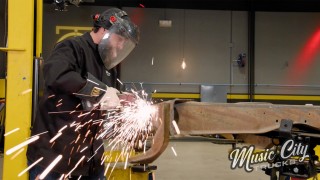
[Mike] Alright, your turn. [Anthony] I'm gonna be using one of these straight die grinders with a cutoff wheel on the end of it. You could use a plasma cutter, you could use a torch, but I think this is gonna be the best way to do it. Whenever I'm using any kind of cutoff wheel I like to have a shield on and not safety glasses cause there's a chance that these could explode on you and you don't want to catch one of these in the face. So let's get to cutting. [ grinder buzzing ] [ Music ] [ grinder buzzing ] [ Music ]
[Anthony] And we're gonna finish it up with a grinder and a flap disc. [ grinder buzzing ] [ Music ] [ grinder buzzing ] [ Music ] [Anthony] Alright, let's see how we're looking. [ Music ] I think we're good. When you're doing this at home with the tolerances on these frames. Yours may be a little different. It may take a little extra massaging here and there but you'll have to figure that out when you get into it. Looks like we're good here. Let's get to the other side so we can get this suspension mocked up. Up next, we finish mocking up our front suspension.
[Mike] Hey guys, welcome back. We got our spring pocket cleaned up and we got the frame flipped back over. Now it's time to address these upper control arm mounts. Now you notice this big slot right here. Well that is where you get your adjustment for your vehicle's alignment like castor and camber. But on this particular one, one of those modifications from the past is showing its ugly head again. What they did is they welded this washer in place to give it the set it and forget it mindset on their adjustment. So we need that adjustment back in here. So we've gotta cut this washer out so we're back to ground level there. Let's go ahead and get it cut out. [ grinder buzzing ] [ Music ]
[ grinder buzzing ] [Mike] This one's too slow. [Anthony] Give this one a whirl? [ grinder buzzing ] [ Music ]
[ hammer tapping ] [ Music ] [Mike] Off she goes. [ grinder buzzing ] [Mike] With those washers off now we've just got to grind her smooth. [ grinders buzzing ] [ Music ] [ grinder buzzing ] [Mike] That's what we're looking for right there. We're gonna finish getting these front pieces mocked up. That way we know our suspension's ready to go. [Anthony] I'm excited to see these on. [Mike] Alright! [ Music ] [ metal clanging ] [ hammer banging metal ] [Mike] Shock pieces, get this in here. [ Music ]
Now I'll use that little bit of leverage to help pop this through and get some threads. See we don't have any threads popping through. I'm just gonna, uuhh, like that. There we go, boom! [ Music ]
We'll get the last piece, the upper control arms, on here. These have some nice ball joints on them too. [Anthony] They really do. They have a lot of travel in them. On these lowered trucks sometimes the ball joints angles aren't very happy. These help solve that problem. [ Music ]
[Mike] Other than the front sway bar that completes the front suspension with it mocked up. [Anthony] I think we're looking pretty good. What do you say we head to the back? Coming up, we do a little bit more cutting and grinding before we get our 1500 suspended.
[Anthony] Hey guys, welcome back! So now that we got the front suspension all mocked up it's time to tackle the rear. Now we're continuing the RideTech suspension system with one of their wishbone setups but as you can see our frame's already been modified. [Mike] Sins of modifications past are showing their ugly head again. As you can see somebody got a little aggressive with the cutoff wheel when they first installed these C-notch kits. Ours has a new C-notch and it may take a little bit of trimming. First thing we need to do is get these brackets off and see how much work we've got to do. [ Music ] [ drill humming ] [ Music ] [ hammer tapping ] [Mike] That's movement. All the bolts in there she was under pressure. [ Music ] Come on little buddy. Would you just. There you go. [ Music ] [ drill humming ] [Mike] Before that last bolt comes out how about we put a little support on the back here just in case. [Anthony] I think that's a pretty good idea. [ Music ]
With our old C-notch removed it's a good idea to hit the frame with a grinder, clean up any of the burrs from the original holes and any of the muck that found its way behind the old bracket. [Mike] You may have heard us use the term C-notch already and you might be thinking, what is he talking about? Well when you lower your truck there's only so far you can drop the frame before it hits the rear axle and you have to notch the frame to get it to go even lower. And that's what we've got to do here with this RideTech kit. This boxed section right here replaces the area in your frame to give it that strength. So RideTech gives you this template in the kit that you can line up on your frame rail to give you an accurate place to cut your frame. The first thing you have to do is align it in the correct spot, and they give you these printed holes on the sheet here that you line up with the preexisting holes in the frame. That way you know you're in the same spot. One way I like to do this is I've got a light here and we shine it on the back side and get our hole lined up directly in the alignment spot. So we know, okay, our template is right where we need and we can go ahead and mark these locations and cut out our frame. We'll start by punching the center for our holes. The reason for these holes is to give us a radius on the transition for our edge when we got to cut the C-notch. Next we'll transfer our lines to the frame so we know where to cut. Then we can remove the template and start drilling. Start by using a smaller bit for our pilot hole before stepping up to a half inch drill bit. [ drill humming ] [ Music ] [ drill humming ] Now that we've got our holes drilled we've got to connect the dots here for when we cut it out. I like to use a piece of tape. Give us a hard line when we go to draw it out with our paint pen. Right there, and then I'm gonna go across the top from the top of this hole on each side. Then just that little section's all we've got to trim off on the back side. It won't be too hard. Take my paint pen and I'm just gonna use that tape as the hard edge to draw the line. [ Music ]
Now we can take our tape off. There's our cut line. Get that cut out. [Anthony] I'm gonna be using the cutoff wheel here to cut these lines out. I like to use a cutoff wheel cause I can get real precise with the cut. You just have to be sure that you're using nice, even, light pressure with the wheel. Let the wheel do the work. [ cutoff wheel buzzing ] [Anthony] And once both sides are removed I'll hit it with the grinder just to knock down the burrs and get it all cleaned up. Looking good? [Mike] Yeah that looks good. [Anthony] Let's crank her down. See how we're looking over here. [Mike] So we've got our brackets here installed on the frame. We've got to drill out the holes to mount the bolts but RideTech recommends you use the bracket as a guide to drill out the hole. So we've got it clamped down in place. Got it positioned where we want. Now I'm just gonna center punch these holes and get drilling. [ drill humming ] [ Music ] [ drill humming ]
[Anthony] Let's finish this up here Mike so we can get that crossmember in. [Mike] Get all these tight and keep on mocking it up and see how low this thing will go. [Anthony] Let's do it. [ Music ] [Mike] Coming up, we brace ourselves for some more rear axle clearance.
[Anthony] Hey guys, welcome back. So now that we got our notches installed on the chassis it's time for us to move forward, and the next step that we've got to tackle is getting this crossmember installed in the truck. [Mike] Let me see that thing. This piece from RideTech, it draws from off these brackets here. It's gonna give us a little bit more strength in the back of the truck. All that power we're putting to it we'll definitely need that. [Anthony] This is a real stout piece that's really gonna do the trick, and it's also gonna give us a spot to mount our wishbone coming off the rear end.
[Mike] Got that tight. Now RideTech makes these suspension kits for the stock 10-bolt rear axle or if you've got one of those SS-454 trucks with a 14-bolt they make one of those as well. That's what I actually ordered for our kit was a 14-bolt but as projects typically do and change and evolve we decided to go with this Ford nine inch from Quick Performance. This is also gonna be strong enough for our power but they also integrate these brackets that will bolt right up to our RideTech kit. [Anthony] Now with our bracket being that it was a 14-bolt it came with a three and a half inch tube diameter where our nine inch Ford has a three inch diameter. So all I did was whip up a couple of doubler plates real fast with correct radius and that way we can bolt it right up and it keeps it tight and locked in. What do you think we get this thing under the truck Mike? [Mike] Yeah, let's get it under here. Let's see. Set it on there and it should be pretty centered. [ Music ] Pretty good right there. [ Music ]
[ ratchets clicking ] [Mike] Next piece we've got are the lower shock mounts. They recommend you go into the two and three hole from the bottom right here. Sometimes you can adjust those. Say you don't like the ride height. Maybe like Anthony you want to put it all the way on the ground. You can move that down a spot and change your ride height. [Anthony] The lower the better for me. [ ratchet clicking ] [ Music ] [Mike] Next we've got our lower shock stud. Put a little red thread locker on here. Tighten it down. And we'll go ahead and leave this in here. So we're gonna hit it with a torque wrench, about seven pounds. [ Music ] Go ahead and lower this thing down. We'll get this thing close and get these front bars on here. [Anthony] Let's do it. Now that we got the frame down low we can go ahead and install our lower link bars. You've just got to pay attention when installing these you want to put this R-joint towards the back underneath the rear end and the fixed joint up here on the frame. They give you a couple of different misalignment spacers you've got to use. You just gotta pay attention and make sure you're putting the right ones in the right place. For the fronts you want to put the longer ones in. We'll go ahead and do that. [ Music ] [ metal clanging ] [ Music ]
[Mike] So the unique thing about this piece from RideTech, this wishbone, is it not only locates the rear end from the front and back cause it wants to rotate but also side to side movement and that triangulation right there. [Anthony] Try not to act too shocked there Mike. [Mike] Get these coil overs installed here. These things are super nice. Once we get these on that'll complete our mockup of this unit. [ Music ] With that, that completes the mockup of this suspension kit. We've got a little trimming of the bed when we get it back on here. Other than that it's a really nice kit. [Anthony] It really went together pretty smoothly. Still got a few more things to do back here. We want to install the tank. Maybe stiffen up the back of the chassis. We're also gonna add a couple of plates to the middle of the chassis to stiffen it up. That's gonna be for next time. [Mike] Let's go check on that engine. [Anthony] Let's see if that thing isn't running yet.
Show Full Transcript
[Anthony] Today on Music City Trucks. [Mike] I'm gonna cut and grind on you. Give you a performance suspension. Get you close to the ground. Make you handle like your on rails. In the back half give you a C-notch. We'll get that rear end tucked up nice and tight. Then I'm gonna give you a big block. Give you 500 more horsepower you hear me. [Anthony] Mike, what are you doing man? [Mike] Uh, nothing! [ Music ] Hey y'all, welcome to Music City Trucks. Today we got our 1989 Chevy back in the shop. [Anthony] Well what's left of it. We got it stripped down to a bare chassis. Let us show you how we got there. We bought this '89 Silverado with a big plan in mind. We gave it a little shakedown run to check to see what we had to work with. The truck was running and driving but it had a few issues to say the least. [Mike] We then took it over to the guys over at Engine Power and strapped it to the dyno to see how much horsepower was left in this tired old small block. The 200 horses wasn't gonna cut it for our expectations. So we got her in the shop and like Luke Bryan says, we stripped it down to the bare bones. [Anthony] So now that we have a bare frame it's a good opportunity to go ahead and check for stress cracks. Make sure everything's straight and true so that the foundation that we're starting with is good to go. We're also gonna take this time to go ahead and mockup the front and rear suspension. So that way after the truck gets back from powder coat we're not gonna have to do any drilling, any welding, or any kind of fabrication on it. So we're not messing up any of that pretty new powder coat. [Mike] For the suspension we got this RideTech kit from Summit Racing. I've got our stock components laid out to give you a good visual on the comparison there. RideTech calls these their Strong Arm system. Not only are they stronger than the factory stamped steel unit but they're also lighter. Any time you can reduce the weight of the vehicle it's gonna be quicker and a lot more fun to drive. They also utilize these Delrin bushings that are gonna provide a firmer feel versus the stock rubber bushings. Moving on we've got these spindles here. These are a two inch drop spindle. So that gets that front stance down low like we like it. Then over on the coil over this is a coil over shock and spring setup. It also provides another level of adjustability from the ride height to this knob on the top that controls the firmness. We can drive this down the road. If it's a little firm, a little soft, we can make an adjustment by turning this knob and it changes the feel of that ride. All this stuff can be put on in a weekend by anybody. You don't necessarily have to have this thing down to the frame. But because we're down at the frame let's go ahead and get this bolted on. Now this kit is about 89.3 percent bolt on but there are a couple of modifications. The first one we have to open up this shock mount to accept this bushing. [Anthony] In order to do that we're gonna use a three quarter inch uni-bit. I like to wrap a little bit of electrical tape to the depth that I'm gonna be drilling. So that way I don't make the hole bigger than I want to. [ Music ] [ drill humming ] [ Music ]
[ drill humming ] [Mike] Alright, got that one done? [Anthony] She's all hollared out. [Mike] Our next modification you may or may not have to do depending on your frame. This is our upper shock mount. We're gonna put this down in here. We've gotta take this and the opening, they need to line up. Notice they don't. Yours may be the same way. To fix that we've got to cut the fingers that locate the spring on the bottom side. To show you we're gonna flip it over so you can get a better view. [ Music ]
With our frame upside down now you can get a better view of these fingers that locate that stock spring, and that's what we've got to cut out. Appartently we flipped upside down the life of some little mouse or squirrel. So we're gonna go ahead and get that cleaned out and cut it out. Hit that button for me Anthony. [Anthony] Got it! [ vacuum humming ] [ Music ]
[Mike] Alright, your turn. [Anthony] I'm gonna be using one of these straight die grinders with a cutoff wheel on the end of it. You could use a plasma cutter, you could use a torch, but I think this is gonna be the best way to do it. Whenever I'm using any kind of cutoff wheel I like to have a shield on and not safety glasses cause there's a chance that these could explode on you and you don't want to catch one of these in the face. So let's get to cutting. [ grinder buzzing ] [ Music ] [ grinder buzzing ] [ Music ]
[Anthony] And we're gonna finish it up with a grinder and a flap disc. [ grinder buzzing ] [ Music ] [ grinder buzzing ] [ Music ] [Anthony] Alright, let's see how we're looking. [ Music ] I think we're good. When you're doing this at home with the tolerances on these frames. Yours may be a little different. It may take a little extra massaging here and there but you'll have to figure that out when you get into it. Looks like we're good here. Let's get to the other side so we can get this suspension mocked up. Up next, we finish mocking up our front suspension.
[Mike] Hey guys, welcome back. We got our spring pocket cleaned up and we got the frame flipped back over. Now it's time to address these upper control arm mounts. Now you notice this big slot right here. Well that is where you get your adjustment for your vehicle's alignment like castor and camber. But on this particular one, one of those modifications from the past is showing its ugly head again. What they did is they welded this washer in place to give it the set it and forget it mindset on their adjustment. So we need that adjustment back in here. So we've gotta cut this washer out so we're back to ground level there. Let's go ahead and get it cut out. [ grinder buzzing ] [ Music ]
[ grinder buzzing ] [Mike] This one's too slow. [Anthony] Give this one a whirl? [ grinder buzzing ] [ Music ]
[ hammer tapping ] [ Music ] [Mike] Off she goes. [ grinder buzzing ] [Mike] With those washers off now we've just got to grind her smooth. [ grinders buzzing ] [ Music ] [ grinder buzzing ] [Mike] That's what we're looking for right there. We're gonna finish getting these front pieces mocked up. That way we know our suspension's ready to go. [Anthony] I'm excited to see these on. [Mike] Alright! [ Music ] [ metal clanging ] [ hammer banging metal ] [Mike] Shock pieces, get this in here. [ Music ]
Now I'll use that little bit of leverage to help pop this through and get some threads. See we don't have any threads popping through. I'm just gonna, uuhh, like that. There we go, boom! [ Music ]
We'll get the last piece, the upper control arms, on here. These have some nice ball joints on them too. [Anthony] They really do. They have a lot of travel in them. On these lowered trucks sometimes the ball joints angles aren't very happy. These help solve that problem. [ Music ]
[Mike] Other than the front sway bar that completes the front suspension with it mocked up. [Anthony] I think we're looking pretty good. What do you say we head to the back? Coming up, we do a little bit more cutting and grinding before we get our 1500 suspended.
[Anthony] Hey guys, welcome back! So now that we got the front suspension all mocked up it's time to tackle the rear. Now we're continuing the RideTech suspension system with one of their wishbone setups but as you can see our frame's already been modified. [Mike] Sins of modifications past are showing their ugly head again. As you can see somebody got a little aggressive with the cutoff wheel when they first installed these C-notch kits. Ours has a new C-notch and it may take a little bit of trimming. First thing we need to do is get these brackets off and see how much work we've got to do. [ Music ] [ drill humming ] [ Music ] [ hammer tapping ] [Mike] That's movement. All the bolts in there she was under pressure. [ Music ] Come on little buddy. Would you just. There you go. [ Music ] [ drill humming ] [Mike] Before that last bolt comes out how about we put a little support on the back here just in case. [Anthony] I think that's a pretty good idea. [ Music ]
With our old C-notch removed it's a good idea to hit the frame with a grinder, clean up any of the burrs from the original holes and any of the muck that found its way behind the old bracket. [Mike] You may have heard us use the term C-notch already and you might be thinking, what is he talking about? Well when you lower your truck there's only so far you can drop the frame before it hits the rear axle and you have to notch the frame to get it to go even lower. And that's what we've got to do here with this RideTech kit. This boxed section right here replaces the area in your frame to give it that strength. So RideTech gives you this template in the kit that you can line up on your frame rail to give you an accurate place to cut your frame. The first thing you have to do is align it in the correct spot, and they give you these printed holes on the sheet here that you line up with the preexisting holes in the frame. That way you know you're in the same spot. One way I like to do this is I've got a light here and we shine it on the back side and get our hole lined up directly in the alignment spot. So we know, okay, our template is right where we need and we can go ahead and mark these locations and cut out our frame. We'll start by punching the center for our holes. The reason for these holes is to give us a radius on the transition for our edge when we got to cut the C-notch. Next we'll transfer our lines to the frame so we know where to cut. Then we can remove the template and start drilling. Start by using a smaller bit for our pilot hole before stepping up to a half inch drill bit. [ drill humming ] [ Music ] [ drill humming ] Now that we've got our holes drilled we've got to connect the dots here for when we cut it out. I like to use a piece of tape. Give us a hard line when we go to draw it out with our paint pen. Right there, and then I'm gonna go across the top from the top of this hole on each side. Then just that little section's all we've got to trim off on the back side. It won't be too hard. Take my paint pen and I'm just gonna use that tape as the hard edge to draw the line. [ Music ]
Now we can take our tape off. There's our cut line. Get that cut out. [Anthony] I'm gonna be using the cutoff wheel here to cut these lines out. I like to use a cutoff wheel cause I can get real precise with the cut. You just have to be sure that you're using nice, even, light pressure with the wheel. Let the wheel do the work. [ cutoff wheel buzzing ] [Anthony] And once both sides are removed I'll hit it with the grinder just to knock down the burrs and get it all cleaned up. Looking good? [Mike] Yeah that looks good. [Anthony] Let's crank her down. See how we're looking over here. [Mike] So we've got our brackets here installed on the frame. We've got to drill out the holes to mount the bolts but RideTech recommends you use the bracket as a guide to drill out the hole. So we've got it clamped down in place. Got it positioned where we want. Now I'm just gonna center punch these holes and get drilling. [ drill humming ] [ Music ] [ drill humming ]
[Anthony] Let's finish this up here Mike so we can get that crossmember in. [Mike] Get all these tight and keep on mocking it up and see how low this thing will go. [Anthony] Let's do it. [ Music ] [Mike] Coming up, we brace ourselves for some more rear axle clearance.
[Anthony] Hey guys, welcome back. So now that we got our notches installed on the chassis it's time for us to move forward, and the next step that we've got to tackle is getting this crossmember installed in the truck. [Mike] Let me see that thing. This piece from RideTech, it draws from off these brackets here. It's gonna give us a little bit more strength in the back of the truck. All that power we're putting to it we'll definitely need that. [Anthony] This is a real stout piece that's really gonna do the trick, and it's also gonna give us a spot to mount our wishbone coming off the rear end.
[Mike] Got that tight. Now RideTech makes these suspension kits for the stock 10-bolt rear axle or if you've got one of those SS-454 trucks with a 14-bolt they make one of those as well. That's what I actually ordered for our kit was a 14-bolt but as projects typically do and change and evolve we decided to go with this Ford nine inch from Quick Performance. This is also gonna be strong enough for our power but they also integrate these brackets that will bolt right up to our RideTech kit. [Anthony] Now with our bracket being that it was a 14-bolt it came with a three and a half inch tube diameter where our nine inch Ford has a three inch diameter. So all I did was whip up a couple of doubler plates real fast with correct radius and that way we can bolt it right up and it keeps it tight and locked in. What do you think we get this thing under the truck Mike? [Mike] Yeah, let's get it under here. Let's see. Set it on there and it should be pretty centered. [ Music ] Pretty good right there. [ Music ]
[ ratchets clicking ] [Mike] Next piece we've got are the lower shock mounts. They recommend you go into the two and three hole from the bottom right here. Sometimes you can adjust those. Say you don't like the ride height. Maybe like Anthony you want to put it all the way on the ground. You can move that down a spot and change your ride height. [Anthony] The lower the better for me. [ ratchet clicking ] [ Music ] [Mike] Next we've got our lower shock stud. Put a little red thread locker on here. Tighten it down. And we'll go ahead and leave this in here. So we're gonna hit it with a torque wrench, about seven pounds. [ Music ] Go ahead and lower this thing down. We'll get this thing close and get these front bars on here. [Anthony] Let's do it. Now that we got the frame down low we can go ahead and install our lower link bars. You've just got to pay attention when installing these you want to put this R-joint towards the back underneath the rear end and the fixed joint up here on the frame. They give you a couple of different misalignment spacers you've got to use. You just gotta pay attention and make sure you're putting the right ones in the right place. For the fronts you want to put the longer ones in. We'll go ahead and do that. [ Music ] [ metal clanging ] [ Music ]
[Mike] So the unique thing about this piece from RideTech, this wishbone, is it not only locates the rear end from the front and back cause it wants to rotate but also side to side movement and that triangulation right there. [Anthony] Try not to act too shocked there Mike. [Mike] Get these coil overs installed here. These things are super nice. Once we get these on that'll complete our mockup of this unit. [ Music ] With that, that completes the mockup of this suspension kit. We've got a little trimming of the bed when we get it back on here. Other than that it's a really nice kit. [Anthony] It really went together pretty smoothly. Still got a few more things to do back here. We want to install the tank. Maybe stiffen up the back of the chassis. We're also gonna add a couple of plates to the middle of the chassis to stiffen it up. That's gonna be for next time. [Mike] Let's go check on that engine. [Anthony] Let's see if that thing isn't running yet.