Video Transcript
[Anthony] You're watching Powernation!
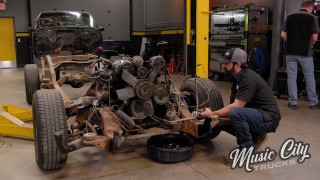
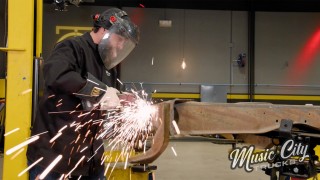
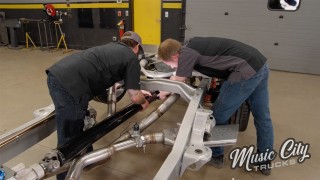
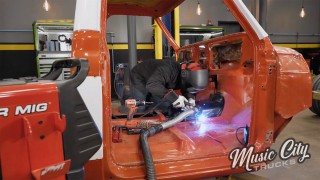
[Anthony] Today on Music City Trucks we strengthen our chassis to help handle our new power plant. We'll also make some room for our new fuel tank. [Mike] There she goes! Plus drop a new drivetrain in its final resting place. [ Music ] Hey guys, welcome to Music City Trucks. We are full steam ahead on our 632 SS project, and with over 800 horsepower from that rat engine we need to make sure our frame is strong enough to handle it. [Anthony] And in order for us to do that we're gonna weld in these boxing plates. GM has utilized this C-channel style of frame starting with the early C-10 trucks all the way up to these OBS'. Now they got a little wiser in their old age and started boxing the front of these chassis but as you can see here the middle is still wide open. So once we get these welded into place hopefully that'll help us from keeping our chassis from twisting coming off the line. In order to do that we've got to address a couple of things here on the frame first. First off we've got to get this all cleaned up in here and get it ready to be coated with some kind of encapsulater or some kind of coating that's gonna keep it from rusting on the inside. Then the only other we've gotta do is cut this radius out to get this plate to slide up here nice and flush so we can get a good weld on it. Let's go ahead and grab the wire wheel and get to it. [ grinder buzzing ] [ pneumatic drill vibrating ] [ Music ] [ grinder buzzing ] [ Music ]
[ torch hissing ] [ Music ]
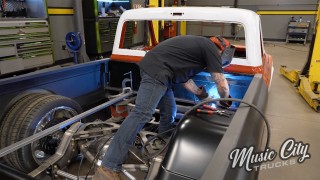
[ grinder buzzing ] [Mike] Now once we get those boxing plates on here we're not gonna have access to the inside of that frame rail. So to protect it we're gonna apply this POR-15 Rust Preventative on the inside of this frame rail to keep it coated and last a long time. It's a multi-step process. The first thing you want to do is hit it with this cleaner/degreaser. Now Anthony already took the wire wheel and knocked off the surface rust there. So we're ready to get this thing cleaned, prepped, and painted. Cleaner/degreaser mixes a four to one ratio with hot water. So we're gonna add some water here. And little bit more! Perfect, right there. We've got it mixed up. Now let's get it cleaned up. POR's directions for this metal prep they want you to keep the surface wet for 10 minutes. So we're gonna keep on applying this stuff for 10 minutes and then we'll rinse it off and move on to the next step. Here on the show they call me Mike but right now it's Michelangelo. [ Music ] Once the cleaner is done we'll hit it with some water just to rinse it off. [ Music ] Next step is our metal prep. It's a metal etching rust neutralizer. This stuff is gonna prepare the surface for best adhesion of the POR-15 Rust Preventative Coating we're about to put on. With the metal prep same thing. They want to keep the surface wet for 10 minutes. [ Music ] [ spray bottle whoosh ] [ Music ] [Mike] We got our metal prep finished and we know it's working correctly because this white finish, how it's changed colors, that's normal. We know that etching process is working. Now we're gonna hit it with some paint. Gonna stir this thing up. Now POR doesn't recommend shaking. So they prefer stirring. I used my best stirrer for the job. Perfect! [ Music ] Because we're gonna be welding on this area here I just put some tape down cause we don't want the paint right there. We're gonna put a minimum of two coats on this. So you don't have to put it on really thick the first time. Get a little coverage and go back and do another coat. The temperature rating on this stuff is pretty good. When we send this to powder coat and they bake that finish on I don't think there's gonna be a problem there. [Anthony] So now that we have our frame all coated on the inside we can go ahead and start boxing it. Now we got our plates here from OBS Chevy Racing dot com. They're laser cut, fit real well, and saved us a lot of time. Now the only thing we had to do with them is squirt some paint on the back side and put a nice bevel on here from a full penetration well. Now there's nothing left to it but to get it tacked up and get it welded on. So let's do it. [ Music ] Alright we got that all tacked in. Only thing left to do is burn it all in and then we'll be ready to roll. [ Music ] [Mike] Stay tuned for some riveting action on our chassis.
[Anthony] Hey guys, welcome back. So we got our boxing plates all welded in but we still have a couple more things to tackle in the rear. [Mike] We decided to relocate our fuel tank to the back of the truck to give us a little bit better balance for the vehicle. We reached out to our friends at Tanks Inc and they sent us this 18-gallon rear mount fuel tank for the back of the vehicle here. Now as you can see we've got a crossmember in the way. So we need to get rid of that and give us some real estate. [Anthony] But when we take this crossmember out we're not gonna have much structural rigidity in the back here. So I whipped out this tubular crossmember. We're gonna go ahead and get this tacked in. After that's done we'll go ahead and knock these rivets out and get this frame cleaned up back here. [ grinder buzzing ] [Anthony] Before we tack this into place we want to go ahead and hit it with a grinder. Get it cleaned up and ready for a weld. [ Music ] [ grinder buzzing ] [ welder crackling ] [ Music ] [ welder crackling ]
[Mike] I'll tell you what. You're definitely the better welder of the two of us. [Anthony] Appreciate that sir. I've been using that squirt gun for quite a long time. [Mike] Like we said before, we've got to put that fuel tank in this general area but we've got something in the way. So we've got to get this brace out. Now that we're strong enough let's pop this out. I'm gonna show you a couple of tricks to get all these rivets out. We've got 21 rivets on here to bust out and get these brackets off of here. To get these rivets off I'm gonna use the cutoff wheel to cut a cross pattern in the top. Then we'll use an air chisel to knock the top off. [ air chisel vibrating ] [ saw buzzing ] [ air chisel vibrating ] [ hammer banging metal ] [Mike] There she goes! [ Music ] [Anthony] So now that we got our brackets and our crossmember removed from the rear of the chassis we can go ahead and start getting our tank mounted up. I already whipped up a couple of these brackets here. All I did was take a tab, weld a couple of gussets on the end, and that way we can go ahead and get this thing tacked into place on our frame, pop a couple of holes in it, and we'll be good to go. [ welder crackling ] [ Music ] Now that we have our brackets tacked into place I'm gonna use a transfer punch to mark the hole locations. I'm gonna take the tank out. I'm gonna drill those out and then we'll be good to go. Let's see if we can slide this thing out of here. [ Music ] [ drill humming ]
[ drill humming ]
[Anthony] Let's get this tank in there and see what we're looking like. [ Music ] That all looks pretty good. Now the only thing we have left to do is possibly tap these brackets to make installation of the tank from underneath a little bit easier. Other than that all I've gotta do is get these brackets burned in and then we'll be good to go. [Mike] Coming up, we get our transmission ready for installation.
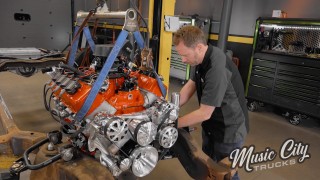
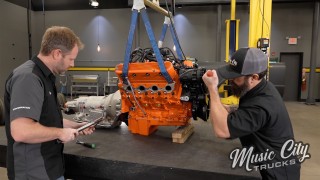
[Mike] It's time to mount up the transmission to our engine, and for the transmission we're going with a manual from American Powertrain. They sent us this Tremec Magnum six-speed transmission and everything else we need to make this install complete. From the bell housing, to the throw out bearing, to the clutch. This clutch setup is trick. We've got the flywheel here and this is a twin disc clutch setup with the pressure plate as well. You've got two clutch discs, the floater. All this clutch setup will handle 1,100 foot pounds of torque, and that's more than enough for our application here. Let's go ahead and get it installed. First thing is the pilot bearing. Now the pilot bearing lives in the back of the crank shaft here. Its job is to support the front of the input shaft. This thing is a very tight fit. So I had this sitting in the freezer for a little bit. Kinda make it a little bit smaller. Give it an easier time to install it. Just want to make sure that's flush with that crank surface. Next thing we've got to install is the front part of our bell housing, or scatter shield. This is a safety bell housing. So in the event of a clutch explosion it's all contained inside the bell housing. So we'll get this up here. It just rides on the dowel pins and that seals that off. Next we need our flywheel, and we'll set that up there. Got to hold it just right. We'll get our bolts in here. You always want to put new flywheel bolts any time you have this on and off. These things see a lot of stress. It's a good investment to go ahead and put some new bolts on. We'll throw a dab of thread locker on here and get them all started. Once we get them started we'll run them down and then I'll torque them to 40 pounds one pass, and then we'll finish it off with 60 pounds in a star pattern. Make sure it's seated nice and flush with the back of the crankshaft. Now we're ready to get our first clutch disc on here but I'm gonna take these bolts. I had to put these nuts on here to hold all these washers. They had these spacers on here to get the air gap and clutch pack clearances set when they shipped it to us. We thank them for that. So we want to leave those in the right spot. Get that off of there. Our clutch disc first and this is our clutch alignment tool right here. This simulates the front of the input shaft here. It looks just like that. We'll use this to go into the splines here. It should fit, there it goes. Then this will ride in the back of that pilot bearing. Get that centered. So that's our first disc. You want to make sure these are the right direction cause you could have this backwards. This says flywheel side, f-w, flywheel side.
Now we'll take our floater. Look at our marks right here. It's where they balanced it. We'll get that to line up. Then we'll take our three little nuts. Install on here. Got those tight. It still moves, so that's good right there. We'll go ahead and torque those little nuts, 25 foot pounds. Now I'm gonna take off the nuts for the pressure plate. So we'll grab our outer disc. Now we need our pressure plate. Get our pressure plate here, get our washers all the way around. Then we'll get all our nuts started cause we've got to be particular on how we tighten this down. When we run this down we're gonna run it down in a star pattern but we also have to maintain our disc in the center of the crankshaft cause if you tighten it up and it's offside the input shaft's never gonna slide in. We're gonna use our installation tool to hold our center, our happy spot, left to right, up and down. Then we'll take our impact and start to run these down until they touch in a star pattern. Then we'll go back and torque them. You can see how it tries to draw it down. Now it still slides smoothly. That's the little check right there. If that slides smoothly you know you're in a really good spot right there. Take our torque wrench. I'm gonna set this at 40 foot pounds on these outer nuts here. Same thing, we'll torque them in a star pattern. Now make sure it slides smoothly just like that. Now that should be lined up perfectly in the center. So when we get that transmission in it'll slide right in. Next step, get the bell housing back on and we've gotta check the depth for our throw out bearing. Last thing we need to do is measure for our throw out bearing. Now that throw out bearing has some shim to adjust to get the right air gap between the fingers of the pressure plate. The way we're gonna do this is take our straight edge here and then get our calipers extended down in here. Get our depth to the tenth with the pressure plate fingers. Then we'll take this measurement, 3.195. Then jump over here to the throw out bearing itself. Same idea, .039. 156 is our number. Our target is 200 to 100, hundred thousandths window there. We're right in the middle. So we're good to go. Let's get this transmission bolted up right now. Now if you did need to make adjustments to your throw out bearing spacing these are the shims right here. Go down a little bit. There you go. That's all of them. Once it got over those dowel pins and got started it slid right in place. Put those bolts in, tighten them up, and it's ready to go. Let's get it in the truck. [Anthony] I'm excited to be banging some gears. [Mike] I hear ya! [Anthony] We make a few more adjustments to get our new drivetrain in place.
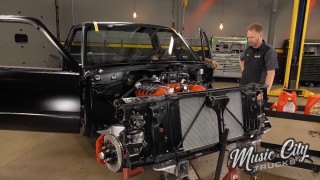
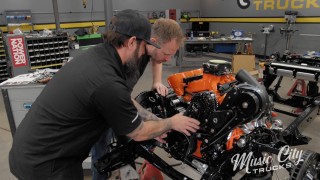
[Mike] We'll get this thing lowered down in here between the rails. You got the back? [Anthony] You're looking good back here. [ Music ] Come on down a little more. [ Music ] [Mike] Pretty close there. Get a bolt in here. Get this side. Well that's got the engine mounts in place but the transmission mount, well we've got to come up with something there and there's a few measurements we need to take before we fab up our own deal between that tail housing of the transmission and the pinion of the rear end. [Anthony] What we're gonna end up doing is making our own crossmember or we could do what OBS Chevy Racing recommends and use the factory crossmember with a couple of pieces of angle iron here. We're kinda undecided at this point. What do you say we check out and see what kind of metal we've got laying around? [Mike] Yeah you get the metal. I'm gonna grab that third member. Before we get our third member in here we've got to get our studs pressed in. Take a little copper slip. Slide it into place. Take my stack of washers here. This is where it gets loud. [ drill humming ] [ Music ] [Mike] One down and the rest of them to go. [Anthony] For our differential we called up Quick Performance and they sent us over one of these nodular case third members. Now we opted to get ours with a 13-50 billet yoke, Detroit True Track with a 35 spline to match our axles, and a 3.25 gear set to help with all the low end torque that big block makes. Now all we've got to do is get this thing installed, get our pinion angle set, and get this on. [Mike] Let's send that thing in here. Obviously we try to do things the most difficult way possible. [ Music ] I think we could work it down with some nuts now. That way we can get some even pressure all the way around it. Hit that torque wrench and she's good to go. With our pinion angle set on the rear end we need to move up to the transmission. When we put these boxing plates on the frame rails that eliminated the possibility of using that stock crossmember in the stock location. The main thing we need to do here is make sure our transmission, the driveline angle, and the pinion angle are lined up. We're gonna use our angle finder on the back of the tail shaft to get that measurement. So if I had to exaggerate that. If the tail shaft is coming down like this we want the pinion doing that same direction there. So we decided to come up with a little bit different crossmember design. [Anthony] And the crossmember I decided to go with was a piece of d-o-m tube and a couple of plates welded on the end. You could have utilized the factory crossmember but it was sheet metal and this is gonna be much more rigid and should be able to handle this big block a little bit better. [Mike] It looks really good. Get that set up here. Right there looks good. Alright, let's get that bracket in there. [Anthony] Got it right here. Here's our bracket. All we did was use a piece of two by three rectangular tubing, popped a couple of holes in it, notched it, put a little prettiness on that end and in she goes. [ ratchet clicking ] [Mike] That's tight! Let's check how square it is. [Anthony] Let me grab a tape here and see where we're at. [ Music ] I'm about 31 and a sixteenth. [Mike] Let's try it over here. Yep, same, 31 and a sixteenth. That's good and square. [Anthony] Well the next thing to do is grab the welder. Get this tacked in. You can go ahead and grab a transfer punch. We'll get a couple of holes punch, get it ready to drill. [Mike] Get it tacked in and drilled out there. [ Music ]
Now I've just got to get those drilled out. [Anthony] We'll get this thing out of here, get it on the table, and burn it in. [Mike] Sounds good. [ Music ]
[Anthony] Thank you sir! [ Music ]
So we got our crossmember all welded up and it fits really good. The only thing we've got to do is put a few bolts in it and we're gonna be good to go. [Mike] This thing turned out really well. We got a lot done today with that engine and transmission. It's really starting to come together but that's all we've got time for today. We'll catch y'all later. [Anthony] We'll see y'all on the next one.
Show Full Transcript
[Anthony] Today on Music City Trucks we strengthen our chassis to help handle our new power plant. We'll also make some room for our new fuel tank. [Mike] There she goes! Plus drop a new drivetrain in its final resting place. [ Music ] Hey guys, welcome to Music City Trucks. We are full steam ahead on our 632 SS project, and with over 800 horsepower from that rat engine we need to make sure our frame is strong enough to handle it. [Anthony] And in order for us to do that we're gonna weld in these boxing plates. GM has utilized this C-channel style of frame starting with the early C-10 trucks all the way up to these OBS'. Now they got a little wiser in their old age and started boxing the front of these chassis but as you can see here the middle is still wide open. So once we get these welded into place hopefully that'll help us from keeping our chassis from twisting coming off the line. In order to do that we've got to address a couple of things here on the frame first. First off we've got to get this all cleaned up in here and get it ready to be coated with some kind of encapsulater or some kind of coating that's gonna keep it from rusting on the inside. Then the only other we've gotta do is cut this radius out to get this plate to slide up here nice and flush so we can get a good weld on it. Let's go ahead and grab the wire wheel and get to it. [ grinder buzzing ] [ pneumatic drill vibrating ] [ Music ] [ grinder buzzing ] [ Music ]
[ torch hissing ] [ Music ]
[ grinder buzzing ] [Mike] Now once we get those boxing plates on here we're not gonna have access to the inside of that frame rail. So to protect it we're gonna apply this POR-15 Rust Preventative on the inside of this frame rail to keep it coated and last a long time. It's a multi-step process. The first thing you want to do is hit it with this cleaner/degreaser. Now Anthony already took the wire wheel and knocked off the surface rust there. So we're ready to get this thing cleaned, prepped, and painted. Cleaner/degreaser mixes a four to one ratio with hot water. So we're gonna add some water here. And little bit more! Perfect, right there. We've got it mixed up. Now let's get it cleaned up. POR's directions for this metal prep they want you to keep the surface wet for 10 minutes. So we're gonna keep on applying this stuff for 10 minutes and then we'll rinse it off and move on to the next step. Here on the show they call me Mike but right now it's Michelangelo. [ Music ] Once the cleaner is done we'll hit it with some water just to rinse it off. [ Music ] Next step is our metal prep. It's a metal etching rust neutralizer. This stuff is gonna prepare the surface for best adhesion of the POR-15 Rust Preventative Coating we're about to put on. With the metal prep same thing. They want to keep the surface wet for 10 minutes. [ Music ] [ spray bottle whoosh ] [ Music ] [Mike] We got our metal prep finished and we know it's working correctly because this white finish, how it's changed colors, that's normal. We know that etching process is working. Now we're gonna hit it with some paint. Gonna stir this thing up. Now POR doesn't recommend shaking. So they prefer stirring. I used my best stirrer for the job. Perfect! [ Music ] Because we're gonna be welding on this area here I just put some tape down cause we don't want the paint right there. We're gonna put a minimum of two coats on this. So you don't have to put it on really thick the first time. Get a little coverage and go back and do another coat. The temperature rating on this stuff is pretty good. When we send this to powder coat and they bake that finish on I don't think there's gonna be a problem there. [Anthony] So now that we have our frame all coated on the inside we can go ahead and start boxing it. Now we got our plates here from OBS Chevy Racing dot com. They're laser cut, fit real well, and saved us a lot of time. Now the only thing we had to do with them is squirt some paint on the back side and put a nice bevel on here from a full penetration well. Now there's nothing left to it but to get it tacked up and get it welded on. So let's do it. [ Music ] Alright we got that all tacked in. Only thing left to do is burn it all in and then we'll be ready to roll. [ Music ] [Mike] Stay tuned for some riveting action on our chassis.
[Anthony] Hey guys, welcome back. So we got our boxing plates all welded in but we still have a couple more things to tackle in the rear. [Mike] We decided to relocate our fuel tank to the back of the truck to give us a little bit better balance for the vehicle. We reached out to our friends at Tanks Inc and they sent us this 18-gallon rear mount fuel tank for the back of the vehicle here. Now as you can see we've got a crossmember in the way. So we need to get rid of that and give us some real estate. [Anthony] But when we take this crossmember out we're not gonna have much structural rigidity in the back here. So I whipped out this tubular crossmember. We're gonna go ahead and get this tacked in. After that's done we'll go ahead and knock these rivets out and get this frame cleaned up back here. [ grinder buzzing ] [Anthony] Before we tack this into place we want to go ahead and hit it with a grinder. Get it cleaned up and ready for a weld. [ Music ] [ grinder buzzing ] [ welder crackling ] [ Music ] [ welder crackling ]
[Mike] I'll tell you what. You're definitely the better welder of the two of us. [Anthony] Appreciate that sir. I've been using that squirt gun for quite a long time. [Mike] Like we said before, we've got to put that fuel tank in this general area but we've got something in the way. So we've got to get this brace out. Now that we're strong enough let's pop this out. I'm gonna show you a couple of tricks to get all these rivets out. We've got 21 rivets on here to bust out and get these brackets off of here. To get these rivets off I'm gonna use the cutoff wheel to cut a cross pattern in the top. Then we'll use an air chisel to knock the top off. [ air chisel vibrating ] [ saw buzzing ] [ air chisel vibrating ] [ hammer banging metal ] [Mike] There she goes! [ Music ] [Anthony] So now that we got our brackets and our crossmember removed from the rear of the chassis we can go ahead and start getting our tank mounted up. I already whipped up a couple of these brackets here. All I did was take a tab, weld a couple of gussets on the end, and that way we can go ahead and get this thing tacked into place on our frame, pop a couple of holes in it, and we'll be good to go. [ welder crackling ] [ Music ] Now that we have our brackets tacked into place I'm gonna use a transfer punch to mark the hole locations. I'm gonna take the tank out. I'm gonna drill those out and then we'll be good to go. Let's see if we can slide this thing out of here. [ Music ] [ drill humming ]
[ drill humming ]
[Anthony] Let's get this tank in there and see what we're looking like. [ Music ] That all looks pretty good. Now the only thing we have left to do is possibly tap these brackets to make installation of the tank from underneath a little bit easier. Other than that all I've gotta do is get these brackets burned in and then we'll be good to go. [Mike] Coming up, we get our transmission ready for installation.
[Mike] It's time to mount up the transmission to our engine, and for the transmission we're going with a manual from American Powertrain. They sent us this Tremec Magnum six-speed transmission and everything else we need to make this install complete. From the bell housing, to the throw out bearing, to the clutch. This clutch setup is trick. We've got the flywheel here and this is a twin disc clutch setup with the pressure plate as well. You've got two clutch discs, the floater. All this clutch setup will handle 1,100 foot pounds of torque, and that's more than enough for our application here. Let's go ahead and get it installed. First thing is the pilot bearing. Now the pilot bearing lives in the back of the crank shaft here. Its job is to support the front of the input shaft. This thing is a very tight fit. So I had this sitting in the freezer for a little bit. Kinda make it a little bit smaller. Give it an easier time to install it. Just want to make sure that's flush with that crank surface. Next thing we've got to install is the front part of our bell housing, or scatter shield. This is a safety bell housing. So in the event of a clutch explosion it's all contained inside the bell housing. So we'll get this up here. It just rides on the dowel pins and that seals that off. Next we need our flywheel, and we'll set that up there. Got to hold it just right. We'll get our bolts in here. You always want to put new flywheel bolts any time you have this on and off. These things see a lot of stress. It's a good investment to go ahead and put some new bolts on. We'll throw a dab of thread locker on here and get them all started. Once we get them started we'll run them down and then I'll torque them to 40 pounds one pass, and then we'll finish it off with 60 pounds in a star pattern. Make sure it's seated nice and flush with the back of the crankshaft. Now we're ready to get our first clutch disc on here but I'm gonna take these bolts. I had to put these nuts on here to hold all these washers. They had these spacers on here to get the air gap and clutch pack clearances set when they shipped it to us. We thank them for that. So we want to leave those in the right spot. Get that off of there. Our clutch disc first and this is our clutch alignment tool right here. This simulates the front of the input shaft here. It looks just like that. We'll use this to go into the splines here. It should fit, there it goes. Then this will ride in the back of that pilot bearing. Get that centered. So that's our first disc. You want to make sure these are the right direction cause you could have this backwards. This says flywheel side, f-w, flywheel side.
Now we'll take our floater. Look at our marks right here. It's where they balanced it. We'll get that to line up. Then we'll take our three little nuts. Install on here. Got those tight. It still moves, so that's good right there. We'll go ahead and torque those little nuts, 25 foot pounds. Now I'm gonna take off the nuts for the pressure plate. So we'll grab our outer disc. Now we need our pressure plate. Get our pressure plate here, get our washers all the way around. Then we'll get all our nuts started cause we've got to be particular on how we tighten this down. When we run this down we're gonna run it down in a star pattern but we also have to maintain our disc in the center of the crankshaft cause if you tighten it up and it's offside the input shaft's never gonna slide in. We're gonna use our installation tool to hold our center, our happy spot, left to right, up and down. Then we'll take our impact and start to run these down until they touch in a star pattern. Then we'll go back and torque them. You can see how it tries to draw it down. Now it still slides smoothly. That's the little check right there. If that slides smoothly you know you're in a really good spot right there. Take our torque wrench. I'm gonna set this at 40 foot pounds on these outer nuts here. Same thing, we'll torque them in a star pattern. Now make sure it slides smoothly just like that. Now that should be lined up perfectly in the center. So when we get that transmission in it'll slide right in. Next step, get the bell housing back on and we've gotta check the depth for our throw out bearing. Last thing we need to do is measure for our throw out bearing. Now that throw out bearing has some shim to adjust to get the right air gap between the fingers of the pressure plate. The way we're gonna do this is take our straight edge here and then get our calipers extended down in here. Get our depth to the tenth with the pressure plate fingers. Then we'll take this measurement, 3.195. Then jump over here to the throw out bearing itself. Same idea, .039. 156 is our number. Our target is 200 to 100, hundred thousandths window there. We're right in the middle. So we're good to go. Let's get this transmission bolted up right now. Now if you did need to make adjustments to your throw out bearing spacing these are the shims right here. Go down a little bit. There you go. That's all of them. Once it got over those dowel pins and got started it slid right in place. Put those bolts in, tighten them up, and it's ready to go. Let's get it in the truck. [Anthony] I'm excited to be banging some gears. [Mike] I hear ya! [Anthony] We make a few more adjustments to get our new drivetrain in place.
[Mike] We'll get this thing lowered down in here between the rails. You got the back? [Anthony] You're looking good back here. [ Music ] Come on down a little more. [ Music ] [Mike] Pretty close there. Get a bolt in here. Get this side. Well that's got the engine mounts in place but the transmission mount, well we've got to come up with something there and there's a few measurements we need to take before we fab up our own deal between that tail housing of the transmission and the pinion of the rear end. [Anthony] What we're gonna end up doing is making our own crossmember or we could do what OBS Chevy Racing recommends and use the factory crossmember with a couple of pieces of angle iron here. We're kinda undecided at this point. What do you say we check out and see what kind of metal we've got laying around? [Mike] Yeah you get the metal. I'm gonna grab that third member. Before we get our third member in here we've got to get our studs pressed in. Take a little copper slip. Slide it into place. Take my stack of washers here. This is where it gets loud. [ drill humming ] [ Music ] [Mike] One down and the rest of them to go. [Anthony] For our differential we called up Quick Performance and they sent us over one of these nodular case third members. Now we opted to get ours with a 13-50 billet yoke, Detroit True Track with a 35 spline to match our axles, and a 3.25 gear set to help with all the low end torque that big block makes. Now all we've got to do is get this thing installed, get our pinion angle set, and get this on. [Mike] Let's send that thing in here. Obviously we try to do things the most difficult way possible. [ Music ] I think we could work it down with some nuts now. That way we can get some even pressure all the way around it. Hit that torque wrench and she's good to go. With our pinion angle set on the rear end we need to move up to the transmission. When we put these boxing plates on the frame rails that eliminated the possibility of using that stock crossmember in the stock location. The main thing we need to do here is make sure our transmission, the driveline angle, and the pinion angle are lined up. We're gonna use our angle finder on the back of the tail shaft to get that measurement. So if I had to exaggerate that. If the tail shaft is coming down like this we want the pinion doing that same direction there. So we decided to come up with a little bit different crossmember design. [Anthony] And the crossmember I decided to go with was a piece of d-o-m tube and a couple of plates welded on the end. You could have utilized the factory crossmember but it was sheet metal and this is gonna be much more rigid and should be able to handle this big block a little bit better. [Mike] It looks really good. Get that set up here. Right there looks good. Alright, let's get that bracket in there. [Anthony] Got it right here. Here's our bracket. All we did was use a piece of two by three rectangular tubing, popped a couple of holes in it, notched it, put a little prettiness on that end and in she goes. [ ratchet clicking ] [Mike] That's tight! Let's check how square it is. [Anthony] Let me grab a tape here and see where we're at. [ Music ] I'm about 31 and a sixteenth. [Mike] Let's try it over here. Yep, same, 31 and a sixteenth. That's good and square. [Anthony] Well the next thing to do is grab the welder. Get this tacked in. You can go ahead and grab a transfer punch. We'll get a couple of holes punch, get it ready to drill. [Mike] Get it tacked in and drilled out there. [ Music ]
Now I've just got to get those drilled out. [Anthony] We'll get this thing out of here, get it on the table, and burn it in. [Mike] Sounds good. [ Music ]
[Anthony] Thank you sir! [ Music ]
So we got our crossmember all welded up and it fits really good. The only thing we've got to do is put a few bolts in it and we're gonna be good to go. [Mike] This thing turned out really well. We got a lot done today with that engine and transmission. It's really starting to come together but that's all we've got time for today. We'll catch y'all later. [Anthony] We'll see y'all on the next one.