Video Transcript
You're watching Power Nation.
Dragonan is about to get a serious upgrade.
Watch your feet.
Stock rear axle can't handle the kind of power we're aiming for.
Don't smash your fingers.
So it's being replaced with stronger gears and massive axles all tied together with a fully adjustable four-le setup.
The goal,
more traction,
better control,
and a truck that stays planted and pointed straight down the track.
Let's get to work on Music City Trucks.
All right,
well, you think a 4:30 gear ratio is gonna be enough to get this beast up off the line? I think a 4:30 gear ratio is gonna be enough to get all 4 tires off the line.
That's funny.
Well, we'll see what happens, right, right.
Welcome to Music City Trucks.
We're hard at work on our project Dragon Lanch,
and if you haven't seen it yet,
well,
we'll get you caught up.
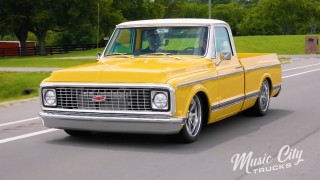
After taking our avalanche out for a quick test drive, we brought it back into the shop and began stripping out the interior
in a quest to shed as much weight as possible.
The goal was simple, make our Chevy lighter, and that'll make it quicker going down the drag strip.
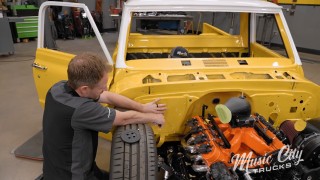
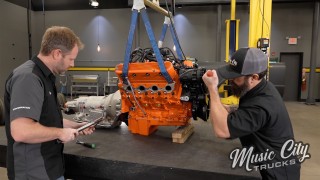
Once that was accomplished, we moved on to removing components from the engine bay so we could pull the 6.2 L V8 and begin the disassembly process.
With the engine out, we can start preparing it for machine work and a host of upgraded performance parts. Oh, that sounds like money right there.
We also ditched the factory front suspension
and installed new improved components to give Drag a la the stance,
adjustability,
and performance it needs to dominate at the track.
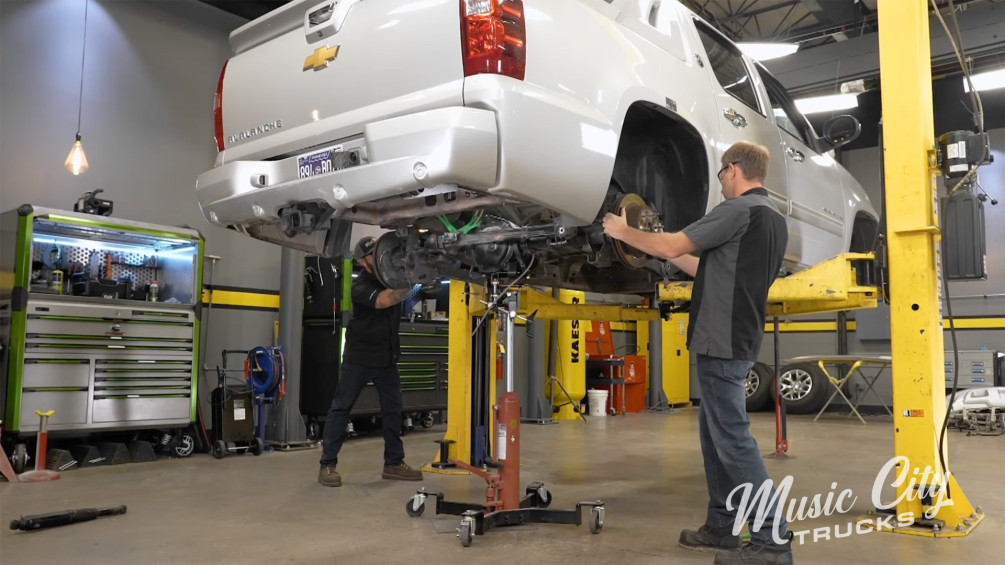
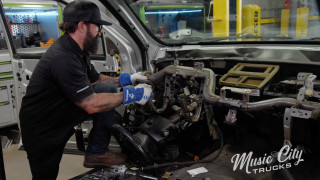
Well, now that you're up to speed for the plans of our project, we're gonna get this stock rear end out of the truck.
Before we do that, we've gotta take a couple of reference points. Yeah, and those reference points and measurements we're gonna take first is to make sure that we keep this wheel in the center of our wheel opening here. So what we're gonna do
is we're gonna take a measurement at full.
Group,
mid-travel and then full bump.
And that way we know because this, this is a 4-link, it's a parallel 4-link, kind of like what we're going to be running,
and that's gonna move on an arc when it goes up and down to travel.
So we just want to make sure that wherever we're at at ride height that we're keeping our wheel
center of the wheel well.
So let's go ahead. Let's get this thing.
Let's go ahead and get our plumb bob up here and I'm gonna get your eyes on it. Yeah,
I'll stand back here and look.
My eyes are starting to go away as I get older.
How's that looking?
Go to the back of touch,
touch more right,
right there.
That's perfect.
Is that the spot?
All right, we'll mark it here.
Let me go ahead and get a marked
now. I mean,
this is somewhat critical, but it's really not in the grand scheme of things because our
forele is gonna have some adjustability in it, so we'll be able to move it
forward and back, but just for reference,
you know what I mean.
All right,
so now let's go ahead and we'll get the shocks, the springs out that way we can move this thing up in the truck and we'll take more measurements.
Watch your feet.
I knew that was coming.
There it goes.
OK.
These brake lines off of here.
Oh, yeah.
Clearly our line stoppers are
working effectively, so we're gonna add another layer of protection. Just take some earplugs,
we're gonna shove them in this hole right here.
Go to stop our leak that way.
That'll do donkey.
Ah, the old
earplug trick.
I like where your head's at, Mike.
Now you do need to make sure you're working quick when using your earplugs because it does,
brake fluid does not.
Mix well with earplugs right?
I'll see if I can get this out.
Well, there she is.
All right,
so now that we're at full bump, we'll go ahead and
pull another plumb uh measurement.
How we look in there Mike, uh,
that looks good right there. That looks pretty good.
Go ahead and mark that.
Now as you can see as we're in full bump,
the axle actually moved rearward,
so it's going to change its relation into the wheel well, and that's why we're doing this for reference later on.
We want to make sure that at ride height that the wheel is in the center of the wheel well.
Yes,
so pull that string off, you can see.
Pull that off there.
This was the center
all the way down,
and that's the center all the way up. So that just illustrates how it moves front to back as it goes through suspension travel. And then you can also see this number that we put here.
Now this is gonna,
this is our
fixed point dimension
from a fixed point here
to our bottom of our tape line,
and that's just giving us a number to where our axle is in relation to.
Yeah, so like to measure it at.
Travel at the top.
Travel at the bottom and then travel in the middle right there. We'll take some points.
We'll get one at the top,
one at the bottom, and get our middle travel
tape measure.
20 and 5/16.
Yeah.
Now it's critical that you choose a spot and you use the spot for every single measurement that you take here
and make sure you're not changing because then it's gonna skew your numbers.
It's not gonna be accurate data.
That looks pretty good.
So now we'll subtract those two numbers,
find our mid-travel,
and then we'll make another mark.
It's gonna happen.
Oh, bingo,
here she comes.
Oh,
uneventful just the way we like it.
Perfect.
Lower,
lower this thing down.
All right,
going down, uh,
yeah,
it's like we know what we're doing. Down Periscope.
I think you're rocking, you're rocking it.
Yeah,
whoa, whoa,
watch your toes,
watch your head,
all right.
With the old axle and the scrap pile,
we start building our massive 40 sli spooled 9-inch rear end.
All right, well, now that we have our
factory rear axle out of the truck, it's time to get our new one in, and this is a Ford 9-inch housing here from Quick Performance. Yeah, and they also sent us over this beefy third member you see sitting here. This thing's got their billet 1350 yoke on it.
It's a nodular Yukon case, and it's also spooled, so when we're at the drag strip,
all four of our tires are hopefully hooking up.
Now it's got the 430 gear set that's gonna match the.
Front differential in the truck
and then underneath you can probably see these
big boys sitting here.
These are their 40 flying axles. It's already got the bearings installed on it along with the studs, and they're ready to drop into the rear end.
So what do you say? You almost done over there?
Yeah, man,
those things are gonna be nice.
I mean,
handle all the power we're gonna throw to. Those are stout.
Yeah,
so let me finish getting these studs in here. We'll drop that 3rd member and we'll get rolling.
Sounds good.
Studs installed.
See if I can do this without smashing my fingers.
Don't smash your fingers. I'm gonna try not to.
That's why I've got my gloves on.
Good, we'll just give it a little love tap,
yeah,
a couple of little love taps, and I think it's gonna drop right into place.
Maybe we try some nuts now.
Yeah,
she's tight now,
yeah.
Finished torquing these up 35 ft pounds.
All right,
so with the 3rd member installed in the housing, it's time to move on and get these big old axles installed in there. But before we can do that, we gotta get the brakes on them.
Yeah,
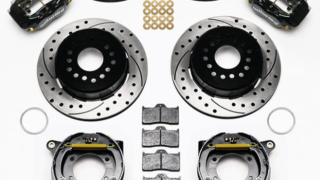
so for the brakes, we reached out to our friends at Summit Racing, they sent us this Will Wood kit.
It's their Dynamite series.
It's just a 4 piston caliper right here. integrates the parking brake assembly,
but they all have to go together with the axles together.
So we're gonna go ahead and
throw them in,
get them on.
That's good.
Mhm mmm.
All right, so we got these big dog axles in,
got the back of plates on.
Time to get our rotors on and mount the calipers.
Now for the caliper,
the main thing is we have to get this spaced in the center
of the rotor so they got some shims that will mount between here and the bracket
to get that spacing correct.
And then to eliminate any slop and put a couple of lug nuts on here.
Square up our rotor.
All right, those are snug.
All right, I'll check our gap now.
Right now for our pads and these make it pretty easy here you just slide them in from the top.
And then we've got a pin
from the
outside to the inside here.
I'll roll those back.
All right, since we're on the subject of axles, let's look at where we're gonna bolt to those axles
for our wheels. We've contacted 3030 Autosport. We made a custom set for our Draglance project.
This is a 17 inch diameter wheel by 11 in the back and a 17 by 9
up front, and they have a beautiful gloss black powder coat finish,
but a unique thing about these wheels is it's a bead lock wheel,
a single
bead lock right here, and that's gonna provide great clamping force for our tires.
And then for the tires,
well,
we reached out to Summit Racing,
and they sent us this Mickey Thompson pro bracket radials.
Now the size on these are 29.5, 105, 17.
They can provide a lot of traction on the track.
Now it could be unique to mount these things up to those wheels,
and that's gonna be the subject of today's summit tech tip.
All right,
we'll get our ring
off of here.
And then take the wheel
and we're gonna drop it down into the tire.
Like that
now we'll flip it over.
OK,
get our bead
centered on the wheel like that.
Make sure it's down in the register.
Bead seated down there.
We get our ring,
set it on top here,
and then all of our hardware
like to put a little anises on there.
All right, with all of our hardware lubed up and started by hand,
now
we'll start running them down. I like to go like a 12:00,
6:00,
3:00, 9:00 pattern,
working that ring down evenly.
All right, I'd like to run the impact down just a little bit, but then I'll go through it with the torque wrench.
I got this set at 18 ft pounds
and just start tightening them up evenly.
You keep going in a circle until they don't move anymore.
If one moves
like that one right there,
you gotta go all the way back around so we make sure they're all even like that.
So
get them all torqued up
and then we'll throw some air in here,
get the back bead seated.
And then we're ready to rock and roll.
We mock up our new drivetrain featuring a built transmission and heavy duty transfer case ready for the track.
All right,
so we got our rear end put together
and we're ready to get it in the truck, get it fabricated in the right spot, but to know the exact center line of that pinion,
well, we need to know the drive line where it's gonna be at.
So we're gonna go ahead and get the transmission, transfer case put in
before the transmission. Well, we got this little peach here from FTI Performance.
Performance.
This is a 4L80.
It's a level 3. They call it the level 3 so it can handle
up to 1000 horsepower, 1000 horsepower. So
we, that's our, that's our goal. We're gonna be striving. We're gonna try to get as close as you can to 1000 horsepower with that, so.
They also sent us one of their torque converters as well.
Now that is a 10 inch triple disc torque converter. So with our combination it's probably gonna be about 3500 stall. It's good for the strip,
good for the streak,
yeah,
exactly.
Good little balance right there.
And then to make it 4 wheel drive,
well, we got our transfer case. So we reached out to Summit Racing and they sent us one of these Zombrota remanufactured units.
Now
you say, well, we already had a transfer case in the original truck.
Well, it's computer controlled electronically shifted,
and make it more reliable,
more.
User friendly.
I wanted to go with a manually shifted one.
So this is a 261 HD out of
kind of like a Durmax 2500, yeah,
so like an early 2000s GM truck 2500 truck.
So you got the heavy duty aspect and it's also manually controlled,
manually shifted there as well.
So this is gonna be perfect for us for a drive on,
you know, it's gonna be exciting to get that in there and let it rip.
So
next step, let's get the crane over here and we'll get it
over on the left.
Let's do it.
Is that enough?
It's going to have to be, I think.
Hold on,
hold on.
She's a little longer than the other one,
maybe
just a little one.
Going up.
When can we go back?
Uh, we can go back whenever you want,
OK.
Somewhere like that
And then
we get our strap
up here,
yeah, and I can block this back here.
Full release
I'll get this out of the way.
oop.
This one right here.
Uh-huh.
I'm just gonna try to lift up on it,
get soft,
yeah,
get soft.
Nope,
you
ain't get done.
There it goes. That's it.
Stick the ball through your eye. I know,
right through my teeth.
Next stop,
dentist.
All right.
Blind, I was doing it from this side,
staring in the to the light.
All right,
we'll get a couple of nuts on
the tree mount.
Say it's on there.
Let's get the, uh,
mockup block in it now.
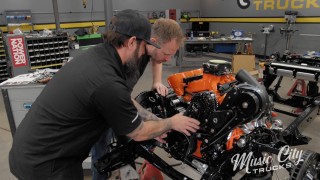
All right, so next up, we got to get our mock-up block in the truck, but before we can do that, we got to deal with our motor mounts.
Now we could use the original ones that came off the truck,
but these were known
for having one major flaw, and that was they're filled with hydraulic fluid,
and, you know,
many miles, those are,
those are prone to leaks, so we don't want to have to deal with that.
So for our replacement, we hit up Summit Racing,
and they sent us over these stout polyurethane motor mounts.
Now these things are, they're already powder coated and they're ready to drop into the truck.
So let's go ahead,
get them mounted up on the block.
All right, went ahead and disassembled the motor mount, make it a little bit easier to install on both the engine
and the truck.
Go to your home,
Bolt.
All right,
you wanna toss me that block?
Should I really toss it?
I mean you could.
One block coming at you.
All right,
don't drop it.
Put my hands on it here.
I'll give you a hand, but I ain't getting in there.
Uh,
yeah, it's cap tight.
All right, well, let's get that rear end on the back. All right, let's go slap that thing in there.
Next,
our adjustable for link gets mocked up for maximum traction.
All right,
so we've got the engine and trans mounted in the truck.
Now I had to come up with a little custom fabrication on the crossmember for the trans.
Since the 6 L80 we pulled out of here,
just a little bit shorter than the 4L80 that's going in there,
but it's all done,
it's centered, and it's about time we get to this 4 link.
Yeah,
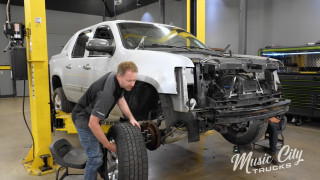
you know, we've got the tire and wheel combination on here for you.
That's kind of. A visual so you can get the overall idea of what the tire's gonna look like in relationship to the rest of the truck.
I don't know about you, but
that's pretty cool.
That's looking pretty tough.
Yeah,
it's got, it's got quite a bit of poke coming out of the, uh, I like it set up right there. So now we gotta get to getting the suspension
put together.
So let's go jump under here and show you what we're working with.
Alright,
let's see what we got going on under here.
Yeah,
let's look at it the,
you know, the factory suspension set up,
it was a type of 4 length set up they utilize lower bar here and upper bar here, but it's a, a fixed point
and for this racing setup we want some adjustability is the main thing in setting up the suspension there.
So
our 4 length kit is gonna have some adjustment in the back kind of bracket that goes to this point.
Then we'll have an upper bar
and a lower bar it's gonna extend
somewhere in this area.
So we'll have to put another cross member in.
Here
to get a mounting point.
OK,
looks like we're gonna have to remove maybe that cross member, maybe a couple more of these brackets back here.
Yeah, there's a lot of stuff in the factory that,
you know,
exhaust hangers, a spring perches, stuff like that that we'll probably have to cut out and give us some more room.
Yeah,
and then we're gonna have to figure out our diagonal since it's a parallel four link. There's nothing locating the rear end, so we gotta make sure that's locked down,
get that in there, and then,
you drag racing, guys, you.
The coil is pretty tight usually,
right?
Yeah,
I mean,
typically when it's got a narrower rear end, but we've got a wide one here, so yeah,
we may have to
move those out,
move them out a little bit. We'll see when we get to that point, but I think the first thing is we'll get this cross member done, so we'll clean off the frame rail here, get some good metal to,
to weld to,
and then, uh, go from there. Yeah,
well,
there's nothing to it,
but I guess to do it right. Let's do it. Let's clean it up.
The first step to a good weld is a clean surface.
All right.
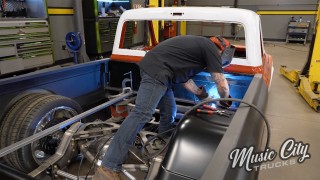
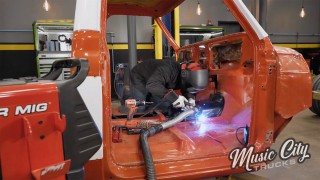
Once our frame width is measured, we'll get our crossmember cut and tacked into place.
That ain't 90.
Next we'll attach the axle housing brackets.
Yeah.
Yeah.
All right,
before we get too carried away, let's check the alignment here.
I think this will be a good bar to keep in while we're welding all this stuff up,
keep it square if it goes in.
Uh oh,
just kidding.
Uh, look at that.
Look at that, like butter.
Nice.
Looks good.
Now let's get our
top pieces tacked in place. I'll go grab them.
Unwavering.
Then we'll get the front for length brackets up on the cross member.
Now we're using a piece of square tubing here that has the same dimension as a rod ends. Oh, that sounds solid
to keep the brackets parallel from front to back and spaced correctly.
Let's see here, let's put,
uh,
clamp this one.
Beautiful,
get our
orange box of life here.
Oh,
get a load of that.
My icrometer is
calibrated.
All right, so we got our crossmember all tacked into place,
our link brackets tacked to the crossmember.
Uh, it's almost ready to burn in.
Now,
I'm gonna add,
wanna add some gussets here,
try to keep this chassis as rigid as possible because there's a lot of force coming into this bar,
but yeah,
it's almost there.
Yeah,
we'll definitely add some triangulation to that cross member.
All these brackets, give it that strength.
You know,
some other things you want to check is your measurements.
We have measured this thing
over and over and over again with tape measures.
Plumb bobs, strings,
lass, yeah,
levels, laser levels, things like that to make sure everything is where we want it to be.
I still got the, uh,
shock mounts to do on the back here as well. We're still waiting on the shocks to show up and we'll get those
welded in place, but that's kind of the general idea. You can see
where we're going with this setup right there. And then we'll get this diagonal bar in here, and that's pretty much gonna
get ready to weld everything in. That'll be it,
yeah,
we'll get it all welded up and we'll see you guys next time on New York City Trucks.
Show Full Transcript
Dragonan is about to get a serious upgrade.
Watch your feet.
Stock rear axle can't handle the kind of power we're aiming for.
Don't smash your fingers.
So it's being replaced with stronger gears and massive axles all tied together with a fully adjustable four-le setup.
The goal,
more traction,
better control,
and a truck that stays planted and pointed straight down the track.
Let's get to work on Music City Trucks.
All right,
well, you think a 4:30 gear ratio is gonna be enough to get this beast up off the line? I think a 4:30 gear ratio is gonna be enough to get all 4 tires off the line.
That's funny.
Well, we'll see what happens, right, right.
Welcome to Music City Trucks.
We're hard at work on our project Dragon Lanch,
and if you haven't seen it yet,
well,
we'll get you caught up.
After taking our avalanche out for a quick test drive, we brought it back into the shop and began stripping out the interior
in a quest to shed as much weight as possible.
The goal was simple, make our Chevy lighter, and that'll make it quicker going down the drag strip.
Once that was accomplished, we moved on to removing components from the engine bay so we could pull the 6.2 L V8 and begin the disassembly process.
With the engine out, we can start preparing it for machine work and a host of upgraded performance parts. Oh, that sounds like money right there.
We also ditched the factory front suspension
and installed new improved components to give Drag a la the stance,
adjustability,
and performance it needs to dominate at the track.
Well, now that you're up to speed for the plans of our project, we're gonna get this stock rear end out of the truck.
Before we do that, we've gotta take a couple of reference points. Yeah, and those reference points and measurements we're gonna take first is to make sure that we keep this wheel in the center of our wheel opening here. So what we're gonna do
is we're gonna take a measurement at full.
Group,
mid-travel and then full bump.
And that way we know because this, this is a 4-link, it's a parallel 4-link, kind of like what we're going to be running,
and that's gonna move on an arc when it goes up and down to travel.
So we just want to make sure that wherever we're at at ride height that we're keeping our wheel
center of the wheel well.
So let's go ahead. Let's get this thing.
Let's go ahead and get our plumb bob up here and I'm gonna get your eyes on it. Yeah,
I'll stand back here and look.
My eyes are starting to go away as I get older.
How's that looking?
Go to the back of touch,
touch more right,
right there.
That's perfect.
Is that the spot?
All right, we'll mark it here.
Let me go ahead and get a marked
now. I mean,
this is somewhat critical, but it's really not in the grand scheme of things because our
forele is gonna have some adjustability in it, so we'll be able to move it
forward and back, but just for reference,
you know what I mean.
All right,
so now let's go ahead and we'll get the shocks, the springs out that way we can move this thing up in the truck and we'll take more measurements.
Watch your feet.
I knew that was coming.
There it goes.
OK.
These brake lines off of here.
Oh, yeah.
Clearly our line stoppers are
working effectively, so we're gonna add another layer of protection. Just take some earplugs,
we're gonna shove them in this hole right here.
Go to stop our leak that way.
That'll do donkey.
Ah, the old
earplug trick.
I like where your head's at, Mike.
Now you do need to make sure you're working quick when using your earplugs because it does,
brake fluid does not.
Mix well with earplugs right?
I'll see if I can get this out.
Well, there she is.
All right,
so now that we're at full bump, we'll go ahead and
pull another plumb uh measurement.
How we look in there Mike, uh,
that looks good right there. That looks pretty good.
Go ahead and mark that.
Now as you can see as we're in full bump,
the axle actually moved rearward,
so it's going to change its relation into the wheel well, and that's why we're doing this for reference later on.
We want to make sure that at ride height that the wheel is in the center of the wheel well.
Yes,
so pull that string off, you can see.
Pull that off there.
This was the center
all the way down,
and that's the center all the way up. So that just illustrates how it moves front to back as it goes through suspension travel. And then you can also see this number that we put here.
Now this is gonna,
this is our
fixed point dimension
from a fixed point here
to our bottom of our tape line,
and that's just giving us a number to where our axle is in relation to.
Yeah, so like to measure it at.
Travel at the top.
Travel at the bottom and then travel in the middle right there. We'll take some points.
We'll get one at the top,
one at the bottom, and get our middle travel
tape measure.
20 and 5/16.
Yeah.
Now it's critical that you choose a spot and you use the spot for every single measurement that you take here
and make sure you're not changing because then it's gonna skew your numbers.
It's not gonna be accurate data.
That looks pretty good.
So now we'll subtract those two numbers,
find our mid-travel,
and then we'll make another mark.
It's gonna happen.
Oh, bingo,
here she comes.
Oh,
uneventful just the way we like it.
Perfect.
Lower,
lower this thing down.
All right,
going down, uh,
yeah,
it's like we know what we're doing. Down Periscope.
I think you're rocking, you're rocking it.
Yeah,
whoa, whoa,
watch your toes,
watch your head,
all right.
With the old axle and the scrap pile,
we start building our massive 40 sli spooled 9-inch rear end.
All right, well, now that we have our
factory rear axle out of the truck, it's time to get our new one in, and this is a Ford 9-inch housing here from Quick Performance. Yeah, and they also sent us over this beefy third member you see sitting here. This thing's got their billet 1350 yoke on it.
It's a nodular Yukon case, and it's also spooled, so when we're at the drag strip,
all four of our tires are hopefully hooking up.
Now it's got the 430 gear set that's gonna match the.
Front differential in the truck
and then underneath you can probably see these
big boys sitting here.
These are their 40 flying axles. It's already got the bearings installed on it along with the studs, and they're ready to drop into the rear end.
So what do you say? You almost done over there?
Yeah, man,
those things are gonna be nice.
I mean,
handle all the power we're gonna throw to. Those are stout.
Yeah,
so let me finish getting these studs in here. We'll drop that 3rd member and we'll get rolling.
Sounds good.
Studs installed.
See if I can do this without smashing my fingers.
Don't smash your fingers. I'm gonna try not to.
That's why I've got my gloves on.
Good, we'll just give it a little love tap,
yeah,
a couple of little love taps, and I think it's gonna drop right into place.
Maybe we try some nuts now.
Yeah,
she's tight now,
yeah.
Finished torquing these up 35 ft pounds.
All right,
so with the 3rd member installed in the housing, it's time to move on and get these big old axles installed in there. But before we can do that, we gotta get the brakes on them.
Yeah,
so for the brakes, we reached out to our friends at Summit Racing, they sent us this Will Wood kit.
It's their Dynamite series.
It's just a 4 piston caliper right here. integrates the parking brake assembly,
but they all have to go together with the axles together.
So we're gonna go ahead and
throw them in,
get them on.
That's good.
Mhm mmm.
All right, so we got these big dog axles in,
got the back of plates on.
Time to get our rotors on and mount the calipers.
Now for the caliper,
the main thing is we have to get this spaced in the center
of the rotor so they got some shims that will mount between here and the bracket
to get that spacing correct.
And then to eliminate any slop and put a couple of lug nuts on here.
Square up our rotor.
All right, those are snug.
All right, I'll check our gap now.
Right now for our pads and these make it pretty easy here you just slide them in from the top.
And then we've got a pin
from the
outside to the inside here.
I'll roll those back.
All right, since we're on the subject of axles, let's look at where we're gonna bolt to those axles
for our wheels. We've contacted 3030 Autosport. We made a custom set for our Draglance project.
This is a 17 inch diameter wheel by 11 in the back and a 17 by 9
up front, and they have a beautiful gloss black powder coat finish,
but a unique thing about these wheels is it's a bead lock wheel,
a single
bead lock right here, and that's gonna provide great clamping force for our tires.
And then for the tires,
well,
we reached out to Summit Racing,
and they sent us this Mickey Thompson pro bracket radials.
Now the size on these are 29.5, 105, 17.
They can provide a lot of traction on the track.
Now it could be unique to mount these things up to those wheels,
and that's gonna be the subject of today's summit tech tip.
All right,
we'll get our ring
off of here.
And then take the wheel
and we're gonna drop it down into the tire.
Like that
now we'll flip it over.
OK,
get our bead
centered on the wheel like that.
Make sure it's down in the register.
Bead seated down there.
We get our ring,
set it on top here,
and then all of our hardware
like to put a little anises on there.
All right, with all of our hardware lubed up and started by hand,
now
we'll start running them down. I like to go like a 12:00,
6:00,
3:00, 9:00 pattern,
working that ring down evenly.
All right, I'd like to run the impact down just a little bit, but then I'll go through it with the torque wrench.
I got this set at 18 ft pounds
and just start tightening them up evenly.
You keep going in a circle until they don't move anymore.
If one moves
like that one right there,
you gotta go all the way back around so we make sure they're all even like that.
So
get them all torqued up
and then we'll throw some air in here,
get the back bead seated.
And then we're ready to rock and roll.
We mock up our new drivetrain featuring a built transmission and heavy duty transfer case ready for the track.
All right,
so we got our rear end put together
and we're ready to get it in the truck, get it fabricated in the right spot, but to know the exact center line of that pinion,
well, we need to know the drive line where it's gonna be at.
So we're gonna go ahead and get the transmission, transfer case put in
before the transmission. Well, we got this little peach here from FTI Performance.
Performance.
This is a 4L80.
It's a level 3. They call it the level 3 so it can handle
up to 1000 horsepower, 1000 horsepower. So
we, that's our, that's our goal. We're gonna be striving. We're gonna try to get as close as you can to 1000 horsepower with that, so.
They also sent us one of their torque converters as well.
Now that is a 10 inch triple disc torque converter. So with our combination it's probably gonna be about 3500 stall. It's good for the strip,
good for the streak,
yeah,
exactly.
Good little balance right there.
And then to make it 4 wheel drive,
well, we got our transfer case. So we reached out to Summit Racing and they sent us one of these Zombrota remanufactured units.
Now
you say, well, we already had a transfer case in the original truck.
Well, it's computer controlled electronically shifted,
and make it more reliable,
more.
User friendly.
I wanted to go with a manually shifted one.
So this is a 261 HD out of
kind of like a Durmax 2500, yeah,
so like an early 2000s GM truck 2500 truck.
So you got the heavy duty aspect and it's also manually controlled,
manually shifted there as well.
So this is gonna be perfect for us for a drive on,
you know, it's gonna be exciting to get that in there and let it rip.
So
next step, let's get the crane over here and we'll get it
over on the left.
Let's do it.
Is that enough?
It's going to have to be, I think.
Hold on,
hold on.
She's a little longer than the other one,
maybe
just a little one.
Going up.
When can we go back?
Uh, we can go back whenever you want,
OK.
Somewhere like that
And then
we get our strap
up here,
yeah, and I can block this back here.
Full release
I'll get this out of the way.
oop.
This one right here.
Uh-huh.
I'm just gonna try to lift up on it,
get soft,
yeah,
get soft.
Nope,
you
ain't get done.
There it goes. That's it.
Stick the ball through your eye. I know,
right through my teeth.
Next stop,
dentist.
All right.
Blind, I was doing it from this side,
staring in the to the light.
All right,
we'll get a couple of nuts on
the tree mount.
Say it's on there.
Let's get the, uh,
mockup block in it now.
All right, so next up, we got to get our mock-up block in the truck, but before we can do that, we got to deal with our motor mounts.
Now we could use the original ones that came off the truck,
but these were known
for having one major flaw, and that was they're filled with hydraulic fluid,
and, you know,
many miles, those are,
those are prone to leaks, so we don't want to have to deal with that.
So for our replacement, we hit up Summit Racing,
and they sent us over these stout polyurethane motor mounts.
Now these things are, they're already powder coated and they're ready to drop into the truck.
So let's go ahead,
get them mounted up on the block.
All right, went ahead and disassembled the motor mount, make it a little bit easier to install on both the engine
and the truck.
Go to your home,
Bolt.
All right,
you wanna toss me that block?
Should I really toss it?
I mean you could.
One block coming at you.
All right,
don't drop it.
Put my hands on it here.
I'll give you a hand, but I ain't getting in there.
Uh,
yeah, it's cap tight.
All right, well, let's get that rear end on the back. All right, let's go slap that thing in there.
Next,
our adjustable for link gets mocked up for maximum traction.
All right,
so we've got the engine and trans mounted in the truck.
Now I had to come up with a little custom fabrication on the crossmember for the trans.
Since the 6 L80 we pulled out of here,
just a little bit shorter than the 4L80 that's going in there,
but it's all done,
it's centered, and it's about time we get to this 4 link.
Yeah,
you know, we've got the tire and wheel combination on here for you.
That's kind of. A visual so you can get the overall idea of what the tire's gonna look like in relationship to the rest of the truck.
I don't know about you, but
that's pretty cool.
That's looking pretty tough.
Yeah,
it's got, it's got quite a bit of poke coming out of the, uh, I like it set up right there. So now we gotta get to getting the suspension
put together.
So let's go jump under here and show you what we're working with.
Alright,
let's see what we got going on under here.
Yeah,
let's look at it the,
you know, the factory suspension set up,
it was a type of 4 length set up they utilize lower bar here and upper bar here, but it's a, a fixed point
and for this racing setup we want some adjustability is the main thing in setting up the suspension there.
So
our 4 length kit is gonna have some adjustment in the back kind of bracket that goes to this point.
Then we'll have an upper bar
and a lower bar it's gonna extend
somewhere in this area.
So we'll have to put another cross member in.
Here
to get a mounting point.
OK,
looks like we're gonna have to remove maybe that cross member, maybe a couple more of these brackets back here.
Yeah, there's a lot of stuff in the factory that,
you know,
exhaust hangers, a spring perches, stuff like that that we'll probably have to cut out and give us some more room.
Yeah,
and then we're gonna have to figure out our diagonal since it's a parallel four link. There's nothing locating the rear end, so we gotta make sure that's locked down,
get that in there, and then,
you drag racing, guys, you.
The coil is pretty tight usually,
right?
Yeah,
I mean,
typically when it's got a narrower rear end, but we've got a wide one here, so yeah,
we may have to
move those out,
move them out a little bit. We'll see when we get to that point, but I think the first thing is we'll get this cross member done, so we'll clean off the frame rail here, get some good metal to,
to weld to,
and then, uh, go from there. Yeah,
well,
there's nothing to it,
but I guess to do it right. Let's do it. Let's clean it up.
The first step to a good weld is a clean surface.
All right.
Once our frame width is measured, we'll get our crossmember cut and tacked into place.
That ain't 90.
Next we'll attach the axle housing brackets.
Yeah.
Yeah.
All right,
before we get too carried away, let's check the alignment here.
I think this will be a good bar to keep in while we're welding all this stuff up,
keep it square if it goes in.
Uh oh,
just kidding.
Uh, look at that.
Look at that, like butter.
Nice.
Looks good.
Now let's get our
top pieces tacked in place. I'll go grab them.
Unwavering.
Then we'll get the front for length brackets up on the cross member.
Now we're using a piece of square tubing here that has the same dimension as a rod ends. Oh, that sounds solid
to keep the brackets parallel from front to back and spaced correctly.
Let's see here, let's put,
uh,
clamp this one.
Beautiful,
get our
orange box of life here.
Oh,
get a load of that.
My icrometer is
calibrated.
All right, so we got our crossmember all tacked into place,
our link brackets tacked to the crossmember.
Uh, it's almost ready to burn in.
Now,
I'm gonna add,
wanna add some gussets here,
try to keep this chassis as rigid as possible because there's a lot of force coming into this bar,
but yeah,
it's almost there.
Yeah,
we'll definitely add some triangulation to that cross member.
All these brackets, give it that strength.
You know,
some other things you want to check is your measurements.
We have measured this thing
over and over and over again with tape measures.
Plumb bobs, strings,
lass, yeah,
levels, laser levels, things like that to make sure everything is where we want it to be.
I still got the, uh,
shock mounts to do on the back here as well. We're still waiting on the shocks to show up and we'll get those
welded in place, but that's kind of the general idea. You can see
where we're going with this setup right there. And then we'll get this diagonal bar in here, and that's pretty much gonna
get ready to weld everything in. That'll be it,
yeah,
we'll get it all welded up and we'll see you guys next time on New York City Trucks.