Video Transcript
You're watching Power Nation.
I'm super excited to see this thing on the ground.
Let's get it.
Dragonan,
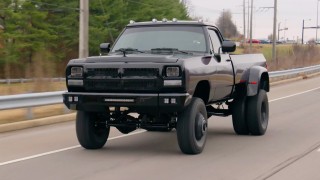
our 4 wheel drive street and strip truck is getting closer to the finish line,
but there's still plenty to do.
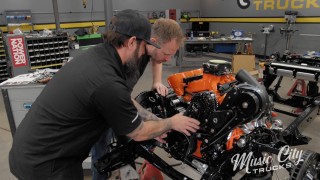
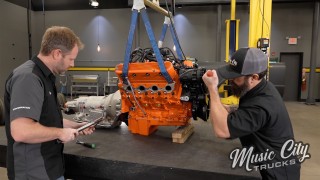
The 6.2 L V8 is back from engine power,
and we're loading it with high performance parts built for big horsepower.
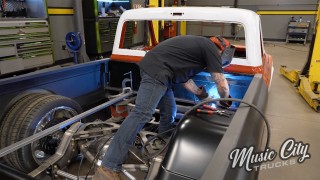
Then we fabricate a custom mount and relocate the fuel tank.
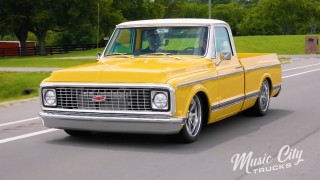
Plus, we finish the rear suspension and finally get Draggolange back on the ground to check out its new stance. It's all happening today on Music City Trucks.
Well hey everybody, welcome to Music City Trucks.
Well, we're moving right along on Project Dragon La,
and if you remember, this project came equipped with a 6.2 L LS engine. When we pulled that tired engine out,
stripped it apart,
and got it over to Pat and Frankie at Engine Power where they started some machine work.
Pat was able to take our block and hone the cylinders out to match our new pistons we got from SummitRacing.
Frankie took those pistons and rods in the crankshaft and was able to balance that rotating assembly to get this thing in tip-top condition.
Once we got the block done with machine work, we were able to give the thing a good
wash,
cleaning out all of our oil passages,
get this thing ready for reassembly.
That first step was a new set of can bearings we were able to knock in place,
making sure our oil passages are lined up precisely.
Then we were able to measure our crankshaft main journals for our oil clearance, and ours comes out right at 2.5,000.
All right,
got one beautifully machined crank for you, Mike.
All right,
let me get some lube on these bearings here.
All right,
about ready to drop this thing in,
set her in there.
Watch your fingers.
Mine or yours?
Uh, yours.
Beautiful.
All right,
there's main caps on. All right.
We'll torque down our ARP main studs in 3 equal steps,
60 pounds on the inners and 50 pounds on the outers.
All right,
there's the last one. Let's get the side mains in now.
Put a little silicone underneath the head that way it doesn't leak out.
You able to get the torque with that, uh, torque wrench.
Might need a longer torque wrench or a different socket extension adapter set up,
but we'll make it work.
All right, with our crankshaft in place, we can go ahead and check our inplay.
We're right at 4000.
Perfect.
That's beautiful.
All right,
it's a moment of truth here,
Mike.
We mandatorily
have to spin this thing. There you go.
So let's see what we got.
Oh, that feels nice like butter.
Yeah, we're not turning much RPM,
but she sure feels good.
Are you about ready to get this old bump stick in?
Yeah, let's get that cam in.
Now this camshaft is from Summit Racing's Pro LS line and this particular one,
well, it's a healthy one. It's gonna provide a 625,000 of intake valve lift and 605,000 of exhaust valve lift.
Now the duration on this at 50, well, it's 242 on the intake and 251 on the exhaust,
and the lobe separation angle is 116 degrees.
If you don't have one of those cam insulation tools,
uh, you can just take your
timing gear,
throw a couple of bolts in there, and give you the leverage
that you need,
that you need,
right, right, yep.
OK, yeah,
yeah,
gotta take your time and your back off.
You don't wanna leave it on.
No, I've gotta put a retaining plate on it.
All right,
get our retaining plate
in and that camshaft's going nowhere.
All right, so next up, we're gonna go ahead and get our timing set on.
I'm gonna go ahead and start with the crank gear here. Now this is a comp cam set up and we got this from our friends over at Summit. We're just, we're installing it at 0, so we're straight up.
Go ahead and give it a little tappy,
get this thing on.
Alright, I'm looking fully seated here.
OK,
got our
chain
cam gear and chain on there.
Let's make sure we get this nice and lined up.
We're going straight up,
going to 0,
straight up,
dot to 0.
All right,
dot to dot.
I like it.
I like it.
All right,
hit him with a torque wrench.
Where we going?
Got your strong hand out.
Got my strong hand back here.
I'll try to hold it.
May not.
Let's see what you got.
I don't think it's gonna happen.
25 pounds.
Here
we go.
Look at you.
All right,
it's been stirring some mashed potatoes lately.
Alright, now our next step is to degree the camshaft.
Before we can do that, we've got to get the number one piston rod
in the cylinder
and to complete that rotating assembly where we're continuing with Summit's Pro LS line of components here
with their forged pistons and forged H beam rods now this.
Piston right here,
well, it's got a little bit of a dome, and with all of our numbers, it's gonna give us about 10.9 to 1 compression ratio.
Now that this kit comes with the rings we've already measured them.
We filed them to fit each cylinder.
We got them installed. It's gonna get it lubed up, get it in the cylinder.
The cap on.
We complete the V8 rebuild and show you how to modify your rocker arms after installing a larger camshaft.
All right,
so we went ahead and got our camshaft agreed in.
Everything matches up.
Looks pretty good,
pretty good to our, our cam card there right there. So
that looks good. So let's go ahead and get the rest of the pistons in Let's do it.
With our rod bearings installed and the cap torqued, we can verify our rod journal oil clearance.
Boom.
I like to use studs wherever possible on these aluminum blocks and we're gonna use this set here from ARP
that's gonna be perfect for our nitrous combination.
For our lifters we're just going with a standard set of LS 7 lifters we got from SummitRacing.
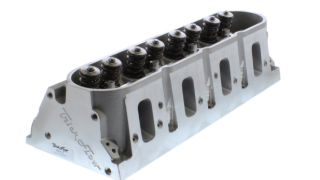
And for our cylinder heads we're going with this set here from Trick Flow Specialties.
This is their Gen X 255 HD series cylinder head for the LS3s.
This features competition CNC ported chambers,
exhaust ports,
intake ports.
They're already fully assembled,
ready to rock and roll,
and with over 380 CFM of flow on the intake side,
well,
there's a bound to make some good power. And I'll tell you what, these things sure are pretty.
Go ahead and get them on the end.
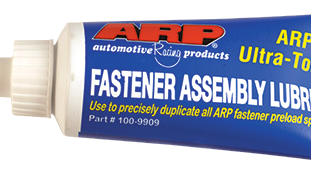
With the ARP Ultra Torque lube on the nuts,
we can tighten our cylinder head hardware in sequence at 30 pounds,
60 pounds, and a final torque of 90 ft pounds on the 11 millimeter studs.
Time for 90.
Time for 90.
All right,
next up is our little rocker stands right here
and then we can get our pushrods and rocker arms
on, but before we get the rocker arms on there,
well, we're gonna do a little modification to them to our factory ones, and that's the subject of today's Summit tech tip.
Whenever you add a larger camshaft to your LS engine, it's always a good idea to update the rocker arms as well, because the last thing you want to happen is the factory needle rollers to fail and go throughout out your engine.
So Summit Racing
makes
a fulcrum and bearing kit along with the tools you need to update your rocker arms.
So let's go ahead and get these swapped out.
The factory bearing setup has limited travel,
so with a high lift camshaft, there's a possibility of mechanical interference.
So this trunnion kit from Summit Racing gives us 360 degrees of rotation
and a better retaining system for those needle bearings.
All that out of there.
And we got her sleeve.
Press in that one.
Until it stops.
Right there.
Take one of our new fulcrums.
And then in place.
And get a bearing for the other side.
OK,
we'll get our clips on here and be ready to go.
All right,
got those in there.
Now let's get them on the engine.
All right,
next up we'll go ahead and get our oil pump on.
Perfect.
All right, so see, with the ARP studs, we had to modify the wind tray just a tickle,
just a little bit right there,
really relief it there, but
other than that, drop that pickup tube on there.
Give a little wiggle.
All right,
for our front cover, a couple things I want to point out here because we're running a double roller timing chain, well, we have to space the oil pump out
which on your stock cover you'll have to relieve some areas for it to clear.
So we've already done that
and we're gonna get and get this on here.
See here.
All right,
before we tighten down our
front cover bolts, I'm gonna go ahead and put our bouncer hub
on.
The key thing here is that balance or that front cover there, it doesn't have any dial pins to locate itself.
So what you gotta do is make sure that the bottom of the cover and the bottom of pan rail here are flat
and also
that hub is centered on that seal there. That's the key areas on that.
Uh, I think that's it.
The bouncer hub on there we can go ahead and tighten down our front cover bolts.
And we can get our,
Bouncer bolt in there here later too.
All right, we'll button this thing up on the bottom side here,
a little bit of little goo on the seams, yeah, on the seams there, a little bit RTV,
OK,
gasket time.
Holes lined up,
yeah, they're close enough, close enough, yeah.
My fingers are so greased up I can't even spin the thing.
All right,
give her a little spinning,
yeah,
get back up. So yeah,
just to recap, the engine,
you know, it's a stock stroke,
right? The bore is just a little bit overboard to hone the cylinders out,
match the pistons, didn't really change cubic inch much, yeah,
377, something like that,
um,
you know, it's got a little bit more compression,
almost 11 to 1
on the compression there,
good set of heads,
good healthy camshaft,
so should make some pretty good power,
and it's gonna.
Once we put that shot of nitrous on it,
should send it over the top, right,
so we are waiting on our custom set of push rods right there,
and we can finish up the valve train on the top of the engine.
Obviously we got the front drive, we gotta put the balancer on and stuff like that. So
we still got a few things to do to finish this up,
but in the meantime,
you know, it's all good to go. I think we can button up some stuff on the truck.
Yeah,
let's get back to it, all right.
Coming up,
we fabricate a new home for our fuel tank.
All right, we're back underneath the truck. I think we're gonna address the fuel system. I think that's a pretty good idea.
So the original fuel tank on this was
way up there,
right in this general area.
That thing was massive. Yeah, it was big. It was like 32 gallons. Now we don't need that much capacity for our rig,
but so something a little bit smaller,
I think it's, uh, maybe 15 gallons.
tank or so, so probably half the size, and it's, it's nice and light being that it's aluminum. It's aluminum as well.
We're gonna put it in this general area where the spare tire was because we're not gonna carry one of those. No.
So why don't you go whip up
a couple brackets, maybe, get this thing so we can get it hung. I'm gonna go ahead and trim some fat off this chassis, get these
stuff we don't need, yeah,
out of here.
All right,
go cut some metal.
All right.
With our pieces tacked together and proper fitment verified,
we can glue it together for good.
All right,
so we got all of our pieces welded together
and we got the frame back underneath the truck and you get a better idea of what we're trying to accomplish with the fuel tank mount.
So now we just got to get it welded to the frame.
All right,
all right,
looks like you got your bracket done. Looks like it's strapped in.
Yeah, I mean, let's, let's make it permanent.
Job's done.
No,
we're just kidding. He's got a couple straps that he whipped up.
They should work pretty well.
Yeah,
we just went around the warehouse and found some old fuel tank straps,
and I think they'll be perfect.
Kind of go over there.
Let's go off this one,
then I'll hold it up
real nice.
Let's get the bolts in.
All right.
All right,
Moment of truth. Do I need to hold it?
Uh, I think those straps will hold it. Let's see here.
Boom, right.
It's Pretty stout,
firm, right? It ain't going anywhere.
Nice.
All right,
but we will take that back out
and we're gonna paint that bracket and stuff like that
that we welded up there
and then also put some rubber, some foam between the aluminum and all the steel so it doesn't puncture it anywhere like that. I think that'd be a good,
good idea, but
how are we gonna get all the fuel in this tank up front?
Well, I'm glad you asked.
Oh,
what do you got?
Beach works.
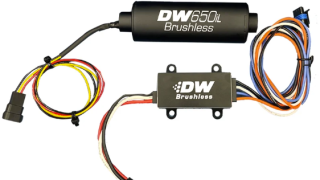
They sent us this fuel pump right here. This is 650 L per hour,
but the big thing, it's brushless and it's gonna be able to handle
ethanol, and we are running E85 in this setup, so I'm thinking we'll mount it
somewhere on the side of the frame rail over here.
But before we get to that,
let's get the rear end back in this thing and get it on the ground.
I'm super excited to see this thing on the ground.
Let's get it.
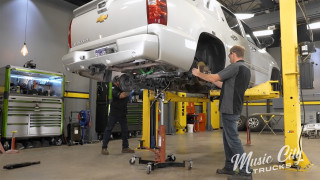
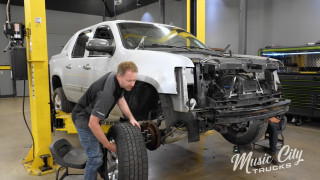
We installed the rear end and set drag a latch on the ground to check the stance.
Well, as you can see, we finally got our quick performance 9 inch back under the truck.
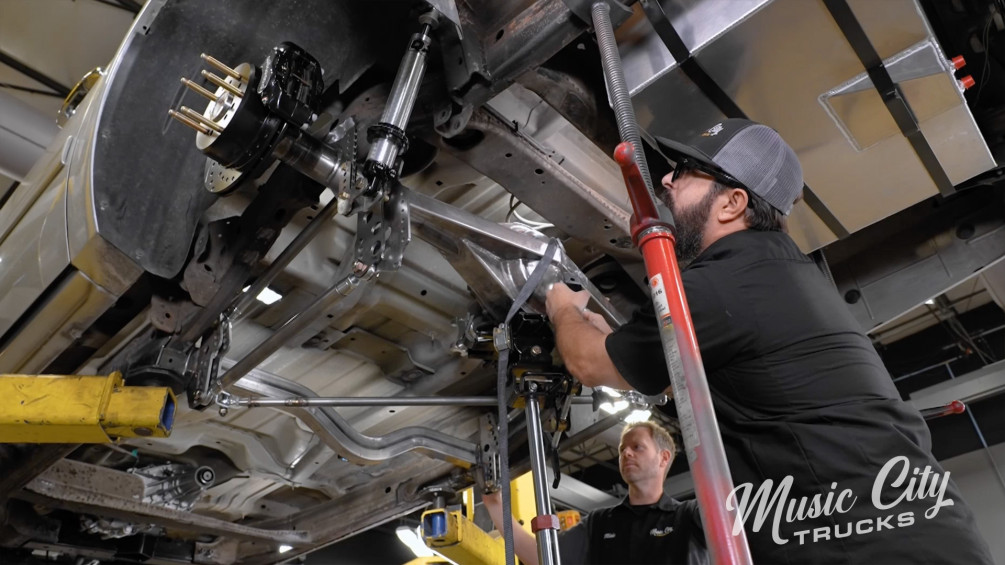
Now I went ahead and welded up all of our 4 link brackets, so those are all ready to go.
Now there's one more thing we gotta do, and that's keep this thing located between the frame rails.
All right,
get it up to what we think is
ride height, mhm.
Somewhere.
Like that I think we've made these bars parallel to the ground for our mock up.
It's pretty close.
All right, so we'll get our diagonal bar in here now. The
purpose of this is to help keep our rear end centered left to right
as it travels up and down through the suspension
motion there.
OK,
got that in here now let's, uh,
run the jack up and down,
kind of cycle everything before we put the springs on it.
All right, Mike, you about ready to cycle this thing? Yeah, let's go up with it.
We're going up.
That's about it right there up
and then.
Looks good.
Clear.
Yeah,
looks good,
and we're never gonna be that in that
much bump hopefully
unless we're bottoming out.
Check all the way down.
Let's see.
Boom, look at that.
That's solid right there,
perfect.
Not too shabby.
Alright, well, let's get our springs on the shocks on the coil overs there,
get the tires on, get on the ground,
it looks like let's do it. I can't wait.
There we go.
Drop her down.
You want to come out this way with it?
Sure.
Wee,
she's hanging.
Beautiful.
Look at that.
All right, good to stay on the ground.
All right, Mikey, it's almost time to see your vision come to life.
There's no engine in it. We haven't really set the springs for the heights.
Yeah, we don't know what it's gonna do.
Yeah,
we get a,
get an idea so far.
Look at it.
Looking pretty good all the way down.
It looks perfect.
You know,
originally I was questioning your vision.
I'm still questioning it,
but
honestly it looks pretty cool.
You put big meats on,
you know,
a lot of dish in the, on the wheel,
and anything can be cool.
This thing's looking pretty cool right
now. It's on the ground though. We can get to the inside. We gotta address something in there.
Yeah, we got a lot of welding,
a lot of notching, and a lot of bending in our future when we make this cage.
A little roll cage action coming up, but that's gonna be next time on Music City Trucks.
It's looking pretty tough.
Show Full Transcript
I'm super excited to see this thing on the ground.
Let's get it.
Dragonan,
our 4 wheel drive street and strip truck is getting closer to the finish line,
but there's still plenty to do.
The 6.2 L V8 is back from engine power,
and we're loading it with high performance parts built for big horsepower.
Then we fabricate a custom mount and relocate the fuel tank.
Plus, we finish the rear suspension and finally get Draggolange back on the ground to check out its new stance. It's all happening today on Music City Trucks.
Well hey everybody, welcome to Music City Trucks.
Well, we're moving right along on Project Dragon La,
and if you remember, this project came equipped with a 6.2 L LS engine. When we pulled that tired engine out,
stripped it apart,
and got it over to Pat and Frankie at Engine Power where they started some machine work.
Pat was able to take our block and hone the cylinders out to match our new pistons we got from SummitRacing.
Frankie took those pistons and rods in the crankshaft and was able to balance that rotating assembly to get this thing in tip-top condition.
Once we got the block done with machine work, we were able to give the thing a good
wash,
cleaning out all of our oil passages,
get this thing ready for reassembly.
That first step was a new set of can bearings we were able to knock in place,
making sure our oil passages are lined up precisely.
Then we were able to measure our crankshaft main journals for our oil clearance, and ours comes out right at 2.5,000.
All right,
got one beautifully machined crank for you, Mike.
All right,
let me get some lube on these bearings here.
All right,
about ready to drop this thing in,
set her in there.
Watch your fingers.
Mine or yours?
Uh, yours.
Beautiful.
All right,
there's main caps on. All right.
We'll torque down our ARP main studs in 3 equal steps,
60 pounds on the inners and 50 pounds on the outers.
All right,
there's the last one. Let's get the side mains in now.
Put a little silicone underneath the head that way it doesn't leak out.
You able to get the torque with that, uh, torque wrench.
Might need a longer torque wrench or a different socket extension adapter set up,
but we'll make it work.
All right, with our crankshaft in place, we can go ahead and check our inplay.
We're right at 4000.
Perfect.
That's beautiful.
All right,
it's a moment of truth here,
Mike.
We mandatorily
have to spin this thing. There you go.
So let's see what we got.
Oh, that feels nice like butter.
Yeah, we're not turning much RPM,
but she sure feels good.
Are you about ready to get this old bump stick in?
Yeah, let's get that cam in.
Now this camshaft is from Summit Racing's Pro LS line and this particular one,
well, it's a healthy one. It's gonna provide a 625,000 of intake valve lift and 605,000 of exhaust valve lift.
Now the duration on this at 50, well, it's 242 on the intake and 251 on the exhaust,
and the lobe separation angle is 116 degrees.
If you don't have one of those cam insulation tools,
uh, you can just take your
timing gear,
throw a couple of bolts in there, and give you the leverage
that you need,
that you need,
right, right, yep.
OK, yeah,
yeah,
gotta take your time and your back off.
You don't wanna leave it on.
No, I've gotta put a retaining plate on it.
All right,
get our retaining plate
in and that camshaft's going nowhere.
All right, so next up, we're gonna go ahead and get our timing set on.
I'm gonna go ahead and start with the crank gear here. Now this is a comp cam set up and we got this from our friends over at Summit. We're just, we're installing it at 0, so we're straight up.
Go ahead and give it a little tappy,
get this thing on.
Alright, I'm looking fully seated here.
OK,
got our
chain
cam gear and chain on there.
Let's make sure we get this nice and lined up.
We're going straight up,
going to 0,
straight up,
dot to 0.
All right,
dot to dot.
I like it.
I like it.
All right,
hit him with a torque wrench.
Where we going?
Got your strong hand out.
Got my strong hand back here.
I'll try to hold it.
May not.
Let's see what you got.
I don't think it's gonna happen.
25 pounds.
Here
we go.
Look at you.
All right,
it's been stirring some mashed potatoes lately.
Alright, now our next step is to degree the camshaft.
Before we can do that, we've got to get the number one piston rod
in the cylinder
and to complete that rotating assembly where we're continuing with Summit's Pro LS line of components here
with their forged pistons and forged H beam rods now this.
Piston right here,
well, it's got a little bit of a dome, and with all of our numbers, it's gonna give us about 10.9 to 1 compression ratio.
Now that this kit comes with the rings we've already measured them.
We filed them to fit each cylinder.
We got them installed. It's gonna get it lubed up, get it in the cylinder.
The cap on.
We complete the V8 rebuild and show you how to modify your rocker arms after installing a larger camshaft.
All right,
so we went ahead and got our camshaft agreed in.
Everything matches up.
Looks pretty good,
pretty good to our, our cam card there right there. So
that looks good. So let's go ahead and get the rest of the pistons in Let's do it.
With our rod bearings installed and the cap torqued, we can verify our rod journal oil clearance.
Boom.
I like to use studs wherever possible on these aluminum blocks and we're gonna use this set here from ARP
that's gonna be perfect for our nitrous combination.
For our lifters we're just going with a standard set of LS 7 lifters we got from SummitRacing.
And for our cylinder heads we're going with this set here from Trick Flow Specialties.
This is their Gen X 255 HD series cylinder head for the LS3s.
This features competition CNC ported chambers,
exhaust ports,
intake ports.
They're already fully assembled,
ready to rock and roll,
and with over 380 CFM of flow on the intake side,
well,
there's a bound to make some good power. And I'll tell you what, these things sure are pretty.
Go ahead and get them on the end.
With the ARP Ultra Torque lube on the nuts,
we can tighten our cylinder head hardware in sequence at 30 pounds,
60 pounds, and a final torque of 90 ft pounds on the 11 millimeter studs.
Time for 90.
Time for 90.
All right,
next up is our little rocker stands right here
and then we can get our pushrods and rocker arms
on, but before we get the rocker arms on there,
well, we're gonna do a little modification to them to our factory ones, and that's the subject of today's Summit tech tip.
Whenever you add a larger camshaft to your LS engine, it's always a good idea to update the rocker arms as well, because the last thing you want to happen is the factory needle rollers to fail and go throughout out your engine.
So Summit Racing
makes
a fulcrum and bearing kit along with the tools you need to update your rocker arms.
So let's go ahead and get these swapped out.
The factory bearing setup has limited travel,
so with a high lift camshaft, there's a possibility of mechanical interference.
So this trunnion kit from Summit Racing gives us 360 degrees of rotation
and a better retaining system for those needle bearings.
All that out of there.
And we got her sleeve.
Press in that one.
Until it stops.
Right there.
Take one of our new fulcrums.
And then in place.
And get a bearing for the other side.
OK,
we'll get our clips on here and be ready to go.
All right,
got those in there.
Now let's get them on the engine.
All right,
next up we'll go ahead and get our oil pump on.
Perfect.
All right, so see, with the ARP studs, we had to modify the wind tray just a tickle,
just a little bit right there,
really relief it there, but
other than that, drop that pickup tube on there.
Give a little wiggle.
All right,
for our front cover, a couple things I want to point out here because we're running a double roller timing chain, well, we have to space the oil pump out
which on your stock cover you'll have to relieve some areas for it to clear.
So we've already done that
and we're gonna get and get this on here.
See here.
All right,
before we tighten down our
front cover bolts, I'm gonna go ahead and put our bouncer hub
on.
The key thing here is that balance or that front cover there, it doesn't have any dial pins to locate itself.
So what you gotta do is make sure that the bottom of the cover and the bottom of pan rail here are flat
and also
that hub is centered on that seal there. That's the key areas on that.
Uh, I think that's it.
The bouncer hub on there we can go ahead and tighten down our front cover bolts.
And we can get our,
Bouncer bolt in there here later too.
All right, we'll button this thing up on the bottom side here,
a little bit of little goo on the seams, yeah, on the seams there, a little bit RTV,
OK,
gasket time.
Holes lined up,
yeah, they're close enough, close enough, yeah.
My fingers are so greased up I can't even spin the thing.
All right,
give her a little spinning,
yeah,
get back up. So yeah,
just to recap, the engine,
you know, it's a stock stroke,
right? The bore is just a little bit overboard to hone the cylinders out,
match the pistons, didn't really change cubic inch much, yeah,
377, something like that,
um,
you know, it's got a little bit more compression,
almost 11 to 1
on the compression there,
good set of heads,
good healthy camshaft,
so should make some pretty good power,
and it's gonna.
Once we put that shot of nitrous on it,
should send it over the top, right,
so we are waiting on our custom set of push rods right there,
and we can finish up the valve train on the top of the engine.
Obviously we got the front drive, we gotta put the balancer on and stuff like that. So
we still got a few things to do to finish this up,
but in the meantime,
you know, it's all good to go. I think we can button up some stuff on the truck.
Yeah,
let's get back to it, all right.
Coming up,
we fabricate a new home for our fuel tank.
All right, we're back underneath the truck. I think we're gonna address the fuel system. I think that's a pretty good idea.
So the original fuel tank on this was
way up there,
right in this general area.
That thing was massive. Yeah, it was big. It was like 32 gallons. Now we don't need that much capacity for our rig,
but so something a little bit smaller,
I think it's, uh, maybe 15 gallons.
tank or so, so probably half the size, and it's, it's nice and light being that it's aluminum. It's aluminum as well.
We're gonna put it in this general area where the spare tire was because we're not gonna carry one of those. No.
So why don't you go whip up
a couple brackets, maybe, get this thing so we can get it hung. I'm gonna go ahead and trim some fat off this chassis, get these
stuff we don't need, yeah,
out of here.
All right,
go cut some metal.
All right.
With our pieces tacked together and proper fitment verified,
we can glue it together for good.
All right,
so we got all of our pieces welded together
and we got the frame back underneath the truck and you get a better idea of what we're trying to accomplish with the fuel tank mount.
So now we just got to get it welded to the frame.
All right,
all right,
looks like you got your bracket done. Looks like it's strapped in.
Yeah, I mean, let's, let's make it permanent.
Job's done.
No,
we're just kidding. He's got a couple straps that he whipped up.
They should work pretty well.
Yeah,
we just went around the warehouse and found some old fuel tank straps,
and I think they'll be perfect.
Kind of go over there.
Let's go off this one,
then I'll hold it up
real nice.
Let's get the bolts in.
All right.
All right,
Moment of truth. Do I need to hold it?
Uh, I think those straps will hold it. Let's see here.
Boom, right.
It's Pretty stout,
firm, right? It ain't going anywhere.
Nice.
All right,
but we will take that back out
and we're gonna paint that bracket and stuff like that
that we welded up there
and then also put some rubber, some foam between the aluminum and all the steel so it doesn't puncture it anywhere like that. I think that'd be a good,
good idea, but
how are we gonna get all the fuel in this tank up front?
Well, I'm glad you asked.
Oh,
what do you got?
Beach works.
They sent us this fuel pump right here. This is 650 L per hour,
but the big thing, it's brushless and it's gonna be able to handle
ethanol, and we are running E85 in this setup, so I'm thinking we'll mount it
somewhere on the side of the frame rail over here.
But before we get to that,
let's get the rear end back in this thing and get it on the ground.
I'm super excited to see this thing on the ground.
Let's get it.
We installed the rear end and set drag a latch on the ground to check the stance.
Well, as you can see, we finally got our quick performance 9 inch back under the truck.
Now I went ahead and welded up all of our 4 link brackets, so those are all ready to go.
Now there's one more thing we gotta do, and that's keep this thing located between the frame rails.
All right,
get it up to what we think is
ride height, mhm.
Somewhere.
Like that I think we've made these bars parallel to the ground for our mock up.
It's pretty close.
All right, so we'll get our diagonal bar in here now. The
purpose of this is to help keep our rear end centered left to right
as it travels up and down through the suspension
motion there.
OK,
got that in here now let's, uh,
run the jack up and down,
kind of cycle everything before we put the springs on it.
All right, Mike, you about ready to cycle this thing? Yeah, let's go up with it.
We're going up.
That's about it right there up
and then.
Looks good.
Clear.
Yeah,
looks good,
and we're never gonna be that in that
much bump hopefully
unless we're bottoming out.
Check all the way down.
Let's see.
Boom, look at that.
That's solid right there,
perfect.
Not too shabby.
Alright, well, let's get our springs on the shocks on the coil overs there,
get the tires on, get on the ground,
it looks like let's do it. I can't wait.
There we go.
Drop her down.
You want to come out this way with it?
Sure.
Wee,
she's hanging.
Beautiful.
Look at that.
All right, good to stay on the ground.
All right, Mikey, it's almost time to see your vision come to life.
There's no engine in it. We haven't really set the springs for the heights.
Yeah, we don't know what it's gonna do.
Yeah,
we get a,
get an idea so far.
Look at it.
Looking pretty good all the way down.
It looks perfect.
You know,
originally I was questioning your vision.
I'm still questioning it,
but
honestly it looks pretty cool.
You put big meats on,
you know,
a lot of dish in the, on the wheel,
and anything can be cool.
This thing's looking pretty cool right
now. It's on the ground though. We can get to the inside. We gotta address something in there.
Yeah, we got a lot of welding,
a lot of notching, and a lot of bending in our future when we make this cage.
A little roll cage action coming up, but that's gonna be next time on Music City Trucks.
It's looking pretty tough.