In This Episode
Video Transcript
[Anthony] You're watching Powernation!
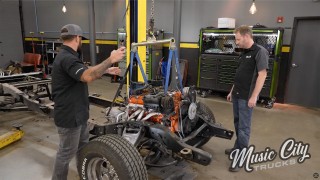
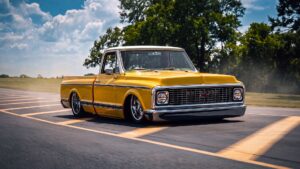
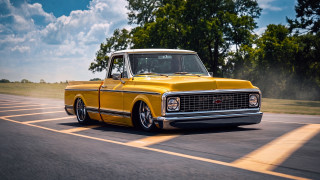
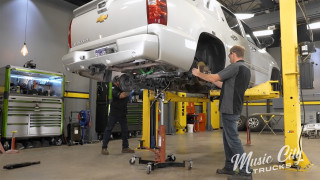
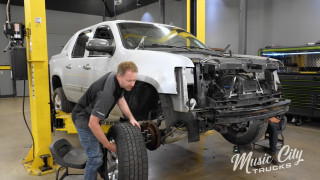
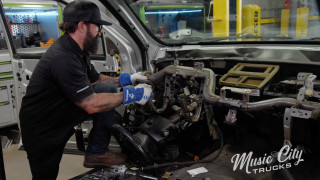
[Mike] Today on Music City Trucks we get surgical on our Super Cheyenne as we slice and dice our frame. Then stitch it back together converting our long bed Chevy into a short bed. [Anthony] Plus we dig on a sweet piece of old iron with some modern touches. [ Music ] [Mike] Hey everybody, welcome to Music City Trucks. Today we are hard at work on our '72 C-10 project. Last time we got all of our new parts on this crossmember here from Porterbuilt and topped it off with these brakes from EBC. [Anthony] To compliment this beautiful drop member you see from Porterbuilt in the front we're gonna put a drop member in the rear, and that includes their step notches, rear frame rails. They also sent us over their shortening kit that's gonna turn this from a long bed to a short bed. It's gonna get us in the weeds but the first thing we've got to do is get rid of those trailing arms. [Mike] I'm gonna get some Deep Creep on these bolt here. To help break the metal surface tension we're gonna use some Seafoam Deep Creep. This stuff is a good penetrant but it also works as a good lubricating oil. Now these control arm bushings right here we could shoot some on this if we were gonna use this in the future. I've had those bushings fail on me and it created driveshaft issues with a two piece driveshaft in one of these units right here. I'm gonna let that sit for a second and then we'll break those loose. [ impact driver humming ] [Anthony] Look at that! Hello ! [Mike] We're gonna knock this one out and it may spring out. [Anthony] May do some stuff. [Mike] See what happens. Watch your toes. One, two, three. [ hammer banging metal ] There it goes. [Anthony] With our trailing arms dangling here we can start shortening this frame. PB Fab, the first thing you've got to do with their kit is get rid of this cab mount and the front bed mount. They're held on by rivets. We've shown you before how to get rid of those but let us show you again. First thing we like to do is cut an "X" in those rivets and it helps get them out of there. [ saw buzzing ] [ Music ]
With our X's cut we can pop them off with an air chisel. [ air punch humming ] [Mike] Some might think this is too long but it's actually just right. [ air punch vibrating ]
[Mike] Ain't doing nothing. Ah ha! [ air punch humming ] [ hammers banging metal ] [ metal clanging ] [Anthony] I think it's template time. [Mike] The existing holes for the cab mount serves as a starting point for this template. So we've got the bolts in here. We'll get it all tightened down.
[ drill humming ] Now we can go through and drill out the rest of the holes needed on that template. Landed! [ drill humming ] [Anthony] Never throw it in drive. [ drill humming ] [Mike] With our template fully bolted into place now it's time to get our cuts on. [ saw buzzing ] [ Music ] [ drill humming ] [ Music ]
[Mike] Gotta a little bit of life left on my blade. [Anthony] What's that? [ saw buzzing ] [ Music ]
Woo! [ Music ] Up next we slide our frame back together and suture it up.
[ grinder humming ] [Mike] Well we've got our section of the frame cut out. If you remember we're taking our long bed and converting it to a short bed. I've talked to a lot of you guys and you want to do that but you're scared about cutting the frame, maybe hesitant. Anthony did you have any regrets about cutting this frame? Reservations, no. I say you cut them all. Every long bed make it a short bed. [Mike] If you can cut metal you can cut this and make your long bed a short bed. Now to complete this we've got these brackets here from PB Fab. They're gonna slide right in here. We're gonna get some bolts in and then we'll marry the two back together. [Anthony] Couldn't be any easier. [Mike] Let's connect these two here. [Anthony] Come on up about an inch. Little bit more, more, more. Yep more, yep. [ Music ]
[ metal clanging ] [Mike] Bingo! [Anthony] Yeah! [ Music ]
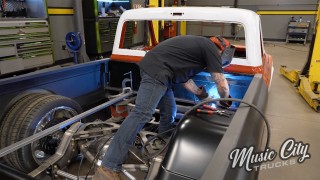
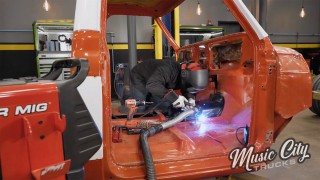
[ impact driver humming ] Now that we have our backing plates in here from Porterbuilt we can go ahead and start welding them in. Before I do that I went ahead and clamped this to make sure everything's tight, square, and true and that we'll have a nice weld when we're done. Also another thing I like to do whenever I'm doing a seam like this, whether it's vertical or horizontal, I like to have a little gap on a butt weld the thickness of the material. So the gap should be close to the thickness. Maybe a little smaller, maybe a little bigger if you can weld it. So let's go ahead and get this tacked in. [ welder crackling ] [ Music ]
Woo! [ welder crackling ] [ Music ] Now that we've got our chassis shortened and it's all welded up we can start moving back here. Now what we're gonna do for this rear drop member. First step is gonna be putting this thing in, and what this is is called a step notch. Now basically it's an oversized C-notch which we did install in our 632 SS build. So you want to go check that video out you'll be able to see one. All this allows us to do is get lower than a standard C-notch is gonna allow you to do. [Mike] Yeah before we get this in there's a few things we need to get out like this crossmember up front. It's got the shocks on it and this crossmember in the back. Let's get those rivets cut and get those knocked out. Then we can get these in place. [ Music ]
[Anthony] The old plasma cutter is looking pretty good right about now. [Mike] Well get the thing out! Let's torch it! Torch it. [Anthony] What's the worst that could happen? Ready? [ torch hissing ] [ Music ]
[Mike] There we go. [ torch hissing ] [Anthony] We got separation. You want to go up with that lift Mike. [Mike] Here we go. [ Music ] [Anthony] That should be good. You want to throw it in reverse. [Mike] Beep-beep-beep-beep. [Anthony] Get that out of here. [Mike] Back on the jack stands. [ saw buzzing ] [ air punch humming ] [ Music ]
[Anthony] Let's see if we can get this. [ Music ]
[Mike] Custom exhaust out of here. [ metal clanging ] We show you a sweet old Chevy with some unique characteristics.
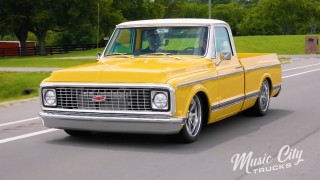
[Mike] Now our C-10 is a long way from hitting the streets but one you might see cruising up and down Broadway is this 1947 3100 from Diggs Rod Shop. Check it out. [ Music ]
[ engine revving ] [ Music ]
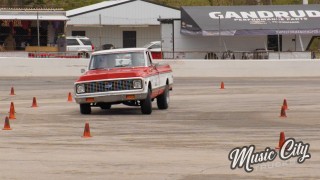
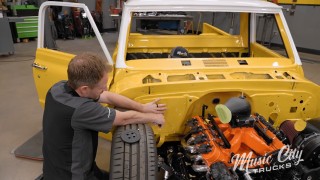
[ engine revving ] [Narrator] Powernation Under The Hood is brought to you by Summit Racing Equipment. [Mike] Before this project turned heads it was just rolling steel and a vision. Woo wee, now this is a classic. How do you do Kassidy? [Kassidy] Pretty good, how are you? [Mike] I'll tell you what. This thing is clean. What year is this one? [Kassidy] This is a 1947 Chevrolet pickup. [Mike] '47, you start doing the math we're getting on up there in years. These are super clean. The lines on them. [Kassidy] This one's sitting on an Art Morrison chassis with Vintage Air, power windows, power brakes. All the amenities a new car would have. [Mike] The color? This is not a red or a black. There's some mixture going on here. What kind of color have we got officially? [Kassidy] We call it a bronze. It's like a siser bronze. The gentleman that owns this truck's last name is Siser. [Mike] Custom made for him. [Kassidy] We custom made in our paint bank. [Mike] Now the wood in that bed. That doesn't look like standard bed wood. It looks like it's got some character to it. [Kassidy] This is barn wood. It was out of the floor of their great grandfather I believe. His hay loft in his barn. They told me that barn was over 100 years old. [Mike] That really makes it personal. [Kassidy] And this is all hidden hardware strips. So you don't see any bolts or anything. [Mike] I've seen a lot guys do different things with the taillights by putting them up here in the bed and hiding down there in the bottom. [Kassidy] They wanted this to all look original. These we got from Jesse Greening, Greening Auto. These are a really nice piece. So this unscrews. There's a led light that comes out and all the wiring hidden up inside so you don't see any of it. [Mike] He makes some good stuff. [Kassidy] Those are probably the best looking taillights I've ever seen on one of these trucks. When we put this bumper the customer wanted to put this filler panel in here. Fills that up and makes it nice, which I really like. Then I took the front license plate bracket, flipped it around, bolted it here on the rear. [Mike] How much time and labor is going into making this polished up to this. [Kassidy] We did this truck in 11 months start to finish. [Mike] Y'all did all the interior work as well right? [Kassidy] This is my second full interior job ever. [Mike] The door panels, all the arm rests. I look at the brake pedal there. Typically you think of a brake pedal it's got an arm that swings up to the dash but this one is going down. [Kassidy] That's all up underneath and it's all Wilwood master, full Wilwood brakes. [Mike] So the master cylinder's actually down by the frame rail? That kinda gives it a little bit cleaner look underneath there. There's a button here on the side. What does that button do? [Kassidy] That's for the header cutouts. [Mike] Now we're talking! We gotta get some noise out there. [Kassidy] When we put those in the dad wanted those and he was hiding them from his boy. This was a father-son project. We got it wired up and I started it for him. They came down and he's looking at the exhaust. He said, what are those under there? Oh that's for emissions. He's like, no it isn't. Then I hit the button and opened them up. He started laughing. It was pretty funny. Underneath here we've got all of our electronics and our wiring. [Mike] All the brains. That's the stuff I like right there. [Kassidy] All the things that make the modern amenities work. [Mike] We've got your power taps there. Got your fuse, your relay center. Got the brains for the computer over there with the fuel injection and you can work on it. [Kassidy] If you've ever got a dead battery that sits under the floor you can't get to it. So we added those. It has a speaker box in the back. They wanted a modern stereo but they didn't want to see it. So we added the cover. It folds down and has a double din stereo in it with navigation and all the amenities there. [Mike] You don't see any of that right now. [Kassidy] When you're done you reach under here and hit this button again. It goes back up and you can't see any of it. [Mike] You had to engineer all the hinges and the motorized portion? [Kassidy] We used the hinges from the glovebox and then we had to figure out the ratio for the arm. It has an electric actuator bolted to the firewall with a cable that comes around. Then it has limits that are set in it. [Mike] It takes a lot of time but those little unique things right there really set it apart. The exterior is super smooth, super clean. I'm guess underneath the hood we're gonna see the same thing. [Kassidy] Oh yeah. [ Music ] [Mike] Definitely LS power, right? [Kassidy] Yes sir. This is a Blueprint 427 stroked LS-3. The dyno sheet said it made 640 horse. Somewhere in that range. We've got a 4L60 transmission behind that going to a Fast Shafts driveshaft into a Strange nine inch rear end all on Art Morrison chassis. [Mike] The unique thing about the LS the intake manifold is not the prettiest thing. It leaves a lot of opportunity for builders like you to customize it. So what do we got going on? [Kassidy] Our customer didn't want to see the coil packs and stuff. I hand built this cover. It all attaches to the factory hardware. So it just snaps down on there. [Mike] What about the headers? Is that off the shelf or did you build those? [Kassidy] Those are Ultimate Headers. We ordered them and they fit very nice. We didn't have to clearance them. [Mike] Those are made for that LS and chassis combination? That makes it a lot easier. [Kassidy] It's got a full three inch stainless exhaust with bullet mufflers and header cutouts of course, X-pipe, all the good stuff. [Mike] Look at this firewall. That thing is super clean. The lights are reflecting off that firewall. That's something you don't really see that. [Kassidy] We custom built this in house. We replaced it from about here down to add more room around here. This one here was actually built for a small block Chevy. This was the second one we done. The newest ones we lower them down so this hole isn't so big if you have an LS. It needs to be this tall if you put a small block in it for the distributor. [Mike] It's not a trailer queen. You're driving this thing. [Kassidy] We've got close to 1,200 miles on it so far. We built this truck to drive. We didn't build it to take to shows. It just happened to turn out nice enough we can take it to shows. [Mike] That's got to make you feel good as a builder knowing this thing is going up and down the road and it's reliable. Somebody's having the time of their life driving this thing. [Kassidy] We drive it every chance we get. [Anthony] Our C-10 needs a little shave to make room for our rear suspension.
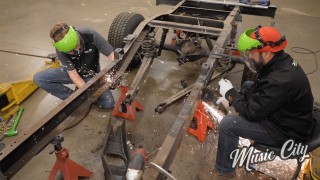
[Anthony] Now that we got our factory crossmembers out of here and have a nice, clean section of frame rail to work with we can go ahead and install this step notch. Porterbuilt wants you to line it up, locate it off the bump stop bracket here right in the center of this. This is gonna mount directly over this rear bump stop bracket hole. You're gonna want to scribe a line from the leading edge. So the edge closest to the front and use a plumb bob to locate it up here. That's gonna get you in the neighborhood. You've got to trim up the frame rail a little bit but I think Mike's gonna tell you a little bit about that. [Mike] The frame is too wide for that bracket to slide over. What we're gonna do is cut a little bit out so it slides right over it. [ saw buzzing ] [ Music ]
So we've got our notches installed on the frame and we went ahead and attached the bridge assembly between the two to get it squared up. What we did is took our level on the frame and made sure the frame was plumb and then connected it up here. As you can see we're right where we want to be. The next step is drill the holes in the side here and get these attached permanently. [Anthony] Got some hardware for you. [Mike] Perfect. [ drill humming ] [ Music ]
Need them little hands to get in there. [Anthony] And to stir the mashed potatoes right? [Mike] Use my strong hand! [ laughing ] That's a good movie. [Anthony] Yes it is. [ Music ] [ drill humming ] [ Music ]
[Mike] That's why I did that one first. [Anthony] I like doing things the hard way. [ Music ]
[Mike] Here he comes with the power tools. Reach around that nut. [Anthony] Michael? [ impact driver humming ] With our notches and bridge bolted up and torqued we can start cutting our frame. [ Sawzall buzzing ] [Mike] Just needs a little pre-suasion. Like this. [ metal clanging ] [Anthony] Now it's a true short bed.
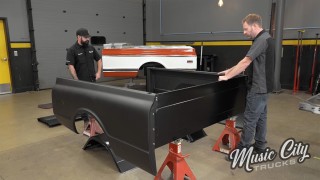
Now that our notches are in we obviously shed some weight in the back here but we've got to add it because we won't have anywhere to mount the bed. So we'll go ahead and get these frame rails that Porterbuilt sends with this kit, get these installed, and we're gonna have a complete chassis once again. [ Music ] [Mike] Before we tighten these down I made some preliminary measurements on our old frame rail from the ground to the bottom of the frame here. So we're gonna check those cause this has got a lot of adjustment in it. Let's see where we're at. That's within an eighth of an inch right there. [Anthony] I can live with that. [Mike] I'll use my old adjustable jack stand here.
[ ratchet clicking ] [ Music ]
Double check that. Money! [Anthony] I mean it's dead on. [ ratchet clicking ] [ Music ]
[Mike] That piece right there is super clean. It ties up those rear frame sections really nice. [Anthony] This kit we together beautifully. Everything's square, everything fit. We didn't have to fight it and look at the welds. [Mike] We've still got a few more things we've got to clean up with that notched area on the old frame. We've got some brackets to bolt in here. It ties in the suspension with a watts link that's gonna go in the back here. That's got to go to the rear end and still waiting on that. That'll be on the next episode of. [Anthony] Music City Trucks! I need the wrench and the ratchet.
Show Full Transcript
[Mike] Today on Music City Trucks we get surgical on our Super Cheyenne as we slice and dice our frame. Then stitch it back together converting our long bed Chevy into a short bed. [Anthony] Plus we dig on a sweet piece of old iron with some modern touches. [ Music ] [Mike] Hey everybody, welcome to Music City Trucks. Today we are hard at work on our '72 C-10 project. Last time we got all of our new parts on this crossmember here from Porterbuilt and topped it off with these brakes from EBC. [Anthony] To compliment this beautiful drop member you see from Porterbuilt in the front we're gonna put a drop member in the rear, and that includes their step notches, rear frame rails. They also sent us over their shortening kit that's gonna turn this from a long bed to a short bed. It's gonna get us in the weeds but the first thing we've got to do is get rid of those trailing arms. [Mike] I'm gonna get some Deep Creep on these bolt here. To help break the metal surface tension we're gonna use some Seafoam Deep Creep. This stuff is a good penetrant but it also works as a good lubricating oil. Now these control arm bushings right here we could shoot some on this if we were gonna use this in the future. I've had those bushings fail on me and it created driveshaft issues with a two piece driveshaft in one of these units right here. I'm gonna let that sit for a second and then we'll break those loose. [ impact driver humming ] [Anthony] Look at that! Hello ! [Mike] We're gonna knock this one out and it may spring out. [Anthony] May do some stuff. [Mike] See what happens. Watch your toes. One, two, three. [ hammer banging metal ] There it goes. [Anthony] With our trailing arms dangling here we can start shortening this frame. PB Fab, the first thing you've got to do with their kit is get rid of this cab mount and the front bed mount. They're held on by rivets. We've shown you before how to get rid of those but let us show you again. First thing we like to do is cut an "X" in those rivets and it helps get them out of there. [ saw buzzing ] [ Music ]
With our X's cut we can pop them off with an air chisel. [ air punch humming ] [Mike] Some might think this is too long but it's actually just right. [ air punch vibrating ]
[Mike] Ain't doing nothing. Ah ha! [ air punch humming ] [ hammers banging metal ] [ metal clanging ] [Anthony] I think it's template time. [Mike] The existing holes for the cab mount serves as a starting point for this template. So we've got the bolts in here. We'll get it all tightened down.
[ drill humming ] Now we can go through and drill out the rest of the holes needed on that template. Landed! [ drill humming ] [Anthony] Never throw it in drive. [ drill humming ] [Mike] With our template fully bolted into place now it's time to get our cuts on. [ saw buzzing ] [ Music ] [ drill humming ] [ Music ]
[Mike] Gotta a little bit of life left on my blade. [Anthony] What's that? [ saw buzzing ] [ Music ]
Woo! [ Music ] Up next we slide our frame back together and suture it up.
[ grinder humming ] [Mike] Well we've got our section of the frame cut out. If you remember we're taking our long bed and converting it to a short bed. I've talked to a lot of you guys and you want to do that but you're scared about cutting the frame, maybe hesitant. Anthony did you have any regrets about cutting this frame? Reservations, no. I say you cut them all. Every long bed make it a short bed. [Mike] If you can cut metal you can cut this and make your long bed a short bed. Now to complete this we've got these brackets here from PB Fab. They're gonna slide right in here. We're gonna get some bolts in and then we'll marry the two back together. [Anthony] Couldn't be any easier. [Mike] Let's connect these two here. [Anthony] Come on up about an inch. Little bit more, more, more. Yep more, yep. [ Music ]
[ metal clanging ] [Mike] Bingo! [Anthony] Yeah! [ Music ]
[ impact driver humming ] Now that we have our backing plates in here from Porterbuilt we can go ahead and start welding them in. Before I do that I went ahead and clamped this to make sure everything's tight, square, and true and that we'll have a nice weld when we're done. Also another thing I like to do whenever I'm doing a seam like this, whether it's vertical or horizontal, I like to have a little gap on a butt weld the thickness of the material. So the gap should be close to the thickness. Maybe a little smaller, maybe a little bigger if you can weld it. So let's go ahead and get this tacked in. [ welder crackling ] [ Music ]
Woo! [ welder crackling ] [ Music ] Now that we've got our chassis shortened and it's all welded up we can start moving back here. Now what we're gonna do for this rear drop member. First step is gonna be putting this thing in, and what this is is called a step notch. Now basically it's an oversized C-notch which we did install in our 632 SS build. So you want to go check that video out you'll be able to see one. All this allows us to do is get lower than a standard C-notch is gonna allow you to do. [Mike] Yeah before we get this in there's a few things we need to get out like this crossmember up front. It's got the shocks on it and this crossmember in the back. Let's get those rivets cut and get those knocked out. Then we can get these in place. [ Music ]
[Anthony] The old plasma cutter is looking pretty good right about now. [Mike] Well get the thing out! Let's torch it! Torch it. [Anthony] What's the worst that could happen? Ready? [ torch hissing ] [ Music ]
[Mike] There we go. [ torch hissing ] [Anthony] We got separation. You want to go up with that lift Mike. [Mike] Here we go. [ Music ] [Anthony] That should be good. You want to throw it in reverse. [Mike] Beep-beep-beep-beep. [Anthony] Get that out of here. [Mike] Back on the jack stands. [ saw buzzing ] [ air punch humming ] [ Music ]
[Anthony] Let's see if we can get this. [ Music ]
[Mike] Custom exhaust out of here. [ metal clanging ] We show you a sweet old Chevy with some unique characteristics.
[Mike] Now our C-10 is a long way from hitting the streets but one you might see cruising up and down Broadway is this 1947 3100 from Diggs Rod Shop. Check it out. [ Music ]
[ engine revving ] [ Music ]
[ engine revving ] [Narrator] Powernation Under The Hood is brought to you by Summit Racing Equipment. [Mike] Before this project turned heads it was just rolling steel and a vision. Woo wee, now this is a classic. How do you do Kassidy? [Kassidy] Pretty good, how are you? [Mike] I'll tell you what. This thing is clean. What year is this one? [Kassidy] This is a 1947 Chevrolet pickup. [Mike] '47, you start doing the math we're getting on up there in years. These are super clean. The lines on them. [Kassidy] This one's sitting on an Art Morrison chassis with Vintage Air, power windows, power brakes. All the amenities a new car would have. [Mike] The color? This is not a red or a black. There's some mixture going on here. What kind of color have we got officially? [Kassidy] We call it a bronze. It's like a siser bronze. The gentleman that owns this truck's last name is Siser. [Mike] Custom made for him. [Kassidy] We custom made in our paint bank. [Mike] Now the wood in that bed. That doesn't look like standard bed wood. It looks like it's got some character to it. [Kassidy] This is barn wood. It was out of the floor of their great grandfather I believe. His hay loft in his barn. They told me that barn was over 100 years old. [Mike] That really makes it personal. [Kassidy] And this is all hidden hardware strips. So you don't see any bolts or anything. [Mike] I've seen a lot guys do different things with the taillights by putting them up here in the bed and hiding down there in the bottom. [Kassidy] They wanted this to all look original. These we got from Jesse Greening, Greening Auto. These are a really nice piece. So this unscrews. There's a led light that comes out and all the wiring hidden up inside so you don't see any of it. [Mike] He makes some good stuff. [Kassidy] Those are probably the best looking taillights I've ever seen on one of these trucks. When we put this bumper the customer wanted to put this filler panel in here. Fills that up and makes it nice, which I really like. Then I took the front license plate bracket, flipped it around, bolted it here on the rear. [Mike] How much time and labor is going into making this polished up to this. [Kassidy] We did this truck in 11 months start to finish. [Mike] Y'all did all the interior work as well right? [Kassidy] This is my second full interior job ever. [Mike] The door panels, all the arm rests. I look at the brake pedal there. Typically you think of a brake pedal it's got an arm that swings up to the dash but this one is going down. [Kassidy] That's all up underneath and it's all Wilwood master, full Wilwood brakes. [Mike] So the master cylinder's actually down by the frame rail? That kinda gives it a little bit cleaner look underneath there. There's a button here on the side. What does that button do? [Kassidy] That's for the header cutouts. [Mike] Now we're talking! We gotta get some noise out there. [Kassidy] When we put those in the dad wanted those and he was hiding them from his boy. This was a father-son project. We got it wired up and I started it for him. They came down and he's looking at the exhaust. He said, what are those under there? Oh that's for emissions. He's like, no it isn't. Then I hit the button and opened them up. He started laughing. It was pretty funny. Underneath here we've got all of our electronics and our wiring. [Mike] All the brains. That's the stuff I like right there. [Kassidy] All the things that make the modern amenities work. [Mike] We've got your power taps there. Got your fuse, your relay center. Got the brains for the computer over there with the fuel injection and you can work on it. [Kassidy] If you've ever got a dead battery that sits under the floor you can't get to it. So we added those. It has a speaker box in the back. They wanted a modern stereo but they didn't want to see it. So we added the cover. It folds down and has a double din stereo in it with navigation and all the amenities there. [Mike] You don't see any of that right now. [Kassidy] When you're done you reach under here and hit this button again. It goes back up and you can't see any of it. [Mike] You had to engineer all the hinges and the motorized portion? [Kassidy] We used the hinges from the glovebox and then we had to figure out the ratio for the arm. It has an electric actuator bolted to the firewall with a cable that comes around. Then it has limits that are set in it. [Mike] It takes a lot of time but those little unique things right there really set it apart. The exterior is super smooth, super clean. I'm guess underneath the hood we're gonna see the same thing. [Kassidy] Oh yeah. [ Music ] [Mike] Definitely LS power, right? [Kassidy] Yes sir. This is a Blueprint 427 stroked LS-3. The dyno sheet said it made 640 horse. Somewhere in that range. We've got a 4L60 transmission behind that going to a Fast Shafts driveshaft into a Strange nine inch rear end all on Art Morrison chassis. [Mike] The unique thing about the LS the intake manifold is not the prettiest thing. It leaves a lot of opportunity for builders like you to customize it. So what do we got going on? [Kassidy] Our customer didn't want to see the coil packs and stuff. I hand built this cover. It all attaches to the factory hardware. So it just snaps down on there. [Mike] What about the headers? Is that off the shelf or did you build those? [Kassidy] Those are Ultimate Headers. We ordered them and they fit very nice. We didn't have to clearance them. [Mike] Those are made for that LS and chassis combination? That makes it a lot easier. [Kassidy] It's got a full three inch stainless exhaust with bullet mufflers and header cutouts of course, X-pipe, all the good stuff. [Mike] Look at this firewall. That thing is super clean. The lights are reflecting off that firewall. That's something you don't really see that. [Kassidy] We custom built this in house. We replaced it from about here down to add more room around here. This one here was actually built for a small block Chevy. This was the second one we done. The newest ones we lower them down so this hole isn't so big if you have an LS. It needs to be this tall if you put a small block in it for the distributor. [Mike] It's not a trailer queen. You're driving this thing. [Kassidy] We've got close to 1,200 miles on it so far. We built this truck to drive. We didn't build it to take to shows. It just happened to turn out nice enough we can take it to shows. [Mike] That's got to make you feel good as a builder knowing this thing is going up and down the road and it's reliable. Somebody's having the time of their life driving this thing. [Kassidy] We drive it every chance we get. [Anthony] Our C-10 needs a little shave to make room for our rear suspension.
[Anthony] Now that we got our factory crossmembers out of here and have a nice, clean section of frame rail to work with we can go ahead and install this step notch. Porterbuilt wants you to line it up, locate it off the bump stop bracket here right in the center of this. This is gonna mount directly over this rear bump stop bracket hole. You're gonna want to scribe a line from the leading edge. So the edge closest to the front and use a plumb bob to locate it up here. That's gonna get you in the neighborhood. You've got to trim up the frame rail a little bit but I think Mike's gonna tell you a little bit about that. [Mike] The frame is too wide for that bracket to slide over. What we're gonna do is cut a little bit out so it slides right over it. [ saw buzzing ] [ Music ]
So we've got our notches installed on the frame and we went ahead and attached the bridge assembly between the two to get it squared up. What we did is took our level on the frame and made sure the frame was plumb and then connected it up here. As you can see we're right where we want to be. The next step is drill the holes in the side here and get these attached permanently. [Anthony] Got some hardware for you. [Mike] Perfect. [ drill humming ] [ Music ]
Need them little hands to get in there. [Anthony] And to stir the mashed potatoes right? [Mike] Use my strong hand! [ laughing ] That's a good movie. [Anthony] Yes it is. [ Music ] [ drill humming ] [ Music ]
[Mike] That's why I did that one first. [Anthony] I like doing things the hard way. [ Music ]
[Mike] Here he comes with the power tools. Reach around that nut. [Anthony] Michael? [ impact driver humming ] With our notches and bridge bolted up and torqued we can start cutting our frame. [ Sawzall buzzing ] [Mike] Just needs a little pre-suasion. Like this. [ metal clanging ] [Anthony] Now it's a true short bed.
Now that our notches are in we obviously shed some weight in the back here but we've got to add it because we won't have anywhere to mount the bed. So we'll go ahead and get these frame rails that Porterbuilt sends with this kit, get these installed, and we're gonna have a complete chassis once again. [ Music ] [Mike] Before we tighten these down I made some preliminary measurements on our old frame rail from the ground to the bottom of the frame here. So we're gonna check those cause this has got a lot of adjustment in it. Let's see where we're at. That's within an eighth of an inch right there. [Anthony] I can live with that. [Mike] I'll use my old adjustable jack stand here.
[ ratchet clicking ] [ Music ]
Double check that. Money! [Anthony] I mean it's dead on. [ ratchet clicking ] [ Music ]
[Mike] That piece right there is super clean. It ties up those rear frame sections really nice. [Anthony] This kit we together beautifully. Everything's square, everything fit. We didn't have to fight it and look at the welds. [Mike] We've still got a few more things we've got to clean up with that notched area on the old frame. We've got some brackets to bolt in here. It ties in the suspension with a watts link that's gonna go in the back here. That's got to go to the rear end and still waiting on that. That'll be on the next episode of. [Anthony] Music City Trucks! I need the wrench and the ratchet.