
Video Transcript
[Tommy] You're watching Powernation.
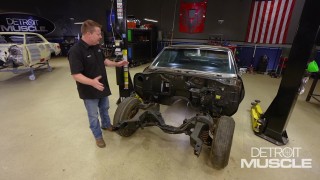
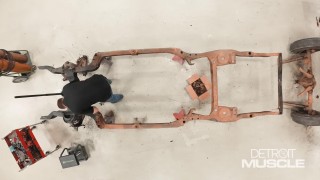
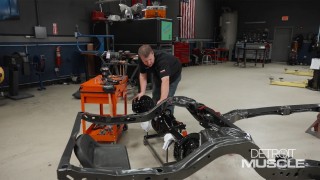
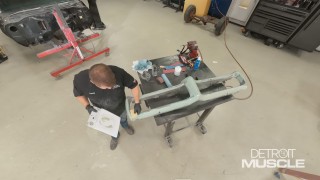
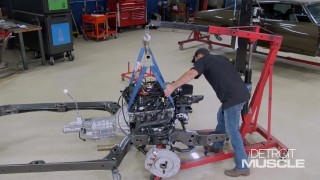
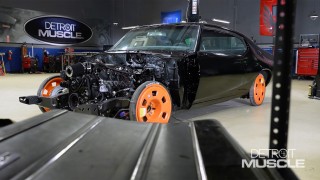
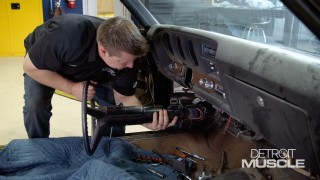
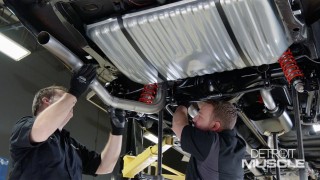
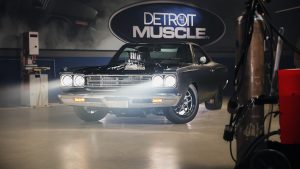
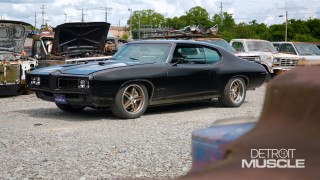
[Tommy] Well guys today we're back on our '69 GTO, Project Henchman, and we're getting pretty close to the finish line. As you all know, this last piece is where all the work comes in. [Joel] Yeah we've still got a couple of things to clean up, few details to iron out, but it won't be long now until that old GTO's back on the road. [ Music ] [ engine revving ] [ Music ] [ tires squealing ] [ Music ] [Tommy] They make a special wrench for this. [ Music ] [ Tommy laughing ] [ Music ] Try this again. Yeah, fixed it! [ Music ] LS swaps are pretty common, and what you'll run into is you've got late model wiring and probably a standalone harness and then you've got the vehicle harness. So what we're needing to do is connect our dash to the engine. Our car just had a switch on the oil pressure. So we've got this simple little adapter here with the sensor screwed into it, and what we've chosen to do is use the location right above the oil filter. It's super simple but if you're running a set of headers sometimes you can run into interference problems. How's it going over there boss man? [Joel] I'm just working on a few of these tight spots near the firewall cause here in a little bit we're gonna be trying to put our front sheet metal on. Stuff like those fuel fittings down there and this brake line, it's easier to tighten them up now than when we get all that stuff up front. We also had to swap out our brake hose because we didn't realize it when we put it on. This thing was probably 14 inches or so. Sometimes what you can run into on that is those brake lines will get caught in between your shocks or your other suspension components and it'll actually pinch them. So we shortened up those hoses. It also looks a little bit better too. [Tommy] Is that them valve covers you had to modify slightly? [Joel] The joys of hot rodding isn't it. They look pretty sharp though. [Tommy] Patent pending? [Joel] There's just something about a nice, clean engine bay though. [Tommy] It's some of that stuff that goes unnoticed. You know what I mean? [Joel] When it looks good you don't really notice it but when it looks bad it's blatantly obvious. [Tommy] We're gonna go ahead and solder this for extra good measure. As that blonde chick said, that's hot. [ Music ] [Joel] Try and find the path of least resistance here. This is our primary key hot and power wire to our fuel pump that runs back to the tank. It's got to come through the firewall. Try to keep it out of the way of the foot pedal so it don't get pinched. Might have to extend it a few as is life. Run this right down the edge of the floorboard. Yep, we're gonna need another seven or eight feet probably. Always give your connections a good test pull. [ Music ] Oh yeah! [ Music ] [ torch hissing ] [ Music ]
[ torch hissing ] [Joel] You can go a couple of different directions when you're running a fuel pump wire back to your tank. Technically right now we could drill a hole right there but throw all that work into that trunk spatter paint job. I'd hate to have to drill a hole right through it, put a grommet. Just be a little bit of an eye sore. I think our best route is to run our fuel pump wire all along the taillight harness, extend it out to the fuel pump wire, call that good. Definitely gonna need some more length. Story of my life. This is a little technique that I learned working in a few hot rod shops. Some people like to apply the torch directly to the solder but I think it makes more of a solid connection if you pre-heat your crimp, let the solder melt down into it, and it'll get down to the nooks and crannies a little bit better. [ Music ] Wiring's one of those things where there's more than one way to skin a cat. Everybody's got their own system that works for them. As long as you don't see any of that blue smoke you do you Scotty-P. I like to put a little bit of electrical tape anywhere I've got these clips here just to keep that wire from getting pinched. [ Music ]
A little trick of the trade here. I can use this wire clothes hanger to see if I can feed that wire to the top of the tank. [ Music ]
Yahtzee! So we're just gonna use a butt connector and some heat shrink and call this thing done. Gotta hold your tongue just right. Sounds like it's about to get pretty dead in here.
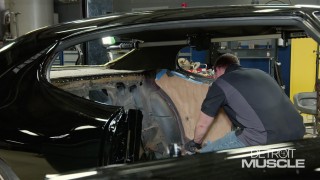
[Joel] We've got plans to put some pretty trick interior into this old Pontiac. I won't give away too much but what I will say, this would be a shame to put all that nice brand new interior on this junk old insulation. So let me get this crap ripped out of here. [ Music ]
Sometimes you can find treasures underneath this stuff. Loose change, build sheets, love letters, all kinds of stuff. [ Music ]
I don't think I've ever seen a GM A-body with this solid of a floor in my entire life. [ vacuum humming ] [ Music ]
[ grinder humming ] [ Music ] [Joel] Just gonna apply some of this rust treatment here. This comes in many different forms. You can spray it on. You can apply it like I am with an applicator. No one will be none the wiser for another 60 years. This stuff is designed to convert the brownish reddish rustiness to like a flat black. That seals it out and seals out the oxidation. The stuff they come up with these days. That should do it. Let that sit for a few hours. Once it's fully cured we can slap on our new sound deadening. What we're gonna be installing is more of an o-e style kit that we got from the guys at Summit Racing. It's pre-cut, pre-formed, pretty easy to put in but there are a few things you need to do when you're putting this stuff in. [ Music ] Sometimes with these direct fit kits they give you a little bit extra. So some trimming may be required. This one's not fitting too shabby. Might lighten up the edges a little bit. Since this GTO is gonna have black interior, black paint, and black chrome it's gonna be exposing itself to some heat. It's gonna get hot in this thing. This sound deadening and this extra insulation will at least give us some temperature control. You can see little spots like this where it bunches up just chop a little relief cut and it'll sit in there a little more nice and flat. [ heat gun humming ] [ Music ]
[Joel] Now you don't need to get this hotter than six kinds of hell. Basically you just want to get it warm enough to loosen up the adhesive underneath and also give it a little bit of flexibility so it sits in there nice and tight. Eventually over time as the car goes down the road it's gonna heat up, expand, cool down over, and over, and over and eventually it'll settle into its foundation. Won't have to worry about it again. [ heat gun humming ] [Joel] One piece done. Fairly nicely! [ Music ]
[ heat gun humming ] [ Music ]
[Joel] Shoot for no more than a couple of hours worth of work I'd say we got some pretty serious protection against heat, and elements, and all kinds of stuff. Gonna be one sweet summer cruiser. Just gotta get the a/c working now. Up next, we're gonna have to iron out a few wrinkles, literally.
[Joel] When it comes to restoring a project it truly is the little details that can make all the difference in the world. In the case of the package tray on our old GTO here this thing's actually not in too bad a shape. Initially we threw around the idea of buying a brand new one, stuffing it in there, and calling it good but it turns out these things are a little hard to come by. Our next best option is to see if we can refurbish this old one. Luckily to fix this thing it's not gonna take a whole lot of time or materials and it's gonna look pretty sharp when we're done. [ Music ] Definitely one of those times where it's more of a marathon than a sprint. Don't want to go ripping this stuff off like it's Velcro. Trying to preserve it as much as you can. This mesh will break and crack if you get too aggressive with it. There is a little bit of a technique to this. You want to use the "mowing the lawn" technique where you're just going all the way down, all the way back, and that's gonna allow for a nice, even pull across the entire thing. [ Music ]
Alright, we got our layers peeled back here. The next step is we're gonna saturate this entire thing, which I know sounds counterintuitive because water damage is what got us here in the first place but that's what you have to do to reform this corrugated surface. I'm gonna dump a little bit of water on it. Get it completely soaked and then we'll set something heavy and flat on it to reshape it. You can use a spray bottle here and if I could find one I would totally be using it. The idea here is to let this water soak in to the corrugated surface and it's gonna soften it up, making it much easier to reshape and reform. Yep, that's working nice. You can see this has a pop can effect to it. I'm just gonna keep saturating it until that goes away and sits a little flatter. If I had a horse trough I'd just dunk it in there and let it soak for a few minutes. This'll work too. [ Music ] I got this thing just about fully saturated. I've got a big piece of cork board over there that I'm gonna set on this thing. It's gonna do a couple of things. It's gonna help ring it out and flatten it out. Just gonna set this cork board right on the seem of our panel here nice and flat. Throw these weights on here to give us a bit more extra insurance. Should look pretty sweet when it's done. Well it's been a few hours. Looks like our package tray's nice and dry. About as flat as a pancake too. Now before I take this cork board off I want to go ahead and see what we can do about ironing out a few of these bubbles on our mesh. To do that just gonna need a good ole household iron. I've got this set on a medium-low heat because we don't want to get this too hot. You can actually melt the rubbery plastic material this is made out of. Keep it moving, don't stay in one spot too long. Just take it nice and easy, nice and smooth all the way across. You'll know it when you're at the correct operating temperature when you can glide your iron across and immediately touch it with your hand. Should be warm enough to where it's moving the material but not too hot to where it's burning your hand. Just gonna keep working from the center out to get all your wrinkles out. Did not wake up this morning thinking I was gonna be ironing out a 60 year old package tray on a '69 GTO. Never know what the workday's gonna bring you. [ Music ]
Better get that back into Tommy's dressing room before he gets fussy. With everything flattened out we're good to start doing some gluing. This is a pretty easy setup. All you've gotta do is get you some rattle can glue. What you want to do is spray this stuff on nice and thin. Don't get too crazy with it because it will bleed through on the other side of the mesh. Gonna let that flash for a few minutes and get to pressing it on. [ aerosol can hissing ] [ Music ]
[Joel] We'll let that sit for a few minutes until it's dry to the touch. Looks like our glue is all set up. So we're gonna glue this thing down from the center out. [ Music ]
[Tommy] Coming up, we customize our tattered taillights to look new-ish!
[Tommy] With our old Pontiac here we need to take care of our taillights so that we can get them installed in the car and make a little more progress. Now I'm kinda astonished that these things are in such bad shape considering the car that we bought. That was a low mileage car. It was in really good shape. You look at these and they've got quite a bit of corrosion on them. They're all pitted up. With all that corrosion all the way around the bezel in here's it's kinda flaked up. So I want to shape that stuff up. Then I'll get these sand blasted and spray on some textured paint. [ metal scraping ] [Tommy] We're not really trying to take off a lot of material here. Just crisping up that line. We could have had these refurbished but the time and effort that the plater would have to go through to work their magic onto this piece would be very expensive. It'd be really time consuming. So when I seen these the first time I told myself I can do something different and actually save a little money. No lie, these refurbished could cost a thousand, two thousand dollars because they're in rough shape. What we're doing is a little bit of time and some probably have all said and done a hundred bucks in these tops. That oughta do it. Now we just need to blast them. Man that's a lot of debris. [ Music ]
[ sand blaster hissing ] [ Music ]
[ sand blaster hissing ] [ Music ]
Oh yeah! [ Music ] Taking a look at this bezel that sand blaster did exactly what we needed it to do. It opened up a lot of those blisters in there. Our solution to the ugliness on this thing is gonna be applying some wrinkle paint. What's great about this is it will give this entire finish that wrinkled look, burying all those little imperfections. Whenever you're applying this stuff they suggest you paint it in a few different directions. Normally you would go across this way oftentimes but since we have to go in those multiple patterns this is just the first one that I started with. Come in at a different angle. And if you notice this is kind of a 45 degree. [ Music ] This helps to ensure you get all the coverage that you're looking for. Plus for this wrinkled finish to work correctly it needs to have a decent amount of material on it. We're sitting here in this fancy paint booth and you don't really have to have one of them to do this type of project. However you do want to make sure that you do have planet of ventilation. Now we're gonna use this fancy heat gun. Basically just turn it on high heat, start this thing warming it up and you'll notice that the wrinkle will begin and will basically walk it all the way across this panel. [ heat gun humming ] [ Music ] [Tommy] Yeah, it's already starting to wrinkle over here. This material gives it a unique look. Is it correct for this car? No, we know that but it's one of those specialized coatings. Kinda like the Mopars had back in the day. This is kinda like that. When you touch this stuff it doesn't feel smooth shiny but it gives it a cool effect.
We've made some pretty good progress for the day and I have to say I'm pleased with the transformation that our taillight has made, especially whenever you factor in we only spent about an hour and about $20 to $30 bucks. That's pretty good. You'll notice our list back here is dramatically smaller than what we started with, and our course of action of actually working on this was pick and choose what we wanted to do. We've still got a lot more to go but I'm done for the day.
Show Full Transcript
[Tommy] Well guys today we're back on our '69 GTO, Project Henchman, and we're getting pretty close to the finish line. As you all know, this last piece is where all the work comes in. [Joel] Yeah we've still got a couple of things to clean up, few details to iron out, but it won't be long now until that old GTO's back on the road. [ Music ] [ engine revving ] [ Music ] [ tires squealing ] [ Music ] [Tommy] They make a special wrench for this. [ Music ] [ Tommy laughing ] [ Music ] Try this again. Yeah, fixed it! [ Music ] LS swaps are pretty common, and what you'll run into is you've got late model wiring and probably a standalone harness and then you've got the vehicle harness. So what we're needing to do is connect our dash to the engine. Our car just had a switch on the oil pressure. So we've got this simple little adapter here with the sensor screwed into it, and what we've chosen to do is use the location right above the oil filter. It's super simple but if you're running a set of headers sometimes you can run into interference problems. How's it going over there boss man? [Joel] I'm just working on a few of these tight spots near the firewall cause here in a little bit we're gonna be trying to put our front sheet metal on. Stuff like those fuel fittings down there and this brake line, it's easier to tighten them up now than when we get all that stuff up front. We also had to swap out our brake hose because we didn't realize it when we put it on. This thing was probably 14 inches or so. Sometimes what you can run into on that is those brake lines will get caught in between your shocks or your other suspension components and it'll actually pinch them. So we shortened up those hoses. It also looks a little bit better too. [Tommy] Is that them valve covers you had to modify slightly? [Joel] The joys of hot rodding isn't it. They look pretty sharp though. [Tommy] Patent pending? [Joel] There's just something about a nice, clean engine bay though. [Tommy] It's some of that stuff that goes unnoticed. You know what I mean? [Joel] When it looks good you don't really notice it but when it looks bad it's blatantly obvious. [Tommy] We're gonna go ahead and solder this for extra good measure. As that blonde chick said, that's hot. [ Music ] [Joel] Try and find the path of least resistance here. This is our primary key hot and power wire to our fuel pump that runs back to the tank. It's got to come through the firewall. Try to keep it out of the way of the foot pedal so it don't get pinched. Might have to extend it a few as is life. Run this right down the edge of the floorboard. Yep, we're gonna need another seven or eight feet probably. Always give your connections a good test pull. [ Music ] Oh yeah! [ Music ] [ torch hissing ] [ Music ]
[ torch hissing ] [Joel] You can go a couple of different directions when you're running a fuel pump wire back to your tank. Technically right now we could drill a hole right there but throw all that work into that trunk spatter paint job. I'd hate to have to drill a hole right through it, put a grommet. Just be a little bit of an eye sore. I think our best route is to run our fuel pump wire all along the taillight harness, extend it out to the fuel pump wire, call that good. Definitely gonna need some more length. Story of my life. This is a little technique that I learned working in a few hot rod shops. Some people like to apply the torch directly to the solder but I think it makes more of a solid connection if you pre-heat your crimp, let the solder melt down into it, and it'll get down to the nooks and crannies a little bit better. [ Music ] Wiring's one of those things where there's more than one way to skin a cat. Everybody's got their own system that works for them. As long as you don't see any of that blue smoke you do you Scotty-P. I like to put a little bit of electrical tape anywhere I've got these clips here just to keep that wire from getting pinched. [ Music ]
A little trick of the trade here. I can use this wire clothes hanger to see if I can feed that wire to the top of the tank. [ Music ]
Yahtzee! So we're just gonna use a butt connector and some heat shrink and call this thing done. Gotta hold your tongue just right. Sounds like it's about to get pretty dead in here.
[Joel] We've got plans to put some pretty trick interior into this old Pontiac. I won't give away too much but what I will say, this would be a shame to put all that nice brand new interior on this junk old insulation. So let me get this crap ripped out of here. [ Music ]
Sometimes you can find treasures underneath this stuff. Loose change, build sheets, love letters, all kinds of stuff. [ Music ]
I don't think I've ever seen a GM A-body with this solid of a floor in my entire life. [ vacuum humming ] [ Music ]
[ grinder humming ] [ Music ] [Joel] Just gonna apply some of this rust treatment here. This comes in many different forms. You can spray it on. You can apply it like I am with an applicator. No one will be none the wiser for another 60 years. This stuff is designed to convert the brownish reddish rustiness to like a flat black. That seals it out and seals out the oxidation. The stuff they come up with these days. That should do it. Let that sit for a few hours. Once it's fully cured we can slap on our new sound deadening. What we're gonna be installing is more of an o-e style kit that we got from the guys at Summit Racing. It's pre-cut, pre-formed, pretty easy to put in but there are a few things you need to do when you're putting this stuff in. [ Music ] Sometimes with these direct fit kits they give you a little bit extra. So some trimming may be required. This one's not fitting too shabby. Might lighten up the edges a little bit. Since this GTO is gonna have black interior, black paint, and black chrome it's gonna be exposing itself to some heat. It's gonna get hot in this thing. This sound deadening and this extra insulation will at least give us some temperature control. You can see little spots like this where it bunches up just chop a little relief cut and it'll sit in there a little more nice and flat. [ heat gun humming ] [ Music ]
[Joel] Now you don't need to get this hotter than six kinds of hell. Basically you just want to get it warm enough to loosen up the adhesive underneath and also give it a little bit of flexibility so it sits in there nice and tight. Eventually over time as the car goes down the road it's gonna heat up, expand, cool down over, and over, and over and eventually it'll settle into its foundation. Won't have to worry about it again. [ heat gun humming ] [Joel] One piece done. Fairly nicely! [ Music ]
[ heat gun humming ] [ Music ]
[Joel] Shoot for no more than a couple of hours worth of work I'd say we got some pretty serious protection against heat, and elements, and all kinds of stuff. Gonna be one sweet summer cruiser. Just gotta get the a/c working now. Up next, we're gonna have to iron out a few wrinkles, literally.
[Joel] When it comes to restoring a project it truly is the little details that can make all the difference in the world. In the case of the package tray on our old GTO here this thing's actually not in too bad a shape. Initially we threw around the idea of buying a brand new one, stuffing it in there, and calling it good but it turns out these things are a little hard to come by. Our next best option is to see if we can refurbish this old one. Luckily to fix this thing it's not gonna take a whole lot of time or materials and it's gonna look pretty sharp when we're done. [ Music ] Definitely one of those times where it's more of a marathon than a sprint. Don't want to go ripping this stuff off like it's Velcro. Trying to preserve it as much as you can. This mesh will break and crack if you get too aggressive with it. There is a little bit of a technique to this. You want to use the "mowing the lawn" technique where you're just going all the way down, all the way back, and that's gonna allow for a nice, even pull across the entire thing. [ Music ]
Alright, we got our layers peeled back here. The next step is we're gonna saturate this entire thing, which I know sounds counterintuitive because water damage is what got us here in the first place but that's what you have to do to reform this corrugated surface. I'm gonna dump a little bit of water on it. Get it completely soaked and then we'll set something heavy and flat on it to reshape it. You can use a spray bottle here and if I could find one I would totally be using it. The idea here is to let this water soak in to the corrugated surface and it's gonna soften it up, making it much easier to reshape and reform. Yep, that's working nice. You can see this has a pop can effect to it. I'm just gonna keep saturating it until that goes away and sits a little flatter. If I had a horse trough I'd just dunk it in there and let it soak for a few minutes. This'll work too. [ Music ] I got this thing just about fully saturated. I've got a big piece of cork board over there that I'm gonna set on this thing. It's gonna do a couple of things. It's gonna help ring it out and flatten it out. Just gonna set this cork board right on the seem of our panel here nice and flat. Throw these weights on here to give us a bit more extra insurance. Should look pretty sweet when it's done. Well it's been a few hours. Looks like our package tray's nice and dry. About as flat as a pancake too. Now before I take this cork board off I want to go ahead and see what we can do about ironing out a few of these bubbles on our mesh. To do that just gonna need a good ole household iron. I've got this set on a medium-low heat because we don't want to get this too hot. You can actually melt the rubbery plastic material this is made out of. Keep it moving, don't stay in one spot too long. Just take it nice and easy, nice and smooth all the way across. You'll know it when you're at the correct operating temperature when you can glide your iron across and immediately touch it with your hand. Should be warm enough to where it's moving the material but not too hot to where it's burning your hand. Just gonna keep working from the center out to get all your wrinkles out. Did not wake up this morning thinking I was gonna be ironing out a 60 year old package tray on a '69 GTO. Never know what the workday's gonna bring you. [ Music ]
Better get that back into Tommy's dressing room before he gets fussy. With everything flattened out we're good to start doing some gluing. This is a pretty easy setup. All you've gotta do is get you some rattle can glue. What you want to do is spray this stuff on nice and thin. Don't get too crazy with it because it will bleed through on the other side of the mesh. Gonna let that flash for a few minutes and get to pressing it on. [ aerosol can hissing ] [ Music ]
[Joel] We'll let that sit for a few minutes until it's dry to the touch. Looks like our glue is all set up. So we're gonna glue this thing down from the center out. [ Music ]
[Tommy] Coming up, we customize our tattered taillights to look new-ish!
[Tommy] With our old Pontiac here we need to take care of our taillights so that we can get them installed in the car and make a little more progress. Now I'm kinda astonished that these things are in such bad shape considering the car that we bought. That was a low mileage car. It was in really good shape. You look at these and they've got quite a bit of corrosion on them. They're all pitted up. With all that corrosion all the way around the bezel in here's it's kinda flaked up. So I want to shape that stuff up. Then I'll get these sand blasted and spray on some textured paint. [ metal scraping ] [Tommy] We're not really trying to take off a lot of material here. Just crisping up that line. We could have had these refurbished but the time and effort that the plater would have to go through to work their magic onto this piece would be very expensive. It'd be really time consuming. So when I seen these the first time I told myself I can do something different and actually save a little money. No lie, these refurbished could cost a thousand, two thousand dollars because they're in rough shape. What we're doing is a little bit of time and some probably have all said and done a hundred bucks in these tops. That oughta do it. Now we just need to blast them. Man that's a lot of debris. [ Music ]
[ sand blaster hissing ] [ Music ]
[ sand blaster hissing ] [ Music ]
Oh yeah! [ Music ] Taking a look at this bezel that sand blaster did exactly what we needed it to do. It opened up a lot of those blisters in there. Our solution to the ugliness on this thing is gonna be applying some wrinkle paint. What's great about this is it will give this entire finish that wrinkled look, burying all those little imperfections. Whenever you're applying this stuff they suggest you paint it in a few different directions. Normally you would go across this way oftentimes but since we have to go in those multiple patterns this is just the first one that I started with. Come in at a different angle. And if you notice this is kind of a 45 degree. [ Music ] This helps to ensure you get all the coverage that you're looking for. Plus for this wrinkled finish to work correctly it needs to have a decent amount of material on it. We're sitting here in this fancy paint booth and you don't really have to have one of them to do this type of project. However you do want to make sure that you do have planet of ventilation. Now we're gonna use this fancy heat gun. Basically just turn it on high heat, start this thing warming it up and you'll notice that the wrinkle will begin and will basically walk it all the way across this panel. [ heat gun humming ] [ Music ] [Tommy] Yeah, it's already starting to wrinkle over here. This material gives it a unique look. Is it correct for this car? No, we know that but it's one of those specialized coatings. Kinda like the Mopars had back in the day. This is kinda like that. When you touch this stuff it doesn't feel smooth shiny but it gives it a cool effect.
We've made some pretty good progress for the day and I have to say I'm pleased with the transformation that our taillight has made, especially whenever you factor in we only spent about an hour and about $20 to $30 bucks. That's pretty good. You'll notice our list back here is dramatically smaller than what we started with, and our course of action of actually working on this was pick and choose what we wanted to do. We've still got a lot more to go but I'm done for the day.