
In This Episode
Video Transcript
[Brian] You are watching Powernation!
[Brian] Today on Detroit Muscle we hit the ground running as we tackle several tasks on our 1969 Dodge Dart, Project Bullseye. We have to do some cutting and welding to install our rear suspension. Plus we upgrade our factory dash with some custom fabrication and give you few tips on tricks on how to do this at home. All you need is time, patience, and a little bit of luck. Hopefully on today's show we have plenty of all three. [ Music ]
[ engine revving ] [ tires squealing ]
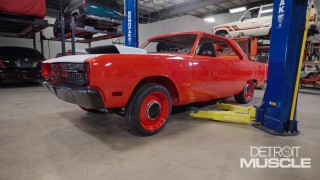
This is our 1969 Dodge Dart, Project Bullseye. We rescued it from a decades long slumber in an old garage because we knew it was gonna be a prime candidate for our next build. We hauled it back to the shop with our gasser because why not? When else are you gonna get a chance to haul a Dart with a Chevy 210? We got it primed, painted, and looking good in Viper Red. Now we're ready to start the assembly of this near mint condition Mopar. The last time you saw Project Bullseye we were installing a brand new front suspension to have pinpoint accuracy handling when we're running the Dart up and down the track. We needed a new beefy setup to handle 700 horses that we're installing under the hood. So we had to make serious upgrades to meet the challenge. Whether you're running a quarter mile or running into town the last thing you want to have zigged when you should have zagged. We needed control arms, shocks, and a brand new sway bar since all we had when we got this car was pretty much a shell. We also needed some serious stopping power. So we installed Wilwood brakes with drilled and slotted rotors to be able to stop this red rocket on a dime. So now that we got the front end handled it's time to address the rear and get this ride one step closer to becoming a road worthy piece of Detroit muscle. So we finally got our front suspension in. It's as simple as the instructions say. Went right in and everything's good. Now let's move on to the back. A couple of things to note. We're gonna have to take a bottom section out of the lower rail right here and insert a piece for the lower link arms to attach to. Woo wee, hot! In addition before that we've got to remove our emergency brake mounting bracket. [ saw buzzing ] [ Music ]
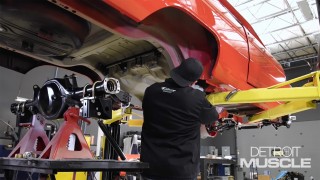
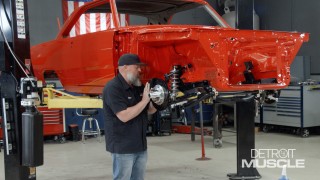
[ metal clanging ] Done! All but the finish. Up next we've got to pre-fit our axle housing with our lower arms and our upper arms to get the placement for my new torque boxes that we have rough cut out. First step I'm gonna put the lower arm mounts on. I've already placed the U-bolts over the top of my axle tube. That's the only thing that's done so far. Next I'm gonna put these on. I'm gonna loose fit everything. Nothing's gonna be tightened until we get everything fitted where we need it. I'm just gonna pull it up flush against the actual mount itself and finger tight it so it don't fall or flop around. Move on to the next one. With our Riley MotorSports suspension kit we pretty much have a four link rear end is what it is. We also got some boxes that we needed to install. We did that on this A-body car so we'd have adjustments forward and backward with our lower control arms so we could set pinion angle. We can also set distance or center of our axle in our rear wheel well as well. Being a four link also it will handle as much power as we're gonna throw at this thing. Street or at the strip, either one. [Eric] Is that part of a kit? [Brian] Yeah, it's part of that Riley MotorSports kit. [Eric] The real question though. Can we fit some 30s on it and rip it around in a field? [Brian] No! [Eric] Not even some skinny atv 30s? [Brian] Maybe. [Eric] I think we can do it. Put some cookie cutters on there. [Brian] Where there's a will there's a way. As you can see we got everything cut away. We're doing some final grinding now and fitment. Here the boxes are temporarily held in place with a magnet and some vice grips. [ grinder humming ] [ Music ]
As you can see it looks good and level. All that's left is to tack it into place. Our lower trailing arm boxes proved to be a little bit of a bear. You have to be able to push versus pull or pull versus push when you weld. This is definitely a structural part of the vehicle. You're already in the dark trying to weld in between the factory wheel well, the lower leaf spring mount, up under the car with your welding hood on. Definitely something we need to practice with. We want to get good penetration to make sure this is strong and structural as possible. [ Music ]
So we've got everything set up. Our box is tacked in where it needs to be. We've got everything ready. We're gonna go ahead and final weld. Remember we're gonna burn opposite sides of the box so we can control our heat. Once that's done we'll take the rear end down out of the way and weld our upper crossmember. Once we let this cool I'll finish welding what little bit's left here underneath the actual floor pan and the top of my brace and then we'll lower the rear end out of the way and get the upper crossmember welded in. Up next, we install the fuel system to feed the beast that's going under the hood.
[Brian] We're back on Project Bullseye once again. We've got a universal factory tank from FiTech with an electric fuel pump system, sending unit, and we're gonna have EFI eventually once we get the engine and transmission back in the car. We're gonna go ahead and start the step by step instructions. Y'all know how I've done it in the past. Anybody can do this. This is a complete system from FiTech, super simple. So let's get started. We're gonna measure all the way to the bottom. I'm gonna take an overall measurement. Right around eight inches deep. It says the sock location will be an eighth of an inch off of the tank and you have to account for the foam gasket as well. So we're gonna set this roughly seven and five-eighths or so. Next we have a pressure feed and a return line. So it says the opaque line. We're gonna measure it, snip it and cut it, and it's gonna go against my fuel pump and we're gonna have to cut the metal bracing as well. I'm measuring my hose from my pump. I'm just gonna mark it. Then I'll go to my toolbox and get our cutters. So we've got everything laid out. Got my measurements made. I'm gonna clip my fuel pump hose off. Get it heated up so we can seat it. I've got to clip the backing bone as I'm gonna call it for the fuel pump so I can get it zip tied together. Go ahead and connect my connector and we'll be ready to place the fuel pump in the tank. Got my backing strap cut. Ready to mount the pump. It recommends to use some zip ties to hold it against the backing plate but I'm gonna go ahead and cut my fuel pump hose first. It recommends to heat it up with a heat gun. I'm just gonna place it over here. Perfect depth, it'll work before installation. Just heat this up with the heat gun a little bit. While it's warm I'm gonna go ahead and move my clamp down and get it into place as well. As it cools it'll harden up exactly where we want it. Pull my return line out. I'm gonna roll some of this up. Instead of cutting it I'm just gonna zip tie it together. That way it won't disrupt the factory clip and plug. I'm gonna leave my return hose out to the side but I am gonna pull my wiring down to the pump. Cut the excess off and zip tie it with one of these as well just so it's all in one unit here. We're ready for install. As you can see we got our pump mounted. Everything's zip tied. Wires are tucked back out of the way. Last step we're gonna cut the return line a 45 degree angle about a quarter inch from the base of the tank. All of our machine screws it recommends to run the rubber O-ring on the screw before screwing these down into the tank and to the fuel pump housing. I'm gonna put my pump and my return both hard feeds towards the front of the vehicle. Once we do get the engine and transmission in the car and figure out what fuel system we're running as far as EFI then we'll route the lines or hosing accordingly. [ Music ]
I'm not gonna run them down super tight. I'm just gonna run them all down at the same time so it pinches my rubber seal or foam gasket evenly. [ Music ]
Pretty flawless kit. Everything is exact and it reads like any other set of directions. Super simple. Anybody can do this. Up next, the sending unit. Same thing. I've got my arm set to one-eighth below the seal that goes up under the sending unit mount plate. I also cut the excess off. The last thing to do is bolt it into the tank. Pretty simple. Make sure you fit the ball in without knocking it off its pedestal and we need to align my bolt holes. There are some relief cuts in the tank for the width of the sending unit as well, which makes it a breeze to drop it right in. Once again it is a liquid area. So the screws itself have O-rings already on them from the manufacturer. Get one started and get the rest of them in before I tighten them up. Just like before. Kind of a rinse, wash, and repeat. Once again my star pattern, make sure it torques down as evenly as possible so we don't have any leaks. If you do this a couple of times too you'll notice right off the bat as you go from across the way the bolts or screws adjacent to the one you just tightened up will loosen up. You can feel it. That way you know everything's going down uniformly. It's just a good way to do it. Eventually the screws will bottom out and you know you're good. So we got our fuel tank all mounted up. Fuel pump, fuel sending unit's in. I've got the factory relocation straps here. It's gonna go right back to the factory location. My buddy Jason here's gonna help me hoist it into place. Let's get it put in. [ Music ]
Good to go! [ Music ]
Heck yeah man. Looks good! Coming up, we have to do some bending and breaking to gauge our custom dash setup.
[Brian] So we've got our dash out of our Dart over here for a little refurb. We've got some aftermarket gauges which obviously is way different than what we currently have in the factory setup. So we're gonna have to fab up the dash plate itself. However there's nothing that I'm gonna do to this that can't be undone to put it back to a factory dash. First thing we've got to look at as you can see, the dash pad is destroyed on this thing. So I've got a brand new dash pad coming. You can see it's just falling apart because it's so dry rotted. I'm sure it's the original pad but it's destroyed. The next thing we run into is with the style of gauge we have it does not fit the profile of our factory gauges in our dash. So if we were just to make a flat plate and install these they would be pointed down and by the time you mount the dash back in the vehicle where it needs to go you wouldn't be able to read the gauge. So we're gonna pull out the factory gauge cluster. We're gonna pull out the heater control cluster as well as the radio face. I've already disassembled the back side of that stuff. We're gonna take it out and measure. And we're gonna make a plate so the gauges will sit flush and we'll get them in an organized manner so we can look at them. Let me show you what I'm talking about. Once again I used some simple cardboard. Actually I pieced it together and taped it. You can see my measurement here. I made an inch and a half strip. This is basically what I call fold in strip because it's gonna fold backwards and that's what's gonna sit my plate up and make it flush on my panel. I decided on some 20 gauge aluminum. It is definitely longer and wider than what I needed. Initially I'm gonna brake it at 90 degrees. That way it'll be perpendicular, and then when I place it up here we can bend it down or change that angle so my gauges sit where I want them to. I guess the next step is go to the brake. We'll brake it first and then we can cut it. First step, 31 and a half wide. This will be complete width of my dash panel. I've got my measurements basically where I want them. So I'm gonna make two cuts. I'm gonna cut here across this side first and get rid of all this. This will be a different plate if we want it. Then I've got to cut here down to get the width that I want for my panel. So I'm gonna make two cuts.
[ metal clanging ] [ Music ] Nice! Next step in the brake. This is a shorter piece than my brake. So I've already clamped this side down. I'm gonna brake it right here, 90 degrees on my line. I'm gonna use the back side of the line for alignment purposes. Remember when you're braking metal go past what you want because it's gonna spring back.
As you can see, 90 degrees. Now we've got our dash all roughed in. Got my edges dressed with a grinding wheel. Everything is cleaned up and wiped down with acetone to keep it clean. Get a couple of tacks on the edges. We're gonna pre-fit it before final welding. [ welder crackling ]
This is a pain in the tookus. This is why I paint. While a majority of us have done some type of welding in our time a lot of people have been experimenting and trying new things welding aluminum. Aluminum's a whole different ball game. There's no heat marks whatsoever. Once aluminum gets too hot or over its threshold it literally just drips in the floor. While welding aluminum you've really got to pay attention to heat management. It's got to be super clean. Dirty, dirty, dirty! Acetone and a stainless brush are gonna be your best friends while welding aluminum. You want the weld area and the joint to be clean as possible to keep your weld from being porous. [ Music ] [ drill humming ] [ Music ] [ drill humming ]
We used the hole saw for our gauges right here. I'm getting ready to use the step bit for my switch panel. A good tech tip. Take some tape and mark on the step of the one you want to go to using the step bit. That way you don't over drill or under drill. [ Music ] [ drill humming ] [ Music ]
Nice! Up next, we load up the paint gun as we spray and then install our refurbished custom factory dash.
[Brian] So we finally got our dash in. Everything fits where we want it to. We had a little bit of issues with some waviness in the panel, and once we got our gauge holes drilled itself had to go back and do some reaming on it to get the ridge out of it so the gauges would actually fit. I think it looks phenomenal. It definitely fits the profile of a nostalgic race or drag worthy car. We're gonna pull it apart now. Get the dash all prepped. Get the plate prepped, and we're gonna paint them all at the same time. [ Music ]
[ spray gun hissing ] [ Music ]
We decided to paint the dash to match the factory Dart stripe across the rear of the trunk and down both sides of the quarter. Also we're gonna paint the hood the flat black, the grille, and both bumpers to match. So it's gonna look really uniform throughout and I think this color combination is gonna be awesome for this build. [ spray gun hissing ] [ Music ]
Let me squeeze in here. [ Music ]
You'll probably have to come all the way in and then we'll tilt it. [ Music ]
[ drill humming ] [ Music ]
I'm gonna try and put this steering wheel drop in. Don't know if it'll fit. [ Music ]
May have to get a different drop. The angle may not be right. [ Music ]
Pretty close. If one won't hold it two never would. They're run up tight and ready to roll. Good job. Pretty painless right. Heck yeah man, awesome. Can you imagine being the guy on the assembly line that puts this dash in? [Jason] Can you imagine what he'd think if he'd see it now? [Brian] He'd probably be pretty impressed. Today we made good progress at both ends of the car. Got it. We got our rear suspension installed so that we have precise control over the entire vehicle. There's a lot of hammering, welding, cutting, and grinding but that's just the name of the game when you're restoring an old car. You have to be sure to get your stretching in on a job like this because you're gonna have to get used to being in some uncomfortable positions. This is a definite measure twice and cut once type of situation when you're doing some pretty heavy modifications in order to have the modern conveniences on a nearly 60 year old car. Now that we have the fuel run the next step is to add the spark that we're gonna need to fire the engine so we can get our Dart out on the track and see how fast this thing can go. Let's see how close we are. We still have quite a ways to go. Slowly but sure this old AMD display is finally starting to look like a car again. It takes several skill sets to build something you can see in your head when you see that empty shell sitting in the garage. That's why we do what we do. Eventually we'll get to enjoy the fruits of our labor and breathe life back into this old piece of Detroit Muscle.
Show Full Transcript
[Brian] Today on Detroit Muscle we hit the ground running as we tackle several tasks on our 1969 Dodge Dart, Project Bullseye. We have to do some cutting and welding to install our rear suspension. Plus we upgrade our factory dash with some custom fabrication and give you few tips on tricks on how to do this at home. All you need is time, patience, and a little bit of luck. Hopefully on today's show we have plenty of all three. [ Music ]
[ engine revving ] [ tires squealing ]
This is our 1969 Dodge Dart, Project Bullseye. We rescued it from a decades long slumber in an old garage because we knew it was gonna be a prime candidate for our next build. We hauled it back to the shop with our gasser because why not? When else are you gonna get a chance to haul a Dart with a Chevy 210? We got it primed, painted, and looking good in Viper Red. Now we're ready to start the assembly of this near mint condition Mopar. The last time you saw Project Bullseye we were installing a brand new front suspension to have pinpoint accuracy handling when we're running the Dart up and down the track. We needed a new beefy setup to handle 700 horses that we're installing under the hood. So we had to make serious upgrades to meet the challenge. Whether you're running a quarter mile or running into town the last thing you want to have zigged when you should have zagged. We needed control arms, shocks, and a brand new sway bar since all we had when we got this car was pretty much a shell. We also needed some serious stopping power. So we installed Wilwood brakes with drilled and slotted rotors to be able to stop this red rocket on a dime. So now that we got the front end handled it's time to address the rear and get this ride one step closer to becoming a road worthy piece of Detroit muscle. So we finally got our front suspension in. It's as simple as the instructions say. Went right in and everything's good. Now let's move on to the back. A couple of things to note. We're gonna have to take a bottom section out of the lower rail right here and insert a piece for the lower link arms to attach to. Woo wee, hot! In addition before that we've got to remove our emergency brake mounting bracket. [ saw buzzing ] [ Music ]
[ metal clanging ] Done! All but the finish. Up next we've got to pre-fit our axle housing with our lower arms and our upper arms to get the placement for my new torque boxes that we have rough cut out. First step I'm gonna put the lower arm mounts on. I've already placed the U-bolts over the top of my axle tube. That's the only thing that's done so far. Next I'm gonna put these on. I'm gonna loose fit everything. Nothing's gonna be tightened until we get everything fitted where we need it. I'm just gonna pull it up flush against the actual mount itself and finger tight it so it don't fall or flop around. Move on to the next one. With our Riley MotorSports suspension kit we pretty much have a four link rear end is what it is. We also got some boxes that we needed to install. We did that on this A-body car so we'd have adjustments forward and backward with our lower control arms so we could set pinion angle. We can also set distance or center of our axle in our rear wheel well as well. Being a four link also it will handle as much power as we're gonna throw at this thing. Street or at the strip, either one. [Eric] Is that part of a kit? [Brian] Yeah, it's part of that Riley MotorSports kit. [Eric] The real question though. Can we fit some 30s on it and rip it around in a field? [Brian] No! [Eric] Not even some skinny atv 30s? [Brian] Maybe. [Eric] I think we can do it. Put some cookie cutters on there. [Brian] Where there's a will there's a way. As you can see we got everything cut away. We're doing some final grinding now and fitment. Here the boxes are temporarily held in place with a magnet and some vice grips. [ grinder humming ] [ Music ]
As you can see it looks good and level. All that's left is to tack it into place. Our lower trailing arm boxes proved to be a little bit of a bear. You have to be able to push versus pull or pull versus push when you weld. This is definitely a structural part of the vehicle. You're already in the dark trying to weld in between the factory wheel well, the lower leaf spring mount, up under the car with your welding hood on. Definitely something we need to practice with. We want to get good penetration to make sure this is strong and structural as possible. [ Music ]
So we've got everything set up. Our box is tacked in where it needs to be. We've got everything ready. We're gonna go ahead and final weld. Remember we're gonna burn opposite sides of the box so we can control our heat. Once that's done we'll take the rear end down out of the way and weld our upper crossmember. Once we let this cool I'll finish welding what little bit's left here underneath the actual floor pan and the top of my brace and then we'll lower the rear end out of the way and get the upper crossmember welded in. Up next, we install the fuel system to feed the beast that's going under the hood.
[Brian] We're back on Project Bullseye once again. We've got a universal factory tank from FiTech with an electric fuel pump system, sending unit, and we're gonna have EFI eventually once we get the engine and transmission back in the car. We're gonna go ahead and start the step by step instructions. Y'all know how I've done it in the past. Anybody can do this. This is a complete system from FiTech, super simple. So let's get started. We're gonna measure all the way to the bottom. I'm gonna take an overall measurement. Right around eight inches deep. It says the sock location will be an eighth of an inch off of the tank and you have to account for the foam gasket as well. So we're gonna set this roughly seven and five-eighths or so. Next we have a pressure feed and a return line. So it says the opaque line. We're gonna measure it, snip it and cut it, and it's gonna go against my fuel pump and we're gonna have to cut the metal bracing as well. I'm measuring my hose from my pump. I'm just gonna mark it. Then I'll go to my toolbox and get our cutters. So we've got everything laid out. Got my measurements made. I'm gonna clip my fuel pump hose off. Get it heated up so we can seat it. I've got to clip the backing bone as I'm gonna call it for the fuel pump so I can get it zip tied together. Go ahead and connect my connector and we'll be ready to place the fuel pump in the tank. Got my backing strap cut. Ready to mount the pump. It recommends to use some zip ties to hold it against the backing plate but I'm gonna go ahead and cut my fuel pump hose first. It recommends to heat it up with a heat gun. I'm just gonna place it over here. Perfect depth, it'll work before installation. Just heat this up with the heat gun a little bit. While it's warm I'm gonna go ahead and move my clamp down and get it into place as well. As it cools it'll harden up exactly where we want it. Pull my return line out. I'm gonna roll some of this up. Instead of cutting it I'm just gonna zip tie it together. That way it won't disrupt the factory clip and plug. I'm gonna leave my return hose out to the side but I am gonna pull my wiring down to the pump. Cut the excess off and zip tie it with one of these as well just so it's all in one unit here. We're ready for install. As you can see we got our pump mounted. Everything's zip tied. Wires are tucked back out of the way. Last step we're gonna cut the return line a 45 degree angle about a quarter inch from the base of the tank. All of our machine screws it recommends to run the rubber O-ring on the screw before screwing these down into the tank and to the fuel pump housing. I'm gonna put my pump and my return both hard feeds towards the front of the vehicle. Once we do get the engine and transmission in the car and figure out what fuel system we're running as far as EFI then we'll route the lines or hosing accordingly. [ Music ]
I'm not gonna run them down super tight. I'm just gonna run them all down at the same time so it pinches my rubber seal or foam gasket evenly. [ Music ]
Pretty flawless kit. Everything is exact and it reads like any other set of directions. Super simple. Anybody can do this. Up next, the sending unit. Same thing. I've got my arm set to one-eighth below the seal that goes up under the sending unit mount plate. I also cut the excess off. The last thing to do is bolt it into the tank. Pretty simple. Make sure you fit the ball in without knocking it off its pedestal and we need to align my bolt holes. There are some relief cuts in the tank for the width of the sending unit as well, which makes it a breeze to drop it right in. Once again it is a liquid area. So the screws itself have O-rings already on them from the manufacturer. Get one started and get the rest of them in before I tighten them up. Just like before. Kind of a rinse, wash, and repeat. Once again my star pattern, make sure it torques down as evenly as possible so we don't have any leaks. If you do this a couple of times too you'll notice right off the bat as you go from across the way the bolts or screws adjacent to the one you just tightened up will loosen up. You can feel it. That way you know everything's going down uniformly. It's just a good way to do it. Eventually the screws will bottom out and you know you're good. So we got our fuel tank all mounted up. Fuel pump, fuel sending unit's in. I've got the factory relocation straps here. It's gonna go right back to the factory location. My buddy Jason here's gonna help me hoist it into place. Let's get it put in. [ Music ]
Good to go! [ Music ]
Heck yeah man. Looks good! Coming up, we have to do some bending and breaking to gauge our custom dash setup.
[Brian] So we've got our dash out of our Dart over here for a little refurb. We've got some aftermarket gauges which obviously is way different than what we currently have in the factory setup. So we're gonna have to fab up the dash plate itself. However there's nothing that I'm gonna do to this that can't be undone to put it back to a factory dash. First thing we've got to look at as you can see, the dash pad is destroyed on this thing. So I've got a brand new dash pad coming. You can see it's just falling apart because it's so dry rotted. I'm sure it's the original pad but it's destroyed. The next thing we run into is with the style of gauge we have it does not fit the profile of our factory gauges in our dash. So if we were just to make a flat plate and install these they would be pointed down and by the time you mount the dash back in the vehicle where it needs to go you wouldn't be able to read the gauge. So we're gonna pull out the factory gauge cluster. We're gonna pull out the heater control cluster as well as the radio face. I've already disassembled the back side of that stuff. We're gonna take it out and measure. And we're gonna make a plate so the gauges will sit flush and we'll get them in an organized manner so we can look at them. Let me show you what I'm talking about. Once again I used some simple cardboard. Actually I pieced it together and taped it. You can see my measurement here. I made an inch and a half strip. This is basically what I call fold in strip because it's gonna fold backwards and that's what's gonna sit my plate up and make it flush on my panel. I decided on some 20 gauge aluminum. It is definitely longer and wider than what I needed. Initially I'm gonna brake it at 90 degrees. That way it'll be perpendicular, and then when I place it up here we can bend it down or change that angle so my gauges sit where I want them to. I guess the next step is go to the brake. We'll brake it first and then we can cut it. First step, 31 and a half wide. This will be complete width of my dash panel. I've got my measurements basically where I want them. So I'm gonna make two cuts. I'm gonna cut here across this side first and get rid of all this. This will be a different plate if we want it. Then I've got to cut here down to get the width that I want for my panel. So I'm gonna make two cuts.
[ metal clanging ] [ Music ] Nice! Next step in the brake. This is a shorter piece than my brake. So I've already clamped this side down. I'm gonna brake it right here, 90 degrees on my line. I'm gonna use the back side of the line for alignment purposes. Remember when you're braking metal go past what you want because it's gonna spring back.
As you can see, 90 degrees. Now we've got our dash all roughed in. Got my edges dressed with a grinding wheel. Everything is cleaned up and wiped down with acetone to keep it clean. Get a couple of tacks on the edges. We're gonna pre-fit it before final welding. [ welder crackling ]
This is a pain in the tookus. This is why I paint. While a majority of us have done some type of welding in our time a lot of people have been experimenting and trying new things welding aluminum. Aluminum's a whole different ball game. There's no heat marks whatsoever. Once aluminum gets too hot or over its threshold it literally just drips in the floor. While welding aluminum you've really got to pay attention to heat management. It's got to be super clean. Dirty, dirty, dirty! Acetone and a stainless brush are gonna be your best friends while welding aluminum. You want the weld area and the joint to be clean as possible to keep your weld from being porous. [ Music ] [ drill humming ] [ Music ] [ drill humming ]
We used the hole saw for our gauges right here. I'm getting ready to use the step bit for my switch panel. A good tech tip. Take some tape and mark on the step of the one you want to go to using the step bit. That way you don't over drill or under drill. [ Music ] [ drill humming ] [ Music ]
Nice! Up next, we load up the paint gun as we spray and then install our refurbished custom factory dash.
[Brian] So we finally got our dash in. Everything fits where we want it to. We had a little bit of issues with some waviness in the panel, and once we got our gauge holes drilled itself had to go back and do some reaming on it to get the ridge out of it so the gauges would actually fit. I think it looks phenomenal. It definitely fits the profile of a nostalgic race or drag worthy car. We're gonna pull it apart now. Get the dash all prepped. Get the plate prepped, and we're gonna paint them all at the same time. [ Music ]
[ spray gun hissing ] [ Music ]
We decided to paint the dash to match the factory Dart stripe across the rear of the trunk and down both sides of the quarter. Also we're gonna paint the hood the flat black, the grille, and both bumpers to match. So it's gonna look really uniform throughout and I think this color combination is gonna be awesome for this build. [ spray gun hissing ] [ Music ]
Let me squeeze in here. [ Music ]
You'll probably have to come all the way in and then we'll tilt it. [ Music ]
[ drill humming ] [ Music ]
I'm gonna try and put this steering wheel drop in. Don't know if it'll fit. [ Music ]
May have to get a different drop. The angle may not be right. [ Music ]
Pretty close. If one won't hold it two never would. They're run up tight and ready to roll. Good job. Pretty painless right. Heck yeah man, awesome. Can you imagine being the guy on the assembly line that puts this dash in? [Jason] Can you imagine what he'd think if he'd see it now? [Brian] He'd probably be pretty impressed. Today we made good progress at both ends of the car. Got it. We got our rear suspension installed so that we have precise control over the entire vehicle. There's a lot of hammering, welding, cutting, and grinding but that's just the name of the game when you're restoring an old car. You have to be sure to get your stretching in on a job like this because you're gonna have to get used to being in some uncomfortable positions. This is a definite measure twice and cut once type of situation when you're doing some pretty heavy modifications in order to have the modern conveniences on a nearly 60 year old car. Now that we have the fuel run the next step is to add the spark that we're gonna need to fire the engine so we can get our Dart out on the track and see how fast this thing can go. Let's see how close we are. We still have quite a ways to go. Slowly but sure this old AMD display is finally starting to look like a car again. It takes several skill sets to build something you can see in your head when you see that empty shell sitting in the garage. That's why we do what we do. Eventually we'll get to enjoy the fruits of our labor and breathe life back into this old piece of Detroit Muscle.