
In This Episode
- 0:01 Introduction and Overview
- 1:00 Blacking Out the '69 G-T-O
- 2:01 Finishing the Fuel System
- 2:11 Painting the Car
- 4:14 Safety Considerations for Lifting the Body
- 4:54 Installing the Body onto the Chassis
- 7:03 Fuel Tank Installation
- 14:00 Finalizing the Fuel System
- 15:25 Sealing the Deal for a Quality Restoration
- 19:01 Installing Weatherstripping and Bump Stops
Video Transcript
[Tommy] You're watching Powernation!
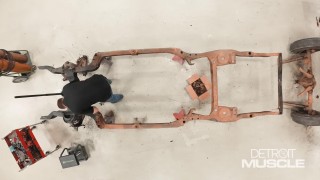
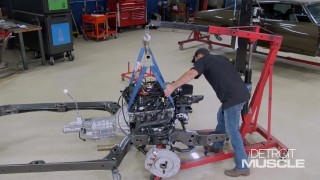
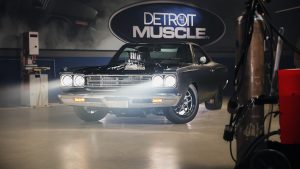
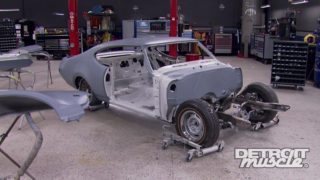
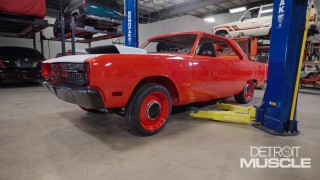
[Tommy] Today on Detroit Muscle we're blacking out our '69 GTO and then dropping the body back on the freshly powder coated frame. [Peyton] Plus we finish up our fuel system and help our Pontiac weather the storm. [ Music ] [ tires squealing ] [Tommy] Hey guys, welcome to Detroit Muscle. If you've been following along with us you know that we've building a pretty killer little Pontiac and we've put forth quite a bit of effort. When this '69 GTO came into the shop most of her was stripped down and gutted to the frame. Thankfully the frame was in good shape. So it didn't take much to tear the rest of it down to the bare bones so we could prep the chassis to send it off to the powder coater. So all those old rusty brakes and suspension components took a one way trip to the scrap heap. [Peyton] When we picked up this GTO it was missing its heart. So that gave us a creative license to do what we wanted, and our plan for this was something that was enjoyable to drive. With this case it was pretty much out with the old and in with the new. After we got our chassis back with its shiny new powder coat we slapped in Quick Performance rear end kitted out with some heavy duty brakes. Then we married the engine and transmission back on the frame and locked it in with some new hardware and motor mounts that took a little bit of convincing to fall in line. We then got our crossmember cinched to our American Powertrain TKO transmission. This is gonna help us hold everything in place when we're putting those ponies to the pavement. [Tommy] Luckily for us we started with a pretty good ole car. So we didn't have to replace a bunch of panels or fix a bunch of rust, but we were planning to paint this thing black. So you guys know what that means. There was a couple of rounds of primer and whole lot of blocking that had to happen. [ sandpaper scratching ] [ Music ]
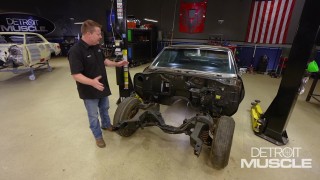
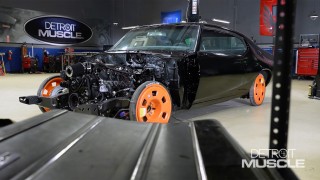
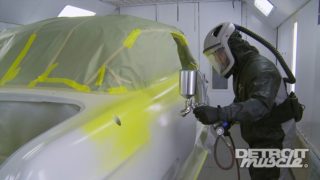
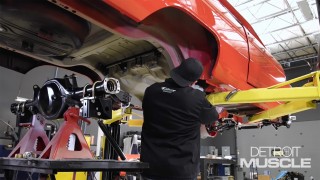
[Tommy] Blocking and sanding can have you out in the shop swearing, sweating, and working muscles that you didn't even know you had. [ Music ] After 10 hours of that if you ain't nursing a backache and/or a sixer you probably ain't doing it right. [ Music ] With the hard part done it was on to cleaning and masking. Now this step ain't necessarily easy but it's definitely less labor intensive. The paint we decided to go with was House of Kolor's Jet Black. We're gonna let this sealer do a lot of the work for us. We're spraying down our first coat of sealer in a black color. Then we'll follow all that up with a couple more coats of black base to set it to perfection. [ Music ] [Peyton] As we lift the body off the rotisserie there's a few safety things you want to think about. You're not only protecting the body of the car but yourself. [Tommy] Peyton's right. Dropping this thing on the floor or getting somebody hurt isn't what we're after. If you'll pay attention to our lift and our car right now you'll notice that a large portion of the body's hanging off the back side of that arm, and what that equals to is when you go to pick it up it could fall off the lift. In the past we have taken and put a whole bunch of weights up here in the front floorboard to hold the front end down but luckily for us right now our car still has the column and the dash. So we have that added weight. You've just got to make sure you know what you're doing whenever you go to pick this thing up. [Peyton] Luckily for us our lift has these rubber pads on the feet. That protects the body. Some guys will use two by fours or whatever else they can get their hands on and that's a recipe for disaster. Your shiny new body could end up on the floor. [ Music ] [Tommy] Oh god! This car is a-shaking! [ drill humming ] [ Music ] [ mechanical humming ] [ Music ]
[Tommy] Oh yeah, perfect! We didn't even put bolts in. Coming up next, it's time to fuel up as we walk through our gas tank installation.
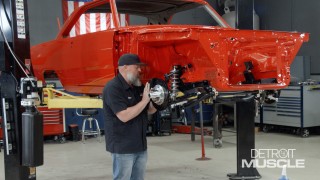
[Tommy] We've got to install a new bushing kit so that we can mount our body onto the chassis. What we decided to go with is a setup that basically is straight o-e-m. What that means is these are a rubber bushing. There are companies out there that offer them in more of the urethane setup. You also have to pay attention to each and every placement of these bushings because they have different thicknesses and diameters, and even some of them don't allow a bolt to pass through them. Getting these kinda mismatched what you'll run into is once you try to cinch it down you can actually tweak the body and the doors and the trunk won't open properly. So pay attention to where they go. Luckily for us our kit also comes with a handy little chart that tells us exactly the way this stuff needs to go. [Peyton] Did you just keep all these up there? [Tommy] Yeah I kept all them over here. This car actually only had them on the outside. This car had those bushings up front. [ Music ] Rail needs to go that way in the back. [ Music ]
What do you think? [Peyton] Close enough. [ Music ] [Tommy] She just slid down. That's close right there buddy. Let her down. [ Music ]
[Peyton] I didn't hear any catastrophic failures. [Tommy] Come on up. [ Music ]
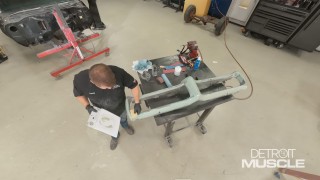
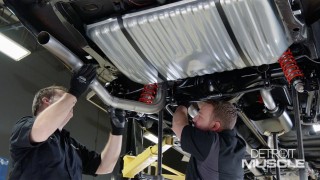
Put that in there. Will it work? Nope! So, yep, I don't have another nut. I need you to go out there and get a seven-sixteenths is what they are. [ Music ] I need like two. [ Music ] We've got our body on and we're continuing to check off the things on our to-do list. A while back we went ahead and ran our hard lines that go from the tank to the engine. So now we need to mount our pump and the tank itself. If you choose to use a pump that's externally mounted there's a couple of things that you need to do. One of them is to mount it lower than the tank because that helps to keep the pump fed whenever the fuel is syphoned from the tank. Another is to mount the pump as close to the tank as possible. Normally these type of pumps work a whole lot better whenever they're pushing the fuel from the tank up to the engine as opposed to mounting the pump way up there and then having to draw it up to the front of the car. With that said things can get a little complicated whenever you're trying to find the perfect location. Plus you're getting close to suspension. You've gotta stay away from it along with your exhaust. Luckily for us Holley has the answer that we need as far as a one stop shop. What they offer is an e-f-i conversion kit that has everything like the tank, pump, sender, fill neck, and even the straps to mount it all. I need to go get a tape measure and I'll be right back. I'm gonna start off by measuring to see how deep the tank is. Right at six inches. That one should be the same. Then I'm gonna take a mark on here, six inches, and set my sender over there. Mark where I'm gonna cut my tube. This one is supposed to be an inch shy. That'll go right there. [ Music ] Before you get too carried away put your clamp in there. [ Music ] We gonna make this a little easier. This is one of them type of tools that's pretty handy. It lets you know if you accidentally leave it on. That's pretty handy. It helps you to keep from using up electricity whenever it's not in use and serenades you. So it helps to lower your blood pressure. Y'all have heard of white noise? This is just heated white noise. [ heat gun humming ] [ Music ] [Tommy] Push that on there. Make sure you're shier than six inches. All this here is doing is sealing that little O-ring in there against the wire sleeve. Whenever you go to tighten your hose clamp up also make sure that it's not on the forward side of the swollen spot. Give it a little quick test. It's nice and tight. We're just shy of our six inch mark. So we're good to go. Peyton, got me some zip ties buddy! [Peyton] Up next, this GTO is gonna get tanked. [Tommy] Yeah, yeah, yeah!
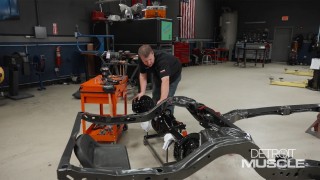
[Tommy] Now if you've been following along you know that we're pushing forward and making progress on our GTO build. We had the body off the frame, and after a trip to the powder coater and a slick black paint job we snapped in the body bolts and reunited these fresh faced old acquaintances. [ ratchet clicking ] [ Music ] [Tommy] We also hit the gas on finalizing our fuel tank. Mark where I'm gonna cut my tube. To get it all lined up and installed. Sometimes on these things the hole pattern on here is kinda offset and it only allows you to go in one way. I bet that's the case with this fuel level sender. We're also using cork gaskets here. Sometimes people get it in their mind that they need to put a bunch of sealer and that kind of thing on here and that's really not the case. Often times with cork style gaskets all you need to do is put them on dry. If you were to use a sealer it actually works as a lubricant and oftentimes causes that gasket when you go to tighten it up to kinda pinch it. So try to refrain from doing that type of thing. Drop this in there, jiggle it around, let that screw through the gasket. [ Music ] When tightening these things up there's a little O-ring under the bottom of the head of that screw or bolt. Don't get all crazy and put a cheater pipe on your screwdriver. Just run it down nice and snug. Star pattern, and you'll be able to tell when it's snugged up. Now we need to do the modifications that's needed to our fuel sending unit so that everything reads properly once we mount it in the tank. Now essentially with your pivot here that's on the sending unit that works up and down with your floater here it needs to be right in the middle of the depth of your tank. Ours is at six inches. So we'll have to measure three and put this pivot point right there. If you get it too far or too short it will give you an inaccurate reading and that'll make your gas gauge read improperly. What we're needing is three inches. So we're gonna have to throw some of this stuff away. This is one of those universal parts. Y'all know what that means. It means it doesn't fit anything directly. With three inches of this thing I'm gonna make a mark on our pivot. What we need to do is mount her right there. Now with this you want to be as close to accurate as possible. But it's kinda like the fuel gauge being off ever so slightly. [ Music ] Right there. [ Music ] Maybe bolt cutters. [ Music ] Snip! [ Music ] Oh yeah, I wonder. It only goes one way. Let's just see how it fits. Put a couple of these screws in to hold the gasket in place. [ Music ]
That'll do it. [ Music ] Are you leaking on that thing? [Peyton] Nah, it's where you put that other pad on there. It had some junk on it. [Tommy] Need to hook up that fuel sending wire. [Peyton] It's gotta go through the frame right here. [Tommy] There's a washer that's gotta come off there. Got it? [Peyton] Yep! [ Music ] Ready to keep on keeping on. [ Music ]
[Tommy] Don't do it. [ Music ]
Yeah, yeah, yeah! That'll make it look a lot better. I can't believe it. We've got another thing all finished up. Getting that tank under here shortens that list quite a bit. Now it's time to move on to the next one. Up next, we seal the deal to keep our GTO high and dry.
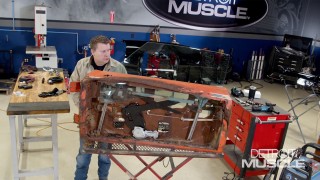
[Tommy] You know there's a lot of parts of the restoration that kinda, let's call it glamourous. And then there's other parts that isn't very exciting at all. The next step we're gonna be doing it ain't nearly as exciting, but when it comes to a quality restoration it's pretty crucial. What you'll run into is leaks, and noise, and all that kinda stuff. The things that you don't really want. Also another problem is you can actually damage your car. With your door this little rubber serves a couple of purposes. One, it keeps it from rattling along with keeping debris and stuff out of the car. Also there's little bump stops that space this thing out to keep you from busting up your paint. Plus not to mention some of this stuff is seen and people will judge you by the quality of your work by what they're looking at. This old rubber up here is all dry rotted and cracked and looks really bad. What's great about most of this type of stuff. It usually doesn't cost you a whole lot of money and you make a vast improvement. I'm kinda wiggling this thing back and forth. Kinda helps to separate it. Now with it we're not trying to save it by any means but we also don't want to mess our car up either. The channel that it sits in on both sides, the inside and the out, I'm just working the outside piece first, and that lets it just fall out of the other one. I should have pulled this out before I painted this car. It'll be fine either way. This is definitely one of those tasks that you've gotta have some patience. However it will do one thing for sure doing this type of work. It'll make a mess. Whenever you're ordering your weather strip it's always a good idea to kinda hold off until you need it. You don't want this stuff setting around for a couple of years if your project's gonna take that long because with it sitting on the shelf it firms up over time. We picked this stuff up from Steele Rubber Group and we've used a lot of their products in the past. So whenever you're using something like this you always want a good quality part and that's the reason why we went with Steele. Whenever you go to put these things in this end right here is what locates everything. You've gotta mount it here at the base of it and then work it up and all the way over. What I prefer to do before I put any adhesive at all in here is kinda get it set into place. This thing kinda has a groove it's gotta sit in. I got it roughed into place at first and then I like to come and work everything in. You want that seam nice and tight up against that piece of stainless steel. Sometimes it takes a little finesse if you will. Just keep working it and next thing you know it looks nice and pretty. If it comes out or it's loose that tells you what you need to know. Now we're gonna hold off on putting the weatherstrip that goes all the way around the door right now because I don't have the glass in it and we're planning to upgrade to power windows. That's a whole other thing we're gonna have to get into. So what I'm gonna install is our two little bump stops that go here inside the door. Oftentimes when guys install these you'll see them grab a little screwdriver and what they'll try to do is mash this little cone inside of there. What you'll run into is if you're not careful this thing will actually shear that little stud off, and then this thing is basically useless. The way I prefer to do it is make sure that you use plenty of lubrication. Basically some glass cleaner will get the job done. Sometimes with this thing you can basically just really push it, hold the pressure on it, and it'll go. In this instance it didn't work like that but that's okay. One of them little tasks that in all reality sounds like it's super easy. Next thing you know 20 minutes spent just putting rubber bumpers in. Some dudes want to use other forms of lubricant like oil, or grease, or something like that. I don't like using that stuff in this instance cause that stuff will stay on the surface. Glass cleaner will evaporate basically and go away where that oil, what it can do is actually make it easier for this thing to come out cause it's got a lubricant still on the little studs. That one, that pair's on. Door even closes better now. It looks pretty good for one of them one coat rollers. I'm kidding guys! We've had a pretty good day today. We got the car painted, most of the panels are sprayed, the fuel tank is installed. Plus we've started installing some weatherstripping. We still have plenty to do and that's easy to see but I'm here to tell you I've had all I want for today. We'll see y'all next time. [ Music ] Good thing we get paid by the hour!
Show Full Transcript
[Tommy] Today on Detroit Muscle we're blacking out our '69 GTO and then dropping the body back on the freshly powder coated frame. [Peyton] Plus we finish up our fuel system and help our Pontiac weather the storm. [ Music ] [ tires squealing ] [Tommy] Hey guys, welcome to Detroit Muscle. If you've been following along with us you know that we've building a pretty killer little Pontiac and we've put forth quite a bit of effort. When this '69 GTO came into the shop most of her was stripped down and gutted to the frame. Thankfully the frame was in good shape. So it didn't take much to tear the rest of it down to the bare bones so we could prep the chassis to send it off to the powder coater. So all those old rusty brakes and suspension components took a one way trip to the scrap heap. [Peyton] When we picked up this GTO it was missing its heart. So that gave us a creative license to do what we wanted, and our plan for this was something that was enjoyable to drive. With this case it was pretty much out with the old and in with the new. After we got our chassis back with its shiny new powder coat we slapped in Quick Performance rear end kitted out with some heavy duty brakes. Then we married the engine and transmission back on the frame and locked it in with some new hardware and motor mounts that took a little bit of convincing to fall in line. We then got our crossmember cinched to our American Powertrain TKO transmission. This is gonna help us hold everything in place when we're putting those ponies to the pavement. [Tommy] Luckily for us we started with a pretty good ole car. So we didn't have to replace a bunch of panels or fix a bunch of rust, but we were planning to paint this thing black. So you guys know what that means. There was a couple of rounds of primer and whole lot of blocking that had to happen. [ sandpaper scratching ] [ Music ]
[Tommy] Blocking and sanding can have you out in the shop swearing, sweating, and working muscles that you didn't even know you had. [ Music ] After 10 hours of that if you ain't nursing a backache and/or a sixer you probably ain't doing it right. [ Music ] With the hard part done it was on to cleaning and masking. Now this step ain't necessarily easy but it's definitely less labor intensive. The paint we decided to go with was House of Kolor's Jet Black. We're gonna let this sealer do a lot of the work for us. We're spraying down our first coat of sealer in a black color. Then we'll follow all that up with a couple more coats of black base to set it to perfection. [ Music ] [Peyton] As we lift the body off the rotisserie there's a few safety things you want to think about. You're not only protecting the body of the car but yourself. [Tommy] Peyton's right. Dropping this thing on the floor or getting somebody hurt isn't what we're after. If you'll pay attention to our lift and our car right now you'll notice that a large portion of the body's hanging off the back side of that arm, and what that equals to is when you go to pick it up it could fall off the lift. In the past we have taken and put a whole bunch of weights up here in the front floorboard to hold the front end down but luckily for us right now our car still has the column and the dash. So we have that added weight. You've just got to make sure you know what you're doing whenever you go to pick this thing up. [Peyton] Luckily for us our lift has these rubber pads on the feet. That protects the body. Some guys will use two by fours or whatever else they can get their hands on and that's a recipe for disaster. Your shiny new body could end up on the floor. [ Music ] [Tommy] Oh god! This car is a-shaking! [ drill humming ] [ Music ] [ mechanical humming ] [ Music ]
[Tommy] Oh yeah, perfect! We didn't even put bolts in. Coming up next, it's time to fuel up as we walk through our gas tank installation.
[Tommy] We've got to install a new bushing kit so that we can mount our body onto the chassis. What we decided to go with is a setup that basically is straight o-e-m. What that means is these are a rubber bushing. There are companies out there that offer them in more of the urethane setup. You also have to pay attention to each and every placement of these bushings because they have different thicknesses and diameters, and even some of them don't allow a bolt to pass through them. Getting these kinda mismatched what you'll run into is once you try to cinch it down you can actually tweak the body and the doors and the trunk won't open properly. So pay attention to where they go. Luckily for us our kit also comes with a handy little chart that tells us exactly the way this stuff needs to go. [Peyton] Did you just keep all these up there? [Tommy] Yeah I kept all them over here. This car actually only had them on the outside. This car had those bushings up front. [ Music ] Rail needs to go that way in the back. [ Music ]
What do you think? [Peyton] Close enough. [ Music ] [Tommy] She just slid down. That's close right there buddy. Let her down. [ Music ]
[Peyton] I didn't hear any catastrophic failures. [Tommy] Come on up. [ Music ]
Put that in there. Will it work? Nope! So, yep, I don't have another nut. I need you to go out there and get a seven-sixteenths is what they are. [ Music ] I need like two. [ Music ] We've got our body on and we're continuing to check off the things on our to-do list. A while back we went ahead and ran our hard lines that go from the tank to the engine. So now we need to mount our pump and the tank itself. If you choose to use a pump that's externally mounted there's a couple of things that you need to do. One of them is to mount it lower than the tank because that helps to keep the pump fed whenever the fuel is syphoned from the tank. Another is to mount the pump as close to the tank as possible. Normally these type of pumps work a whole lot better whenever they're pushing the fuel from the tank up to the engine as opposed to mounting the pump way up there and then having to draw it up to the front of the car. With that said things can get a little complicated whenever you're trying to find the perfect location. Plus you're getting close to suspension. You've gotta stay away from it along with your exhaust. Luckily for us Holley has the answer that we need as far as a one stop shop. What they offer is an e-f-i conversion kit that has everything like the tank, pump, sender, fill neck, and even the straps to mount it all. I need to go get a tape measure and I'll be right back. I'm gonna start off by measuring to see how deep the tank is. Right at six inches. That one should be the same. Then I'm gonna take a mark on here, six inches, and set my sender over there. Mark where I'm gonna cut my tube. This one is supposed to be an inch shy. That'll go right there. [ Music ] Before you get too carried away put your clamp in there. [ Music ] We gonna make this a little easier. This is one of them type of tools that's pretty handy. It lets you know if you accidentally leave it on. That's pretty handy. It helps you to keep from using up electricity whenever it's not in use and serenades you. So it helps to lower your blood pressure. Y'all have heard of white noise? This is just heated white noise. [ heat gun humming ] [ Music ] [Tommy] Push that on there. Make sure you're shier than six inches. All this here is doing is sealing that little O-ring in there against the wire sleeve. Whenever you go to tighten your hose clamp up also make sure that it's not on the forward side of the swollen spot. Give it a little quick test. It's nice and tight. We're just shy of our six inch mark. So we're good to go. Peyton, got me some zip ties buddy! [Peyton] Up next, this GTO is gonna get tanked. [Tommy] Yeah, yeah, yeah!
[Tommy] Now if you've been following along you know that we're pushing forward and making progress on our GTO build. We had the body off the frame, and after a trip to the powder coater and a slick black paint job we snapped in the body bolts and reunited these fresh faced old acquaintances. [ ratchet clicking ] [ Music ] [Tommy] We also hit the gas on finalizing our fuel tank. Mark where I'm gonna cut my tube. To get it all lined up and installed. Sometimes on these things the hole pattern on here is kinda offset and it only allows you to go in one way. I bet that's the case with this fuel level sender. We're also using cork gaskets here. Sometimes people get it in their mind that they need to put a bunch of sealer and that kind of thing on here and that's really not the case. Often times with cork style gaskets all you need to do is put them on dry. If you were to use a sealer it actually works as a lubricant and oftentimes causes that gasket when you go to tighten it up to kinda pinch it. So try to refrain from doing that type of thing. Drop this in there, jiggle it around, let that screw through the gasket. [ Music ] When tightening these things up there's a little O-ring under the bottom of the head of that screw or bolt. Don't get all crazy and put a cheater pipe on your screwdriver. Just run it down nice and snug. Star pattern, and you'll be able to tell when it's snugged up. Now we need to do the modifications that's needed to our fuel sending unit so that everything reads properly once we mount it in the tank. Now essentially with your pivot here that's on the sending unit that works up and down with your floater here it needs to be right in the middle of the depth of your tank. Ours is at six inches. So we'll have to measure three and put this pivot point right there. If you get it too far or too short it will give you an inaccurate reading and that'll make your gas gauge read improperly. What we're needing is three inches. So we're gonna have to throw some of this stuff away. This is one of those universal parts. Y'all know what that means. It means it doesn't fit anything directly. With three inches of this thing I'm gonna make a mark on our pivot. What we need to do is mount her right there. Now with this you want to be as close to accurate as possible. But it's kinda like the fuel gauge being off ever so slightly. [ Music ] Right there. [ Music ] Maybe bolt cutters. [ Music ] Snip! [ Music ] Oh yeah, I wonder. It only goes one way. Let's just see how it fits. Put a couple of these screws in to hold the gasket in place. [ Music ]
That'll do it. [ Music ] Are you leaking on that thing? [Peyton] Nah, it's where you put that other pad on there. It had some junk on it. [Tommy] Need to hook up that fuel sending wire. [Peyton] It's gotta go through the frame right here. [Tommy] There's a washer that's gotta come off there. Got it? [Peyton] Yep! [ Music ] Ready to keep on keeping on. [ Music ]
[Tommy] Don't do it. [ Music ]
Yeah, yeah, yeah! That'll make it look a lot better. I can't believe it. We've got another thing all finished up. Getting that tank under here shortens that list quite a bit. Now it's time to move on to the next one. Up next, we seal the deal to keep our GTO high and dry.
[Tommy] You know there's a lot of parts of the restoration that kinda, let's call it glamourous. And then there's other parts that isn't very exciting at all. The next step we're gonna be doing it ain't nearly as exciting, but when it comes to a quality restoration it's pretty crucial. What you'll run into is leaks, and noise, and all that kinda stuff. The things that you don't really want. Also another problem is you can actually damage your car. With your door this little rubber serves a couple of purposes. One, it keeps it from rattling along with keeping debris and stuff out of the car. Also there's little bump stops that space this thing out to keep you from busting up your paint. Plus not to mention some of this stuff is seen and people will judge you by the quality of your work by what they're looking at. This old rubber up here is all dry rotted and cracked and looks really bad. What's great about most of this type of stuff. It usually doesn't cost you a whole lot of money and you make a vast improvement. I'm kinda wiggling this thing back and forth. Kinda helps to separate it. Now with it we're not trying to save it by any means but we also don't want to mess our car up either. The channel that it sits in on both sides, the inside and the out, I'm just working the outside piece first, and that lets it just fall out of the other one. I should have pulled this out before I painted this car. It'll be fine either way. This is definitely one of those tasks that you've gotta have some patience. However it will do one thing for sure doing this type of work. It'll make a mess. Whenever you're ordering your weather strip it's always a good idea to kinda hold off until you need it. You don't want this stuff setting around for a couple of years if your project's gonna take that long because with it sitting on the shelf it firms up over time. We picked this stuff up from Steele Rubber Group and we've used a lot of their products in the past. So whenever you're using something like this you always want a good quality part and that's the reason why we went with Steele. Whenever you go to put these things in this end right here is what locates everything. You've gotta mount it here at the base of it and then work it up and all the way over. What I prefer to do before I put any adhesive at all in here is kinda get it set into place. This thing kinda has a groove it's gotta sit in. I got it roughed into place at first and then I like to come and work everything in. You want that seam nice and tight up against that piece of stainless steel. Sometimes it takes a little finesse if you will. Just keep working it and next thing you know it looks nice and pretty. If it comes out or it's loose that tells you what you need to know. Now we're gonna hold off on putting the weatherstrip that goes all the way around the door right now because I don't have the glass in it and we're planning to upgrade to power windows. That's a whole other thing we're gonna have to get into. So what I'm gonna install is our two little bump stops that go here inside the door. Oftentimes when guys install these you'll see them grab a little screwdriver and what they'll try to do is mash this little cone inside of there. What you'll run into is if you're not careful this thing will actually shear that little stud off, and then this thing is basically useless. The way I prefer to do it is make sure that you use plenty of lubrication. Basically some glass cleaner will get the job done. Sometimes with this thing you can basically just really push it, hold the pressure on it, and it'll go. In this instance it didn't work like that but that's okay. One of them little tasks that in all reality sounds like it's super easy. Next thing you know 20 minutes spent just putting rubber bumpers in. Some dudes want to use other forms of lubricant like oil, or grease, or something like that. I don't like using that stuff in this instance cause that stuff will stay on the surface. Glass cleaner will evaporate basically and go away where that oil, what it can do is actually make it easier for this thing to come out cause it's got a lubricant still on the little studs. That one, that pair's on. Door even closes better now. It looks pretty good for one of them one coat rollers. I'm kidding guys! We've had a pretty good day today. We got the car painted, most of the panels are sprayed, the fuel tank is installed. Plus we've started installing some weatherstripping. We still have plenty to do and that's easy to see but I'm here to tell you I've had all I want for today. We'll see y'all next time. [ Music ] Good thing we get paid by the hour!