

In This Episode
- 0:01 Introduction and Overview
- 1:01 Replacing Worn Belts
- 1:22 Addressing Mold Under the Hood
- 1:49 Repairing Curb Rash on Wheels
- 2:07 Installing a Plug and Play Throttle Controller
- 2:20 Welding a Nut on a Locking Lug Nut
- 4:15 Replacing Front Brakes
- 5:37 Refurbishing Wheels
- 11:04 Replacing Serpentine Belt
- 14:50 Changing Cabin Air Filter
- 17:20 Installing Pedal Commander
Video Transcript
[Brian] You are watching Powernation.
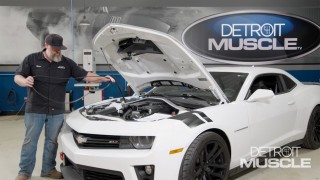
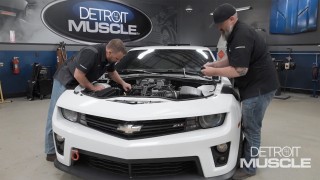
[Brian] Today we're back on our 2015 ZL-1 making performance improvements that won't break the bank. From walking you through replacing the worn out belts to addressing what we hope isn't mold under the hood. These fixes will help us get our Camaro back to peak performance. We'll also show you how to repair curb rash on your wheels and install a plug and play throttle controller to cut down on your accelerator response time. Simple fixes, smart upgrades, and a Camaro that looks and drives better than ever. [ engine revving ] [ Music ] [ tires squealing ]
[ grinder humming ] [Brian] This should be super cool right here. It's amazing how much better it welds when it's clean. Anything else will burn off man. [ grinder humming ]
Noticeable difference. We're back on our 2015 ZL-1 Camaro. Before we put the rear brakes on with the rotors we're gonna do the front brakes now but we run into a little snafu. So we have a security lock or a locking lug nut on the front of our vehicle. We bought this car used. So we did not get that actual socket for that lock. So I'm gonna weld a nut to our locking lug so I can get that off. I've already dressed everything. Sanded it, scuffed it up. I've just got a three quarter inch nut. I've already grounded on all sides. I'm gonna hold it up like this, get it flush, and weld the inside of it. Hopefully it's not torqued too much. Welding a nut on a locking lug nut is not the only repair that we can make. Welding a nut on a rusted fastener, a stripped out lug nut will save you a lot of time and protect your area. Using a hammer and a socket and hammering a socket on a lug nut, whether it's the crown or the acorn, the splitter busted, you could damage your wheel and adjacent surfaces. We got our nut welded to our safety lug. Everything's good, cooled off. Let's see if we can back it off. [ impact driver humming ] She's warm. [ Music ]
Good as new. Next step, get my remaining lug nuts off. Let's get the wheel off so we can pull the caliper and get these brakes put on. [ impact driver humming ] [ Music ]
So we got our wheel off. Everything's ready to go. We've got to loosen and take our caliper back to put our new pads. So I'm gonna walk to the toolbox and get some tools. An 18.
We got everything unboxed. Ready to pull the brakes out of the caliper. Let's go ahead and get started. First I'm gonna remove my pins and then I'll remove my centering bolt. Then I'll pull my pads out from the top. Hopefully this will work. This kit came with all new pins as well. Should be pretty straightforward from here. [ Music ]
Up next my center bolt for my caliper. Should be 13 millimeter. Go ahead and get it loose. [ Music ]
Long winded bolt. [ Music ]
Pull the bolt out. [ Music ]
As you can see I got my caliper off. I got my pads out. Here's my brand new pins. I've also verified my return spring here at the top and make sure it's the right one. We're gonna reverse everything and put our caliper back on. These should drop right into your caliper. Or all the way through your caliper in that case. [ Music ]
[ ratchet clicking ] [ Music ]
[ impact driver humming ] [ Music ]
Perfect! Coming up, the Camaro's got a rash but we've got a remedy to clear it up.
[Brian] Our 2015 ZL-1 Camaro is a super nice vehicle. Clean on the outside. However with the black factory wheels, really nice wheel and tire combo, but we have some curb rash and things like that going on in the wheels. So I'm gonna give you a tech tip on how to refurbish a wheel. A scuff and shoot pretty simple process that you at home could do as well. [ grinder humming ] Try to remove as little material as possible but smooth it up. I've already wiped it all clean. Used an alcohol based cleaner to get all the tire dress and things like that off of it. As we bought a used vehicle not 100 percent sure what was on here. [ grinder humming ] [ Music ]
Everything is good man. [ Music ] Back to hand sanding for everything else. Feels pretty good. Got the major gouges out of it. We'll feather the paint as much as possible. We'll put just a little bit of primer over these couple of spots right here. We are going to use a single stage satin finish, flat or a matte black to match the factory application as well and it's a single stage. So it's pretty thick body and covers really well. Also I'm just sanding the face of the wheel. I'm not painting the inside of the wheel either. We'll back tape it and I'll show you that process here in a second. Main thing you're looking for is deglossing of the wheel so it's not shining. That gives us a tooth if you will for the new paint to stick to. Hand sanding is gonna be the best way to sand these wheels as you can't get access with a d/a. The pad's too wide. A three inch d/a would be good however I don't have one of those with me at the moment. Hand sanding I can control it a lot easier. It don't take a whole lot to degloss it to where we can paint right over it. Let me get a scotchbrite pad. [ compressed air hissing ] [ Music ]
Everything scuffed up. It's blown off really well. I'm gonna get some wax and grease remover. Get everything wiped down real good. Get it dried before we ever start. When you tape your wheel just take your time. Short pieces instead of trying to tape it all at once. That way you can get it down behind the lip of the wheel. They do make aperture tape. It's got a plastic edge on it made for windshield, trim molding, and stuff like that. It works really well in this application as well. I just prefer masking tape. [ Music ]
So while there are many wheel repair services available to you whether it's a mobile service or a brick and mortar where you take your wheel off and take it to them depending on the finish on your wheel and type could be super costly. So we're choosing to do something that you too could do at home. First step is identify your type of wheel. Is it a satin finish, matte finish, shinny. Then we need to get the appropriate tools to do that with. First thing is make sure the wheel's clean. Silicone tire dressing, brake dust, these are all things that could affect your refinish and adhesion. Womp womp womp! [ Music ]
The repairs that we just did in here are gonna make the biggest impact on your vehicle for the lowest amount of cost and effort. This is definitely something you can do in your driveway to get the most bang for your buck and make your vehicle look outstanding. In our ZL-1 Camaro we have a satin finish wheel. I chose the hot rod black from Summit Racing. With this paint it has a satin finish. Just a four to one mix ratio. The more reducer or reducer if we add to it we can control the sheen or shine factor of my wheels. [ spray gun hissing ] [ Music ]
Those of you who are gonna do this in your driveway no booth is needed. We've told you that from the beginning. You may choose to spray this out of a gun in your driveway. You can tape the wheel up on the vehicle. You can take it off, lay it flat, stand it up, completely up to you. There's gonna be a lot of people that choose to do this with an aerosol can. That's no problem. Once again figure your sheen. You could even go to your local paint store and have paint mixed and put into an aerosol can to match your perfect application. The key is make sure the wheel is clean and match your sheen. [ Music ]
Up next, we loosen our belts and filter out what we hope isn't mold.
[Brian] Well we're back on our 2015 ZL-1 Camaro. We're gonna do the serpentine belt setup next and the supercharger belt as part of the maintenance regiment. Due to fact of some dry rotting and things like that coming through the belt now's a good time to take care of that. [ Music ]
Pull the tension off for the supercharger belt. We got our serpentine belt off for our supercharger pulley system. Now we're gonna remove the engine serpentine belt next. I went and got a three-eighths drive ratchet and this is a 15 millimeter for the tensioner pulley here. A lot of times the belt routing diagram is found here on what we call a sight shield or the radiator support. Sometimes under the hood. Also in the owner's manual, and there's all types websites you can get it from. I drew my own. While there are serpentine kits available to change a serpentine belt our 2015 ZL-1 Camaro is a rear wheel drive vehicle. Primarily those serpentine belt kits are for ease of access. Pull it off the idler pulley first. Our vehicle luckily is a longitudinal mount engine which means front to back. Not a transverse or front wheel drive application, but if you have a tight space to work in Autozone does have a rent a tool program that offers the serpentine belt tool kit. [ Music ]
There we go. We got our old serpentine belt off. We're gonna put our new belt right back on, follow my belt routing diagram that I drew, and this is our Duralast belt. Center of the crank pulley first, all the way up to the tensioner. Then pull our slack out as we go. Front wheel drive vehicles have an access problem against the frame rail or the inner apron most of the time. So that flat bar in that serpentine belt kit makes it a lot faster and a lot easier but remember. We're trying to do something we can do at home. [ Music ]
We're good.
So we have our serpentine belt installed complete. We're gonna go ahead and put our supercharger belt on to finish up with our maintenance upgrade to our vehicle. Get it around my crank first. Up top to my supercharger. Back around my tensioner. [ Music ]
Make sure everything's aligned where it needs to be before you let the tension off of your tensioner. Nice! [ Music ]
As part of our maintenance to our 2015 ZL-1 Camaro not only have we done everything under the hood but we're also gonna change the cabin air filter. Something that's really neglected and a lot of people forget to do. First I'm gonna pull the weatherstrip. Just lay it to the front. Then we've got three push clips right here, trim clips. Be careful because as they get older they tend to dry rot and break. Pull the center up on them. [ Music ]
This should give us access to our compartment where our cabin air filter is. Pull it back by your hood foam here and from underneath the windshield seal. As you can see, this is the compartment where the filter lives right here. The cover peels back from the top. Then you'll have access to get your filter out. So what you'll notice right off the bat is the black. Could be mold, could be dirt, debris, anything like that. This is what the air comes through to the passenger compartment of your vehicle. If this is mold make sure you check your HVAC box drains and look for any debris that may be covering the cowl vent panel to make sure it's not holding moisture. They do have an air flow indicator on them. Make sure we put the filter in the correct way. It says here air flow and arrows pointing back. So we want the arrow to point inside the passenger compartment of the vehicle. It should slide right in from there. Remember the non-sealed top is the one that goes on the top for the cover to snap over. [ Music ]
Snap our cover back over it. And reverse our process. Put your cover back in. Make sure it goes under the windshield molding and this lip goes underneath your fender as well. [ Music ]
Good as new. Coming up, it's plug and play time as we get full command over the accelerator.
[Brian] Next we're gonna install a Pedal Commander on our 2015 ZL-1 Camaro. We want a more effective and faster response in our throttle pedal. This has four different settings, Fuel Economy, City Mode for everyday driving but a little over stock, Sport over stock for sure, and Sport Plus they recommend for track only use. We're gonna be on track a whole lot. We'll probably stay in Sport Plus mode. [ Music ] Pull the lock back and we should be able to depress it and push it right up. Got my factory harness disconnected from my pedal. We're gonna plug our Pedal Commander in between. Click-click! Our ZL-1 Chevy Camaro is drive by wire. So this plug and play setup will improve the throttle response time between our accelerator and our 6.2-liter LSA supercharged engine. [ engine revving ] [ Music ]
And we're installed. We'll peel the tape off both sides. Then we'll route our wire afterwards. [ Music ]
It does have a cage it sits in like your cell phone belt loop carrier or whatever you want to call it. We got everything installed. Next step, take the car out, drive it, and check the performance. [ Music ]
[ engine starting ] [ engine idling ] [ Music ]
We got our Pedal Commander installed. We're getting ready to do our initial run. I've got it turned to the off position right now. It's at barebones basic factory stock so we can get an accurate feel of the improvement we're gonna get. [ engine revving ]
Wow she's quick. All gas, all horsepower. You would think there would be some kind of delay. The ZL-1 it's hard to find that. Super excited to see what this Pedal Commander can really do for our acceleration. Back stop. Pedal Commander Sport Plus mode. [ engine revving ]
Wow! Woo! Oh yeah! When you think you can't wake it up or liven it up any more you just find that one little piece that really works. Wow what a difference. Today we did a lot of grunt work that isn't always the most flashy or fun but sometimes little fixes can prevent big problems. Nuts man, crazy! She just goes! To be honest this car didn't have much wrong with it when we got it but I'm always up for driving a 500 plus horsepower Camaro. You know what they say. If it ain't broke don't fix it. Around here we're never satisfied with just good enough.
Show Full Transcript
[Brian] Today we're back on our 2015 ZL-1 making performance improvements that won't break the bank. From walking you through replacing the worn out belts to addressing what we hope isn't mold under the hood. These fixes will help us get our Camaro back to peak performance. We'll also show you how to repair curb rash on your wheels and install a plug and play throttle controller to cut down on your accelerator response time. Simple fixes, smart upgrades, and a Camaro that looks and drives better than ever. [ engine revving ] [ Music ] [ tires squealing ]
[ grinder humming ] [Brian] This should be super cool right here. It's amazing how much better it welds when it's clean. Anything else will burn off man. [ grinder humming ]
Noticeable difference. We're back on our 2015 ZL-1 Camaro. Before we put the rear brakes on with the rotors we're gonna do the front brakes now but we run into a little snafu. So we have a security lock or a locking lug nut on the front of our vehicle. We bought this car used. So we did not get that actual socket for that lock. So I'm gonna weld a nut to our locking lug so I can get that off. I've already dressed everything. Sanded it, scuffed it up. I've just got a three quarter inch nut. I've already grounded on all sides. I'm gonna hold it up like this, get it flush, and weld the inside of it. Hopefully it's not torqued too much. Welding a nut on a locking lug nut is not the only repair that we can make. Welding a nut on a rusted fastener, a stripped out lug nut will save you a lot of time and protect your area. Using a hammer and a socket and hammering a socket on a lug nut, whether it's the crown or the acorn, the splitter busted, you could damage your wheel and adjacent surfaces. We got our nut welded to our safety lug. Everything's good, cooled off. Let's see if we can back it off. [ impact driver humming ] She's warm. [ Music ]
Good as new. Next step, get my remaining lug nuts off. Let's get the wheel off so we can pull the caliper and get these brakes put on. [ impact driver humming ] [ Music ]
So we got our wheel off. Everything's ready to go. We've got to loosen and take our caliper back to put our new pads. So I'm gonna walk to the toolbox and get some tools. An 18.
We got everything unboxed. Ready to pull the brakes out of the caliper. Let's go ahead and get started. First I'm gonna remove my pins and then I'll remove my centering bolt. Then I'll pull my pads out from the top. Hopefully this will work. This kit came with all new pins as well. Should be pretty straightforward from here. [ Music ]
Up next my center bolt for my caliper. Should be 13 millimeter. Go ahead and get it loose. [ Music ]
Long winded bolt. [ Music ]
Pull the bolt out. [ Music ]
As you can see I got my caliper off. I got my pads out. Here's my brand new pins. I've also verified my return spring here at the top and make sure it's the right one. We're gonna reverse everything and put our caliper back on. These should drop right into your caliper. Or all the way through your caliper in that case. [ Music ]
[ ratchet clicking ] [ Music ]
[ impact driver humming ] [ Music ]
Perfect! Coming up, the Camaro's got a rash but we've got a remedy to clear it up.
[Brian] Our 2015 ZL-1 Camaro is a super nice vehicle. Clean on the outside. However with the black factory wheels, really nice wheel and tire combo, but we have some curb rash and things like that going on in the wheels. So I'm gonna give you a tech tip on how to refurbish a wheel. A scuff and shoot pretty simple process that you at home could do as well. [ grinder humming ] Try to remove as little material as possible but smooth it up. I've already wiped it all clean. Used an alcohol based cleaner to get all the tire dress and things like that off of it. As we bought a used vehicle not 100 percent sure what was on here. [ grinder humming ] [ Music ]
Everything is good man. [ Music ] Back to hand sanding for everything else. Feels pretty good. Got the major gouges out of it. We'll feather the paint as much as possible. We'll put just a little bit of primer over these couple of spots right here. We are going to use a single stage satin finish, flat or a matte black to match the factory application as well and it's a single stage. So it's pretty thick body and covers really well. Also I'm just sanding the face of the wheel. I'm not painting the inside of the wheel either. We'll back tape it and I'll show you that process here in a second. Main thing you're looking for is deglossing of the wheel so it's not shining. That gives us a tooth if you will for the new paint to stick to. Hand sanding is gonna be the best way to sand these wheels as you can't get access with a d/a. The pad's too wide. A three inch d/a would be good however I don't have one of those with me at the moment. Hand sanding I can control it a lot easier. It don't take a whole lot to degloss it to where we can paint right over it. Let me get a scotchbrite pad. [ compressed air hissing ] [ Music ]
Everything scuffed up. It's blown off really well. I'm gonna get some wax and grease remover. Get everything wiped down real good. Get it dried before we ever start. When you tape your wheel just take your time. Short pieces instead of trying to tape it all at once. That way you can get it down behind the lip of the wheel. They do make aperture tape. It's got a plastic edge on it made for windshield, trim molding, and stuff like that. It works really well in this application as well. I just prefer masking tape. [ Music ]
So while there are many wheel repair services available to you whether it's a mobile service or a brick and mortar where you take your wheel off and take it to them depending on the finish on your wheel and type could be super costly. So we're choosing to do something that you too could do at home. First step is identify your type of wheel. Is it a satin finish, matte finish, shinny. Then we need to get the appropriate tools to do that with. First thing is make sure the wheel's clean. Silicone tire dressing, brake dust, these are all things that could affect your refinish and adhesion. Womp womp womp! [ Music ]
The repairs that we just did in here are gonna make the biggest impact on your vehicle for the lowest amount of cost and effort. This is definitely something you can do in your driveway to get the most bang for your buck and make your vehicle look outstanding. In our ZL-1 Camaro we have a satin finish wheel. I chose the hot rod black from Summit Racing. With this paint it has a satin finish. Just a four to one mix ratio. The more reducer or reducer if we add to it we can control the sheen or shine factor of my wheels. [ spray gun hissing ] [ Music ]
Those of you who are gonna do this in your driveway no booth is needed. We've told you that from the beginning. You may choose to spray this out of a gun in your driveway. You can tape the wheel up on the vehicle. You can take it off, lay it flat, stand it up, completely up to you. There's gonna be a lot of people that choose to do this with an aerosol can. That's no problem. Once again figure your sheen. You could even go to your local paint store and have paint mixed and put into an aerosol can to match your perfect application. The key is make sure the wheel is clean and match your sheen. [ Music ]
Up next, we loosen our belts and filter out what we hope isn't mold.
[Brian] Well we're back on our 2015 ZL-1 Camaro. We're gonna do the serpentine belt setup next and the supercharger belt as part of the maintenance regiment. Due to fact of some dry rotting and things like that coming through the belt now's a good time to take care of that. [ Music ]
Pull the tension off for the supercharger belt. We got our serpentine belt off for our supercharger pulley system. Now we're gonna remove the engine serpentine belt next. I went and got a three-eighths drive ratchet and this is a 15 millimeter for the tensioner pulley here. A lot of times the belt routing diagram is found here on what we call a sight shield or the radiator support. Sometimes under the hood. Also in the owner's manual, and there's all types websites you can get it from. I drew my own. While there are serpentine kits available to change a serpentine belt our 2015 ZL-1 Camaro is a rear wheel drive vehicle. Primarily those serpentine belt kits are for ease of access. Pull it off the idler pulley first. Our vehicle luckily is a longitudinal mount engine which means front to back. Not a transverse or front wheel drive application, but if you have a tight space to work in Autozone does have a rent a tool program that offers the serpentine belt tool kit. [ Music ]
There we go. We got our old serpentine belt off. We're gonna put our new belt right back on, follow my belt routing diagram that I drew, and this is our Duralast belt. Center of the crank pulley first, all the way up to the tensioner. Then pull our slack out as we go. Front wheel drive vehicles have an access problem against the frame rail or the inner apron most of the time. So that flat bar in that serpentine belt kit makes it a lot faster and a lot easier but remember. We're trying to do something we can do at home. [ Music ]
We're good.
So we have our serpentine belt installed complete. We're gonna go ahead and put our supercharger belt on to finish up with our maintenance upgrade to our vehicle. Get it around my crank first. Up top to my supercharger. Back around my tensioner. [ Music ]
Make sure everything's aligned where it needs to be before you let the tension off of your tensioner. Nice! [ Music ]
As part of our maintenance to our 2015 ZL-1 Camaro not only have we done everything under the hood but we're also gonna change the cabin air filter. Something that's really neglected and a lot of people forget to do. First I'm gonna pull the weatherstrip. Just lay it to the front. Then we've got three push clips right here, trim clips. Be careful because as they get older they tend to dry rot and break. Pull the center up on them. [ Music ]
This should give us access to our compartment where our cabin air filter is. Pull it back by your hood foam here and from underneath the windshield seal. As you can see, this is the compartment where the filter lives right here. The cover peels back from the top. Then you'll have access to get your filter out. So what you'll notice right off the bat is the black. Could be mold, could be dirt, debris, anything like that. This is what the air comes through to the passenger compartment of your vehicle. If this is mold make sure you check your HVAC box drains and look for any debris that may be covering the cowl vent panel to make sure it's not holding moisture. They do have an air flow indicator on them. Make sure we put the filter in the correct way. It says here air flow and arrows pointing back. So we want the arrow to point inside the passenger compartment of the vehicle. It should slide right in from there. Remember the non-sealed top is the one that goes on the top for the cover to snap over. [ Music ]
Snap our cover back over it. And reverse our process. Put your cover back in. Make sure it goes under the windshield molding and this lip goes underneath your fender as well. [ Music ]
Good as new. Coming up, it's plug and play time as we get full command over the accelerator.
[Brian] Next we're gonna install a Pedal Commander on our 2015 ZL-1 Camaro. We want a more effective and faster response in our throttle pedal. This has four different settings, Fuel Economy, City Mode for everyday driving but a little over stock, Sport over stock for sure, and Sport Plus they recommend for track only use. We're gonna be on track a whole lot. We'll probably stay in Sport Plus mode. [ Music ] Pull the lock back and we should be able to depress it and push it right up. Got my factory harness disconnected from my pedal. We're gonna plug our Pedal Commander in between. Click-click! Our ZL-1 Chevy Camaro is drive by wire. So this plug and play setup will improve the throttle response time between our accelerator and our 6.2-liter LSA supercharged engine. [ engine revving ] [ Music ]
And we're installed. We'll peel the tape off both sides. Then we'll route our wire afterwards. [ Music ]
It does have a cage it sits in like your cell phone belt loop carrier or whatever you want to call it. We got everything installed. Next step, take the car out, drive it, and check the performance. [ Music ]
[ engine starting ] [ engine idling ] [ Music ]
We got our Pedal Commander installed. We're getting ready to do our initial run. I've got it turned to the off position right now. It's at barebones basic factory stock so we can get an accurate feel of the improvement we're gonna get. [ engine revving ]
Wow she's quick. All gas, all horsepower. You would think there would be some kind of delay. The ZL-1 it's hard to find that. Super excited to see what this Pedal Commander can really do for our acceleration. Back stop. Pedal Commander Sport Plus mode. [ engine revving ]
Wow! Woo! Oh yeah! When you think you can't wake it up or liven it up any more you just find that one little piece that really works. Wow what a difference. Today we did a lot of grunt work that isn't always the most flashy or fun but sometimes little fixes can prevent big problems. Nuts man, crazy! She just goes! To be honest this car didn't have much wrong with it when we got it but I'm always up for driving a 500 plus horsepower Camaro. You know what they say. If it ain't broke don't fix it. Around here we're never satisfied with just good enough.
Detroit Muscle Featured Projects

Detroit Muscle Builds



Want more content like this?
Join the PowerNation Email NewsletterParts Used In This Episode


Vitalen Auto Performance Inc. DBA Pedal Commander
Pedal Commander Throttle Response Controller



