
Video Transcript
[Brian] You are watching Powernation.
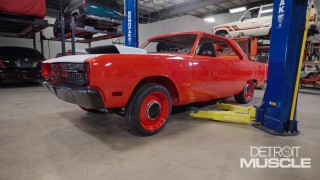
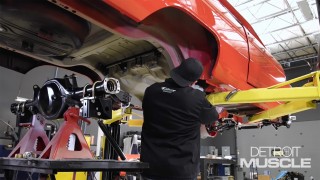
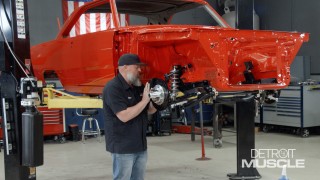
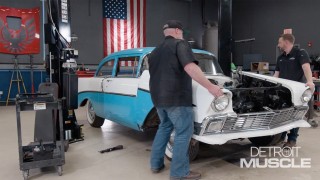
[Brian] Today on Detroit Muscle we dash to the finish line on our 1956 Chevy 210 gasser Project Shellshock. We've got some bright ideas for replacing some of the old parts with new upgrades that keep the heart and soul of this ride intact. They say it's the last 20 percent that takes 80 percent of your time but those fine details are the things that are gonna make this build stand tall as we keep grinding away at this piece of Detroit muscle. [ engine revving ] [ Music ] [ tires squealing ] [ Music ] We're back on our 1956 Chevy 210, Project Shellshock. When we got this car it was in pretty good shape for a nearly 70 year old ride. The only real issues were some rust in the floor pans, which we fixed and we also dropped it down on a new chassis. Now we've got it in primer and put back together ready for the next steps. Next thing we need to tackle is the front brakes on our gasser. So let's go ahead and get started. Get the wheel off first. [ impact driver humming ] [ Music ]
Alright! [ Music ]
Next step, our friends over at Checkered Racing went ahead and put our spindles on that we got from Wilwood cause we got our chassis from them. We have to remove the spindle because the rotor and hat mount to the back side of the spindle for this application. So I'm gonna pull the center cap off first to remove the spindle. Next is my cotter pin to get my castellated nut off. Be careful because your bearing will want to come out of the front of your spindle. I'm just gonna lay it up here for now. Next up we got our spindle off. I got my front bearing out as well. We've got to put our center hat on first. We're gonna put it with the concave side down. So I've got the holes lined up. I'm gonna push it down. It's a press fit to get it where we want it. Then I'm gonna install our fasteners. So I am gonna put some thread locker on my fasteners as we go, and then we'll torque them down afterward. While working on any brake job it's recommended that thread locker be applied to all your nuts, bolts, and fasteners. For our application the backing out or loosening of fasteners is much more anticipated than normal driving as we're gonna be ripping this thing up and down the track at high speeds. So we want that extra assurance on every nut and fastener that we have. [ Music ] Now once we get everything fitted up where it needs to be we can go back and torque it then. So I got my center hub hat on. Next step will be putting my rotor on. And then we'll put the fasteners in it. Then we can put it back on the vehicle. Once again align the holes where they need to be and we'll apply the fasteners there as well with some thread locker. I'm starting everything by hand. Some people start it by an impact or ratchet. I just like to know that my threads are even and straight so I'm not cross threading anything. I don't even have that option running them in finger tight. Same thing as before. Gonna snug them up in a star pattern. Our calipers did come with 30 thousandths spacers that we can use. So I want to make sure everything is gonna align before we final torque everything in case we have to do some adjustments. [ Music ] Now I'm gonna put in these EBC brake pads. Make sure your pads are flush and sit in the holes where they need to. Then we'll run our pin through. These EBC Redstuff ceramic pads are low dust and made for fast street driving. So they'll work great for what we're aiming to do. Alright, back to the car. Got my rotor and hat built with my spindle attached. We're gonna remount it, put my brake caliper into the mounts, and check my alignment. Replace my front bearing. Don't forget to align the tabs on your washer. Make sure everything is good. Castellated nut. I'm gonna run this all the way in by hand to tighten it up and then back it out so my cotter pin will go in. I like to bend my ears as flat as I can get them. Then push then around the nut. Next will be my spindle cap and it is threaded. It's a friction fit. So it won't back off. Give her a spin. No slack or slop in it. Everything feels good. Next step's my caliper. We've already put our pads in our caliper. It should go right over our rotor and mount in the correct location. These are nine-sixteenths fasteners. I'm gonna run them up snug. It does come with shims for the caliper if need be but I think we're in pretty good shape. You want to spin the rotor and make sure nothing is rubbing so everything is good. [ Music ]
Feels good right there. Next step, reinstall the wheel. [ Music ]
[ impact driver humming ] [ Music ]
Looks good. It's amazing how just adding a set of wheels changes the whole attitude of a vehicle. [ Music ] Coming up, it's out with the old and in with the new but calm down. It still looks old. Man they look good.
[Brian] So we're getting ready to replace our factory taillights with some brand new aftermarket Summit Racing taillights. First thing, we got some seized fasteners, things like that. Being a well over 50 year old vehicle we know we're going to have some problems. So we're going to soak them first with some Deep Creep. This one actually has the filler neck in it. So we gotta let the door down for the fuel. Put a little on the hinge to. Just like in the past it's good to keep all your factory hardware bag and tag. [ Music ] Our new lights from Summit Racing do come with new screws. I like to keep everything together if possible. One of the coolest features about a tri-five. [ Music ] [ drill humming ] [ Music ] Awkward place right here. [ Music ]
All right, left side out. Right side to go. Let's get it done. [ Music ]
Everything in my bag. [ Music ]
Left side I need my trim bag. All right, now we got our factory taillights out. We run into a small problem. The reverse lights are missing the socket wire and everything's missing out of the rear of the car. So I have a Summit Tech Tip for you. We're going to use our aftermarket reproduction lights from Summit as well as some replacement reverse light sockets and we're going to show you how to get it done. So our brand new aftermarket replacement lights from Summit Racing are ready to go in the vehicle. However we're going to replace the reverse light sockets. Put brand new ones in it. These lights do come as a shell or hollow. So it will be going here. They're already pre-drilled. Ready for backing plates and the socket. So let's get this done. So as you see, we got our kit laid out. First step, we're going to run our wire through our rubber grommet that's going to go over our socket. Install my socket. I'm just going to loosely let it hang. Make sure your wires are twisted at the end. Next step will be my spring that goes inside of my socket. Next step will be my plunger. It's going to go on. The last step will be to crimp my actual plunger end or my terminal to my wire. It's going to be a little hard to see. But I've pre-stripped my wire back and twisted it so it will get a good connection. All imma do is close the hasp over it and then we'll cut the excess off. These are super soft. I know a lot of people are going to be thinking, why is he not using crimpers? It's just a brass tab. So it closes together well. All it's got to do is go inside of our plunger. [ Music ]
Remember, when you solder you want to heat the actual wire itself and not melt the solder. All right, so now we've got everything crimped and soldered. All we gotta do is push it back down into my plunger and it should be spring loaded. So I should be able to pull on this wire and you see it go up and down. Let's go ahead and install my bulb. Make sure everything is good. The rubber sleeve naturally goes over the socket once it's mounted in the vehicle. Here we are. Next step, pull the lens out cause the bulb won't fit through the back of the housing but I can go ahead and mount the socket and everything. So we'll do that next. Reinstall my screws. We'll have to pull the lens off to install the bulb from the front side. [ Music ]
Slide my rubber grommet back over my wire. [ Music ]
Keep my rubber grommet from coming off. That's cool. Man, they look good. That's what it's all about. [ Music ]
Up next, we excavate 70 years worth of parts to prep for paint. Maybe we'll get lucky and see the factory speaker.
[Brian] All right, so next part of the process we're going to refinish our dash in our car. Obviously we got to pull out a couple items here. Speedometer cluster, speaker grille. We're going to pull the lock out of the dash, wiper motor, and the ignition switch. So let's go ahead and get this done. We're going to tone it to match the outside of the car. First thing we're going to do. Remove the column drop cover. Should just be spring loaded. Just pull it. It'll expose our Phillips head screws here at the bottom of our bezel. Next two screws in the top of the bezel here. [ Music ]
Now it's just undoing lights out of the sockets and it'll be free to come out. [ Music ]
So with the headlight switch, especially if it's the factory switch, to remove the shaft and the actual knob itself there's a release at the top of the switch. So this gives me complete access to it. The light actually has to be in the on-position. Should be able to depress the button and pull the shaft right out. Now unlock my bezel and the whole switch should come out of the assembly. [ Music ]
Wow! I wonder how long that's been in there. [ Music ] Dang it! I guess I'll go ahead and pull the emergency brake out. We'll work our way across the dash itself. It's not tied to anything anymore as we have a different chassis. So you just take it out. You know, we told you we had a super clean car when we started. This just goes to show how original and preserved this vehicle is. So it has the original clutch head type fasteners that's holding our parking brake. It's holding also our kick panel vents as well. These have not been taken out at all. Pretty amazing stuff. Next up, kick panel vents. I'm just going to remove both sides. Once again, clutch head screws. I am using a flathead screwdriver blade because the clutch size. [ ratchet clicking ] [ Music ]
All right, up next, speaker cover. [ Music ]
Should be two Phillips head screws. [ Music ] Maybe we'll get lucky and see the factory speaker. Don't really know. [ Music ] Womp womp womp. No speaker. But it's crazy how good a shape stuff's in for real. Phillips head screw in our aftermarket water temp gauge. Just a single screw. [ Music ]
Next, heater control bezel. Should be Phillips head screws as well. And I'm sure there's linkages that we have to remove to get this out. [ Music ]
Let's go ahead and get the wiper switch out. Should have a set screw in the top of the knob right here. We've got to loosen it up. To loosen this one up. So this does have a specialty set for it. Also, snap ring pliers work good for this. Up next, my ignition switch. I'm going to do it the same way. Hopefully with the snap ring pliers. Once again, it does take a specialty socket to remove these but luckily in our case it's not too tight. [ Music ]
Up next glove box and see what kind of treasures we got in here. Get to know your new 1956 Chevy, registration. Factory squeeze clamps for radiator hoses. All right. Looks like Phillips head screw to get our glove box lock. [ Music ]
I believe I'm gonna go ahead and pull the door off as well. We're already here. That way, the inside of the dash door can be painted as well to match the dash. The glove box itself is in pretty good shape but it seems to be pretty brittle. So I'm gonna try to leave the actual glove box, paper box inside the dash. So that's why I'm trying to just pull the door. Well there she is. All stripped down, ready for some sanding. A couple coats of paint. It's gonna look like a brand new car. Coming up, it's not Halloween but we've got some candy for you. This color gonna be fire!
Now that we got the dash all sanded and prepped it's time to start laying down some paint. This is going to be impressive. This color gonna be fire! [ Music ]
This ain't impressive. It's gray. Exactly where I thought it was gonna pour from. [ Music ] Don't know if this lid's gonna go back on there as bent as it is. [ hammer tapping ] Four parts sealer. One part hardener. And because we're spraying it as a sealer two parts reducer. And I need a razorblade not to spin the top. I don't have to worry about it locking. It's like taking the child lock off of your medicine bottle. One part activator. Two parts reducer. Wow, we'll have a lot. [ Music ] Make sure you stir it long enough so it incorporates. [ Music ] [ spray gun hissing ] [ Music ]
Golden. [ Music ]
Yeah, boy. Let's get it done. [ Music ]
I love it! [ Music ]
So for the dash application we use the KBC or a kandy base coat instead of a true KK or a kandy koncentrate. So the difference is candy base coat mixes and reduces just like a standard base coat for a vehicle okay. So it allows the overlaps to be more forgiving. Also it gives you the depth of color with less coats. For instance, a regular candy concentrate is a tinted mid coat. Basically it's translucent. You can see right through it but it is a color. All right, this is a candy base coat. So we're going to reduce it with standard reducer. We're going to choose RU-311. Two-to-one, three-to-four to however many coats you want. But it recommends 3 to 4 medium wet coats. Why couldn't the other stuff pour like that? Even though we are using the candy base coat and it is more forgiving and better to spray for a first time or a novice painter you still need to follow the standard protocol of 75% overlap, at least on your first coat. Then you could go 50% after that. Also keep this in mind. Anytime you're spraying candy or a pearl color, for example, you want to walk the length of a vehicle if you're painting the outside. But in this case we painted the entire width of the dash at one time. True candy coat. You know, it could be anything upwards of 7 or 8 coats depending on the depth of color that you're looking for. So we chose to go the easy route. Also, it's a lot more forgiving for somebody who's never sprayed candy before. And that keeps the striping down. That keeps my metallic even. And by painting the entire panel at the same time we cut down on any paint imperfections. And it makes every job come out like a professional every time. There we are. Man, they look good. We keep getting closer and closer to our end goal of turning this Chevy 210 into a gasser that goes 120. We can make it stop but next on our list, we've got to make it start. We've got a couple friends who know a thing or two about engines who are going to help us with that. There's still a lot left to do but once this project is said and done the last thing you'll see off the starting line will be the words Detroit Muscle leaving you in the dust.
Show Full Transcript
[Brian] Today on Detroit Muscle we dash to the finish line on our 1956 Chevy 210 gasser Project Shellshock. We've got some bright ideas for replacing some of the old parts with new upgrades that keep the heart and soul of this ride intact. They say it's the last 20 percent that takes 80 percent of your time but those fine details are the things that are gonna make this build stand tall as we keep grinding away at this piece of Detroit muscle. [ engine revving ] [ Music ] [ tires squealing ] [ Music ] We're back on our 1956 Chevy 210, Project Shellshock. When we got this car it was in pretty good shape for a nearly 70 year old ride. The only real issues were some rust in the floor pans, which we fixed and we also dropped it down on a new chassis. Now we've got it in primer and put back together ready for the next steps. Next thing we need to tackle is the front brakes on our gasser. So let's go ahead and get started. Get the wheel off first. [ impact driver humming ] [ Music ]
Alright! [ Music ]
Next step, our friends over at Checkered Racing went ahead and put our spindles on that we got from Wilwood cause we got our chassis from them. We have to remove the spindle because the rotor and hat mount to the back side of the spindle for this application. So I'm gonna pull the center cap off first to remove the spindle. Next is my cotter pin to get my castellated nut off. Be careful because your bearing will want to come out of the front of your spindle. I'm just gonna lay it up here for now. Next up we got our spindle off. I got my front bearing out as well. We've got to put our center hat on first. We're gonna put it with the concave side down. So I've got the holes lined up. I'm gonna push it down. It's a press fit to get it where we want it. Then I'm gonna install our fasteners. So I am gonna put some thread locker on my fasteners as we go, and then we'll torque them down afterward. While working on any brake job it's recommended that thread locker be applied to all your nuts, bolts, and fasteners. For our application the backing out or loosening of fasteners is much more anticipated than normal driving as we're gonna be ripping this thing up and down the track at high speeds. So we want that extra assurance on every nut and fastener that we have. [ Music ] Now once we get everything fitted up where it needs to be we can go back and torque it then. So I got my center hub hat on. Next step will be putting my rotor on. And then we'll put the fasteners in it. Then we can put it back on the vehicle. Once again align the holes where they need to be and we'll apply the fasteners there as well with some thread locker. I'm starting everything by hand. Some people start it by an impact or ratchet. I just like to know that my threads are even and straight so I'm not cross threading anything. I don't even have that option running them in finger tight. Same thing as before. Gonna snug them up in a star pattern. Our calipers did come with 30 thousandths spacers that we can use. So I want to make sure everything is gonna align before we final torque everything in case we have to do some adjustments. [ Music ] Now I'm gonna put in these EBC brake pads. Make sure your pads are flush and sit in the holes where they need to. Then we'll run our pin through. These EBC Redstuff ceramic pads are low dust and made for fast street driving. So they'll work great for what we're aiming to do. Alright, back to the car. Got my rotor and hat built with my spindle attached. We're gonna remount it, put my brake caliper into the mounts, and check my alignment. Replace my front bearing. Don't forget to align the tabs on your washer. Make sure everything is good. Castellated nut. I'm gonna run this all the way in by hand to tighten it up and then back it out so my cotter pin will go in. I like to bend my ears as flat as I can get them. Then push then around the nut. Next will be my spindle cap and it is threaded. It's a friction fit. So it won't back off. Give her a spin. No slack or slop in it. Everything feels good. Next step's my caliper. We've already put our pads in our caliper. It should go right over our rotor and mount in the correct location. These are nine-sixteenths fasteners. I'm gonna run them up snug. It does come with shims for the caliper if need be but I think we're in pretty good shape. You want to spin the rotor and make sure nothing is rubbing so everything is good. [ Music ]
Feels good right there. Next step, reinstall the wheel. [ Music ]
[ impact driver humming ] [ Music ]
Looks good. It's amazing how just adding a set of wheels changes the whole attitude of a vehicle. [ Music ] Coming up, it's out with the old and in with the new but calm down. It still looks old. Man they look good.
[Brian] So we're getting ready to replace our factory taillights with some brand new aftermarket Summit Racing taillights. First thing, we got some seized fasteners, things like that. Being a well over 50 year old vehicle we know we're going to have some problems. So we're going to soak them first with some Deep Creep. This one actually has the filler neck in it. So we gotta let the door down for the fuel. Put a little on the hinge to. Just like in the past it's good to keep all your factory hardware bag and tag. [ Music ] Our new lights from Summit Racing do come with new screws. I like to keep everything together if possible. One of the coolest features about a tri-five. [ Music ] [ drill humming ] [ Music ] Awkward place right here. [ Music ]
All right, left side out. Right side to go. Let's get it done. [ Music ]
Everything in my bag. [ Music ]
Left side I need my trim bag. All right, now we got our factory taillights out. We run into a small problem. The reverse lights are missing the socket wire and everything's missing out of the rear of the car. So I have a Summit Tech Tip for you. We're going to use our aftermarket reproduction lights from Summit as well as some replacement reverse light sockets and we're going to show you how to get it done. So our brand new aftermarket replacement lights from Summit Racing are ready to go in the vehicle. However we're going to replace the reverse light sockets. Put brand new ones in it. These lights do come as a shell or hollow. So it will be going here. They're already pre-drilled. Ready for backing plates and the socket. So let's get this done. So as you see, we got our kit laid out. First step, we're going to run our wire through our rubber grommet that's going to go over our socket. Install my socket. I'm just going to loosely let it hang. Make sure your wires are twisted at the end. Next step will be my spring that goes inside of my socket. Next step will be my plunger. It's going to go on. The last step will be to crimp my actual plunger end or my terminal to my wire. It's going to be a little hard to see. But I've pre-stripped my wire back and twisted it so it will get a good connection. All imma do is close the hasp over it and then we'll cut the excess off. These are super soft. I know a lot of people are going to be thinking, why is he not using crimpers? It's just a brass tab. So it closes together well. All it's got to do is go inside of our plunger. [ Music ]
Remember, when you solder you want to heat the actual wire itself and not melt the solder. All right, so now we've got everything crimped and soldered. All we gotta do is push it back down into my plunger and it should be spring loaded. So I should be able to pull on this wire and you see it go up and down. Let's go ahead and install my bulb. Make sure everything is good. The rubber sleeve naturally goes over the socket once it's mounted in the vehicle. Here we are. Next step, pull the lens out cause the bulb won't fit through the back of the housing but I can go ahead and mount the socket and everything. So we'll do that next. Reinstall my screws. We'll have to pull the lens off to install the bulb from the front side. [ Music ]
Slide my rubber grommet back over my wire. [ Music ]
Keep my rubber grommet from coming off. That's cool. Man, they look good. That's what it's all about. [ Music ]
Up next, we excavate 70 years worth of parts to prep for paint. Maybe we'll get lucky and see the factory speaker.
[Brian] All right, so next part of the process we're going to refinish our dash in our car. Obviously we got to pull out a couple items here. Speedometer cluster, speaker grille. We're going to pull the lock out of the dash, wiper motor, and the ignition switch. So let's go ahead and get this done. We're going to tone it to match the outside of the car. First thing we're going to do. Remove the column drop cover. Should just be spring loaded. Just pull it. It'll expose our Phillips head screws here at the bottom of our bezel. Next two screws in the top of the bezel here. [ Music ]
Now it's just undoing lights out of the sockets and it'll be free to come out. [ Music ]
So with the headlight switch, especially if it's the factory switch, to remove the shaft and the actual knob itself there's a release at the top of the switch. So this gives me complete access to it. The light actually has to be in the on-position. Should be able to depress the button and pull the shaft right out. Now unlock my bezel and the whole switch should come out of the assembly. [ Music ]
Wow! I wonder how long that's been in there. [ Music ] Dang it! I guess I'll go ahead and pull the emergency brake out. We'll work our way across the dash itself. It's not tied to anything anymore as we have a different chassis. So you just take it out. You know, we told you we had a super clean car when we started. This just goes to show how original and preserved this vehicle is. So it has the original clutch head type fasteners that's holding our parking brake. It's holding also our kick panel vents as well. These have not been taken out at all. Pretty amazing stuff. Next up, kick panel vents. I'm just going to remove both sides. Once again, clutch head screws. I am using a flathead screwdriver blade because the clutch size. [ ratchet clicking ] [ Music ]
All right, up next, speaker cover. [ Music ]
Should be two Phillips head screws. [ Music ] Maybe we'll get lucky and see the factory speaker. Don't really know. [ Music ] Womp womp womp. No speaker. But it's crazy how good a shape stuff's in for real. Phillips head screw in our aftermarket water temp gauge. Just a single screw. [ Music ]
Next, heater control bezel. Should be Phillips head screws as well. And I'm sure there's linkages that we have to remove to get this out. [ Music ]
Let's go ahead and get the wiper switch out. Should have a set screw in the top of the knob right here. We've got to loosen it up. To loosen this one up. So this does have a specialty set for it. Also, snap ring pliers work good for this. Up next, my ignition switch. I'm going to do it the same way. Hopefully with the snap ring pliers. Once again, it does take a specialty socket to remove these but luckily in our case it's not too tight. [ Music ]
Up next glove box and see what kind of treasures we got in here. Get to know your new 1956 Chevy, registration. Factory squeeze clamps for radiator hoses. All right. Looks like Phillips head screw to get our glove box lock. [ Music ]
I believe I'm gonna go ahead and pull the door off as well. We're already here. That way, the inside of the dash door can be painted as well to match the dash. The glove box itself is in pretty good shape but it seems to be pretty brittle. So I'm gonna try to leave the actual glove box, paper box inside the dash. So that's why I'm trying to just pull the door. Well there she is. All stripped down, ready for some sanding. A couple coats of paint. It's gonna look like a brand new car. Coming up, it's not Halloween but we've got some candy for you. This color gonna be fire!
Now that we got the dash all sanded and prepped it's time to start laying down some paint. This is going to be impressive. This color gonna be fire! [ Music ]
This ain't impressive. It's gray. Exactly where I thought it was gonna pour from. [ Music ] Don't know if this lid's gonna go back on there as bent as it is. [ hammer tapping ] Four parts sealer. One part hardener. And because we're spraying it as a sealer two parts reducer. And I need a razorblade not to spin the top. I don't have to worry about it locking. It's like taking the child lock off of your medicine bottle. One part activator. Two parts reducer. Wow, we'll have a lot. [ Music ] Make sure you stir it long enough so it incorporates. [ Music ] [ spray gun hissing ] [ Music ]
Golden. [ Music ]
Yeah, boy. Let's get it done. [ Music ]
I love it! [ Music ]
So for the dash application we use the KBC or a kandy base coat instead of a true KK or a kandy koncentrate. So the difference is candy base coat mixes and reduces just like a standard base coat for a vehicle okay. So it allows the overlaps to be more forgiving. Also it gives you the depth of color with less coats. For instance, a regular candy concentrate is a tinted mid coat. Basically it's translucent. You can see right through it but it is a color. All right, this is a candy base coat. So we're going to reduce it with standard reducer. We're going to choose RU-311. Two-to-one, three-to-four to however many coats you want. But it recommends 3 to 4 medium wet coats. Why couldn't the other stuff pour like that? Even though we are using the candy base coat and it is more forgiving and better to spray for a first time or a novice painter you still need to follow the standard protocol of 75% overlap, at least on your first coat. Then you could go 50% after that. Also keep this in mind. Anytime you're spraying candy or a pearl color, for example, you want to walk the length of a vehicle if you're painting the outside. But in this case we painted the entire width of the dash at one time. True candy coat. You know, it could be anything upwards of 7 or 8 coats depending on the depth of color that you're looking for. So we chose to go the easy route. Also, it's a lot more forgiving for somebody who's never sprayed candy before. And that keeps the striping down. That keeps my metallic even. And by painting the entire panel at the same time we cut down on any paint imperfections. And it makes every job come out like a professional every time. There we are. Man, they look good. We keep getting closer and closer to our end goal of turning this Chevy 210 into a gasser that goes 120. We can make it stop but next on our list, we've got to make it start. We've got a couple friends who know a thing or two about engines who are going to help us with that. There's still a lot left to do but once this project is said and done the last thing you'll see off the starting line will be the words Detroit Muscle leaving you in the dust.