
Video Transcript
[Brian] You are watching Powernation!
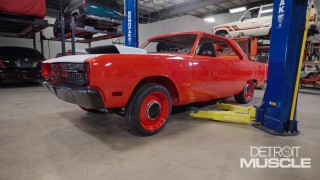
[Brian] Today working out of our warehouse to continue hammering on our 1969 Dodge Dart, Project Bullseye. We've got all the parts to install the rest of our Mopar eight and three quarter inch rear axle. Once that's done we're gonna drop it down on a new set of wheels and tires so we can hit the bullseye on our stance and style. We're also gonna paint some of the bright work to go with our matte black style Swinger stripe to get this ride one step closer to becoming a polished piece of Detroit muscle. [ engine revving ] [ Music ] [ tires squealing ] [ Music ]
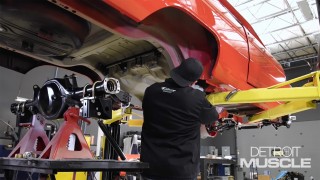
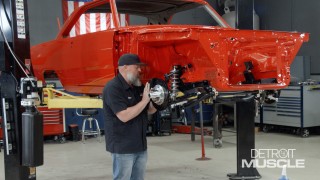
You know during your build if you've got a high horsepower and high torque vehicle you make some suspension choices, rear end choices, rear differential and gearing. [ air ratchet humming ] [ Music ] So we wanted to stay with our Mopar roots. So we stayed with the eight and three quarter rear end. Standard width axle tubes. Mosier axles and a Mosier third member. We can keep as much and torque power going to the rear end and the wheels as we can. As you can see I got the studs installed. They are a pull through style. Next we're gonna clean the housing real good. Get it all blowed out, dried out. We're gonna install the axle seals. Then we'll put our third member and everything in but first we've got to get it clean. [ aerosol can hissing ] [ Music ]
[ compressed air hissing ] They whole goal for Project Bullseye was to build something you could drive during the week and you could drag race or go to the strip any time you want as well without having to do some major changes in setup. So running this rear end setup gets us as much torque to the ground as possible. Lightweight car, high horsepower, you need something that will really grip and rip. Probably not necessary but I'm gonna clean off this excess cause I don't want it to look ugly. I hope it looks good. [ Music ]
Let's see if we can get this up here. [ Music ]
So gearing is super important for application of torque and horsepower in any vehicle that you build. Man that looks good! So for your particular application, whether it's street or strip, you want something in between if you're gonna do a combo drive. We chose to use the Mosier third member rear end in this vehicle and we're running a 3.90 Mopar ring and pinion gear. That way we still have adequate street driving ability but we have that instantaneous power when we go to the strip. Now we've got our housing, our third member in. Next step, put our axles into our housing. We've got to install our inner seal first. So let's go ahead and do that. Just check and make sure it's seated and even all the way around inside of your tube. That way you know it's all the way down. Feels good. I've already wiped off my axles. Got them cleaned off, all my bearing mating surface, and my O-ring. So everything's clean and ready to go. I'm gonna slide this in and make sure it splines with my third member. [ Music ]
[ metal clanging ] [ Music ]
It's been a long day coming right here fellas. This is 35 foot pounds of torque spec on these bolts. Not really wrenching down on any of them. Just make sure everything seats like it should. [ Music ]
[ ratchet clicking ] [ Music ]
Awful close though. The outer. Coming up. [Mike] We have a swing arm lock here. [Brian] The shop gets an upgrade for mounting our wheels and tires. [Mike] There she is!
[Brian] You know with Project Bullseye we wanted precision control with handling. So we decided to go with a low profile stiff sidewall Continental tire for this application. If you've ever mounted a tire yourself by hand or even with a machine low profile tires are always the worst. [Mike] Depress the clamping pedal. That's gonna pull the clamps in. You notice I'm clamping from the outside. [Brian] I see that. So we had our buddy Mike come over from Coats to show us how to use our brand new Coats Maxx-90 machine. [Mike] Such a nice paint job. We don't want to put any dimples on the inside. So we're just gonna clamp it from the outside. Our next step is lube. [Brian] I noticed it seems day. Lube's kinda dry not like a sloppy soaking wet. [Mike] Yeah this is called paste lube. It's what the UHP tire manufacturers recommend for lube. A lot of the traditional old style use the blue slip tack. This just stays a little tackier. Just as slick but it stays tacky. So going to pull our mount/demount head in. I'm gonna push this down right up against the wheel and I'm gonna lock this in. We have swing arm lock here. So once you set that pull this back to where you get a little bit of tension and that keeps your arm from rocking back and forth. [Brian] I painted these wheels on this car. So it's a delicate application to mount this tire on this wheel. [Mike] I'm gonna hit my rotation pedal. [Brian] You at home, if you've ever done this before by hand, crow bars, pry bars, and some Dawn dishwashing soap or even a single foot machine you know what I'm talking about. [Mike] Press the rotation pedal down halfway. We've got a fairly stiff tire here. So we're gonna bring our Robo roller in and we're gonna bring our Robo arm in. What these devices do is help push the tire sidewall so that the bead is into the drop center. The sidewall pulls in, and then I'm gonna bring my Robo roller and position it here just to hold it into the drop center in a different position. Then I go slowly to let the bead relax and pull into the drop center. Once you get to about here you can release your Robo arm and then continue the rotation. [Brian] So a huge advantage for low profile sidewall tires. [Mike] Most definitely. I'll unlock my swing arm and pull that out of the way. Now I'm gonna rotate the tire around to where our inflation hose will reach. This is a locking chuck. So once you squeeze the trigger and put it on there it'll stay while you're doing your bead sealing and bead seeding operation. Remember we clamp the wheel from the outside. So we're gonna want to release these clamps. By unclamping that wheel it allows the wheel to drop down. The tire stays up to create a gap if you need it for bead sealing. [ compressed air hissing ] And there she is. You do have a tire lift here. So we didn't have a lot of weight to deal with because we had a bare wheel and tire but you can roll this over and it saves that wear and tear on your back. [Brian] Having this machine is just a super huge convenience for those of you who have painted wheels and trying to mount a tire. [Mike] If I'm gonna buy a product I want to look at it, touch it, feel it, smell it. I find a lot of people are that way too with the tire changer. [Brian] We started on Project Bullseye. We wanted to keep the nostalgic look of the Dodge Dart. However we wanted it to look more racy as well. So while sticking to our race car roots we wanted a wider, taller tire in the rear. We went with a smaller tire in the front for steering ratio clearance as well as we want that little bit of rake in the front so it looks menacing street or strip. Man that looks good. We decided to go with some oversized steel wheels to keep the factory wheel look but we wanted something sticky with a low profile tire to put all this power to the asphalt. So we went with Continental Extreme Contact Sport 02 tires. That looks so much better than that solid silver. Up next, we go under the hood of a hot rod classic that's guaranteed to turn heads. [Alan] Without those guys I wouldn't be here talking to you.
[Brian] Long before the Dodge Dart ever hit the streets it was the hot rod builders that were building rides that inspired us. So let's take a moment to go under the hood and look at a revolutionary hot rod, the 32 Ford Coupe. [ engine revving ] [ Music ]
[ engine revving ] [ Music ]
[ engine rumbling ] [ engine revving ] [ Music ]
[Narrator] Powernation Under the Hood is brought to you by ARP. [Joel] Sometimes the story behind a build is just as elevated and important as the build itself. Mr. Johnson. [Alan] Hey, Joel. -Good to see you again, sir. [Alan] How are you today? -Man every day is a good day at the office when you got something like this in here. -Any day working on a hot rod is always good. -Absolutely, and she is definitely a piece of artwork. -Thank you. Didn't expect a hot pink roadster to be in here today. So let's start from ground zero. Tell me about how this build came to fruition. -Well this car belongs to Mackenzie Murphy. She's 20 year old now. We've known the family since she was in diapers and growing up around her dad and mom and grandfather. She didn't have much choice but to be a hot rod girl. -I'm sure you feel the same way but when I think of the term hot rod '32 Ford is first thing that comes to my mind. Do you feel like kind of same thing for you? -'32 Ford is the essential hot rod. Whether it's a roadster, coupe, or sedan it's essential hot rod. - The first one I saw was John Milner's in American Graffiti. That yellow '32 five window coupe and man I've been hooked ever since. -That car's inspired a lot of builds and a lot of people to get into hot rods through the years for sure. -An entire revolution in a sense. I noticed the windshield's kind of at an angle too. Can you walk me through how you guys went through that? - I mean to get the look we did here a lot of guys are using a curved windshield on the roadster to lean it back because doing that you don't have to change the body style line. We wanted to keep more of a traditional look on this car with the flat windshield. So when it's been brought back around 20 degrees then this curvature doesn't match the top of the cowl. So now we had to reshape the whole cowl detail line across here to make that make that work. -That's what I've always noticed about guys that would use those old boat windshields that had the big spike point in the middle. You definitely went with a better, more custom. -Well I mean it's just a different look. We've used those before, you know, the Duval windshields before or the Rodwell curved glass. It's just something different because we didn't want to keep doing the same thing over and over again. Just a little bit different look. -Now the color on this thing. This is not like anything you could pull off the shelf. This is an in-house special you guys created? -It is. We tried to make it a little easier for us to be able to paint the car. Her original pedal car that we were kind of modeling everything off of color wise it had a candy magenta, a hot pink candy on it, which would have took 10, 11 coats of the pink color to get that out. Well there's no way we could have painted this car all the panels apart, chassis, suspension pieces and everything, and got it to ever match. We'd have had a different color on every panel. So the guys in the paint shop, Greg and Scotty, worked on color chips for I can't tell you how long trying to come up with a color that we knew we could have color match between panels. We knew we could repair cause we're going to damage it putting it together. They worked with Xalta to get this color to where we had a kind of a pearl pink base coat and then only do three coats of the candy top coat to get the color we were after. -It's not loud in the sense of like a Mopar Panther Pink. -No, all the black details really brought all that together and made it more hot rod look. We could have went with a polished wheel on this car and all the suspension pieces polished, but that to me would have been too bright with the pink color. I mean it needed the black to tone that down. -Now is this Henry Ford steel? - No this is actually a brick wall reproduction Brookville roadster? In my eyes it's a whole lot better to start out with something that's new sheet metal. It's not rusty. It's not got 85 years worth of wear and tear on it to where you've gotta restore it before you can start hot rodding it. But we do a lot of the original Henry cars too. It's all what a customer wants. -So what made you guys decide to go with keeping it a soft top? -Well to me the top helped set the attitude of the car. Again, you get back away from this car 50 foot the top makes it look fast. The windshield leaned back makes it look fast. If you take the top off it kind of loses some of its attitude. The second reason, they're driving this car. They're using it. So one time with no top or no side windows, I'm not tough enough to do that. I want something to get out of the rain if I've got to keep driving. With this section being moved back the four inches it changed everything. So we worked with Rod Tops on the initial parts to do the top, and then we wound up modifying the bows and changing the look of everything to make it flow and work with what we were doing on the car. -Alright Alan, million dollar question. What's under the hood? -We've got a 400 small block Chevy by Keith and Jeff Dorton at Automotive Specialist Racing Engines. -And it don't get more traditional than a small block Chevy and an old Ford. -No, that's how you make a Ford good. Put a Chevy in it. -Oh, yeah got the Rams head manifolds and everything. -Eric, he's got Offenhauser three-twos on it, Offenhauser valve cover. So kind of going off that same theme with this car. He didn't like the looks of the Offenhauser valve cover as far as how well we could detail them. And they had a a boss in the middle of them for a breather on top. So to fix that problem we cad modeled and cnc machined a set of Offenhauser valve covers. So we've eliminated the breather on that, which thinned the gasket area down. So the valve cover covers the gasket up so you don't see the cork gasket around. It's just detail after detail on here for what their wants were. I mean we're running auto trendy EFI throttle bodies with a Holley Terminator Max ECU control and all that. Every fastener on the car's ARP from whether it's in the engine, outside showing, suspension stuff. I mean we've used their product for 16, 18 years on every build. We're trying to give our customer the best of everything that we can do. So we're not going to put a hardware store bolt on something we're putting together. -It really does make a difference when you've got every nut and bolt. It's a nice piece of hardware. It just elevates the entire build. -All this stuff is as modern as can be. We're running our Johnson's Radiator Works radiator in here for cooling. You know again, it's the best products that we can put in a car for our customer. -You guys do good work. I don't know if you've ever considered a career in car building but I think it's something you should look into. -A lot of great customers and a great team behind me at the shop. I can't do this by myself. So without those guys and without the customers I wouldn't be here talking to. [Brian] Coming up, we give some Dart original parts a facelift to match our swinger style. Just crazy how different it looks.
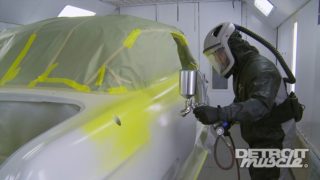
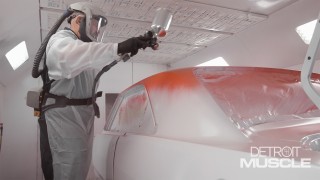
[Brian] All right, we got our Dodge Dart bumpers in the prep booth. We're going to use the factory bumpers or the bumpers that we receive when we bought the car. They do have some dings and blemishes in them. That really fits the dark look of our vehicle we're going for. So gonna sand all these 80 grit. Then I'm going to put some DTM Direct To Metal primer on these. Then we're gonna seal them black and we're gonna paint them matte black to match the swinger stripe that's on the vehicle. First step start with a clean surface. So let's get everything blowed off. [ compressed air hissing ] While sanding in chrome I'm gonna start with 80 grit like I said earlier. I want a good tooth and scratch and see how it's going to do. [ grinder humming ] [ Music ]
This chrome is pretty hard. So we're going to switch the paper more often than we would for sanding filler or something like that. You just want to make sure it cuts good and fast. We have our factory bumpers. We have a factory grille for this vehicle and we know they're not perfect. You know this vehicle's 50 years old plus. So we want to do something to keep it as real as possible. So we decided to paint the bumpers matte finish black to match the stripe and the dash that we've already previously painted for this car. Something that somebody would have done at home without spending a whole lot of money and still have that same nostalgic look. It's called a love dent. We're just going to leave it. Somebody put it there for a reason. One here too. One down here. I just think it adds character, man. I mean if you were a dude back in the 60s, this is what you built. This is what you drive. You know, you do this in your driveway. Ready to roll. So we decided to refinish our bumpers. Even though they're chrome, we had the bumpers and the grille was all factory for this car, but we wanted to look the part. [ Music ] [ spray gun hissing ] Not too bad right? [ spray gun hissing ] [ Music ]
You know we wanted to keep this car as traditional looking as possible. We're going to rip this thing up and down the track constantly. So we know it's going to get bumps, dents, scratches, things like that. There was no need to really having everything re-chromed. No spillage right there. So we decided to paint it matte black to match the stripe in the dash we've already done. Crazy how different it looks, man. [ spray gun hissing ] [ Music ]
Nice! [ spray gun hissing ] [ Music ]
Nice. Looks pretty snazzy. Awful close though, man. Well it looks professional. Like somebody knew what they were doing, somebody. Now with all our brightwork all blacked out all we lack is painting our hood to get this Dart looking exactly like we wanted. A lean, mean Mopar machine. It's been a long road to hoe with Project Bullseye. We had to do some cutting and welding but we finally got the front and rear suspension installed and the rear axle was all ready to roll. That's awesome. It looks professional. We got our custom wheels modified and prepared for our new tires so we can haul or hook, whether on the street or at the strip. Now that we look the part, it's time to put the horses under the hood of this piece of Detroit muscle.
Show Full Transcript
[Brian] Today working out of our warehouse to continue hammering on our 1969 Dodge Dart, Project Bullseye. We've got all the parts to install the rest of our Mopar eight and three quarter inch rear axle. Once that's done we're gonna drop it down on a new set of wheels and tires so we can hit the bullseye on our stance and style. We're also gonna paint some of the bright work to go with our matte black style Swinger stripe to get this ride one step closer to becoming a polished piece of Detroit muscle. [ engine revving ] [ Music ] [ tires squealing ] [ Music ]
You know during your build if you've got a high horsepower and high torque vehicle you make some suspension choices, rear end choices, rear differential and gearing. [ air ratchet humming ] [ Music ] So we wanted to stay with our Mopar roots. So we stayed with the eight and three quarter rear end. Standard width axle tubes. Mosier axles and a Mosier third member. We can keep as much and torque power going to the rear end and the wheels as we can. As you can see I got the studs installed. They are a pull through style. Next we're gonna clean the housing real good. Get it all blowed out, dried out. We're gonna install the axle seals. Then we'll put our third member and everything in but first we've got to get it clean. [ aerosol can hissing ] [ Music ]
[ compressed air hissing ] They whole goal for Project Bullseye was to build something you could drive during the week and you could drag race or go to the strip any time you want as well without having to do some major changes in setup. So running this rear end setup gets us as much torque to the ground as possible. Lightweight car, high horsepower, you need something that will really grip and rip. Probably not necessary but I'm gonna clean off this excess cause I don't want it to look ugly. I hope it looks good. [ Music ]
Let's see if we can get this up here. [ Music ]
So gearing is super important for application of torque and horsepower in any vehicle that you build. Man that looks good! So for your particular application, whether it's street or strip, you want something in between if you're gonna do a combo drive. We chose to use the Mosier third member rear end in this vehicle and we're running a 3.90 Mopar ring and pinion gear. That way we still have adequate street driving ability but we have that instantaneous power when we go to the strip. Now we've got our housing, our third member in. Next step, put our axles into our housing. We've got to install our inner seal first. So let's go ahead and do that. Just check and make sure it's seated and even all the way around inside of your tube. That way you know it's all the way down. Feels good. I've already wiped off my axles. Got them cleaned off, all my bearing mating surface, and my O-ring. So everything's clean and ready to go. I'm gonna slide this in and make sure it splines with my third member. [ Music ]
[ metal clanging ] [ Music ]
It's been a long day coming right here fellas. This is 35 foot pounds of torque spec on these bolts. Not really wrenching down on any of them. Just make sure everything seats like it should. [ Music ]
[ ratchet clicking ] [ Music ]
Awful close though. The outer. Coming up. [Mike] We have a swing arm lock here. [Brian] The shop gets an upgrade for mounting our wheels and tires. [Mike] There she is!
[Brian] You know with Project Bullseye we wanted precision control with handling. So we decided to go with a low profile stiff sidewall Continental tire for this application. If you've ever mounted a tire yourself by hand or even with a machine low profile tires are always the worst. [Mike] Depress the clamping pedal. That's gonna pull the clamps in. You notice I'm clamping from the outside. [Brian] I see that. So we had our buddy Mike come over from Coats to show us how to use our brand new Coats Maxx-90 machine. [Mike] Such a nice paint job. We don't want to put any dimples on the inside. So we're just gonna clamp it from the outside. Our next step is lube. [Brian] I noticed it seems day. Lube's kinda dry not like a sloppy soaking wet. [Mike] Yeah this is called paste lube. It's what the UHP tire manufacturers recommend for lube. A lot of the traditional old style use the blue slip tack. This just stays a little tackier. Just as slick but it stays tacky. So going to pull our mount/demount head in. I'm gonna push this down right up against the wheel and I'm gonna lock this in. We have swing arm lock here. So once you set that pull this back to where you get a little bit of tension and that keeps your arm from rocking back and forth. [Brian] I painted these wheels on this car. So it's a delicate application to mount this tire on this wheel. [Mike] I'm gonna hit my rotation pedal. [Brian] You at home, if you've ever done this before by hand, crow bars, pry bars, and some Dawn dishwashing soap or even a single foot machine you know what I'm talking about. [Mike] Press the rotation pedal down halfway. We've got a fairly stiff tire here. So we're gonna bring our Robo roller in and we're gonna bring our Robo arm in. What these devices do is help push the tire sidewall so that the bead is into the drop center. The sidewall pulls in, and then I'm gonna bring my Robo roller and position it here just to hold it into the drop center in a different position. Then I go slowly to let the bead relax and pull into the drop center. Once you get to about here you can release your Robo arm and then continue the rotation. [Brian] So a huge advantage for low profile sidewall tires. [Mike] Most definitely. I'll unlock my swing arm and pull that out of the way. Now I'm gonna rotate the tire around to where our inflation hose will reach. This is a locking chuck. So once you squeeze the trigger and put it on there it'll stay while you're doing your bead sealing and bead seeding operation. Remember we clamp the wheel from the outside. So we're gonna want to release these clamps. By unclamping that wheel it allows the wheel to drop down. The tire stays up to create a gap if you need it for bead sealing. [ compressed air hissing ] And there she is. You do have a tire lift here. So we didn't have a lot of weight to deal with because we had a bare wheel and tire but you can roll this over and it saves that wear and tear on your back. [Brian] Having this machine is just a super huge convenience for those of you who have painted wheels and trying to mount a tire. [Mike] If I'm gonna buy a product I want to look at it, touch it, feel it, smell it. I find a lot of people are that way too with the tire changer. [Brian] We started on Project Bullseye. We wanted to keep the nostalgic look of the Dodge Dart. However we wanted it to look more racy as well. So while sticking to our race car roots we wanted a wider, taller tire in the rear. We went with a smaller tire in the front for steering ratio clearance as well as we want that little bit of rake in the front so it looks menacing street or strip. Man that looks good. We decided to go with some oversized steel wheels to keep the factory wheel look but we wanted something sticky with a low profile tire to put all this power to the asphalt. So we went with Continental Extreme Contact Sport 02 tires. That looks so much better than that solid silver. Up next, we go under the hood of a hot rod classic that's guaranteed to turn heads. [Alan] Without those guys I wouldn't be here talking to you.
[Brian] Long before the Dodge Dart ever hit the streets it was the hot rod builders that were building rides that inspired us. So let's take a moment to go under the hood and look at a revolutionary hot rod, the 32 Ford Coupe. [ engine revving ] [ Music ]
[ engine revving ] [ Music ]
[ engine rumbling ] [ engine revving ] [ Music ]
[Narrator] Powernation Under the Hood is brought to you by ARP. [Joel] Sometimes the story behind a build is just as elevated and important as the build itself. Mr. Johnson. [Alan] Hey, Joel. -Good to see you again, sir. [Alan] How are you today? -Man every day is a good day at the office when you got something like this in here. -Any day working on a hot rod is always good. -Absolutely, and she is definitely a piece of artwork. -Thank you. Didn't expect a hot pink roadster to be in here today. So let's start from ground zero. Tell me about how this build came to fruition. -Well this car belongs to Mackenzie Murphy. She's 20 year old now. We've known the family since she was in diapers and growing up around her dad and mom and grandfather. She didn't have much choice but to be a hot rod girl. -I'm sure you feel the same way but when I think of the term hot rod '32 Ford is first thing that comes to my mind. Do you feel like kind of same thing for you? -'32 Ford is the essential hot rod. Whether it's a roadster, coupe, or sedan it's essential hot rod. - The first one I saw was John Milner's in American Graffiti. That yellow '32 five window coupe and man I've been hooked ever since. -That car's inspired a lot of builds and a lot of people to get into hot rods through the years for sure. -An entire revolution in a sense. I noticed the windshield's kind of at an angle too. Can you walk me through how you guys went through that? - I mean to get the look we did here a lot of guys are using a curved windshield on the roadster to lean it back because doing that you don't have to change the body style line. We wanted to keep more of a traditional look on this car with the flat windshield. So when it's been brought back around 20 degrees then this curvature doesn't match the top of the cowl. So now we had to reshape the whole cowl detail line across here to make that make that work. -That's what I've always noticed about guys that would use those old boat windshields that had the big spike point in the middle. You definitely went with a better, more custom. -Well I mean it's just a different look. We've used those before, you know, the Duval windshields before or the Rodwell curved glass. It's just something different because we didn't want to keep doing the same thing over and over again. Just a little bit different look. -Now the color on this thing. This is not like anything you could pull off the shelf. This is an in-house special you guys created? -It is. We tried to make it a little easier for us to be able to paint the car. Her original pedal car that we were kind of modeling everything off of color wise it had a candy magenta, a hot pink candy on it, which would have took 10, 11 coats of the pink color to get that out. Well there's no way we could have painted this car all the panels apart, chassis, suspension pieces and everything, and got it to ever match. We'd have had a different color on every panel. So the guys in the paint shop, Greg and Scotty, worked on color chips for I can't tell you how long trying to come up with a color that we knew we could have color match between panels. We knew we could repair cause we're going to damage it putting it together. They worked with Xalta to get this color to where we had a kind of a pearl pink base coat and then only do three coats of the candy top coat to get the color we were after. -It's not loud in the sense of like a Mopar Panther Pink. -No, all the black details really brought all that together and made it more hot rod look. We could have went with a polished wheel on this car and all the suspension pieces polished, but that to me would have been too bright with the pink color. I mean it needed the black to tone that down. -Now is this Henry Ford steel? - No this is actually a brick wall reproduction Brookville roadster? In my eyes it's a whole lot better to start out with something that's new sheet metal. It's not rusty. It's not got 85 years worth of wear and tear on it to where you've gotta restore it before you can start hot rodding it. But we do a lot of the original Henry cars too. It's all what a customer wants. -So what made you guys decide to go with keeping it a soft top? -Well to me the top helped set the attitude of the car. Again, you get back away from this car 50 foot the top makes it look fast. The windshield leaned back makes it look fast. If you take the top off it kind of loses some of its attitude. The second reason, they're driving this car. They're using it. So one time with no top or no side windows, I'm not tough enough to do that. I want something to get out of the rain if I've got to keep driving. With this section being moved back the four inches it changed everything. So we worked with Rod Tops on the initial parts to do the top, and then we wound up modifying the bows and changing the look of everything to make it flow and work with what we were doing on the car. -Alright Alan, million dollar question. What's under the hood? -We've got a 400 small block Chevy by Keith and Jeff Dorton at Automotive Specialist Racing Engines. -And it don't get more traditional than a small block Chevy and an old Ford. -No, that's how you make a Ford good. Put a Chevy in it. -Oh, yeah got the Rams head manifolds and everything. -Eric, he's got Offenhauser three-twos on it, Offenhauser valve cover. So kind of going off that same theme with this car. He didn't like the looks of the Offenhauser valve cover as far as how well we could detail them. And they had a a boss in the middle of them for a breather on top. So to fix that problem we cad modeled and cnc machined a set of Offenhauser valve covers. So we've eliminated the breather on that, which thinned the gasket area down. So the valve cover covers the gasket up so you don't see the cork gasket around. It's just detail after detail on here for what their wants were. I mean we're running auto trendy EFI throttle bodies with a Holley Terminator Max ECU control and all that. Every fastener on the car's ARP from whether it's in the engine, outside showing, suspension stuff. I mean we've used their product for 16, 18 years on every build. We're trying to give our customer the best of everything that we can do. So we're not going to put a hardware store bolt on something we're putting together. -It really does make a difference when you've got every nut and bolt. It's a nice piece of hardware. It just elevates the entire build. -All this stuff is as modern as can be. We're running our Johnson's Radiator Works radiator in here for cooling. You know again, it's the best products that we can put in a car for our customer. -You guys do good work. I don't know if you've ever considered a career in car building but I think it's something you should look into. -A lot of great customers and a great team behind me at the shop. I can't do this by myself. So without those guys and without the customers I wouldn't be here talking to. [Brian] Coming up, we give some Dart original parts a facelift to match our swinger style. Just crazy how different it looks.
[Brian] All right, we got our Dodge Dart bumpers in the prep booth. We're going to use the factory bumpers or the bumpers that we receive when we bought the car. They do have some dings and blemishes in them. That really fits the dark look of our vehicle we're going for. So gonna sand all these 80 grit. Then I'm going to put some DTM Direct To Metal primer on these. Then we're gonna seal them black and we're gonna paint them matte black to match the swinger stripe that's on the vehicle. First step start with a clean surface. So let's get everything blowed off. [ compressed air hissing ] While sanding in chrome I'm gonna start with 80 grit like I said earlier. I want a good tooth and scratch and see how it's going to do. [ grinder humming ] [ Music ]
This chrome is pretty hard. So we're going to switch the paper more often than we would for sanding filler or something like that. You just want to make sure it cuts good and fast. We have our factory bumpers. We have a factory grille for this vehicle and we know they're not perfect. You know this vehicle's 50 years old plus. So we want to do something to keep it as real as possible. So we decided to paint the bumpers matte finish black to match the stripe and the dash that we've already previously painted for this car. Something that somebody would have done at home without spending a whole lot of money and still have that same nostalgic look. It's called a love dent. We're just going to leave it. Somebody put it there for a reason. One here too. One down here. I just think it adds character, man. I mean if you were a dude back in the 60s, this is what you built. This is what you drive. You know, you do this in your driveway. Ready to roll. So we decided to refinish our bumpers. Even though they're chrome, we had the bumpers and the grille was all factory for this car, but we wanted to look the part. [ Music ] [ spray gun hissing ] Not too bad right? [ spray gun hissing ] [ Music ]
You know we wanted to keep this car as traditional looking as possible. We're going to rip this thing up and down the track constantly. So we know it's going to get bumps, dents, scratches, things like that. There was no need to really having everything re-chromed. No spillage right there. So we decided to paint it matte black to match the stripe in the dash we've already done. Crazy how different it looks, man. [ spray gun hissing ] [ Music ]
Nice! [ spray gun hissing ] [ Music ]
Nice. Looks pretty snazzy. Awful close though, man. Well it looks professional. Like somebody knew what they were doing, somebody. Now with all our brightwork all blacked out all we lack is painting our hood to get this Dart looking exactly like we wanted. A lean, mean Mopar machine. It's been a long road to hoe with Project Bullseye. We had to do some cutting and welding but we finally got the front and rear suspension installed and the rear axle was all ready to roll. That's awesome. It looks professional. We got our custom wheels modified and prepared for our new tires so we can haul or hook, whether on the street or at the strip. Now that we look the part, it's time to put the horses under the hood of this piece of Detroit muscle.