
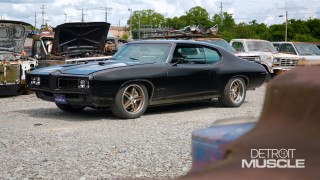
Video Transcript
[Brian] You are watching Powernation!
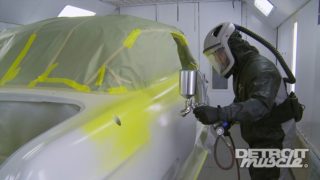
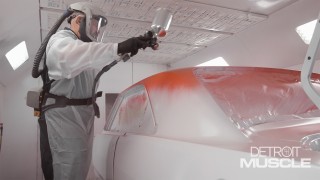
[Brian] It's finally time to start bolting this thing back together. Project Bullseye's out of the paint booth and looks sharp in its Viper Red paint. Today we're diving into the front end getting the suspension dialed in and upgrading the brakes so this '69 Dodge Dart can stop on a dime. [ Music ] [ engine revving ] [ Music ] [ tires squealing ]
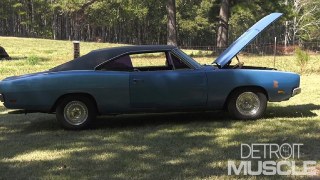
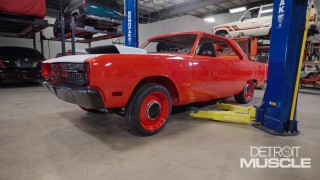
Well we got Project Bullseye back in the shop, our 1969 Dodge Dart. The last time you seen this vehicle we were prepping it and getting it ready for paint. We've got all the paint work done. It's back in the shop to start reassembling and putting things on this vehicle. [ bleep ] So the whole goal for this car was to build a more traditional style race car if you will. However the journey to get it here was anything but traditional. With Project Bullseye we struck gold with this one of a kind Dodge Dart that was originally used with AMD as a concept to showcase their sheet metal and our buddies over at Stephens Performance had it tucked away for over 25 years before we got a chance to get our hands on it. We've completely repainted it now and we're ready to start reassembling everything so we could turn this display into a true piece of Detroit Muscle. [ drill humming ] [ Music ]
[ hammer banging ] [ Music ]
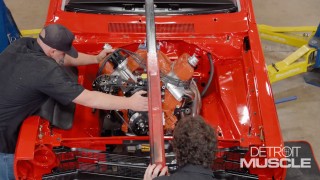
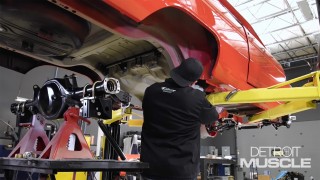
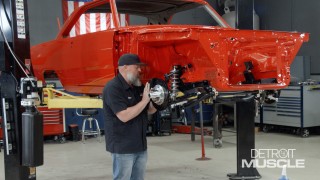
First step is putting our K-member in. Then we can build the rest of our suspension around that. So while all these parts look like a huge, daunting task Reilly MotorSports' instructional packet make this a breeze. Don't feel like you can't do this at home because anyone can do this following the instructions. So shoutout to Reilly MotorSports. The bolts for our K-member have a shoulder on them. This shoulder helps to align my K-member in the center. This keeps it in the center of the hole. So make sure you pay attention to that. These are like a clam shell lug nut. Get them all started. Like I said, it has the radius or shoulder on the bottom of it. So we need to run them all four up at the same time so it will self-center before go torquing or tightening. With all of our horsepower upgrades and power upgrades we're doing to this vehicle suspension was a must. So we decided to go with a fully adjustable coil over suspension in the front for this vehicle, independent front suspension, maneuverability, responsiveness in my steering for when we try to rip it up and down the track. [ drill humming ] [ Music ]
Second step after we get the crossmember up is through bolts for where the upper control arm and your strut mount. [ impact driver humming ] Hey now! This is not gonna be just a daily driver all the time. If we want to go to autocross, if we want to go down the dragstrip we have that ability with some quick changes and easy adjustments due to our coil over shocks. Next up installing the lower control arms using the hardware provided. Make sure you put some anti-seize on your lower control arm mounts. They include an extra bolt with it to drive the rod through. Make sure you use that as well. Torque to 25 foot pounds at the end. Also you notice I've preassembled a lot of this. I did that for fitment and to make sure everything was there. You'll see me from time to time taking a couple of things apart as we go forward. [ hammer banging ]
The bushings push in pretty easy. Make sure that they go all the way in and sit flush. [ Music ]
Before you do your final torque make sure you tighten your set screw in the relief of the attachment rod at the bottom of the control arm. It's tapered. So it'll go right into the hole and it'll hold it flush where it needs to be. [ Music ] [ torque wrench clicking ] [ Music ]
Up next I'm gonna assemble a coil over shock assembly. First we're gonna put the locking ring on. It also recommends using a little anti seize on this. We're just gonna put a little bit on here cause it goes a long ways. Next will be my washer. And next will be my spring adjuster. I'm gonna put a little bit more anti seize up on the top. I'm gonna go ahead and pull the end of it out. This will be overkill but it'll make it easy for the spring. Next install the spring and install my cup at the top. This goes up under the end of the shock extension. Then we're gonna run the ring back up. Turn it upside down so it sits flush. Next step will be install them on the car. In the lower control arm first per the directions. Also make sure your adjustment knobs are out towards your wheel so they're easy to get to for adjustments. I'll tighten that up in a second once I get the top in position as well. Get out my sleeve. I'm gonna raise my lower control arm up. [ Music ]
Easy as that. It's starting to look like a car guys. Up next, we're locking in the control arms, hanging the sway bar, and showing you every step along the way.
[Brian] Next up, spindles are next. We're gonna put both sides on. It says attach by the lower. Then we'll go to the upper. Put a little anti seize on here just to help lubricate it. Not a lot though cause I don't want it all over the boot. It recommends putting the knuckle on the lower first. Add the washer. Remember this is a castellated nut with a cotter pin. I'm gonna put it on finger tight. Then we'll tighten it up. It recommends 50-60 foot pounds of torque on here with the torque wrench. However my castellation part of my nut doesn't line up for my cotter pin. So I'm gonna back it off about a quarter of a turn so we can get the cotter pin in it. We did torque it to 55. So we're still in range of where it needs to be. [ Music ]
It says some clearancing may be required for the forward mounts on the A-bodies. That would be us. It recommends two to three turns out as a good starting point for the upper control arms. I'm gonna run them all the way in flush. Then I'm gonna turn them three turns. One, two, three. According to the directions as well it says shorter spacers go towards the front and longer spacers towards the rear. [ Music ]
Ultimately I just didn't like the way this looked. The washer's pushing on our upper ball joint boot itself. I'm gonna move the washer to the stud side where the castle nut sits on it like we did the lower. So here we are with the suspension all the way in. At this time we've got to do some clearancing of the front mount for the upper control arm. After reading the directions it's recommending for A-bodies it says you may have to do this. The suspension's not even loaded or compressed at this point and we're already knocking paint off. I'm gonna mark this so it's more visible. We don't have to trim all of it but we do want to take quite a bit for my suspension to move up and down while we're driving the vehicle. There's a bunch of different ways you can do this. I'm personally using the air saw instead of a cut off wheel but it's completely your choice. Let's take a look. [ Music ]
Now as you can see after I put the upper control arm back in place I've got plenty of room for it to move up and down without rubbing anything on the frame. Let's do the other side. [ Music ]
I'm leaving the cams down on the upper control arm bolts. We will send it to have the alignment done once it's down on the ground but it's a good starting place. So I'm not changing it. Power rack is next. One thing to keep in mind. It recommends to put the actual washer itself on the back side of the rubber bushing and not on the nylock nut. [ Music ]
This power rack is gonna be so much better than the manual steering. Also make sure with your nylock nuts the actual threads reach the nylock or it's not gonna do you any good. Finger tight will hold it. Now my tie rod ends are run all the way in tight. So I'm just gonna leave it there and we'll adjust it once we get everything mounted. Next is our sway bar. Just gonna get a couple of bolts in to hold it for now as I need three arms to do this. Add this on here. You all know it's a dancing game. Use the one you can get to would probably make more sense. [ Music ]
Remember everything's loose. Nothing's tightened up until we get everything mounted where it needs to be. Go to the next side. [ ratchet clicking ] [ Music ]
It's about to get greasy. Coming up, we add some serious stopping power to Project Bullseye.
[Brian] Having high horsepower in a fast vehicle is no good if you can't stop it. Up next we have brakes. Our brake kit is from Riley MotorSports but it is a universal Wilwood kit. First things first, we need to select our bolt pattern. Depending on the brand of vehicle or the bolt pattern itself. This is universal five by four and a half to five by four and three quarter. So if you have a GM vehicle for example, you can run a five by four and a half. Five by four and three quarter is more of a truck pattern. First things first, we thread the wheel studs in from the back side of the hub. We will be red thread locking these as we move throughout this build. That is recommended per instructions. These are 12 points as well. They can withstand a pretty high torque value. While in the 1960s this vehicle would have come equipped with full drum brakes all the way around some vehicles started to have some front disc brakes available for power options. Things like that you could get but we choose to go with a full disc system on this vehicle. Soon as I get them all in we'll go through a final torque before we assemble our brake rotor. Could have run these in with an impact but I want to make sure they fit all the way flush against my hub. So I don't want to damage anything with those. I'm just gonna check and verify my bolt pattern fits. Everything is in flush mounted like it should be. I'm just gonna turn it upside down and drop it down in my rim. Everything fits like it should. Time to torque them. Fast speeds equal high distances to stop most of the time but we have a lot more pressure with a lot more cooling with the full disc brake system. Now my wheel studs are in. After reading the directions the next part is my caliper mount. This will go on first onto my knuckle before we progress or move forward from here. Two different fasteners. One with a shoulder with no threads, a longer bolt, and one shorter. Longer one goes through the actual knuckle itself into my mount. So it will go on just like this. It actually tells you in the instructions to make sure it's a non-interference fit. This block needs to fit flush against your knuckle. Finger tighten only at this time and then put your thread locker on before you tighten them for final. So it looks like it's gonna fit flush top and bottom side both. So I'm gonna do one at a time with my thread locker. Just gonna get that snug until I can remove the bottom. This red thread locker will keep them from backing out and loosening up but it does allow it to still be serviceable if need be. Up next the rotor adapter and the hub. They only go on one direction, non-interference fit, and five fasteners to hold it together. These are torx bits. They also recommend torque at 25 foot pounds. So I'm gonna start these. I'll put some thread locker on them and run them the rest of the way in. Just remember anybody can do this. It's super simple. Follow the directions step by step. It's as clear as day. [ Music ] I'm just gonna snug with my hand and then I'll tighten them. Also work smart guys. Use your extensions that have knurled ends on them so they're not slick between your fingers. Makes installation a lot faster. I'm going back to my wheel. Cinch it down and torque them. It says to use a star pattern. So I'm gonna go across from each other. 25 foot pounds. I'm not looking for a whole lot here. Remember all it takes is one click guys. Just cause it clicks multiple times doesn't mean you're getting any tighter. Alright guys, hubs are on, rotor adapters are on, torque to spec with thread locker. Next step is your rotor. A couple of key things about your rotor. Number one, these are cross drilled and slotted rotors. So the direction of the rotor is important. So make sure you pay attention to that. They do have indication arrows already pre-made on this. So it takes the guess work out of it for anybody. These lay face down in my case. You're gonna line up the bolt holes and install all the fasteners. These are a really nice kit. Also the star pattern is super important. Try not to do two fasteners side by side. Always "X" them out as much as possible so you ensure it sits flush and true as you go. Two fasteners side by side it can warp your rotor. It just sounds crazy to me even saying it but it can happen. Back to my demo wheel for final torque. [ Music ]
Feels pretty good right there. Ready to roll. Coming up, we're in the home stretch for locking in our brake installation. It's looking good guys. We're getting closer. This thing's gonna look awesome when it's all said and done.
[Brian] Now for everybody's favorite part, packing bearings that go in my hub. I've already got everything torqued together to factory spec as recommended in the paperwork. I'm just gonna put some grease in my hand and pack it the old school way. Make sure that it's full. So I'm gonna put a little bit more in there. It feels like it's pretty full already. As these bearings are not very big. So it's not gonna take a whole lot. Once you get it in there they pack pretty easy. What you're looking for is the grease to come out of the top of race in between the rollers. Then you know your bearing is full. That's the whole goal. I'm gonna use a soft faced hammer. I'm just gonna start tapping around the edges and try to make sure it doesn't warp. So this is what we call a lip seal. It's got a rubber lip. The lips go down, meaning it keeps all the grease inside of my bearing allowing it not to escape back onto my hub assembly. Up next I'm gonna remove my hub cap. These are threaded super nice unlike the old school where you beat them in. That will expose my valley for my front bearings. That's the next step. Pack the front bearings the same way we did the rear and then we will install them on the car using the axle washer and a castellated axle nut. [ Music ]
Next step, pull my thread protectors off of my spindle and it's ready to sit the hub up here. Keep in mind your directional arrows on your rotors to make sure they're going forward. [ Music ] My retaining washer, my castellated nut. I'm just gonna leave it finger tight for right now. Spin it a little bit and make sure it seats where it needs to and then we'll final tighten it in a moment. I'm gonna tighten this up to where it doesn't spin and is pretty tight. Then I'm gonna back it off to allow it to free spin and I want to make sure my cotter pin hole aligns. It shouldn't have any friction or anything like that when you spin the hub. Feels pretty good right there. Let me make sure I get my cotter pin in. After this you'll put the threaded center cap back on that we spoke about earlier and it also has a rubber O-ring already installed. It's like a friction fit basically and keeps the center cap from backing off the spindle. [ Music ]
Pretty, pretty! Next we're gonna install our brake calipers. Takes some needle nose pliers first and we're gonna remove this clip. They are just wire clips. So you have to be careful. If you can get one side up just like that and the other side will follow. Let's go ahead and install our fluid fitting in the side of the caliper and then we'll put just a little bit of thread sealant on this. I'm not gonna put a lot. I just want to make sure it is a fluid fitting. Our fluid fittings appear to be seven-sixteenths. So I'm gonna use this and just run it down until it's snug. I'm not gonna crank on it. I don't need it to be super tight. Next step, pull the pins out of your caliper. You can literally just turn it over and they'll fall out. These are the brake pad alignment pins. They physically go through the top of the pad and hold them in place. According to our instructions as well, which I've already done this, we need to pre-fit our caliper okay. It says to run the bolts in finger tight. Once we get this on looking at it from the side our actual rotor itself should be in the center of my caliper, and if not it comes with some 32 thousandths shim washers that we can adjust the distance or shim it out or in depending on which way we need to go. But everything looks good. So I'm gonna go ahead and install our pads. Pad installation pretty simple guys. They've got troughs that they mount in. So you literally just push them in. Make sure your friction surfaces go to the inside so they will mate or contact the rotor itself. Once you get those in it should be as simple as sliding in your alignment pins. Go ahead and put these in each side, and then the retaining clip will go in after that. Add some thread locker to my fine thread bolts before we install them finger tight on my caliper. Make sure your pads are separated completely before you try to install this over top of my rotor. I've already got my mount in there as well. So the threads and bolt hole should line up pretty easily. [ ratchet clicking ] I'm gonna go ahead and spin my rotor. Make sure it spins freely without rubbing. Otherwise we'd have to go back and shim it. [ Music ] We're good to go. Next step, install my brake line. It's gonna screw to the back of my NPT fitting here. Then it goes through the factory hole for your brake line bracket if you will on the frame. It's looking good guys. We're getting closer. This thing is gonna look awesome when it's all said and done.
Show Full Transcript
[Brian] It's finally time to start bolting this thing back together. Project Bullseye's out of the paint booth and looks sharp in its Viper Red paint. Today we're diving into the front end getting the suspension dialed in and upgrading the brakes so this '69 Dodge Dart can stop on a dime. [ Music ] [ engine revving ] [ Music ] [ tires squealing ]
Well we got Project Bullseye back in the shop, our 1969 Dodge Dart. The last time you seen this vehicle we were prepping it and getting it ready for paint. We've got all the paint work done. It's back in the shop to start reassembling and putting things on this vehicle. [ bleep ] So the whole goal for this car was to build a more traditional style race car if you will. However the journey to get it here was anything but traditional. With Project Bullseye we struck gold with this one of a kind Dodge Dart that was originally used with AMD as a concept to showcase their sheet metal and our buddies over at Stephens Performance had it tucked away for over 25 years before we got a chance to get our hands on it. We've completely repainted it now and we're ready to start reassembling everything so we could turn this display into a true piece of Detroit Muscle. [ drill humming ] [ Music ]
[ hammer banging ] [ Music ]
First step is putting our K-member in. Then we can build the rest of our suspension around that. So while all these parts look like a huge, daunting task Reilly MotorSports' instructional packet make this a breeze. Don't feel like you can't do this at home because anyone can do this following the instructions. So shoutout to Reilly MotorSports. The bolts for our K-member have a shoulder on them. This shoulder helps to align my K-member in the center. This keeps it in the center of the hole. So make sure you pay attention to that. These are like a clam shell lug nut. Get them all started. Like I said, it has the radius or shoulder on the bottom of it. So we need to run them all four up at the same time so it will self-center before go torquing or tightening. With all of our horsepower upgrades and power upgrades we're doing to this vehicle suspension was a must. So we decided to go with a fully adjustable coil over suspension in the front for this vehicle, independent front suspension, maneuverability, responsiveness in my steering for when we try to rip it up and down the track. [ drill humming ] [ Music ]
Second step after we get the crossmember up is through bolts for where the upper control arm and your strut mount. [ impact driver humming ] Hey now! This is not gonna be just a daily driver all the time. If we want to go to autocross, if we want to go down the dragstrip we have that ability with some quick changes and easy adjustments due to our coil over shocks. Next up installing the lower control arms using the hardware provided. Make sure you put some anti-seize on your lower control arm mounts. They include an extra bolt with it to drive the rod through. Make sure you use that as well. Torque to 25 foot pounds at the end. Also you notice I've preassembled a lot of this. I did that for fitment and to make sure everything was there. You'll see me from time to time taking a couple of things apart as we go forward. [ hammer banging ]
The bushings push in pretty easy. Make sure that they go all the way in and sit flush. [ Music ]
Before you do your final torque make sure you tighten your set screw in the relief of the attachment rod at the bottom of the control arm. It's tapered. So it'll go right into the hole and it'll hold it flush where it needs to be. [ Music ] [ torque wrench clicking ] [ Music ]
Up next I'm gonna assemble a coil over shock assembly. First we're gonna put the locking ring on. It also recommends using a little anti seize on this. We're just gonna put a little bit on here cause it goes a long ways. Next will be my washer. And next will be my spring adjuster. I'm gonna put a little bit more anti seize up on the top. I'm gonna go ahead and pull the end of it out. This will be overkill but it'll make it easy for the spring. Next install the spring and install my cup at the top. This goes up under the end of the shock extension. Then we're gonna run the ring back up. Turn it upside down so it sits flush. Next step will be install them on the car. In the lower control arm first per the directions. Also make sure your adjustment knobs are out towards your wheel so they're easy to get to for adjustments. I'll tighten that up in a second once I get the top in position as well. Get out my sleeve. I'm gonna raise my lower control arm up. [ Music ]
Easy as that. It's starting to look like a car guys. Up next, we're locking in the control arms, hanging the sway bar, and showing you every step along the way.
[Brian] Next up, spindles are next. We're gonna put both sides on. It says attach by the lower. Then we'll go to the upper. Put a little anti seize on here just to help lubricate it. Not a lot though cause I don't want it all over the boot. It recommends putting the knuckle on the lower first. Add the washer. Remember this is a castellated nut with a cotter pin. I'm gonna put it on finger tight. Then we'll tighten it up. It recommends 50-60 foot pounds of torque on here with the torque wrench. However my castellation part of my nut doesn't line up for my cotter pin. So I'm gonna back it off about a quarter of a turn so we can get the cotter pin in it. We did torque it to 55. So we're still in range of where it needs to be. [ Music ]
It says some clearancing may be required for the forward mounts on the A-bodies. That would be us. It recommends two to three turns out as a good starting point for the upper control arms. I'm gonna run them all the way in flush. Then I'm gonna turn them three turns. One, two, three. According to the directions as well it says shorter spacers go towards the front and longer spacers towards the rear. [ Music ]
Ultimately I just didn't like the way this looked. The washer's pushing on our upper ball joint boot itself. I'm gonna move the washer to the stud side where the castle nut sits on it like we did the lower. So here we are with the suspension all the way in. At this time we've got to do some clearancing of the front mount for the upper control arm. After reading the directions it's recommending for A-bodies it says you may have to do this. The suspension's not even loaded or compressed at this point and we're already knocking paint off. I'm gonna mark this so it's more visible. We don't have to trim all of it but we do want to take quite a bit for my suspension to move up and down while we're driving the vehicle. There's a bunch of different ways you can do this. I'm personally using the air saw instead of a cut off wheel but it's completely your choice. Let's take a look. [ Music ]
Now as you can see after I put the upper control arm back in place I've got plenty of room for it to move up and down without rubbing anything on the frame. Let's do the other side. [ Music ]
I'm leaving the cams down on the upper control arm bolts. We will send it to have the alignment done once it's down on the ground but it's a good starting place. So I'm not changing it. Power rack is next. One thing to keep in mind. It recommends to put the actual washer itself on the back side of the rubber bushing and not on the nylock nut. [ Music ]
This power rack is gonna be so much better than the manual steering. Also make sure with your nylock nuts the actual threads reach the nylock or it's not gonna do you any good. Finger tight will hold it. Now my tie rod ends are run all the way in tight. So I'm just gonna leave it there and we'll adjust it once we get everything mounted. Next is our sway bar. Just gonna get a couple of bolts in to hold it for now as I need three arms to do this. Add this on here. You all know it's a dancing game. Use the one you can get to would probably make more sense. [ Music ]
Remember everything's loose. Nothing's tightened up until we get everything mounted where it needs to be. Go to the next side. [ ratchet clicking ] [ Music ]
It's about to get greasy. Coming up, we add some serious stopping power to Project Bullseye.
[Brian] Having high horsepower in a fast vehicle is no good if you can't stop it. Up next we have brakes. Our brake kit is from Riley MotorSports but it is a universal Wilwood kit. First things first, we need to select our bolt pattern. Depending on the brand of vehicle or the bolt pattern itself. This is universal five by four and a half to five by four and three quarter. So if you have a GM vehicle for example, you can run a five by four and a half. Five by four and three quarter is more of a truck pattern. First things first, we thread the wheel studs in from the back side of the hub. We will be red thread locking these as we move throughout this build. That is recommended per instructions. These are 12 points as well. They can withstand a pretty high torque value. While in the 1960s this vehicle would have come equipped with full drum brakes all the way around some vehicles started to have some front disc brakes available for power options. Things like that you could get but we choose to go with a full disc system on this vehicle. Soon as I get them all in we'll go through a final torque before we assemble our brake rotor. Could have run these in with an impact but I want to make sure they fit all the way flush against my hub. So I don't want to damage anything with those. I'm just gonna check and verify my bolt pattern fits. Everything is in flush mounted like it should be. I'm just gonna turn it upside down and drop it down in my rim. Everything fits like it should. Time to torque them. Fast speeds equal high distances to stop most of the time but we have a lot more pressure with a lot more cooling with the full disc brake system. Now my wheel studs are in. After reading the directions the next part is my caliper mount. This will go on first onto my knuckle before we progress or move forward from here. Two different fasteners. One with a shoulder with no threads, a longer bolt, and one shorter. Longer one goes through the actual knuckle itself into my mount. So it will go on just like this. It actually tells you in the instructions to make sure it's a non-interference fit. This block needs to fit flush against your knuckle. Finger tighten only at this time and then put your thread locker on before you tighten them for final. So it looks like it's gonna fit flush top and bottom side both. So I'm gonna do one at a time with my thread locker. Just gonna get that snug until I can remove the bottom. This red thread locker will keep them from backing out and loosening up but it does allow it to still be serviceable if need be. Up next the rotor adapter and the hub. They only go on one direction, non-interference fit, and five fasteners to hold it together. These are torx bits. They also recommend torque at 25 foot pounds. So I'm gonna start these. I'll put some thread locker on them and run them the rest of the way in. Just remember anybody can do this. It's super simple. Follow the directions step by step. It's as clear as day. [ Music ] I'm just gonna snug with my hand and then I'll tighten them. Also work smart guys. Use your extensions that have knurled ends on them so they're not slick between your fingers. Makes installation a lot faster. I'm going back to my wheel. Cinch it down and torque them. It says to use a star pattern. So I'm gonna go across from each other. 25 foot pounds. I'm not looking for a whole lot here. Remember all it takes is one click guys. Just cause it clicks multiple times doesn't mean you're getting any tighter. Alright guys, hubs are on, rotor adapters are on, torque to spec with thread locker. Next step is your rotor. A couple of key things about your rotor. Number one, these are cross drilled and slotted rotors. So the direction of the rotor is important. So make sure you pay attention to that. They do have indication arrows already pre-made on this. So it takes the guess work out of it for anybody. These lay face down in my case. You're gonna line up the bolt holes and install all the fasteners. These are a really nice kit. Also the star pattern is super important. Try not to do two fasteners side by side. Always "X" them out as much as possible so you ensure it sits flush and true as you go. Two fasteners side by side it can warp your rotor. It just sounds crazy to me even saying it but it can happen. Back to my demo wheel for final torque. [ Music ]
Feels pretty good right there. Ready to roll. Coming up, we're in the home stretch for locking in our brake installation. It's looking good guys. We're getting closer. This thing's gonna look awesome when it's all said and done.
[Brian] Now for everybody's favorite part, packing bearings that go in my hub. I've already got everything torqued together to factory spec as recommended in the paperwork. I'm just gonna put some grease in my hand and pack it the old school way. Make sure that it's full. So I'm gonna put a little bit more in there. It feels like it's pretty full already. As these bearings are not very big. So it's not gonna take a whole lot. Once you get it in there they pack pretty easy. What you're looking for is the grease to come out of the top of race in between the rollers. Then you know your bearing is full. That's the whole goal. I'm gonna use a soft faced hammer. I'm just gonna start tapping around the edges and try to make sure it doesn't warp. So this is what we call a lip seal. It's got a rubber lip. The lips go down, meaning it keeps all the grease inside of my bearing allowing it not to escape back onto my hub assembly. Up next I'm gonna remove my hub cap. These are threaded super nice unlike the old school where you beat them in. That will expose my valley for my front bearings. That's the next step. Pack the front bearings the same way we did the rear and then we will install them on the car using the axle washer and a castellated axle nut. [ Music ]
Next step, pull my thread protectors off of my spindle and it's ready to sit the hub up here. Keep in mind your directional arrows on your rotors to make sure they're going forward. [ Music ] My retaining washer, my castellated nut. I'm just gonna leave it finger tight for right now. Spin it a little bit and make sure it seats where it needs to and then we'll final tighten it in a moment. I'm gonna tighten this up to where it doesn't spin and is pretty tight. Then I'm gonna back it off to allow it to free spin and I want to make sure my cotter pin hole aligns. It shouldn't have any friction or anything like that when you spin the hub. Feels pretty good right there. Let me make sure I get my cotter pin in. After this you'll put the threaded center cap back on that we spoke about earlier and it also has a rubber O-ring already installed. It's like a friction fit basically and keeps the center cap from backing off the spindle. [ Music ]
Pretty, pretty! Next we're gonna install our brake calipers. Takes some needle nose pliers first and we're gonna remove this clip. They are just wire clips. So you have to be careful. If you can get one side up just like that and the other side will follow. Let's go ahead and install our fluid fitting in the side of the caliper and then we'll put just a little bit of thread sealant on this. I'm not gonna put a lot. I just want to make sure it is a fluid fitting. Our fluid fittings appear to be seven-sixteenths. So I'm gonna use this and just run it down until it's snug. I'm not gonna crank on it. I don't need it to be super tight. Next step, pull the pins out of your caliper. You can literally just turn it over and they'll fall out. These are the brake pad alignment pins. They physically go through the top of the pad and hold them in place. According to our instructions as well, which I've already done this, we need to pre-fit our caliper okay. It says to run the bolts in finger tight. Once we get this on looking at it from the side our actual rotor itself should be in the center of my caliper, and if not it comes with some 32 thousandths shim washers that we can adjust the distance or shim it out or in depending on which way we need to go. But everything looks good. So I'm gonna go ahead and install our pads. Pad installation pretty simple guys. They've got troughs that they mount in. So you literally just push them in. Make sure your friction surfaces go to the inside so they will mate or contact the rotor itself. Once you get those in it should be as simple as sliding in your alignment pins. Go ahead and put these in each side, and then the retaining clip will go in after that. Add some thread locker to my fine thread bolts before we install them finger tight on my caliper. Make sure your pads are separated completely before you try to install this over top of my rotor. I've already got my mount in there as well. So the threads and bolt hole should line up pretty easily. [ ratchet clicking ] I'm gonna go ahead and spin my rotor. Make sure it spins freely without rubbing. Otherwise we'd have to go back and shim it. [ Music ] We're good to go. Next step, install my brake line. It's gonna screw to the back of my NPT fitting here. Then it goes through the factory hole for your brake line bracket if you will on the frame. It's looking good guys. We're getting closer. This thing is gonna look awesome when it's all said and done.