
Video Transcript
[Brian] You are watching Powernation!
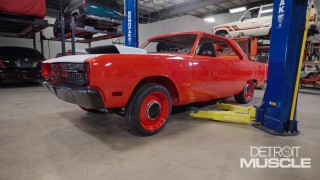
[Brian] Today on Detroit Muscle we're out in the warehouse working on our '69 Dodge Dart, Project Bullseye. No going back. We're going to finalize our liftoff hood. [Jason] It ain't gonna get no better. -Then color match the paint. So it goes with our stripes. All done. -Looks good. Plus we drop in our 505 Mopar engine and hook up the steering linkage so we can turn this thing in the shop. -Really think that wheel's going to look good. -I like it. [ engine revving ] [ Music ] [ tires squealing ] [Brian] Well we're back on Project Bullseye. While we had the bumpers, grille, and everything already painted, the next step in line, we're converting to a lift off hood instead of a bolt on. So before we install the engine and transmission we need to mark the holes for the pins in our hood. No going back. God I hope it fits. [Jason] Me too. -So it's easier to do that without it installed. We just let it down after marking it. We're going to drill for the front pins. Mount the hood back on the car with the front pins, and then we're going to drill the rear. -You want to worry about lining that up? -I am going to use that step bit though and waller them out to the next size up. -I figured. -So on Project Bullseye we really wanted that nostalgic drag car look. So we decided to go with a Hemi style hood, which they didn't make a Hemi style hood for this vehicle at the time. We wanted a fiberglass hood, and we wanted the whole look and feel. So we went to a lift off instead of a bolt on. I just about think we need to drill it from the inside where we have access to the panel. We can mark the hole in the hood from there because if you get under there and look there's a round for a defroster fan. That's the best place to reach up on the dash is in that hole. You still see it right there? -Yeah, it's right there. I can see it. -So we're good there? -It ain't going to get no better drill. -Drill bit engaged. We have the factory hinges and it has factory bolt holes in this fiberglass hood as well. [ drill humming ] -But we really wanted that nostalgia piece as part of our project. What does that look like? -It looks like a hole. -Is it close to aligned with the front? Don't be knocking it off in my face. Good enough? -Yeah. -All right. -Is your face still there? -Nope. [ drill humming ] [ Music ]
Thank you. Oh, God. Man I'm too old for this. Guess we'll try to adjust the pins too as close to the hood as we can get them. After we get the real ones in it. Let's see buddy. [ Music ]
That fits so much better. -That fits so good. Looks good to. -The key is now to keep the body lines even on both sides. [ Music ]
[ drill humming ] [ Music ]
-That work? -There's a hole. -There's a hole. Didn't know I'd have to do yoga before working on a vehicle. [ drill humming ] [ Music ]
-Yeah, baby. Now we've just got to step the hood out since we already did the bolts. [ Music ]
-With the stagger. [ Music ]
-So this is what I'll do. They're 19mm. We'll set the hood back on it. Let's put the nuts on the bottom and then we'll go and adjust them while I'm in the car. That way we can crank down on it and tighten it up. You know what I mean? -Sounds good. [ Music ]
-Let's see. I have high hopes. [ Music ]
-It'll fit. [ Music ]
Dang boy! -It's pretty good on this side, too. Maybe a little taller. -This one's way long over here? You want it to fit tight where you like? You know, push it down and get the pin through it. -We'll get her. These need to go down. -The main thing is out of the way. And we can still adjust the fender. But the gap looks good, I think. - Doesn't get much better than that. -Next step, final tighten it. Sand and ready for paint? Cool, that's how you do it. Coming up, we sand and paint our hood and double check that all the black sheens are the same. All done.
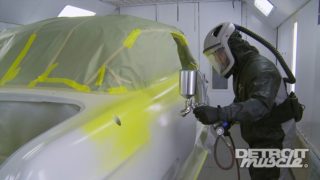
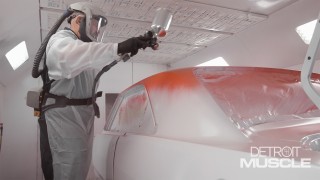
[Brian] Next up, paint the hood. Obviously it's fiberglass pre-textured. So we'll have to get that smoothed out as we sand. We got some sticker residue left here. So probably just take some lacquer thinner on a rag and rub this. That'll come off, and then we're going to sand it with 320 grit paper. We'll work through it. [ Music ]
Is that your Little Tikes My First Respirator? [Jason] It is. -What's taking so long? I'm already done by now. [ sander humming ] [ Music ]
-Excuse me sir. I believe it's my turn. -Have at it buddy. I'm going to go around the edges while you're doing that. -That's fine. [ sander humming ] -When you sand this come up on the edge like this, and that way you can get all this at once. If you sand like this you'll cut the top of it off. -Sanding fiberglass is a lot different than sanding metal. Fiberglass is a lot more flimsy. It's a lot more fragile. You don't want to break it. [ sander humming ] [ Music ]
Brian is a good teacher some days. -Paid endorsement. No, it's good man. We'll tape the stripe up on the car. Get the car bagged. We'll paint the hood and the stripe at the same time. So let's teach you some more. -Let's get it done. -So I really need your help because the stripe's gotta be even over the sides. Do you see my template I made right there. Can you get that out? So we did this, and I made this. So that way we know exactly what the stripe is. Fine line tape. We're putting this down as our first layer. That way I know I got a good crisp edge for my stripe. We'll put masking tape over top of it. So when we peel it everything looks consistent and even. Take three quarter inch tape, we'll pull the trunk now. We'll continue this line across. Then we could tape to the outside of the stripe and then it'll be ready to paint. So we'll paint the middle, middle, middle. It sticks good but it's more pliable and movable than regular masking tape. It doesn't allow paint to bridge as much as regular masking tape. In other words, it won't allow paint to pile up on the top of it. And this being single stage, two coats and it's done. So it's not like we're going to put a, you know, a whole bunch on it anyway. Man I am sweating like I'm on trial for murder right now. Come here and look see what you think of this side. And I'll cut that with a razor blade in that edge right there, and we'll roll it on both sides okay. It looks nice. -You're asking the wrong guy, but yeah. -Looks nice, wow! [ Music ]
-We use Deep Creep on rusty bolts quite a bit around here, but you can also use it to clean your tools. Squeaky door hinges. Anything that needs a little extra lubrication to get it moving right again. -Well we've already painted the stripe across the trunk of our Swinger stripe that we're putting back on Bullseye, but we wanted to make sure everything was lined up perfectly. So we used the trunk lines as a guide for both quarters. [ spray gun hissing ] However, we're going to go ahead and respray the stripe on the trunk to match the same sheen and texture of the quarters. Any of y'all at home have sprayed before know spraying a matte finish coating like this. It's impossible to spray it at different times to get the same matching sheen and texture. [ spray gun hissing ] [ Music ]
-All done. -You happy with that? Looks good. -Thank you sir. [ Music ] All right, with Project Bullseye we knew we had to run an oversized wheel to accommodate for our oversized rotors and calipers. So we went with a 17 inch steel wheel, the Continental Extreme Contact Sport 02. This is a short, stiff sidewall tire and we needed to run the widest tread width we could get from lock to lock for our optimum steering and handling. And we wanted the tallest actual sidewall we could get for our ride height that we were looking forward to keep with that nostalgic look of our vehicle. So we used our handy dandy calculator on Powernation TV.com to help us figure out our perfect size for our application. So all you do is go through and plug in all your aspect ratios, and we run a 215/45 R17 and click calculate and it gives me my overall calculated tire size. So overall diameter, wheel size, sidewall height, tire width of almost 8.5 inches wide. So that gives us optimum control and traction on the road and the soft compound aspect for warmer weather. So we wanted that optimum traction and handling for our vehicle. -Up next, we drop in our 505 Mopar so this Dart can make over 700 horse.
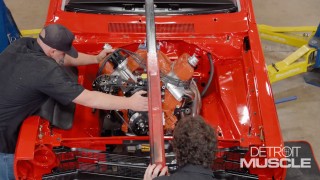
[Brian] So we got our hood pins drilled in our hood. Got it over in the paint booth already. Next logical step, install our engine and transmission. So we have a 505 Mopar with a 727 automatic TCI transmission. We've already got them mated together. Next step, let's set it over in here. All right, hold on right there. You come down some? [Jason] Yep. -It's gonna fall fast. So you gotta be careful. -I'm going to go slow. If we go any farther that oil is going to hit. Can you tilt it anymore? [ impact driver humming ] -Guess let's play this song and dance a little bit. Let it down some. A little bit more. -We're just resting on the core support. [ Music ]
-A little bit more. Oh, yeah. You know what? Maybe I can raise the car up some now. [ mechanical humming – lift ] [ Music ]
-I don't know if it'll ever clear with them on there dude. -The headers? -I think this was all for naught. I don't look like it's gonna have enough clearance. I think the header's gotta go dude. -Well we tried to drop the motor in and we got a problem. The headers are too big. So now I'm pulling all the plug wires off and marking them. So I get my firing order right when I put it back together. And these pretty headers have to come off so I can fit the motor. We lifted the motor back up just enough to hopefully wiggle these headers out without pulling the motor all the way back out. So we'll see how that goes. [ Music ]
-It's free, it's free. While we still wanted to use the headers that we got from Engine Power off the dyno stainless steel long tubes, super nice. Yes, got it! They just wouldn't clear between our shock towers and the front of our A-body. So super narrow under the hood. Plenty of room but narrow in between the shock towers. So we've got to get some block hugger style headers or build your own kit. So we got the headers, right. The car is still up a little bit. So let's go down and see if it will fall back some. You want to come back over here on this side like you were? I'll move. Now it's going to have to go back to clear the oil pan across the crossmember. So slow and steady, sir. -Yes, sir. -Oh, boy! All right, hold on. Let me get the tilty thing. [ Music ] [ impact driver humming ] -It's resting on that crossmember now. [ Music ]
You ever see the way they have to muscle them things around? I don't know if I could do that. -What if we dolphin it again and then try to shove it back? It's hitting the bell housing is what's keeping it from going. So leave it where it's it. Run this in to pull the nose of the engine back up to sit it back in there. -Try it. -It should thread in pretty easy. I mean threads are threads. [ electric ratchet humming ] -aah, uuh, ahh. -Because it was under someone. [ impact driver humming ] [ Music ]
-You want to let the cherry picker down some and then we'll sit the car on the ground. Wonder how low it's going to be? -I think it's going to sit pretty nice. -Gonna be awesome. -From in here anyway. -Dude, I can't wait. Now we got our engine and transmission installed up front and due to weight distribution and actual area space up under the hood we're going to move the battery to the back. We're going to install our Duralast Pro Power Ultra 700 cold cranking amp battery. That way our weight distribution is better and it looks better under the hood. Since our Dart's also gonna be a track car a lot of the race tracks demand that you install a kill switch in the rear. So moving our battery to the trunk allows us to simplify our wiring so we can add that kill switch to our build. Go ahead and install my brace first, my battery hold down. [ Music ]
Next step, hook my cables up, positive and negative. We'll go ahead and hook my positive up first. [ Music ]
Next my negative cable. Go ahead and snug them up. [ Music ]
Always make sure your cables are tight for good charging. You don't want any arching. Last step, get our lid on our box. We got some thumb bolts that hold the lid down tight. It's got a drain tube in the bottom as well. So everything should be good to go. [ Music ]
Looks good. [ Music ]
-Coming up. -You want me to hold this? -We link up our steering and get our brakes lined out. As we're going fast, you've got to be able to stop fast as well.
[Brian] All right guys, we got our engine and transmission in Project Bullseye. We did have a small snafu. The actual headers that Engine Power were using on the dyno do not clear our shock towers in our vehicle. So we have the right and correct headers for the A-body on their way. However, it's not going to delay us from moving on. So next up we're gonna put the steering shaft in, get the linkage and stuff hooked up. First step, put the universal to the actual rack itself. [Jason] While you're doing that I'm gonna go get the wheel. [ Music ]
-All right, hold on. I'm gonna tighten these up all right Jason? - You want me to hold this? -No, I just don't want you spinning the steering shaft around. -All right, I guess. [ Music ] [ impact driver humming ] [ Music ]
-I really think that wheel's going to look good man. -I like it. -You ever had a billet wheel like that with the vinyl or leather grip? -No, sir. I have only had factory wheels. -Guess we need to take it back out to wire the horn and all that. It'll make that easier too. -That's right. I just want to see how it looks. -It's bad ass man. -I like it. That looks good. -Good job man. I'm glad you did something today. -Watch it. -You know with Project Bullseye heavy braking is just inevitable for us. So we got our EBC brake lines in. These are PTFE Teflon rubber lines wrapped in stainless steel braids and they also have a clear PVC coating on the outside that is abrasion resistant as well as prevents our brake lines from swelling under pressure. So we know these brake lines will last and stand the test of time. So we could have went with just a standard brake line, like on an everyday vehicle for daily driving. Most of those are rubber with the same ends on them. If not, depending on the brand that you have. But those won't withstand the heavy braking pressure that we're going to have, and we want to make sure as we're going fast you got to be able to stop fast as well. So the stainless steel brake lines with the coating on it withstand ballooning and swelling. Once again, for adequate and intense braking. Next going to install our Wilwood master cylinder. We've already pre-bench bled this. I left the lines in it. Ready buddy? -Yes, sir. -Once we get It mounted we'll top it off with our EBC dot four brake fluid, which is recommended for this master cylinder. -All right, which one you holding? -All of them. -You sir are all set. -Perfect. -I should have figured out what size that all was before we put it down there. What do you think? -Nah, it's all right. You got it. Perfect place to put lines. You know with our new brakes installed on Project Bullseye we could have run some standard Dot 3 brake fluid like every day street driving most vehicles on the road today. However we went with EBC's Dot Four, which is a performance brake fluid that has a higher boiling point dry and wet both because it's going to be a high performance vehicle and we're going to put it through its paces. -That one's yours. -Thank you sir. -Keep it up and you're going to hear me snoring in a second. -It's gonna be awesome. -We're gonna have to rock, paper, scissors. See who gets to drive it first. It's my system. You're smart man. I guess I never thought to put it in my pocket. -Today we hit some big milestones with our engine and transmission. So we're good there. -It ain't gonna get no better. -We also checked off a lot of little boxes that are low hanging fruit but aren't always easy to pick when you're in the thick of things. Everything all matches now and this Dart's finally looking like what we had envisioned in our minds when we set out to transform this garage stored shell into a fire breathing piece of Detroit muscle.
Show Full Transcript
[Brian] Today on Detroit Muscle we're out in the warehouse working on our '69 Dodge Dart, Project Bullseye. No going back. We're going to finalize our liftoff hood. [Jason] It ain't gonna get no better. -Then color match the paint. So it goes with our stripes. All done. -Looks good. Plus we drop in our 505 Mopar engine and hook up the steering linkage so we can turn this thing in the shop. -Really think that wheel's going to look good. -I like it. [ engine revving ] [ Music ] [ tires squealing ] [Brian] Well we're back on Project Bullseye. While we had the bumpers, grille, and everything already painted, the next step in line, we're converting to a lift off hood instead of a bolt on. So before we install the engine and transmission we need to mark the holes for the pins in our hood. No going back. God I hope it fits. [Jason] Me too. -So it's easier to do that without it installed. We just let it down after marking it. We're going to drill for the front pins. Mount the hood back on the car with the front pins, and then we're going to drill the rear. -You want to worry about lining that up? -I am going to use that step bit though and waller them out to the next size up. -I figured. -So on Project Bullseye we really wanted that nostalgic drag car look. So we decided to go with a Hemi style hood, which they didn't make a Hemi style hood for this vehicle at the time. We wanted a fiberglass hood, and we wanted the whole look and feel. So we went to a lift off instead of a bolt on. I just about think we need to drill it from the inside where we have access to the panel. We can mark the hole in the hood from there because if you get under there and look there's a round for a defroster fan. That's the best place to reach up on the dash is in that hole. You still see it right there? -Yeah, it's right there. I can see it. -So we're good there? -It ain't going to get no better drill. -Drill bit engaged. We have the factory hinges and it has factory bolt holes in this fiberglass hood as well. [ drill humming ] -But we really wanted that nostalgia piece as part of our project. What does that look like? -It looks like a hole. -Is it close to aligned with the front? Don't be knocking it off in my face. Good enough? -Yeah. -All right. -Is your face still there? -Nope. [ drill humming ] [ Music ]
Thank you. Oh, God. Man I'm too old for this. Guess we'll try to adjust the pins too as close to the hood as we can get them. After we get the real ones in it. Let's see buddy. [ Music ]
That fits so much better. -That fits so good. Looks good to. -The key is now to keep the body lines even on both sides. [ Music ]
[ drill humming ] [ Music ]
-That work? -There's a hole. -There's a hole. Didn't know I'd have to do yoga before working on a vehicle. [ drill humming ] [ Music ]
-Yeah, baby. Now we've just got to step the hood out since we already did the bolts. [ Music ]
-With the stagger. [ Music ]
-So this is what I'll do. They're 19mm. We'll set the hood back on it. Let's put the nuts on the bottom and then we'll go and adjust them while I'm in the car. That way we can crank down on it and tighten it up. You know what I mean? -Sounds good. [ Music ]
-Let's see. I have high hopes. [ Music ]
-It'll fit. [ Music ]
Dang boy! -It's pretty good on this side, too. Maybe a little taller. -This one's way long over here? You want it to fit tight where you like? You know, push it down and get the pin through it. -We'll get her. These need to go down. -The main thing is out of the way. And we can still adjust the fender. But the gap looks good, I think. - Doesn't get much better than that. -Next step, final tighten it. Sand and ready for paint? Cool, that's how you do it. Coming up, we sand and paint our hood and double check that all the black sheens are the same. All done.
[Brian] Next up, paint the hood. Obviously it's fiberglass pre-textured. So we'll have to get that smoothed out as we sand. We got some sticker residue left here. So probably just take some lacquer thinner on a rag and rub this. That'll come off, and then we're going to sand it with 320 grit paper. We'll work through it. [ Music ]
Is that your Little Tikes My First Respirator? [Jason] It is. -What's taking so long? I'm already done by now. [ sander humming ] [ Music ]
-Excuse me sir. I believe it's my turn. -Have at it buddy. I'm going to go around the edges while you're doing that. -That's fine. [ sander humming ] -When you sand this come up on the edge like this, and that way you can get all this at once. If you sand like this you'll cut the top of it off. -Sanding fiberglass is a lot different than sanding metal. Fiberglass is a lot more flimsy. It's a lot more fragile. You don't want to break it. [ sander humming ] [ Music ]
Brian is a good teacher some days. -Paid endorsement. No, it's good man. We'll tape the stripe up on the car. Get the car bagged. We'll paint the hood and the stripe at the same time. So let's teach you some more. -Let's get it done. -So I really need your help because the stripe's gotta be even over the sides. Do you see my template I made right there. Can you get that out? So we did this, and I made this. So that way we know exactly what the stripe is. Fine line tape. We're putting this down as our first layer. That way I know I got a good crisp edge for my stripe. We'll put masking tape over top of it. So when we peel it everything looks consistent and even. Take three quarter inch tape, we'll pull the trunk now. We'll continue this line across. Then we could tape to the outside of the stripe and then it'll be ready to paint. So we'll paint the middle, middle, middle. It sticks good but it's more pliable and movable than regular masking tape. It doesn't allow paint to bridge as much as regular masking tape. In other words, it won't allow paint to pile up on the top of it. And this being single stage, two coats and it's done. So it's not like we're going to put a, you know, a whole bunch on it anyway. Man I am sweating like I'm on trial for murder right now. Come here and look see what you think of this side. And I'll cut that with a razor blade in that edge right there, and we'll roll it on both sides okay. It looks nice. -You're asking the wrong guy, but yeah. -Looks nice, wow! [ Music ]
-We use Deep Creep on rusty bolts quite a bit around here, but you can also use it to clean your tools. Squeaky door hinges. Anything that needs a little extra lubrication to get it moving right again. -Well we've already painted the stripe across the trunk of our Swinger stripe that we're putting back on Bullseye, but we wanted to make sure everything was lined up perfectly. So we used the trunk lines as a guide for both quarters. [ spray gun hissing ] However, we're going to go ahead and respray the stripe on the trunk to match the same sheen and texture of the quarters. Any of y'all at home have sprayed before know spraying a matte finish coating like this. It's impossible to spray it at different times to get the same matching sheen and texture. [ spray gun hissing ] [ Music ]
-All done. -You happy with that? Looks good. -Thank you sir. [ Music ] All right, with Project Bullseye we knew we had to run an oversized wheel to accommodate for our oversized rotors and calipers. So we went with a 17 inch steel wheel, the Continental Extreme Contact Sport 02. This is a short, stiff sidewall tire and we needed to run the widest tread width we could get from lock to lock for our optimum steering and handling. And we wanted the tallest actual sidewall we could get for our ride height that we were looking forward to keep with that nostalgic look of our vehicle. So we used our handy dandy calculator on Powernation TV.com to help us figure out our perfect size for our application. So all you do is go through and plug in all your aspect ratios, and we run a 215/45 R17 and click calculate and it gives me my overall calculated tire size. So overall diameter, wheel size, sidewall height, tire width of almost 8.5 inches wide. So that gives us optimum control and traction on the road and the soft compound aspect for warmer weather. So we wanted that optimum traction and handling for our vehicle. -Up next, we drop in our 505 Mopar so this Dart can make over 700 horse.
[Brian] So we got our hood pins drilled in our hood. Got it over in the paint booth already. Next logical step, install our engine and transmission. So we have a 505 Mopar with a 727 automatic TCI transmission. We've already got them mated together. Next step, let's set it over in here. All right, hold on right there. You come down some? [Jason] Yep. -It's gonna fall fast. So you gotta be careful. -I'm going to go slow. If we go any farther that oil is going to hit. Can you tilt it anymore? [ impact driver humming ] -Guess let's play this song and dance a little bit. Let it down some. A little bit more. -We're just resting on the core support. [ Music ]
-A little bit more. Oh, yeah. You know what? Maybe I can raise the car up some now. [ mechanical humming – lift ] [ Music ]
-I don't know if it'll ever clear with them on there dude. -The headers? -I think this was all for naught. I don't look like it's gonna have enough clearance. I think the header's gotta go dude. -Well we tried to drop the motor in and we got a problem. The headers are too big. So now I'm pulling all the plug wires off and marking them. So I get my firing order right when I put it back together. And these pretty headers have to come off so I can fit the motor. We lifted the motor back up just enough to hopefully wiggle these headers out without pulling the motor all the way back out. So we'll see how that goes. [ Music ]
-It's free, it's free. While we still wanted to use the headers that we got from Engine Power off the dyno stainless steel long tubes, super nice. Yes, got it! They just wouldn't clear between our shock towers and the front of our A-body. So super narrow under the hood. Plenty of room but narrow in between the shock towers. So we've got to get some block hugger style headers or build your own kit. So we got the headers, right. The car is still up a little bit. So let's go down and see if it will fall back some. You want to come back over here on this side like you were? I'll move. Now it's going to have to go back to clear the oil pan across the crossmember. So slow and steady, sir. -Yes, sir. -Oh, boy! All right, hold on. Let me get the tilty thing. [ Music ] [ impact driver humming ] -It's resting on that crossmember now. [ Music ]
You ever see the way they have to muscle them things around? I don't know if I could do that. -What if we dolphin it again and then try to shove it back? It's hitting the bell housing is what's keeping it from going. So leave it where it's it. Run this in to pull the nose of the engine back up to sit it back in there. -Try it. -It should thread in pretty easy. I mean threads are threads. [ electric ratchet humming ] -aah, uuh, ahh. -Because it was under someone. [ impact driver humming ] [ Music ]
-You want to let the cherry picker down some and then we'll sit the car on the ground. Wonder how low it's going to be? -I think it's going to sit pretty nice. -Gonna be awesome. -From in here anyway. -Dude, I can't wait. Now we got our engine and transmission installed up front and due to weight distribution and actual area space up under the hood we're going to move the battery to the back. We're going to install our Duralast Pro Power Ultra 700 cold cranking amp battery. That way our weight distribution is better and it looks better under the hood. Since our Dart's also gonna be a track car a lot of the race tracks demand that you install a kill switch in the rear. So moving our battery to the trunk allows us to simplify our wiring so we can add that kill switch to our build. Go ahead and install my brace first, my battery hold down. [ Music ]
Next step, hook my cables up, positive and negative. We'll go ahead and hook my positive up first. [ Music ]
Next my negative cable. Go ahead and snug them up. [ Music ]
Always make sure your cables are tight for good charging. You don't want any arching. Last step, get our lid on our box. We got some thumb bolts that hold the lid down tight. It's got a drain tube in the bottom as well. So everything should be good to go. [ Music ]
Looks good. [ Music ]
-Coming up. -You want me to hold this? -We link up our steering and get our brakes lined out. As we're going fast, you've got to be able to stop fast as well.
[Brian] All right guys, we got our engine and transmission in Project Bullseye. We did have a small snafu. The actual headers that Engine Power were using on the dyno do not clear our shock towers in our vehicle. So we have the right and correct headers for the A-body on their way. However, it's not going to delay us from moving on. So next up we're gonna put the steering shaft in, get the linkage and stuff hooked up. First step, put the universal to the actual rack itself. [Jason] While you're doing that I'm gonna go get the wheel. [ Music ]
-All right, hold on. I'm gonna tighten these up all right Jason? - You want me to hold this? -No, I just don't want you spinning the steering shaft around. -All right, I guess. [ Music ] [ impact driver humming ] [ Music ]
-I really think that wheel's going to look good man. -I like it. -You ever had a billet wheel like that with the vinyl or leather grip? -No, sir. I have only had factory wheels. -Guess we need to take it back out to wire the horn and all that. It'll make that easier too. -That's right. I just want to see how it looks. -It's bad ass man. -I like it. That looks good. -Good job man. I'm glad you did something today. -Watch it. -You know with Project Bullseye heavy braking is just inevitable for us. So we got our EBC brake lines in. These are PTFE Teflon rubber lines wrapped in stainless steel braids and they also have a clear PVC coating on the outside that is abrasion resistant as well as prevents our brake lines from swelling under pressure. So we know these brake lines will last and stand the test of time. So we could have went with just a standard brake line, like on an everyday vehicle for daily driving. Most of those are rubber with the same ends on them. If not, depending on the brand that you have. But those won't withstand the heavy braking pressure that we're going to have, and we want to make sure as we're going fast you got to be able to stop fast as well. So the stainless steel brake lines with the coating on it withstand ballooning and swelling. Once again, for adequate and intense braking. Next going to install our Wilwood master cylinder. We've already pre-bench bled this. I left the lines in it. Ready buddy? -Yes, sir. -Once we get It mounted we'll top it off with our EBC dot four brake fluid, which is recommended for this master cylinder. -All right, which one you holding? -All of them. -You sir are all set. -Perfect. -I should have figured out what size that all was before we put it down there. What do you think? -Nah, it's all right. You got it. Perfect place to put lines. You know with our new brakes installed on Project Bullseye we could have run some standard Dot 3 brake fluid like every day street driving most vehicles on the road today. However we went with EBC's Dot Four, which is a performance brake fluid that has a higher boiling point dry and wet both because it's going to be a high performance vehicle and we're going to put it through its paces. -That one's yours. -Thank you sir. -Keep it up and you're going to hear me snoring in a second. -It's gonna be awesome. -We're gonna have to rock, paper, scissors. See who gets to drive it first. It's my system. You're smart man. I guess I never thought to put it in my pocket. -Today we hit some big milestones with our engine and transmission. So we're good there. -It ain't gonna get no better. -We also checked off a lot of little boxes that are low hanging fruit but aren't always easy to pick when you're in the thick of things. Everything all matches now and this Dart's finally looking like what we had envisioned in our minds when we set out to transform this garage stored shell into a fire breathing piece of Detroit muscle.