

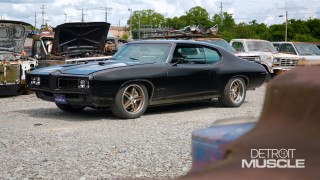
In This Episode
- 0:01 Introduction and Overview
- 1:04 Project Introduction: '69 Dart Bullseye
- 2:01 Painting Process and Challenges
- 4:01 Applying Primer and High Build Primer
- 4:37 Painting Experiment and Process
- 6:01 Color Matching and Tinting Techniques
- 12:01 Painting in Different Environments
- 15:00 Duplicating Factory Stripes
Video Transcript
[Joel] You're watching Powernation!
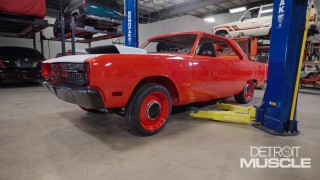
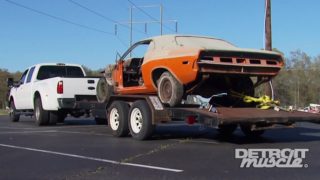
[Joel] Today on Detroit Muscle we've got some work to do as we fix mother nature's handiwork and freshen up our '69 Dart Bullseye with a new coat of paint. [Brian] We'll also show you how to mix and match back to your factory color or any shade that you want. [Joel] Think we can get workman's comp for swamp foot? [Brian] If you can't see the faded stripe that you want to bring back we'll show you how to do that too. [Joel] This one's loud, dusty, and too good to skip. [ Music ] [ engine revving ] [ Music ] [ tires squealing ] [ Music ] [Joel] Every project has its own set of challenges. When you're working on old cars there's always something to fix. A lot of times even when they're done they're not truly done. Holes to weld, dents to mend, and a slew of never ending repairs, like on our latest project, Bullseye. You bought us a Dart? [Tommy] It's rust free. It's a three wheeler. It's definitely a fixer upper. Let me fix it. [Joel] There you go. 45 all the way to Franklin. [Tommy] Just cook it real hard but stay on the gas. [Joel] When we picked up this '69 Dart it was the dictionary definition of bare bones. No engine, no transmission, nothing. So first order of business is slapping on some new paint. Back in the '60s and '70s Mopars were painted with the majority of the panels already bolted to the car. That way as it was going down the assembly the deck lid, the doors, the fenders, even the trunk and floor pans all matched the body color. We're not looking to go that chalk mark style restoration because quite frankly the majority of the original parts on this car are long gone. Basically we're just gonna build a car that looks good and hauls ass. [ sander humming ] [ Music ] [ sandpaper scratching ] [ Music ]
[ spray gun hissing ] [Brian] We're putting the high build primer just on a few sections of this vehicle while it has a factory roof and it is a factory vinyl top car. So it's got some moisture pitting. As we're not going back with the vinyl top. The rest of the vehicle is pretty much brand new aftermarket panels besides the doors and the roof. So we're gonna high build those. Make sure everything's flat and smooth. [ Music ]
[ sander buzzing ] [ Music ]
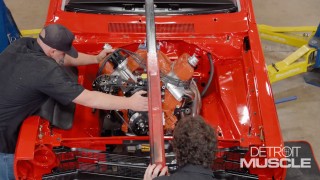
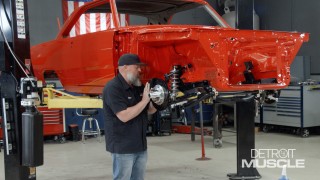
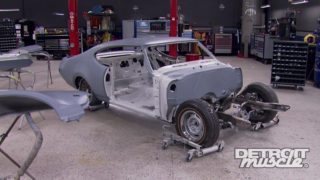
While our Dart is just a shell of a car we did make the decision to pull the front fenders off for ease of access and be able to paint the front of the door, the hinge pillar, and engine compartment all at the same time. We're also gonna conduct an experiment. We're gonna paint parts in separate locations to see if you can tell the difference of the refinish depending on where it's painted. [ sandpaper scratching ] Oh yeah! [ Music ]
[ compressed air hissing ] [ Music ]
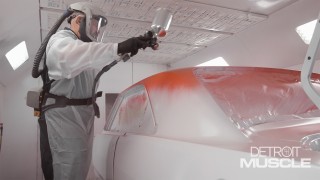
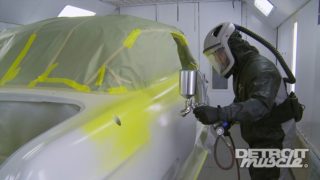
[ spray gun hissing ] [Brian] So we've already applied our high build primer to the roof and both doors as it is the factory sheet metal. The aftermarket brand new panels are already on the car. So we're gonna cover everything with some 2K primer. We do that for moisture protection for the new panels and we have to cover up the polyester high build for the other. [ spray gun hissing ] [ Music ]
[Joel] I'd like to take this opportunity to personally thank Brian for taking one for the team and strapping on that one piece onesie and baking his brains out inside that oversized toaster oven while I gracefully stand out here the miracle that is central air conditioning. My hat goes off to you guys and gals at home that do paint and body work for a living because it ain't for the weak. Can't spell paint without pain. [ Music ]
[ spray bottle whoosh ] [ Music ] [Brian] If it's still dark black then it's low. [ Music ]
Be nice if we could get it wet sanded all tomorrow and wash it. Then it could sit all weekend and dry. [ sandpaper scratching ] [ Music ]
[Joel] Think we get workman's comp for swamp foot? [ Music ]
[Brian] Joel you finish wet sanding and I'll just paint it. How about that? [Joel] You're not gonna like the results if we go that route. [ Music ]
Got a problem with my flow. [Brian] Shoulda yelled snake. Snake! Pretty sure everybody says I want to be a painter so I can wet sand all day. [Joel] I'll bet your hands are smooth as butter though. [Brian] Up next, we hit the Bullseye with some red and show you how to color match back to your factory paint. Then we can make it change how we want.
[Brian] Ahh! Two-one to ten percent y'all. Always pour from the side of the can without your scale on it too. [ Music ] Looks like I'm bleeding everywhere. [ Music ] [ spray gun hissing ] [ Music ]
I may let it bake during lunch and put a little putty in, dust some base. It's not bad. You just scratched it you know. [ Music ]
So we decided to use some white sealer on this vehicle instead of gray. We wanted the red to really pop and stand out. I knew that a lighter base to put our base coat over would definitely make the color more vivid and stand out in a crowd. [ Music ]
[ bleep ] We chose Summit Viper Red paint for our '69 Dodge Dart. I have a tech tip for you so you can change or vary this color, or any color for that matter, to mix anything you want at home. [ Music ] Let's go back to your schooling. Start at the color wheel. It's super simple to remember. Every color that you choose, whether it be red, black, white, has a variation of multiple colors in it. It is not one single color. Using the color wheel right here it is red on red and depending on where we go around the color how we will change the variant of the color. If we add orange to our red naturally we get a red-orange color. By adding yellow to our orange we get an orange-yellow color. What we don't want to do is vary this color across the color wheel. In other words we can't add a red with a green or we can't add a blue with an orange because it goes muddy brown or dark if you cross the color wheel. Always remember, if we want to tint our color to match your applications at home or to make a custom color of your own. We always tint within the formula that you already have. So let's open these cans so we can see what we're talking about. So I'm gonna take some of our factory Viper Red right here that we have. I'm gonna place this on this spray out card. That's what these are. That's our color that we're going for. Inside of this red is a translucent black, which basically means a see through black. A binder, which is a clear carrier for all your colors. Our base red color naturally and it also has a red-orange tint as well. So any way that we want to vary this we can take any one of these colors and start adding to our factory color. We can make it change how we want. So I'm gonna add a little bit of our factory red right here so you can see it as we go. Let's add some white. Let's do that first. I'm not measuring anything guys. You can mix it to your eye and how it matches your application. Now I'm gonna stir this and we're gonna put a dot beside the factory color so you can see the change right off the bat. So this is our first variation in color. If you notice it's more pale or a pinkish color. Take the factory color once again and we're gonna shift it even more to the other side of the color wheel. Now I'm gonna use some of our orange tint. Like I said, I'm not measuring this. A lot of people call this bench mixing. That's where you take what you have at home and mix it together to come up with your own color. This has been a trend and been done for decades. '50s, '60s, '70s true hot rodders used what they had at home and on the shelf. Keep in mind too these are just color blobs that I'm putting down. If we were to spray this out on the spray out card it would be a lot more noticeable that way. By doing this I can tell right off that it's going more to the orange side. Now we can really see a difference in this color here. I want you to see what this does when we add this transparent black. I'm just gonna add a few drops. Then I'm gonna use a clean stir stick. Watch how drastic this changes. Immediately we're a darker brick color red. Not quite burgundy but it has darkened it up a whole lot. Here's the difference with the black in it. Remember this one is our factory color right here. So this is more black. This is white. This was our redder one. This is an orange color. Remember this will be our factory pack color that we're trying to go to or we're starting with and we're varying it as we go. I know this is probably hard to see on camera or from at home but these colors are drastically different. No matter which way you decide to go with your color choice Summit Racing has your covered for your materials. [Joel] Coming up, same paint, same parts, two booths. Can you get pro results in your driveway? We're about to find out.
[Joel] Everything's wiped down. Just gotta mix some sealer. Ready to rock 'n' roll. [Brian] Need a gun holder and a beer holder. [Joel] There's a common misconception out there that you have to have an industrial paint booth in order to get professional quality results on your paint job. We'll need to be walking in slow motion like we're going to the spaceship. We're here to debunk that today as we've got our Mobile Environmental Solutions booth set up and I'm gonna be painting two wheels and a fender in there and Brian's set up in our other paint booth. He's also got two wheels and a fender. We're gonna finish at the same time and come together and see which one produced the same if not better results. [ spray gun hissing ] [ Music ]
Now no matter what environment you're painting in there's several factors you need to consider. One is temperature. Another is humidity, precipitation especially when you're painting in a mobile booth like I am today. So the temperature is gonna be much hotter in there today just because it's nice and warm out in our warehouse. Brian's painting in more of a temperature controlled environment. So he's gonna be using a medium reducer while I'm gonna be using a high temp reducer. [ spray gun hissing ] [Brian] As a 20 year vet guys in the collision field I've worked in a lot of shops. I've painted in a lot of places. Everything from industrial paint booths. I painted a couple of cars in the middle of a grass field, driveway. No matter where you paint though the key is the prep work. One thing I've learned over the years is little ways, tips, and tricks. One thing we like to do a lot for static electricity is to use a microfiber towel. Just regular hot warm water. Take it, wring it out, then wipe it down after your wax and grease remover is done. It'll kill the static charge without affecting anything else. [Joel] Now if you're painting with a mobile booth outside there are other factors like time of day, humidity that you also have to factor in. At the end of the day it's all about limiting contamination as much as possible and keeping your environment sterile. Don't be entering and exiting the paint booth any more than you have to. You should just be in there with that full business mindset and get stuff done. Don't be taking any pictures until everything is baked, cured, ready to rock 'n roll. Then you can start your documentation process. Looks like glass in there. That's pretty pimp. [Brian] That's bad ass dude. With that solid black tire. [Joel] I need to take a picture of that and send it to the dude that sent us the wheels. We finally got our pieces painted, baked, and they're ready to rock n' roll. Now it's time to finally reveal which one was painted where. Can you guys guess? Lock in your answers. Three, two, one. Alright Brian, stand next to the pieces you painted. Fake out! Now Brian used our industrial paint booth to paint his fender and his wheels, and honestly it came out great but the stuff that I painted in the Mobile Environmental Solutions booth came out just as good. If you're just a hobbyist at home that just wants a pop up paint booth for painting cars, parts, or anything like that this is a great solution for you. Again an industrial paint booth is a great think to have but if you don't have access to one this is a great option. [Brian] Up next, a quick trick when your deck lid's toast and you want to match back to that factory stripe without guessing.
[Brian] Paint jobs are an aesthetic or pretty part of a build. A lot of people like to go back, factory stripes, things like that that may not be available. So let's talk a little bit about how to duplicate a factory stripe even in your garage with some basic tools and some basic materials that you have at home. We want to duplicate this factory Swinger stripe and try to make it as close to factory as possible without ordering a kit. First thing we're gonna do, let's clean the surface. Just regular glass cleaner. Not a lot. I just want to get all the dust off. I'm gonna show you two different techniques on this. One, just some paper and basic tracing to duplicate it. Two, we're gonna put down some fine line tape and do the same so you can see the difference in those. After you get your surface clean lay your paper out. Make sure everything is good and taut. We want it to be as accurate as possible, especially if you're trying to duplicate that factory look. Now remember this is just to duplicate the stripe. This is not locating exactly where it is. We can do those measurements later on. I'm just showing you how you can do this with basically a pencil, and paper, and some tape. Now I'm just gonna scribble over the top of my factory stripe location on my paper. So I'm not putting a whole lot of pressure on it but I am going over where I know for a fact the stripe's gonna be. I'm just looking for that difference. You can start to see it show up. Right here's the edges of it from your stripe itself. Luckily with this stripe guys the center is a solid section all the way across. It has two quarter inch stripes on the exterior. So not a huge intricate design if you will. So pretty simple. Let's talk about the other way. I'm gonna use quarter inch fine line tape and I'm gonna basically follow the factory stripe and what's left of it or the impression that's there in the trunk. Keep your tape pulled tight guys. You don't want to stretch it though being vinyl tape. We want to run it in the longest pieces that we can. You want to stripe the entire side at once. Not in pieces or panel sections okay. I'm just getting something and eyeballing it as close as I can keep it to the factory. Remember I'm just gonna show you what it looks like if there was more of the stripe left on the trunk. I understand this is not gonna be perfect as I am doing one side at a time here, but you're getting the idea and the technical aspect of it. This works really good for at home people who don't want to spend a lot of money or if you had that special one off project for stripes aren't even available anymore. This would be another option for you. This is gonna allow me to transfer this design a lot faster and a lot more precise because there's more stripe left. I'm gonna pull this down tight. As tight as I can get it, and we're gonna repeat the process with the pencil scribbling over my design. You should be able to see the difference when there's more material on here. I don't even have to do it quite as hard. Then I can go back and smudge it and there's a defined line. Another way to do this I've seen people, just d-i-y stuff. You can actually take chalk box chalk like used for construction. Put it in a shop towel or a microfiber. Then that powder's fine enough to go through that. I do like the guide coat powdered form with the foam pad a lot better than the pencil. Actually I'm gonna turn this one around so you can see it more clearly. If I was to lay them and orientate the lines together as you see both ways will work. Definitely this is a lot more clear to be able to follow. If you had the time and some tape to put down a fine line and trace the factory then you could scrub it over top. But now I have a duplicating ability for my design. I can measure in between them if I need to to get my stripe width. I could do my stripe gap. I could do my orientation on the panel from rear to front, front to rear, side to side and still have a factory look from my home. God that hurts my feelings so bad to do that. [ Music ]
Another quarter. [ Music ]
Make my gap and then I'm gonna pull the green tape off and that's what's gonna be black. Putting down what I'm picking up? [ Music ]
So a little over seven inches but the same all the way across in the middle. Three quarter inch gap, quarter inch stripe. So everything that's untapped will be black and then we'll cover the rest of it. [ spray gun hissing ] [ Music ]
I think we hit the bullseye with our color choice. That red is loud but definitely matches what we have in store for the rest of this build. [Joel] She may not have an engine yet but what we've got lined up for this thing will make a Mopar fan out of anybody who loves American muscle. We've got our sights set on plenty of bad ass upgrades but I think what we've accomplished today has lit the fuse on this red rocket ship.
Show Full Transcript
[Joel] Today on Detroit Muscle we've got some work to do as we fix mother nature's handiwork and freshen up our '69 Dart Bullseye with a new coat of paint. [Brian] We'll also show you how to mix and match back to your factory color or any shade that you want. [Joel] Think we can get workman's comp for swamp foot? [Brian] If you can't see the faded stripe that you want to bring back we'll show you how to do that too. [Joel] This one's loud, dusty, and too good to skip. [ Music ] [ engine revving ] [ Music ] [ tires squealing ] [ Music ] [Joel] Every project has its own set of challenges. When you're working on old cars there's always something to fix. A lot of times even when they're done they're not truly done. Holes to weld, dents to mend, and a slew of never ending repairs, like on our latest project, Bullseye. You bought us a Dart? [Tommy] It's rust free. It's a three wheeler. It's definitely a fixer upper. Let me fix it. [Joel] There you go. 45 all the way to Franklin. [Tommy] Just cook it real hard but stay on the gas. [Joel] When we picked up this '69 Dart it was the dictionary definition of bare bones. No engine, no transmission, nothing. So first order of business is slapping on some new paint. Back in the '60s and '70s Mopars were painted with the majority of the panels already bolted to the car. That way as it was going down the assembly the deck lid, the doors, the fenders, even the trunk and floor pans all matched the body color. We're not looking to go that chalk mark style restoration because quite frankly the majority of the original parts on this car are long gone. Basically we're just gonna build a car that looks good and hauls ass. [ sander humming ] [ Music ] [ sandpaper scratching ] [ Music ]
[ spray gun hissing ] [Brian] We're putting the high build primer just on a few sections of this vehicle while it has a factory roof and it is a factory vinyl top car. So it's got some moisture pitting. As we're not going back with the vinyl top. The rest of the vehicle is pretty much brand new aftermarket panels besides the doors and the roof. So we're gonna high build those. Make sure everything's flat and smooth. [ Music ]
[ sander buzzing ] [ Music ]
While our Dart is just a shell of a car we did make the decision to pull the front fenders off for ease of access and be able to paint the front of the door, the hinge pillar, and engine compartment all at the same time. We're also gonna conduct an experiment. We're gonna paint parts in separate locations to see if you can tell the difference of the refinish depending on where it's painted. [ sandpaper scratching ] Oh yeah! [ Music ]
[ compressed air hissing ] [ Music ]
[ spray gun hissing ] [Brian] So we've already applied our high build primer to the roof and both doors as it is the factory sheet metal. The aftermarket brand new panels are already on the car. So we're gonna cover everything with some 2K primer. We do that for moisture protection for the new panels and we have to cover up the polyester high build for the other. [ spray gun hissing ] [ Music ]
[Joel] I'd like to take this opportunity to personally thank Brian for taking one for the team and strapping on that one piece onesie and baking his brains out inside that oversized toaster oven while I gracefully stand out here the miracle that is central air conditioning. My hat goes off to you guys and gals at home that do paint and body work for a living because it ain't for the weak. Can't spell paint without pain. [ Music ]
[ spray bottle whoosh ] [ Music ] [Brian] If it's still dark black then it's low. [ Music ]
Be nice if we could get it wet sanded all tomorrow and wash it. Then it could sit all weekend and dry. [ sandpaper scratching ] [ Music ]
[Joel] Think we get workman's comp for swamp foot? [ Music ]
[Brian] Joel you finish wet sanding and I'll just paint it. How about that? [Joel] You're not gonna like the results if we go that route. [ Music ]
Got a problem with my flow. [Brian] Shoulda yelled snake. Snake! Pretty sure everybody says I want to be a painter so I can wet sand all day. [Joel] I'll bet your hands are smooth as butter though. [Brian] Up next, we hit the Bullseye with some red and show you how to color match back to your factory paint. Then we can make it change how we want.
[Brian] Ahh! Two-one to ten percent y'all. Always pour from the side of the can without your scale on it too. [ Music ] Looks like I'm bleeding everywhere. [ Music ] [ spray gun hissing ] [ Music ]
I may let it bake during lunch and put a little putty in, dust some base. It's not bad. You just scratched it you know. [ Music ]
So we decided to use some white sealer on this vehicle instead of gray. We wanted the red to really pop and stand out. I knew that a lighter base to put our base coat over would definitely make the color more vivid and stand out in a crowd. [ Music ]
[ bleep ] We chose Summit Viper Red paint for our '69 Dodge Dart. I have a tech tip for you so you can change or vary this color, or any color for that matter, to mix anything you want at home. [ Music ] Let's go back to your schooling. Start at the color wheel. It's super simple to remember. Every color that you choose, whether it be red, black, white, has a variation of multiple colors in it. It is not one single color. Using the color wheel right here it is red on red and depending on where we go around the color how we will change the variant of the color. If we add orange to our red naturally we get a red-orange color. By adding yellow to our orange we get an orange-yellow color. What we don't want to do is vary this color across the color wheel. In other words we can't add a red with a green or we can't add a blue with an orange because it goes muddy brown or dark if you cross the color wheel. Always remember, if we want to tint our color to match your applications at home or to make a custom color of your own. We always tint within the formula that you already have. So let's open these cans so we can see what we're talking about. So I'm gonna take some of our factory Viper Red right here that we have. I'm gonna place this on this spray out card. That's what these are. That's our color that we're going for. Inside of this red is a translucent black, which basically means a see through black. A binder, which is a clear carrier for all your colors. Our base red color naturally and it also has a red-orange tint as well. So any way that we want to vary this we can take any one of these colors and start adding to our factory color. We can make it change how we want. So I'm gonna add a little bit of our factory red right here so you can see it as we go. Let's add some white. Let's do that first. I'm not measuring anything guys. You can mix it to your eye and how it matches your application. Now I'm gonna stir this and we're gonna put a dot beside the factory color so you can see the change right off the bat. So this is our first variation in color. If you notice it's more pale or a pinkish color. Take the factory color once again and we're gonna shift it even more to the other side of the color wheel. Now I'm gonna use some of our orange tint. Like I said, I'm not measuring this. A lot of people call this bench mixing. That's where you take what you have at home and mix it together to come up with your own color. This has been a trend and been done for decades. '50s, '60s, '70s true hot rodders used what they had at home and on the shelf. Keep in mind too these are just color blobs that I'm putting down. If we were to spray this out on the spray out card it would be a lot more noticeable that way. By doing this I can tell right off that it's going more to the orange side. Now we can really see a difference in this color here. I want you to see what this does when we add this transparent black. I'm just gonna add a few drops. Then I'm gonna use a clean stir stick. Watch how drastic this changes. Immediately we're a darker brick color red. Not quite burgundy but it has darkened it up a whole lot. Here's the difference with the black in it. Remember this one is our factory color right here. So this is more black. This is white. This was our redder one. This is an orange color. Remember this will be our factory pack color that we're trying to go to or we're starting with and we're varying it as we go. I know this is probably hard to see on camera or from at home but these colors are drastically different. No matter which way you decide to go with your color choice Summit Racing has your covered for your materials. [Joel] Coming up, same paint, same parts, two booths. Can you get pro results in your driveway? We're about to find out.
[Joel] Everything's wiped down. Just gotta mix some sealer. Ready to rock 'n' roll. [Brian] Need a gun holder and a beer holder. [Joel] There's a common misconception out there that you have to have an industrial paint booth in order to get professional quality results on your paint job. We'll need to be walking in slow motion like we're going to the spaceship. We're here to debunk that today as we've got our Mobile Environmental Solutions booth set up and I'm gonna be painting two wheels and a fender in there and Brian's set up in our other paint booth. He's also got two wheels and a fender. We're gonna finish at the same time and come together and see which one produced the same if not better results. [ spray gun hissing ] [ Music ]
Now no matter what environment you're painting in there's several factors you need to consider. One is temperature. Another is humidity, precipitation especially when you're painting in a mobile booth like I am today. So the temperature is gonna be much hotter in there today just because it's nice and warm out in our warehouse. Brian's painting in more of a temperature controlled environment. So he's gonna be using a medium reducer while I'm gonna be using a high temp reducer. [ spray gun hissing ] [Brian] As a 20 year vet guys in the collision field I've worked in a lot of shops. I've painted in a lot of places. Everything from industrial paint booths. I painted a couple of cars in the middle of a grass field, driveway. No matter where you paint though the key is the prep work. One thing I've learned over the years is little ways, tips, and tricks. One thing we like to do a lot for static electricity is to use a microfiber towel. Just regular hot warm water. Take it, wring it out, then wipe it down after your wax and grease remover is done. It'll kill the static charge without affecting anything else. [Joel] Now if you're painting with a mobile booth outside there are other factors like time of day, humidity that you also have to factor in. At the end of the day it's all about limiting contamination as much as possible and keeping your environment sterile. Don't be entering and exiting the paint booth any more than you have to. You should just be in there with that full business mindset and get stuff done. Don't be taking any pictures until everything is baked, cured, ready to rock 'n roll. Then you can start your documentation process. Looks like glass in there. That's pretty pimp. [Brian] That's bad ass dude. With that solid black tire. [Joel] I need to take a picture of that and send it to the dude that sent us the wheels. We finally got our pieces painted, baked, and they're ready to rock n' roll. Now it's time to finally reveal which one was painted where. Can you guys guess? Lock in your answers. Three, two, one. Alright Brian, stand next to the pieces you painted. Fake out! Now Brian used our industrial paint booth to paint his fender and his wheels, and honestly it came out great but the stuff that I painted in the Mobile Environmental Solutions booth came out just as good. If you're just a hobbyist at home that just wants a pop up paint booth for painting cars, parts, or anything like that this is a great solution for you. Again an industrial paint booth is a great think to have but if you don't have access to one this is a great option. [Brian] Up next, a quick trick when your deck lid's toast and you want to match back to that factory stripe without guessing.
[Brian] Paint jobs are an aesthetic or pretty part of a build. A lot of people like to go back, factory stripes, things like that that may not be available. So let's talk a little bit about how to duplicate a factory stripe even in your garage with some basic tools and some basic materials that you have at home. We want to duplicate this factory Swinger stripe and try to make it as close to factory as possible without ordering a kit. First thing we're gonna do, let's clean the surface. Just regular glass cleaner. Not a lot. I just want to get all the dust off. I'm gonna show you two different techniques on this. One, just some paper and basic tracing to duplicate it. Two, we're gonna put down some fine line tape and do the same so you can see the difference in those. After you get your surface clean lay your paper out. Make sure everything is good and taut. We want it to be as accurate as possible, especially if you're trying to duplicate that factory look. Now remember this is just to duplicate the stripe. This is not locating exactly where it is. We can do those measurements later on. I'm just showing you how you can do this with basically a pencil, and paper, and some tape. Now I'm just gonna scribble over the top of my factory stripe location on my paper. So I'm not putting a whole lot of pressure on it but I am going over where I know for a fact the stripe's gonna be. I'm just looking for that difference. You can start to see it show up. Right here's the edges of it from your stripe itself. Luckily with this stripe guys the center is a solid section all the way across. It has two quarter inch stripes on the exterior. So not a huge intricate design if you will. So pretty simple. Let's talk about the other way. I'm gonna use quarter inch fine line tape and I'm gonna basically follow the factory stripe and what's left of it or the impression that's there in the trunk. Keep your tape pulled tight guys. You don't want to stretch it though being vinyl tape. We want to run it in the longest pieces that we can. You want to stripe the entire side at once. Not in pieces or panel sections okay. I'm just getting something and eyeballing it as close as I can keep it to the factory. Remember I'm just gonna show you what it looks like if there was more of the stripe left on the trunk. I understand this is not gonna be perfect as I am doing one side at a time here, but you're getting the idea and the technical aspect of it. This works really good for at home people who don't want to spend a lot of money or if you had that special one off project for stripes aren't even available anymore. This would be another option for you. This is gonna allow me to transfer this design a lot faster and a lot more precise because there's more stripe left. I'm gonna pull this down tight. As tight as I can get it, and we're gonna repeat the process with the pencil scribbling over my design. You should be able to see the difference when there's more material on here. I don't even have to do it quite as hard. Then I can go back and smudge it and there's a defined line. Another way to do this I've seen people, just d-i-y stuff. You can actually take chalk box chalk like used for construction. Put it in a shop towel or a microfiber. Then that powder's fine enough to go through that. I do like the guide coat powdered form with the foam pad a lot better than the pencil. Actually I'm gonna turn this one around so you can see it more clearly. If I was to lay them and orientate the lines together as you see both ways will work. Definitely this is a lot more clear to be able to follow. If you had the time and some tape to put down a fine line and trace the factory then you could scrub it over top. But now I have a duplicating ability for my design. I can measure in between them if I need to to get my stripe width. I could do my stripe gap. I could do my orientation on the panel from rear to front, front to rear, side to side and still have a factory look from my home. God that hurts my feelings so bad to do that. [ Music ]
Another quarter. [ Music ]
Make my gap and then I'm gonna pull the green tape off and that's what's gonna be black. Putting down what I'm picking up? [ Music ]
So a little over seven inches but the same all the way across in the middle. Three quarter inch gap, quarter inch stripe. So everything that's untapped will be black and then we'll cover the rest of it. [ spray gun hissing ] [ Music ]
I think we hit the bullseye with our color choice. That red is loud but definitely matches what we have in store for the rest of this build. [Joel] She may not have an engine yet but what we've got lined up for this thing will make a Mopar fan out of anybody who loves American muscle. We've got our sights set on plenty of bad ass upgrades but I think what we've accomplished today has lit the fuse on this red rocket ship.
Detroit Muscle Featured Projects
Detroit Muscle Builds


Want more content like this?
Join the PowerNation Email NewsletterParts Used In This Episode

Mobile Environmental Solutions
Mobile Inflatable Paint Booth

Summit Racing
Summit Racing 2-Stage System - 3.5 Low VOC Base Coat Paint



