
Video Transcript
[Brian] You are watching Powernation!
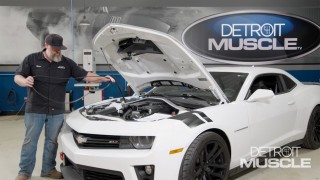
[Brian] Today on Detroit Muscle we have a new project in the shop. 500 horsepower is fun but only if your ride can handle it. We tune things up adding better spark, improving our air flow, and slapping on some exhaust to match the muscle that we're making under the hood. Then we bolt on some track ready brakes to be able to handle those corners when we push our ride to the limit. We've got muscle, mayhem, and it's gonna get loud. [ Music ] [ engine revving ] [ Music ] [ tires squealing ] [Brian] Woo! [ Music ] It's nuts man, crazy! She just goes man. She just goes! [ engine revving ] [Joel] You're not doing anything this car wasn't engineered already to do. As GM intended. [Brian] It seems super nimble. Like go into a corner and it'll just suck down and go. [Joel] This is our latest project, a 2015 Chevrolet Camaro ZL1. Even in its stock form this car packs a mean punch. The ZL1 is the top tier performance package for the Camaro and it's Chevy's answer to the Ford Shelby GT500. [ Music ] You're right never gets old. [Brian] No way man. Let her eat! [ Music ] This Camaro's rockin' with 580 horsepower under the hood but this high mileage high performance ride definitely still has room for improvement. This 350Z was coming hard buddy. He turned out of that gas station back there. He was getting it as hard as he could. [Joel] Probably some young kid and he thinks you're a young kid too. Or it's a young kid who thinks you're a hot chick in a ZL1 Camaro. [Brian] Wait til he sees my beard! [Joel] Oh man, that's the third time this week! [Brian] The seat's just like a warm hug. [Joel] That's why they're built like that. They know it sucks you back in and then whoosh. [ engine revving ]
Well we got our project out and about. It's got a lot of cool features. Supercharged LS, six speed, but the reality is we're not familiar with its maintenance history. So we're gonna stop in, talk to a few friends, get some new parts. Good morning boss. [ ] Good morning guys. [Brian] I had an online pickup order for Detroit Muscle. [ ] Looks to be some tune-up stuff? Be right back guys. [Brian] We gonna eat soon? Second breakfast is always the best Joel. [ ] Got you all bagged up and ready to go. Is there anything else?
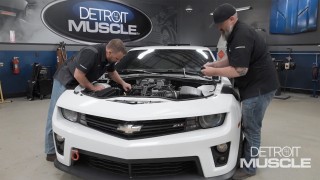
[Joel] Really? [Brian] It's for my kid. [Joel] Ring it up. [ ] Got you. [Brian] Thanks for my car. [Joel] Don't thank me. We've got our Camaro back in the shop. We removed the hood, the strut brace, and the engine cover so you guys can see what we got going on. First thing we're gonna tackle is a tune-up kit with some new plug wires, plugs, and coil packs. [ ratchet clicking ] [ Music ]
[Joel] Tight? [Brian] Not no more! [ Music ]
[Joel] One down, seven to go. [Brian] As you know, buying a used vehicle you don't know the full maintenance history or the full history of upkeep and how it was driven before you purchased it. So a tune-up never hurts. It always helps and benefits fuel economy, horsepower, and something with over 500 horsepower like we have here the more spark we can get the more horsepower output we can get from this. A more complete burn in the cylinder helps all the way around. [Joel] What do you think the story is on the first LS swap? Think it was just two dudes hanging out in the garage like 2am? One guy said to the other hey, see that old Tahoe I got out back? I think that engine will fit in my Camaro. What do you say? [Brian] Bet it won't. Glad these are so easy to get to. [Joel] Are you saying that sarcastically. [Brian] 100 percent. While this tune-up may seem unnecessary looking at spark plugs can give you a more in-depth look at the maintenance history and how your vehicle's been driven throughout its life. Plug number one don't look bad. Iridium factory plug. Oil soaked plugs, fuel soaked plugs. A lean condition, a fat condition as we call it, broken porcelain. These are all things that could indicate something more serious internal going on with your engine. The worst one yet but still not bad. [Joel] Mine wasn't bad either. The one I've gotten out so far. At least they're not fowled. [Brian] Torque spec good enough. [Joel] Kinda cool how they engineered these. It's like they pushed that whole engine back to give it more center of gravity. Like it's recessed into the firewall a little bit. [Brian] It does sit back further. [Joel] Hmm! [Brian] Did you get it? [Joel] Umm hmm! [Brian] All that noise I hope you did. [Joel] Hurt my pride while I was at it and my finger. Oww! Yep, yep, yep. I can see why you like to do body and fender work. [Brian] I'm just waiting on the air bag to deploy while I'm doing this. Wonder how much hate I would get if I put these on with an impact? [Joel] Can't be much worse than the hate we're gonna get just for taking the hood off to do a tune-up. That's what these tests are for. [Brian] These, they fit so good. Ta-ting! I'm almost done. What's your story? [Joel] Just hanging out. [Brian] Up next, we'll show you how to test your spark and spruce up your old engine cover to look like it's carbon fiber.
[Brian] So we're doing our basic tune-up here on our 2015 ZL1 Camaro. We've already done plugs. We've done coil packs. We're also replacing the wires but we want you to know why it's important to do all this. So you buy a high mileage vehicle, unknown maintenance history. Moving forward it's just a general practice and a good practice for fuel economy and power. Let's talk about a couple of tests and checks you can do with your plug wires to determine if they in fact need to be changed. Some common signs, radio feedback, buzzing noise from your electrical system in your vehicle. You may see a performance problem, a misfire. Something like that you can't get rid of could be as simple as an incorrect resistance value or a porous wire. As long as you have a digital volt ohm meter or an ohm meter you could test your plug wires. So we're gonna set our ohm meter to ohms. A good practice is to touch your leads together and you need a resistance value. Whatever reading is gonna tell your internal resistance of your leads to your meter. Right now I'm readying .3 ohms of resistance. I know my fuse is good in my meter. Now we can get to testing. All you're gonna do is simple place one lead into one wire. The other lead into the opposite end of the same wire. If for some reason it reads "OL" that means it's open. There's a break or there's a contact or continuity problem somewhere in this wire, whether it's between my leads or not. One lead in one end of the wire. The other lead in the opposite end and I'm at 1.65 kiloohms of resistance in this wire. Anything approaching one to two thousand ohms of resistance it's definitely time to change your wires. However there's nothing wrong with a little preventative maintenance for your vehicle. Other than visual inspection looking at the wire, looking for obvious holes, things like that. If you've had the hood open at night while your vehicle's running you can see the sparks jump from the wire to a metal surface. A valve cover if you will. So then you're losing complete fire in that cylinder. It's showing as a miss or a dead cylinder when it's nothing more than a porous plug wire. While we're doing our tune-up under the hood I also want to show you guys a quick way to make your stock engine cover look like you upgraded to a carbon fiber one. All you need is some shelving paper, a little elbow grease, and some give a damn. I'm not going for full coverage as I'm using satin black. I just want to make sure it sticks and tacks up well. I'm gonna let that dry for a minute and we'll put another coat. [ aerosol can hissing ] [ Music ] [Brian] She's good to go man. This is your typical shelving paper that you can buy at any local store near you. Depending on the style of carbon fiber design that you want would depend on the holes that are in your shelving paper. We wanted a more custom design. So we left the center black. We're gonna pull these out on the sides and get them taped up. Make sure you get it larger than your area cause you want it to overlap your corners and where you think you're wanting it. Just so it holds it on there. Another good tip to remember guys is to try this before you put it on your piece that you're working on. So a piece of cardboard, flat metal, anything that can mimic that same part or piece that you're gonna paint is a good way to see what it's gonna look like before you ruin your piece. While I'm putting it on here I'm trying to keep it pulled as tight as I can. It makes the design more clear. [ Music ]
Next up, apply the silver. Remember, light coats until we get coverage that we want. We got our silver over the top of our black. It's time to peel it off and take a look. Be careful when you're peeling it. You don't want it to stick to your surface. So start at one end and work your way around. I'm gonna loosen it at the top. Then I'm gonna have to peel from underneath. A couple cool things about this too guys. Remember I said earlier the carbon fiber look or the faux look that you're going for is completely up to you. It's whatever works for you and your application. [Joel] Up next, we swap out our intake and exhaust for more power, better sound, and a cleaner look under the hood.
[Brian] In addition to our tune-up we wanted to add a cold air intake to this vehicle. So a cold air intake will increase the volume of air coming in your engine as well as the temperature of the air being drawn in. So it gives you a complete burn and a lot higher combustion value inside the cylinder of our vehicle. We've already got the battery disconnected as well cause it'll have to go through a re-learn through p-c-m knowing that we have a different volumetric of air coming in it'll have to account for. [ ratchet buzzing ] [Joel] Make sure your clamps are loose. That way it's easy to come off, no binding. Pretty clean. [ Music ]
Looking at this I've never seen this before, especially with a factory box like this. While it may increase the air flow. You may get more air in, just cutting a hole in the back of a factory air box is introducing all the dirt, debris, water. Internally moisture coming in is throttle plate rust, pistons, rings, valve seats, anything like that will cause detrimental failure later down the road. I'm gonna uninstall this breather end into the actual intake elbow itself and get it mounted on the throttle body first. That will be the next steps in the install. Good to go. Now I'm gonna rock it back and forth to get it to go up on the throttle body. I'm gonna leave it loose at this time cause I don't know how much of angle we're gonna have to have it. Next we're gonna put the mass air flow housing in the other end of the inlet tube. I am gonna put some glass cleaner on it so it slicks it up a little bit. I've got it recessed all the way back to where it was in the tube as well. I'm gonna leave this band clamp loose in case we have to turn it or move it as well. My intake box here, you can see it's just three quarter turn screws. So I'm gonna go ahead and loosen those and take the top off of this. Next we'll dry fit the base of the box into our factory location. We put one of the 10 millimeter bolts back in over that stud so the box don't slide around. Make sure you don't pinch your windshield washer line that runs to your nozzles under your hood. [ ratchet humming ] Next will be installing the filter element. This will go through the box to the other end of the tube. [ Music ] [ ratchet clicking ] Make sure you don't overtighten these guys. You can just snug them up so they're good and tight. This could be done pretty simple in your own garage or driveway. Nothing major here. Just take your time and make sure everything fits like it should. Install the mass air flow sensor. Make sure it's debris clean. Nothing in there. Make sure it's nice before you go putting it down into your intake. [ Music ] Install my hose from my intake. Make sure it's snapped together. [ Music ]
Make sure everything lines up before you go shoving it down in here too guys. There it went. Good to go. [Joel] The selection of your exhaust system is gonna be one of the most important decisions you make on your build because it's gonna dictate the overall character. From the factory the exhaust that came on this car actually isn't bad. It's got a nice, clean sound but we want it to be more aggressive. We want this thing to make a statement upon its arrival. [ metal clanging ] [ Music ]
[Brian] Almost got it didn't you? [Joel] We'll have to look at that on the instant replay. See how close I got to your finger. [ slow warped speaking ] I think you got more Deep Creep on the floor than you did on the bolts. This car having a supercharged LSA it needs to have that signature loud aggressive sound to it. So we called up the guys at Holley and ordered a Flowmaster American Thunder exhaust system. This is gonna give our car that aggressive sound while also maintaining that 50 state compliance. There we go! Look at that! This is passenger side. [Brian] You see it up there? [Joel] A little bit. As a lot of you guys know, the more horsepower you're pushing through your engine the more air and fuel gets sucked into the intake. Therefore more air needs to get pushed out the exhaust. So something like this is gonna help with that. [Brian] This is gonna sound so bad ass. [Joel] This is gonna sound like how a muscle car should sound like. This is gonna be awesome. [ Music ]
[Brian] This side needs to come down a little bit. [Joel] Moment of truth now buddy. Let's see what she sounds like. [ engine starts ] [Brian] Oh yeah! [Joel] Yes sir! [ engine revving ] [Joel] That's what a muscle car should sound like. [Brian] Yes sir! [Joel] Yep. Coming up, we beef up our brakes to keep all that performance in check.
[ Music ] [ drill humming ] [ Music ]
[Joel] They got that one tight enough. [ Music ]
[Brian] They should have used longer bolts. [Joel] Long winded ain't they. We've got way bigger plans for this Camaro than just cruising it around town. Eventually we want to rip it around the track. So we need to swap out our stock brakes for some drilled and slotted rotors that we got from Powerstop. These kinda help dissipate a lot of heat and friction. If you were trying to do any kind of high performance applications where you're going really fast and stopping really fast that generates a lot of heat but drilled and slotted rotors provides some ventilation. Too much heat in your brakes can cause warpage, excessive wear, and eventually they will fail. Mine popped off. When you're going that fast around a track you kinda want your brakes to work. Show you how you do it in the pros. Got it Brian. [Brian] You break it loose? [Joel] Yep. Just had to get some man on it. Until he shows up I guess we've got to work with what we got. [Brian] Will work for now. [ hammer tapping ] [Brian] Sure we're getting the surface rust off cause it is hub centric. In other words it goes over this center of the wheel hub, the rotor does. So we want it to slide on easy and not cause us no problems. Just cleaning the surface rust off. Try not to remove a bunch of material cause you don't want it to be smaller than what it was. Good enough. [ grinder buzzing ] [ Music ]
Drilled and slotted! [ Music ]
Like a glove! [ Music ]
Ah, they got new pins too. [ Music ]
Hammer and thumb not good. [ Music ]
[ hammer tapping ]
Obviously that's not the right order. [ Music ]
[Joel] Why is it always me? [ Music ]
[ ratchet clicking ] [ Music ]
[Brian] Impressive. [Joel] Thanks, installed it myself! [Brian] Maybe I'll put mine in upside down. I don't guess it really matters. [ Music ]
I got underneath the car and hit them from the back of them. Make sure them pins went all the way in. One of us is right. I don't know which one cause I didn't pay attention when I pulled it off. [Joel] Yours looks more right.
Show Full Transcript
[Brian] Today on Detroit Muscle we have a new project in the shop. 500 horsepower is fun but only if your ride can handle it. We tune things up adding better spark, improving our air flow, and slapping on some exhaust to match the muscle that we're making under the hood. Then we bolt on some track ready brakes to be able to handle those corners when we push our ride to the limit. We've got muscle, mayhem, and it's gonna get loud. [ Music ] [ engine revving ] [ Music ] [ tires squealing ] [Brian] Woo! [ Music ] It's nuts man, crazy! She just goes man. She just goes! [ engine revving ] [Joel] You're not doing anything this car wasn't engineered already to do. As GM intended. [Brian] It seems super nimble. Like go into a corner and it'll just suck down and go. [Joel] This is our latest project, a 2015 Chevrolet Camaro ZL1. Even in its stock form this car packs a mean punch. The ZL1 is the top tier performance package for the Camaro and it's Chevy's answer to the Ford Shelby GT500. [ Music ] You're right never gets old. [Brian] No way man. Let her eat! [ Music ] This Camaro's rockin' with 580 horsepower under the hood but this high mileage high performance ride definitely still has room for improvement. This 350Z was coming hard buddy. He turned out of that gas station back there. He was getting it as hard as he could. [Joel] Probably some young kid and he thinks you're a young kid too. Or it's a young kid who thinks you're a hot chick in a ZL1 Camaro. [Brian] Wait til he sees my beard! [Joel] Oh man, that's the third time this week! [Brian] The seat's just like a warm hug. [Joel] That's why they're built like that. They know it sucks you back in and then whoosh. [ engine revving ]
Well we got our project out and about. It's got a lot of cool features. Supercharged LS, six speed, but the reality is we're not familiar with its maintenance history. So we're gonna stop in, talk to a few friends, get some new parts. Good morning boss. [ ] Good morning guys. [Brian] I had an online pickup order for Detroit Muscle. [ ] Looks to be some tune-up stuff? Be right back guys. [Brian] We gonna eat soon? Second breakfast is always the best Joel. [ ] Got you all bagged up and ready to go. Is there anything else?
[Joel] Really? [Brian] It's for my kid. [Joel] Ring it up. [ ] Got you. [Brian] Thanks for my car. [Joel] Don't thank me. We've got our Camaro back in the shop. We removed the hood, the strut brace, and the engine cover so you guys can see what we got going on. First thing we're gonna tackle is a tune-up kit with some new plug wires, plugs, and coil packs. [ ratchet clicking ] [ Music ]
[Joel] Tight? [Brian] Not no more! [ Music ]
[Joel] One down, seven to go. [Brian] As you know, buying a used vehicle you don't know the full maintenance history or the full history of upkeep and how it was driven before you purchased it. So a tune-up never hurts. It always helps and benefits fuel economy, horsepower, and something with over 500 horsepower like we have here the more spark we can get the more horsepower output we can get from this. A more complete burn in the cylinder helps all the way around. [Joel] What do you think the story is on the first LS swap? Think it was just two dudes hanging out in the garage like 2am? One guy said to the other hey, see that old Tahoe I got out back? I think that engine will fit in my Camaro. What do you say? [Brian] Bet it won't. Glad these are so easy to get to. [Joel] Are you saying that sarcastically. [Brian] 100 percent. While this tune-up may seem unnecessary looking at spark plugs can give you a more in-depth look at the maintenance history and how your vehicle's been driven throughout its life. Plug number one don't look bad. Iridium factory plug. Oil soaked plugs, fuel soaked plugs. A lean condition, a fat condition as we call it, broken porcelain. These are all things that could indicate something more serious internal going on with your engine. The worst one yet but still not bad. [Joel] Mine wasn't bad either. The one I've gotten out so far. At least they're not fowled. [Brian] Torque spec good enough. [Joel] Kinda cool how they engineered these. It's like they pushed that whole engine back to give it more center of gravity. Like it's recessed into the firewall a little bit. [Brian] It does sit back further. [Joel] Hmm! [Brian] Did you get it? [Joel] Umm hmm! [Brian] All that noise I hope you did. [Joel] Hurt my pride while I was at it and my finger. Oww! Yep, yep, yep. I can see why you like to do body and fender work. [Brian] I'm just waiting on the air bag to deploy while I'm doing this. Wonder how much hate I would get if I put these on with an impact? [Joel] Can't be much worse than the hate we're gonna get just for taking the hood off to do a tune-up. That's what these tests are for. [Brian] These, they fit so good. Ta-ting! I'm almost done. What's your story? [Joel] Just hanging out. [Brian] Up next, we'll show you how to test your spark and spruce up your old engine cover to look like it's carbon fiber.
[Brian] So we're doing our basic tune-up here on our 2015 ZL1 Camaro. We've already done plugs. We've done coil packs. We're also replacing the wires but we want you to know why it's important to do all this. So you buy a high mileage vehicle, unknown maintenance history. Moving forward it's just a general practice and a good practice for fuel economy and power. Let's talk about a couple of tests and checks you can do with your plug wires to determine if they in fact need to be changed. Some common signs, radio feedback, buzzing noise from your electrical system in your vehicle. You may see a performance problem, a misfire. Something like that you can't get rid of could be as simple as an incorrect resistance value or a porous wire. As long as you have a digital volt ohm meter or an ohm meter you could test your plug wires. So we're gonna set our ohm meter to ohms. A good practice is to touch your leads together and you need a resistance value. Whatever reading is gonna tell your internal resistance of your leads to your meter. Right now I'm readying .3 ohms of resistance. I know my fuse is good in my meter. Now we can get to testing. All you're gonna do is simple place one lead into one wire. The other lead into the opposite end of the same wire. If for some reason it reads "OL" that means it's open. There's a break or there's a contact or continuity problem somewhere in this wire, whether it's between my leads or not. One lead in one end of the wire. The other lead in the opposite end and I'm at 1.65 kiloohms of resistance in this wire. Anything approaching one to two thousand ohms of resistance it's definitely time to change your wires. However there's nothing wrong with a little preventative maintenance for your vehicle. Other than visual inspection looking at the wire, looking for obvious holes, things like that. If you've had the hood open at night while your vehicle's running you can see the sparks jump from the wire to a metal surface. A valve cover if you will. So then you're losing complete fire in that cylinder. It's showing as a miss or a dead cylinder when it's nothing more than a porous plug wire. While we're doing our tune-up under the hood I also want to show you guys a quick way to make your stock engine cover look like you upgraded to a carbon fiber one. All you need is some shelving paper, a little elbow grease, and some give a damn. I'm not going for full coverage as I'm using satin black. I just want to make sure it sticks and tacks up well. I'm gonna let that dry for a minute and we'll put another coat. [ aerosol can hissing ] [ Music ] [Brian] She's good to go man. This is your typical shelving paper that you can buy at any local store near you. Depending on the style of carbon fiber design that you want would depend on the holes that are in your shelving paper. We wanted a more custom design. So we left the center black. We're gonna pull these out on the sides and get them taped up. Make sure you get it larger than your area cause you want it to overlap your corners and where you think you're wanting it. Just so it holds it on there. Another good tip to remember guys is to try this before you put it on your piece that you're working on. So a piece of cardboard, flat metal, anything that can mimic that same part or piece that you're gonna paint is a good way to see what it's gonna look like before you ruin your piece. While I'm putting it on here I'm trying to keep it pulled as tight as I can. It makes the design more clear. [ Music ]
Next up, apply the silver. Remember, light coats until we get coverage that we want. We got our silver over the top of our black. It's time to peel it off and take a look. Be careful when you're peeling it. You don't want it to stick to your surface. So start at one end and work your way around. I'm gonna loosen it at the top. Then I'm gonna have to peel from underneath. A couple cool things about this too guys. Remember I said earlier the carbon fiber look or the faux look that you're going for is completely up to you. It's whatever works for you and your application. [Joel] Up next, we swap out our intake and exhaust for more power, better sound, and a cleaner look under the hood.
[Brian] In addition to our tune-up we wanted to add a cold air intake to this vehicle. So a cold air intake will increase the volume of air coming in your engine as well as the temperature of the air being drawn in. So it gives you a complete burn and a lot higher combustion value inside the cylinder of our vehicle. We've already got the battery disconnected as well cause it'll have to go through a re-learn through p-c-m knowing that we have a different volumetric of air coming in it'll have to account for. [ ratchet buzzing ] [Joel] Make sure your clamps are loose. That way it's easy to come off, no binding. Pretty clean. [ Music ]
Looking at this I've never seen this before, especially with a factory box like this. While it may increase the air flow. You may get more air in, just cutting a hole in the back of a factory air box is introducing all the dirt, debris, water. Internally moisture coming in is throttle plate rust, pistons, rings, valve seats, anything like that will cause detrimental failure later down the road. I'm gonna uninstall this breather end into the actual intake elbow itself and get it mounted on the throttle body first. That will be the next steps in the install. Good to go. Now I'm gonna rock it back and forth to get it to go up on the throttle body. I'm gonna leave it loose at this time cause I don't know how much of angle we're gonna have to have it. Next we're gonna put the mass air flow housing in the other end of the inlet tube. I am gonna put some glass cleaner on it so it slicks it up a little bit. I've got it recessed all the way back to where it was in the tube as well. I'm gonna leave this band clamp loose in case we have to turn it or move it as well. My intake box here, you can see it's just three quarter turn screws. So I'm gonna go ahead and loosen those and take the top off of this. Next we'll dry fit the base of the box into our factory location. We put one of the 10 millimeter bolts back in over that stud so the box don't slide around. Make sure you don't pinch your windshield washer line that runs to your nozzles under your hood. [ ratchet humming ] Next will be installing the filter element. This will go through the box to the other end of the tube. [ Music ] [ ratchet clicking ] Make sure you don't overtighten these guys. You can just snug them up so they're good and tight. This could be done pretty simple in your own garage or driveway. Nothing major here. Just take your time and make sure everything fits like it should. Install the mass air flow sensor. Make sure it's debris clean. Nothing in there. Make sure it's nice before you go putting it down into your intake. [ Music ] Install my hose from my intake. Make sure it's snapped together. [ Music ]
Make sure everything lines up before you go shoving it down in here too guys. There it went. Good to go. [Joel] The selection of your exhaust system is gonna be one of the most important decisions you make on your build because it's gonna dictate the overall character. From the factory the exhaust that came on this car actually isn't bad. It's got a nice, clean sound but we want it to be more aggressive. We want this thing to make a statement upon its arrival. [ metal clanging ] [ Music ]
[Brian] Almost got it didn't you? [Joel] We'll have to look at that on the instant replay. See how close I got to your finger. [ slow warped speaking ] I think you got more Deep Creep on the floor than you did on the bolts. This car having a supercharged LSA it needs to have that signature loud aggressive sound to it. So we called up the guys at Holley and ordered a Flowmaster American Thunder exhaust system. This is gonna give our car that aggressive sound while also maintaining that 50 state compliance. There we go! Look at that! This is passenger side. [Brian] You see it up there? [Joel] A little bit. As a lot of you guys know, the more horsepower you're pushing through your engine the more air and fuel gets sucked into the intake. Therefore more air needs to get pushed out the exhaust. So something like this is gonna help with that. [Brian] This is gonna sound so bad ass. [Joel] This is gonna sound like how a muscle car should sound like. This is gonna be awesome. [ Music ]
[Brian] This side needs to come down a little bit. [Joel] Moment of truth now buddy. Let's see what she sounds like. [ engine starts ] [Brian] Oh yeah! [Joel] Yes sir! [ engine revving ] [Joel] That's what a muscle car should sound like. [Brian] Yes sir! [Joel] Yep. Coming up, we beef up our brakes to keep all that performance in check.
[ Music ] [ drill humming ] [ Music ]
[Joel] They got that one tight enough. [ Music ]
[Brian] They should have used longer bolts. [Joel] Long winded ain't they. We've got way bigger plans for this Camaro than just cruising it around town. Eventually we want to rip it around the track. So we need to swap out our stock brakes for some drilled and slotted rotors that we got from Powerstop. These kinda help dissipate a lot of heat and friction. If you were trying to do any kind of high performance applications where you're going really fast and stopping really fast that generates a lot of heat but drilled and slotted rotors provides some ventilation. Too much heat in your brakes can cause warpage, excessive wear, and eventually they will fail. Mine popped off. When you're going that fast around a track you kinda want your brakes to work. Show you how you do it in the pros. Got it Brian. [Brian] You break it loose? [Joel] Yep. Just had to get some man on it. Until he shows up I guess we've got to work with what we got. [Brian] Will work for now. [ hammer tapping ] [Brian] Sure we're getting the surface rust off cause it is hub centric. In other words it goes over this center of the wheel hub, the rotor does. So we want it to slide on easy and not cause us no problems. Just cleaning the surface rust off. Try not to remove a bunch of material cause you don't want it to be smaller than what it was. Good enough. [ grinder buzzing ] [ Music ]
Drilled and slotted! [ Music ]
Like a glove! [ Music ]
Ah, they got new pins too. [ Music ]
Hammer and thumb not good. [ Music ]
[ hammer tapping ]
Obviously that's not the right order. [ Music ]
[Joel] Why is it always me? [ Music ]
[ ratchet clicking ] [ Music ]
[Brian] Impressive. [Joel] Thanks, installed it myself! [Brian] Maybe I'll put mine in upside down. I don't guess it really matters. [ Music ]
I got underneath the car and hit them from the back of them. Make sure them pins went all the way in. One of us is right. I don't know which one cause I didn't pay attention when I pulled it off. [Joel] Yours looks more right.