
In This Episode
- 0:01 Introduction to the Project
- 0:30 Removing Rust and Preparing for Paint
- 2:00 Applying POR-15 Engine Enamel
- 3:59 Addressing Floorboard Issues
- 5:00 Cutting and Preparing New Panels
- 6:12 Using Clecos for Panel Alignment
- 7:24 Welding New Panels
- 10:40 Stripping and Preparing for Paint
- 13:05 Applying Epoxy Primer
- 14:35 Applying High Build Primer
- 16:51 Sanding and Preparing for Paint
- 18:58 Applying 2K Primer
- 19:25 Final Preparations and Reflections
Video Transcript
[Brian] You are watching Powernation.
[Brain] Today on Detroit Muscle we square off against rust, dust, and mother nature. We find a few hidden surprises as we continue to work on our '56 Chevy. Here's our first patch panel. [Joel] We dig in and get our hands dirty removing the malignant metal from Project Shell Shock to make this bodacious bowtie rust free and ready for paint. That's why the nickname for rust is cancer. [ Music ] [ engine revving ] [ Music ] [Joel] This might be the most solid Tri-Five Chevy I've ever seen in my entire life. This is our 1956 Chevrolet 210 Sedan that we have dubbed as Project Shell Shock. The quarter panels, rockers, doors, and even the fenders are super solid. However we do got a little bit of rust that we need to address. So we're gonna do a little hands on work and see what we can do about cleaning up all of that rust and get this thing ready for paint. [ grinder buzzing ] [ Music ] With this car we're not doing a full blown restoration. We mostly want to just get it ripped down the track as soon as possible. So to do any kind of sand blasting or chemical dipping we'd have to pull all the trim, all the interior, all the glass. Literally every nut, bolt, and screw would have to come out of this thing. It's cleaning up pretty good too. So we're just gonna do a quick scuff and shoot. Get some of this grease off the firewall. Lay down the POR-15 and just spruce it up a bit. It's like somebody's done a little bit of a rattle can overhaul on this firewall already at some point. [ Music ]
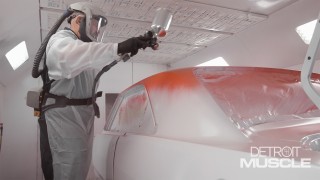
[Brian] Alright guys, we got the '56 in the booth. Got it all prepped and ready. We're gonna apply some POR-15 engine enamel. We're gonna paint the firewall with this. A lot of high temperatures and heat are generated under there. While we're at it we're gonna go ahead and do the trunk floor so we don't have to mix multiple products. Remember it's recommended while using this do not reduce any more than ten percent per can. Normal mid temp reducer is what we're using. Make sure any time you start to mix paint you stir it thoroughly and make sure that it mixes together complete. We're looking for the consistency of milk so it'll flow through the gun and apply evenly. I think we're good to go. Don't forget to strain it before you put it in your gun. [ spray gun hissing ] [ Music ]
[Joel] Now overall the paint on our firewall and our trunk pan we're actually still in pretty good shape after 70 years but this is one of those easy jobs where if you just spend a couple of hours it can really elevate the build and clean up your engine bay. [ spray gun hissing ] [ Music ] [Brian] As you know we're putting the POR-15 on our vehicle out here. For this application we chose to spray it on instead of brushing or rolling which you can do with their product. I'm using the h-v-l-p gravity feed gun. So about 10 to 15 psi worth of air pressure coming out of the cap. A little goes a long way guys with this material but we're gonna put two coats to make sure everything's even and laid out. [ spray gun hissing ] [ Music ]
[ grinder buzzing ] [ Music ] [Joel] This old car's definitely in pretty good shape but it does have a little bit of a primitive repair on the passenger's side floorboard. Looks like the previous owner used galvanized steel and maybe roofing tar to keep it all together. Which will be fine for a Sunday cruiser but for the amount of horsepower we're gonna put in this thing the floorboards need to be solid. [ Music ] [Brian] Oh man, oh man! [Joel] For 70 years old it appears the floorboards on our old '56 Chevy are actually in pretty good shape although we do have a few issues here that we need to address. But since we need two patch panels and we've got two guys me and Brian are gonna divide and conquer. [ Music ]
Cool, let's glue them in and call it good. [Brian] Just get out the two part epoxy. You coming all the way to the bottom of the hump? [Joel] Yeah, mine's not that bad really. The majority of my bad stuff is in this section. [Brian] This one's in the corner here. [Joel] I'm still blown away at how good a shape these floors are in in general though. If we were just building a Sunday cruiser they'd be fine. [Brian] We'd be done. [ saw buzzing ] [ Music ]
[Joel] A common mistake a lot of people make when they're doing this kind of repair is that they will cut too much out of the car. Ideally you don't want to cut the car to match the new panel. You want to cut the new panel to match the car. Ideally you want to cut about an inch or so past the corrosion point. That way you know you're welding good metal to good metal. [ saw buzzing ] [ Music ]
That was fun. [ Music ] [Brian] Coming up, we hang tin as we install some new floor pans in our '56 Chevy.
[Joel] Looks like our panel is cut and about where we want it to be. Now the next step is to make sure this new panel is sitting nice and flush with the old panel so that we got a good outline for how much we need to cut out. To do that we've got a Summit Tech Tip for you. [ drill humming ]
Basically what I'm doing here is drilling some holes because we're getting ready to use what are called Clecos. Each time I put one of these in it's sandwiching the new panel and the old panel so close together that you've got a good outline for how much you need to cut out. Then when you go to weld in your seams it's nice, seamless, and nice and clean. [ drill humming ] [Brian] I wanted to explain what a Cleco is a little bit more in depth. It is basically a reusable rivet guys. It has a center piece of spring steel in the middle and two exterior pieces. When you depress the plunger it spreads the tips out but they come to a point at the end. When they draw back in then it tightens it up in the hold to hold two pieces of metal together at the same time. Super-fast, quick, easy, and very efficient for the job. [ Music ]
[Joel] As I'm doing this I'm kinda feeling around the panel for loose spots. Can feel that part's got a little bit of a pop-can effect to it. So you've just got to go through, start in the middle, work your way out to the edges until everything's nice and tight. [ drill humming ] [ Music ]
[ drill humming ] [ Music ]
Oh yeah, much better. It's a nice, tight fit. Panel on panel action. This is one of those times where having the right tool for the right job can really save you some time and energy. All this can be found at a one stop shop, Summit Racing. [ Music ]
[ plasma cutter hissing ]
A plasma cutter is by far one of the most efficient methods for cutting out old sheet metal. However it is one of those things that it's easy to use but easy to screw up. You always want to double check and make sure that you're not cutting through any floor braces or any structural component. [ Music ] [ plasma cutting hissing ]
Looks like this thing's sitting in here nice and flush. Got a little bit of clean up work to do on the edges as well as a little bit of hammer and dolly work, but it's all part of the process but I'm really liking how it's fitting. So let's get this stuff welded in here. [ Music ] [ welder crackling ] [ Music ]
[ welder crackling ]
[Brian] All that tar over here. [Joel] One more time around the horn I guess. [ Music ]
[Brian] Fitting good? [Joel] I'm gonna have to trim a little bit but as you know. The more you weld it the more it wants to. [Brian] Distort and warp right. [Joel] How's yours looking? [Brian] Good! [Joel] Any time you're welding on sheet metal it's gonna distort. There's no getting around it but the key is to control the heat. As we're doing this me and Brian keep an air blower by our side to help control the heat as we weld. That's gonna do a couple of things. One, it's gonna help with the fitment. And two, when you're welding on floorboards you have a tendency to have rubber insulation and all kinds of stuff underneath the car that's gonna easily catch fire. But if you maintain and control that heat it's gonna keep that stuff from catching on fire and causing any kind of hazard. And this process of welding, cooling, trimming, welding, cooling, trimming, it takes a little bit longer but the end product speaks for itself. Coming up, it's not a beach day but there's plenty of sand.
[ Music ]
[ grinder buzzing ]
[Brian] So originally we hadn't planned on painting the entire vehicle at all. We were actually just gonna touch up the white and touch up the teal both but upon further inspection the paint was just flaking off cause it's a lacquer based paint. It was a major adhesion problem and no where to feather back to. So we had to strip it to bare metal to start all over. [ grinder buzzing ] [ Music ] If you're like me guys, 20 plus years in the collision business. Time is money and efficiency. So we don't have to go everywhere looking for trash cans and places to dispose of our sandpaper. If you're from the old school and have a stick-it back pad using stick-it paper it's a good idea to take the paper when you're done, squish it together, and I just throw them in the floor. That way I'm not wasting time. I don't spend my whole day sanding. I'm gonna have to sweep the floor to get the dust and stuff up anyway. You don't have to worry about it sticking to the floor or your boot. Saves time and efficient. [ grinder buzzing ]
[Joel] What's up player! [ Music ] [ grinder buzzing ]
[ spray gun hissing ] [ Music ] [Joel] Now Brian's in there applying what is known as a DTM epoxy primer, or Direct To Metal. Now we're a big proponent of this stuff because for one it's tough. This is literally the same stuff they use on bridges and railways. Also it's gonna help seal out moisture on all of our bare metal spots and keep that old lacquer paint from lifting. [ Music ]
Once the epoxy has cured we'll go ahead and wipe it down one more time. Then we'll lay down our polyester high build primer. This stuff is really great for filling in small imperfections or waves in the metal. We've already gotten lucky with this car being pretty cherry. So it really won't take much to get this thing ready for paint. [ spray gun hissing ] [ Music ]
[Brian] So as you know guys we used some high build primer on this vehicle. We started out with a super straight vehicle to begin with. So we wanted something quick and easy to get the minor imperfections out. [ spray gun hissing ] [ Music ]
We also went with the one with built in guide coat. As you know as a body person or a painter block sanding takes a lot of your day. So this has built in guide coat in it. We did not choose to prime it pink but that's the way it comes out. As you block it down the areas becomes flat and it turns gray. That way you know everything is smooth and a level surface from then on. [ spray gun hissing ]
When we're spraying this high build primer it actually recommends a two-zero or larger fluid tip size. While we're applying this you'll notice that I've been using the siphon feed gun. Kinda went back to my roots from where I started from. The siphon feed gun tends to have a larger fluid nozzle and tip for application of thicker materials. The 2K primer that we're gonna put on after this I'm using a gravity feed gun. A 1.4 or somewhere like that. Siphon feed gun everything is pulled up through a tube out of the base of the gun. This is old technology if you will having a tube that draws the material up versus a gravity feed gun where the material is on the top. These guns were not known for balance. Matter a fact it was known to cause a lot of problems in your elbow because of the lack of balance of the gun. However it makes our job a lot more efficient. Up next, whoa! We find a stinger but its not a Kia. You pissed it off, look at it!
[ sandpaper scratching ] [ Music ] [ d/a humming ] [ Music ]
[Joel] You know what's awesome? Custom candy paint on a Tri-Five Chevy. You know what's not awesome? Sanding your life away. [ Music ] For as straight as this old car is we kinda ran into a little bit of an issue on the passenger's side door. Appears to be some old damage. Maybe scraped across a pole or a parked car, something like that. So we've gotta fix that. Unfortunately we can't use the d/a on that side. That's one of the situations where we need to do a bit of body and filler work. For what it is it's a fairly easy repair and get this thing painted before we know it.
[ d/a humming ] [ Music ] [Brian] Whoa, look at that! A wasp, a hornet. [Joel] Got it! [Brian] No you didn't. You pissed it off! [Joel] He's in my shirt! He's in my shirt! [Brian] I got it. I know what you're thinking right off the bat guys. Why are they using the d/a on a vehicle that they're trying to sand flat if you will. Let's talk about it. Super straight, sub straight to begin with. We put the high build primer on it. We used an extremely soft faced pad on the d/a as well. If you had heavy body work, if you applied a lot of filler in areas, things like that. If you had major imperfections you would need to block it first. We chose to go the different route. With a straight, sub straight that we already have we want to d/a it to get it to paint as quick as possible. [ d/a humming ] [ Music ]
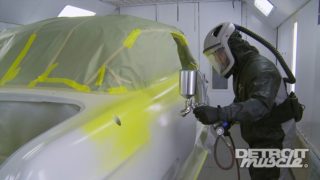
[ spray gun hissing ] [Brian] High build polyurethane primer. A couple of things you need to know. It is porous. So we have to topcoat it before it is able to be painted or be put in the booth. Sealer cannot be applied directly to polyurethane primer. So we block sanded and d/a'ed everything with 180. It's ready for 2K. We're gonna put some of that on it. We'll spray some guide coat over top. It's ready for wet sand and topcoats from there. Won't be long and it'll be ready for paint. [ spray gun hissing ] [ Music ]
[Joel] Doing paint and body work is gonna be one of the most monotonous tasks you do on your entire build but it is one of those things where you need to trust the process. You'll be priming, sanding, priming, sanding, over and over again and you're just adding more and more layers. It's gonna feel like you're not getting anywhere but it's all important. I've worked in a few hot rod shops in the past and there is something about taking that extra bit of time to make sure you're putting out a quality product. One thing my old man used to tell me is that what you put into life is what you're gonna get out of it. Brian and I have already put a lot of time and sanding into this car and I can already tell you that by the time this thing is done it's gonna be one of the most iconic gassers you've ever seen. I don't think Chevrolet wanted that coming off did they? [Brian] No boy, not at all! Now we've gotten our old '56 Chevy looking like a whole different vehicle. [Joel] Come on baby. [Brian] We've given her a face lift, busted loose some rusty bolts. Being stubborn. [Joel] Gotta get angry with it. [Brian] Even had to do a little bit of invasive surgery to remove 70 years of crud and corrosion in order to separate the body from the frame. [Joel] Big guy, you want to do the honors? [Brian] Going up! [ lift – mechanical humming ] [Joel] All the way to the top. We also pulled all the interior and we're pleasantly surprised. Now I've got enough air fresheners in here to last us a couple of winters really. However we did find a couple of small problems. Oh boy! But with some elbow grease and a little sweat from our brow we've got this car sanded flat. Ready for paint to get it one step closer to its new lease on life.
Show Full Transcript
[Brain] Today on Detroit Muscle we square off against rust, dust, and mother nature. We find a few hidden surprises as we continue to work on our '56 Chevy. Here's our first patch panel. [Joel] We dig in and get our hands dirty removing the malignant metal from Project Shell Shock to make this bodacious bowtie rust free and ready for paint. That's why the nickname for rust is cancer. [ Music ] [ engine revving ] [ Music ] [Joel] This might be the most solid Tri-Five Chevy I've ever seen in my entire life. This is our 1956 Chevrolet 210 Sedan that we have dubbed as Project Shell Shock. The quarter panels, rockers, doors, and even the fenders are super solid. However we do got a little bit of rust that we need to address. So we're gonna do a little hands on work and see what we can do about cleaning up all of that rust and get this thing ready for paint. [ grinder buzzing ] [ Music ] With this car we're not doing a full blown restoration. We mostly want to just get it ripped down the track as soon as possible. So to do any kind of sand blasting or chemical dipping we'd have to pull all the trim, all the interior, all the glass. Literally every nut, bolt, and screw would have to come out of this thing. It's cleaning up pretty good too. So we're just gonna do a quick scuff and shoot. Get some of this grease off the firewall. Lay down the POR-15 and just spruce it up a bit. It's like somebody's done a little bit of a rattle can overhaul on this firewall already at some point. [ Music ]
[Brian] Alright guys, we got the '56 in the booth. Got it all prepped and ready. We're gonna apply some POR-15 engine enamel. We're gonna paint the firewall with this. A lot of high temperatures and heat are generated under there. While we're at it we're gonna go ahead and do the trunk floor so we don't have to mix multiple products. Remember it's recommended while using this do not reduce any more than ten percent per can. Normal mid temp reducer is what we're using. Make sure any time you start to mix paint you stir it thoroughly and make sure that it mixes together complete. We're looking for the consistency of milk so it'll flow through the gun and apply evenly. I think we're good to go. Don't forget to strain it before you put it in your gun. [ spray gun hissing ] [ Music ]
[Joel] Now overall the paint on our firewall and our trunk pan we're actually still in pretty good shape after 70 years but this is one of those easy jobs where if you just spend a couple of hours it can really elevate the build and clean up your engine bay. [ spray gun hissing ] [ Music ] [Brian] As you know we're putting the POR-15 on our vehicle out here. For this application we chose to spray it on instead of brushing or rolling which you can do with their product. I'm using the h-v-l-p gravity feed gun. So about 10 to 15 psi worth of air pressure coming out of the cap. A little goes a long way guys with this material but we're gonna put two coats to make sure everything's even and laid out. [ spray gun hissing ] [ Music ]
[ grinder buzzing ] [ Music ] [Joel] This old car's definitely in pretty good shape but it does have a little bit of a primitive repair on the passenger's side floorboard. Looks like the previous owner used galvanized steel and maybe roofing tar to keep it all together. Which will be fine for a Sunday cruiser but for the amount of horsepower we're gonna put in this thing the floorboards need to be solid. [ Music ] [Brian] Oh man, oh man! [Joel] For 70 years old it appears the floorboards on our old '56 Chevy are actually in pretty good shape although we do have a few issues here that we need to address. But since we need two patch panels and we've got two guys me and Brian are gonna divide and conquer. [ Music ]
Cool, let's glue them in and call it good. [Brian] Just get out the two part epoxy. You coming all the way to the bottom of the hump? [Joel] Yeah, mine's not that bad really. The majority of my bad stuff is in this section. [Brian] This one's in the corner here. [Joel] I'm still blown away at how good a shape these floors are in in general though. If we were just building a Sunday cruiser they'd be fine. [Brian] We'd be done. [ saw buzzing ] [ Music ]
[Joel] A common mistake a lot of people make when they're doing this kind of repair is that they will cut too much out of the car. Ideally you don't want to cut the car to match the new panel. You want to cut the new panel to match the car. Ideally you want to cut about an inch or so past the corrosion point. That way you know you're welding good metal to good metal. [ saw buzzing ] [ Music ]
That was fun. [ Music ] [Brian] Coming up, we hang tin as we install some new floor pans in our '56 Chevy.
[Joel] Looks like our panel is cut and about where we want it to be. Now the next step is to make sure this new panel is sitting nice and flush with the old panel so that we got a good outline for how much we need to cut out. To do that we've got a Summit Tech Tip for you. [ drill humming ]
Basically what I'm doing here is drilling some holes because we're getting ready to use what are called Clecos. Each time I put one of these in it's sandwiching the new panel and the old panel so close together that you've got a good outline for how much you need to cut out. Then when you go to weld in your seams it's nice, seamless, and nice and clean. [ drill humming ] [Brian] I wanted to explain what a Cleco is a little bit more in depth. It is basically a reusable rivet guys. It has a center piece of spring steel in the middle and two exterior pieces. When you depress the plunger it spreads the tips out but they come to a point at the end. When they draw back in then it tightens it up in the hold to hold two pieces of metal together at the same time. Super-fast, quick, easy, and very efficient for the job. [ Music ]
[Joel] As I'm doing this I'm kinda feeling around the panel for loose spots. Can feel that part's got a little bit of a pop-can effect to it. So you've just got to go through, start in the middle, work your way out to the edges until everything's nice and tight. [ drill humming ] [ Music ]
[ drill humming ] [ Music ]
Oh yeah, much better. It's a nice, tight fit. Panel on panel action. This is one of those times where having the right tool for the right job can really save you some time and energy. All this can be found at a one stop shop, Summit Racing. [ Music ]
[ plasma cutter hissing ]
A plasma cutter is by far one of the most efficient methods for cutting out old sheet metal. However it is one of those things that it's easy to use but easy to screw up. You always want to double check and make sure that you're not cutting through any floor braces or any structural component. [ Music ] [ plasma cutting hissing ]
Looks like this thing's sitting in here nice and flush. Got a little bit of clean up work to do on the edges as well as a little bit of hammer and dolly work, but it's all part of the process but I'm really liking how it's fitting. So let's get this stuff welded in here. [ Music ] [ welder crackling ] [ Music ]
[ welder crackling ]
[Brian] All that tar over here. [Joel] One more time around the horn I guess. [ Music ]
[Brian] Fitting good? [Joel] I'm gonna have to trim a little bit but as you know. The more you weld it the more it wants to. [Brian] Distort and warp right. [Joel] How's yours looking? [Brian] Good! [Joel] Any time you're welding on sheet metal it's gonna distort. There's no getting around it but the key is to control the heat. As we're doing this me and Brian keep an air blower by our side to help control the heat as we weld. That's gonna do a couple of things. One, it's gonna help with the fitment. And two, when you're welding on floorboards you have a tendency to have rubber insulation and all kinds of stuff underneath the car that's gonna easily catch fire. But if you maintain and control that heat it's gonna keep that stuff from catching on fire and causing any kind of hazard. And this process of welding, cooling, trimming, welding, cooling, trimming, it takes a little bit longer but the end product speaks for itself. Coming up, it's not a beach day but there's plenty of sand.
[ Music ]
[ grinder buzzing ]
[Brian] So originally we hadn't planned on painting the entire vehicle at all. We were actually just gonna touch up the white and touch up the teal both but upon further inspection the paint was just flaking off cause it's a lacquer based paint. It was a major adhesion problem and no where to feather back to. So we had to strip it to bare metal to start all over. [ grinder buzzing ] [ Music ] If you're like me guys, 20 plus years in the collision business. Time is money and efficiency. So we don't have to go everywhere looking for trash cans and places to dispose of our sandpaper. If you're from the old school and have a stick-it back pad using stick-it paper it's a good idea to take the paper when you're done, squish it together, and I just throw them in the floor. That way I'm not wasting time. I don't spend my whole day sanding. I'm gonna have to sweep the floor to get the dust and stuff up anyway. You don't have to worry about it sticking to the floor or your boot. Saves time and efficient. [ grinder buzzing ]
[Joel] What's up player! [ Music ] [ grinder buzzing ]
[ spray gun hissing ] [ Music ] [Joel] Now Brian's in there applying what is known as a DTM epoxy primer, or Direct To Metal. Now we're a big proponent of this stuff because for one it's tough. This is literally the same stuff they use on bridges and railways. Also it's gonna help seal out moisture on all of our bare metal spots and keep that old lacquer paint from lifting. [ Music ]
Once the epoxy has cured we'll go ahead and wipe it down one more time. Then we'll lay down our polyester high build primer. This stuff is really great for filling in small imperfections or waves in the metal. We've already gotten lucky with this car being pretty cherry. So it really won't take much to get this thing ready for paint. [ spray gun hissing ] [ Music ]
[Brian] So as you know guys we used some high build primer on this vehicle. We started out with a super straight vehicle to begin with. So we wanted something quick and easy to get the minor imperfections out. [ spray gun hissing ] [ Music ]
We also went with the one with built in guide coat. As you know as a body person or a painter block sanding takes a lot of your day. So this has built in guide coat in it. We did not choose to prime it pink but that's the way it comes out. As you block it down the areas becomes flat and it turns gray. That way you know everything is smooth and a level surface from then on. [ spray gun hissing ]
When we're spraying this high build primer it actually recommends a two-zero or larger fluid tip size. While we're applying this you'll notice that I've been using the siphon feed gun. Kinda went back to my roots from where I started from. The siphon feed gun tends to have a larger fluid nozzle and tip for application of thicker materials. The 2K primer that we're gonna put on after this I'm using a gravity feed gun. A 1.4 or somewhere like that. Siphon feed gun everything is pulled up through a tube out of the base of the gun. This is old technology if you will having a tube that draws the material up versus a gravity feed gun where the material is on the top. These guns were not known for balance. Matter a fact it was known to cause a lot of problems in your elbow because of the lack of balance of the gun. However it makes our job a lot more efficient. Up next, whoa! We find a stinger but its not a Kia. You pissed it off, look at it!
[ sandpaper scratching ] [ Music ] [ d/a humming ] [ Music ]
[Joel] You know what's awesome? Custom candy paint on a Tri-Five Chevy. You know what's not awesome? Sanding your life away. [ Music ] For as straight as this old car is we kinda ran into a little bit of an issue on the passenger's side door. Appears to be some old damage. Maybe scraped across a pole or a parked car, something like that. So we've gotta fix that. Unfortunately we can't use the d/a on that side. That's one of the situations where we need to do a bit of body and filler work. For what it is it's a fairly easy repair and get this thing painted before we know it.
[ d/a humming ] [ Music ] [Brian] Whoa, look at that! A wasp, a hornet. [Joel] Got it! [Brian] No you didn't. You pissed it off! [Joel] He's in my shirt! He's in my shirt! [Brian] I got it. I know what you're thinking right off the bat guys. Why are they using the d/a on a vehicle that they're trying to sand flat if you will. Let's talk about it. Super straight, sub straight to begin with. We put the high build primer on it. We used an extremely soft faced pad on the d/a as well. If you had heavy body work, if you applied a lot of filler in areas, things like that. If you had major imperfections you would need to block it first. We chose to go the different route. With a straight, sub straight that we already have we want to d/a it to get it to paint as quick as possible. [ d/a humming ] [ Music ]
[ spray gun hissing ] [Brian] High build polyurethane primer. A couple of things you need to know. It is porous. So we have to topcoat it before it is able to be painted or be put in the booth. Sealer cannot be applied directly to polyurethane primer. So we block sanded and d/a'ed everything with 180. It's ready for 2K. We're gonna put some of that on it. We'll spray some guide coat over top. It's ready for wet sand and topcoats from there. Won't be long and it'll be ready for paint. [ spray gun hissing ] [ Music ]
[Joel] Doing paint and body work is gonna be one of the most monotonous tasks you do on your entire build but it is one of those things where you need to trust the process. You'll be priming, sanding, priming, sanding, over and over again and you're just adding more and more layers. It's gonna feel like you're not getting anywhere but it's all important. I've worked in a few hot rod shops in the past and there is something about taking that extra bit of time to make sure you're putting out a quality product. One thing my old man used to tell me is that what you put into life is what you're gonna get out of it. Brian and I have already put a lot of time and sanding into this car and I can already tell you that by the time this thing is done it's gonna be one of the most iconic gassers you've ever seen. I don't think Chevrolet wanted that coming off did they? [Brian] No boy, not at all! Now we've gotten our old '56 Chevy looking like a whole different vehicle. [Joel] Come on baby. [Brian] We've given her a face lift, busted loose some rusty bolts. Being stubborn. [Joel] Gotta get angry with it. [Brian] Even had to do a little bit of invasive surgery to remove 70 years of crud and corrosion in order to separate the body from the frame. [Joel] Big guy, you want to do the honors? [Brian] Going up! [ lift – mechanical humming ] [Joel] All the way to the top. We also pulled all the interior and we're pleasantly surprised. Now I've got enough air fresheners in here to last us a couple of winters really. However we did find a couple of small problems. Oh boy! But with some elbow grease and a little sweat from our brow we've got this car sanded flat. Ready for paint to get it one step closer to its new lease on life.