


More Hard Charger Episodes


Detroit Muscle Featured Projects


Detroit Muscle Builds


Want more content like this?
Join the PowerNation Email NewsletterParts Used In This Episode

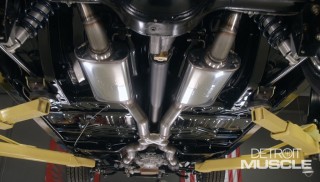
Doug's Headers
Doug's Header's '64-'72 GM A-Body LS1-LS6 Swap Ceramic Headers
Lincoln Electric
Lincoln Electric is the Official Welding Supplier to Detroit Muscle
Matco Tools
MATCO Tools are the Official Tool Supplier to Detroit Muscle
The Industrial Depot
Tools, Hardware, and Shop Supplies


