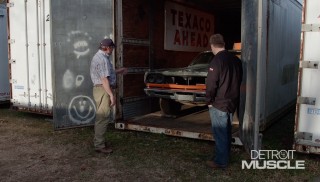
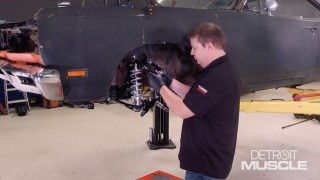
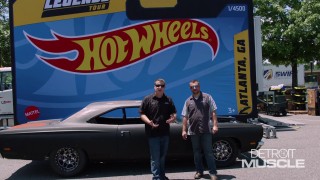
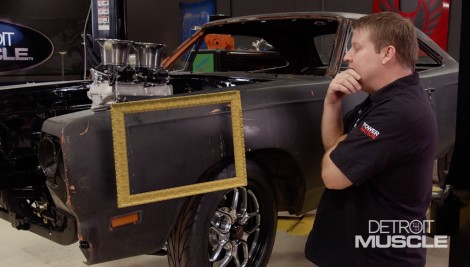
More Road Burner Episodes

Detroit Muscle Featured Projects

Detroit Muscle Builds

Parts Used In This Episode

The Industrial Depot
Tools, Hardware, Shop Supplies

Episode Transcript

(Tommy)>> You're watching Powernation!

(Tommy)>> Today class is in session, and we have several subjects to cover. We show you ways to save some cash and improve your curb appeal with little effort. Patina magic coming up! [ Music ] [ engines revving ] [ Music ]

(Tommy)>> You know guys, as we go through life we all make decisions that can and will have an effect on upcoming events. Some of these in the moment may seem a little miniscule. [ Music ] And some can put you in an awkward situation. [ Music ] And to quote mister Newton, for every action there is an equal and opposite reaction. So, what did we learn? And whenever it's all said and done it's simply science. You got us some drinks for the road?

(Joel)>> Got us some aspirin too.

(Tommy)>> That's cool, let's ride! What I'm referring to is the exterior appearance of your ride. Are you the I only like shiny kind of person, or you alright with primer, or do you prefer that worn and weathered look? Some people never really consider a car complete or finished until the paint and chrome is polished to perfection.

(Joel)>> You ever heard of the term face value? Well, that's when somebody judges your car based solely on the appearance.

(Tommy)>> Show reflections are great but there's a few draw backs. One, they're expensive. Two, it's got a lot of upkeep. And three, think about it. You always get a little nervous when someone gets too close. There are ways to make mother nature's handiwork look a whole lot better, and some of the techniques used are old school. This tip came from an older friend of mine that managed a used car lot, and this is a trick that they used to do back in the day to brighten up the color and rejuvenate that faux wood grain on their inventory. Now these three look completely different. My favorite just by rubbing oil on the side of the car is the transmission fluid. It actually looks deeper than the other two. I'm just curious how long this is gonna last, and if it's gonna stay greasy. Man, that's way greasy. Now we're gonna label all three of these. That way when we come back, we know which one's what. You know the old saying. A long hand is better than a short memory.

(Joel)>> Now some of you guys in the wood working industry are probably familiar with linseed oil. And whether that's kinda cleaning up an old piece of furniture or sprucing up all that old woodgrain in the bed of your pickup truck you've probably used this stuff before and you're familiar with how nasty and tacky it can be. So, it's not uncommon to reduce it down with some turpentine. So just for the sake of science I'll go ahead and apply this just by itself, and then we'll come back, reduce it, and then we'll do it on a different section of the panel and just kinda see which one gets the better product. [ Music ] Now just checking out the surface of this old crusty Charger you've got some original patina that might turn out pretty good, and then we've got some really nasty crusty rustiness, and being a curious cat, I am I kinda wanted to check out and see what this linseed oil does on both surfaces. [ Music ] At first glance I can already tell the stuff's making a huge difference, and if our reduced mixer looks this good, I'm pretty excited to see what the linseed oil does by itself. [ Music ] And just like Tom did over there, I'm gonna go ahead and mark my mixtures for future reference. [ Music ]

(Tommy)>> This last product that we're gonna be applying is an actual polymer paint sealant. It's designed to protect your paint. Now I'm gonna do it two different ways. I'm gonna just spray it on back here in the back, and then up here spray it on and then wipe off the excess. I'm curious to see if the amount of product on the front and back has a different sheen to it. [ aerosol can hissing ]

(Tommy)>> I'm curious that this is probably gonna work better. It almost seems like I'm rubbing or massaging the material into the surface a lot more, but we'll just have to come back and see. [ Music ] You know I really am curious to what all this stuff turns out like. You been staying busy?

(Joel)>> Oh yeah! You weren't kidding! That linseed oil's kinda nasty.

(Tommy)>> That reminds me, I know a place we can stop.

(Joel)>> I don't know if I like the sound of that.

(Tommy)>> It'll be fun, trust me! You might need some change though. Coming up, we don't turn the clock back. We crank it up.

(Tommy)>> We have a little bit more paint work that we're needing to take care of on Road Burner, and what I'm talking about isn't the usual stuff. You normally do a bunch of blocking and sanding trying to achieve a perfect reflection. It's obvious that you guys can tell that this doesn't even come close to matching this over. We can't have it sticking out like an old sore thumb. So, we need to give this thing the patina treatment. The paint itself is in pretty good shape. However, it does have a few nicks and chips here and there, and even a couple of spots of rust. To get this to look like that isn't all that difficult. There are a few techniques that you can apply, and some of them are a bit primitive. You just need the foresight of what you're trying to accomplish. You're basically creating a piece of artwork. Can you sense the anger of the artist? It's quite intense. The first thing that we're gonna address is the rust. Now normally with paint and body work corrosion is a bad thing, but in this instance, we're actually looking for a bit more. So, we've got to do some grinding. [ Music ] Obviously, we need some bare steel. So, some of that orange paint has to come off. You can use a grinder, paint stripper, or even a carbide bit. It's all up to you and what you're trying to accomplish. We're not gonna strip this entire thing. Just the spots where we want the rust. To make things rust in a hurry it don't take much. You need a heat source, a corrosion factor, and an oxygen promoter. So, if you've got one of these heating devices, some salt, and peroxide you're in business. I have painted a simulated rust effect on one of our other projects. All it took was a couple of different colors of paint and a brush, but this time we're going authentic. [ Music ] With everything all rusty and crusty now it's time to move on. On Road Burner the main paint color is black with orange under it, and some places like the top of the car the black is thin and almost worn and weathered away, but on the sides it's mainly all chipped up and has scratches here and there. This is what we're trying to duplicate. You're probably thinking the next thing we're gonna do is paint this entire panel black, and then we're gonna get all crazy and show it some corporal punishment and make it look all bruised and abuse. That's really not the case. I have a technique here that I want to apply that's a bit more refined. However, it does cause you to think a little backwards. We're using some petroleum jelly as a congealed form of masking tape. This prevents the paint we're applying from sticking to the surface. Sometimes whenever I'm applying this stuff I like to do it over a relatively large area, apply my topcoat, and then wipe it off and check it out and see what it looks like. Doing it that it allows you to fine tune your artwork cause if you don't like what you see you can just simply apply more of your topcoat. Also painting this in multiple layers, it creates a stair step effect. It's all in what you're wanting to try to do. It's kinda like you painted over chips, and then painted in more chips, and then you painted it. [ paint gun hissing ] [ Music ]

(Tommy)>> Once the paint is dry to the touch all you have to do is wipe off that petroleum jelly. Let's do that and see what this thing looks like. [ Music ] After a quick rub down with some glass cleaner it was off for the final detail. [ Music ] I have one last touch that I want to do that's gonna involve some air brushing. If you'll notice here on the top of the fender there's kind of a rust stain that runs down the top of it, and I want to continue that as if it dripped down here onto our panel. I also want to kinda complement our rust that we created. It has that stain look where the water runs down it. It won't take much but it's definitely gonna add some detail. [ Music ] So, with a couple of powder pearls mixed in some clear base coat we can simulate that aging effect. A little here, a little there, boom. What you looking at? Let me see your grille.

(Tommy)>> The next thing that we're gonna address on the outward appearance of our old rusty, crusty bird here is the grille. With this old grille it's easy to see that it's seen its better days, and I'm gonna guess they were many, many moons ago. With our chrome and bright work we want it to look fresh and clean, kinda like our bumper. You can obviously tell that it's been swapped out. Up here we've got some work to do. When these Plymouths rolled off the assembly line the grille was definitely a focal point. Mopar started with an anodized aluminum shell and gave it multiple colors and textures to increase the appeal. Around the headlight openings they used a dark gray metallic color with a rough texture. Then to add a bit of detail and to create some cool effects some semi-gloss black was used. If you look close, those two chrome rectangles seem to be floating. Now what we're about to do is what I refer to as a shade tree restoration. With our grille and headlight bezels having that anodized coating, to replicate that usually requires the help of a professional. There are companies out there that reproduce these, but maybe it's not in your budget. Or we all know that there has been some supply chain issues. So, for you chalk mark style guys out there what we're about to do isn't correct for your application. However, this procedure is gonna make these pieces stand tall when we're all said and done. So, let's check out what we're working with. Our headlight bezels really aren't in that bad of a shape. There are a few nicks here and there as expected. Kinda like this big one where the hood has actually came in contact with it. Now as for our grille it's about the same except for we've got a rather large dent here, but that's all swell and good. We'll just have to massage this stuff out first thing. [ Music ] [ bead blaster hissing ]

(Tommy)>> Shoot these things look a whole lot better just getting all that oil paint off of them. The next thing that we're gonna do is spray them down with some self-etching primer, and then follow that up with some filler primer. There are a few little blemishes here that have some nicks and stuff on them. I'm gonna use some sandpaper and mow them down first. Then we can get to priming. Now we're also gonna be using this stuff inside of our big, fancy prep station, and you don't have to have one of these. You just need to make sure where you do it is a well ventilated area. [ sandpaper scratching ] [ compressed air hissing ]

(Tommy)>> If you're wondering why we're apply etch down first it's actually to improve adhesion of our coatings. Self-etching primer has chemical adhering properties along with mechanical. Now we're gonna be applying some filler primer. This helps to fill in those nicks and chips, and small imperfections. [ aerosol can hissing ]

(Tommy)>> Now it's better to apply this stuff with several light coats. Don't try to cover it in one heavy coat. One, this allows it to dry actually faster, and more thoroughly. I feel like a graffiti artist. After a few rounds of priming and sanding our headlight bezels and grille shell is really turning out slick. The next thing we're gonna be doing is applying our color. I'm going to be using some black, some charcoal metallic, and even some simulated chrome. Now with this I'm gonna apply those in a different sequence from the headlight bezels to the grille shell because of the complexity of the shape of them. [ aerosol can hissing ]

(Tommy)>> We're gonna apply a cool little paint technique here on this silver that we just sprayed on. Now I have let this dry for about an hour, but what we're gonna do now is give this a simulated brushed effect. I'm gonna use a little gray scuff pad here, and basically all you do is drag it right across the surface. You don't' want to press down too hard, and you also don't want to do it in multiple directions cause it kinda gives it a cross hatch effect. [ Music ] I also like to use a gray and red pad. They have different grits to them, thus creating different depths of scratches. [ Music ] The last step to this little do it yourself project is gonna be applying the topcoat, or what often time is referred to a clear coat. This will give our parts quite a bit more depth and luster. [ aerosol can hissing ] [ Music ]

(Tommy)>> The results are in! Minimal effort spent, plus experimentation equals drastic improvement.

(Tommy)>> We're definitely not in the office today. We're down at Stephens Performance checking on a science experiment that we're in the middle of.

(Joel)>> We basically applied a bunch of goo to some old cars. We're gonna see which one gave us the best result, and we're gonna use it on the Road Burner project.

(Tommy)>> Speaking of project that's what this old thing is. Roll that window back up.

(Joel)>> I don't know. It's kind of a peach.

(Tommy)>> Oh she's something! A lot of fancy stuff, isn't it?

(Joel)>> Who needs sunny beaches in Florida when you've got a view like this?

(Tommy)>> Now this first car is where I applied a whole bunch of lubricants, which is basically motor oil, transmission fluid, and even some penetrating oil. Really it just looks like we cleaned it. This one here on the back where the transmission fluid is it looks a little bit more greasy. Don't really have much of a stickiness to it. The transmission fluid does look the best, but I don't think I want to go down this path. So, what'd you do up here on this one boss?

(Joel)>> Well you can kinda see right here this section's a little bit shinier than the rest of the car, and this is just linseed oil by itself, and then on this back part is a 50/50 mixture of linseed oil and turpentine. At first glance it looks like the shines are pretty similar. This one's got some stickiness.

(Tommy)>> Back here on the back it almost looks like the green is a little more concentrated. I wonder if that turpentine worked as a cleaner, but they are really close to the same, but it sucked that it's sticky. Joel, on this old yard bird here if you will I've sprayed on that polymer net shield, and on this one I sprayed it on and wiped it off. Back here I just simply squirted it onto the quarter panel. Up here it's really not sticky at all, and that red under the decal does look a lot better. It's not all faded out, yet not too shiny either. What do you think?

(Joel)>> There's a clear difference right there. Back here it's way more shiny. Almost too much really.

(Tommy)>> Is it sticky at all?

(Joel)>> Just a little bit.

(Tommy)>> Let's go further and get back to work. Believe it or not one of the main reasons we picked this exact car is he look and condition of the paint. We wanted a ride that looked battered and abused. With patina the color can be somewhat rejuvenated, and that was the whole reason we took that field trip down to the Mopar cemetery. And to basically really bring it back you have to exfoliate the surface. Laying on top is a bunch of dead paint giving you that dull gray reflection. Now you don't want to get too aggressive here. You're just trying to take off that top layer, and just like whenever you're preparing for a night out on the town and you want to look your best it's time to take a bath. Our plan of attack on cleaning this thing is super simple. We're gonna take the hose pipe, wet the surface, and then spray the body down with some heavy-duty degreaser and cleaner like you would pick up at a home improvement or even a parts store. Now after it sets for a little while we're gonna scrub it down with some of these old grease rags, and it's pretty cool to watch. You'll actually get to see some of that dead paint wind up into the floor. [ Music ] Now if you want some words of wisdom as far as the key to success here, about all I can tell you is you better be prepared to use some elbow grease. [ Music ] So, after that little science experiment that we did down there at the salvage yard the conclusion that we came up with is we're gonna be using Sonax Polymer Net Shield. This will give us the look that we want with the added benefit of some paint protection, and application of this product is as easy as it gets. [ Music ] To completely coat a car it only takes about 15 minutes to apply. You want to do this in small sections. Normally a two foot by two-foot square. [ Music ] You don't want the surface that you're using this on to be hot. It needs to be cool to the touch. It's easy to see that we went from ashy to alluring. Check it out. Our old Road Burner definitely looks a whole lot better.

(Joel)>> Plus it doesn't have a stick or greasy feel like some of those other options have. If anything she's soft to the touch.

(Tommy)>> You know I think we got quite a bit accomplished for the amount of effort we spent.

(Joel)>> So what do you want to tackle next?

(Tommy)>> I'm thinking probably a sandwich.

(Joel)>> Sounds good to me. We've still got to rock, paper, scissors on who's gonna wire this thing.

(Tommy)>> We did, you lost.
Show Full Transcript