

In This Episode
- 0:01 Introduction to the project
- 1:26 Adding chrome bed bar
- 2:11 Drilling holes in the bed
- 2:44 Installing light bracket
- 3:07 Removing exhaust manifold
- 4:44 Installing dual exhaust
- 6:38 Rebuilding rear axle
- 8:20 Rebuilding front suspension
- 9:53 Installing new wheels and tires
- 13:22 Trimming fenders for clearance
- 15:16 Adjusting suspension height
- 15:53 Upgrading engine performance
- 18:04 Testing the truck off-road
Video Transcript
You're watching Power Nation.
Welcome to Power Nation Builds.
I'm Natalie Stovall.
This is your chance to see one of our projects from start to finish in just 30 minutes.
Check this out.
Now I suppose the logical choice for a mid 90s throwback build would be a mid 90s truck,
but we've seen that before.
I wanted to see the mid 90s treatment on an early 2000s truck and that's why I picked a 2002.
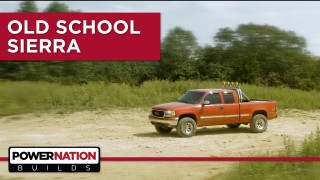
GMC Sierra 1500. Now this is probably one of the most popular used trucks on the market to this day.
They made literally millions of these things, and ours has 250,000 miles on it,
but that's OK because it runs great.
Now as far as the condition it's in, this is about as original as they come.
The three most popular modifications wheels,
exhaust, and intake
all bone stock. So this truck is basically a time capsule.
The interior,
considering its age, is in really great shape, so this is a perfect blank canvas to start our retro build.
We're adding a little mid nineties throwback styling to our extended cab GMC with this chrome bed bar and it's very simple to assemble.
The tubes are sleeves so they can slide together and a series of bolts hold it all in place.
With the main double tubes connected with the spacer in between and everything tightened down,
we get the whole thing into the bed of the Sierra.
So we're going for a bit of a retro vibe here. What do you think? Did we nail it?
Uh,
yes, I think you did. It screams 90s.
OK,
good.
I was gonna say some people,
some people think a little bit 80s or even 70s with a roll bar, but
no,
this is what I remember.
Oh, you're on the little toe hook there we go.
All right,
we're drilling holes through the bed,
so you gotta pay attention to where stuff is
this particular truck, there's a gas tank that runs right along here. This is a really long drill bit.
Now you just can be careful,
you shouldn't have any problems,
but if you jam this thing all the way through,
you might smell gas that starts to leak.
So
just kind of take your time.
You'll be all set.
The light bracket is an optional extra,
but it comes with the mounting holes pre-drilled, which makes installation of the lights a breeze,
and the whole assembly can be attached to the roll bar with two bolts.
Well, that is definitely Chuck Norris approved.
We gotta get the driver side exhaust manifold off of the engine and I already just took a peek and there's a broken off bolt on the very front port.
Now this is actually a little bit common on an LS application,
especially in a pickup truck or a vehicle that's seen higher miles.
And a lot of heat cycles basically as that fastener expands and contracts as it gets warmer and cooler, it can fatigue and just crack and basically the heads will fall off.
Like I said, it's a fairly common problem, and I'll show you how to deal with it, but first we're gonna get this manifold off the engine.
I've seen guys try to fix these bolts, drilling them out,
tapping them with like an easy out type situation.
I've done that and it'll work,
but it's time consuming and.
This is a little bit easier.
Our 40 MIG welder is the ideal tool for the job since it can quickly build up material and get down into some hard to reach places.
I'll throw in some vice grips and the broken bolt quickly backs out.
Well, all it took is one little glob welded on the end and we're able to back the bolt out.
Since we're building our GMC to be sort of like a throwback to a mid-nineties truck,
there's one thing it absolutely has to have
dual exhaust.
Before we get this thing on though,
we're gonna get some old parts off.
My method for building a custom exhaust may seem a little bit unorthodox,
but it works out pretty well for me.
This is basically a game of connect the dots, and once the major components are mounted,
all you've gotta do is fill in the gaps.
I like to build small subassemblies at a time.
Basically I'll hold up 1 or 2 or possibly 3 bends at a time,
marked for position and then tack weld everything together over on the bench.
Then I'll mg tack the big chunks together underneath the truck so I know it's all gonna fit perfectly and then remove the entire thing for finish welding over on the bench.
You don't want to spend 4 days on your back, on your floor
building a custom exhaust, and that's where the appeal of a bolt on kit like this comes in.
Everything is engineered to fit.
It goes in the stock hangers and it'll sound great and you do it in probably a half hour.
Let's grab that muffler.
The Flowmaster Super 40 has a nice aggressive rumble without being overly loud or obnoxious,
and it'll give this truck an unmistakable sound.
Coming up,
our Cerra gets new suspension and brakes.
I've got our 10 bolt axle assembly cleaned up,
stripped down.
The axle bearings are in along with the seals, and we're ready to start reassembling.
This system includes shims of 57, and 10,000 of an inch thick.
So depending on how you stack them, you can make very fine adjustments.
With my selection made,
the carrier and shim stack goes into the housing and the caps are tightened up.
So that was still quite a bit too loose. So I'm gonna take one of the 10,000 shims
out of the stack that's on the right hand side.
I'll switch it over to the left,
which will shift the carrier over,
hopefully tighten up the backlash just enough.
With a quick swap of one shim, I'll reinstall the carrier into the housing and once again install the bearing caps.
yeah,
with the carrier sitting exactly where it should be, the axles can now slide back in.
The C clips are reinstalled
along with the cross pin.
Finally,
it's time to seal this thing up for good with some Permatex Optimum grade gasket maker.
And the stock cover finishes the job.
An ISS or independent front suspension makes for a lot smoother ride and better handling than a solid front axle, which is found on some heavy duty trucks.
This is because when one side of the truck hits a bump in the road, the other side remains unaffected.
The downside of IFS is there are a lot of moving parts which can wear out as the years go by,
especially when larger tires are thrown into the mix.
By swapping out the old control arms,
we're gonna be replacing 8 bushings,
4 ball joints, and 2 shot mounts, all of which should restore the factory handling and ride quality.
The rebuild starts with a torsion bar sliding through the control arm then lining up the bushings with the mount holes in the lower frame.
Next,
the shot goes back into place which holds the suspension in position.
The upper arm now goes in and I'll set the alignment bolts to roughly midway through their travel.
The spindle attaches to both the lower and upper ball joint.
The castle nuts are torqued
and the cotter pin slides in which keeps it from loosening up.
Our new unit bearing assembly bolts onto the spindle.
Followed by the CV axle shaft which slides into the position.
A single nut secures it to the wheel bearing and 6 bolts pulled it to the front different
done.
The EBC rotor goes on
along with the caliper bracket.
The brake pads
and finally the calipers.
Last thing going on up front
is a new sway bar endless.
Well,
that wraps up the rebuild of our front suspension,
and you can more or less use these steps on any GM truck from '88 on up.
This is a general grabber ATX and it's an all terrain tire which is gonna work great on the street.
It'll drive nice and quiet, but you can also.
Use it year round in the ice and the snow.
Now our new wheels have also just showed up and I'm tempted to get this mounted on the truck right away,
but we also just installed a new posse and some loud exhaust. So as a car guy,
there's one thing that I'm obligated to do first with these old tires.
You guys probably know what's coming next because as far as I'm concerned there's only one way to properly test that all these upgrades have worked.
The exhaust sounds great.
With the back tires out of the way,
I'll support the rear axle with a pole jack
so I can loosen the U-bolts.
I'll lower the axle away from the leaf spring
and swap the stock block.
For the new lift plot.
The longer you bolts go in securing the whole thing together.
The new rear shocks will finish up the rear end.
The stock adjuster bolt comes out.
But to remove the block nut, you'll either have to use a heavy duty two jaw puller or a torsion bar unloading tool like this.
With the stock height key removed,
I'll now swap to the longer shock since there's no tension on the suspension.
Well,
with the hex lined up on the new and the old key,
you can see how there's just a slight difference at the end of the arm, but that slight difference is enough to lift the truck.
I'll install the new keyway
and screw the adjuster bolt in about halfway.
Up next it's how to make bigger wheels and tires fit.
We've got both the steering and the suspension systems taken care of on our retro GMC build, so we're almost ready to throw on the larger wheels and tires,
but
I know with this mild lift that we've installed, they're not gonna fit right away without just a little bit of modification of the fenders.
Now the stock wheels have a very high positive offset and they have a narrow tire, which means they kind of sucked up in underneath the fender wells.
Our new wheels have a high negative offset, which means they're pushed further out and on top of that they have a tall and wide tire.
So there's two areas that are going to interfere.
Number one here is the back of the fender kind of at the lower rocker,
and number 2 is up front on the lower splash guard and a little bit of this bumper.
Now trimming is kind of a standard practice when it comes to fitting larger wheels and tires onto an older truck. So let's get to it and throw some sparks.
On Chevy and GMC trucks from 99 to '07,
the lower rear edge of the front fender and front pinch weld on the rocker are the main areas which will interfere with taller and wider tires,
but
all we need is about an extra inch and a half of clearance.
Rather than just chopping the metal away,
I like to fold down the front fender and trim away just a little bit.
Then fold the pinch weld flat with the rocker to retain most of its strength.
Then I can add another fold in the sheet metal part of the fender for a clean look that doesn't have any sharp edges
on the front bumper.
I'll trim it back about 1 inch at a slight angle and then give it a test fit.
All right,
this is the moment of truth.
See if all this effort
is worth it.
If I get to line up, that'd be helpful.
Now it might seem a little bit drastic at first to have to cut into the sheet metal of your pickup just to fit a larger
set of wheels and tires, but like I said earlier, it is fairly common practice,
especially on a GM truck because the wheel wells are just pretty tight to the tire.
Now
one thing to keep in mind, you don't want to cut into the actual framework of your truck depending on what model you have, there might be some important structure back here, but on these GM trucks it is just sheet metal, so there's no safety factor that we're taking away.
Now obviously the suspension is still drooped out, but when we turn the wheel you can see there is plenty of clearance on both the front
as well as the back
start light back there,
um, but when the wheels are turned, there should be no rubbing at all.
So the next thing to do is get that back tire on,
get the truck on the ground,
see how our old school cool Sierra is gonna look.
With the weight of the truck finally back on the suspension at first glance, it appears that the front end is sitting just a little bit too hot,
and according to the tape measure,
it's about 1 inch higher than it is in the rear, which isn't gonna fly. We don't have enough up travel of the suspension.
So all I've got to do is de crank the adjuster bolts for the torsion bars, a few turns.
We'll lower this thing down so it's level or maybe about 3/4 of an inch lower in the front. I really like how that looks.
I'm digging the stands with the new wheels and tires, so now it's time to do some work under the hood to give this truck a little more scoot.
Now there are 3 main ways which you can increase the horsepower of your truck without spending a ton of money,
and the first we've already taken care of.
We did long tube headers and a free flowing exhaust a couple weeks back.
So today we're gonna take care of the remaining 2 intake and calibration.
I went to summer racing and I picked up a Banks Ram Air cold air intake and this air box is gonna flow substantially more air than the stock setup,
but most importantly, it's a true cold air intake, which means the filters isolated in this box from the heat of the engine base, so it's only gonna draw in cool outside air.
The stock intake tube and airbox is easily removed from the ear.
Which gives us a little extra room to pull out the stock plug wires
and the spark plugs.
The new MSD plugs bolt right in,
and the superconductor wires finish up the ignition upgrade.
The bank's intake box bolts onto the fender
and with the lid in place,
the mass airflow sensor slides in
and the intake tube connects the engine to the air box.
It's no secret that you can increase the performance of your fuel injected engine simply by changing around the calibration inside the computer.
How exactly does a device like the SAT X4
increase performance?
And the best comparison that I could make is to an old school carbureted engine.
You see, back in the day, if you wanted more power, you could simply turn the distributor to advance the timing,
or you could mess around with a carburetor to change the air fuel ratio,
and the same exact thing is happening here except electronically.
We're changing around ignition timing, we're changing the fuel mixture RPM in which the transmission shifts, how.
Goes into power enrichment mode and a whole bunch of other parameters which will work perfectly together with the mechanical parts that we've changed like a cold air intake,
long two peers, and free flowing exhaust.
So altogether we should have a nice upgrade in horsepower to our 5.3.
So the only thing we have left to do is get this thing out on the road and see how it all works together.
Coming up,
our old school Cerra is ready to hit the street and the trail.
Now obviously the first thing that you're gonna notice about this truck from the outside are the changes that we made to its visual appearance.
We wanted to give it a retro look,
and I think we nailed it.
We've got the chrome roll bar on the bed with the 4 KC highlights on top
and the 16 inch wheels with the 3030 inch tires. It just really,
really nails that look.
Now speaking of the tires, I am very impressed with how these general grabber ATXs are performing on the road,
but when we get these things off road in the dirt,
that's where they're really begin to shine.
Just because a pickup like this is probably gonna spend most of his life driving down the highway,
there's no reason we can't get it off the road and that's the only place I could think of to properly test it. So we came out to Woolly's off-road Park in Lynnville, Tennessee.
The 99 to 007 full size Chevy is probably one of the most popular used trucks right now, and I think this is why,
because you can do so many different things with it, whether it's daily driving,
off-roading,
the weekend warrior, or what have you.
You can go racing
or driving to the mall.
Now I know I've said this before, but I'm gonna say it again. I love how this truck sounds.
You get a 53 V8,
long tube headers and flow master exhaust.
It just has an unmistakable rumble that you can't beat. You can't go wrong with it.
When it's coming up the trail, it just has a really cool sound.
There we go, come on
oh effortless effortless.
Bumpy.
Oh,
don't mind the scratches on the paint.
It's walking right up.
Oh yeah.
So when I'm sitting at the bottom of the hill kind of staring up and I see that big rut at the bottom it's pretty intimidating but honestly this truck crawled right up I mean it's probably got a couple of scratches on the roof from those branches but not a big deal that's off-roading.
So far I am impressed with how these ATX all terrain tires are doing and honestly this is exactly the terrain
that they're designed for.
You got loose dirt,
some rocks, a little bit of mud.
I've never broken traction once. I mean, I'm really not trying to go nuts here,
but
the tires, they clean themselves out, the mud spins out so the treads stay open,
and they've done everything I've asked them to. Now, obviously we are gonna put it to the test and try to find a little bit more extreme terrain.
So far so good.
And the one thing I was worried about them rubbing,
I haven't heard a single bit yet,
especially when you turn, you kind of go over a bump and the wheels get stuffed up in that's where you're gonna rub and that's where you're gonna have problems but
right now we didn't have to trim a whole lot. There's no rubbing,
so I think we're golden.
I think LT really enjoyed that Sierra.
Now remember you can always catch all our other amazing builds on our website.
I'm Natalie Stovall.
I'll see y'all next time.
Show Full Transcript
Welcome to Power Nation Builds.
I'm Natalie Stovall.
This is your chance to see one of our projects from start to finish in just 30 minutes.
Check this out.
Now I suppose the logical choice for a mid 90s throwback build would be a mid 90s truck,
but we've seen that before.
I wanted to see the mid 90s treatment on an early 2000s truck and that's why I picked a 2002.
GMC Sierra 1500. Now this is probably one of the most popular used trucks on the market to this day.
They made literally millions of these things, and ours has 250,000 miles on it,
but that's OK because it runs great.
Now as far as the condition it's in, this is about as original as they come.
The three most popular modifications wheels,
exhaust, and intake
all bone stock. So this truck is basically a time capsule.
The interior,
considering its age, is in really great shape, so this is a perfect blank canvas to start our retro build.
We're adding a little mid nineties throwback styling to our extended cab GMC with this chrome bed bar and it's very simple to assemble.
The tubes are sleeves so they can slide together and a series of bolts hold it all in place.
With the main double tubes connected with the spacer in between and everything tightened down,
we get the whole thing into the bed of the Sierra.
So we're going for a bit of a retro vibe here. What do you think? Did we nail it?
Uh,
yes, I think you did. It screams 90s.
OK,
good.
I was gonna say some people,
some people think a little bit 80s or even 70s with a roll bar, but
no,
this is what I remember.
Oh, you're on the little toe hook there we go.
All right,
we're drilling holes through the bed,
so you gotta pay attention to where stuff is
this particular truck, there's a gas tank that runs right along here. This is a really long drill bit.
Now you just can be careful,
you shouldn't have any problems,
but if you jam this thing all the way through,
you might smell gas that starts to leak.
So
just kind of take your time.
You'll be all set.
The light bracket is an optional extra,
but it comes with the mounting holes pre-drilled, which makes installation of the lights a breeze,
and the whole assembly can be attached to the roll bar with two bolts.
Well, that is definitely Chuck Norris approved.
We gotta get the driver side exhaust manifold off of the engine and I already just took a peek and there's a broken off bolt on the very front port.
Now this is actually a little bit common on an LS application,
especially in a pickup truck or a vehicle that's seen higher miles.
And a lot of heat cycles basically as that fastener expands and contracts as it gets warmer and cooler, it can fatigue and just crack and basically the heads will fall off.
Like I said, it's a fairly common problem, and I'll show you how to deal with it, but first we're gonna get this manifold off the engine.
I've seen guys try to fix these bolts, drilling them out,
tapping them with like an easy out type situation.
I've done that and it'll work,
but it's time consuming and.
This is a little bit easier.
Our 40 MIG welder is the ideal tool for the job since it can quickly build up material and get down into some hard to reach places.
I'll throw in some vice grips and the broken bolt quickly backs out.
Well, all it took is one little glob welded on the end and we're able to back the bolt out.
Since we're building our GMC to be sort of like a throwback to a mid-nineties truck,
there's one thing it absolutely has to have
dual exhaust.
Before we get this thing on though,
we're gonna get some old parts off.
My method for building a custom exhaust may seem a little bit unorthodox,
but it works out pretty well for me.
This is basically a game of connect the dots, and once the major components are mounted,
all you've gotta do is fill in the gaps.
I like to build small subassemblies at a time.
Basically I'll hold up 1 or 2 or possibly 3 bends at a time,
marked for position and then tack weld everything together over on the bench.
Then I'll mg tack the big chunks together underneath the truck so I know it's all gonna fit perfectly and then remove the entire thing for finish welding over on the bench.
You don't want to spend 4 days on your back, on your floor
building a custom exhaust, and that's where the appeal of a bolt on kit like this comes in.
Everything is engineered to fit.
It goes in the stock hangers and it'll sound great and you do it in probably a half hour.
Let's grab that muffler.
The Flowmaster Super 40 has a nice aggressive rumble without being overly loud or obnoxious,
and it'll give this truck an unmistakable sound.
Coming up,
our Cerra gets new suspension and brakes.
I've got our 10 bolt axle assembly cleaned up,
stripped down.
The axle bearings are in along with the seals, and we're ready to start reassembling.
This system includes shims of 57, and 10,000 of an inch thick.
So depending on how you stack them, you can make very fine adjustments.
With my selection made,
the carrier and shim stack goes into the housing and the caps are tightened up.
So that was still quite a bit too loose. So I'm gonna take one of the 10,000 shims
out of the stack that's on the right hand side.
I'll switch it over to the left,
which will shift the carrier over,
hopefully tighten up the backlash just enough.
With a quick swap of one shim, I'll reinstall the carrier into the housing and once again install the bearing caps.
yeah,
with the carrier sitting exactly where it should be, the axles can now slide back in.
The C clips are reinstalled
along with the cross pin.
Finally,
it's time to seal this thing up for good with some Permatex Optimum grade gasket maker.
And the stock cover finishes the job.
An ISS or independent front suspension makes for a lot smoother ride and better handling than a solid front axle, which is found on some heavy duty trucks.
This is because when one side of the truck hits a bump in the road, the other side remains unaffected.
The downside of IFS is there are a lot of moving parts which can wear out as the years go by,
especially when larger tires are thrown into the mix.
By swapping out the old control arms,
we're gonna be replacing 8 bushings,
4 ball joints, and 2 shot mounts, all of which should restore the factory handling and ride quality.
The rebuild starts with a torsion bar sliding through the control arm then lining up the bushings with the mount holes in the lower frame.
Next,
the shot goes back into place which holds the suspension in position.
The upper arm now goes in and I'll set the alignment bolts to roughly midway through their travel.
The spindle attaches to both the lower and upper ball joint.
The castle nuts are torqued
and the cotter pin slides in which keeps it from loosening up.
Our new unit bearing assembly bolts onto the spindle.
Followed by the CV axle shaft which slides into the position.
A single nut secures it to the wheel bearing and 6 bolts pulled it to the front different
done.
The EBC rotor goes on
along with the caliper bracket.
The brake pads
and finally the calipers.
Last thing going on up front
is a new sway bar endless.
Well,
that wraps up the rebuild of our front suspension,
and you can more or less use these steps on any GM truck from '88 on up.
This is a general grabber ATX and it's an all terrain tire which is gonna work great on the street.
It'll drive nice and quiet, but you can also.
Use it year round in the ice and the snow.
Now our new wheels have also just showed up and I'm tempted to get this mounted on the truck right away,
but we also just installed a new posse and some loud exhaust. So as a car guy,
there's one thing that I'm obligated to do first with these old tires.
You guys probably know what's coming next because as far as I'm concerned there's only one way to properly test that all these upgrades have worked.
The exhaust sounds great.
With the back tires out of the way,
I'll support the rear axle with a pole jack
so I can loosen the U-bolts.
I'll lower the axle away from the leaf spring
and swap the stock block.
For the new lift plot.
The longer you bolts go in securing the whole thing together.
The new rear shocks will finish up the rear end.
The stock adjuster bolt comes out.
But to remove the block nut, you'll either have to use a heavy duty two jaw puller or a torsion bar unloading tool like this.
With the stock height key removed,
I'll now swap to the longer shock since there's no tension on the suspension.
Well,
with the hex lined up on the new and the old key,
you can see how there's just a slight difference at the end of the arm, but that slight difference is enough to lift the truck.
I'll install the new keyway
and screw the adjuster bolt in about halfway.
Up next it's how to make bigger wheels and tires fit.
We've got both the steering and the suspension systems taken care of on our retro GMC build, so we're almost ready to throw on the larger wheels and tires,
but
I know with this mild lift that we've installed, they're not gonna fit right away without just a little bit of modification of the fenders.
Now the stock wheels have a very high positive offset and they have a narrow tire, which means they kind of sucked up in underneath the fender wells.
Our new wheels have a high negative offset, which means they're pushed further out and on top of that they have a tall and wide tire.
So there's two areas that are going to interfere.
Number one here is the back of the fender kind of at the lower rocker,
and number 2 is up front on the lower splash guard and a little bit of this bumper.
Now trimming is kind of a standard practice when it comes to fitting larger wheels and tires onto an older truck. So let's get to it and throw some sparks.
On Chevy and GMC trucks from 99 to '07,
the lower rear edge of the front fender and front pinch weld on the rocker are the main areas which will interfere with taller and wider tires,
but
all we need is about an extra inch and a half of clearance.
Rather than just chopping the metal away,
I like to fold down the front fender and trim away just a little bit.
Then fold the pinch weld flat with the rocker to retain most of its strength.
Then I can add another fold in the sheet metal part of the fender for a clean look that doesn't have any sharp edges
on the front bumper.
I'll trim it back about 1 inch at a slight angle and then give it a test fit.
All right,
this is the moment of truth.
See if all this effort
is worth it.
If I get to line up, that'd be helpful.
Now it might seem a little bit drastic at first to have to cut into the sheet metal of your pickup just to fit a larger
set of wheels and tires, but like I said earlier, it is fairly common practice,
especially on a GM truck because the wheel wells are just pretty tight to the tire.
Now
one thing to keep in mind, you don't want to cut into the actual framework of your truck depending on what model you have, there might be some important structure back here, but on these GM trucks it is just sheet metal, so there's no safety factor that we're taking away.
Now obviously the suspension is still drooped out, but when we turn the wheel you can see there is plenty of clearance on both the front
as well as the back
start light back there,
um, but when the wheels are turned, there should be no rubbing at all.
So the next thing to do is get that back tire on,
get the truck on the ground,
see how our old school cool Sierra is gonna look.
With the weight of the truck finally back on the suspension at first glance, it appears that the front end is sitting just a little bit too hot,
and according to the tape measure,
it's about 1 inch higher than it is in the rear, which isn't gonna fly. We don't have enough up travel of the suspension.
So all I've got to do is de crank the adjuster bolts for the torsion bars, a few turns.
We'll lower this thing down so it's level or maybe about 3/4 of an inch lower in the front. I really like how that looks.
I'm digging the stands with the new wheels and tires, so now it's time to do some work under the hood to give this truck a little more scoot.
Now there are 3 main ways which you can increase the horsepower of your truck without spending a ton of money,
and the first we've already taken care of.
We did long tube headers and a free flowing exhaust a couple weeks back.
So today we're gonna take care of the remaining 2 intake and calibration.
I went to summer racing and I picked up a Banks Ram Air cold air intake and this air box is gonna flow substantially more air than the stock setup,
but most importantly, it's a true cold air intake, which means the filters isolated in this box from the heat of the engine base, so it's only gonna draw in cool outside air.
The stock intake tube and airbox is easily removed from the ear.
Which gives us a little extra room to pull out the stock plug wires
and the spark plugs.
The new MSD plugs bolt right in,
and the superconductor wires finish up the ignition upgrade.
The bank's intake box bolts onto the fender
and with the lid in place,
the mass airflow sensor slides in
and the intake tube connects the engine to the air box.
It's no secret that you can increase the performance of your fuel injected engine simply by changing around the calibration inside the computer.
How exactly does a device like the SAT X4
increase performance?
And the best comparison that I could make is to an old school carbureted engine.
You see, back in the day, if you wanted more power, you could simply turn the distributor to advance the timing,
or you could mess around with a carburetor to change the air fuel ratio,
and the same exact thing is happening here except electronically.
We're changing around ignition timing, we're changing the fuel mixture RPM in which the transmission shifts, how.
Goes into power enrichment mode and a whole bunch of other parameters which will work perfectly together with the mechanical parts that we've changed like a cold air intake,
long two peers, and free flowing exhaust.
So altogether we should have a nice upgrade in horsepower to our 5.3.
So the only thing we have left to do is get this thing out on the road and see how it all works together.
Coming up,
our old school Cerra is ready to hit the street and the trail.
Now obviously the first thing that you're gonna notice about this truck from the outside are the changes that we made to its visual appearance.
We wanted to give it a retro look,
and I think we nailed it.
We've got the chrome roll bar on the bed with the 4 KC highlights on top
and the 16 inch wheels with the 3030 inch tires. It just really,
really nails that look.
Now speaking of the tires, I am very impressed with how these general grabber ATXs are performing on the road,
but when we get these things off road in the dirt,
that's where they're really begin to shine.
Just because a pickup like this is probably gonna spend most of his life driving down the highway,
there's no reason we can't get it off the road and that's the only place I could think of to properly test it. So we came out to Woolly's off-road Park in Lynnville, Tennessee.
The 99 to 007 full size Chevy is probably one of the most popular used trucks right now, and I think this is why,
because you can do so many different things with it, whether it's daily driving,
off-roading,
the weekend warrior, or what have you.
You can go racing
or driving to the mall.
Now I know I've said this before, but I'm gonna say it again. I love how this truck sounds.
You get a 53 V8,
long tube headers and flow master exhaust.
It just has an unmistakable rumble that you can't beat. You can't go wrong with it.
When it's coming up the trail, it just has a really cool sound.
There we go, come on
oh effortless effortless.
Bumpy.
Oh,
don't mind the scratches on the paint.
It's walking right up.
Oh yeah.
So when I'm sitting at the bottom of the hill kind of staring up and I see that big rut at the bottom it's pretty intimidating but honestly this truck crawled right up I mean it's probably got a couple of scratches on the roof from those branches but not a big deal that's off-roading.
So far I am impressed with how these ATX all terrain tires are doing and honestly this is exactly the terrain
that they're designed for.
You got loose dirt,
some rocks, a little bit of mud.
I've never broken traction once. I mean, I'm really not trying to go nuts here,
but
the tires, they clean themselves out, the mud spins out so the treads stay open,
and they've done everything I've asked them to. Now, obviously we are gonna put it to the test and try to find a little bit more extreme terrain.
So far so good.
And the one thing I was worried about them rubbing,
I haven't heard a single bit yet,
especially when you turn, you kind of go over a bump and the wheels get stuffed up in that's where you're gonna rub and that's where you're gonna have problems but
right now we didn't have to trim a whole lot. There's no rubbing,
so I think we're golden.
I think LT really enjoyed that Sierra.
Now remember you can always catch all our other amazing builds on our website.
I'm Natalie Stovall.
I'll see y'all next time.



