


In This Episode
- 0:01 Introduction to the Project
- 0:50 Removing the Roof and Preparing for Replacement
- 2:00 Cutting and Fitting the New Roof
- 5:06 Welding and Strengthening the Roof
- 6:00 Modifying the Bumpers
- 9:25 Suspension and Engine Work
- 11:32 Painting the Car
- 15:04 Installing Disc Brakes
- 17:38 Dyno Testing and Performance Upgrades
- 19:00 Final Touches and Road Testing
Video Transcript
You're watching Power Nation.
Welcome to Power Nation Builds. I'm Natalie Stovall.
This is your chance to see one of our projects from start to finish in 30 minutes.
Today,
muscle car's latest transformation starts with
a Buick Century.
And you may be wondering, am I watching muscle car? Am I watching an old episode of Kojak?
Well,
believe it or not,
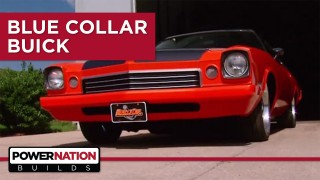
this is our newest project, 1973 Buick Century.
If you're wondering why this thing deserves to be in the muscle car shop,
look at it this way.
It's V8, it's mid-size, it's rear wheel drive, and it's got some cool lines to it.
This thing's got a.
A lot of potential plus it was stupid cheap.
It's not hard to look past that 70s funk to see that with the right paint scheme,
wheels, stances, and a few other appearance tweaks,
this could be a head turning street bruiser.
It's time to start ripping into Project Blue collar Buick. We're gonna tackle the panel that needs the most work first,
the roof.
We just need to expose the pillar, so we're only pulling the trim we need to for now.
Yeah this homemade tool here works pretty good.
It doesn't work that good when the molding is glued into place.
This is awesome.
Judging by the three layers of different types of sealant,
I'd say this car's been messed with a few times before.
Now this bench seat is definitely not going back in.
I hate bed seats.
The windshield isn't cracked, so we're hanging on to it for now.
If our budget allows, we might replace it later.
The back glass is going in the keeper pile too.
Our Buick's all stripped out and ready to get decapitated, but what are we gonna replace that roof with?
Well, that brings us to today's special guest, 1975 Pontiac Le Mans.
It may not look pretty, but it's got the same roof as our 73 Buick and it's plenty solid enough. It's something we can work with.
After triple checking our measurements and marks, it's time to break out the saws and have at it.
Now, try to keep your cuts at an angle that can be easily duplicated because you're gonna have to copy them on the other card.
This is a drop top.
It's a little late to turn back now.
We got two cars with the tops cut off.
Like I said earlier, we trimmed the top a little long,
so it's gonna be riding a little high,
but now it's just a matter of trimming this dude to fit and welding it on.
Yeah, it don't fit
if you plan on keeping the dash, and we do,
you better throw a welding blanket over it or a new dash might chew up a chunk of your budget.
And don't go crazy here,
just take a little bit at a time. It's a whole lot easier to take it off than it is to put it back on.
Now you can see after I trimmed the front pillar a little bit, we're still way out of alignment here.
You can tell by this this whole roof still needs to come forward.
That means we still got to cut some more out of the front.
Here we go. Now that's getting better.
You can see here where the lines are coming together pretty nice on this post here,
but on the back you can see where it's still stepped up quite a bit
and that tells me that the next step is gonna be trimming this one off.
And those are 26 inches right there.
Perfect.
Considerate trimmed and fit.
When welding on the top, we're gonna use a procedure called sleeving.
Since we're using butt welds,
all the pillars need to be reinforced to make them as strong as they were from the factory. So we're adding the small plates to all the weld joints.
The sleeves are going on the inside of the post they'll actually end up stronger than they were from the factory.
Small squares of sheet metal will form the sleeves and some plug wheels will hold them in place.
A punch will keep the drill from wandering and make sure the holes are right where you want them.
Once the first leave is welded up,
a second one goes on for extra strength.
Front first front first.
This ain't gonna work.
No,
let's try just dropping it in the back first.
So if we drop it in the back,
let this slide in,
cut these off shorter, I'll bet we can get this to pop over the top of it.
We want a slight gap between the two panels here, so the wheel goes all the way through to the sleeves. It doesn't get much stronger than that.
It's hot.
It's like me,
smoking.
And once all 6 pillars are welded solid, we'll grind them off and prep them for body work.
Coming up,
Blue collar gets a trimming and the power plant gets dropped in.
OK,
bring it back.
After pulling off the trim, we realized these mounting bolts also hold the bumper to the inner structure.
No big deal. I'll clean them and plug weld them back up so we don't lose any strength.
Man, we've been wanting to get rid of these bumperrettes since the first time we saw this car in good riddance.
A few licks of the grinder and my welds are clean and we're ready for more chopping.
If you're planning on having your bumpers re-chromed,
take a piece of advice from our friends over at Advanced Plating.
Don't grind down your own welds. Let them do it. It'll save you some work and save you some money in the long run.
But for budget reasons, we're gonna paint ours, so it's no big deal.
Rick's got the bumper looking a whole lot better, but by no means are we done. We still got to trim 3/4 of an inch on both ends to tighten up the gap.
That may not seem like a whole lot,
but it's the little details like that that add up to make a big attitude change.
I want to tuck in each in 3/4 of an inch,
so I'm using, you guessed it,
3/4 inch masking tape as a guide.
Using a combination of different width tape, you can easily measure out consistent sections of whatever it is you're hacking on.
I've swapped from the cutting disk to a flap wheel to bed with the edges for better well penetration.
Well,
that brought it in 3/4 of an inch, but we still want to clip its wings and also shorten up the side about 4 inches, but that requires a little more cutting.
I'm reusing the back part of this piece,
but I'll get the excess first.
This is part of the piece I just cut off trim to fit.
I'm filling in the gap with some 18 inch plate. I already shake.
Next comes the big piece.
Over 4 inches is coming out of here.
Just like before I'm capping it with a piece I just cut off the end.
Now that's a real change.
This is a big chunk of metal that I cut out of there,
but anything less just wouldn't have got the job done.
The front end is definitely looking a lot better.
And from the time we bought this car, we knew that the rear bumper had some fitment issues.
Well now you can see why.
Sucker's been rear ended at some point.
Pretty good. That's a lot of movement when that happened,
it bent the rear bumper out of shape.
Now we don't have any fancy pants tools around here to get the sucker pushed back out, so we're gonna do it the same way you guys would do it at home.
Take it off, chop it apart,
and make it fit.
We got the bumper stripped down to just the chrome skin marked the center, so now we're ready to cut this dude in half.
Hey Tommy got the brackets on and see where we're at with this thing.
All right.
How's it look down there?
Much better, man.
I like this one right here.
We got blue collar Buick out of the booth with the first coat of primer laid down and now it's time to get it up on the rack,
do some suspension work.
Knocking the front end apart is pretty straightforward.
Find a nut
and remove it.
The steering linkage comes off all in one piece.
We'll explain why later.
That dude hasn't been off in a while.
The down and dirty but safe way to get your springs off if you don't have a spring compressor is to break out the torch.
There's a lot of tension in these springs,
so the trick is to release that energy a little bit at a time.
Once they're relaxed,
you can cut them out.
This adapter from Transat will allow the Buick engine and the Chevy transmission to bolt together with no problem.
This is an externally balanced flex plate, so it has to be clocked correctly.
We paid attention when we took the old one off so we can match it up now.
Like most critical drive train parts,
the flex plate needs to be torque to spec.
Last on is the adapter spacer.
Hey Tommy, heard you've been looking for a tranny, not exactly,
but let's put this on.
That
Our latest wrecking yard score is these factory big block motor mounts.
With these,
the 455 should bolt in just like it's been there its whole life.
OK,
bring it back.
Come on bullet.
We're in.
Well,
it looks great, but we want to hear this thing make some noise,
and that means all the accessories need to go back on.
Now keep in mind
all the hard parts are refurbished originals.
Ready? Yeah.
Up next, our Buick gets an amazing brand new code of color.
Now,
strike that
colors.
A clean surface is critical to a good paint job.
So after all that sanding, we blew it out real well,
mask it off, and then wiped it down with some paint prep.
Now she's ready for some color.
Now if you don't remember our plans for the paint scheme,
let me refresh your memory. Now we have made a few changes since this rendering was done,
namely we're gonna add a silver stripe inside of this red that breaks the charcoal from the orange.
Now when you're dealing with multiple colors like this,
you need to plan ahead. So I'm gonna be laying down the red first because that color is gonna dictate where all the other colors end up.
And even though the red stripes are only gonna be 1/8 of an inch wide,
I'm laying down a pretty wide stripe to give myself plenty of wiggle room when I lay out the design.
The quickest and most accurate way to lay out long stripes is to pull the longest lines that you can.
This helps keep your stripes from looking wavy.
This half-inch tape is going down as a guide to keep the graphics straight and consistent.
Once the upper red stripe is laid out,
the guide tape can go.
Next, I can lay down silver in the center of the strike.
After about 20 minutes of flash time, it's time to cover it all up.
To prevent the orange from bleeding into the graphic, I'm covering the entire strike,
then coming back and trimming it to expose the outside edge of where the final colors will meet.
This in your face orange is far from custom. It's just straight PPG DMD 617 toner,
but to make this basic toner look custom,
I'm topping it off with a mixture of orange and gold pearl.
I'm fogging in some candy tangerine on the rockers.
This will give a subtle fade to the lower half of the car.
And once it's dry, I can mask off for the final color.
The last color is a metallic charcoal
called Dark Smoke poly,
also known as GM code number 14.
It'll take 3 coats to cover and a dust coat to even out the metallic.
Looking slick.
You gotta resist the urge to jump in there and just start really ripping and tearing.
You gotta be careful with this.
What you been up to, cuz?
There you are.
So working. Where the heck you've been taking a nap,
playing on the intranet?
No,
no, I'm not supposed to be looking on that while I'm at work.
When you're doing performance upgrades on a vehicle,
bolting on all those high performance go fast goodies is the fun part. But don't forget,
stopping is pretty important too.
The drum brakes are prone to fading and overheating,
adding bigger wheels and tires and more speed.
The problem's just gonna get worse.
Now disc brakes run cooler and they're a lot more efficient, so they can handle the pressure of bringing that nearly 2 ton beast to a halt.
Now Summit Racing sent us this conversion kit for a GM 10 bolt,
but they're available for just about anything.
Drum brakes aren't horrible and they've safely stopped vehicles for over a century,
but the fact is disc brakes are simpler,
lighter, and safer.
The only thing we're reusing here is the e-brake cable.
Everything else is out of here.
Now preassembling some of the parts on the table makes this process a lot easier.
This way you don't have to try to hold everything together with your third arm while tightening the bolts.
The brake mount plate that came with the kit is also the new actual retaining plate.
bolt it on and tighten it down just like the stock piece.
Next,
set the rotors on,
load the brake pads into the caliper and bolt them to the bracket.
Since these are floating calipers, we need to add a section of flex line to allow for some movement.
The original hard lines can be used,
but they need to be shortened,
and that's about it.
Now we don't have to worry about scrubbing off any excess speed.
Now we just have to bleed these out,
install a shortened drive shaft,
then it's back to the dyno to see if this big block lives up to the name Buick.
Coming up Tommy takes blue collar on a road trip.
Before we started our upgrades,
we made a baseline dyno run so we'd have some before numbers for comparison.
194 horsepower, 271 ft pounds of torque.
From the minute we fired her up,
we could tell she had a deeper growl.
But we're after more than just sound.
The dyno numbers are gonna tell us if we've reached our goal of a 40% horsepower increase.
Picked up a few 290 Ford picked up the 352, but your peaks right at 5000 and it starts to roll off.
That's a good gain.
That is almost 100 horsepower difference, dude, 50% gain.
That's fantastic.
Yeah, that's not bad.
Now that we got some respectable power under the hood, it's gonna be kind of hard to keep my foot off the gas.
So to make sure I don't overdo it, we're gonna add a hood tack.
First I'll mark the bottom side to make sure we'll clear all the braces.
After drilling the pilot hole, the whole saw comes.
Out you can actually smell the fresh paint as it chews its way through.
Poor Rick had to leave the room while I did this,
but you gotta break some eggs to make an omelet,
and this one's looking pretty good.
Step drill bits are designed for drilling through sheet metal and it sure a perfectly round hole.
After smoothing off the rough edges,
I'll mask up the hole and shoot on some duplicol edge primer and semigloss black.
After screwing in a hose bar, the tag can be dropped into place.
Rubber vacuum line works fine for the feed.
Run it through any available hole in the firewall and pull the excess through to the inside.
Drill a hole in the heater box,
being careful not to rupture the heater core, flaps, or anything else important.
A 90 degree hose bar completes the defrost option on our attack.
Dude,
that is cool.
Now she's ready to roll. I take it out for a quick road test,
man, I was thinking more like a road trip. You game?
I can't, brother. I have to go pick up our next project.
Gonna have to go on without me.
Well,
uh, I try to keep it on two wheels most of the time.
We'll see you bye.
Alright, man.
Blue collar is running like a champ,
so I pointed her toward Bowling Green, Kentucky, where the Buick GS Nationals are in full swing.
This is the place to go if you have a Buick or if you just love looking at them,
and there's some nice looking Buicks here.
There's guys and gals from all over the country here.
This is a perfect chance to put our new performance upgrades to the test.
Let's see what this girl will do.
13.8,
not bad for a two ton car with no hook.
Oh, blue collar's done everything we've asked her to do and more.
She may not be everybody's idea of a muscle car, but we hope it's inspired you to think outside of the box
and redefine what a muscle car can be.
I wanna thank the GS Club of America for putting on a great show.
I'm headed back to the track for one more run,
so until next week y'all keep it between the ditches.
Well done, guys.
Y'all made me a Buick believer.
Now remember, you can see all of our other amazing builds on our website.
I'm Natalie Stovall. I'll see y'all down the road.
Show Full Transcript
Welcome to Power Nation Builds. I'm Natalie Stovall.
This is your chance to see one of our projects from start to finish in 30 minutes.
Today,
muscle car's latest transformation starts with
a Buick Century.
And you may be wondering, am I watching muscle car? Am I watching an old episode of Kojak?
Well,
believe it or not,
this is our newest project, 1973 Buick Century.
If you're wondering why this thing deserves to be in the muscle car shop,
look at it this way.
It's V8, it's mid-size, it's rear wheel drive, and it's got some cool lines to it.
This thing's got a.
A lot of potential plus it was stupid cheap.
It's not hard to look past that 70s funk to see that with the right paint scheme,
wheels, stances, and a few other appearance tweaks,
this could be a head turning street bruiser.
It's time to start ripping into Project Blue collar Buick. We're gonna tackle the panel that needs the most work first,
the roof.
We just need to expose the pillar, so we're only pulling the trim we need to for now.
Yeah this homemade tool here works pretty good.
It doesn't work that good when the molding is glued into place.
This is awesome.
Judging by the three layers of different types of sealant,
I'd say this car's been messed with a few times before.
Now this bench seat is definitely not going back in.
I hate bed seats.
The windshield isn't cracked, so we're hanging on to it for now.
If our budget allows, we might replace it later.
The back glass is going in the keeper pile too.
Our Buick's all stripped out and ready to get decapitated, but what are we gonna replace that roof with?
Well, that brings us to today's special guest, 1975 Pontiac Le Mans.
It may not look pretty, but it's got the same roof as our 73 Buick and it's plenty solid enough. It's something we can work with.
After triple checking our measurements and marks, it's time to break out the saws and have at it.
Now, try to keep your cuts at an angle that can be easily duplicated because you're gonna have to copy them on the other card.
This is a drop top.
It's a little late to turn back now.
We got two cars with the tops cut off.
Like I said earlier, we trimmed the top a little long,
so it's gonna be riding a little high,
but now it's just a matter of trimming this dude to fit and welding it on.
Yeah, it don't fit
if you plan on keeping the dash, and we do,
you better throw a welding blanket over it or a new dash might chew up a chunk of your budget.
And don't go crazy here,
just take a little bit at a time. It's a whole lot easier to take it off than it is to put it back on.
Now you can see after I trimmed the front pillar a little bit, we're still way out of alignment here.
You can tell by this this whole roof still needs to come forward.
That means we still got to cut some more out of the front.
Here we go. Now that's getting better.
You can see here where the lines are coming together pretty nice on this post here,
but on the back you can see where it's still stepped up quite a bit
and that tells me that the next step is gonna be trimming this one off.
And those are 26 inches right there.
Perfect.
Considerate trimmed and fit.
When welding on the top, we're gonna use a procedure called sleeving.
Since we're using butt welds,
all the pillars need to be reinforced to make them as strong as they were from the factory. So we're adding the small plates to all the weld joints.
The sleeves are going on the inside of the post they'll actually end up stronger than they were from the factory.
Small squares of sheet metal will form the sleeves and some plug wheels will hold them in place.
A punch will keep the drill from wandering and make sure the holes are right where you want them.
Once the first leave is welded up,
a second one goes on for extra strength.
Front first front first.
This ain't gonna work.
No,
let's try just dropping it in the back first.
So if we drop it in the back,
let this slide in,
cut these off shorter, I'll bet we can get this to pop over the top of it.
We want a slight gap between the two panels here, so the wheel goes all the way through to the sleeves. It doesn't get much stronger than that.
It's hot.
It's like me,
smoking.
And once all 6 pillars are welded solid, we'll grind them off and prep them for body work.
Coming up,
Blue collar gets a trimming and the power plant gets dropped in.
OK,
bring it back.
After pulling off the trim, we realized these mounting bolts also hold the bumper to the inner structure.
No big deal. I'll clean them and plug weld them back up so we don't lose any strength.
Man, we've been wanting to get rid of these bumperrettes since the first time we saw this car in good riddance.
A few licks of the grinder and my welds are clean and we're ready for more chopping.
If you're planning on having your bumpers re-chromed,
take a piece of advice from our friends over at Advanced Plating.
Don't grind down your own welds. Let them do it. It'll save you some work and save you some money in the long run.
But for budget reasons, we're gonna paint ours, so it's no big deal.
Rick's got the bumper looking a whole lot better, but by no means are we done. We still got to trim 3/4 of an inch on both ends to tighten up the gap.
That may not seem like a whole lot,
but it's the little details like that that add up to make a big attitude change.
I want to tuck in each in 3/4 of an inch,
so I'm using, you guessed it,
3/4 inch masking tape as a guide.
Using a combination of different width tape, you can easily measure out consistent sections of whatever it is you're hacking on.
I've swapped from the cutting disk to a flap wheel to bed with the edges for better well penetration.
Well,
that brought it in 3/4 of an inch, but we still want to clip its wings and also shorten up the side about 4 inches, but that requires a little more cutting.
I'm reusing the back part of this piece,
but I'll get the excess first.
This is part of the piece I just cut off trim to fit.
I'm filling in the gap with some 18 inch plate. I already shake.
Next comes the big piece.
Over 4 inches is coming out of here.
Just like before I'm capping it with a piece I just cut off the end.
Now that's a real change.
This is a big chunk of metal that I cut out of there,
but anything less just wouldn't have got the job done.
The front end is definitely looking a lot better.
And from the time we bought this car, we knew that the rear bumper had some fitment issues.
Well now you can see why.
Sucker's been rear ended at some point.
Pretty good. That's a lot of movement when that happened,
it bent the rear bumper out of shape.
Now we don't have any fancy pants tools around here to get the sucker pushed back out, so we're gonna do it the same way you guys would do it at home.
Take it off, chop it apart,
and make it fit.
We got the bumper stripped down to just the chrome skin marked the center, so now we're ready to cut this dude in half.
Hey Tommy got the brackets on and see where we're at with this thing.
All right.
How's it look down there?
Much better, man.
I like this one right here.
We got blue collar Buick out of the booth with the first coat of primer laid down and now it's time to get it up on the rack,
do some suspension work.
Knocking the front end apart is pretty straightforward.
Find a nut
and remove it.
The steering linkage comes off all in one piece.
We'll explain why later.
That dude hasn't been off in a while.
The down and dirty but safe way to get your springs off if you don't have a spring compressor is to break out the torch.
There's a lot of tension in these springs,
so the trick is to release that energy a little bit at a time.
Once they're relaxed,
you can cut them out.
This adapter from Transat will allow the Buick engine and the Chevy transmission to bolt together with no problem.
This is an externally balanced flex plate, so it has to be clocked correctly.
We paid attention when we took the old one off so we can match it up now.
Like most critical drive train parts,
the flex plate needs to be torque to spec.
Last on is the adapter spacer.
Hey Tommy, heard you've been looking for a tranny, not exactly,
but let's put this on.
That
Our latest wrecking yard score is these factory big block motor mounts.
With these,
the 455 should bolt in just like it's been there its whole life.
OK,
bring it back.
Come on bullet.
We're in.
Well,
it looks great, but we want to hear this thing make some noise,
and that means all the accessories need to go back on.
Now keep in mind
all the hard parts are refurbished originals.
Ready? Yeah.
Up next, our Buick gets an amazing brand new code of color.
Now,
strike that
colors.
A clean surface is critical to a good paint job.
So after all that sanding, we blew it out real well,
mask it off, and then wiped it down with some paint prep.
Now she's ready for some color.
Now if you don't remember our plans for the paint scheme,
let me refresh your memory. Now we have made a few changes since this rendering was done,
namely we're gonna add a silver stripe inside of this red that breaks the charcoal from the orange.
Now when you're dealing with multiple colors like this,
you need to plan ahead. So I'm gonna be laying down the red first because that color is gonna dictate where all the other colors end up.
And even though the red stripes are only gonna be 1/8 of an inch wide,
I'm laying down a pretty wide stripe to give myself plenty of wiggle room when I lay out the design.
The quickest and most accurate way to lay out long stripes is to pull the longest lines that you can.
This helps keep your stripes from looking wavy.
This half-inch tape is going down as a guide to keep the graphics straight and consistent.
Once the upper red stripe is laid out,
the guide tape can go.
Next, I can lay down silver in the center of the strike.
After about 20 minutes of flash time, it's time to cover it all up.
To prevent the orange from bleeding into the graphic, I'm covering the entire strike,
then coming back and trimming it to expose the outside edge of where the final colors will meet.
This in your face orange is far from custom. It's just straight PPG DMD 617 toner,
but to make this basic toner look custom,
I'm topping it off with a mixture of orange and gold pearl.
I'm fogging in some candy tangerine on the rockers.
This will give a subtle fade to the lower half of the car.
And once it's dry, I can mask off for the final color.
The last color is a metallic charcoal
called Dark Smoke poly,
also known as GM code number 14.
It'll take 3 coats to cover and a dust coat to even out the metallic.
Looking slick.
You gotta resist the urge to jump in there and just start really ripping and tearing.
You gotta be careful with this.
What you been up to, cuz?
There you are.
So working. Where the heck you've been taking a nap,
playing on the intranet?
No,
no, I'm not supposed to be looking on that while I'm at work.
When you're doing performance upgrades on a vehicle,
bolting on all those high performance go fast goodies is the fun part. But don't forget,
stopping is pretty important too.
The drum brakes are prone to fading and overheating,
adding bigger wheels and tires and more speed.
The problem's just gonna get worse.
Now disc brakes run cooler and they're a lot more efficient, so they can handle the pressure of bringing that nearly 2 ton beast to a halt.
Now Summit Racing sent us this conversion kit for a GM 10 bolt,
but they're available for just about anything.
Drum brakes aren't horrible and they've safely stopped vehicles for over a century,
but the fact is disc brakes are simpler,
lighter, and safer.
The only thing we're reusing here is the e-brake cable.
Everything else is out of here.
Now preassembling some of the parts on the table makes this process a lot easier.
This way you don't have to try to hold everything together with your third arm while tightening the bolts.
The brake mount plate that came with the kit is also the new actual retaining plate.
bolt it on and tighten it down just like the stock piece.
Next,
set the rotors on,
load the brake pads into the caliper and bolt them to the bracket.
Since these are floating calipers, we need to add a section of flex line to allow for some movement.
The original hard lines can be used,
but they need to be shortened,
and that's about it.
Now we don't have to worry about scrubbing off any excess speed.
Now we just have to bleed these out,
install a shortened drive shaft,
then it's back to the dyno to see if this big block lives up to the name Buick.
Coming up Tommy takes blue collar on a road trip.
Before we started our upgrades,
we made a baseline dyno run so we'd have some before numbers for comparison.
194 horsepower, 271 ft pounds of torque.
From the minute we fired her up,
we could tell she had a deeper growl.
But we're after more than just sound.
The dyno numbers are gonna tell us if we've reached our goal of a 40% horsepower increase.
Picked up a few 290 Ford picked up the 352, but your peaks right at 5000 and it starts to roll off.
That's a good gain.
That is almost 100 horsepower difference, dude, 50% gain.
That's fantastic.
Yeah, that's not bad.
Now that we got some respectable power under the hood, it's gonna be kind of hard to keep my foot off the gas.
So to make sure I don't overdo it, we're gonna add a hood tack.
First I'll mark the bottom side to make sure we'll clear all the braces.
After drilling the pilot hole, the whole saw comes.
Out you can actually smell the fresh paint as it chews its way through.
Poor Rick had to leave the room while I did this,
but you gotta break some eggs to make an omelet,
and this one's looking pretty good.
Step drill bits are designed for drilling through sheet metal and it sure a perfectly round hole.
After smoothing off the rough edges,
I'll mask up the hole and shoot on some duplicol edge primer and semigloss black.
After screwing in a hose bar, the tag can be dropped into place.
Rubber vacuum line works fine for the feed.
Run it through any available hole in the firewall and pull the excess through to the inside.
Drill a hole in the heater box,
being careful not to rupture the heater core, flaps, or anything else important.
A 90 degree hose bar completes the defrost option on our attack.
Dude,
that is cool.
Now she's ready to roll. I take it out for a quick road test,
man, I was thinking more like a road trip. You game?
I can't, brother. I have to go pick up our next project.
Gonna have to go on without me.
Well,
uh, I try to keep it on two wheels most of the time.
We'll see you bye.
Alright, man.
Blue collar is running like a champ,
so I pointed her toward Bowling Green, Kentucky, where the Buick GS Nationals are in full swing.
This is the place to go if you have a Buick or if you just love looking at them,
and there's some nice looking Buicks here.
There's guys and gals from all over the country here.
This is a perfect chance to put our new performance upgrades to the test.
Let's see what this girl will do.
13.8,
not bad for a two ton car with no hook.
Oh, blue collar's done everything we've asked her to do and more.
She may not be everybody's idea of a muscle car, but we hope it's inspired you to think outside of the box
and redefine what a muscle car can be.
I wanna thank the GS Club of America for putting on a great show.
I'm headed back to the track for one more run,
so until next week y'all keep it between the ditches.
Well done, guys.
Y'all made me a Buick believer.
Now remember, you can see all of our other amazing builds on our website.
I'm Natalie Stovall. I'll see y'all down the road.



