
Video Transcript
You're watching Power Nation.
Welcome to Power Nation Builds. I'm Natalie Stovall.
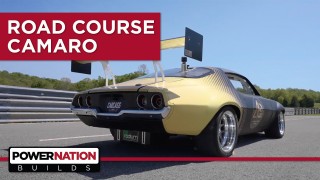
Today we'll show the conversion of a 1972 Camaro Rally Sport into an awesome track ready race car in just 30 minutes.
Here's Carcass.
So this is our 1972 Camaro Rally sport with the famous split bumper on the front,
and the goal of this car is just to be a full tilt race car, and we have built race cars here before
and pretty respectful at that, but this thing should be even a few levels above those.
So when we go to take this car apart, it's actually gonna be quite simple.
We're gonna take the front clip off the car and the front clip consists of like the hood.
The two fenders, the nose cone and the core support radiator and stuff like that.
And then from there when we go to take the engine and transmission out we're just gonna unbolt the subframe which consists of about 6 bolts
as we take those 6 bolts out we're gonna pull the subframe, the suspension, the engine, and the transmission
clean out from underneath the car and it'll just give us a really good platform to start building out the roll cage and whatnot
now our car.
Does have a 350 in it, or at least that's what the air cleaner says on the top. Um, it's also a 3 speed automatic car and the odometer shows 46,000 miles.
Now
we're not sure if that's really 46,000 or 146,000 because back then
GM only ran 5 digits in their odometer, which means it only read up to 99,999 miles and then.
Restarted over so it started counting back from zero,
so this car could either have 46 or 146,000 miles on it
and really just with the condition of the car we're probably just assuming it's gonna have 146,000 miles on it just because it's pretty beat up for what it is now our car is a little higher option car does have air conditioning. It's got power steering, power brakes, plus it's got the vinyl top and the sport.
on the back and it also is holding the rally sport badges on the side.
Now with this being what would be considered to be a higher option car,
don't get us wrong,
it's not that nice of a car, but it is a perfect platform for us to start building our race car.
So we got nothing else connected here? Yeah, we're good.
We got jack spinning.
It's gonna fall off, so just be careful,
let it fall. Oh, it's sitting on the exhaust.
I was actually sitting on the part of the supplement.
Hey,
look at that. That works.
And as you can see there's not a single part on the inside or the outside.
Next thing we're trying to tackle is fabricating the roll cage, so having nothing on the interior is a great place to start.
So the spots that we're gonna be cleaning up for the base plates is this big flat area right here in the back on both sides plus we've got two little areas to do up front.
We're gonna be using this crud buster and that should whip right through the paint.
We're using the crudbuster because it doesn't remove any of the actual material or metal from the floor.
All this is doing is removing the paint
and the seam sealer.
Then we'll switch over to the bristle disc to do a little bit of polishing.
And we're only interested in using just the two frame rails of our subframe so everything's gotta come off of here so we're gonna get rid of all this junk because we're gonna get this thing all cleaned up
and then we're gonna start building out the suspension for our Camaro.
Get this thing up high enough
to clear every
cross members steering all that stuff but.
Works really good with this engine sling.
We got 4 solid points.
Of mounting
on the engine and it
keeps the engine sitting pretty level too.
All right,
I should do it.
See if we can get this thing out of here.
That's a beauty, Clark.
OK,
now that we have the front subframe pretty much stripped down to its bare bones, we're gonna get ready to get this thing cleaned up. Now there are a couple of things that we're gonna do before we get to the actual clean up.
We're gonna be running UMI's front suspension on this thing, and it has a set of coil overs to run their coil overs,
we have to come into this upper control arm mount bracket here and make.
Couple specific cuts to get this piece out of the way now we're not gonna be installing the suspension right now,
but what we are gonna do is get this out of the way that way it just makes it a whole lot easier to get it all cleaned up,
get this down to bare metal because we are gonna have to do a couple mods a little bit later.
It's pretty simple to get it out of the way.
Got the old cut off wheel here, so we'll make these three cuts on both sides.
We'll keep moving on.
Next we build a roll cage and fabricate custom carbon fiber panels.
Get this guy up and in here.
You gotta tell me kind of where you want it.
Um,
There,
so I got the main hoop in now and we tweaked on this thing a little bit, just kind of crept up on the bends to make sure this thing fits like it should.
We've got about 1/8 inch gap
on each side of the car and it actually touches the roof, so we'll be able to weld to the car in 3 places, which is really good.
This is just a great base for the start of the cage,
so we'll start working on the diagonal brace harness bar
and the 2 down bars.
When you're building cages or other tube structures, you wanna take your time to get the joints fitting as tightly as possible.
I can tack in a lot of these tubes without a filler rod because of the fit up,
and that's also helpful just in case you don't have someone to hold the tubes for you at that time.
I made some base plates to tie in the roll cage to two other points on the rear part of the body
just to increase the rigidity of the car itself,
which should help us with performance.
In the past we basically used two methods to get to the top of the roll cage.
The first one is using a whole saw to cut holes in the floor to drop the cage down,
or we build the cage on plinth boxes which also allows us to drop it down.
Basically what we're trying to achieve is just to give some room between the cage and the roof so we can get a tig torch up there.
But the third method which we're gonna show you guys is actually taking the roof away from the cage. So we're just gonna cut the A pillars and the B pillars, lift the roof off,
do what we need to do, and then weld the roof back on.
Oh,
Camaro convertible,
that's crazy.
That's how you do it though.
With the roof off of the car,
I can finish welding the joints up top as well as putting the roof diagonal bar.
We start the process of making the fiberglass molds on our 72 Camaro race car.
Alright guys, so we have both sides of the Camaro basically matching as far as the bulge goes on the quarter panels here. We've gone through the foam.
We've done some body filler work, and then we put both sides in the primer.
What I'm doing on my side is just hitting down the primer or knocking it down with some 400 grit.
What Jimmy's doing on his side of the quarter is he's actually applying some wax.
I'll go ahead and hit this quarter panel with 2 to 3 coats of wax before brushing on some PBA release agent,
which will also help aid in the release of the mold.
The PVA is meant to be a thin film,
so we'll go ahead and spread this out evenly.
Next up is the gel coat which provides the tooling surface of the mold, and this needs to be applied in two thick coats.
So for right now we're just gonna start cutting some fiberglass kind of lay it out and then we'll get some resin on it.
We are using chop strand matte fiberglass along with a polyester resin.
When the polyester resin gets applied,
it breaks down the binder in the mat, which makes it extremely pliable to form around complex shapes.
To saturate the matte with resin,
it's best to use a stippling action with the brush instead of trying to use brush strokes which can separate the mat and make a mess.
We got 4 layers of fiberglass on the 2 coats of gel coat, and we've let this cure for 24 hours
and now we can try to pop this thing off and see what our mold looks like and hopefully we get a clean release.
We got our fiberglass mold, so I'm gonna trim this up and we'll start laying some carbon.
We're using 2 layers of carbon fiber and 1 layer of fiberglass.
There's not much of a weight difference between the two.
However,
we want the look of the carbon fiber on the outside.
Another benefit of using both carbon fiber and fiberglass is that fiberglass is much cheaper than carbon fiber fabric,
which will help lower the cost.
All right, we got the quarter
all saturated with epoxy, so we're gonna let that cure
and we'll start working on the door.
These doors used to weigh somewhere around 115 pounds, and now they're down to the 30 to 35 pound range, which is a huge weight reduction.
All right guys, so we've had some time to let these body panels cure.
So we're gonna get the quarter panel out of the mold,
get the door skin off the door, and once I pop this, you'll see just how different it is.
All right, so we got a pretty good release there,
um, and as you can see this surface is perfectly smooth or it just takes on the surface of the mold.
So all we have to do to this is just trim it up,
wash the PBA off, give it a quick sand, and then we'll clear coat it.
Coming up,
our Camaro race car gets a wrap.
Just to give you guys a little bit of a recap, the reason why we did the flares in the first place is just so we could have a wider track width and still be able to tuck the wheels and tires underneath
and make it look really nice.
Now one big benefit of using some of this fender structure to mount our flares is that we retain the stock mounting points of the fenders so it goes right back on the car.
We'll get some rigidity once we rivet everything together and also we retain the headlight bucket geometry which allows everything just to go back in its original place.
Alright,
got these two click go together. We'll see
how everything looks.
I've got the fender on the car and fitting the way that I want it to, and I can see already that
it's just a little bit too low, so we're gonna go ahead and jack the car up
and get our set up rod, maybe a 1/2 inch to a 3/4 of an inch taller and then we can take a measurement,
send them off
now after we sprayed everything on the inside of the car with the white paint, we went ahead,
unmasked it all,
remasked.
The entire car and flipped it on its side and now what Jimmy's doing is spraying the underside of the car with a chassis shield.
All this stuff or all the paint that we're spraying came from SummitRacing.
This will be great on some of the bare metal surfaces, but it'll also do really good coverage over the painted surfaces that were underneath,
so he's kind of just getting at it and we'll see how it turns out.
That go down a little bit?
Stop,
go forward.
You mean backwards?
Yes.
Alright,
stay right there.
Back to the shop to put our Camaro back together for the final time.
We this thing in here.
Let's get this on here.
Then
we're gonna finish up the car.
When working with raps you do have to be careful
and it does take
you know some thought behind it you can't just close your eyes and
and throw it on there and magically appears there is a lot of technique to it.
It's very situational,
so you know it depends on the temperature.
And then it just depends on what you're putting it on. Are you putting it on a
a clean car, a nice smooth paint you do a block wall and it doesn't just stick to a block wall.
You actually have to torch every inch of it,
um, so there's just there's techniques to do what you need to do and certain situations require different techniques. The vinyl will tell you what it wants. You just gotta know how to read it and you gotta know what to do when you see it, so
it's, it's kind of crazy.
Obviously if it's a race car it's gonna see a lot of you know potential damage even if it's just from debris,
rocks,
sand anything from being rubber from being coming off the race track uh a lot of times it's you can clean it easily
and then if if it does get messed up beyond repair then you can replace that whole panel with either just a piece of material or a click of a button and print out a new fender um you don't necessarily have to repaint the whole car or reprint the whole car and rewrap the whole car.
Our Camaro has made a huge transformation and we want to give a big thank you to Mike and Jimmy for doing this.
This thing has completely exceeded our expectations and looks 100 times better than what we thought it could.
Oh yeah.
Coming up,
let's see how our Camaro performs on the track.
All right,
everybody,
today is the day
that we finally get to pay off our Camaro.
This is one of those projects,
as many of you may know,
you work on it for a really long time and you kind of have these ups and downs and
You're trying to figure out if it's all worth it,
if you should keep sinking money into it,
and if it's just worth your time to do it,
and I could tell you
ripping this thing for the first time down the straightaway,
it definitely makes it all worth it because this thing is fast,
it's mean,
it hugs the turns and it does exactly what we want it to do.
We're out here at Polecat Training Center in Fayetteville, Tennessee to put our car to the test.
This track is 2.1 miles long. It has about 120 ft of elevation change.
It's a nice technical course that's really gonna test our car and our skill set.
And I think one of my favorite parts about this so far is
uh shifting of course we have the dog box transmission that came out of
an NASCAR car
and learning how to shift up and down,
you know, we don't have to heel toe we can just flip the throttle as we're going through neutral
and uh makes for a really quick shift and makes for a really fun driving experience.
Well,
you looked really fast. How was it?
Let me tell you,
the fastest car we've ever built,
and it's gonna put the biggest smile on your face so you get in and you drive now.
Uh, you don't have to tell me twice.
I will gladly get in and drive the car. I'm a little scared, but I think, uh,
I think I should be able to pull this off.
You know, we've had this car in our shop for a long time. We've done a ton of work to it,
and we really did start with a good solid platform.
We didn't have to replace any of the floors or really worry about major damage on the car,
but it was a really good platform for us to build something just like
what we're driving right now.
You know, it took a long time for us to get to this point,
but I couldn't ask for anything else. This car is an absolute animal. It's doing everything that we ask of it.
We want to give a huge shout out to everybody over at EBC Breaks, because as everybody knows,
a whole bunch of horsepower is no good if you can't stop it,
especially in a car like this.
And really sitting in the seat right now running this thing around the track,
I am so happy with the way that it turned out.
I just am grinning from ear to ear.
It's so hard for me to focus on talking right now just because all I want to do is snap the throttle,
hit those corners, and just have a good time out here.
Man,
I would love to get behind the wheel of that Camaro,
wouldn't you?
Now remember you can catch all our other builds on our website.
I'm Natalie Stovall. I'll see y'all at the track.
Show Full Transcript
Welcome to Power Nation Builds. I'm Natalie Stovall.
Today we'll show the conversion of a 1972 Camaro Rally Sport into an awesome track ready race car in just 30 minutes.
Here's Carcass.
So this is our 1972 Camaro Rally sport with the famous split bumper on the front,
and the goal of this car is just to be a full tilt race car, and we have built race cars here before
and pretty respectful at that, but this thing should be even a few levels above those.
So when we go to take this car apart, it's actually gonna be quite simple.
We're gonna take the front clip off the car and the front clip consists of like the hood.
The two fenders, the nose cone and the core support radiator and stuff like that.
And then from there when we go to take the engine and transmission out we're just gonna unbolt the subframe which consists of about 6 bolts
as we take those 6 bolts out we're gonna pull the subframe, the suspension, the engine, and the transmission
clean out from underneath the car and it'll just give us a really good platform to start building out the roll cage and whatnot
now our car.
Does have a 350 in it, or at least that's what the air cleaner says on the top. Um, it's also a 3 speed automatic car and the odometer shows 46,000 miles.
Now
we're not sure if that's really 46,000 or 146,000 because back then
GM only ran 5 digits in their odometer, which means it only read up to 99,999 miles and then.
Restarted over so it started counting back from zero,
so this car could either have 46 or 146,000 miles on it
and really just with the condition of the car we're probably just assuming it's gonna have 146,000 miles on it just because it's pretty beat up for what it is now our car is a little higher option car does have air conditioning. It's got power steering, power brakes, plus it's got the vinyl top and the sport.
on the back and it also is holding the rally sport badges on the side.
Now with this being what would be considered to be a higher option car,
don't get us wrong,
it's not that nice of a car, but it is a perfect platform for us to start building our race car.
So we got nothing else connected here? Yeah, we're good.
We got jack spinning.
It's gonna fall off, so just be careful,
let it fall. Oh, it's sitting on the exhaust.
I was actually sitting on the part of the supplement.
Hey,
look at that. That works.
And as you can see there's not a single part on the inside or the outside.
Next thing we're trying to tackle is fabricating the roll cage, so having nothing on the interior is a great place to start.
So the spots that we're gonna be cleaning up for the base plates is this big flat area right here in the back on both sides plus we've got two little areas to do up front.
We're gonna be using this crud buster and that should whip right through the paint.
We're using the crudbuster because it doesn't remove any of the actual material or metal from the floor.
All this is doing is removing the paint
and the seam sealer.
Then we'll switch over to the bristle disc to do a little bit of polishing.
And we're only interested in using just the two frame rails of our subframe so everything's gotta come off of here so we're gonna get rid of all this junk because we're gonna get this thing all cleaned up
and then we're gonna start building out the suspension for our Camaro.
Get this thing up high enough
to clear every
cross members steering all that stuff but.
Works really good with this engine sling.
We got 4 solid points.
Of mounting
on the engine and it
keeps the engine sitting pretty level too.
All right,
I should do it.
See if we can get this thing out of here.
That's a beauty, Clark.
OK,
now that we have the front subframe pretty much stripped down to its bare bones, we're gonna get ready to get this thing cleaned up. Now there are a couple of things that we're gonna do before we get to the actual clean up.
We're gonna be running UMI's front suspension on this thing, and it has a set of coil overs to run their coil overs,
we have to come into this upper control arm mount bracket here and make.
Couple specific cuts to get this piece out of the way now we're not gonna be installing the suspension right now,
but what we are gonna do is get this out of the way that way it just makes it a whole lot easier to get it all cleaned up,
get this down to bare metal because we are gonna have to do a couple mods a little bit later.
It's pretty simple to get it out of the way.
Got the old cut off wheel here, so we'll make these three cuts on both sides.
We'll keep moving on.
Next we build a roll cage and fabricate custom carbon fiber panels.
Get this guy up and in here.
You gotta tell me kind of where you want it.
Um,
There,
so I got the main hoop in now and we tweaked on this thing a little bit, just kind of crept up on the bends to make sure this thing fits like it should.
We've got about 1/8 inch gap
on each side of the car and it actually touches the roof, so we'll be able to weld to the car in 3 places, which is really good.
This is just a great base for the start of the cage,
so we'll start working on the diagonal brace harness bar
and the 2 down bars.
When you're building cages or other tube structures, you wanna take your time to get the joints fitting as tightly as possible.
I can tack in a lot of these tubes without a filler rod because of the fit up,
and that's also helpful just in case you don't have someone to hold the tubes for you at that time.
I made some base plates to tie in the roll cage to two other points on the rear part of the body
just to increase the rigidity of the car itself,
which should help us with performance.
In the past we basically used two methods to get to the top of the roll cage.
The first one is using a whole saw to cut holes in the floor to drop the cage down,
or we build the cage on plinth boxes which also allows us to drop it down.
Basically what we're trying to achieve is just to give some room between the cage and the roof so we can get a tig torch up there.
But the third method which we're gonna show you guys is actually taking the roof away from the cage. So we're just gonna cut the A pillars and the B pillars, lift the roof off,
do what we need to do, and then weld the roof back on.
Oh,
Camaro convertible,
that's crazy.
That's how you do it though.
With the roof off of the car,
I can finish welding the joints up top as well as putting the roof diagonal bar.
We start the process of making the fiberglass molds on our 72 Camaro race car.
Alright guys, so we have both sides of the Camaro basically matching as far as the bulge goes on the quarter panels here. We've gone through the foam.
We've done some body filler work, and then we put both sides in the primer.
What I'm doing on my side is just hitting down the primer or knocking it down with some 400 grit.
What Jimmy's doing on his side of the quarter is he's actually applying some wax.
I'll go ahead and hit this quarter panel with 2 to 3 coats of wax before brushing on some PBA release agent,
which will also help aid in the release of the mold.
The PVA is meant to be a thin film,
so we'll go ahead and spread this out evenly.
Next up is the gel coat which provides the tooling surface of the mold, and this needs to be applied in two thick coats.
So for right now we're just gonna start cutting some fiberglass kind of lay it out and then we'll get some resin on it.
We are using chop strand matte fiberglass along with a polyester resin.
When the polyester resin gets applied,
it breaks down the binder in the mat, which makes it extremely pliable to form around complex shapes.
To saturate the matte with resin,
it's best to use a stippling action with the brush instead of trying to use brush strokes which can separate the mat and make a mess.
We got 4 layers of fiberglass on the 2 coats of gel coat, and we've let this cure for 24 hours
and now we can try to pop this thing off and see what our mold looks like and hopefully we get a clean release.
We got our fiberglass mold, so I'm gonna trim this up and we'll start laying some carbon.
We're using 2 layers of carbon fiber and 1 layer of fiberglass.
There's not much of a weight difference between the two.
However,
we want the look of the carbon fiber on the outside.
Another benefit of using both carbon fiber and fiberglass is that fiberglass is much cheaper than carbon fiber fabric,
which will help lower the cost.
All right, we got the quarter
all saturated with epoxy, so we're gonna let that cure
and we'll start working on the door.
These doors used to weigh somewhere around 115 pounds, and now they're down to the 30 to 35 pound range, which is a huge weight reduction.
All right guys, so we've had some time to let these body panels cure.
So we're gonna get the quarter panel out of the mold,
get the door skin off the door, and once I pop this, you'll see just how different it is.
All right, so we got a pretty good release there,
um, and as you can see this surface is perfectly smooth or it just takes on the surface of the mold.
So all we have to do to this is just trim it up,
wash the PBA off, give it a quick sand, and then we'll clear coat it.
Coming up,
our Camaro race car gets a wrap.
Just to give you guys a little bit of a recap, the reason why we did the flares in the first place is just so we could have a wider track width and still be able to tuck the wheels and tires underneath
and make it look really nice.
Now one big benefit of using some of this fender structure to mount our flares is that we retain the stock mounting points of the fenders so it goes right back on the car.
We'll get some rigidity once we rivet everything together and also we retain the headlight bucket geometry which allows everything just to go back in its original place.
Alright,
got these two click go together. We'll see
how everything looks.
I've got the fender on the car and fitting the way that I want it to, and I can see already that
it's just a little bit too low, so we're gonna go ahead and jack the car up
and get our set up rod, maybe a 1/2 inch to a 3/4 of an inch taller and then we can take a measurement,
send them off
now after we sprayed everything on the inside of the car with the white paint, we went ahead,
unmasked it all,
remasked.
The entire car and flipped it on its side and now what Jimmy's doing is spraying the underside of the car with a chassis shield.
All this stuff or all the paint that we're spraying came from SummitRacing.
This will be great on some of the bare metal surfaces, but it'll also do really good coverage over the painted surfaces that were underneath,
so he's kind of just getting at it and we'll see how it turns out.
That go down a little bit?
Stop,
go forward.
You mean backwards?
Yes.
Alright,
stay right there.
Back to the shop to put our Camaro back together for the final time.
We this thing in here.
Let's get this on here.
Then
we're gonna finish up the car.
When working with raps you do have to be careful
and it does take
you know some thought behind it you can't just close your eyes and
and throw it on there and magically appears there is a lot of technique to it.
It's very situational,
so you know it depends on the temperature.
And then it just depends on what you're putting it on. Are you putting it on a
a clean car, a nice smooth paint you do a block wall and it doesn't just stick to a block wall.
You actually have to torch every inch of it,
um, so there's just there's techniques to do what you need to do and certain situations require different techniques. The vinyl will tell you what it wants. You just gotta know how to read it and you gotta know what to do when you see it, so
it's, it's kind of crazy.
Obviously if it's a race car it's gonna see a lot of you know potential damage even if it's just from debris,
rocks,
sand anything from being rubber from being coming off the race track uh a lot of times it's you can clean it easily
and then if if it does get messed up beyond repair then you can replace that whole panel with either just a piece of material or a click of a button and print out a new fender um you don't necessarily have to repaint the whole car or reprint the whole car and rewrap the whole car.
Our Camaro has made a huge transformation and we want to give a big thank you to Mike and Jimmy for doing this.
This thing has completely exceeded our expectations and looks 100 times better than what we thought it could.
Oh yeah.
Coming up,
let's see how our Camaro performs on the track.
All right,
everybody,
today is the day
that we finally get to pay off our Camaro.
This is one of those projects,
as many of you may know,
you work on it for a really long time and you kind of have these ups and downs and
You're trying to figure out if it's all worth it,
if you should keep sinking money into it,
and if it's just worth your time to do it,
and I could tell you
ripping this thing for the first time down the straightaway,
it definitely makes it all worth it because this thing is fast,
it's mean,
it hugs the turns and it does exactly what we want it to do.
We're out here at Polecat Training Center in Fayetteville, Tennessee to put our car to the test.
This track is 2.1 miles long. It has about 120 ft of elevation change.
It's a nice technical course that's really gonna test our car and our skill set.
And I think one of my favorite parts about this so far is
uh shifting of course we have the dog box transmission that came out of
an NASCAR car
and learning how to shift up and down,
you know, we don't have to heel toe we can just flip the throttle as we're going through neutral
and uh makes for a really quick shift and makes for a really fun driving experience.
Well,
you looked really fast. How was it?
Let me tell you,
the fastest car we've ever built,
and it's gonna put the biggest smile on your face so you get in and you drive now.
Uh, you don't have to tell me twice.
I will gladly get in and drive the car. I'm a little scared, but I think, uh,
I think I should be able to pull this off.
You know, we've had this car in our shop for a long time. We've done a ton of work to it,
and we really did start with a good solid platform.
We didn't have to replace any of the floors or really worry about major damage on the car,
but it was a really good platform for us to build something just like
what we're driving right now.
You know, it took a long time for us to get to this point,
but I couldn't ask for anything else. This car is an absolute animal. It's doing everything that we ask of it.
We want to give a huge shout out to everybody over at EBC Breaks, because as everybody knows,
a whole bunch of horsepower is no good if you can't stop it,
especially in a car like this.
And really sitting in the seat right now running this thing around the track,
I am so happy with the way that it turned out.
I just am grinning from ear to ear.
It's so hard for me to focus on talking right now just because all I want to do is snap the throttle,
hit those corners, and just have a good time out here.
Man,
I would love to get behind the wheel of that Camaro,
wouldn't you?
Now remember you can catch all our other builds on our website.
I'm Natalie Stovall. I'll see y'all at the track.



