
Video Transcript
You're watching Power Nation.
Welcome to the Power Nation Builds warehouse where we keep all of our past,
present, and future projects.
I'm Natalie Stovall, and in the next 30 minutes,
trucks is gonna turn a Mazda into a lightning.
Check it out.
I love that truck.
Now can you imagine a drive train like that with that kind of horsepower and torque in a smaller,
more nimble truck that can weigh anywhere between 1500 and 2000 pounds less?
You'd have a little rocket ship on your hands or at least a mini version of a Ford Lightning.
And since mini Lightning doesn't sound that tough,
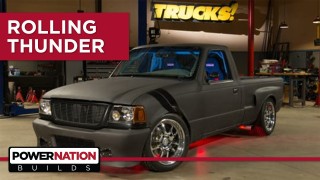
we're calling this thing Project Rolling Thunder.
Now we were actually looking for a single cab Ford Ranger when we found our Mazda B-2500, and they look almost identical until you get a little closer.
For instance,
look at the bedside. It's got this kind of a cool style line that we're actually getting used to,
sort of sets it apart.
The doors, well,
Ford Ranger,
the cab Ford Ranger, the proofs in the pudding,
you check out the VIN and the sticker.
So it's manufactured by Ford Motor Company in the USA.
So for all intents and purposes, it's a Ranger.
Now I know that right now there's guys talking back to their television saying you don't have to pull the cab to pull the engine and you're right, you don't have to.
However,
the ability to do this type of work flatfooted and not laying on your back on a creeper well it's definitely worth the extra effort.
And since the air conditioning on our little Mazda still worked,
well, that means it's full of freon,
and the air conditioning compressor is gonna stay with the rest of the system and go up with the body when we separate it from the chassis
until we can deal with it the correct way.
We may end up reusing our radiator, so we pulled it to keep it from getting damaged
and since our 4 cylinder computer won't exactly work on our new 8 cylinder engine,
we pulled that as well.
OK.
Separating the rest of the cab from the chassis,
what was simple as pulling the bulkhead connector on the floorboard of the cab,
made it really easy.
And with the driver controls and harnesses separated,
all that are left are 6 bolts holding the body to the chassis.
Now believe it or not, the cab is actually not that heavy, so even without a lift with a few buddies, you can set the cab and nose on some jack sands.
Now Ford Servic will tell you that everything we've done is standard procedure except the surfing.
Now pulling the exhaust system was pretty straightforward,
and we were able to remove most of the hardware with the help of some penetrating oil.
But separating the down pipe from the exhaust manifold,
that took a little heat.
Now with a swap like this, it's kind of uncharted so you never really know what you're gonna reuse and what you're gonna throw away.
So we're carefully disassembling everything rather than hacking it up and throwing it in a pot.
Now we're not really sure what we're gonna do with this 4 cylinder engine and 5 speed transmission.
I guess we could sell it as used parts or make a really, really fast go-kart.
Obviously weight bias is pretty important with a project like this, so we're weighing everything that we pull out of this truck as well as the new components we're gonna put in.
The stock engine and transmission coming right at
537 pounds, which is actually a little bit lighter than we thought it was gonna be.
Now with the new engine and transmission, unfortunately we're picking up a couple 100 extra pounds,
but we're also picking up a couple 100 extra horsepower,
and that is a tradeoff we'll take any day.
From there it becomes a balancing act in trying to effectively plant that power to the rear wheels. Get this thing balanced out.
Now for our application,
we knew we were going to need a better than stock replacement clutch.
So we went to Summit Racing and picked up some parts from Center Force.
The first thing we're doing is installing the bearing assembly and making sure it's sitting flush.
Then we can take our first measurement from the bell housing mating surface to the front of the throw out bearing.
But before we can get our second measurement,
there's some installation work we've got to do like getting this pilot bearing installed in the back of the crankshaft.
We're using an impact socket and a mallet.
Next was a bell housing separator plate.
We followed that with the aluminum flywheel
and since this thing's going on for good,
we use some red lock tight on the bolts to make sure it stays place.
And after starting the bolts by hand, we're just snugging them down using the impact wrench.
We follow that with an accurate torque.
And by using an alignment tool,
we can finish up the job getting the clutch disk and the new pressure plate installed.
And with the bell housing installed,
we can get that 2nd measurement we needed,
and it goes from the bell housing to transmission mating surface
to the very top point of the clutch fingers
and using these measurements and doing a little bit of math,
we were able to properly set the height of the adjusting sleeve on the throw out bearing.
It needs to have an 18 inch clearance in between the face of the throw out bearing and the clutch fingers to operate properly.
Now for our application,
we ended up using the provided spacer sleeve.
Now the two O-rings on the throwout bearing are a snug fit. So if you need to lubricate them with brake fluid only.
One final measurement will verify,
we're still right on the money.
That's it.
And last but not least,
we can install the bell housing,
hopefully for the last time.
Coming up,
the transformation continues with the Ford body panel swap.
Now another reason this stock fuel tank has got to go away is that it's going to try to occupy the same space is that IRS subframe assembly and needless to say, the 7.5 inch rear axle has got to go as well.
And I'm kind of surprised that this thing held together during the test drive.
But I guess the fact that the engine was a little bit wounded
and these bike tires weren't exactly hooking up
helped the axle live.
Now, we're stripping the front suspension down
just for the sake of getting it to a bare frame.
That way, we can set the frame at ride height and work the front and rear suspensions separately.
Now there aren't any off the shelf Bolton kits whose primary focus is to get the truck to handle better.
They're mainly designed to sit the truck lower down for looks and aesthetics, but I guess that's to be expected since nobody really takes a pickup truck to a road course.
So we're going to be on our own for a completely custom front suspension that handles.
This rendering was inspired by an actual vehicle that Ford's SVT team put together using an '01 Ford Ranger and a Ford Lightning drivetrain.
Now this truck looks downright mean and with the power that we've got sitting in the corner waiting to go in it, it's gonna back it up too.
Now one thing we're definitely not gonna change because it's the same as the Ford Ranger.
This is lightweight aluminum hood.
Now the rest of the swap is pretty straightforward,
and since these fenders have a few dings, dents, and pop knots, well, it would take a little bit of labor to get them ready for paint anyway.
So a sheet metal swap makes even more sense.
So it doesn't take much to tear down the nose of one of these trucks,
just a few simple tools will get the job done.
But keep this in mind, this truck's old enough so that some of the plastic parts and fasteners, well, they can get a little brittle, so take care,
taking it apart.
All the parts and pieces while they're very lightweight and it might seem like these trucks aren't made of much, but just because the sheet metal's light doesn't mean the underlying structure is not.
It's made to absorb impact on a collision and it's quite strong.
Obvious differences between a replacement fender and the original fender.
The biggest one that you see is the fact that the Ecode or the electrodeposition primer is black instead of the grayish green color,
and your eyes are drawn right to the sticker. This just signifies that this fender or this panel has been certified by the Department of Transportation.
Being a safe replacement now this greenish gray E code is what the factory put on. So if this is still the color underneath your truck's skin,
well,
chances are it hadn't been crashed out.
Here's what we're doing now. We're going to transfer this clip.
Now there's an easy way to release these J clips. Just grab a hold of the spring steel tab.
Just lift it straight up.
That allows you to replace it and it still stays in place, it won't drop off on the floor and it's still movable so you can adjust this panel.
Now you can clearly see the difference between the Mazda Fender and the Ford Ranger Fender, at least when it comes to styling,
but the mounting locations are exactly the same on both pieces.
We had no trouble at all lining up the panel gaps and the stampings were precise.
Now you wanna make sure that there's no interference between the door and the new fender.
This fender passed that test pretty good too.
Looks good width wise for the most part it looks pretty good.
Now making sure your fenders are properly aligned is the foundation for the rest of the truck fitting well.
If the fenders don't fit,
none of this other stuff is gonna line up and you're gonna be chasing problems around in a circle.
So fit your panels from the back to the front, you should be in good shape.
Now some of the parts come with hardware and clips.
Some of it you've got to repurpose from the old parts that you've taken off.
We reused the mounting hardware for the headlights and marker lights from the old ones.
Such as these spring steel headlight mounting clips. They go in from the backside and hold the headlights in, but they can be accessed from the top.
Sometimes it takes some specialty tools, so thanks, Matco.
Now we're using brand new retainers to hold the grill in from the top,
but we transferred the spring steel clips from the bottom from the other header and grill.
Ranger
Now with the Mazda front bumper stripped down,
guess what?
It perfectly matches the profile of the Ford Ranger grill, and that's just proof that there's some cross breeding going on, and this truly was a Ranger to start with.
Now the lower balance here, like we said, we want to utilize these fog light ports as some kind of break cooling duct.
Now it doesn't bolt right up. We're gonna have to do some work to it to get it to work,
but we wanted to build a chin spoiler or a splitter anyway,
so we've got fabrication work ahead of us no matter what we do.
Now for the minimal time and money investment we've got in this thing,
we've turned our plain Jane Mazda B2500 into a late model Ford Ranger
and a modified one at that.
Up next,
more flat black paint and suspension.
Welcome back to Power Nation builds.
Let's return to trucks.
After spending a couple of hours sanding the surfaces with 320 grit sandpaper and about 45 minutes worth of masking to cover up the headlights, the tail lights, and all the windows, we carefully drove it into the spray booth.
Dead rat flat black is a single stage paint,
meaning there's no clear coat that goes on top of it, although we have used a flat clear coat in the past.
In a typical single sage paint,
the strength and the gloss are built into the one coat, although with this being flat,
well,
of course there's no gloss.
The paint job we're giving Rolling Thunder is what's commonly known in the industry as a scuff and shoot,
meaning that we didn't take the mirrors off.
I didn't slide the bed back or remove it, and all we did was bag the wheels.
If we've been using a full gloss paint,
well,
the area between the bed and the cab would have showed dry spray with a total flat black.
We're not even gonna see it, so it wasn't worth the effort.
The biggest benefit to have in this truck, all one color,
aside from looking like a completed vehicle,
is that this is truly a topcoat,
meaning that when we scratch it, it's not going to scratch off white, it's not gonna look like a chalkboard anymore and it's gonna look like the racing thoroughbred that we built.
Now the lower control arm mounts are made out of 1/4 inch thick steel and welded solidly to the frame.
The lower arms are from factory 5 Racing
and fit a Mustang.
The upper mounts have two holes for adjustability.
They're made out of 3/16 plate
and attach the circle track upper A arms.
Now we had to ditch our stock Ranger rack and pinion.
When we built our custom front suspension,
we built it to match the increased track width of our independent rear suspension out of an '04 Mustang Cobra.
So bottom line, the Ranger rack just wasn't wide enough,
so we picked up a steering rack from a late model Mustang to suit our needs.
For tie rod ends we're gonna try to get away with using these Mustang ends, but if need be we can upgrade to an adjustable rod end later.
Now the front suspension system is a mixture of aftermarket and original equipment components like these front seal bearing hubs that are spec for an SN 95 Mustang.
Now they're easy to replace and inexpensive and also support aftermarket break upgrades like these rambo 13 inch rotors with 4 piston calipers that we got out of the Ford Racing catalog because at the end of every straightaway is a curve or retaining wall that we frankly do not want to come into contact with.
And the last piece of the drivetrain puzzle is the drive shaft.
Now a great way to reduce weight and parasitic drag at the same time is with an aluminum drive shaft.
So we called Denny's drive shaft service and had to make us up this one.
It's his 1350 series high speed balance 4 inch aluminum hat and features Spicer 1350 series U joints and this forged Spicer slip yoke.
Now we told Danny we were gonna be pushing about 600 horsepower out of the back of this transmission,
and we needed a shaft that would handle it.
Well, he built this one that would take double that punishment.
Now a stock Mazda or Ranger frame isn't exactly the stiffest platform to build a track vehicle off of,
so we added some boxing plates complete with speed holes.
Then we welded those in along with all the cross member junctions to make the chassis as stiff as possible.
Then we dropped in our 4.6 L engine and 6 speed manual transmission.
Follow that with the installation of an independent rear suspension out of an '03 Mustang Cobra.
You don't see that every day in a truck.
Then it was on the front suspension which we moved forward 5.5 inches for weight distribution.
Speaking of which,
that's why we put the fuel tank and the battery towards the rear of the truck.
Better balance equals better handling.
A heavy duty aluminum drive shaft connects our six speed gearbox to the limited slip equip differential.
After a little bit of plumbing,
we reinstalled our ceramic coated factory manifolds
and followed that with the installation of a completely custom stainless steel exhaust system.
And since we like the side exit, well, we kept that, but this time we went out both sides.
Now to feed the supercharger,
we added the cold air intake.
Now to keep tabs on what's going on underneath the hood,
we added a whole slew of gauges
and to keep it safe inside,
well,
we added a pretty robust roll cage complete with race seats and 5 point harnesses.
The last thing we need to do to wad this thing up on a road course and not walk away.
We're back.
Rolling Thunder is now at DVR to get a custom engine tune on the dyno.
It's done. We're ready. We're ready.
First thing we did when we got Rolling Thunder was just do a basic check over the vehicle
um found a couple of things we need to fix right away,
got those kind of in order.
We're gonna start and make a pull from 2000 to 4000.
We like what we see,
we'll go from there. If not, we'll make some changes, go from there.
We kind of take baby steps.
We look everything over we look at the boost,
we look at all the temperatures,
we check the belts, we check the drive line to make sure you know everything's OK.
With the help of one Racing we make changes based off of what we saw
and then we make another pool, usually 2000 or 5000.
On and on and on until we get to the, the revel of that vehicle,
um, until it's done.
Now on a pump gas drag tune where he added a couple of degrees of timing,
this thing responded by making 550 horsepower and 540 pounds of torque. So needless to say,
well, we're beyond psyched and we're gonna have to flip a coin or arm wrestle or something determine who gets to drive this bad boy home.
We were very pleased with how we were able to accomplish the goal for this truck.
Um, I feel like the, the calibration it's it's gonna be very safe.
You're gonna get a lot of fun out of it and there's tons of room for potential.
All right,
now we're up here at a wet Nashville fairground speedway and this truck's only seen street miles,
so we want to be cautious, give it a few warm up laps, take it into the pits, make sure everything's good to go,
and we can suit up,
hope the track dries out and give this thing a real workout.
I always overcooked that one.
Over rotation.
Now those changes we made were increased negative camra on the front tires, which really didn't do anything for rear grip.
Now that increased negative camber will help even out front tire temperatures and even out the tire wear,
which is a good thing since they're not exactly cheap.
Now this truck's got a ton of adjustability built into it between alignment and a triple adjustable coil overs.
We can set this thing up for just about any road course,
but that's what it's made for.
So we won't be trying to dial it in for a banked oval.
Plants spot what?
Now our BFGs are street tires and they're doing a great job of keeping our truck planted on the track.
Now it's probably a good idea that we installed brake cooling ducts because we were working them hard.
The truck was going from wide open throttle to a foot full of brake pedal.
The truck didn't have much time to cool the brakes off cruising around the oval.
Man this thing pulls, it just never stops.
Now this truck was years in the making,
but after today it's very clear to me it's all worth it.
Did y'all think they could pull that off?
Nice job, guys.
Now remember you can catch all of our other great builds on our website.
I'm Natalie Stovall. I'll see you down the road.
Show Full Transcript
Welcome to the Power Nation Builds warehouse where we keep all of our past,
present, and future projects.
I'm Natalie Stovall, and in the next 30 minutes,
trucks is gonna turn a Mazda into a lightning.
Check it out.
I love that truck.
Now can you imagine a drive train like that with that kind of horsepower and torque in a smaller,
more nimble truck that can weigh anywhere between 1500 and 2000 pounds less?
You'd have a little rocket ship on your hands or at least a mini version of a Ford Lightning.
And since mini Lightning doesn't sound that tough,
we're calling this thing Project Rolling Thunder.
Now we were actually looking for a single cab Ford Ranger when we found our Mazda B-2500, and they look almost identical until you get a little closer.
For instance,
look at the bedside. It's got this kind of a cool style line that we're actually getting used to,
sort of sets it apart.
The doors, well,
Ford Ranger,
the cab Ford Ranger, the proofs in the pudding,
you check out the VIN and the sticker.
So it's manufactured by Ford Motor Company in the USA.
So for all intents and purposes, it's a Ranger.
Now I know that right now there's guys talking back to their television saying you don't have to pull the cab to pull the engine and you're right, you don't have to.
However,
the ability to do this type of work flatfooted and not laying on your back on a creeper well it's definitely worth the extra effort.
And since the air conditioning on our little Mazda still worked,
well, that means it's full of freon,
and the air conditioning compressor is gonna stay with the rest of the system and go up with the body when we separate it from the chassis
until we can deal with it the correct way.
We may end up reusing our radiator, so we pulled it to keep it from getting damaged
and since our 4 cylinder computer won't exactly work on our new 8 cylinder engine,
we pulled that as well.
OK.
Separating the rest of the cab from the chassis,
what was simple as pulling the bulkhead connector on the floorboard of the cab,
made it really easy.
And with the driver controls and harnesses separated,
all that are left are 6 bolts holding the body to the chassis.
Now believe it or not, the cab is actually not that heavy, so even without a lift with a few buddies, you can set the cab and nose on some jack sands.
Now Ford Servic will tell you that everything we've done is standard procedure except the surfing.
Now pulling the exhaust system was pretty straightforward,
and we were able to remove most of the hardware with the help of some penetrating oil.
But separating the down pipe from the exhaust manifold,
that took a little heat.
Now with a swap like this, it's kind of uncharted so you never really know what you're gonna reuse and what you're gonna throw away.
So we're carefully disassembling everything rather than hacking it up and throwing it in a pot.
Now we're not really sure what we're gonna do with this 4 cylinder engine and 5 speed transmission.
I guess we could sell it as used parts or make a really, really fast go-kart.
Obviously weight bias is pretty important with a project like this, so we're weighing everything that we pull out of this truck as well as the new components we're gonna put in.
The stock engine and transmission coming right at
537 pounds, which is actually a little bit lighter than we thought it was gonna be.
Now with the new engine and transmission, unfortunately we're picking up a couple 100 extra pounds,
but we're also picking up a couple 100 extra horsepower,
and that is a tradeoff we'll take any day.
From there it becomes a balancing act in trying to effectively plant that power to the rear wheels. Get this thing balanced out.
Now for our application,
we knew we were going to need a better than stock replacement clutch.
So we went to Summit Racing and picked up some parts from Center Force.
The first thing we're doing is installing the bearing assembly and making sure it's sitting flush.
Then we can take our first measurement from the bell housing mating surface to the front of the throw out bearing.
But before we can get our second measurement,
there's some installation work we've got to do like getting this pilot bearing installed in the back of the crankshaft.
We're using an impact socket and a mallet.
Next was a bell housing separator plate.
We followed that with the aluminum flywheel
and since this thing's going on for good,
we use some red lock tight on the bolts to make sure it stays place.
And after starting the bolts by hand, we're just snugging them down using the impact wrench.
We follow that with an accurate torque.
And by using an alignment tool,
we can finish up the job getting the clutch disk and the new pressure plate installed.
And with the bell housing installed,
we can get that 2nd measurement we needed,
and it goes from the bell housing to transmission mating surface
to the very top point of the clutch fingers
and using these measurements and doing a little bit of math,
we were able to properly set the height of the adjusting sleeve on the throw out bearing.
It needs to have an 18 inch clearance in between the face of the throw out bearing and the clutch fingers to operate properly.
Now for our application,
we ended up using the provided spacer sleeve.
Now the two O-rings on the throwout bearing are a snug fit. So if you need to lubricate them with brake fluid only.
One final measurement will verify,
we're still right on the money.
That's it.
And last but not least,
we can install the bell housing,
hopefully for the last time.
Coming up,
the transformation continues with the Ford body panel swap.
Now another reason this stock fuel tank has got to go away is that it's going to try to occupy the same space is that IRS subframe assembly and needless to say, the 7.5 inch rear axle has got to go as well.
And I'm kind of surprised that this thing held together during the test drive.
But I guess the fact that the engine was a little bit wounded
and these bike tires weren't exactly hooking up
helped the axle live.
Now, we're stripping the front suspension down
just for the sake of getting it to a bare frame.
That way, we can set the frame at ride height and work the front and rear suspensions separately.
Now there aren't any off the shelf Bolton kits whose primary focus is to get the truck to handle better.
They're mainly designed to sit the truck lower down for looks and aesthetics, but I guess that's to be expected since nobody really takes a pickup truck to a road course.
So we're going to be on our own for a completely custom front suspension that handles.
This rendering was inspired by an actual vehicle that Ford's SVT team put together using an '01 Ford Ranger and a Ford Lightning drivetrain.
Now this truck looks downright mean and with the power that we've got sitting in the corner waiting to go in it, it's gonna back it up too.
Now one thing we're definitely not gonna change because it's the same as the Ford Ranger.
This is lightweight aluminum hood.
Now the rest of the swap is pretty straightforward,
and since these fenders have a few dings, dents, and pop knots, well, it would take a little bit of labor to get them ready for paint anyway.
So a sheet metal swap makes even more sense.
So it doesn't take much to tear down the nose of one of these trucks,
just a few simple tools will get the job done.
But keep this in mind, this truck's old enough so that some of the plastic parts and fasteners, well, they can get a little brittle, so take care,
taking it apart.
All the parts and pieces while they're very lightweight and it might seem like these trucks aren't made of much, but just because the sheet metal's light doesn't mean the underlying structure is not.
It's made to absorb impact on a collision and it's quite strong.
Obvious differences between a replacement fender and the original fender.
The biggest one that you see is the fact that the Ecode or the electrodeposition primer is black instead of the grayish green color,
and your eyes are drawn right to the sticker. This just signifies that this fender or this panel has been certified by the Department of Transportation.
Being a safe replacement now this greenish gray E code is what the factory put on. So if this is still the color underneath your truck's skin,
well,
chances are it hadn't been crashed out.
Here's what we're doing now. We're going to transfer this clip.
Now there's an easy way to release these J clips. Just grab a hold of the spring steel tab.
Just lift it straight up.
That allows you to replace it and it still stays in place, it won't drop off on the floor and it's still movable so you can adjust this panel.
Now you can clearly see the difference between the Mazda Fender and the Ford Ranger Fender, at least when it comes to styling,
but the mounting locations are exactly the same on both pieces.
We had no trouble at all lining up the panel gaps and the stampings were precise.
Now you wanna make sure that there's no interference between the door and the new fender.
This fender passed that test pretty good too.
Looks good width wise for the most part it looks pretty good.
Now making sure your fenders are properly aligned is the foundation for the rest of the truck fitting well.
If the fenders don't fit,
none of this other stuff is gonna line up and you're gonna be chasing problems around in a circle.
So fit your panels from the back to the front, you should be in good shape.
Now some of the parts come with hardware and clips.
Some of it you've got to repurpose from the old parts that you've taken off.
We reused the mounting hardware for the headlights and marker lights from the old ones.
Such as these spring steel headlight mounting clips. They go in from the backside and hold the headlights in, but they can be accessed from the top.
Sometimes it takes some specialty tools, so thanks, Matco.
Now we're using brand new retainers to hold the grill in from the top,
but we transferred the spring steel clips from the bottom from the other header and grill.
Ranger
Now with the Mazda front bumper stripped down,
guess what?
It perfectly matches the profile of the Ford Ranger grill, and that's just proof that there's some cross breeding going on, and this truly was a Ranger to start with.
Now the lower balance here, like we said, we want to utilize these fog light ports as some kind of break cooling duct.
Now it doesn't bolt right up. We're gonna have to do some work to it to get it to work,
but we wanted to build a chin spoiler or a splitter anyway,
so we've got fabrication work ahead of us no matter what we do.
Now for the minimal time and money investment we've got in this thing,
we've turned our plain Jane Mazda B2500 into a late model Ford Ranger
and a modified one at that.
Up next,
more flat black paint and suspension.
Welcome back to Power Nation builds.
Let's return to trucks.
After spending a couple of hours sanding the surfaces with 320 grit sandpaper and about 45 minutes worth of masking to cover up the headlights, the tail lights, and all the windows, we carefully drove it into the spray booth.
Dead rat flat black is a single stage paint,
meaning there's no clear coat that goes on top of it, although we have used a flat clear coat in the past.
In a typical single sage paint,
the strength and the gloss are built into the one coat, although with this being flat,
well,
of course there's no gloss.
The paint job we're giving Rolling Thunder is what's commonly known in the industry as a scuff and shoot,
meaning that we didn't take the mirrors off.
I didn't slide the bed back or remove it, and all we did was bag the wheels.
If we've been using a full gloss paint,
well,
the area between the bed and the cab would have showed dry spray with a total flat black.
We're not even gonna see it, so it wasn't worth the effort.
The biggest benefit to have in this truck, all one color,
aside from looking like a completed vehicle,
is that this is truly a topcoat,
meaning that when we scratch it, it's not going to scratch off white, it's not gonna look like a chalkboard anymore and it's gonna look like the racing thoroughbred that we built.
Now the lower control arm mounts are made out of 1/4 inch thick steel and welded solidly to the frame.
The lower arms are from factory 5 Racing
and fit a Mustang.
The upper mounts have two holes for adjustability.
They're made out of 3/16 plate
and attach the circle track upper A arms.
Now we had to ditch our stock Ranger rack and pinion.
When we built our custom front suspension,
we built it to match the increased track width of our independent rear suspension out of an '04 Mustang Cobra.
So bottom line, the Ranger rack just wasn't wide enough,
so we picked up a steering rack from a late model Mustang to suit our needs.
For tie rod ends we're gonna try to get away with using these Mustang ends, but if need be we can upgrade to an adjustable rod end later.
Now the front suspension system is a mixture of aftermarket and original equipment components like these front seal bearing hubs that are spec for an SN 95 Mustang.
Now they're easy to replace and inexpensive and also support aftermarket break upgrades like these rambo 13 inch rotors with 4 piston calipers that we got out of the Ford Racing catalog because at the end of every straightaway is a curve or retaining wall that we frankly do not want to come into contact with.
And the last piece of the drivetrain puzzle is the drive shaft.
Now a great way to reduce weight and parasitic drag at the same time is with an aluminum drive shaft.
So we called Denny's drive shaft service and had to make us up this one.
It's his 1350 series high speed balance 4 inch aluminum hat and features Spicer 1350 series U joints and this forged Spicer slip yoke.
Now we told Danny we were gonna be pushing about 600 horsepower out of the back of this transmission,
and we needed a shaft that would handle it.
Well, he built this one that would take double that punishment.
Now a stock Mazda or Ranger frame isn't exactly the stiffest platform to build a track vehicle off of,
so we added some boxing plates complete with speed holes.
Then we welded those in along with all the cross member junctions to make the chassis as stiff as possible.
Then we dropped in our 4.6 L engine and 6 speed manual transmission.
Follow that with the installation of an independent rear suspension out of an '03 Mustang Cobra.
You don't see that every day in a truck.
Then it was on the front suspension which we moved forward 5.5 inches for weight distribution.
Speaking of which,
that's why we put the fuel tank and the battery towards the rear of the truck.
Better balance equals better handling.
A heavy duty aluminum drive shaft connects our six speed gearbox to the limited slip equip differential.
After a little bit of plumbing,
we reinstalled our ceramic coated factory manifolds
and followed that with the installation of a completely custom stainless steel exhaust system.
And since we like the side exit, well, we kept that, but this time we went out both sides.
Now to feed the supercharger,
we added the cold air intake.
Now to keep tabs on what's going on underneath the hood,
we added a whole slew of gauges
and to keep it safe inside,
well,
we added a pretty robust roll cage complete with race seats and 5 point harnesses.
The last thing we need to do to wad this thing up on a road course and not walk away.
We're back.
Rolling Thunder is now at DVR to get a custom engine tune on the dyno.
It's done. We're ready. We're ready.
First thing we did when we got Rolling Thunder was just do a basic check over the vehicle
um found a couple of things we need to fix right away,
got those kind of in order.
We're gonna start and make a pull from 2000 to 4000.
We like what we see,
we'll go from there. If not, we'll make some changes, go from there.
We kind of take baby steps.
We look everything over we look at the boost,
we look at all the temperatures,
we check the belts, we check the drive line to make sure you know everything's OK.
With the help of one Racing we make changes based off of what we saw
and then we make another pool, usually 2000 or 5000.
On and on and on until we get to the, the revel of that vehicle,
um, until it's done.
Now on a pump gas drag tune where he added a couple of degrees of timing,
this thing responded by making 550 horsepower and 540 pounds of torque. So needless to say,
well, we're beyond psyched and we're gonna have to flip a coin or arm wrestle or something determine who gets to drive this bad boy home.
We were very pleased with how we were able to accomplish the goal for this truck.
Um, I feel like the, the calibration it's it's gonna be very safe.
You're gonna get a lot of fun out of it and there's tons of room for potential.
All right,
now we're up here at a wet Nashville fairground speedway and this truck's only seen street miles,
so we want to be cautious, give it a few warm up laps, take it into the pits, make sure everything's good to go,
and we can suit up,
hope the track dries out and give this thing a real workout.
I always overcooked that one.
Over rotation.
Now those changes we made were increased negative camra on the front tires, which really didn't do anything for rear grip.
Now that increased negative camber will help even out front tire temperatures and even out the tire wear,
which is a good thing since they're not exactly cheap.
Now this truck's got a ton of adjustability built into it between alignment and a triple adjustable coil overs.
We can set this thing up for just about any road course,
but that's what it's made for.
So we won't be trying to dial it in for a banked oval.
Plants spot what?
Now our BFGs are street tires and they're doing a great job of keeping our truck planted on the track.
Now it's probably a good idea that we installed brake cooling ducts because we were working them hard.
The truck was going from wide open throttle to a foot full of brake pedal.
The truck didn't have much time to cool the brakes off cruising around the oval.
Man this thing pulls, it just never stops.
Now this truck was years in the making,
but after today it's very clear to me it's all worth it.
Did y'all think they could pull that off?
Nice job, guys.
Now remember you can catch all of our other great builds on our website.
I'm Natalie Stovall. I'll see you down the road.



