
In This Episode
- 0:10 Introduction to the build
- 0:44 Frame straightening process
- 2:08 Wheel bearing and hub replacement
- 3:52 Axle assembly swap
- 4:34 Body fitting and welding
- 5:48 Exhaust manifold and turbo installation
- 7:18 Clutch upgrade
- 8:44 Team introduction and body work
- 11:48 Painting process
- 15:14 Reassembly and final touches
- 16:55 First drive and performance review
Video Transcript
Welcome to Power Nation Builds. I'm Natalie Stovall.
This is your chance to see one of our builds from start to finish in just 30 minutes.
Today
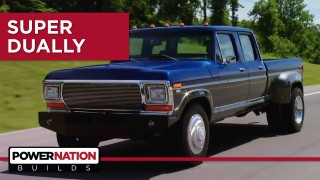
we drop a 97 Ram body with a diesel engine onto a '79 Ford F-350.
Here's trucks.
Hey,
welcome to trucks.
Today we're back on our diesel tow rig project.
We're in the process of stripping parts of it so we can transplant some of this stuff into our classic Ford
to give you guys an idea on where this project got started,
check this out.
Monty had exactly what we were looking for this F-350 XLT Ranger four door cab with a short bed sitting on the long bed frame.
Now it had faded paint and a little bit of surface rust,
but this body was in solid condition, which is kind of rare for these trucks since they were used for work trucks.
Now one minor detail,
it didn't have an engine, but that's OK because this was a gas burner and we want a diesel.
So we thought we'd head down that road and see what it takes to drop that classic Ford body down on a newer Dodge frame.
And when this truck was wrecked, there's a combination of sheet metal, suspension, and.
A little bit of frame damage.
So we've shipped our chassis to Gerald's autobody to have it straightened, and we're going to show you guys a little bit of insight as to what it takes to repair one of these heavy duty frames sitting underneath these trucks. And this machine doesn't play with over 10,000 PSI of hydraulic pulling pressure.
With the system measuring at 3 times a second,
Greg has instant feedback that he can monitor during the poll.
He can actually watch the measurements change on the screen as he's straightening the frame.
Patience is very important when pulling and aligning frames,
and Greg Greenhaugh has almost 20 years of experience in frame alignment.
Well, thanks to our Kendall crane,
this featherweight engine and transmission dropped right back into place on our newly straightened frame. We just wanna say thanks to Greg and all the guys at Gerald's Auto Body.
Now one of the best things about switching over to a Dooley system is that all 6 wheels and tires can be rotated,
really increasing your tire life span.
Now tear down is pretty straightforward.
We'll pull a spindle nut and get the caliper safely out of the way like everything else on this truck.
These things are heavy.
And we could have thrown these parts on like they were,
but we thought we'd take a few minutes,
throw them in the blast it all cabinet, and get them ready for a fresh coat of paint.
And we also wanted to throw in a new set of wheel bearings.
Now driving the old races out, we could use a regular old chisel,
but on the installation of the new races,
you need to use a brass drip that way you don't damage the surface of your new race.
And you'll know when you've got it fully driven in because you'll get a solid metal on metal field.
Then it's time to make them look new again and we did that by spraying on a fresh coat of semig-gloss paint from Dupaol.
And since I was a bit lazy and didn't mask off what I didn't want to paint,
I use some brake clean to wipe off the rotor surface so we didn't gum up our brake pads.
After that we installed our freshly packed wheel bearings and a couple of new grease seals
that way the brakes and our wheel bearings on the front end of our Dodge ought to be in good shape for quite a while.
And make sure you carefully install the hub so you don't damage the seal on the sharp threaded end.
Now the single rear wheel axle we pulled out is also a Dana 80, and we're gonna keep it around just in case we can find another use for it in a project down the road.
Now swapping the axle assemblies is pretty straightforward and can be done with basic tools,
but we've gotten pretty used to our overhead crane.
Now mocking up and fitting the body of this truck is actually the fun part because you can't really make a mistake since the chassis is dictating where the bed goes and we're building it from the rear to the front.
Now a plasma torch will save you some time,
but you can achieve the same results with a cutoff wheel.
Now the plasma cutter leaves a little bit of a rough edge,
so we're using a flap wheel to grind down any sharp spots as well as hit the top side of the frame rail because that's where we'll be welding in our new bed mount.
After taking a quick measurement,
all we had to do was trim a little bit off the factory mount and reusing the factory mount saves us a whole lot of time and frustration trying to fabricate a new one.
Now once we had our mount modified,
all we had to do was flip it around so it was facing inward as opposed to facing outward on the Dodge set up and it lined right up with the factory Ford mount then we just cranked up our welder and burned it in.
All right,
now we got the bed pretty much where we want it, but we're not gonna bolt it down just yet.
We wanna leave it loose to have a little bit of adjustability.
Now we can start working our way forward,
move on to the cab.
Coming up, it's an all out body rash on Super Dooley.
Now luckily for us,
the exhaust manifold ports are symmetrical,
so it's just a matter of flipping the exhaust manifold over short of relocating a couple of brackets well there aren't gonna be any drawbacks to doing this.
Now to get our turbo to sit correctly on the exhaust manifold,
we need to remove a little bit of metal.
Now we don't want to get too carried away here because this manifold gets really, really hot and we don't wanna create any weak points.
We use the same treatment on the turbo housing itself.
And with that done, we'll blow out all the metal shavings then it's just a matter of clocking the front half of our turbo so everything lines up.
Just be careful around the impeller blades. You don't want to break them.
I'm gonna try this again.
That's a little better.
It's better.
Let's get this thing bolted out.
Look here, we've got room for the radiator and condenser, and since the Ford grille comes out so far, we can even put an in cooler up here,
even room for an upgrade.
Now we don't need any more proof than that right there
that a stock type clutch assembly
ain't gonna cut it behind our torquey straight 6 it's pretty obvious that the previous clutch that was installed got shredded to pieces.
So to us at least going back with the stocker was just a waste of time and money,
especially considering we're gonna be making power improvements to the engine.
So we might as well upgrade the clutch as well.
That's why we're installing a South Bend clutch.
Now this dynamax clutch kit we got.
South Bend can handle up to 450 horsepower
and 1000 pound feet of torque,
and that should easily cover our power improvements as well as offer up some room for upgrades in the future.
After installing the flywheel onto the end of the crankshaft using lock tight and 100 ft pounds of torque,
the alignment tool allows you to perfectly center the clutch disk.
Then you're ready for the pressure plate,
which is installed using lock tight and the bolts snug down in a star pattern.
Now be careful not to run the bolts in with too much pressure because the final torque spec is only 20 ft pounds and again it's torque down using a star pattern to ensure an even clamp load.
Got one last bit of business.
Tap in a new tail shaft seal, fill the transmission up with the recommended fluid.
We're gonna call this thing done.
Now we're doing a couple of different things, but you better pay attention because these guys are good
and they're fast.
Now we're calling this a thrash, but don't think for a second that it's unorganized.
These guys know exactly what to do, and each team member fell into a job and got busy.
Now everybody has a different specialty street rods, mini trucks, muscle cars, but the common thread to all of this is good old fashioned hard work,
and we're gonna have to cut through some crusty crap metal to make room for some brand new good metal.
OK, we're running ata line here to make sure we cut this panel off
straight.
We're making sure we're just cutting the outer panel.
So I get this cut out, we're gonna grind it.
Randy's gonna
cut a panel
and
put it right here on this,
on this edge here.
Now a lot of guys,
including myself,
prefer to use a MIG welder for sheet metal,
but it takes a lot of finesse to tig weld single-walled sheet metal because of the incredibly focused heat zone.
We're just trying to even up the gap so we can keep bringing the metal together where we, it's easier just to take together and the reason we're taking it together is
to help us not have to grind so much with it so.
Now some of these sheet metal panels are brand new,
but other places we had no choice but to work with what was already there.
And Randy Borching takes a crack at stating the obvious.
Well, I've discovered some rust. It's kind of hard to tell,
I'm sure, but these are rusty areas.
There's some really tiny ones back here, but they imply that the metal's really thin all the way along here.
So I'm gonna cut out this whole area.
We'll make a patch,
weld it back in.
Yeah,
I think we can bring it back from the dead.
We're gonna resurrect this one.
Now some of the cool stuff we get to show you are the homemade tools and techniques from all of these guys like this tip from Eric.
You're pulling a crown into an otherwise flat panel to match the contour of the factory stamp door.
It works perfectly.
Now they make patch panels for a lot of this truck, but not this door. This is one of the rare
shorter doors for the squadca truck.
So what Eric has done is used some 20 gauge flat sock and a brake,
made his own patch panel, and rolled it under.
That's what.
That's what 10 or 15 years of hacking up many trucks will do for you.
Nice job.
Now the front of the door skin was good here, but the backside in the jam was ate up with rust.
Nobody makes a patch panel for this, so Brian, tell them what you're doing.
So as Kevin said,
we want,
we want to maintain the integrity of this front panel,
keep our we don't to do a lot of work.
We cut out where all the rot was,
make a new patch filler piece in here.
We separate the panels,
clean out all the rust,
treat it with some some good metal prep,
come back in with a small strip of metal on the backside.
We'll weld it along the end,
grind it good as new.
Now it seems like a lot of work for just a small patch, but these guys don't. You do it once and you do it right,
exactly.
Up next our diesel toe rig gets a custom paint scheme.
Hey, welcome back to trucks.
Now there's a specific technique that we're using that we all agreed on for this paint job since it's completely disassembled,
and that is following the same recipe for every part regardless of where it is or when you shoot it,
and it starts with using the gun metal gray on every bit of the panel,
even though it's gonna be two toned.
What this does, it sets up a repeatable pattern that we can transpose onto the rest of the panels, and that
will guarantee a color match combined with the right technique.
Now we didn't want to let Randy's custom painting talent go to waste while we had him locked in here, so we sent him to the task of creating a cool ghost effect with the Super Duly logo in the top of the bedside,
and he came up with something really simple but very cool,
a candy with some pearl added in it sprayed over our blue.
Gives it a ghosty effect where under some conditions you won't see it and under other conditions it will just jump out and be obvious.
It's got two effects one where it disappears and one where it appears.
Now with Randy baring his graphic and clear
now with all hands on deck, we set up a real production environment so we could get this job done.
Now if you use a recipe or preset guidelines, you can get away with using different painters and get the same results, which is pretty important in this case because we're trying out a brand new paint system.
Now Summit calls this a budget paint system,
but you'd never know by spraying it, and it was cool to get some feedback from these guys.
The paint covers really well the first time it,
it lays down nice.
It's very forgiving, you know, for, for somebody who, who may not be an expert in in gun set up or proper technique.
The paint just just goes on and does what it's supposed to, especially the clear coat.
uh, the clear coat,
you know, laid down nice,
um, it had, it had a good flow out,
but you could, you could hammer it down and it wouldn't run, right? So,
uh, you know,
very, very impressed for, for what it is. I'd use it.
Now painting Super Duo the way we're doing saves you a lot of time on masking and certain preparation,
but the price you pay, well, it's multiple painting sessions and having a place to store the parts,
even with all of that, it's still easier than trying to wedge that entire truck into the booth.
Some parts are shot,
some parts are primed, some parts are masked,
but there's still a ton of work to do for all three of us.
Now over the years,
spray gun technology has become very sophisticated.
Even so,
when you're like Randy and you've been spraying paint for more than 20 years,
sometimes tried and tested reliable technology is kind of what you stick with,
such is the case with this AccuSpray siphon feet gun.
Call it Old Faithful.
It sprays everything
perfectly the first time. I don't have to go back and fix striping problems or uneven metallics.
It works every time and I don't see a reason to change that.
Yeah, it's a little harder to clean. It's a little more awkward at times,
but the finished product more than makes up for that.
And if you've seen some of the award winning flawless work that Randy kicks out over and over again, well, it's kind of hard to argue with that kind of success.
How's it look?
You're so far,
get up here.
Now with the overspray cleared out, the paint dry, and everything laid down smooth as glass,
it's time to get to the fun part, reassembly.
Now this is the last time that we're ever gonna put the doors back on the cab,
so of course we're spending a little bit of time making sure we don't bruise the paint,
but also that we get nice panel gaps and a good alignment.
See that now
now the dog house,
well, that's a different story because not only have the aprons in the back of the firewall.
Not been painted we've still got to do things like figure out our steering linkage which steering column we're gonna use, what kind of brake booster we're gonna use. So this is purely a mock up,
but I gotta tell you, after all the hard work and all the time that it's taken to get here,
we can't wait to get this thing assembled.
Well,
Project Super Dooly is really coming along.
We've got our clearance lights installed,
a fresh battery dropped down in this thing,
and it starts and runs and moves around the shop, at least underneath its own power.
Now we've done a little bit of work merging the Dodge wiring harness with the Ford lights, but when it came time to put the lenses on the lights,
we fished through a few boxes, and this is what we found
lenses that are broken, beat up, and
all in all in rough shape.
Now, even if the lenses themselves weren't beat up,
look at the difference in the color and the new ones we got from LMC Truck.
Not to mention that the new ones are gonna look great up against the new paint
once we have these things installed,
they're gonna give us the safety and visibility that this truck had when it was brand new.
Now some of you guys may even notice we've got the 3rd brake light from the '97 Dodge grafted into our '79
just in case you couldn't see this giant truck stopping with just two brake lights.
Now bringing this truck more into a modern era are the LED marker lights on the fenders and the high visibility halogen headlights in the grille,
which helps to blend the vintage styling and modern technology.
Up next,
finally, it is time for Super duly to hit the road.
Man, after working hard on this thing for a few years
off and on again,
it sure feels good to get some sea time finally.
I'm actually really surprised how smooth this thing is riding down the highway.
I expected it to be a little bit more uh 1979 and a little less than 1997.
Tires and wheels must have balanced out good. There's no wheels shimmy,
no brakes shimmy.
Little bit extra wind noise, but
you can't have it all, right?
These 12 valve Cummins engines are all mechanically controlled.
There's no tuner, no electronics.
So if you want to make modifications or upgrades,
you gotta get your hands dirty,
but they're really fun to tinker with, and they respond to modifications really well.
The power gains are really impressive.
A few minor bolt-on modifications we made to this truck really woke it up.
The fuel plate,
Governor springs,
allows the engine to rev and gives it plenty of fuel.
Let that turbo do its job.
Our diesel engine is backed up by an NV 4500 5 speed manual transmission.
I know some guys prefer to tow with an automatic, but I actually prefer to tow with a manual.
I feel it gives me more control,
and you're not looking at a 300 or $4000 overhaul bill when it comes time for a rebuild.
Put a good clutch in it like the South Bend clutch we put in
and call it done.
We've also fixed the fifth year not issue that plagues these transmissions,
so we should be good to go on maintenance for quite some time.
You got the turbo
Alright, now our enclosed trailer is empty.
You guys, the tow a lot know enclosed trailers.
Well,
half of it is wind resistance, not necessarily the weight that's inside of it.
So it's a pretty good representation
of a loaded down trailer.
And he doesn't know we got a Cummins under the hood.
Who's got the cooler truck.
His is quieter, rides smoother,
probably a little bit nicer,
but ours is cooler
hands down.
Our crew cab truck isn't very common,
but it will hold 4 people and some gear as long as they're not NBA players.
Now there's no doubt it won't compete with a late model mega cab for creature comforts,
but it's still a nice truck and kind of hard to find.
Our aluminum wheels are from Nashville Wheel Company,
and it's a great modern twist of a classic Dooley style and the wrapped in commercial grade rubber
that ought to last over 100,000 miles.
That might ride a little rough compared to most light truck tires,
but that's the trade-off you get with such durability.
Now the interior of this truck got freshened up as well.
It's got new carpet, a new headliner,
and the mash up Ford and Dodge Dash.
The front seats are out of the Dodge as well.
See how much boost we make here.
The 4th gear.
A little bit of load
Right, you got booed up 30 pounds.
Rolling like a freight train.
Now these Dodge trucks have an overkill cooling system and it's definitely working on this truck.
90 degrees out AC on,
running nice and cool.
Looks like we did pretty good on the engine adjustments too. We're not getting a lot of extra black smoke.
No point in wasting fuel.
Our crew cab duly from the 70s is definitely one of a kind.
It can haul 4 people and a house down the road.
And with the blue and gray two-tone paint job and the diesel under the hood,
our Super Dooley is 100% American awesomeness.
Wow,
Super Dooley,
what a transformation.
Now remember you can catch all our other great builds on our website.
I'm Natalie Stovall.
See you down the road.
Show Full Transcript
This is your chance to see one of our builds from start to finish in just 30 minutes.
Today
we drop a 97 Ram body with a diesel engine onto a '79 Ford F-350.
Here's trucks.
Hey,
welcome to trucks.
Today we're back on our diesel tow rig project.
We're in the process of stripping parts of it so we can transplant some of this stuff into our classic Ford
to give you guys an idea on where this project got started,
check this out.
Monty had exactly what we were looking for this F-350 XLT Ranger four door cab with a short bed sitting on the long bed frame.
Now it had faded paint and a little bit of surface rust,
but this body was in solid condition, which is kind of rare for these trucks since they were used for work trucks.
Now one minor detail,
it didn't have an engine, but that's OK because this was a gas burner and we want a diesel.
So we thought we'd head down that road and see what it takes to drop that classic Ford body down on a newer Dodge frame.
And when this truck was wrecked, there's a combination of sheet metal, suspension, and.
A little bit of frame damage.
So we've shipped our chassis to Gerald's autobody to have it straightened, and we're going to show you guys a little bit of insight as to what it takes to repair one of these heavy duty frames sitting underneath these trucks. And this machine doesn't play with over 10,000 PSI of hydraulic pulling pressure.
With the system measuring at 3 times a second,
Greg has instant feedback that he can monitor during the poll.
He can actually watch the measurements change on the screen as he's straightening the frame.
Patience is very important when pulling and aligning frames,
and Greg Greenhaugh has almost 20 years of experience in frame alignment.
Well, thanks to our Kendall crane,
this featherweight engine and transmission dropped right back into place on our newly straightened frame. We just wanna say thanks to Greg and all the guys at Gerald's Auto Body.
Now one of the best things about switching over to a Dooley system is that all 6 wheels and tires can be rotated,
really increasing your tire life span.
Now tear down is pretty straightforward.
We'll pull a spindle nut and get the caliper safely out of the way like everything else on this truck.
These things are heavy.
And we could have thrown these parts on like they were,
but we thought we'd take a few minutes,
throw them in the blast it all cabinet, and get them ready for a fresh coat of paint.
And we also wanted to throw in a new set of wheel bearings.
Now driving the old races out, we could use a regular old chisel,
but on the installation of the new races,
you need to use a brass drip that way you don't damage the surface of your new race.
And you'll know when you've got it fully driven in because you'll get a solid metal on metal field.
Then it's time to make them look new again and we did that by spraying on a fresh coat of semig-gloss paint from Dupaol.
And since I was a bit lazy and didn't mask off what I didn't want to paint,
I use some brake clean to wipe off the rotor surface so we didn't gum up our brake pads.
After that we installed our freshly packed wheel bearings and a couple of new grease seals
that way the brakes and our wheel bearings on the front end of our Dodge ought to be in good shape for quite a while.
And make sure you carefully install the hub so you don't damage the seal on the sharp threaded end.
Now the single rear wheel axle we pulled out is also a Dana 80, and we're gonna keep it around just in case we can find another use for it in a project down the road.
Now swapping the axle assemblies is pretty straightforward and can be done with basic tools,
but we've gotten pretty used to our overhead crane.
Now mocking up and fitting the body of this truck is actually the fun part because you can't really make a mistake since the chassis is dictating where the bed goes and we're building it from the rear to the front.
Now a plasma torch will save you some time,
but you can achieve the same results with a cutoff wheel.
Now the plasma cutter leaves a little bit of a rough edge,
so we're using a flap wheel to grind down any sharp spots as well as hit the top side of the frame rail because that's where we'll be welding in our new bed mount.
After taking a quick measurement,
all we had to do was trim a little bit off the factory mount and reusing the factory mount saves us a whole lot of time and frustration trying to fabricate a new one.
Now once we had our mount modified,
all we had to do was flip it around so it was facing inward as opposed to facing outward on the Dodge set up and it lined right up with the factory Ford mount then we just cranked up our welder and burned it in.
All right,
now we got the bed pretty much where we want it, but we're not gonna bolt it down just yet.
We wanna leave it loose to have a little bit of adjustability.
Now we can start working our way forward,
move on to the cab.
Coming up, it's an all out body rash on Super Dooley.
Now luckily for us,
the exhaust manifold ports are symmetrical,
so it's just a matter of flipping the exhaust manifold over short of relocating a couple of brackets well there aren't gonna be any drawbacks to doing this.
Now to get our turbo to sit correctly on the exhaust manifold,
we need to remove a little bit of metal.
Now we don't want to get too carried away here because this manifold gets really, really hot and we don't wanna create any weak points.
We use the same treatment on the turbo housing itself.
And with that done, we'll blow out all the metal shavings then it's just a matter of clocking the front half of our turbo so everything lines up.
Just be careful around the impeller blades. You don't want to break them.
I'm gonna try this again.
That's a little better.
It's better.
Let's get this thing bolted out.
Look here, we've got room for the radiator and condenser, and since the Ford grille comes out so far, we can even put an in cooler up here,
even room for an upgrade.
Now we don't need any more proof than that right there
that a stock type clutch assembly
ain't gonna cut it behind our torquey straight 6 it's pretty obvious that the previous clutch that was installed got shredded to pieces.
So to us at least going back with the stocker was just a waste of time and money,
especially considering we're gonna be making power improvements to the engine.
So we might as well upgrade the clutch as well.
That's why we're installing a South Bend clutch.
Now this dynamax clutch kit we got.
South Bend can handle up to 450 horsepower
and 1000 pound feet of torque,
and that should easily cover our power improvements as well as offer up some room for upgrades in the future.
After installing the flywheel onto the end of the crankshaft using lock tight and 100 ft pounds of torque,
the alignment tool allows you to perfectly center the clutch disk.
Then you're ready for the pressure plate,
which is installed using lock tight and the bolts snug down in a star pattern.
Now be careful not to run the bolts in with too much pressure because the final torque spec is only 20 ft pounds and again it's torque down using a star pattern to ensure an even clamp load.
Got one last bit of business.
Tap in a new tail shaft seal, fill the transmission up with the recommended fluid.
We're gonna call this thing done.
Now we're doing a couple of different things, but you better pay attention because these guys are good
and they're fast.
Now we're calling this a thrash, but don't think for a second that it's unorganized.
These guys know exactly what to do, and each team member fell into a job and got busy.
Now everybody has a different specialty street rods, mini trucks, muscle cars, but the common thread to all of this is good old fashioned hard work,
and we're gonna have to cut through some crusty crap metal to make room for some brand new good metal.
OK, we're running ata line here to make sure we cut this panel off
straight.
We're making sure we're just cutting the outer panel.
So I get this cut out, we're gonna grind it.
Randy's gonna
cut a panel
and
put it right here on this,
on this edge here.
Now a lot of guys,
including myself,
prefer to use a MIG welder for sheet metal,
but it takes a lot of finesse to tig weld single-walled sheet metal because of the incredibly focused heat zone.
We're just trying to even up the gap so we can keep bringing the metal together where we, it's easier just to take together and the reason we're taking it together is
to help us not have to grind so much with it so.
Now some of these sheet metal panels are brand new,
but other places we had no choice but to work with what was already there.
And Randy Borching takes a crack at stating the obvious.
Well, I've discovered some rust. It's kind of hard to tell,
I'm sure, but these are rusty areas.
There's some really tiny ones back here, but they imply that the metal's really thin all the way along here.
So I'm gonna cut out this whole area.
We'll make a patch,
weld it back in.
Yeah,
I think we can bring it back from the dead.
We're gonna resurrect this one.
Now some of the cool stuff we get to show you are the homemade tools and techniques from all of these guys like this tip from Eric.
You're pulling a crown into an otherwise flat panel to match the contour of the factory stamp door.
It works perfectly.
Now they make patch panels for a lot of this truck, but not this door. This is one of the rare
shorter doors for the squadca truck.
So what Eric has done is used some 20 gauge flat sock and a brake,
made his own patch panel, and rolled it under.
That's what.
That's what 10 or 15 years of hacking up many trucks will do for you.
Nice job.
Now the front of the door skin was good here, but the backside in the jam was ate up with rust.
Nobody makes a patch panel for this, so Brian, tell them what you're doing.
So as Kevin said,
we want,
we want to maintain the integrity of this front panel,
keep our we don't to do a lot of work.
We cut out where all the rot was,
make a new patch filler piece in here.
We separate the panels,
clean out all the rust,
treat it with some some good metal prep,
come back in with a small strip of metal on the backside.
We'll weld it along the end,
grind it good as new.
Now it seems like a lot of work for just a small patch, but these guys don't. You do it once and you do it right,
exactly.
Up next our diesel toe rig gets a custom paint scheme.
Hey, welcome back to trucks.
Now there's a specific technique that we're using that we all agreed on for this paint job since it's completely disassembled,
and that is following the same recipe for every part regardless of where it is or when you shoot it,
and it starts with using the gun metal gray on every bit of the panel,
even though it's gonna be two toned.
What this does, it sets up a repeatable pattern that we can transpose onto the rest of the panels, and that
will guarantee a color match combined with the right technique.
Now we didn't want to let Randy's custom painting talent go to waste while we had him locked in here, so we sent him to the task of creating a cool ghost effect with the Super Duly logo in the top of the bedside,
and he came up with something really simple but very cool,
a candy with some pearl added in it sprayed over our blue.
Gives it a ghosty effect where under some conditions you won't see it and under other conditions it will just jump out and be obvious.
It's got two effects one where it disappears and one where it appears.
Now with Randy baring his graphic and clear
now with all hands on deck, we set up a real production environment so we could get this job done.
Now if you use a recipe or preset guidelines, you can get away with using different painters and get the same results, which is pretty important in this case because we're trying out a brand new paint system.
Now Summit calls this a budget paint system,
but you'd never know by spraying it, and it was cool to get some feedback from these guys.
The paint covers really well the first time it,
it lays down nice.
It's very forgiving, you know, for, for somebody who, who may not be an expert in in gun set up or proper technique.
The paint just just goes on and does what it's supposed to, especially the clear coat.
uh, the clear coat,
you know, laid down nice,
um, it had, it had a good flow out,
but you could, you could hammer it down and it wouldn't run, right? So,
uh, you know,
very, very impressed for, for what it is. I'd use it.
Now painting Super Duo the way we're doing saves you a lot of time on masking and certain preparation,
but the price you pay, well, it's multiple painting sessions and having a place to store the parts,
even with all of that, it's still easier than trying to wedge that entire truck into the booth.
Some parts are shot,
some parts are primed, some parts are masked,
but there's still a ton of work to do for all three of us.
Now over the years,
spray gun technology has become very sophisticated.
Even so,
when you're like Randy and you've been spraying paint for more than 20 years,
sometimes tried and tested reliable technology is kind of what you stick with,
such is the case with this AccuSpray siphon feet gun.
Call it Old Faithful.
It sprays everything
perfectly the first time. I don't have to go back and fix striping problems or uneven metallics.
It works every time and I don't see a reason to change that.
Yeah, it's a little harder to clean. It's a little more awkward at times,
but the finished product more than makes up for that.
And if you've seen some of the award winning flawless work that Randy kicks out over and over again, well, it's kind of hard to argue with that kind of success.
How's it look?
You're so far,
get up here.
Now with the overspray cleared out, the paint dry, and everything laid down smooth as glass,
it's time to get to the fun part, reassembly.
Now this is the last time that we're ever gonna put the doors back on the cab,
so of course we're spending a little bit of time making sure we don't bruise the paint,
but also that we get nice panel gaps and a good alignment.
See that now
now the dog house,
well, that's a different story because not only have the aprons in the back of the firewall.
Not been painted we've still got to do things like figure out our steering linkage which steering column we're gonna use, what kind of brake booster we're gonna use. So this is purely a mock up,
but I gotta tell you, after all the hard work and all the time that it's taken to get here,
we can't wait to get this thing assembled.
Well,
Project Super Dooly is really coming along.
We've got our clearance lights installed,
a fresh battery dropped down in this thing,
and it starts and runs and moves around the shop, at least underneath its own power.
Now we've done a little bit of work merging the Dodge wiring harness with the Ford lights, but when it came time to put the lenses on the lights,
we fished through a few boxes, and this is what we found
lenses that are broken, beat up, and
all in all in rough shape.
Now, even if the lenses themselves weren't beat up,
look at the difference in the color and the new ones we got from LMC Truck.
Not to mention that the new ones are gonna look great up against the new paint
once we have these things installed,
they're gonna give us the safety and visibility that this truck had when it was brand new.
Now some of you guys may even notice we've got the 3rd brake light from the '97 Dodge grafted into our '79
just in case you couldn't see this giant truck stopping with just two brake lights.
Now bringing this truck more into a modern era are the LED marker lights on the fenders and the high visibility halogen headlights in the grille,
which helps to blend the vintage styling and modern technology.
Up next,
finally, it is time for Super duly to hit the road.
Man, after working hard on this thing for a few years
off and on again,
it sure feels good to get some sea time finally.
I'm actually really surprised how smooth this thing is riding down the highway.
I expected it to be a little bit more uh 1979 and a little less than 1997.
Tires and wheels must have balanced out good. There's no wheels shimmy,
no brakes shimmy.
Little bit extra wind noise, but
you can't have it all, right?
These 12 valve Cummins engines are all mechanically controlled.
There's no tuner, no electronics.
So if you want to make modifications or upgrades,
you gotta get your hands dirty,
but they're really fun to tinker with, and they respond to modifications really well.
The power gains are really impressive.
A few minor bolt-on modifications we made to this truck really woke it up.
The fuel plate,
Governor springs,
allows the engine to rev and gives it plenty of fuel.
Let that turbo do its job.
Our diesel engine is backed up by an NV 4500 5 speed manual transmission.
I know some guys prefer to tow with an automatic, but I actually prefer to tow with a manual.
I feel it gives me more control,
and you're not looking at a 300 or $4000 overhaul bill when it comes time for a rebuild.
Put a good clutch in it like the South Bend clutch we put in
and call it done.
We've also fixed the fifth year not issue that plagues these transmissions,
so we should be good to go on maintenance for quite some time.
You got the turbo
Alright, now our enclosed trailer is empty.
You guys, the tow a lot know enclosed trailers.
Well,
half of it is wind resistance, not necessarily the weight that's inside of it.
So it's a pretty good representation
of a loaded down trailer.
And he doesn't know we got a Cummins under the hood.
Who's got the cooler truck.
His is quieter, rides smoother,
probably a little bit nicer,
but ours is cooler
hands down.
Our crew cab truck isn't very common,
but it will hold 4 people and some gear as long as they're not NBA players.
Now there's no doubt it won't compete with a late model mega cab for creature comforts,
but it's still a nice truck and kind of hard to find.
Our aluminum wheels are from Nashville Wheel Company,
and it's a great modern twist of a classic Dooley style and the wrapped in commercial grade rubber
that ought to last over 100,000 miles.
That might ride a little rough compared to most light truck tires,
but that's the trade-off you get with such durability.
Now the interior of this truck got freshened up as well.
It's got new carpet, a new headliner,
and the mash up Ford and Dodge Dash.
The front seats are out of the Dodge as well.
See how much boost we make here.
The 4th gear.
A little bit of load
Right, you got booed up 30 pounds.
Rolling like a freight train.
Now these Dodge trucks have an overkill cooling system and it's definitely working on this truck.
90 degrees out AC on,
running nice and cool.
Looks like we did pretty good on the engine adjustments too. We're not getting a lot of extra black smoke.
No point in wasting fuel.
Our crew cab duly from the 70s is definitely one of a kind.
It can haul 4 people and a house down the road.
And with the blue and gray two-tone paint job and the diesel under the hood,
our Super Dooley is 100% American awesomeness.
Wow,
Super Dooley,
what a transformation.
Now remember you can catch all our other great builds on our website.
I'm Natalie Stovall.
See you down the road.



