
In This Episode
- 0:01 Introduction to the build
- 1:00 Finding and evaluating the truck
- 1:42 Disassembly and preparation
- 5:04 Painting the truck
- 8:03 Chassis and powertrain upgrades
- 10:02 Body mounting and door assembly
- 12:03 Exhaust and interior work
- 14:00 Shifter and transfer case modifications
- 15:17 Final accessories and details
- 18:03 Testing and final thoughts
Video Transcript
You're watching Power Nation.
Welcome to Power Nation Builds. I'm Natalie Stovall.
Today is your chance to see our Music City trucks team build one of TV's most iconic and beloved trucks all in the next 30 minutes.
Here's Mark and Brandon.
It's a project.
Put it on the list.
Well, we finally got our square body in our hands. It took a lot of effort searching, digging through the internet and people we know,
but we found the perfect example for us to start building.
You know what this thing looks like?
What?
Looks like Scotch truck.
We took it out, we had some fun, and then we decided what this truck's second life is gonna look like.
Well,
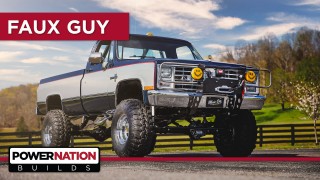
that's gonna be a tribute to the 80s TV show, The Fall Guy,
which we're calling
the Faux Guy.
Now this truck's actually in really good shape. There's almost no rust
between that and all the original paperwork in the glove box with the owner's manual.
Me and Mark decided that we're gonna keep this color scheme, this dark navy blue.
So this truck is not a clone, it is a tribute. So there's things that.
About it that the TV truck had that our truck won't have. Obviously it's a Chevy, not a GMC.
It's not gonna have that crazy hideaway box in the bed.
That's OK.
But there are some components that you have to have to make Colt Sivers proud.
Of course, got some restoration components to bring this truck back to its original glory,
and then
we're gonna tap into the aftermarket for some performance parts to bring this truck up to the level that we think it deserves and quite frankly,
build the truck that we want to build.
All right,
first thing first is this rear drive shaft.
Oh yeah,
that looks pretty good.
It really is.
Perfect
drop her down.
Look at that.
Transmission cooler lines disconnected.
Think I don't ride like that.
Get out of here.
Look at that.
Oh
There's a reason why flex plates have uh torch specs, Brandon.
Those
are not supposed to be.
Hand tight.
I mean, look at that,
every single one of them.
With all the bed bolts loose,
we can now remove the tailgate.
Then we can remove the bed.
There you go.
This is a truck bed lifter,
one of the most invaluable tools while working on a truck.
You ready?
Yep,
hit it.
Oh, you're good right there,
send it.
Coming on down,
I think these bolts are tight.
There it is.
There you go.
Well his head like bezels off.
You ready? yep.
There we go. Yay.
If we would have took the AC line off.
It's hard to do this without this special tool. I'll tell you that.
Here we go.
OK. Finally,
Right.
That's never been out of there before.
Get the seat out of here.
OK
Oh,
look at this,
a little treasure trove.
What's this?
Oh, bill of sale.
$2500.
We overpaid for this truck.
There we go.
With all of that stuff out of the way, this old dingy, smelly floor mat can be removed.
That's
disgusting.
Looks good.
It's
pretty good.
Well, I guarantee it won't go back on.
As easily as it came off.
That's alright.
Well, we only had one body cart,
so we ordered another one from
SummitRacing.
So that's what I'm gonna put the cab on here is this brand new body car.
See how this works out.
Body's off.
I'm gonna get this thing out to Brandon so he can start prepping it for paint.
I'm gonna tear that chassis down.
Hey Brandon,
brought you something.
I got it mostly stripped down for you. There's a couple things left. I don't know what you wanna do with the firewall, and
if you need a hand maybe taking out that glass. I can, yeah, I already,
I already got this bedside done.
Look at that.
That looks
straight.
Yeah,
that looks great.
Guess what?
What?
er filler.
Wow.
This is a straight truck.
I was gonna say maybe you can keep that up.
I got more tear down to do.
Good luck.
Yeah, I'll take it from here.
Better you than me.
Well, I call that bare metal, so the only thing left to do now is wipe it down,
mask it up and throw some primer on this thing.
Coming up our faux guy truck gets a custom coat of paint.
Well, that took a lot longer than I expected, but we're finally ready for paint. The only thing we have to do is finish masking up the cab,
and then we're gonna jam it,
hang the doors and get them aligned, and then paint the rest of the truck.
That's it. Everything's taped up. We got the overspray plastic on.
It's pretty much time to spray some silver.
We decided to go with painting our stripes on instead of the traditional stick on stripes and that's kind of why I went with the order of which I painted the truck in
that way the stripes are not buried in the first layer of paint, they're actually on the last layer
um that way at least if you feel them it kind of feels like.
An original stripe would feel.
This is the point where you can actually stand back and really appreciate all the hard work you've put into your paint job.
Probably have about 200 hours into this at this point,
and let me tell you, I'm really satisfied with the way this truck turned out.
Super straight,
the color scheme,
and I'm really glad that we decided to paint the pinstripes into the truck. It looks really good.
Now that the truck's done, we can go ahead and give it to Mark so we could finish up with the frame, and before I go help him,
I actually have a few more pieces to paint.
We started out with a mud caked completely stock half ton chassis. Although impressive in its day,
it definitely was not up to our standards for this build.
After stripping it down, we blasted it and gave it a fresh coat of Summit chassis paint.
The power plant is where the change really starts to happen.
We started with this 305 boat anchor that gave us a whopping 160 horsepower with 235 pound feet of torque.
Then we slammed in this 496 cubic inch big block Chevy
that makes an impressive 596 horsepower
and 629 pound feet of torque.
Wow.
The 700R4 transmission was ahead of its time back in the mid 80s, but
it's not up to the task of handling that nearly 600 horsepower.
However, thanks to TCI Automotive,
we now have a new electronic 4L80E transmission.
Then we ditched the half ton 10 bolts for a pair of 1 ton Dana 60 crate axles,
a 6 inch skyjacker lift, and some 36 inch super swappers on a set of chrome wagon wheels.
This is what we started with.
And this is what we've got now.
Well,
now it's time to get our body mounts ready. We went ahead and upgraded to these polyurethane mounts. It's a really nice kit, but it doesn't come with all of the hardware.
Uh, you've got to reuse
all of the, uh, the sleeve and then the washer, of course.
So it just replaces the rubber bushing. This is an original one.
you can really see the difference here how nasty they were.
Down comes the body.
Wow.
Well, what do you think?
You're speechless, dude. This truck,
the blue and silver, nothing screams '80s like chrome wagon wheels, baby.
Well,
we got our frame all cleaned up. Looks great,
fresh coat of paint,
gonna start assembling.
I'm using just some regular
mild dish soap here
to loop this up.
Because it's gotta click into that or clip into that uh frame.
Uh, I gotta get this thing seated in this track.
It's
tight fit, so we have to.
Get them in the groove on one side and then push this side in with the tool.
A little bit of pressure.
No problem.
It's ready for the glass.
Uh, there was a rivet here originally, but we drilled that out, so I'm actually gonna use some
stainless hardware
with a lock
washer
so it doesn't
come undone, but also it's still able to move.
All right, well, that looks like a brand new vent window really happy with how that turned out. We even dressed it up with the new latch that we got from Classic Industries.
Now this thing's ready to go in the truck, but before I put this in,
there's a couple of things I wanna do over here on the door.
Now when it comes to assembling these doors, if you do it in the right order, it usually goes pretty smoothly. I like starting with the lock cylinders.
Now these door handles are super shiny and you'll see why later.
Next is our polished side mirrors, then the quarter glass,
and then the door glass.
Now patience is a virtue here.
Don't force it
and everything will fit real nicely.
All right,
well, we got the door seal on here,
got the striker on here, and got it adjusted and tight.
Let's give this thing a try.
Oh,
sounds so good,
uh, and it looks even better.
Uh, we just need to go on and move on to the driver door, get it assembled,
then we can move on to something else.
Coming up,
the transformation into aux guy continues.
Well,
we've got those shorty headers in place and it's time to move on to the rest of the exhaust.
So what we've got here
is this mid pipe
uh that we had laying around the shop
that I think is gonna work perfectly. We went ahead and cut those pipes off
same length.
And made some grooves in there so they'll slide over the ends of this
passenger sides all the way in. We just gotta get the driver's side now.
Oh really? I need to get a hammer.
Wow,
look at that.
All right,
well, I don't want to put this on yet until we get the bed on here because we don't know where this is gonna end up
and get a hanger on there too.
With the cluster restored and fully assembled,
we slide it back into place.
Are you ready for this dash pad?
Absolutely.
This thing looks good.
Closter looks nice.
OK,
I'll go get some screws.
All right.
Time for the new bezel to go in.
All right,
let's take this little protective coating off.
Oh,
look how good that looks gorgeous.
All right, well that dash is done.
Now it's time to move on to getting this floor covered.
It's heavier than it looks.
It definitely is.
Once we added the floor padding, we make quick work of our vinyl flooring.
We chose this option because this truck was originally equipped with one,
plus they're super easy to keep clean.
With the seat belts installed, it's time for the seat.
All right, well,
we are making some great headway with this truck today.
Michael got just about everything under the hood all wrapped up. We do have a couple of little things we need to take care of a little later,
uh, but we felt comfortable enough to go ahead and put the fenders on and the emblems, and it looks amazing as you can see the bed's already on there.
We're getting really close and the truck's looking the way it's gonna look when it's done, but we have a couple of major things we still need to do one of.
is figuring out how we're gonna shift our transfer case,
but we've got that solved with this kit right here that we got from JB Custom fabrication.
Now since we switched our transfer case,
our drop is on the driver's side,
so that's given us an opportunity to move our shifter closer to the driver.
I've got this block off plate that I've made that I'm gonna use to cover up our old hole and this template to draw out the lines to cut our new hole.
So let's get started.
I'm adjusting my template, making sure that when I cut it out,
the shifter does not hit the transmission.
I trace out my template.
Drill pilot holes
Use the cutoff wheel for the bigger sections.
Finishing it up with a reciprocating saw for the tighter areas.
Drop in the shifter,
lock it down.
For ease of installment,
we're using quarter 20 nut certs and riveting them to the body.
Yeah.
All right,
well,
we've got the shifter mounted.
All we need to do is connect the business end of the cable here
to our transfer case, and we're gonna do that with this little bit of hardware we've got here. We're gonna start with this bracket right here that's gonna mount to our transfer case adapter.
We'll get the bracket installed onto the adapter
followed by the lever,
and then the cable goes through the hole in the bracket and washer,
then the rod end can be installed onto the cable and then attached to the lever.
With a few adjustments, we're ready to lock it down.
When we return, it's lights camera action for our stunt truck foe guy.
Um
All right,
the guys are finishing up some last minute details for a most anticipated debut on the road.
Well,
we're getting really close on our square body here, the faux guy. We only have a few things left, but these are like
key ingredients
to make this truck what it should be.
You might recognize this, and
you got these right here,
classic KC Daylighters.
Yeah,
well,
well, doesn't get any more 80s than that.
I'm gonna start with this and tenna mount,
and I'm gonna tackle the roll bar and spotlights that we found at SummitRacing.
So actually drilling into the freshly painted truck is not my concern.
Drilling into the freshly painted truck in the right location.
That's my concern.
How's everything going for you Eric?
Not too bad up here.
definitely glad we put this bed liner in
because now I don't have to worry about damaging anything while I'm putting this roll bar in here.
While Eric's working on the roll bar and lights, I'm running the CB antenna cable and getting the side moldings installed.
Well,
now the truck is fully accessorized.
So am I.
Now it's time to get the headlights and turn signals installed so we can move on to putting in the new grill.
With the outer molding installed, the new grill can go in along with our brand new bow tie badge.
Mmm.
To finish out this part of the truck,
we're gonna get the headlight bezels installed and peel off the protective film to reveal the chrome on our grill.
Look at that shine.
big moment.
Really glad we went with this yellow finish on this bumper.
Just kidding,
we're just trying to protect this beautiful advanced plating chrome finish.
Wow,
that's chrome now.
That's chrome now.
That is the shiniest thing I've ever seen in my life.
Now it's time for our Fall Guy style winch mount.
So
Look at that.
We can't call this finished without adding these KCs.
Huge thanks to Summit Racing for this uh this other set of KC Daylighters because this whole entire winch mountain brush guard
wouldn't be complete without the KCs on there.
Let's get the hood on there, all right.
All right,
fire it off.
Let's see how you did.
Oh,
look at that.
Very nice.
Are we done?
I think so.
Yeah,
we gotta check one more thing though.
What's up?
You think anybody still uses these?
I do.
Let's find out.
Breaker breaker 19. Anybody out there?
This is the fall guy here. I hear you loud and clear.
Do you hear that?
This is by far one of the most beautiful square bodies I've ever seen, and I can't believe that we built this.
This is the kind of truck that makes dreams come true.
Yeah.
square bodies are pretty near and dear to me because the first ever engine swap I did was in a square body Chevy, so,
um, kind of hits home for me to, to build this truck.
And well,
here it is all finished up and I have to say if we had to do it all over again.
I wouldn't change a thing.
I don't think so. I mean,
this is the perfect square body. I don't care what anybody says, it does not get better than this thing.
Well, that says a lot coming from a square body guy.
How many of those things you have?
Uh, 3 right now.
Well,
I wanna say I know you haven't been here since the beginning of the build,
but thank you for everything that you've done since you've been on board.
Uh, you really came in and dug in here at the end when things were really tough,
and I mean look at it, it's, it's been my pleasure to get my hands on this thing. I still can't believe that I got to work on it.
Well, not only did you get to work on it.
But you get to drive it.
Let's go.
I got a ride though because you need a chaperone.
You mean we can't go to Woolly's?
Not this time.
Well, what do you think?
This
is the nicest square body I've ever been in, let alone driven.
You mentioned this being a dream build.
what's cool about it is
if you're a square body guy or even if you just like old school trucks like this,
this is kind of what you picture of like the ultimate truck, right?
What makes this truck?
An 80s build or a period correct build.
The roll bar I think is number one.
The roll bar definitely the KC lights on there and on the front
chrome wagon wheels.
And then of course,
you know,
no,
no replacement for displacement, we got
496 cubic inches of
Chevy awesomeness under the hood. I mean that
that just screams 80s right there.
There is nothing better than this,
you know, it's got the perfect lift, it's got the right old school wheels and tires.
Glad to have you on board and glad you got to drive your dream truck here, bud. Oh yeah,
what do you say we head back to the shop and start planning our next one?
I think that's a good idea.
All right,
we'll probably out of gas by now anyway,
truth be know.
There is no doubt the guys really enjoyed this truck.
Now remember,
you can catch all our other great builds like this on our website.
I'm Natalie Stovall and as the stunt people say,
keep it between the ditches.
Show Full Transcript
Welcome to Power Nation Builds. I'm Natalie Stovall.
Today is your chance to see our Music City trucks team build one of TV's most iconic and beloved trucks all in the next 30 minutes.
Here's Mark and Brandon.
It's a project.
Put it on the list.
Well, we finally got our square body in our hands. It took a lot of effort searching, digging through the internet and people we know,
but we found the perfect example for us to start building.
You know what this thing looks like?
What?
Looks like Scotch truck.
We took it out, we had some fun, and then we decided what this truck's second life is gonna look like.
Well,
that's gonna be a tribute to the 80s TV show, The Fall Guy,
which we're calling
the Faux Guy.
Now this truck's actually in really good shape. There's almost no rust
between that and all the original paperwork in the glove box with the owner's manual.
Me and Mark decided that we're gonna keep this color scheme, this dark navy blue.
So this truck is not a clone, it is a tribute. So there's things that.
About it that the TV truck had that our truck won't have. Obviously it's a Chevy, not a GMC.
It's not gonna have that crazy hideaway box in the bed.
That's OK.
But there are some components that you have to have to make Colt Sivers proud.
Of course, got some restoration components to bring this truck back to its original glory,
and then
we're gonna tap into the aftermarket for some performance parts to bring this truck up to the level that we think it deserves and quite frankly,
build the truck that we want to build.
All right,
first thing first is this rear drive shaft.
Oh yeah,
that looks pretty good.
It really is.
Perfect
drop her down.
Look at that.
Transmission cooler lines disconnected.
Think I don't ride like that.
Get out of here.
Look at that.
Oh
There's a reason why flex plates have uh torch specs, Brandon.
Those
are not supposed to be.
Hand tight.
I mean, look at that,
every single one of them.
With all the bed bolts loose,
we can now remove the tailgate.
Then we can remove the bed.
There you go.
This is a truck bed lifter,
one of the most invaluable tools while working on a truck.
You ready?
Yep,
hit it.
Oh, you're good right there,
send it.
Coming on down,
I think these bolts are tight.
There it is.
There you go.
Well his head like bezels off.
You ready? yep.
There we go. Yay.
If we would have took the AC line off.
It's hard to do this without this special tool. I'll tell you that.
Here we go.
OK. Finally,
Right.
That's never been out of there before.
Get the seat out of here.
OK
Oh,
look at this,
a little treasure trove.
What's this?
Oh, bill of sale.
$2500.
We overpaid for this truck.
There we go.
With all of that stuff out of the way, this old dingy, smelly floor mat can be removed.
That's
disgusting.
Looks good.
It's
pretty good.
Well, I guarantee it won't go back on.
As easily as it came off.
That's alright.
Well, we only had one body cart,
so we ordered another one from
SummitRacing.
So that's what I'm gonna put the cab on here is this brand new body car.
See how this works out.
Body's off.
I'm gonna get this thing out to Brandon so he can start prepping it for paint.
I'm gonna tear that chassis down.
Hey Brandon,
brought you something.
I got it mostly stripped down for you. There's a couple things left. I don't know what you wanna do with the firewall, and
if you need a hand maybe taking out that glass. I can, yeah, I already,
I already got this bedside done.
Look at that.
That looks
straight.
Yeah,
that looks great.
Guess what?
What?
er filler.
Wow.
This is a straight truck.
I was gonna say maybe you can keep that up.
I got more tear down to do.
Good luck.
Yeah, I'll take it from here.
Better you than me.
Well, I call that bare metal, so the only thing left to do now is wipe it down,
mask it up and throw some primer on this thing.
Coming up our faux guy truck gets a custom coat of paint.
Well, that took a lot longer than I expected, but we're finally ready for paint. The only thing we have to do is finish masking up the cab,
and then we're gonna jam it,
hang the doors and get them aligned, and then paint the rest of the truck.
That's it. Everything's taped up. We got the overspray plastic on.
It's pretty much time to spray some silver.
We decided to go with painting our stripes on instead of the traditional stick on stripes and that's kind of why I went with the order of which I painted the truck in
that way the stripes are not buried in the first layer of paint, they're actually on the last layer
um that way at least if you feel them it kind of feels like.
An original stripe would feel.
This is the point where you can actually stand back and really appreciate all the hard work you've put into your paint job.
Probably have about 200 hours into this at this point,
and let me tell you, I'm really satisfied with the way this truck turned out.
Super straight,
the color scheme,
and I'm really glad that we decided to paint the pinstripes into the truck. It looks really good.
Now that the truck's done, we can go ahead and give it to Mark so we could finish up with the frame, and before I go help him,
I actually have a few more pieces to paint.
We started out with a mud caked completely stock half ton chassis. Although impressive in its day,
it definitely was not up to our standards for this build.
After stripping it down, we blasted it and gave it a fresh coat of Summit chassis paint.
The power plant is where the change really starts to happen.
We started with this 305 boat anchor that gave us a whopping 160 horsepower with 235 pound feet of torque.
Then we slammed in this 496 cubic inch big block Chevy
that makes an impressive 596 horsepower
and 629 pound feet of torque.
Wow.
The 700R4 transmission was ahead of its time back in the mid 80s, but
it's not up to the task of handling that nearly 600 horsepower.
However, thanks to TCI Automotive,
we now have a new electronic 4L80E transmission.
Then we ditched the half ton 10 bolts for a pair of 1 ton Dana 60 crate axles,
a 6 inch skyjacker lift, and some 36 inch super swappers on a set of chrome wagon wheels.
This is what we started with.
And this is what we've got now.
Well,
now it's time to get our body mounts ready. We went ahead and upgraded to these polyurethane mounts. It's a really nice kit, but it doesn't come with all of the hardware.
Uh, you've got to reuse
all of the, uh, the sleeve and then the washer, of course.
So it just replaces the rubber bushing. This is an original one.
you can really see the difference here how nasty they were.
Down comes the body.
Wow.
Well, what do you think?
You're speechless, dude. This truck,
the blue and silver, nothing screams '80s like chrome wagon wheels, baby.
Well,
we got our frame all cleaned up. Looks great,
fresh coat of paint,
gonna start assembling.
I'm using just some regular
mild dish soap here
to loop this up.
Because it's gotta click into that or clip into that uh frame.
Uh, I gotta get this thing seated in this track.
It's
tight fit, so we have to.
Get them in the groove on one side and then push this side in with the tool.
A little bit of pressure.
No problem.
It's ready for the glass.
Uh, there was a rivet here originally, but we drilled that out, so I'm actually gonna use some
stainless hardware
with a lock
washer
so it doesn't
come undone, but also it's still able to move.
All right, well, that looks like a brand new vent window really happy with how that turned out. We even dressed it up with the new latch that we got from Classic Industries.
Now this thing's ready to go in the truck, but before I put this in,
there's a couple of things I wanna do over here on the door.
Now when it comes to assembling these doors, if you do it in the right order, it usually goes pretty smoothly. I like starting with the lock cylinders.
Now these door handles are super shiny and you'll see why later.
Next is our polished side mirrors, then the quarter glass,
and then the door glass.
Now patience is a virtue here.
Don't force it
and everything will fit real nicely.
All right,
well, we got the door seal on here,
got the striker on here, and got it adjusted and tight.
Let's give this thing a try.
Oh,
sounds so good,
uh, and it looks even better.
Uh, we just need to go on and move on to the driver door, get it assembled,
then we can move on to something else.
Coming up,
the transformation into aux guy continues.
Well,
we've got those shorty headers in place and it's time to move on to the rest of the exhaust.
So what we've got here
is this mid pipe
uh that we had laying around the shop
that I think is gonna work perfectly. We went ahead and cut those pipes off
same length.
And made some grooves in there so they'll slide over the ends of this
passenger sides all the way in. We just gotta get the driver's side now.
Oh really? I need to get a hammer.
Wow,
look at that.
All right,
well, I don't want to put this on yet until we get the bed on here because we don't know where this is gonna end up
and get a hanger on there too.
With the cluster restored and fully assembled,
we slide it back into place.
Are you ready for this dash pad?
Absolutely.
This thing looks good.
Closter looks nice.
OK,
I'll go get some screws.
All right.
Time for the new bezel to go in.
All right,
let's take this little protective coating off.
Oh,
look how good that looks gorgeous.
All right, well that dash is done.
Now it's time to move on to getting this floor covered.
It's heavier than it looks.
It definitely is.
Once we added the floor padding, we make quick work of our vinyl flooring.
We chose this option because this truck was originally equipped with one,
plus they're super easy to keep clean.
With the seat belts installed, it's time for the seat.
All right, well,
we are making some great headway with this truck today.
Michael got just about everything under the hood all wrapped up. We do have a couple of little things we need to take care of a little later,
uh, but we felt comfortable enough to go ahead and put the fenders on and the emblems, and it looks amazing as you can see the bed's already on there.
We're getting really close and the truck's looking the way it's gonna look when it's done, but we have a couple of major things we still need to do one of.
is figuring out how we're gonna shift our transfer case,
but we've got that solved with this kit right here that we got from JB Custom fabrication.
Now since we switched our transfer case,
our drop is on the driver's side,
so that's given us an opportunity to move our shifter closer to the driver.
I've got this block off plate that I've made that I'm gonna use to cover up our old hole and this template to draw out the lines to cut our new hole.
So let's get started.
I'm adjusting my template, making sure that when I cut it out,
the shifter does not hit the transmission.
I trace out my template.
Drill pilot holes
Use the cutoff wheel for the bigger sections.
Finishing it up with a reciprocating saw for the tighter areas.
Drop in the shifter,
lock it down.
For ease of installment,
we're using quarter 20 nut certs and riveting them to the body.
Yeah.
All right,
well,
we've got the shifter mounted.
All we need to do is connect the business end of the cable here
to our transfer case, and we're gonna do that with this little bit of hardware we've got here. We're gonna start with this bracket right here that's gonna mount to our transfer case adapter.
We'll get the bracket installed onto the adapter
followed by the lever,
and then the cable goes through the hole in the bracket and washer,
then the rod end can be installed onto the cable and then attached to the lever.
With a few adjustments, we're ready to lock it down.
When we return, it's lights camera action for our stunt truck foe guy.
Um
All right,
the guys are finishing up some last minute details for a most anticipated debut on the road.
Well,
we're getting really close on our square body here, the faux guy. We only have a few things left, but these are like
key ingredients
to make this truck what it should be.
You might recognize this, and
you got these right here,
classic KC Daylighters.
Yeah,
well,
well, doesn't get any more 80s than that.
I'm gonna start with this and tenna mount,
and I'm gonna tackle the roll bar and spotlights that we found at SummitRacing.
So actually drilling into the freshly painted truck is not my concern.
Drilling into the freshly painted truck in the right location.
That's my concern.
How's everything going for you Eric?
Not too bad up here.
definitely glad we put this bed liner in
because now I don't have to worry about damaging anything while I'm putting this roll bar in here.
While Eric's working on the roll bar and lights, I'm running the CB antenna cable and getting the side moldings installed.
Well,
now the truck is fully accessorized.
So am I.
Now it's time to get the headlights and turn signals installed so we can move on to putting in the new grill.
With the outer molding installed, the new grill can go in along with our brand new bow tie badge.
Mmm.
To finish out this part of the truck,
we're gonna get the headlight bezels installed and peel off the protective film to reveal the chrome on our grill.
Look at that shine.
big moment.
Really glad we went with this yellow finish on this bumper.
Just kidding,
we're just trying to protect this beautiful advanced plating chrome finish.
Wow,
that's chrome now.
That's chrome now.
That is the shiniest thing I've ever seen in my life.
Now it's time for our Fall Guy style winch mount.
So
Look at that.
We can't call this finished without adding these KCs.
Huge thanks to Summit Racing for this uh this other set of KC Daylighters because this whole entire winch mountain brush guard
wouldn't be complete without the KCs on there.
Let's get the hood on there, all right.
All right,
fire it off.
Let's see how you did.
Oh,
look at that.
Very nice.
Are we done?
I think so.
Yeah,
we gotta check one more thing though.
What's up?
You think anybody still uses these?
I do.
Let's find out.
Breaker breaker 19. Anybody out there?
This is the fall guy here. I hear you loud and clear.
Do you hear that?
This is by far one of the most beautiful square bodies I've ever seen, and I can't believe that we built this.
This is the kind of truck that makes dreams come true.
Yeah.
square bodies are pretty near and dear to me because the first ever engine swap I did was in a square body Chevy, so,
um, kind of hits home for me to, to build this truck.
And well,
here it is all finished up and I have to say if we had to do it all over again.
I wouldn't change a thing.
I don't think so. I mean,
this is the perfect square body. I don't care what anybody says, it does not get better than this thing.
Well, that says a lot coming from a square body guy.
How many of those things you have?
Uh, 3 right now.
Well,
I wanna say I know you haven't been here since the beginning of the build,
but thank you for everything that you've done since you've been on board.
Uh, you really came in and dug in here at the end when things were really tough,
and I mean look at it, it's, it's been my pleasure to get my hands on this thing. I still can't believe that I got to work on it.
Well, not only did you get to work on it.
But you get to drive it.
Let's go.
I got a ride though because you need a chaperone.
You mean we can't go to Woolly's?
Not this time.
Well, what do you think?
This
is the nicest square body I've ever been in, let alone driven.
You mentioned this being a dream build.
what's cool about it is
if you're a square body guy or even if you just like old school trucks like this,
this is kind of what you picture of like the ultimate truck, right?
What makes this truck?
An 80s build or a period correct build.
The roll bar I think is number one.
The roll bar definitely the KC lights on there and on the front
chrome wagon wheels.
And then of course,
you know,
no,
no replacement for displacement, we got
496 cubic inches of
Chevy awesomeness under the hood. I mean that
that just screams 80s right there.
There is nothing better than this,
you know, it's got the perfect lift, it's got the right old school wheels and tires.
Glad to have you on board and glad you got to drive your dream truck here, bud. Oh yeah,
what do you say we head back to the shop and start planning our next one?
I think that's a good idea.
All right,
we'll probably out of gas by now anyway,
truth be know.
There is no doubt the guys really enjoyed this truck.
Now remember,
you can catch all our other great builds like this on our website.
I'm Natalie Stovall and as the stunt people say,
keep it between the ditches.



