
In This Episode
- 0:01 Introduction to the Build
- 0:53 Finding and Assessing the Truck
- 1:34 Getting the Truck Running
- 2:56 Making the Truck Roadworthy
- 5:34 Choosing a New Engine
- 6:55 Removing the Old Engine and Transmission
- 9:14 Modifying the Suspension
- 14:08 Installing the New Engine and Transmission
- 16:05 Final Touches and Test Drive
- 21:23 Conclusion and Future Plans
Video Transcript
You're watching Power Nation.
Welcome to Power Nation Builds. I'm Natalie Stovall.
This is your chance to see one of our builds from start to finish in just 30 minutes.
Today,
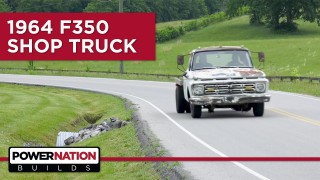
Music City Trucks finds a '64 Ford flatbed.
Our journey begins about 30 miles south of Nashville in Columbia, Tennessee.
I actually found this truck on a farm on the way home from work.
And it looks like a few roosters have called it home.
The guy says it hasn't run in the last 6 years.
We like what we see, but the truck definitely has some age issues and some obvious rust problems.
So this is a 64 F3501 ton obviously but it's a dully and it's a flat bed.
The owner that we bought it from made this flat bed because it used to have a water tank on the back of it.
Uh, once he bought it from the county,
he ripped it all out and put this bed in here.
So as we move the Rock Auto van into place, our goal here is just get it started.
Not surprising,
she didn't start.
That's to be expected.
We next try spraying starter fluid directly into the car.
Another start attempt.
Not happening.
So our last recourse is to take apart the carburetor right there in the field.
We found the float spring was jammed, so we sprayed a lot of sea foam deep creep into the springs.
Don't let that spring go bye bye.
The last thing we want is to drop one of those small springs or screws.
Then we cleaned out the old gas in the bowl and put the 57 year old car back together and on the engine.
That's the sound of success.
We had to be careful to drive the truck onto our holler because with the engine leak and no brakes whatsoever,
this is trickier than it looks.
Mission accomplished.
So now all we have to do is haul it back to the Music City truck shop
to make it safer and drivable.
You know, there for a little bit we thought maybe we wouldn't get it running, but I mean who are we kidding? These old Ford straight 6s are tanks. Well, just because it's running doesn't mean it's actually roadworthy. There's a couple of things we gotta check off the list because this thing's been sitting for 6 years like tune up,
brakes, and anything else to make sure this thing's safe for the road.
All right,
let's get this thing on the lift.
First things first,
all the tires come off,
including the Dooley in the rear.
And since our goal is to just make the truck drivable,
we're gonna keep these tires, otherwise they'd be in the recycle bin.
The axle comes out
surprisingly dry.
Then it takes two of us to lift this 50+ pound rear hub off
and not uncommon on these trucks this old that have been sitting this long.
We've got dirt daubers's nest on the backing plates.
Drum brake installation calls for a special tool.
We're using replacement brakes we got at RockAuto.com and like Brandon said earlier,
it helps if you keep one of the old brakes intact as you install the replacements so you have a guide to work with.
First things first is that retainer and spring.
Sometimes those springs can be a little tricky to get in it's a lot easier with the right tool.
Installed
And then get the front shocks on that we got from Rock Auto,
get this thing on the ground.
With the front back together, we can lift our wheels back onto the axles.
The new plugs go in with a little NECs and get torqueed in followed by the coil.
And the plug wires.
Next, the rebuilt carb goes back in its stock location with a couple of nuts and two lines.
furs like a kitten
OK,
now I'm excited about it.
We gotta take this thing out, yeah,
let's have some fun,
OK,
you know, maybe do some restoration on the paint
and kind of go for that.
Oh, I would totally keep this paint as close to this patina as possible.
So when I mentioned to Pat,
you notice that when I mentioned to Pat that we may keep it, he like.
Hey,
we got all these Ford engines here.
He seemed as excited about it as we were, if not more.
Which says a lot,
which I mean if he's got an engine to throw in this,
I'm,
I'm all down for it.
What if we do this?
What if we let him pick
because he loves the truck just as much as we do,
we should let him pick what goes in this.
That's actually a really good idea.
That is.
Coming up,
pulling out the engine that's original to our 64.
We do have something that might, in our opinion,
might be just what you want, and that is our turbocharge 306. Now this engine itself,
um, this was pretty,
uh, this was pretty fun build.
I would love to see it in a vehicle.
I think this is a great application,
right I'm,
I'm partial to the straight 6.
I,
I'm down.
I'm down for that.
I,
I'll just say this.
It looks like we have an engine.
Well, now that we know what engine we're gonna be stabbing in this old pig, it's time to remove all the old stuff,
and that's gonna start with this hood.
You got help?
Some help.
Take her away.
Now that we know what engine we're running, we're excited to be jumping back on our flatbed shop truck going up.
Oh,
and just for funsies,
we thought we'd see what it looks like to live as a socket.
Cool,
right?
First thing we need to do is get all that old oil and coolant out of the way.
Mark, leaving me with the hard stuff.
Yeah,
there we go.
Saws all the time tossing all that old exhaust.
Get this drive shop out of here.
Now it's time to access the top of the transmission by removing the transmission tunnel.
It's just a little puzzle.
This is what I like about Ford floor pans is you can take the trans tunnel off and access the transmission,
disconnecting the
brake lever,
undoing the shifter, and then getting this engine and transmission out as one unit.
Yeah,
about that drive here, let me,
let me pop that drive shaft completely loose swing it right.
Well
There we go.
She's out.
That was tight,
ambitious to try to take this out in one swing.
We did it
well we did it.
Now that we got the engine and transs out of the truck, it's time to divorce them for possibly the first time in 60 years ever,
ever,
yeah.
Ready? Yep.
Here it is.
Wow, look at that rat nest.
Uh,
now the problem with these old straight axles is when you go to lower these things, you're gonna usually do what they call a flip kit, which is putting the axle on top of the leaf,
but these cast iron axles actually have the pedestals cast into them.
So we're gonna have to make a cradle that goes on the bottom.
Once we get it on top of this leaf, so the axle doesn't rotate around on us, and then it should be fine.
With the suspension bolts rusted on,
we gave them a shot of sea foam deeprete to loosen them up.
Little bit of nature's thread locker on there.
As we move around the front suspension,
everything is starting to get more difficult to remove,
requiring more persuasion.
And the rust dust is flying.
Might need the heat for this one.
No.
Got it.
All right.
All right,
the axle is hanging free now.
Now we start putting the front suspension back in using the original hardware.
What a cool design.
No shackles.
So simple
rubber roller.
So simple.
Now the axle's on top of the leaf, we're just gonna take these universal axle perches
and stick them right there on the center pin,
and then we're gonna lower it down so it's centered, and then, uh, as you can see,
there's nothing holding this axle from rotating back and forth.
Uh,
so we're gonna have to make a little pedestal and then just put the U bolts in and
the thing should be done.
There's really no rule book on how to lower these old trucks and uh the best thing to do is just try to keep safety in mind.
So this is the old bump stop which actually kept the U bolts in line with the leaf and the axle.
um, so we're just gonna go ahead and use that at the bottom
like that,
but we're just gonna take the bump stop off and that way this U bolt stays straight and then we don't spit a spring out or roll an axle.
And it's a good idea to always use new U bolts.
The new hardware goes on and everything gets tightened down as we keep checking for level.
Well, this is what I came up with.
That's a tight fit.
Up next,
the guys reconfigure the suspension and bob our truck.
Now that we got our engine precariously placed in our engine bay, it's time to address motor mounts. Now just because this is a straight 6 doesn't mean it mounts the same as our original straight 6 did.
So we're gonna have to make a little bit more traditional motor mount pedestals.
So this is what we came up with this inner plate is gonna. To get welded to the frame and then we welded some flange nuts on the inside that way we don't have to use a wrench on those
and then this outer plate gets sandwiched with these 4 bolts then we're gonna weld a tube that goes to the engine that way we could take this engine in and out pretty easily.
I'm gonna just turn or push it.
Now I'm kind of backwoods,
so I just use a socket to drive the pilot bearing in
and remember it's gotta go in straight.
I don't make those things light.
Now there's certain times when torque sequence and ensuring you got all the bolts tight is crucial,
and the flywheel is on that list for me.
That's why I put witness marks.
Now for the clutch.
Talking of pressure plates, a little different than the flywheel.
You wanna
Sun them down slowly that way
it goes evenly.
OK
Drawing in slow.
So they're all snug.
It is gonna be a little easier getting though.
Transmission there do the hopping first.
Oh, for sure,
especially since this cross member's still here.
A T-19 and a one time?
It's pretty close right there.
Now that we're done with the front suspension, we're gonna be moving on to the rear and we're gonna be doing something a little simpler than doing a flip kit. We're actually just gonna be pulling leaf out of the leaf pack.
Now that's gonna lower the spring rate and soften the ride, which,
let's be honest, probably not gonna tow anything with this truck in this configuration,
so.
With a 58 year old truck like this one,
some of the parts that have never been off,
don't want to come off.
Whoa.
Three-quarter isn't touching it.
You wanna give it some heat?
With a stock bolt like this, a little heat persuades you to do the trick.
Do I try that?
We work on this one,
those two,
and the other side needs some help as well.
Careful with that one.
It was a little warm.
That's a hot tamale.
Take these overload springs out.
Ain't gonna need them.
Check that out.
broken leaf,
look at that.
Broken leaf spring.
It's part of the overload.
That's when you know it's had a load on it.
It's still pretty stiff.
don't even need any shocks.
We can get away. It looks really, really good. We can get away without bombing that bad.
Yeah, but why not?
I just cut it?
Yeah, I wanna get the sos all out.
Let's do it. Let's cut it.
All right, well, let's take a look at what exactly we're gonna accomplish here.
Uh,
the leaf perch is really gonna be our limiting factor here.
It ends about right here and we don't want to move the axle forward, so let's see about how much of that we're gonna be able to
cut off.
Uh,
about.
About 10 inches
All right,
so we don't want to go past.
The hanger
I'll go right there.
Well, with the beam where we want it, I'm just gonna tack it in place that way when we're cutting everything, it doesn't move.
Oops,
we need a new tail light.
Coming up it's time for our flat bed to hit the street.
Welcome back to Music City Trucks, and we are on the road with our 1964 F350 flatbed.
Well, I finished up and installed the exhaust,
but now it's time for us to enjoy our turbo 300 swap flatbed shop truck.
This thing is awesome.
It takes so long for it to build that boost up, but when it does,
it's just like go and creeps in and then it's there.
It's like, oh this is awesome.
God, that steering is just like,
oh, and as soon as you let off it like darts over.
One thing is it still sounds and smells like a farm truck.
I feel like it though now.
This thing is as rowdy.
And more carrier and trash talk.
Way more scary.
I, I'm
trying to find 4th. I don't want to accidentally throw it in 2nd.
Way scarier than trash and not nearly as fast.
You see me at the wheel.
So at the wheel.
So let's talk about what we've done to this thing so far.
All right,
so.
We found a truck sitting in the dude's field right by his barn left for dead,
left for dead, literally.
We got it running out in the field.
Then we put brakes on it, got it driving,
went around town.
That was fun. Yeah,
but we couldn't leave it alone, so we came back.
We, we threw the turbo 300 in it, right,
put a trams in it.
Put another dyno,
I mean 5 times as much power as it used to have,
yeah.
Lowered it.
Bought the bed
and actually made it drivable per se.
Yeah,
so I mean it's,
this is
the best iteration for me
so far for sure.
Yeah,
I mean,
If, if, if you, if you ask me to.
Tell you what I would do differently. I would,
I'll definitely do something different with the gearing.
Oh yeah,
uh,
because yeah, I mean we're.
It really
2500 RPM.
So it's a 40 mile an hour truck, really,
yeah,
yeah, it's a cool truck to take to cars and coffee or like a local cruise.
And to show it off.
This just shows you you can have a lot of fun without going overboard.
I mean, really, what do we do? We got the brakes working, we put new tires on it.
I mean sure we put a turbo 300 in it.
You don't have to do that.
You don't have to do that. You can just put
a turbo on a 300 or just
leave the 300 in it, you know, uh,
a little bit upgraded trams from the older one,
easier to get parts, but I mean overall we really didn't spend.
A crazy amount of money to have a crazy lu truck, yeah.
That's right.
Yeah, people can take what we did
and
modify it to,
to, to fit their budget.
We love it and we still have more plans for this old truck, but for now on to our next project.
What will they do next to that old farm truck and by the way,
no roosters were harmed in the making of this production.
Remember you can catch all of our other great builds on our website. I'm Natalie Stovall.
See you all next time.
Show Full Transcript
Welcome to Power Nation Builds. I'm Natalie Stovall.
This is your chance to see one of our builds from start to finish in just 30 minutes.
Today,
Music City Trucks finds a '64 Ford flatbed.
Our journey begins about 30 miles south of Nashville in Columbia, Tennessee.
I actually found this truck on a farm on the way home from work.
And it looks like a few roosters have called it home.
The guy says it hasn't run in the last 6 years.
We like what we see, but the truck definitely has some age issues and some obvious rust problems.
So this is a 64 F3501 ton obviously but it's a dully and it's a flat bed.
The owner that we bought it from made this flat bed because it used to have a water tank on the back of it.
Uh, once he bought it from the county,
he ripped it all out and put this bed in here.
So as we move the Rock Auto van into place, our goal here is just get it started.
Not surprising,
she didn't start.
That's to be expected.
We next try spraying starter fluid directly into the car.
Another start attempt.
Not happening.
So our last recourse is to take apart the carburetor right there in the field.
We found the float spring was jammed, so we sprayed a lot of sea foam deep creep into the springs.
Don't let that spring go bye bye.
The last thing we want is to drop one of those small springs or screws.
Then we cleaned out the old gas in the bowl and put the 57 year old car back together and on the engine.
That's the sound of success.
We had to be careful to drive the truck onto our holler because with the engine leak and no brakes whatsoever,
this is trickier than it looks.
Mission accomplished.
So now all we have to do is haul it back to the Music City truck shop
to make it safer and drivable.
You know, there for a little bit we thought maybe we wouldn't get it running, but I mean who are we kidding? These old Ford straight 6s are tanks. Well, just because it's running doesn't mean it's actually roadworthy. There's a couple of things we gotta check off the list because this thing's been sitting for 6 years like tune up,
brakes, and anything else to make sure this thing's safe for the road.
All right,
let's get this thing on the lift.
First things first,
all the tires come off,
including the Dooley in the rear.
And since our goal is to just make the truck drivable,
we're gonna keep these tires, otherwise they'd be in the recycle bin.
The axle comes out
surprisingly dry.
Then it takes two of us to lift this 50+ pound rear hub off
and not uncommon on these trucks this old that have been sitting this long.
We've got dirt daubers's nest on the backing plates.
Drum brake installation calls for a special tool.
We're using replacement brakes we got at RockAuto.com and like Brandon said earlier,
it helps if you keep one of the old brakes intact as you install the replacements so you have a guide to work with.
First things first is that retainer and spring.
Sometimes those springs can be a little tricky to get in it's a lot easier with the right tool.
Installed
And then get the front shocks on that we got from Rock Auto,
get this thing on the ground.
With the front back together, we can lift our wheels back onto the axles.
The new plugs go in with a little NECs and get torqueed in followed by the coil.
And the plug wires.
Next, the rebuilt carb goes back in its stock location with a couple of nuts and two lines.
furs like a kitten
OK,
now I'm excited about it.
We gotta take this thing out, yeah,
let's have some fun,
OK,
you know, maybe do some restoration on the paint
and kind of go for that.
Oh, I would totally keep this paint as close to this patina as possible.
So when I mentioned to Pat,
you notice that when I mentioned to Pat that we may keep it, he like.
Hey,
we got all these Ford engines here.
He seemed as excited about it as we were, if not more.
Which says a lot,
which I mean if he's got an engine to throw in this,
I'm,
I'm all down for it.
What if we do this?
What if we let him pick
because he loves the truck just as much as we do,
we should let him pick what goes in this.
That's actually a really good idea.
That is.
Coming up,
pulling out the engine that's original to our 64.
We do have something that might, in our opinion,
might be just what you want, and that is our turbocharge 306. Now this engine itself,
um, this was pretty,
uh, this was pretty fun build.
I would love to see it in a vehicle.
I think this is a great application,
right I'm,
I'm partial to the straight 6.
I,
I'm down.
I'm down for that.
I,
I'll just say this.
It looks like we have an engine.
Well, now that we know what engine we're gonna be stabbing in this old pig, it's time to remove all the old stuff,
and that's gonna start with this hood.
You got help?
Some help.
Take her away.
Now that we know what engine we're running, we're excited to be jumping back on our flatbed shop truck going up.
Oh,
and just for funsies,
we thought we'd see what it looks like to live as a socket.
Cool,
right?
First thing we need to do is get all that old oil and coolant out of the way.
Mark, leaving me with the hard stuff.
Yeah,
there we go.
Saws all the time tossing all that old exhaust.
Get this drive shop out of here.
Now it's time to access the top of the transmission by removing the transmission tunnel.
It's just a little puzzle.
This is what I like about Ford floor pans is you can take the trans tunnel off and access the transmission,
disconnecting the
brake lever,
undoing the shifter, and then getting this engine and transmission out as one unit.
Yeah,
about that drive here, let me,
let me pop that drive shaft completely loose swing it right.
Well
There we go.
She's out.
That was tight,
ambitious to try to take this out in one swing.
We did it
well we did it.
Now that we got the engine and transs out of the truck, it's time to divorce them for possibly the first time in 60 years ever,
ever,
yeah.
Ready? Yep.
Here it is.
Wow, look at that rat nest.
Uh,
now the problem with these old straight axles is when you go to lower these things, you're gonna usually do what they call a flip kit, which is putting the axle on top of the leaf,
but these cast iron axles actually have the pedestals cast into them.
So we're gonna have to make a cradle that goes on the bottom.
Once we get it on top of this leaf, so the axle doesn't rotate around on us, and then it should be fine.
With the suspension bolts rusted on,
we gave them a shot of sea foam deeprete to loosen them up.
Little bit of nature's thread locker on there.
As we move around the front suspension,
everything is starting to get more difficult to remove,
requiring more persuasion.
And the rust dust is flying.
Might need the heat for this one.
No.
Got it.
All right.
All right,
the axle is hanging free now.
Now we start putting the front suspension back in using the original hardware.
What a cool design.
No shackles.
So simple
rubber roller.
So simple.
Now the axle's on top of the leaf, we're just gonna take these universal axle perches
and stick them right there on the center pin,
and then we're gonna lower it down so it's centered, and then, uh, as you can see,
there's nothing holding this axle from rotating back and forth.
Uh,
so we're gonna have to make a little pedestal and then just put the U bolts in and
the thing should be done.
There's really no rule book on how to lower these old trucks and uh the best thing to do is just try to keep safety in mind.
So this is the old bump stop which actually kept the U bolts in line with the leaf and the axle.
um, so we're just gonna go ahead and use that at the bottom
like that,
but we're just gonna take the bump stop off and that way this U bolt stays straight and then we don't spit a spring out or roll an axle.
And it's a good idea to always use new U bolts.
The new hardware goes on and everything gets tightened down as we keep checking for level.
Well, this is what I came up with.
That's a tight fit.
Up next,
the guys reconfigure the suspension and bob our truck.
Now that we got our engine precariously placed in our engine bay, it's time to address motor mounts. Now just because this is a straight 6 doesn't mean it mounts the same as our original straight 6 did.
So we're gonna have to make a little bit more traditional motor mount pedestals.
So this is what we came up with this inner plate is gonna. To get welded to the frame and then we welded some flange nuts on the inside that way we don't have to use a wrench on those
and then this outer plate gets sandwiched with these 4 bolts then we're gonna weld a tube that goes to the engine that way we could take this engine in and out pretty easily.
I'm gonna just turn or push it.
Now I'm kind of backwoods,
so I just use a socket to drive the pilot bearing in
and remember it's gotta go in straight.
I don't make those things light.
Now there's certain times when torque sequence and ensuring you got all the bolts tight is crucial,
and the flywheel is on that list for me.
That's why I put witness marks.
Now for the clutch.
Talking of pressure plates, a little different than the flywheel.
You wanna
Sun them down slowly that way
it goes evenly.
OK
Drawing in slow.
So they're all snug.
It is gonna be a little easier getting though.
Transmission there do the hopping first.
Oh, for sure,
especially since this cross member's still here.
A T-19 and a one time?
It's pretty close right there.
Now that we're done with the front suspension, we're gonna be moving on to the rear and we're gonna be doing something a little simpler than doing a flip kit. We're actually just gonna be pulling leaf out of the leaf pack.
Now that's gonna lower the spring rate and soften the ride, which,
let's be honest, probably not gonna tow anything with this truck in this configuration,
so.
With a 58 year old truck like this one,
some of the parts that have never been off,
don't want to come off.
Whoa.
Three-quarter isn't touching it.
You wanna give it some heat?
With a stock bolt like this, a little heat persuades you to do the trick.
Do I try that?
We work on this one,
those two,
and the other side needs some help as well.
Careful with that one.
It was a little warm.
That's a hot tamale.
Take these overload springs out.
Ain't gonna need them.
Check that out.
broken leaf,
look at that.
Broken leaf spring.
It's part of the overload.
That's when you know it's had a load on it.
It's still pretty stiff.
don't even need any shocks.
We can get away. It looks really, really good. We can get away without bombing that bad.
Yeah, but why not?
I just cut it?
Yeah, I wanna get the sos all out.
Let's do it. Let's cut it.
All right, well, let's take a look at what exactly we're gonna accomplish here.
Uh,
the leaf perch is really gonna be our limiting factor here.
It ends about right here and we don't want to move the axle forward, so let's see about how much of that we're gonna be able to
cut off.
Uh,
about.
About 10 inches
All right,
so we don't want to go past.
The hanger
I'll go right there.
Well, with the beam where we want it, I'm just gonna tack it in place that way when we're cutting everything, it doesn't move.
Oops,
we need a new tail light.
Coming up it's time for our flat bed to hit the street.
Welcome back to Music City Trucks, and we are on the road with our 1964 F350 flatbed.
Well, I finished up and installed the exhaust,
but now it's time for us to enjoy our turbo 300 swap flatbed shop truck.
This thing is awesome.
It takes so long for it to build that boost up, but when it does,
it's just like go and creeps in and then it's there.
It's like, oh this is awesome.
God, that steering is just like,
oh, and as soon as you let off it like darts over.
One thing is it still sounds and smells like a farm truck.
I feel like it though now.
This thing is as rowdy.
And more carrier and trash talk.
Way more scary.
I, I'm
trying to find 4th. I don't want to accidentally throw it in 2nd.
Way scarier than trash and not nearly as fast.
You see me at the wheel.
So at the wheel.
So let's talk about what we've done to this thing so far.
All right,
so.
We found a truck sitting in the dude's field right by his barn left for dead,
left for dead, literally.
We got it running out in the field.
Then we put brakes on it, got it driving,
went around town.
That was fun. Yeah,
but we couldn't leave it alone, so we came back.
We, we threw the turbo 300 in it, right,
put a trams in it.
Put another dyno,
I mean 5 times as much power as it used to have,
yeah.
Lowered it.
Bought the bed
and actually made it drivable per se.
Yeah,
so I mean it's,
this is
the best iteration for me
so far for sure.
Yeah,
I mean,
If, if, if you, if you ask me to.
Tell you what I would do differently. I would,
I'll definitely do something different with the gearing.
Oh yeah,
uh,
because yeah, I mean we're.
It really
2500 RPM.
So it's a 40 mile an hour truck, really,
yeah,
yeah, it's a cool truck to take to cars and coffee or like a local cruise.
And to show it off.
This just shows you you can have a lot of fun without going overboard.
I mean, really, what do we do? We got the brakes working, we put new tires on it.
I mean sure we put a turbo 300 in it.
You don't have to do that.
You don't have to do that. You can just put
a turbo on a 300 or just
leave the 300 in it, you know, uh,
a little bit upgraded trams from the older one,
easier to get parts, but I mean overall we really didn't spend.
A crazy amount of money to have a crazy lu truck, yeah.
That's right.
Yeah, people can take what we did
and
modify it to,
to, to fit their budget.
We love it and we still have more plans for this old truck, but for now on to our next project.
What will they do next to that old farm truck and by the way,
no roosters were harmed in the making of this production.
Remember you can catch all of our other great builds on our website. I'm Natalie Stovall.
See you all next time.



