
In This Episode
- 0:01 Introduction to the Project
- 0:27 Choosing the Car and Initial Plans
- 1:20 Engine Removal and Preparation
- 4:10 Cleaning and Painting the Engine Bay
- 6:19 Installing the New Engine
- 6:25 Suspension Upgrade
- 10:03 Brake System Upgrade
- 12:24 Painting the Car
- 16:02 Installing the Decal
- 17:13 Interior Makeover
- 20:03 Final Touches and Test Drive
Video Transcript
You're watching Power Nation.
Welcome to Power Nation Builds, your chance to see one of our projects from start to finish in just 30 minutes.
I'm Natalie Stovall,
and today Detroit Muscles next build is legendary
based on one iconic movie.
So coming out of the gate we wanted to put our back into it we wanted to pick a car that was iconic,
cool,
and something you guys could relate to.
I think you're gonna like what we picked.
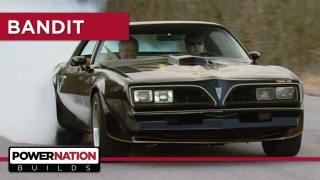
With unmistakable lines and an iconic legacy,
the 77 and 78 Trans Ams were among the most beloved pony car platforms ever built,
thanks in no small part to Burt Reynolds and Jackie Gleason.
The plans that we have for the old red dragon include a change of skin,
giving it the iconic black and gold special edition look.
In addition to that,
all the performance specs on this car are going through the roof.
Everything from the rear end to the radiator is going to get an upgrade. Now we're kind of an impasse.
We got that big bad stroker motor ready to drop into its new home.
However,
that 150 horse dog is still sitting in its place.
The plan is to snatch this old motor out so we can spruce up a bit,
clean paint all under here before we drop in that new engine.
In case you're wondering,
no,
this isn't the original engine from this car. It came from an earlier model TA,
so keeping the numbers matching engine,
well, that's a no go since it's already gone.
So first things first, we gotta get this hood off.
There are a few things in life more titillating than trying to contort your body around a hood while doing major engine surgery.
So I think we'll go ahead and lose ours for this swap. Little bird's heavy.
Don't forget to drain the radiator into a pan before you pull the lower hose that way you can save yourself a pretty big mess.
What he just said about avoiding a mess there we go.
Well,
so much for that.
We know that the old exhaust is going away for good,
so no need to struggle when a reciprocating thought makes short work of removing it.
OK, let's see if I can get this old dry shaft going
there,
you know,
we're using a lift to get all this stuff out from underneath,
but if you're doing this at home,
don't forget without the dry shaft,
things are gonna wanna roll.
Be ready for the role.
The motor mount bolts can come out next
as well as the transmission crossmember bolts.
We're removing the old rans in conjunction with the engine,
so stuff like that and the Speedo cable will need to be disconnected.
Of course you can't forget the training linkage.
Let it down
if you're tackling an engine swap for the first time,
safety should be your first concern.
Use a cherry picker rated to handle the weight.
This transmission decided to dump fluid all over the floor for us.
So try as we might to catch it.
We got another mess to clean up. Well, after some additional exhaust trimming for clearance,
well, she's pretty well ready to come out.
Just to be too much.
Let me know.
I'll give you a break. I'm not gonna do it.
What you huffing and puffing for? I'll blow your house down.
Alright,
go ahead, Joe.
Funny thing about an old greasy engine is that it leaves a greasy old mess that's gotta be taken care of.
That's her.
We're ready to spray on some cleaner. We got some degreaser from Safety Clean.
We're gonna hose this stuff on, let it sit, go grab a bite to eat,
come back and see what we got.
If you've got access to a power washer, it'll save you a boatload of time over a brush and bucket,
and you can rent them pretty cheaply too.
Well we got everything taped up, cleaned up, ready to start doing some spraying. We're gonna put on some duplicol spray enamel to give our engine bay a makeover.
Now this is engine enamel and even though we're not really spraying the engine,
this stuff is designed to withstand the temperatures and chemical elements that live under the hood of your car.
Then we'll work on plugging the newlyweds into their appropriate home in our Trans Am.
Mhm.
Easy does it.
We don't want to scratch up our nicely painted engine or car.
It doesn't take long before we start to realize that, well, the factory cross member is hanging us up
and try as we might,
it's not gonna allow us to properly position the transmission.
That's no big deal. A few bolts and some hammer taps and the old cross member is out of the way.
Then the engine can seed onto its mouths.
Tell you what, man, that's a pretty little motor sitting in there.
Yeah, I think it looks just fine. It looks right at home.
Coming up,
old suspension out,
new suspension in.
So let the suspension tear down begin.
The stock calipers are first to go,
and we're gonna replace the rubber brake lines anyway,
so those can just be clipped.
Then the tie rods can be, uh, persuaded out of the way.
The sway bar links are going bye bye as well,
so instead of struggling to loosen them up, it's the old hot range.
Then the sway bar drops out.
The top shock mount is unbolted first,
then the two bottle boats can be loosened,
allowing you to remove the shock.
The spindle is held on with a couple of pin castle nuts.
Now be careful,
this thing contains the energy of that front spring.
Using a jack to hold the bottom control arm up while you remove the nut is a good way to keep that spring in check.
Then you can let the jack down
and remove the spring,
but like I said,
use caution with that out of the way,
the spindle can come off a couple of bolts hold the upper control arm on.
As well as a couple more which hold on the lower one.
You've seen us install tubular control arms many times before and well, if you wondered why it's simple.
It offsets the stock suspension geometry
and provides for better performance handling
and helps you carve those corners a lot easier.
Somehow Joe managed to get the less greasy job of installing the shiny new parts.
When it comes to how hard you wanna run these bolts down,
you wanna make sure they're pretty darn tight.
Now ready for coil overs. Here's a little tip for you. If you put a little lock tight NSCs on this adjuster,
it won't gall up when you're ready to use it,
see if the thing will go up.
To get these coil over shocks on, we'll have to cheat a bit using a nut and washer to hold the top in place.
Here, let me help you, Joe.
Then we'll get the two bottom boats secured to the lower control arm.
Area
And using a screwjack we can load up the suspension,
allowing us to remove the temporary nut and washer on top.
Then insert the proper rubber grommet and washer.
Now how much do you tighten down the shock nut?
Well,
you wanna squish down this rubber gromite until it's flush with this washer and no more.
That's about enough
now for the jam nut.
Well,
thanks to Tommy
and the bead blaster
and some paint,
the spindle looks brand new.
We also use our old screwjack trick to bring the spindle up where it can be bolted to the upper control arm,
but if your car's on the ground, a floor jack does the job just as well.
When you upgrade your suspension like this, it only makes sense to remove the old original steering components
and install some new ones like these we got from RockAuto.com.
Otherwise it's kind of like trying to play basketball and worn out cowboy boots.
And once the car hits the road, you gotta come back and tighten everything up again because it will settle in during the first run.
Well,
since we also added some extra horsepower, we need some better binders to bring it to a halt.
We'll start with a set of EBC sport rotors.
Now these things have slots to keep the pads cooler and help them wear evenly.
These dimples,
well, they're all about degassing the rotors.
Some safety clean brake cleaner will help us clean our new rotors,
ensuring that there aren't any unwanted substances that could compromise or break.
We're also using EBC's yellow stuff pads which are ideal for serious street and track use.
They're made with a high friction formula
and the red break in services. Well,
make sure we get safe instant braking as soon as we install them.
These EBC pads work with our factory calipers which we've cleaned up and painted with cast iron colored paint.
Now some of these cars did come with four wheel discs, but
ours came with drums in the rear.
After Tom got finished rebuilding our 8.5 rear end, we went ahead and did a rear drum to disc brake conversion.
Now this is a real budget friendly project you might want to take on yourself, and it all starts with a junkyard backing plate from a 98.
To 02 Camaro
and from there you can use more used parts or some you find off the shelf at the parts store.
Now you will have to make some sort of 8 inch space there like we made out of aluminum
and it goes right in front of that Camaro backing plate we got from the junkyard.
Now we can go ahead and grab the axle and being careful not to damage the seal,
slide it into place.
Then a magnet makes it easy to insert the sea cliff.
And pulling the axle back out holds it in place.
Some lock tight thread locker on the pin locking bolt will ensure that these components stay where they're supposed to be.
I put plenty on.
Well,
finally we get to vote on this Mosier differential cover.
Now for the home stretch,
the rotors go on easy as pie,
and these are the ones that would fit those 9802 Camaros.
Same goes for the calipers and the brake pads.
These pads are the EBC yellow stuff units,
which are the same that we opted for on the front brakes.
That's how you do it,
drums to disc.
Up next,
of course, it's a bandit Black for our Trans Am tribute car.
All right guys, we've got the car in the booth we've got it primed up and sanded down and we're just about ready to hose on some sealer and some base coat but before we do all that,
well, we've got to get it taped up
now at first glance you guys may be saying, oh no, it still got some red paint on it.
Well this thing we're not really doing what's called a restoration. This car is gonna get a paint job and there's a total difference between the two.
Now the paint job we're gonna give it it's gonna be really nice.
Y'all check this out.
So excited.
Awesome.
You're not excited.
I'm excited. I'm very excited.
I don't believe you.
The masking that we're doing is going to protect the windows, the interior,
and the undercarriage from paint overspray,
and we've got to protect our pretty engine too.
We'll be sure to mask it to the floor so nothing gets under the car.
OK, right now what we're gonna do is we're gonna mix up some PPGDP epoxy primer and use it as a sealer
through the sanding process we had some burn throughs and cut throughs and some bare metal sticking through.
This will give us a more uniform canvas to lay down our base coat.
The sealer comes in a variety of colors and you can actually slightly alter the look of your paint by choosing one shade or another.
We're going for a straight up black look so black sealers what we'll go with.
It's a good idea to run between 20 to 25 PSI on an HVLP gun for this material
and to use a 50% overlap pattern when you spray.
We sprayed our PPG sealer and allow it to flash for 30 minutes, but this time I'm mixing up some starlight black base coat to put on next.
All the material that we're using on the Trans Am came from our old buddy Brian at Single Source,
including this black base coat.
When Tommy approached me about the color, he said he wanted the DBC 9700, which is our base coat black, which is standard black used by General Motors and Ford and stuff, and, and it was the black that was actually a factory on the.
Car when it was produced,
the misconception about the name sorry black for this car would lead you to believe this metallic color and it's not, not, it's not the case at all. It's actually a straight black and that's the one problem that people run into the variations on the, on the name,
um, would lead you to believe that either has pearl or metallic in it, and it doesn't. It's a solid black color which is when the car is done right the way the, the guys do it here,
it's slick and you can't ask for a more beautiful paint job than a black car when it's done like this.
Now after some black seaer for that uniformity we talked about earlier,
she also gets some black base,
4 coats to be exact.
Once the base cures for at least 30 minutes,
several coats of clear will be that cherry on top.
Well we've got the black paint sprayed on the hood's all buffed out and we're ready to start the installation of this giant bird.
Now a lot of you may be looking at it and maybe a little bit intimidated by it,
but
it's not really all that difficult.
But there are a few things that you should keep in mind.
Also, you want to place the decal about an inch or so from the leading edge of the hood.
Now that may seem like it's a little bit too close, but you have to consider the front fascia is gonna add a few inches to the nose of the car.
I'll use a small piece of tape
so that I can.
Make me a reference point here on the top of the hood because I still have to lift the decal
and remove the backing from it.
Now you could use a pencil
and mark the center line of the hood.
And you wanna mark the center line of this little bird's tail feathers
that way we can line them up.
Make sure your hood is clean.
That's a given
and spraying some soapy water on the decal will help you move it once it takes flight
and lands on the car over the hoops.
We'll line up the marks that we made on the points and a rubber squeegee gently pulled from the middle to the outside
will push out the water and smooth the graphic,
getting rid of all those little bubbles.
Now we're just about 1/8 of an inch too far forward,
but
I think we're within our tolerance.
Peel off the transfer paper and reveal that golden glory.
The old birds really starting to come together.
Coming up,
Finally,
it is time for our bandit Trans Am to hit the streets.
Nothing like brand new carpet for the foundation of an interior makeover.
This we got from year one is custom molded for our TA and it's got
juke backing for a little cushion.
However,
before we throw this thing in the car,
I'll show you a little trick that'll make life a lot easier when it's time to install seats.
If you loosely install some bolts into the holes where the seats mount up,
once the carpet's laid down,
you'll be able to fill this through the carpet,
cut a little slip for a neat installation.
The way we see it, it only takes one chicken to lay an egg,
but to lay a carpet
helps to have two sets of hands.
Ours is a little on the loose side,
so sprays a block tight adhesive on the back
helps to make for a tighter fit.
Then after a few minutes of tucking and a pat down this job's covered.
Next,
after some clean up and fresh paint,
the rear side panels can go in place along with the sail panels.
Well,
Tom's hard at work recovering the factory seats, replacing the boring black vinyl with a set of camel colored fabric covers from year one
that come with trim that matches our carpet,
another little touch that'll set this bandit apart from the rest.
While he's doing the front seats, I'm gonna plug our console back in.
Year one has introduced a new version of the classic Pontiac snowflake wheel.
It's a new version because back in '77 to 81, they were 15 inches in diameter.
These are 17 by 9.
You get them in three accents,
black,
silver, and well, of course, gold.
We wrapped our wheels with Falcon's newest high performance tires,
a Zenus FK 453.
Understandably, this is gonna be our favorite part of the bandit Trans Am project, the payoff,
uh, breaking one down any smokies in the sky or the bushes,
finally getting to feel how the engine and other new parts performed together on the curves and straightaway.
So what do you think Joe?
I'll tell you what,
I like it.
I like the way it sounds. It's a really fun car to drive. It steers it stops, it goes, it's comfortable,
you know,
and not to mention the attention a person can get in it,
you know, whether or not you like these type of cars or not, you have to respect them, man,
because they,
they get the attention.
You know there's nothing under the sun better looking than a black muscle car unless it's a black TA muscle car with new paint,
gold stripes, and those special snowflake wheels. This may be our coolest looking project ever.
By now you might be wondering if we're gonna get crazy and do a burnout with this car.
Well,
no.
I'll probably have to do several
before the day's over.
Yes sir, I believe them.
Butler boys knocked the plumb out of the park.
This band of cars a fun ride,
but
I'd be having a lot more fun if Tommy quit hogging the wheel.
Yeah, I think I could drive this thing with more creativity.
Yeah,
that's more like it, right?
Real bandit.
Hey Cletus, you got a copy?
Uh oh.
Wardrobe malfunction.
What are you looking at?
Don't sweat it, Joe.
Everybody's gonna be looking at the car anyways.
That was one Oscar worthy build.
Now remember you can catch all our other great projects on our website.
I'm Natalie Stovall and I'll see you down the road, good buddy.
Show Full Transcript
Welcome to Power Nation Builds, your chance to see one of our projects from start to finish in just 30 minutes.
I'm Natalie Stovall,
and today Detroit Muscles next build is legendary
based on one iconic movie.
So coming out of the gate we wanted to put our back into it we wanted to pick a car that was iconic,
cool,
and something you guys could relate to.
I think you're gonna like what we picked.
With unmistakable lines and an iconic legacy,
the 77 and 78 Trans Ams were among the most beloved pony car platforms ever built,
thanks in no small part to Burt Reynolds and Jackie Gleason.
The plans that we have for the old red dragon include a change of skin,
giving it the iconic black and gold special edition look.
In addition to that,
all the performance specs on this car are going through the roof.
Everything from the rear end to the radiator is going to get an upgrade. Now we're kind of an impasse.
We got that big bad stroker motor ready to drop into its new home.
However,
that 150 horse dog is still sitting in its place.
The plan is to snatch this old motor out so we can spruce up a bit,
clean paint all under here before we drop in that new engine.
In case you're wondering,
no,
this isn't the original engine from this car. It came from an earlier model TA,
so keeping the numbers matching engine,
well, that's a no go since it's already gone.
So first things first, we gotta get this hood off.
There are a few things in life more titillating than trying to contort your body around a hood while doing major engine surgery.
So I think we'll go ahead and lose ours for this swap. Little bird's heavy.
Don't forget to drain the radiator into a pan before you pull the lower hose that way you can save yourself a pretty big mess.
What he just said about avoiding a mess there we go.
Well,
so much for that.
We know that the old exhaust is going away for good,
so no need to struggle when a reciprocating thought makes short work of removing it.
OK, let's see if I can get this old dry shaft going
there,
you know,
we're using a lift to get all this stuff out from underneath,
but if you're doing this at home,
don't forget without the dry shaft,
things are gonna wanna roll.
Be ready for the role.
The motor mount bolts can come out next
as well as the transmission crossmember bolts.
We're removing the old rans in conjunction with the engine,
so stuff like that and the Speedo cable will need to be disconnected.
Of course you can't forget the training linkage.
Let it down
if you're tackling an engine swap for the first time,
safety should be your first concern.
Use a cherry picker rated to handle the weight.
This transmission decided to dump fluid all over the floor for us.
So try as we might to catch it.
We got another mess to clean up. Well, after some additional exhaust trimming for clearance,
well, she's pretty well ready to come out.
Just to be too much.
Let me know.
I'll give you a break. I'm not gonna do it.
What you huffing and puffing for? I'll blow your house down.
Alright,
go ahead, Joe.
Funny thing about an old greasy engine is that it leaves a greasy old mess that's gotta be taken care of.
That's her.
We're ready to spray on some cleaner. We got some degreaser from Safety Clean.
We're gonna hose this stuff on, let it sit, go grab a bite to eat,
come back and see what we got.
If you've got access to a power washer, it'll save you a boatload of time over a brush and bucket,
and you can rent them pretty cheaply too.
Well we got everything taped up, cleaned up, ready to start doing some spraying. We're gonna put on some duplicol spray enamel to give our engine bay a makeover.
Now this is engine enamel and even though we're not really spraying the engine,
this stuff is designed to withstand the temperatures and chemical elements that live under the hood of your car.
Then we'll work on plugging the newlyweds into their appropriate home in our Trans Am.
Mhm.
Easy does it.
We don't want to scratch up our nicely painted engine or car.
It doesn't take long before we start to realize that, well, the factory cross member is hanging us up
and try as we might,
it's not gonna allow us to properly position the transmission.
That's no big deal. A few bolts and some hammer taps and the old cross member is out of the way.
Then the engine can seed onto its mouths.
Tell you what, man, that's a pretty little motor sitting in there.
Yeah, I think it looks just fine. It looks right at home.
Coming up,
old suspension out,
new suspension in.
So let the suspension tear down begin.
The stock calipers are first to go,
and we're gonna replace the rubber brake lines anyway,
so those can just be clipped.
Then the tie rods can be, uh, persuaded out of the way.
The sway bar links are going bye bye as well,
so instead of struggling to loosen them up, it's the old hot range.
Then the sway bar drops out.
The top shock mount is unbolted first,
then the two bottle boats can be loosened,
allowing you to remove the shock.
The spindle is held on with a couple of pin castle nuts.
Now be careful,
this thing contains the energy of that front spring.
Using a jack to hold the bottom control arm up while you remove the nut is a good way to keep that spring in check.
Then you can let the jack down
and remove the spring,
but like I said,
use caution with that out of the way,
the spindle can come off a couple of bolts hold the upper control arm on.
As well as a couple more which hold on the lower one.
You've seen us install tubular control arms many times before and well, if you wondered why it's simple.
It offsets the stock suspension geometry
and provides for better performance handling
and helps you carve those corners a lot easier.
Somehow Joe managed to get the less greasy job of installing the shiny new parts.
When it comes to how hard you wanna run these bolts down,
you wanna make sure they're pretty darn tight.
Now ready for coil overs. Here's a little tip for you. If you put a little lock tight NSCs on this adjuster,
it won't gall up when you're ready to use it,
see if the thing will go up.
To get these coil over shocks on, we'll have to cheat a bit using a nut and washer to hold the top in place.
Here, let me help you, Joe.
Then we'll get the two bottom boats secured to the lower control arm.
Area
And using a screwjack we can load up the suspension,
allowing us to remove the temporary nut and washer on top.
Then insert the proper rubber grommet and washer.
Now how much do you tighten down the shock nut?
Well,
you wanna squish down this rubber gromite until it's flush with this washer and no more.
That's about enough
now for the jam nut.
Well,
thanks to Tommy
and the bead blaster
and some paint,
the spindle looks brand new.
We also use our old screwjack trick to bring the spindle up where it can be bolted to the upper control arm,
but if your car's on the ground, a floor jack does the job just as well.
When you upgrade your suspension like this, it only makes sense to remove the old original steering components
and install some new ones like these we got from RockAuto.com.
Otherwise it's kind of like trying to play basketball and worn out cowboy boots.
And once the car hits the road, you gotta come back and tighten everything up again because it will settle in during the first run.
Well,
since we also added some extra horsepower, we need some better binders to bring it to a halt.
We'll start with a set of EBC sport rotors.
Now these things have slots to keep the pads cooler and help them wear evenly.
These dimples,
well, they're all about degassing the rotors.
Some safety clean brake cleaner will help us clean our new rotors,
ensuring that there aren't any unwanted substances that could compromise or break.
We're also using EBC's yellow stuff pads which are ideal for serious street and track use.
They're made with a high friction formula
and the red break in services. Well,
make sure we get safe instant braking as soon as we install them.
These EBC pads work with our factory calipers which we've cleaned up and painted with cast iron colored paint.
Now some of these cars did come with four wheel discs, but
ours came with drums in the rear.
After Tom got finished rebuilding our 8.5 rear end, we went ahead and did a rear drum to disc brake conversion.
Now this is a real budget friendly project you might want to take on yourself, and it all starts with a junkyard backing plate from a 98.
To 02 Camaro
and from there you can use more used parts or some you find off the shelf at the parts store.
Now you will have to make some sort of 8 inch space there like we made out of aluminum
and it goes right in front of that Camaro backing plate we got from the junkyard.
Now we can go ahead and grab the axle and being careful not to damage the seal,
slide it into place.
Then a magnet makes it easy to insert the sea cliff.
And pulling the axle back out holds it in place.
Some lock tight thread locker on the pin locking bolt will ensure that these components stay where they're supposed to be.
I put plenty on.
Well,
finally we get to vote on this Mosier differential cover.
Now for the home stretch,
the rotors go on easy as pie,
and these are the ones that would fit those 9802 Camaros.
Same goes for the calipers and the brake pads.
These pads are the EBC yellow stuff units,
which are the same that we opted for on the front brakes.
That's how you do it,
drums to disc.
Up next,
of course, it's a bandit Black for our Trans Am tribute car.
All right guys, we've got the car in the booth we've got it primed up and sanded down and we're just about ready to hose on some sealer and some base coat but before we do all that,
well, we've got to get it taped up
now at first glance you guys may be saying, oh no, it still got some red paint on it.
Well this thing we're not really doing what's called a restoration. This car is gonna get a paint job and there's a total difference between the two.
Now the paint job we're gonna give it it's gonna be really nice.
Y'all check this out.
So excited.
Awesome.
You're not excited.
I'm excited. I'm very excited.
I don't believe you.
The masking that we're doing is going to protect the windows, the interior,
and the undercarriage from paint overspray,
and we've got to protect our pretty engine too.
We'll be sure to mask it to the floor so nothing gets under the car.
OK, right now what we're gonna do is we're gonna mix up some PPGDP epoxy primer and use it as a sealer
through the sanding process we had some burn throughs and cut throughs and some bare metal sticking through.
This will give us a more uniform canvas to lay down our base coat.
The sealer comes in a variety of colors and you can actually slightly alter the look of your paint by choosing one shade or another.
We're going for a straight up black look so black sealers what we'll go with.
It's a good idea to run between 20 to 25 PSI on an HVLP gun for this material
and to use a 50% overlap pattern when you spray.
We sprayed our PPG sealer and allow it to flash for 30 minutes, but this time I'm mixing up some starlight black base coat to put on next.
All the material that we're using on the Trans Am came from our old buddy Brian at Single Source,
including this black base coat.
When Tommy approached me about the color, he said he wanted the DBC 9700, which is our base coat black, which is standard black used by General Motors and Ford and stuff, and, and it was the black that was actually a factory on the.
Car when it was produced,
the misconception about the name sorry black for this car would lead you to believe this metallic color and it's not, not, it's not the case at all. It's actually a straight black and that's the one problem that people run into the variations on the, on the name,
um, would lead you to believe that either has pearl or metallic in it, and it doesn't. It's a solid black color which is when the car is done right the way the, the guys do it here,
it's slick and you can't ask for a more beautiful paint job than a black car when it's done like this.
Now after some black seaer for that uniformity we talked about earlier,
she also gets some black base,
4 coats to be exact.
Once the base cures for at least 30 minutes,
several coats of clear will be that cherry on top.
Well we've got the black paint sprayed on the hood's all buffed out and we're ready to start the installation of this giant bird.
Now a lot of you may be looking at it and maybe a little bit intimidated by it,
but
it's not really all that difficult.
But there are a few things that you should keep in mind.
Also, you want to place the decal about an inch or so from the leading edge of the hood.
Now that may seem like it's a little bit too close, but you have to consider the front fascia is gonna add a few inches to the nose of the car.
I'll use a small piece of tape
so that I can.
Make me a reference point here on the top of the hood because I still have to lift the decal
and remove the backing from it.
Now you could use a pencil
and mark the center line of the hood.
And you wanna mark the center line of this little bird's tail feathers
that way we can line them up.
Make sure your hood is clean.
That's a given
and spraying some soapy water on the decal will help you move it once it takes flight
and lands on the car over the hoops.
We'll line up the marks that we made on the points and a rubber squeegee gently pulled from the middle to the outside
will push out the water and smooth the graphic,
getting rid of all those little bubbles.
Now we're just about 1/8 of an inch too far forward,
but
I think we're within our tolerance.
Peel off the transfer paper and reveal that golden glory.
The old birds really starting to come together.
Coming up,
Finally,
it is time for our bandit Trans Am to hit the streets.
Nothing like brand new carpet for the foundation of an interior makeover.
This we got from year one is custom molded for our TA and it's got
juke backing for a little cushion.
However,
before we throw this thing in the car,
I'll show you a little trick that'll make life a lot easier when it's time to install seats.
If you loosely install some bolts into the holes where the seats mount up,
once the carpet's laid down,
you'll be able to fill this through the carpet,
cut a little slip for a neat installation.
The way we see it, it only takes one chicken to lay an egg,
but to lay a carpet
helps to have two sets of hands.
Ours is a little on the loose side,
so sprays a block tight adhesive on the back
helps to make for a tighter fit.
Then after a few minutes of tucking and a pat down this job's covered.
Next,
after some clean up and fresh paint,
the rear side panels can go in place along with the sail panels.
Well,
Tom's hard at work recovering the factory seats, replacing the boring black vinyl with a set of camel colored fabric covers from year one
that come with trim that matches our carpet,
another little touch that'll set this bandit apart from the rest.
While he's doing the front seats, I'm gonna plug our console back in.
Year one has introduced a new version of the classic Pontiac snowflake wheel.
It's a new version because back in '77 to 81, they were 15 inches in diameter.
These are 17 by 9.
You get them in three accents,
black,
silver, and well, of course, gold.
We wrapped our wheels with Falcon's newest high performance tires,
a Zenus FK 453.
Understandably, this is gonna be our favorite part of the bandit Trans Am project, the payoff,
uh, breaking one down any smokies in the sky or the bushes,
finally getting to feel how the engine and other new parts performed together on the curves and straightaway.
So what do you think Joe?
I'll tell you what,
I like it.
I like the way it sounds. It's a really fun car to drive. It steers it stops, it goes, it's comfortable,
you know,
and not to mention the attention a person can get in it,
you know, whether or not you like these type of cars or not, you have to respect them, man,
because they,
they get the attention.
You know there's nothing under the sun better looking than a black muscle car unless it's a black TA muscle car with new paint,
gold stripes, and those special snowflake wheels. This may be our coolest looking project ever.
By now you might be wondering if we're gonna get crazy and do a burnout with this car.
Well,
no.
I'll probably have to do several
before the day's over.
Yes sir, I believe them.
Butler boys knocked the plumb out of the park.
This band of cars a fun ride,
but
I'd be having a lot more fun if Tommy quit hogging the wheel.
Yeah, I think I could drive this thing with more creativity.
Yeah,
that's more like it, right?
Real bandit.
Hey Cletus, you got a copy?
Uh oh.
Wardrobe malfunction.
What are you looking at?
Don't sweat it, Joe.
Everybody's gonna be looking at the car anyways.
That was one Oscar worthy build.
Now remember you can catch all our other great projects on our website.
I'm Natalie Stovall and I'll see you down the road, good buddy.



