In This Episode
- 0:01 Introduction and Overview
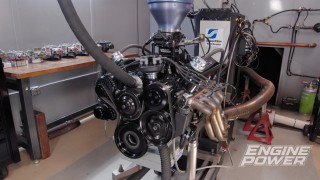
- 1:02 Initial Engine Test and Water Pump Issue
- 3:37 Water Pump Replacement and Engine Running
- 4:59 Dyno Testing and Timing Adjustment
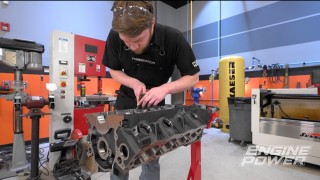
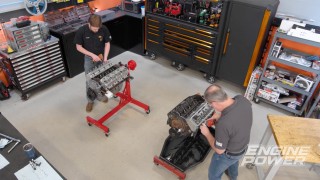
- 6:59 Disassembly and Inspection of the Engine
- 9:01 Removing and Inspecting Engine Components
- 11:15 Port and Polish Engine Block
- 14:31 Bore Honing the Cylinders
- 16:35 Balancing the Crankshaft
- 20:31 Polishing the Crankshaft
Video Transcript
You're watching Power Nation.
Today in engine power, it is our most requested
mobile par ever and we're going to tackle challenge after challenge on Dodge's forgotten economy V8.
Chevy guys should be nervous and Ford fans will be jealous as we strip,
prep and machine this hidden powerhouse on the way to modern performance.
Hello everyone and welcome to Engine Power.
Boy, do we have a fun one for this build.
This is fresh off the delivery truck into our building from a salvage yard,
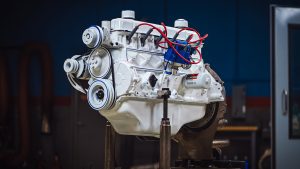
the Dodge 318
LA.
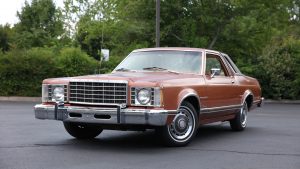
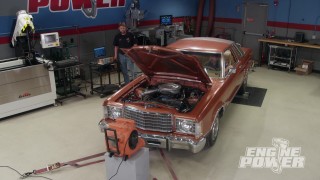
So this thing is from an '81 to 84 Chrysler Fifth Avenue.
We're going to do a staged build.
This thing similar to our Ultimate 305 series, so we're gonna go from mild to the extremely wild.
But
first, we're going to take it just like it is
and see if this thing will actually run in this condition.
We'll sling a chain across two intake bolts and lift this thing out of the crate to get it mounted to our dyno cart.
We'll also drain any remaining coolant,
install an internal balance flywheel with ARP fasteners,
and true up our drive plate before rolling it into the test cell.
It's always a challenge hooking up stock components to our dyno,
but we are able to use some stock bracketry to correctly mount our electronic throttle cable.
The stock fuel line will work for now,
but we will cut it off with a tubing cutter and give it a nice
bubble flare to help it seal with a rubber hose.
Once it's reinstalled, we can hose clamp our dyno fuel line on it with a feed pressure of around 4 PSI.
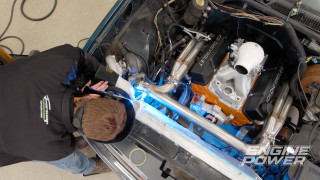
The stock distributor is wired up to our MSD ignition box, and then we'll do our best to get the exhaust pipes around these broken manifolds.
The only way that'll get better
is if you do it a different way.
We started to pump water into the engine to fire it up,
but ran into a slight problem.
Oh,
hey,
oh.
Oh,
I hear a lot of liquid.
We have water leakage.
Is it coming out of the wee hole?
No, I think the freaking water pump is like cracked or something. It is shooting out.
Testing was over before we started.
I knew it was too smooth.
All right,
little snafu,
not a big deal. We're gonna change it out for a brand new water pump. Pat's been draining the engine.
He started to get it disassembled,
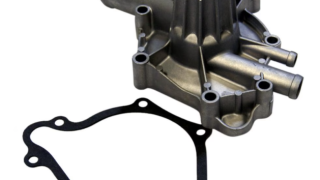
so I went down to our local AutoZone and I got a brand new Duralast water pump.
The reason I got a Duralast one is because this is a 100% brand new water pump.
It's not rebuilt. It's not remanufactured. It's all new components and everything.
So it's
aluminum like the original one, but it has precision machine flanges.
It has the correct fit,
like just like our OE ones. That means we'll be able to pull that one off,
stick this one on,
and it has sealed
permanent bearings in it. So that means this thing is gonna last just as long,
if not longer
than the one from 1983.
So we're gonna get that one off,
get this one on,
and
even came with a new gasket.
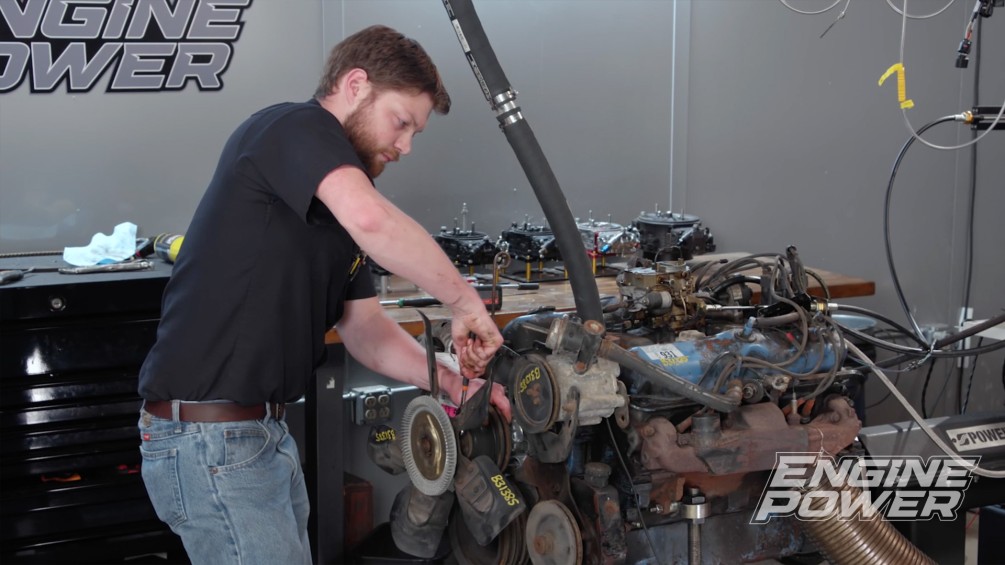
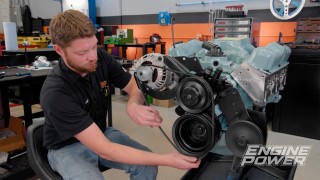
To get to the water pump, we have to pull all of the bulky stock accessory drive off.
Unfortunately,
one of the long water pump bolts is seized into the timing cover and it's snapped off,
but that is an issue for future Pat and Frankie.
Right now we're just trying to get this thing running,
so a new desk goes on and the water pump follows.
All of the V belt accessories are installed in the reverse order,
including the fan to wrap up this quick fix and put everything back to the way it was.
With 5 quarts of fresh oil,
we're ready to hit the key on this dirty Dodge.
OK, now that we've made a huge mess in our dining room, we have our 318
actually running
creamy, smooth, idle,
good oil pressure, 52.8 PSI.
Now that it's up to temp,
we're around 150 degrees right now.
This thing for all intents and purposes is running really, really well.
Usually something that sits in a salvager, it's gonna have a broke plug,
broke wire. It's gonna have broke something and leaks a little bit of oil, but that's OK.
We can,
we can deal with that. We're gonna make a pool from 1800 to 4500.
That should be somewhere where this thing peaks. I have no idea.
We think,
see if it'll load in.
No problem.
doesn't care at all. 2 barrel goodness.
There's your pole right there. There's your poll. So
we have peaks
of 133.7
and 215 pound feet.
So that's your,
that's your horsepower and torque peaks there.
Let me just go see if anything's going on in here and we'll go from there,
make sure nothing fell off of it,
um,
yeah,
I mean it.
It actually ran pretty good until it got to about
yeah, 4500 or so.
Wasn't very happy.
We'll see, he's probably gonna put some timing in if I had to guess.
What do you think ahead for timing?
I don't know, 20s, mid-20s it had 13 degrees of timing on.
Yeah,
these have that weird like vacuum it's like a vacuum operated spark control lean burn you know computer.
What do you think I have in it now?
36 or 38.
Yeah, 36.
I'm like this thing's, you know,
probably I think these are under 9 to 1, so it's gonna take all kinds of timing.
Yeah.
186 horsepower
and 284.9 pound feet.
That's crazy.
Look,
the crazy thing was, is, is pull up the overlay.
That's not bad.
Just for,
yeah,
literally just from a timing change.
I mean you added like 22 degrees, 23 degrees degrees of timing,
but
I feel good about this now. I mean,
I feel like we have a, a solid-ish base.
We just want to have a good engine to start with, and
we have one.
That's a huge win.
Time to get it off now.
Stick around because up next we dig into this greasy, grimy junkyard jewel to see if we hit gold or blew our money on scrap.
All right, we have our 318 off the dyno
onto an engine stand and here in the assembly slash disassembly area because for our upgrades we do need to disassemble this thing basically completely.
Yeah,
so we're not reusing particularly the induction package, but everything else, the block, the crank, the rods, the pen, all that stuff is staying. So the first thing we got to do is we got to get to the bolt, so we got to do a little bit of scraping,
a little bit of vacuuming.
The top of this engine is nastier than a public trash can,
and it has everything from vermin nest to candy wrappers to mouse poop caked on it from decades of neglect.
We'll do the best we can before digging into this engine,
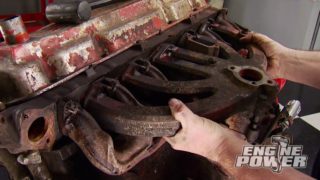
starting with the exhaust manifolds.
We usually have horrible luck,
but every single bolt came out nice and easy on this one.
That one was buttery smooth.
Because
there's no oil
coming out of anything,
everything looks like it was running just fine.
After popping off the stock distributor,
we'll use a small magnet to get the OE drive shaft out.
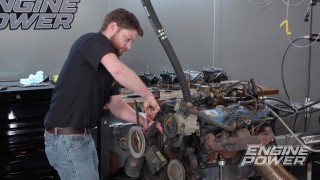
Ironically, we need to pull all the accessory drive off again,
but we do plan on reusing it for this build,
so we'll keep track of the bolts and keep everything in order.
Next, we crack open the valve covers to take our first look inside this 318.
Hm,
that's not bad.
Clean one owner.
After removing the now exposed intake bolts,
we can drive a scraper on the intake and pry it off.
That is so nice. Oh,
so cast irony.
These stock rocker shaft bolts are evenly loosened to remove the tension,
and then they can come off in one piece.
All the stock valvetrain looks exceptionally well,
but for our plans, we won't be reusing it.
The original flat tap at lifters barely have any build up so they can actually be slid out of the boards by hand.
The head bolts are broken loose and then can be zipped out with a 3/8 impact.
I think we are in luck.
There's no oversized markings on the pistons.
39, 10-ish,
a little bit of wear, but uh yeah,
standard bore.
The crank pulley and damper bolt come off next,
and a harmonic damper puller is used to remove the factory damper,
which won't be reused.
I mean it's fresh oil, but definitely picked up some
crud.
That is a rinse session
after getting to all the oil caked bolts,
the oil pan can be wedged off,
revealing the bottom end and adding to the growing pile of parts that need to be cleaned.
Now it's time to tackle our broken bolt seized in the timing cover.
The cover won't come off with a bolt stuck in it,
even with some hammering,
so we'll apply a fair bit of heat and are able to spin the bolt and cover off together.
And, now you don't have to extract that bolt.
Oh,
I just have to extract it from this cover.
Ooh,
spectacular.
That's nice.
She can't look, look how much
movement that has.
Yeah,
the stock fiber timing gears are no good either,
so those will hit the can, but the original thrust plate looks great
and will be reused.
Let's feel pretty good.
Yeah, it turns over really, really nice.
This cam has minimal wear, but is following the timing set to the junk pile for this build.
The bearings are in excellent condition,
so we won't be wasting money on replacing them.
Chunky,
very chunky.
The right angle oil filter adapter bolt is wreathed loose and will be cleaned up and reinstalled later,
along with the stock oil pump that made outstanding pressure.
Before removing the rods and pistons,
we'll use a numbered punch to mark the cylinder location on each rod and cap so they can't be mixed up on accident.
Once the rod bolts are broke loose,
we can get our first look at the condition of the bearings. The tops look like, but that looks good.
This engine definitely hasn't been abused and it is in better shape than most of the salvage engines we've gotten.
Look at that.
mm, look at the bearing
load side of the bearing.
Look at the skirt.
Once we get the remaining assemblies punched out of the block,
the crank is the last piece.
These old engines, when you crack the bolts loose, they all smell the same.
Yeah.
With the caps loose,
we remove and inspect the bearings,
which look as good or better than the rods.
A good sign is that the caps still have a tight register,
but with them out of the way,
the crank can be gently lifted out.
This comes right out.
82.
Mine says 10 of '82.
Mine says 8,
which means original bearings for 83.
What a great year.
Wasn't that when Lincoln was around
stabbed you.
Coming up,
port and polish an engine block.
That's right,
and we get our 318 sealed up better than new with a performance level hone job.
How do you determine what ring gap is right for your application?
Well, that's what we'll talk about in today's summit tech tip.
Just like everything else, piston ring in gap is a very important part of engine building because it has to be right.
Now it has to be right because if it is wrong, it can cause some major damage.
What it is is how much the ring is gapped at ambient temperature.
We'll put a ring in the block. We'll square it up and measure it with a feeler gauge.
Most of the time it's OK to be over, but it's never great to be under.
So
how do we know that
every manufacturer who manufactures rings has a guide to look at to make sure you are getting the application correct.
Stock stuff all the way up to very,
very high cylinder pressure things,
and that is included with the rings that you're going to be getting.
Stock stuff is normally 4 to 4.5000 per inch of cylinder bore.
If it's too small,
that ring can butt up and it can not only destroy the piston but the cylinder bore itself.
If you have any questions on what to have for piston ring and gap,
you can consult the experts at SummitRacing.
Our 318 is now fully apart. We ran it through our jet washer real quick.
Now we have most of the heavy stuff off. We're gonna go ahead and invest some time in this block because we're gonna be using this for multiple different iterations.
It's gonna take a few hours, but it's totally gonna be worth it because we're gonna use this thing over and over again.
And the first thing we're gonna do is get these plugs out of the back.
Surprisingly,
these rear oil gallery plugs did not take a lot of effort to get out.
They popped loose without any heat or penetrating oil.
We can use a long skinny rod to hit the front press plugs
which flew out with almost no effort as well.
The core plugs on this block were not leaking, but some were very rusty,
so we'll use a punch and a hammer to turn them sideways and then grab them with a set of pliers to rip them out.
Next we'll grab a carbide burr and a grinder to deburr the sharp edges, and on this stock block there are many.
We aren't going crazy taking off material,
just trying to break those edges and make the block less of a pain to work with.
On the critical areas like the main saddles,
we'd like to use a small hand file for this, and once all the deburying is done, we'll switch to a 7/16 inch carbide and start smoothing out the thin casting flash in the lifter valley.
Shaping these to a nice radius prevents any of that jagged edge from breaking off in the engine and
gives the oil a smooth return to the pan.
The last thing we will do is port the oil galleries and feed areas in the.
Block smoothing out sharp corners to improve flow is most of the process,
but on this small block Chrysler,
we will go a little farther on the large oil filter boss,
completely smoothing out the sharp edges and castings for a smooth,
polished surface.
All of the passageways are ported using various tools,
even the small feed holes behind the main bearings
that finishes out the prep on our 318, and it can take a quick bath in our jet washer to clean out all the metal shavings we added before it hits the home.
All right.
Block is out of the cleaner. Frankie's got it looking good.
Got a piston measured up.
Next thing we're gonna do is get it in the hone and get it roughed out.
The main caps are installed just like during assembly to recreate the lower cylinder board distortion
with high pressure grease on the bolts.
They are torqued to 85 pound feet,
and then the block can be loaded up into our sun and SV-15 hose.
We're going to be bore honing the cylinders to a 30,000 oversize for our new pistons, and we'll be starting out with a 150 grit diamond abrasive to make short work of it.
The block can be roughed out within 5000 of our final bore size without the torque plate checking progress as we go.
22.5 to go.
But everything is.
Nice and straight.
Then the same gasket we will use during this build is laid down and this torque plate from Summit Racing Equipment is set in place.
It is held down with the same ARP head bolts that will be used in the build, and they are torqued to 100 pound feet.
This will simulate the distortion from the cylinder heads and will ensure we end up with a round cylinder once the engine is assembled.
We.
About
1.5 to go.
Once the bores are within 5/10,000 of final size,
we will switch to a 600 grit diamond abrasive at slower speed and lower load.
This applies a plateau finish in the cylinder that has a flat, smooth top for the ring to seal
and deeper valleys to hold oil for lubrication.
The profile is measured with a profileometer,
and with these numbers,
it's good to go.
In a bit,
we fix the worst part about this small block and focus on getting our crankshaft ready for high horsepower action.
OK, the next stage of our 318 build
is
going to be balancing because we are gonna be changing our piston and we need to rebalance our assembly
because that piston is gonna have a different weight.
So we are gonna be reusing the original crankshaft because this thing's in great condition.
These are relatively robust. They're honestly quite heavy,
uh, but they're gonna be able to take the power level that we're gonna be making in this iteration,
and we're also going to be reusing the stock connecting rods and bolt.
Because kind of like the crank, these are extremely overbuilt for the stock 318 power level, and they're gonna be handled what we're doing just fine.
So we are going to be adding new bearings.
We have those to get an accurate weight measurement.
We have a new set of rings.
We're actually also going to be alleviating one of the biggest problems with the 318, and that is its dismal 8.63 to 1 compression ratio. That is the static compression ratio that we measured on this engine,
and
this engine does come with a flat top piston, but the problem with this piston is.
Actually 90,000 down below the deck, so it leaves a big open space,
kills all the compression,
so we're gonna alleviate that with a new piston.
This is an Icon forged piston with a 4.9 cc dome on it,
and the big,
big positive here on these pistons is that they have a 1810 compression height,
but they are 60 g lighter than the OE piston.
So that's why we need to rebalance our assembly.
So we're gonna start getting our weights on everything and we can get into it.
On the big and small end of the rods, we will first weigh the big end,
then the whole rod, and use the difference as a small end weight.
All right, now that we have all 8 done,
we're gonna go ahead and sort them and see which ones are heavy, and this machine will actually sort it for you, so we have our tolerance at plus or minus 1 g.
Hit sort,
color codes them nicely, so the reds are the heavy.
We're gonna grind those down on the big and small end to match the light ones.
With some of these factory rods being up to 6 g different,
we'll use an air-powered grinder to weight match them,
which makes sure we have even forces on each part of the crank and makes the average bob weight more accurate.
Now that we got them all weight matched, we can sort them again.
They all fall within our 1 g tolerance, so we can
measure the rest of our components and get a bob weight.
The other components are simply weighed individually and sent to the CWT Industries balancer for to automatically calculate our bob weight at 2,094.7 g.
Once they are assembled,
each bob weight is installed on the crank pins with a centering tool,
and then the crankshaft can go for its first spin.
All right, so we're at 3.5 ounce an inch on the rear,
3.6 on the front,
so 28.5 and
basically 30 g there.
It's pretty close and it should be
relatively quick job.
Since this crank already has a few holes in it,
we're just going to add one more to each counterweight to correct our imbalance.
Starting with a small drill to create a dimple in the center,
then following with a 7/8 drill to remove the bulk of the material.
This is definitely one of those times where you can always take more,
so we will carefully chase the imbalance down,
checking as we go.
Once we have drilled around 300,000 on the front and rear counterweight,
we think we have it right where we want it.
All right,
there we go.
So we got
0.119 ounce inch on the rear, 0.0.110 on the front.
They are 190 degrees apart from each other, which is great because we want those to be opposite.
So we'll go ahead and save that as our last spins. We are way under our tolerance of 0.2.
And if we look at our print sheet here, so if you
didn't balance this crank, you just changed the. Pistons at just at 6000, this thing would have had
235 pounds of force on the front
and now at 6000 we've got that down to just 7 pounds.
So
definitely critical that you get your stuff reboundd even if you're gonna change just the piston.
This thing is way better than it needs to be, so we're gonna get it off, we'll get it polished up,
and then we can move on.
Chucking the crankshaft up in our Vectrex 16 by 60 lathe and turning it slowly in the direction of engine rotation,
we can use our Goodson belt polisher with an 800 grit cork belt and some polishing rouge to quickly clean up the main and rod journals for a better than new finish.
All right,
got this crank
polished up and
final cleaned.
Looks like he's got that block final cleaned, so we're basically
ready to start putting this thing together, but we have accomplished a ton of work today.
So the assembly,
I think that's gonna come next time.
Yeah, we're gonna give this thing a flashy paint job and put in all of our cool parts,
and you're gonna find that this thing not only makes great power, but will be super reliable.
We're gonna be running this on the dyno, so you don't want to miss it next time
here on Engine Power.
Show Full Transcript
Today in engine power, it is our most requested
mobile par ever and we're going to tackle challenge after challenge on Dodge's forgotten economy V8.
Chevy guys should be nervous and Ford fans will be jealous as we strip,
prep and machine this hidden powerhouse on the way to modern performance.
Hello everyone and welcome to Engine Power.
Boy, do we have a fun one for this build.
This is fresh off the delivery truck into our building from a salvage yard,
the Dodge 318
LA.
So this thing is from an '81 to 84 Chrysler Fifth Avenue.
We're going to do a staged build.
This thing similar to our Ultimate 305 series, so we're gonna go from mild to the extremely wild.
But
first, we're going to take it just like it is
and see if this thing will actually run in this condition.
We'll sling a chain across two intake bolts and lift this thing out of the crate to get it mounted to our dyno cart.
We'll also drain any remaining coolant,
install an internal balance flywheel with ARP fasteners,
and true up our drive plate before rolling it into the test cell.
It's always a challenge hooking up stock components to our dyno,
but we are able to use some stock bracketry to correctly mount our electronic throttle cable.
The stock fuel line will work for now,
but we will cut it off with a tubing cutter and give it a nice
bubble flare to help it seal with a rubber hose.
Once it's reinstalled, we can hose clamp our dyno fuel line on it with a feed pressure of around 4 PSI.
The stock distributor is wired up to our MSD ignition box, and then we'll do our best to get the exhaust pipes around these broken manifolds.
The only way that'll get better
is if you do it a different way.
We started to pump water into the engine to fire it up,
but ran into a slight problem.
Oh,
hey,
oh.
Oh,
I hear a lot of liquid.
We have water leakage.
Is it coming out of the wee hole?
No, I think the freaking water pump is like cracked or something. It is shooting out.
Testing was over before we started.
I knew it was too smooth.
All right,
little snafu,
not a big deal. We're gonna change it out for a brand new water pump. Pat's been draining the engine.
He started to get it disassembled,
so I went down to our local AutoZone and I got a brand new Duralast water pump.
The reason I got a Duralast one is because this is a 100% brand new water pump.
It's not rebuilt. It's not remanufactured. It's all new components and everything.
So it's
aluminum like the original one, but it has precision machine flanges.
It has the correct fit,
like just like our OE ones. That means we'll be able to pull that one off,
stick this one on,
and it has sealed
permanent bearings in it. So that means this thing is gonna last just as long,
if not longer
than the one from 1983.
So we're gonna get that one off,
get this one on,
and
even came with a new gasket.
To get to the water pump, we have to pull all of the bulky stock accessory drive off.
Unfortunately,
one of the long water pump bolts is seized into the timing cover and it's snapped off,
but that is an issue for future Pat and Frankie.
Right now we're just trying to get this thing running,
so a new desk goes on and the water pump follows.
All of the V belt accessories are installed in the reverse order,
including the fan to wrap up this quick fix and put everything back to the way it was.
With 5 quarts of fresh oil,
we're ready to hit the key on this dirty Dodge.
OK, now that we've made a huge mess in our dining room, we have our 318
actually running
creamy, smooth, idle,
good oil pressure, 52.8 PSI.
Now that it's up to temp,
we're around 150 degrees right now.
This thing for all intents and purposes is running really, really well.
Usually something that sits in a salvager, it's gonna have a broke plug,
broke wire. It's gonna have broke something and leaks a little bit of oil, but that's OK.
We can,
we can deal with that. We're gonna make a pool from 1800 to 4500.
That should be somewhere where this thing peaks. I have no idea.
We think,
see if it'll load in.
No problem.
doesn't care at all. 2 barrel goodness.
There's your pole right there. There's your poll. So
we have peaks
of 133.7
and 215 pound feet.
So that's your,
that's your horsepower and torque peaks there.
Let me just go see if anything's going on in here and we'll go from there,
make sure nothing fell off of it,
um,
yeah,
I mean it.
It actually ran pretty good until it got to about
yeah, 4500 or so.
Wasn't very happy.
We'll see, he's probably gonna put some timing in if I had to guess.
What do you think ahead for timing?
I don't know, 20s, mid-20s it had 13 degrees of timing on.
Yeah,
these have that weird like vacuum it's like a vacuum operated spark control lean burn you know computer.
What do you think I have in it now?
36 or 38.
Yeah, 36.
I'm like this thing's, you know,
probably I think these are under 9 to 1, so it's gonna take all kinds of timing.
Yeah.
186 horsepower
and 284.9 pound feet.
That's crazy.
Look,
the crazy thing was, is, is pull up the overlay.
That's not bad.
Just for,
yeah,
literally just from a timing change.
I mean you added like 22 degrees, 23 degrees degrees of timing,
but
I feel good about this now. I mean,
I feel like we have a, a solid-ish base.
We just want to have a good engine to start with, and
we have one.
That's a huge win.
Time to get it off now.
Stick around because up next we dig into this greasy, grimy junkyard jewel to see if we hit gold or blew our money on scrap.
All right, we have our 318 off the dyno
onto an engine stand and here in the assembly slash disassembly area because for our upgrades we do need to disassemble this thing basically completely.
Yeah,
so we're not reusing particularly the induction package, but everything else, the block, the crank, the rods, the pen, all that stuff is staying. So the first thing we got to do is we got to get to the bolt, so we got to do a little bit of scraping,
a little bit of vacuuming.
The top of this engine is nastier than a public trash can,
and it has everything from vermin nest to candy wrappers to mouse poop caked on it from decades of neglect.
We'll do the best we can before digging into this engine,
starting with the exhaust manifolds.
We usually have horrible luck,
but every single bolt came out nice and easy on this one.
That one was buttery smooth.
Because
there's no oil
coming out of anything,
everything looks like it was running just fine.
After popping off the stock distributor,
we'll use a small magnet to get the OE drive shaft out.
Ironically, we need to pull all the accessory drive off again,
but we do plan on reusing it for this build,
so we'll keep track of the bolts and keep everything in order.
Next, we crack open the valve covers to take our first look inside this 318.
Hm,
that's not bad.
Clean one owner.
After removing the now exposed intake bolts,
we can drive a scraper on the intake and pry it off.
That is so nice. Oh,
so cast irony.
These stock rocker shaft bolts are evenly loosened to remove the tension,
and then they can come off in one piece.
All the stock valvetrain looks exceptionally well,
but for our plans, we won't be reusing it.
The original flat tap at lifters barely have any build up so they can actually be slid out of the boards by hand.
The head bolts are broken loose and then can be zipped out with a 3/8 impact.
I think we are in luck.
There's no oversized markings on the pistons.
39, 10-ish,
a little bit of wear, but uh yeah,
standard bore.
The crank pulley and damper bolt come off next,
and a harmonic damper puller is used to remove the factory damper,
which won't be reused.
I mean it's fresh oil, but definitely picked up some
crud.
That is a rinse session
after getting to all the oil caked bolts,
the oil pan can be wedged off,
revealing the bottom end and adding to the growing pile of parts that need to be cleaned.
Now it's time to tackle our broken bolt seized in the timing cover.
The cover won't come off with a bolt stuck in it,
even with some hammering,
so we'll apply a fair bit of heat and are able to spin the bolt and cover off together.
And, now you don't have to extract that bolt.
Oh,
I just have to extract it from this cover.
Ooh,
spectacular.
That's nice.
She can't look, look how much
movement that has.
Yeah,
the stock fiber timing gears are no good either,
so those will hit the can, but the original thrust plate looks great
and will be reused.
Let's feel pretty good.
Yeah, it turns over really, really nice.
This cam has minimal wear, but is following the timing set to the junk pile for this build.
The bearings are in excellent condition,
so we won't be wasting money on replacing them.
Chunky,
very chunky.
The right angle oil filter adapter bolt is wreathed loose and will be cleaned up and reinstalled later,
along with the stock oil pump that made outstanding pressure.
Before removing the rods and pistons,
we'll use a numbered punch to mark the cylinder location on each rod and cap so they can't be mixed up on accident.
Once the rod bolts are broke loose,
we can get our first look at the condition of the bearings. The tops look like, but that looks good.
This engine definitely hasn't been abused and it is in better shape than most of the salvage engines we've gotten.
Look at that.
mm, look at the bearing
load side of the bearing.
Look at the skirt.
Once we get the remaining assemblies punched out of the block,
the crank is the last piece.
These old engines, when you crack the bolts loose, they all smell the same.
Yeah.
With the caps loose,
we remove and inspect the bearings,
which look as good or better than the rods.
A good sign is that the caps still have a tight register,
but with them out of the way,
the crank can be gently lifted out.
This comes right out.
82.
Mine says 10 of '82.
Mine says 8,
which means original bearings for 83.
What a great year.
Wasn't that when Lincoln was around
stabbed you.
Coming up,
port and polish an engine block.
That's right,
and we get our 318 sealed up better than new with a performance level hone job.
How do you determine what ring gap is right for your application?
Well, that's what we'll talk about in today's summit tech tip.
Just like everything else, piston ring in gap is a very important part of engine building because it has to be right.
Now it has to be right because if it is wrong, it can cause some major damage.
What it is is how much the ring is gapped at ambient temperature.
We'll put a ring in the block. We'll square it up and measure it with a feeler gauge.
Most of the time it's OK to be over, but it's never great to be under.
So
how do we know that
every manufacturer who manufactures rings has a guide to look at to make sure you are getting the application correct.
Stock stuff all the way up to very,
very high cylinder pressure things,
and that is included with the rings that you're going to be getting.
Stock stuff is normally 4 to 4.5000 per inch of cylinder bore.
If it's too small,
that ring can butt up and it can not only destroy the piston but the cylinder bore itself.
If you have any questions on what to have for piston ring and gap,
you can consult the experts at SummitRacing.
Our 318 is now fully apart. We ran it through our jet washer real quick.
Now we have most of the heavy stuff off. We're gonna go ahead and invest some time in this block because we're gonna be using this for multiple different iterations.
It's gonna take a few hours, but it's totally gonna be worth it because we're gonna use this thing over and over again.
And the first thing we're gonna do is get these plugs out of the back.
Surprisingly,
these rear oil gallery plugs did not take a lot of effort to get out.
They popped loose without any heat or penetrating oil.
We can use a long skinny rod to hit the front press plugs
which flew out with almost no effort as well.
The core plugs on this block were not leaking, but some were very rusty,
so we'll use a punch and a hammer to turn them sideways and then grab them with a set of pliers to rip them out.
Next we'll grab a carbide burr and a grinder to deburr the sharp edges, and on this stock block there are many.
We aren't going crazy taking off material,
just trying to break those edges and make the block less of a pain to work with.
On the critical areas like the main saddles,
we'd like to use a small hand file for this, and once all the deburying is done, we'll switch to a 7/16 inch carbide and start smoothing out the thin casting flash in the lifter valley.
Shaping these to a nice radius prevents any of that jagged edge from breaking off in the engine and
gives the oil a smooth return to the pan.
The last thing we will do is port the oil galleries and feed areas in the.
Block smoothing out sharp corners to improve flow is most of the process,
but on this small block Chrysler,
we will go a little farther on the large oil filter boss,
completely smoothing out the sharp edges and castings for a smooth,
polished surface.
All of the passageways are ported using various tools,
even the small feed holes behind the main bearings
that finishes out the prep on our 318, and it can take a quick bath in our jet washer to clean out all the metal shavings we added before it hits the home.
All right.
Block is out of the cleaner. Frankie's got it looking good.
Got a piston measured up.
Next thing we're gonna do is get it in the hone and get it roughed out.
The main caps are installed just like during assembly to recreate the lower cylinder board distortion
with high pressure grease on the bolts.
They are torqued to 85 pound feet,
and then the block can be loaded up into our sun and SV-15 hose.
We're going to be bore honing the cylinders to a 30,000 oversize for our new pistons, and we'll be starting out with a 150 grit diamond abrasive to make short work of it.
The block can be roughed out within 5000 of our final bore size without the torque plate checking progress as we go.
22.5 to go.
But everything is.
Nice and straight.
Then the same gasket we will use during this build is laid down and this torque plate from Summit Racing Equipment is set in place.
It is held down with the same ARP head bolts that will be used in the build, and they are torqued to 100 pound feet.
This will simulate the distortion from the cylinder heads and will ensure we end up with a round cylinder once the engine is assembled.
We.
About
1.5 to go.
Once the bores are within 5/10,000 of final size,
we will switch to a 600 grit diamond abrasive at slower speed and lower load.
This applies a plateau finish in the cylinder that has a flat, smooth top for the ring to seal
and deeper valleys to hold oil for lubrication.
The profile is measured with a profileometer,
and with these numbers,
it's good to go.
In a bit,
we fix the worst part about this small block and focus on getting our crankshaft ready for high horsepower action.
OK, the next stage of our 318 build
is
going to be balancing because we are gonna be changing our piston and we need to rebalance our assembly
because that piston is gonna have a different weight.
So we are gonna be reusing the original crankshaft because this thing's in great condition.
These are relatively robust. They're honestly quite heavy,
uh, but they're gonna be able to take the power level that we're gonna be making in this iteration,
and we're also going to be reusing the stock connecting rods and bolt.
Because kind of like the crank, these are extremely overbuilt for the stock 318 power level, and they're gonna be handled what we're doing just fine.
So we are going to be adding new bearings.
We have those to get an accurate weight measurement.
We have a new set of rings.
We're actually also going to be alleviating one of the biggest problems with the 318, and that is its dismal 8.63 to 1 compression ratio. That is the static compression ratio that we measured on this engine,
and
this engine does come with a flat top piston, but the problem with this piston is.
Actually 90,000 down below the deck, so it leaves a big open space,
kills all the compression,
so we're gonna alleviate that with a new piston.
This is an Icon forged piston with a 4.9 cc dome on it,
and the big,
big positive here on these pistons is that they have a 1810 compression height,
but they are 60 g lighter than the OE piston.
So that's why we need to rebalance our assembly.
So we're gonna start getting our weights on everything and we can get into it.
On the big and small end of the rods, we will first weigh the big end,
then the whole rod, and use the difference as a small end weight.
All right, now that we have all 8 done,
we're gonna go ahead and sort them and see which ones are heavy, and this machine will actually sort it for you, so we have our tolerance at plus or minus 1 g.
Hit sort,
color codes them nicely, so the reds are the heavy.
We're gonna grind those down on the big and small end to match the light ones.
With some of these factory rods being up to 6 g different,
we'll use an air-powered grinder to weight match them,
which makes sure we have even forces on each part of the crank and makes the average bob weight more accurate.
Now that we got them all weight matched, we can sort them again.
They all fall within our 1 g tolerance, so we can
measure the rest of our components and get a bob weight.
The other components are simply weighed individually and sent to the CWT Industries balancer for to automatically calculate our bob weight at 2,094.7 g.
Once they are assembled,
each bob weight is installed on the crank pins with a centering tool,
and then the crankshaft can go for its first spin.
All right, so we're at 3.5 ounce an inch on the rear,
3.6 on the front,
so 28.5 and
basically 30 g there.
It's pretty close and it should be
relatively quick job.
Since this crank already has a few holes in it,
we're just going to add one more to each counterweight to correct our imbalance.
Starting with a small drill to create a dimple in the center,
then following with a 7/8 drill to remove the bulk of the material.
This is definitely one of those times where you can always take more,
so we will carefully chase the imbalance down,
checking as we go.
Once we have drilled around 300,000 on the front and rear counterweight,
we think we have it right where we want it.
All right,
there we go.
So we got
0.119 ounce inch on the rear, 0.0.110 on the front.
They are 190 degrees apart from each other, which is great because we want those to be opposite.
So we'll go ahead and save that as our last spins. We are way under our tolerance of 0.2.
And if we look at our print sheet here, so if you
didn't balance this crank, you just changed the. Pistons at just at 6000, this thing would have had
235 pounds of force on the front
and now at 6000 we've got that down to just 7 pounds.
So
definitely critical that you get your stuff reboundd even if you're gonna change just the piston.
This thing is way better than it needs to be, so we're gonna get it off, we'll get it polished up,
and then we can move on.
Chucking the crankshaft up in our Vectrex 16 by 60 lathe and turning it slowly in the direction of engine rotation,
we can use our Goodson belt polisher with an 800 grit cork belt and some polishing rouge to quickly clean up the main and rod journals for a better than new finish.
All right,
got this crank
polished up and
final cleaned.
Looks like he's got that block final cleaned, so we're basically
ready to start putting this thing together, but we have accomplished a ton of work today.
So the assembly,
I think that's gonna come next time.
Yeah, we're gonna give this thing a flashy paint job and put in all of our cool parts,
and you're gonna find that this thing not only makes great power, but will be super reliable.
We're gonna be running this on the dyno, so you don't want to miss it next time
here on Engine Power.