In This Episode
Video Transcript
[Frankie] You're watching Powernation!
[Pat] Today on Engine Power we're going to show you how to make big gains on an engine with a not so big budget. [Frankie] We dive into the world of small engines and show you multiple upgrades you can do at home and what they do for power. [ Music ]
[ small engine revving ] [ Music ]
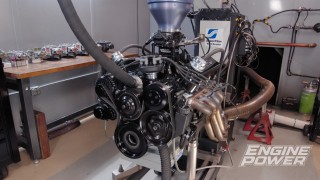
[Pat] Hey everyone and welcome to a very special edition of Engine Power. Today we have a project in the shop we have been dying to do for a very long time and we finally made it happen. It all stems from getting asked all the time. How do I get into engine building without taking up a bunch of space or making a bunch of money disappear out of my wallet? [Frankie] So what we're talking about is small engines. This is a cult of engine building that is super fun, relatively affordable, and we are going to do a full build on one today. So what we have as a testbed is really cool as well. This is a bolt together go cart kit. You don't need any welding. You don't need any fab skills. Comes with great instructions. It's completely bolt together and comes with everything you need to have a yard cart. For the power plant we have a very common engine. This is a 212cc Predator, which is basically a clone engine, but it's really easy to get, relatively affordable. Even if you had to buy the whole engine over again it's only about $150. So we have this completely set up, ready to go, and ready to test. -We have a chassis dyno. So we're strapping it to the rollers. Then we're going to do some easy mods on the outside. And then later we are going to go into the engine, change some internal parts, and see how much power this will put out. We're going to test it all. -Let's see where we're starting. -We have migrated over to the chassis down. Now it looks kind of odd on here but this is going to be a little rough on the equipment. We have this little tiny6 clutch and a big heavy ass roller. This thing is roughly 2,000 pounds. -Basically it measures how fast the roller accelerates and this little thing is rated at like six and a half horse. We're going to try not to burn up our clutch. We're going to try it and see what happens. [ engine starting ] [ small engine revving ]
-5.06 horsepower and 8.31 pound feet of torque. -First mod. -We're going to disable the governor. -The governor limits the engine speed at 3,500 rpm. So after removing the fuel tank, we can access the governor tension spring and we'll run a zip tie around it to effectively make it solid. This will limit the travel of the governor and allow the engine to rev a bit higher. [ Music ] [ small engine revving ]
-That's all it had but that was pretty cool. It's funny what an extra 2,000 rpm will do. -For like a two cent zip tie. 6.28 horsepower and 8.8 pound feet of torque. Now this is not recommended to do that because this has a cast flywheel. It has an aluminum connecting rod. not rated for that kind of rpm. 5,500 is it. -Definitely don't go past that. -For all intents and purposes that's 30 miles per. -We've got to go see what 30 miles an hour feels like right now to compare to later. Let's get it off. We'll take it outside and rip it out. -So we came outside. We know how fast it goes on the dyno by what the dyno speed says but there's no better way to do it than doing it in real life with a radar gun and my test pilot. Look at him. [ small engine revving ]
32 miles per hour. So for our next trick we're going to try to get a baseline on a 0 to 30. So I'm going to have him go up there and stop and we're going to give him the wave, punch the clock, and when he hits 30 we're going to see how long that takes. [ small engine revving ] The time on that one was 5.93. -I guess that's good. -We don't know if that's good or not. Pretty good for us. Now that we know that, inside and let's start doing a few more mods. -You don't want to drive it at all? -No. -You should. -Ah, no. -Up next, we start off with simple upgrades before we go deeper in the hunt for horsepower.
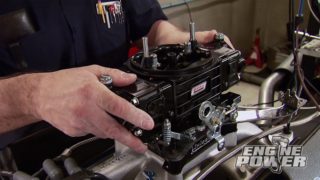
[Pat] We are back in the shop after an easy and injury free test session out in the parking lot. So now we're going to put on some easy parts for easy mods. We're going to start with the upgrades that you would do to an automotive engine with an intake, carburetor, and header swap. An easy way to disconnect the fuel line is to crimp it off with a set of locking pliers before you pull it off. [Frankie] We remove the throttle assembly contraption as well. The muffler is the last piece to be removed. And even though our governor isn't doing anything, we will use one of its springs and keep it from rattling around. -We're swapping to an aftermarket Nibby carburetor, and it comes with its billet intake as part of the kit. This is for a Predator 212 and uses a 22 millimeter flanged carburetor. These have good idle and partial throttle control, but we do have to change out our throttle cable from a straight wire to one designed to work with a slide carburetor. Once the cap is unscrewed from the top we'll push the throttle cable through, install the return spring, and then hook the cable on the slide. Then the whole assembly can be dropped in making sure it is aligned correctly and screwed on tight. It also comes with a high flow foam air filter to help protect the engine. On the hot side we're swapping over to a one inch diameter open header that uses the stock hardware to hold it down. With the mods complete it's time to light this candle and see what it makes on the old roller here. -It's going to be louder. -Oh it's so racy! [ small engine revving ]
I can't believe how loud that is.
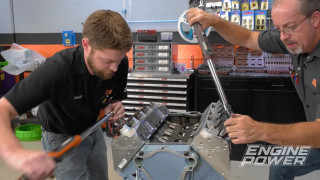
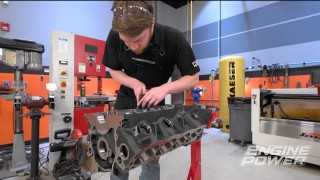
9.33 horsepower. -That's big. -And 10.66 pound feet of torque. -That's a 50% gain basically without even taking the engine apart. -I would not have believed that. -I stopped it at 5,500 because we still have a stock flywheel and rod, and I'm kind of worried about those until we upgrade them. -It got there a lot quicker. -It did rip through the pull basically. Our go kart is off the chassis dyno and our 212 is removed because now we're going to actually tear into this engine and start doing some more involved upgrades. But the great thing about small engines, especially if you're starting out, is they don't take a lot of tools and they don't take a lot of space. -The beauty of all this is everything that applies to a larger engine will apply to this one. There's just one of them. We have some easy parts. We're gonna do some easy mods, and all we got to do is get started tearing it down. -For the upgrades we have planned we're going to tear the engine completely down to the cylinder case. Once we have the fuel blocked off and the tank removed, we can start taking off our exhaust system. The flywheel cover comes off with a few small bolts, and then we can remove the stock ignition system. The flywheel nut can be broken loose and then unscrewed to get the starter ring and cooling fan off. Then it is reinstalled and given a solid hit with a hammer with the flywheel wedged forward to unseat it from the tapered shaft. If I go like this I can draw my name. -We'll pull the valve cover to gain access to the valve train before we can remove the head. -To get the valve train out we're going to turn the engine over to true TDC. So we're going to turn it counterclockwise on the clutch side. We're going to do it until the exhaust opens and closes, and then the intake opens and closes. And then you can watch actually and it's really easy. You can look down and see the piston come up to TDC, and then we're good. -These engines use a shaft rocker system that is held in by these tiny E-clips. Once the outer one is removed, you can slide the shaft out and remove the rocker body and pushrod. [ Music ] That #$%^ just went into space. -Heard it, went over there. -Found it. It was like 14 feet away. [ Music ] With a 12 millimeter socket, we will break the head bolts loose, pull them out, and then we can pop the cylinder head off. -Very nice. On the other side of the engine we can remove our clutch assembly and then unbolt the side cover to open it up. [ Music ]
-There's the inside. Low oil pressure sensor, cam, crank, connecting rod. This governor thing that's going to go away very soon. -The stock camshaft pops out and then the flat tappets are slid out and kept in order. [ Music ]
The tiny rod bolts can be broken loose next, and then the rod cap is removed before pushing the connecting rod and the piston out the top of the bore. Finally, the crankshaft is slid out of its bearings and the teardown is complete. -Coming after this, we'll show you how to put our 212 back together and we'll strap it back on the dyno to see what we've gained.
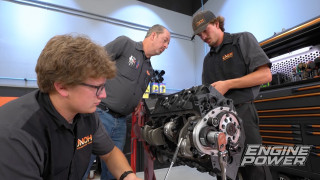
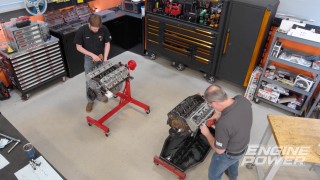
The few modifications we're going to do to this block include driving out the governor pin to remove the assembly. And then the pin will be reinstalled later to seal up the hole. We'll unbolt the oil level sensor. This basically just shuts off the engine if it doesn't see any oil. We're just going to cut the wire to remove it. Got that out. We'll get everything cleaned up and we start going back together. Before we just start throwing parts into it we do have to do a few checks. So one of the big components that we're upgrading is the connecting rod. We're going from the OE cast piece to an Arc Racing billet rod. So this is really cool because it's not only stronger than the stock ones, but it's also 20 thousandths longer than stock. So it's going to put our piston higher up in the bore. Gets us closer to a zero deck. And it has a pressurized oiling dipper. So the dipper actually has a hole in it that forces oiling to the bearings, which is also cool because this uses an automotive style bearing insert. But we need to check our oil clearance between the bearings and our rod journal and on our crankshaft. We're going to be using a piece of plasti-gauge. What we need to do first is get our bearings in and then we'll get going. With the half snapped in, we'll put the rod around the crankshaft and support it so it doesn't move or rotate. A short piece of plasti-gauge is laid across the journal dry, and then the rod cap can be put on and carefully torque to spec. It looks like we're at two thousandths for our minimum oil clearance, which is the minimum for the Spec. So we're going to go ahead and get that cleaned up, and then we can start putting parts together. -The next thing we're going to do is we had to put our current piston that we're running on our new rod. And the one thing you have to make sure is you get the right orientation. These pistons, they have a mark where it goes forward right? So it's easy to remember. You just point the little arrow towards the dipper. You can use a small pick to remove one of the wire locks, and then the wrist pin can be slid out and the rod removed. We'll put a little assembly lube in the pin bores. Same with the new rod to make sure you get some assembly lube in the bore itself. And we are good to go. A little bit of assembly lube in our case preps it for the crankshaft to be reinstalled. With some light oil in the cylinder bore the new rod and the original piston can be slid in. On these little engines you can use your fingers to carefully compress the rings into the bore as you push it in. -With the bearings coated in assembly lube, the cap can be installed in the proper orientation, and then the ARP bolts are threaded in and torqued to 150 pound inches. The stock tappets are lubed and reinstalled for our new cam. This one is a hot 265 grind with 225/235 at 50 durations and 265 thousandths of lift at the valve. The side cover is torqued down with a new gasket to 17 pound feet. -We're changing out the flywheel for a billet aluminum unit that has 32 degrees of timing and is designed for high RPM use. Just like any engine, we'll degree the cam to verify its position. This one comes in at five degrees advanced at 106. With that completed, the flywheel is torqued to 65 pound feet. -We remove the stock 10 pound valve springs and put 22 pound springs in to increase our rpm capabilities. Our new head gasket is an MLS style with a ten thousandths compressed thickness, and we now have a 10.17 to 1 static compression ratio. -The head bolts are torqued with engine oil to 17 pound feet. [ Music ] The stock valvetrain goes back in at TDC compression stroke and the valve lash is set at three thousandths on both valves. [ Music ]
A new higher energy coil is installed with 40 thousandths feeler gauges underneath for proper air gap. And then the rest of the engine can be reassembled in the same way it came apart. [ engine starting ] [ small engine revving ]
-Dang, 12.06 and 11.99. -That's awesome! The best thing is we turned it 7,500. -Yeah, let's compare that to where we started. So the green is with the zip tie but bone stock, and then the blue is with our intake and exhaust package, and then the red is our cam and compression. So now there's only one thing left. -Now it's time to get big with induction. -Yeah. Tear back into it. Let's go. Later on Engine Power we get more compression, more air, more RPM, and more power as we round out our upgrades and complete our final testing.
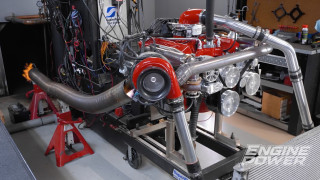
[Frankie] We have one last bit of upgrade that we're going to do, and it's something that you do to a big engine. But something you can't do with a big engine Is throw your cylinder head around. So what we're going to do is a head swap. This is a head from EC Carburetors. It is their Wildcat head. So this has bigger valves, a little bit better of an intake and exhaust design and flows a little bit more. So we're going to swap this out. This is great if you're working at home. You can absolutely practice head porting on these but if you just want a bolt on option this is what we're going to go with. So we're going to start getting it disassembled and swapped out. -We will have to remove the induction and exhaust system for this upgrade but they will work with our new cylinder head. With the valve cover and recoil starter removed, we can turn the engine over to TDC compression stroke and unbolt the cylinder head. Since we aren't reusing any of it we can pull the cylinder head and valve treat all at once and put it aside. -A replacement gasket is laid down for our new cylinder head, which has 31 millimeter intake and 25 millimeter exhaust valves in an inline pattern. 26 pound springs in a tight, measured 17cc combustion chamber. This puts our new static compression ratio at 12.71 to 1. New cut to length pushrods and a set of billet shaft adjustable roller rockers with a 1.1 ratio are installed next. This bumps our lift up to 292 thousandths and the lash is set at three thousandths on both valves. A tall non-hemi valve cover seals them up, and the rest of the engine can be reassembled for testing. [ small engine revving ]
-Wow! That was some RPM right there Charlie! -You can hear the difference immediately. -All right, we are rocking and rolling. 14.28 horsepower, 12.93 pound feet. - Did you notice how much happier it was. -Look much happier that graph is. So this is the engine now with our final couple iterations. First one and then our second one. So this one's the big daddy right. Most compression, best induction, best valvetrain. We've got some testing to do outside. -Let's unstrap it and get it out of here. [ engine starting ] We've got the parking lot blocked off so we're safe about this and we're gonna do a couple of things. We're going to do a top speed run, and we're going to redo our 0 to 30. So I'm going to send them. So here we go. [ small engine revving ] [ Music ]
45. -All right, that's probably going to be it here unless you had like a quarter mile to really run it out. It's definitely so much faster. -If you think about this in terms of what we've actually done right. Now we're going in the 40s right. -We have basically three times the horsepower, the same weight, and above 4,000 this thing is a different animal all together. -It's like a real engine. This is just like the hot rodding with a single cylinder, but it's pretty impressive of what it's doing right now. So let's do this. I think this is going to be impressive as well. -And we've got good horsepower weather. -Now we're going to do the 0 to 30 like we did before. I got the gun, I got my phone, and this is going to be the official time. Here we go. [ small engine revving ] [ Music ]
Are you ready for this? -I'm ready. -3.85. -Ooh, okay. -A little bit of 3.85 action right there. We've shaved two seconds off of our 0 to 30 time. Probably a little bit over. All right, what have we learned? -I learned that we can make this way, way faster. That was what we set out to do, right? Was to show how you can do upgrades. This is relatively budget friendly, which I love. And this is great for like we said, if you're starting out, this is something you can easily do in your garage, kitchen table, whatever. -The fundamentals of engines, they all apply here because even though it's just a single cylinder, has piston valves. Has everything that a big engine has. All the physics, all the science, everything works the same. -If you took the graphs from the progression of this engine and you took the numbers off the side and you showed those graphs to somebody and said, hey, this is a 350 Chevy. Look at these gains, their mind would be blown. But you can do that on a budget with something like this but it's way cheaper. And if you're learning and you mess something up you can replace the whole thing for $150 bucks. -I think that this is something that maybe we can continue. We have a great platform because look. This is where it sits. You can hang almost anything off the back. -I think that's great success. -That's great success. He took my line! [ small engine revving ]
Show Full Transcript
[Pat] Today on Engine Power we're going to show you how to make big gains on an engine with a not so big budget. [Frankie] We dive into the world of small engines and show you multiple upgrades you can do at home and what they do for power. [ Music ]
[ small engine revving ] [ Music ]
[Pat] Hey everyone and welcome to a very special edition of Engine Power. Today we have a project in the shop we have been dying to do for a very long time and we finally made it happen. It all stems from getting asked all the time. How do I get into engine building without taking up a bunch of space or making a bunch of money disappear out of my wallet? [Frankie] So what we're talking about is small engines. This is a cult of engine building that is super fun, relatively affordable, and we are going to do a full build on one today. So what we have as a testbed is really cool as well. This is a bolt together go cart kit. You don't need any welding. You don't need any fab skills. Comes with great instructions. It's completely bolt together and comes with everything you need to have a yard cart. For the power plant we have a very common engine. This is a 212cc Predator, which is basically a clone engine, but it's really easy to get, relatively affordable. Even if you had to buy the whole engine over again it's only about $150. So we have this completely set up, ready to go, and ready to test. -We have a chassis dyno. So we're strapping it to the rollers. Then we're going to do some easy mods on the outside. And then later we are going to go into the engine, change some internal parts, and see how much power this will put out. We're going to test it all. -Let's see where we're starting. -We have migrated over to the chassis down. Now it looks kind of odd on here but this is going to be a little rough on the equipment. We have this little tiny6 clutch and a big heavy ass roller. This thing is roughly 2,000 pounds. -Basically it measures how fast the roller accelerates and this little thing is rated at like six and a half horse. We're going to try not to burn up our clutch. We're going to try it and see what happens. [ engine starting ] [ small engine revving ]
-5.06 horsepower and 8.31 pound feet of torque. -First mod. -We're going to disable the governor. -The governor limits the engine speed at 3,500 rpm. So after removing the fuel tank, we can access the governor tension spring and we'll run a zip tie around it to effectively make it solid. This will limit the travel of the governor and allow the engine to rev a bit higher. [ Music ] [ small engine revving ]
-That's all it had but that was pretty cool. It's funny what an extra 2,000 rpm will do. -For like a two cent zip tie. 6.28 horsepower and 8.8 pound feet of torque. Now this is not recommended to do that because this has a cast flywheel. It has an aluminum connecting rod. not rated for that kind of rpm. 5,500 is it. -Definitely don't go past that. -For all intents and purposes that's 30 miles per. -We've got to go see what 30 miles an hour feels like right now to compare to later. Let's get it off. We'll take it outside and rip it out. -So we came outside. We know how fast it goes on the dyno by what the dyno speed says but there's no better way to do it than doing it in real life with a radar gun and my test pilot. Look at him. [ small engine revving ]
32 miles per hour. So for our next trick we're going to try to get a baseline on a 0 to 30. So I'm going to have him go up there and stop and we're going to give him the wave, punch the clock, and when he hits 30 we're going to see how long that takes. [ small engine revving ] The time on that one was 5.93. -I guess that's good. -We don't know if that's good or not. Pretty good for us. Now that we know that, inside and let's start doing a few more mods. -You don't want to drive it at all? -No. -You should. -Ah, no. -Up next, we start off with simple upgrades before we go deeper in the hunt for horsepower.
[Pat] We are back in the shop after an easy and injury free test session out in the parking lot. So now we're going to put on some easy parts for easy mods. We're going to start with the upgrades that you would do to an automotive engine with an intake, carburetor, and header swap. An easy way to disconnect the fuel line is to crimp it off with a set of locking pliers before you pull it off. [Frankie] We remove the throttle assembly contraption as well. The muffler is the last piece to be removed. And even though our governor isn't doing anything, we will use one of its springs and keep it from rattling around. -We're swapping to an aftermarket Nibby carburetor, and it comes with its billet intake as part of the kit. This is for a Predator 212 and uses a 22 millimeter flanged carburetor. These have good idle and partial throttle control, but we do have to change out our throttle cable from a straight wire to one designed to work with a slide carburetor. Once the cap is unscrewed from the top we'll push the throttle cable through, install the return spring, and then hook the cable on the slide. Then the whole assembly can be dropped in making sure it is aligned correctly and screwed on tight. It also comes with a high flow foam air filter to help protect the engine. On the hot side we're swapping over to a one inch diameter open header that uses the stock hardware to hold it down. With the mods complete it's time to light this candle and see what it makes on the old roller here. -It's going to be louder. -Oh it's so racy! [ small engine revving ]
I can't believe how loud that is.
9.33 horsepower. -That's big. -And 10.66 pound feet of torque. -That's a 50% gain basically without even taking the engine apart. -I would not have believed that. -I stopped it at 5,500 because we still have a stock flywheel and rod, and I'm kind of worried about those until we upgrade them. -It got there a lot quicker. -It did rip through the pull basically. Our go kart is off the chassis dyno and our 212 is removed because now we're going to actually tear into this engine and start doing some more involved upgrades. But the great thing about small engines, especially if you're starting out, is they don't take a lot of tools and they don't take a lot of space. -The beauty of all this is everything that applies to a larger engine will apply to this one. There's just one of them. We have some easy parts. We're gonna do some easy mods, and all we got to do is get started tearing it down. -For the upgrades we have planned we're going to tear the engine completely down to the cylinder case. Once we have the fuel blocked off and the tank removed, we can start taking off our exhaust system. The flywheel cover comes off with a few small bolts, and then we can remove the stock ignition system. The flywheel nut can be broken loose and then unscrewed to get the starter ring and cooling fan off. Then it is reinstalled and given a solid hit with a hammer with the flywheel wedged forward to unseat it from the tapered shaft. If I go like this I can draw my name. -We'll pull the valve cover to gain access to the valve train before we can remove the head. -To get the valve train out we're going to turn the engine over to true TDC. So we're going to turn it counterclockwise on the clutch side. We're going to do it until the exhaust opens and closes, and then the intake opens and closes. And then you can watch actually and it's really easy. You can look down and see the piston come up to TDC, and then we're good. -These engines use a shaft rocker system that is held in by these tiny E-clips. Once the outer one is removed, you can slide the shaft out and remove the rocker body and pushrod. [ Music ] That #$%^ just went into space. -Heard it, went over there. -Found it. It was like 14 feet away. [ Music ] With a 12 millimeter socket, we will break the head bolts loose, pull them out, and then we can pop the cylinder head off. -Very nice. On the other side of the engine we can remove our clutch assembly and then unbolt the side cover to open it up. [ Music ]
-There's the inside. Low oil pressure sensor, cam, crank, connecting rod. This governor thing that's going to go away very soon. -The stock camshaft pops out and then the flat tappets are slid out and kept in order. [ Music ]
The tiny rod bolts can be broken loose next, and then the rod cap is removed before pushing the connecting rod and the piston out the top of the bore. Finally, the crankshaft is slid out of its bearings and the teardown is complete. -Coming after this, we'll show you how to put our 212 back together and we'll strap it back on the dyno to see what we've gained.
The few modifications we're going to do to this block include driving out the governor pin to remove the assembly. And then the pin will be reinstalled later to seal up the hole. We'll unbolt the oil level sensor. This basically just shuts off the engine if it doesn't see any oil. We're just going to cut the wire to remove it. Got that out. We'll get everything cleaned up and we start going back together. Before we just start throwing parts into it we do have to do a few checks. So one of the big components that we're upgrading is the connecting rod. We're going from the OE cast piece to an Arc Racing billet rod. So this is really cool because it's not only stronger than the stock ones, but it's also 20 thousandths longer than stock. So it's going to put our piston higher up in the bore. Gets us closer to a zero deck. And it has a pressurized oiling dipper. So the dipper actually has a hole in it that forces oiling to the bearings, which is also cool because this uses an automotive style bearing insert. But we need to check our oil clearance between the bearings and our rod journal and on our crankshaft. We're going to be using a piece of plasti-gauge. What we need to do first is get our bearings in and then we'll get going. With the half snapped in, we'll put the rod around the crankshaft and support it so it doesn't move or rotate. A short piece of plasti-gauge is laid across the journal dry, and then the rod cap can be put on and carefully torque to spec. It looks like we're at two thousandths for our minimum oil clearance, which is the minimum for the Spec. So we're going to go ahead and get that cleaned up, and then we can start putting parts together. -The next thing we're going to do is we had to put our current piston that we're running on our new rod. And the one thing you have to make sure is you get the right orientation. These pistons, they have a mark where it goes forward right? So it's easy to remember. You just point the little arrow towards the dipper. You can use a small pick to remove one of the wire locks, and then the wrist pin can be slid out and the rod removed. We'll put a little assembly lube in the pin bores. Same with the new rod to make sure you get some assembly lube in the bore itself. And we are good to go. A little bit of assembly lube in our case preps it for the crankshaft to be reinstalled. With some light oil in the cylinder bore the new rod and the original piston can be slid in. On these little engines you can use your fingers to carefully compress the rings into the bore as you push it in. -With the bearings coated in assembly lube, the cap can be installed in the proper orientation, and then the ARP bolts are threaded in and torqued to 150 pound inches. The stock tappets are lubed and reinstalled for our new cam. This one is a hot 265 grind with 225/235 at 50 durations and 265 thousandths of lift at the valve. The side cover is torqued down with a new gasket to 17 pound feet. -We're changing out the flywheel for a billet aluminum unit that has 32 degrees of timing and is designed for high RPM use. Just like any engine, we'll degree the cam to verify its position. This one comes in at five degrees advanced at 106. With that completed, the flywheel is torqued to 65 pound feet. -We remove the stock 10 pound valve springs and put 22 pound springs in to increase our rpm capabilities. Our new head gasket is an MLS style with a ten thousandths compressed thickness, and we now have a 10.17 to 1 static compression ratio. -The head bolts are torqued with engine oil to 17 pound feet. [ Music ] The stock valvetrain goes back in at TDC compression stroke and the valve lash is set at three thousandths on both valves. [ Music ]
A new higher energy coil is installed with 40 thousandths feeler gauges underneath for proper air gap. And then the rest of the engine can be reassembled in the same way it came apart. [ engine starting ] [ small engine revving ]
-Dang, 12.06 and 11.99. -That's awesome! The best thing is we turned it 7,500. -Yeah, let's compare that to where we started. So the green is with the zip tie but bone stock, and then the blue is with our intake and exhaust package, and then the red is our cam and compression. So now there's only one thing left. -Now it's time to get big with induction. -Yeah. Tear back into it. Let's go. Later on Engine Power we get more compression, more air, more RPM, and more power as we round out our upgrades and complete our final testing.
[Frankie] We have one last bit of upgrade that we're going to do, and it's something that you do to a big engine. But something you can't do with a big engine Is throw your cylinder head around. So what we're going to do is a head swap. This is a head from EC Carburetors. It is their Wildcat head. So this has bigger valves, a little bit better of an intake and exhaust design and flows a little bit more. So we're going to swap this out. This is great if you're working at home. You can absolutely practice head porting on these but if you just want a bolt on option this is what we're going to go with. So we're going to start getting it disassembled and swapped out. -We will have to remove the induction and exhaust system for this upgrade but they will work with our new cylinder head. With the valve cover and recoil starter removed, we can turn the engine over to TDC compression stroke and unbolt the cylinder head. Since we aren't reusing any of it we can pull the cylinder head and valve treat all at once and put it aside. -A replacement gasket is laid down for our new cylinder head, which has 31 millimeter intake and 25 millimeter exhaust valves in an inline pattern. 26 pound springs in a tight, measured 17cc combustion chamber. This puts our new static compression ratio at 12.71 to 1. New cut to length pushrods and a set of billet shaft adjustable roller rockers with a 1.1 ratio are installed next. This bumps our lift up to 292 thousandths and the lash is set at three thousandths on both valves. A tall non-hemi valve cover seals them up, and the rest of the engine can be reassembled for testing. [ small engine revving ]
-Wow! That was some RPM right there Charlie! -You can hear the difference immediately. -All right, we are rocking and rolling. 14.28 horsepower, 12.93 pound feet. - Did you notice how much happier it was. -Look much happier that graph is. So this is the engine now with our final couple iterations. First one and then our second one. So this one's the big daddy right. Most compression, best induction, best valvetrain. We've got some testing to do outside. -Let's unstrap it and get it out of here. [ engine starting ] We've got the parking lot blocked off so we're safe about this and we're gonna do a couple of things. We're going to do a top speed run, and we're going to redo our 0 to 30. So I'm going to send them. So here we go. [ small engine revving ] [ Music ]
45. -All right, that's probably going to be it here unless you had like a quarter mile to really run it out. It's definitely so much faster. -If you think about this in terms of what we've actually done right. Now we're going in the 40s right. -We have basically three times the horsepower, the same weight, and above 4,000 this thing is a different animal all together. -It's like a real engine. This is just like the hot rodding with a single cylinder, but it's pretty impressive of what it's doing right now. So let's do this. I think this is going to be impressive as well. -And we've got good horsepower weather. -Now we're going to do the 0 to 30 like we did before. I got the gun, I got my phone, and this is going to be the official time. Here we go. [ small engine revving ] [ Music ]
Are you ready for this? -I'm ready. -3.85. -Ooh, okay. -A little bit of 3.85 action right there. We've shaved two seconds off of our 0 to 30 time. Probably a little bit over. All right, what have we learned? -I learned that we can make this way, way faster. That was what we set out to do, right? Was to show how you can do upgrades. This is relatively budget friendly, which I love. And this is great for like we said, if you're starting out, this is something you can easily do in your garage, kitchen table, whatever. -The fundamentals of engines, they all apply here because even though it's just a single cylinder, has piston valves. Has everything that a big engine has. All the physics, all the science, everything works the same. -If you took the graphs from the progression of this engine and you took the numbers off the side and you showed those graphs to somebody and said, hey, this is a 350 Chevy. Look at these gains, their mind would be blown. But you can do that on a budget with something like this but it's way cheaper. And if you're learning and you mess something up you can replace the whole thing for $150 bucks. -I think that this is something that maybe we can continue. We have a great platform because look. This is where it sits. You can hang almost anything off the back. -I think that's great success. -That's great success. He took my line! [ small engine revving ]
Engine Power Featured Projects
Engine Power Builds






Want more content like this?
Join the PowerNation Email NewsletterParts Used In This Episode
ARP
ARP Bolts & Fasteners
EC Carburetors
Wildcat WC946 Assembly with Valves, Springs & Aluminum Retainers
Go Power Sports
Head Gasket: 212cc Non-Hemi Predator
Go Power Sports
Predator Performance Billet Connecting Rod
Harbor Freight Tools
Predator 6.5HP (212cc) OHV Horizontal-Shaft Gas Engine
NIBBI Racing
Predator 212 Carburetor Set