Video Transcript
[Pat] You're watching Powernation.
[ Music ]
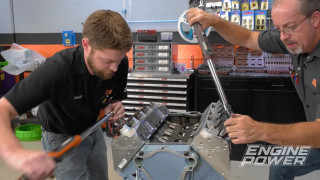
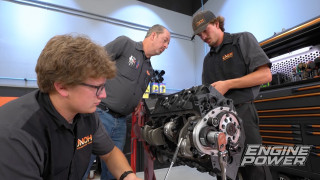
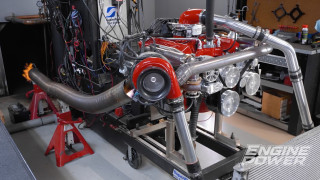
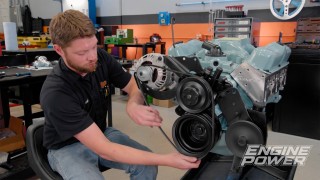
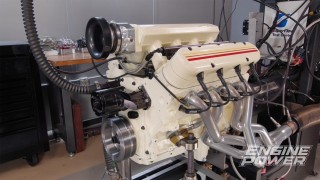
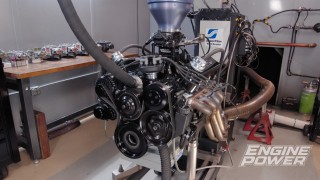
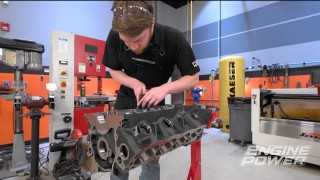
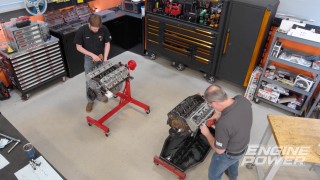
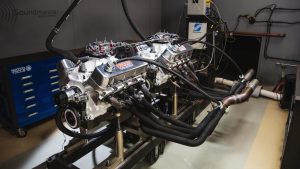
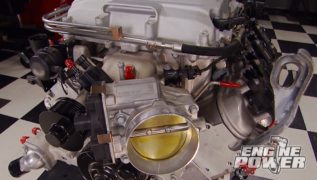
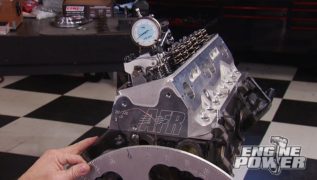
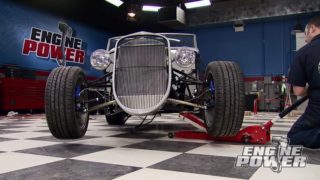
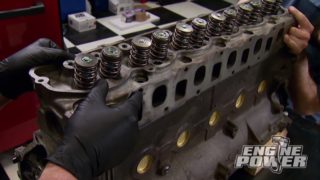
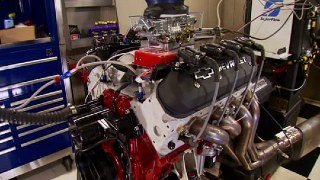
[Brian] All right man. Sign here, here and initial at the bottom. Perfect, good luck! [Pat] Hey everyone, and welcome to another episode of Engine Power. Like the name says, we love doing engines, not only for ourselves but for the other shops and their projects. Every now and then we do a project in here ourselves, and this one we are extremely stoked about. [Frankie] That is right because this is one of those coolest cars ever. This is an iconic classic vehicle that never, ever loses its cool, and it is a '56 Chevy. Now obviously this is not a running/driving car. This is more of a project right in the middle. Brian and his team have done a bunch of great work to this, and really they have a bunch of cool projects. So we don't feel as bad taking over, but this is a project that we have been dying to do for the longest time. This is set up to be a gasser and we're going to keep that? So this has a Checkered racing chassis under it. So it's got a straight axle front. It's got a nine inch in the rear with ladder bars. QA-1 shocks all the way around. Good brakes, manual rack. This is going to be a really good foundation for the rest of our build. As you can see, the outside has not been painted but it is in 2K primer. The inside is completely stripped. We have all the parts, all the original parts. We'll see what we can use and what we're not going to. They did get to the point of painting the dash, but basically we have a blank slate that we can build off of and a lot of the hard work for us, the bodywork, is already done. So we can jump right into the mechanical, getting an engine in this thing and getting it fitted, getting it running, driving and start enjoying it. Speaking of engine, that's where a special, special beast comes in. -Now you guys remember this one. This is an engine we built a while back. This is our all aluminum W-series Chevrolet. Now this is a perfect blend of nostalgia and high tech. One, it's all aluminum, aluminum block, 509 cubic inches, and it is set up to be pump gas friendly. Hydraulic roller cam, dual plane manifold, and FiTech's dual throttle body top end. Now this is a great engine, but if you are not familiar on how it was built have a look at this. It all started with an all aluminum Bill Mitchell block that we worked our magic on. We filled it with a four inch stroke Scat crank and 4-500 bore Racetech pistons. The block required a custom made camshaft and that was done by Comp Cams. -Also we had Lamar Walden Automotive custom port a set of Edelbrock heads and an intake manifold for us. The dual quad EFI gives this engine excellent street manners and this pump gas beast cranked out 581 horsepower and 606 pound feet of torque on our SuperFlow Power Mark dyno. -To kick off the project we'll take a few parts off our engine and get it off the stand. -We're going to mate the engine and transmission before installing them. So the first order of business is pounding in this roller pilot bearing. Our transmission comes with a brand new billet steel flywheel. This is from American Powertrain, and this is the same one we use when we balanced the engine. So it does have our modified external balance weight here. So this flywheel is serviceable if you want to change it but the weight has to go with it. It is held down with a new set of ARP flywheel bolts, which are torque to 85 pound feet with Ultra Torque lubricant. We are using an American Powertrain Pro Twin dual disc clutch kit and are installing it with a billet alignment shaft. After the first friction disc the included shims have to go on before the steel floater plate is installed and torqued to 28 pound feet with orange thread logger. The outer friction goes on and is followed by the pressure plate, making sure all the components are lined up by the manufacturer's markings. The nuts are tightened down slowly and evenly in order to not warp the diaphragm spring before they are torqued to 36 pound feet. With our clutch all buttoned up the next thing we're going to work on is the transmission. Like I said, this came as a complete kit from American Powertrain. So we have a brand new Tremec TKX transmission. These are awesome. They have a really small compact package. So you don't have to do a bunch of cutting if you're trying to swap them into something. This one has a 2.87 first gear and a low .68 overdrive. It is a five speed and it's good for up to 700 pound feet continuous. So it's going to be perfect for our 509. It also comes set up with a built in speedo, reverse lockout, and reverse light switch. The shifter is really cool because this is clockable and flappable. So if you need to get it adjusted for an existing shifter hole. We're going to have to cut a new one anyway, so it doesn't matter. This came with all the hardware to get together, and one of their Hydro Max hydraulic throw out bearing systems. So this has a hydraulic throwout bearing. It comes with an under dash pedal and everything. The next thing we're going to do is get this set up because we need that proper spacing between it and our clutch fingers. So we're gonna get our bell housing on and start measuring. -We have already dialed in our bell housing to the crankshaft center line so it can be installed for real. Using a precision straight edge with a long dial caliper we'll measure the distance from the transmission flange to the clutch fingers. With the throw out bearing on the input shaft, we'll use the same tools to measure the distance from its face to the face of the transmission. We'll subtract that measurement from our bell housing measurement to determine the air gap between the throw out bearing and the clutch. We want it to be between 100 and 200 thousandths. So we'll add three 90 thousandths thick shims to get it within that spec. Then the hydraulic throw out bearing and transmission are installed with no hassles thanks to the proper installation setup. -Coming up, our EFI 509 and five speed transmission get slung between the rails of our classic gasser.
[Frankie] After throwing on some polyurethane engine mounts and Checkered Racing crossmember we can slide the engine and transmission combo into our new frame. [ Music ] The idea is to have this set up correctly the first time so that any Chevy engine can be swapped in later. [ Music ]
[Pat] This is one of those instances where we will check out measurements multiple times and get the powertrain exactly where we want it. [ Music ]
-Right there square to this crossmember. [ Music ]
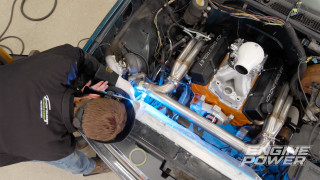
-Then we'll use our Forney 220 tig welder to tack the engine crossmember to the frame rails. [ welder humming ] [ Music ]
-Okay, so we have our 509 basically set where we want in our chassis. The big things that we're looking is we want to make sure that the engine is centered between the frame rails. We want to have it as low as we can while still having our mounts work. We want to have it as far back as we can while still having room to work on it here. Then we're going to make sure it's level left and right. Big thing to check is make sure your frame rails are level as well because if you have a low tire or something it's going to mess that up. So we want the car where it's going to be sitting when it's assembled. And then we're going to set our downward angle. On this one we actually set it a little bit more than what you would think because we have our gasser chassis. It's raised up in the front but our axle is still low. So we have it set so we have about a degree and a half of U-joint angle on our front U-joint. And right now the front is just tacked in in case we need to change it later. We can always fully weld it later but if we need to make adjustments we can. The back is just held in with C-clamps. We're going to get the car over to our two post lift. Get it up in the air and then it'll be easy to work on, drill our holes, and get our rear transmission mount done. [ mechanical humming – lift ] Okay, so we've got our C-clamps out. We've got a screw jack underneath the transmission. Now that we got the car on the lift, what we're going to do is we've already marked the holes for our transmission crossmember. So we're going to pull the cross member out and drill the holes in the frame. We will sleeve them later but this will at least get it so we can bolt the engine trans in and have it suspended on its own. [ Music ]
For now we'll drill 3/8ths holes, but later we'll enlarge them to put a steel tube in the frame to keep it from crushing when the bolts are tightened. [ Music ]
[ ratchet clicking ] [ Music ]
Okay, engine and trans are in under their own weight. Mounts are all done. So we can move on to the next big challenge, which is going to be headers. -Up next, we'll take a break from melting metal to melting some tires with a 1,300 horsepower twin turbo drift BMW.
[ ] You've arrived at your destination. [ Music ] [ engine revving ]
[ ] Make a U-turn. [ ] Drive safe. [ engine revving ]
-You are driving over the speed… [ Music ]
[Narrator] Under the Hood is brought to you by Hot Shot's Secret. [Frankie] There are fun cars. There are fast cars, and then there's this. An unapologetic lunatic on four wheels. Man, I was working. I hear engine noises. I come out and see you doing crazy rips. That was awesome. Nice to see you again, Brandon. [Brandon] Thank you. We're just here to have some fun man. Check out this. -You had all the fun in the parking lot. Dude this is killer. I love the wrap. Is that brand new? -It is actually brand new. -It looks fresh. So you're probably going to beat it up this weekend. -We thought we'd come here before we do anything reckless with it. So this is a 2011 E92 M3 BMW. I'm from Australia. A chassis like this was actually a flood damage car. So you cannot reuse this shell. Once they get flood damage it's basically scrap. It was about a two year build process. I basically built everything myself. -Two year build time. That's commitment. -So we actually always drifted Nissans. S-15s is what I always had. They call it an S-chassis. And basically we were trying to work with sponsors and at that time they're like, well, nobody really cares about you. A 1999 Datsun. I actually liked the shape of this car, and I ran a particular suspension, which is called Wisefab, and that's what allows us to get the angle. -How much do you actually have in this? How much can you rack it? -So we can go 70 degrees each direction? -That's a lot. -But if you're at 70 degrees you're basically a forklift and you're not going very fast. The only time, in my opinion, you would really use it if you basically messed up. -That's the oh crap. -And you go woop, we made it. Usually you would run it, if you're normal drifting, 50 degrees is kinda normal-ish. I mean we obviously did some 360s and stuff out there, which do use some angle. But suspension is very important. A lot of people gonna get the misconception that we want to be like slow and spin the wheels a lot, but you actually want to be fast. It's a cross between a drag car and a circle track car. -So you're actually looking for maximum grip on these. -So we put as much mechanical grip in as we possibly can. So I run a big front bar in this car. I mean you can se there's like literally almost no suspension travel in the front end. So we have the front end tied down and we're basically trying to transfer as much weight to the rear of the car. So I actually run, Silvers is the brand, two way coil over. So we've basically got compression and rebound. With a single way you're compromising. You're either going like hard and that's hard compression and hard rebound or soft. So with the two way we can kind of tie the front end down and make the rear end work how we want. -Especially for different tracks. -Yeah, even like a banked track to a flat track cause it's a completely different set up in the car. 20 years ago we would cut and modify the knuckle and get some extra angle, but you can basically buy most parts these days that just work. -And probably are a little bit better. -Maybe 20 years ago I wasn't the best welder. Sometimes things break. -Well we'll get to the engine because you know I'm going to ask you about that. That's obviously very important, but we'll work our way around the car first. So carbon front end. Are the doors carbon too? -So basically at this level you want to build everything as light as you possibly can. There's not a lot of weight here. So we do sometimes hit walls. So basically from this whole foot from the back of the car to here, this foot is basically a consumable. This is all fiberglass on here. -Quick locks on. -I got the quick latch and then there's a little steel. This actually is kind of bendable. So all this will bend if you hit it. -So something we didn't cover yet. Wheels and tires and also brakes because those are obviously very important. -We have 24 wheels with us this weekend loaded with tires. -For one car? -For one car. And then we have a competition this weekend. So we're actually putting a lot softer tire on the car. You'll see in here we have two brake calipers. So I actually have one set up is the handbrake and the other one is my brake pedal. You can do an inline setup. There's a million different ways to do that brake setup, but on this particular car that's how I built it. So sometimes we will be like if you catch another car and you're sitting there I'll be quite heavy on the foot brake to hold the car from crashing into them. So I don't want my foot brake pedal interfering with the rear brake. So I kinda run a sh#^ pad on my foot brake. -So now this is the part, being an engine guy, this is near and dear to me. So gonna ask you what's under the hood? -Let's have a look at what's under the hood. [ Music ] -It's an engine but it's an LS in a BMW. -Correct. I mean, some people probably wouldn't be that stoked on it. Maybe some BMW enthusiast thinks like a million cams in the top of the engine is a cool thing but I'm old school. I like push rods and long camshafts. We got an LS in here. I built this car originally with the turbos. So if I broke my good motor I could basically go to a junkyard, swap it back. But for what we've done here. SamTech has actually built this motor. This is a SamTech motor. The school built that motor. It's a six liter block. So a cast six liter LS block. -Elephant kind of on top of the engine. To me that looks like a blower base with a manifold on top of it. Am I seeing that correctly? -That's exactly what you're seeing? There's a brick in there which is like. -The intercooler brick. - We do have our two injectors here. That's to help with cooling as well. So we're trying to take some temperature out of the air, and that would basically sum this package up. -This is awesome. I love it when the car becomes a dyno on the road because you have basically all the sensor data that we would want on a dyno you've got it right here on the engine and you can watch it on track. And this is awesome to see this stuffed into a BMW. -It's been pretty fun. -Next we tackle the worst part of any project, getting headers that fit. Will we get lucky or have to start from scratch?
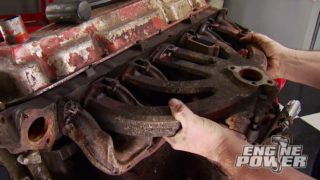
[Pat] We have made some fantastic progress on our '56 gasser project. The engine is in where we think it needs to be and the next order of business is getting some exhaust on it. That means headers. We have a couple of different options that we can do. First off we can go full custom on this and build a set of headers. We've done it before and it's great but it takes an immense amount of time and that's something we want to avoid. So we have a second option, and that will be try to use the existing set of headers that we used to dyno the engine. This is a set of Hooker Super Comp ceramic coated headers with a one and 7/8ths inch primary. Now these are designed for a 1958 through early '60s cars and wagons. Oddly enough, not a lot of header options for a gasser with a W-series in it, but that doesn't mean that these might not work. We might have to modify a little bit on the car or the header to get them on there. And if they work that's going to save us a whole lot of time. So we're going to start over here on the passenger side and see how it goes. Because it goes around the frame rail it actually doesn't look too bad. [Frankie] Mine doesn't fit. -Yours doesn't fit? -Nope, but I think we can make it fit. -Right now I can get bolts in this one. -I got bolts in one and I'm just hitting the body now. -This one's going to do the same thing. [ Music ]
-I think we're good. I don't think there's any major issues because we got plenty of space there. -This saved us like two weeks. -At least a week. We could build a good set for it, but it would be a pain in the butt, and now we don't have to do that. -With the headers in place, we'll mark where they interfere with the front body mount and then we will gently remove our coated headers. We'll raise the car back up and then use our Forney 40-amp plasma cutter to notch the body mounts along our lines. The only way to really cut this out right is you have to use a plasma cutter. -Okay, after several rounds of grinding and cutting and checking we have gotten both sides with both of our body mounts cut, and we've got them cut in the front and rear. They're a little bit different but that's really not a big deal. On this side we took a big chunk out of the front and rear, and we're not just going to leave it like that because it takes a lot of the structure out of the mount. So what we're going to do is sleeve it with this piece of pipe. So this is a four and a half inch OD quarter inch wall piece of tubing that we keep in the shop basically just for stuff like this, and this is going to fit right up in there. We're just going to trace around the body mount and have that half piece that goes in there for our pipe to run under. So get a silver Sharpie. We'll get it marked up and then we can get it cut over by the table. [ Music ] [ plasma torch hissing ] -We use our Forney plasma again, and even on this thick material it blasts through it with no problem. [ Music ]
After cleaning up the edges, we can hold each side in place and then hold them into position and use our 220 multipurpose MiG welder to tack them in place. -With the headers all sorted the last thing we need to do to get all this in for real is have a hole for our shifter. So while the engine and transmission is set exactly where it's going to be we're going to go ahead and mark it out on the bottom. That will give us a template to put holes through the floor and then cut it all out. -We'll use a silver marker to trace out the shifter boss on the tunnel, and then we will pull the engine and transmission out to get access. [ Music ] We will use a quarter inch drill bit to put small holes that will mark out the location. And then from the inside of the car we can use a piece of four inch exhaust tube as a template to plasma torch the floor to cut out a circle in the floor pan. [ Music ]
-All right, that's pretty cool. We have our W-series mounted, transmission mounted. Everything has clearance for these. So we've made huge progress today but that is where we're going to stop. -Yeah we've smooth ran out of time. We have a lot to do. We're building a whole car. So this is going to stick around a while. So keep watching Engine Power for more on this because we're gonna have a gasser. -It won't start. -Not yet.
Show Full Transcript
[ Music ]
[Brian] All right man. Sign here, here and initial at the bottom. Perfect, good luck! [Pat] Hey everyone, and welcome to another episode of Engine Power. Like the name says, we love doing engines, not only for ourselves but for the other shops and their projects. Every now and then we do a project in here ourselves, and this one we are extremely stoked about. [Frankie] That is right because this is one of those coolest cars ever. This is an iconic classic vehicle that never, ever loses its cool, and it is a '56 Chevy. Now obviously this is not a running/driving car. This is more of a project right in the middle. Brian and his team have done a bunch of great work to this, and really they have a bunch of cool projects. So we don't feel as bad taking over, but this is a project that we have been dying to do for the longest time. This is set up to be a gasser and we're going to keep that? So this has a Checkered racing chassis under it. So it's got a straight axle front. It's got a nine inch in the rear with ladder bars. QA-1 shocks all the way around. Good brakes, manual rack. This is going to be a really good foundation for the rest of our build. As you can see, the outside has not been painted but it is in 2K primer. The inside is completely stripped. We have all the parts, all the original parts. We'll see what we can use and what we're not going to. They did get to the point of painting the dash, but basically we have a blank slate that we can build off of and a lot of the hard work for us, the bodywork, is already done. So we can jump right into the mechanical, getting an engine in this thing and getting it fitted, getting it running, driving and start enjoying it. Speaking of engine, that's where a special, special beast comes in. -Now you guys remember this one. This is an engine we built a while back. This is our all aluminum W-series Chevrolet. Now this is a perfect blend of nostalgia and high tech. One, it's all aluminum, aluminum block, 509 cubic inches, and it is set up to be pump gas friendly. Hydraulic roller cam, dual plane manifold, and FiTech's dual throttle body top end. Now this is a great engine, but if you are not familiar on how it was built have a look at this. It all started with an all aluminum Bill Mitchell block that we worked our magic on. We filled it with a four inch stroke Scat crank and 4-500 bore Racetech pistons. The block required a custom made camshaft and that was done by Comp Cams. -Also we had Lamar Walden Automotive custom port a set of Edelbrock heads and an intake manifold for us. The dual quad EFI gives this engine excellent street manners and this pump gas beast cranked out 581 horsepower and 606 pound feet of torque on our SuperFlow Power Mark dyno. -To kick off the project we'll take a few parts off our engine and get it off the stand. -We're going to mate the engine and transmission before installing them. So the first order of business is pounding in this roller pilot bearing. Our transmission comes with a brand new billet steel flywheel. This is from American Powertrain, and this is the same one we use when we balanced the engine. So it does have our modified external balance weight here. So this flywheel is serviceable if you want to change it but the weight has to go with it. It is held down with a new set of ARP flywheel bolts, which are torque to 85 pound feet with Ultra Torque lubricant. We are using an American Powertrain Pro Twin dual disc clutch kit and are installing it with a billet alignment shaft. After the first friction disc the included shims have to go on before the steel floater plate is installed and torqued to 28 pound feet with orange thread logger. The outer friction goes on and is followed by the pressure plate, making sure all the components are lined up by the manufacturer's markings. The nuts are tightened down slowly and evenly in order to not warp the diaphragm spring before they are torqued to 36 pound feet. With our clutch all buttoned up the next thing we're going to work on is the transmission. Like I said, this came as a complete kit from American Powertrain. So we have a brand new Tremec TKX transmission. These are awesome. They have a really small compact package. So you don't have to do a bunch of cutting if you're trying to swap them into something. This one has a 2.87 first gear and a low .68 overdrive. It is a five speed and it's good for up to 700 pound feet continuous. So it's going to be perfect for our 509. It also comes set up with a built in speedo, reverse lockout, and reverse light switch. The shifter is really cool because this is clockable and flappable. So if you need to get it adjusted for an existing shifter hole. We're going to have to cut a new one anyway, so it doesn't matter. This came with all the hardware to get together, and one of their Hydro Max hydraulic throw out bearing systems. So this has a hydraulic throwout bearing. It comes with an under dash pedal and everything. The next thing we're going to do is get this set up because we need that proper spacing between it and our clutch fingers. So we're gonna get our bell housing on and start measuring. -We have already dialed in our bell housing to the crankshaft center line so it can be installed for real. Using a precision straight edge with a long dial caliper we'll measure the distance from the transmission flange to the clutch fingers. With the throw out bearing on the input shaft, we'll use the same tools to measure the distance from its face to the face of the transmission. We'll subtract that measurement from our bell housing measurement to determine the air gap between the throw out bearing and the clutch. We want it to be between 100 and 200 thousandths. So we'll add three 90 thousandths thick shims to get it within that spec. Then the hydraulic throw out bearing and transmission are installed with no hassles thanks to the proper installation setup. -Coming up, our EFI 509 and five speed transmission get slung between the rails of our classic gasser.
[Frankie] After throwing on some polyurethane engine mounts and Checkered Racing crossmember we can slide the engine and transmission combo into our new frame. [ Music ] The idea is to have this set up correctly the first time so that any Chevy engine can be swapped in later. [ Music ]
[Pat] This is one of those instances where we will check out measurements multiple times and get the powertrain exactly where we want it. [ Music ]
-Right there square to this crossmember. [ Music ]
-Then we'll use our Forney 220 tig welder to tack the engine crossmember to the frame rails. [ welder humming ] [ Music ]
-Okay, so we have our 509 basically set where we want in our chassis. The big things that we're looking is we want to make sure that the engine is centered between the frame rails. We want to have it as low as we can while still having our mounts work. We want to have it as far back as we can while still having room to work on it here. Then we're going to make sure it's level left and right. Big thing to check is make sure your frame rails are level as well because if you have a low tire or something it's going to mess that up. So we want the car where it's going to be sitting when it's assembled. And then we're going to set our downward angle. On this one we actually set it a little bit more than what you would think because we have our gasser chassis. It's raised up in the front but our axle is still low. So we have it set so we have about a degree and a half of U-joint angle on our front U-joint. And right now the front is just tacked in in case we need to change it later. We can always fully weld it later but if we need to make adjustments we can. The back is just held in with C-clamps. We're going to get the car over to our two post lift. Get it up in the air and then it'll be easy to work on, drill our holes, and get our rear transmission mount done. [ mechanical humming – lift ] Okay, so we've got our C-clamps out. We've got a screw jack underneath the transmission. Now that we got the car on the lift, what we're going to do is we've already marked the holes for our transmission crossmember. So we're going to pull the cross member out and drill the holes in the frame. We will sleeve them later but this will at least get it so we can bolt the engine trans in and have it suspended on its own. [ Music ]
For now we'll drill 3/8ths holes, but later we'll enlarge them to put a steel tube in the frame to keep it from crushing when the bolts are tightened. [ Music ]
[ ratchet clicking ] [ Music ]
Okay, engine and trans are in under their own weight. Mounts are all done. So we can move on to the next big challenge, which is going to be headers. -Up next, we'll take a break from melting metal to melting some tires with a 1,300 horsepower twin turbo drift BMW.
[ ] You've arrived at your destination. [ Music ] [ engine revving ]
[ ] Make a U-turn. [ ] Drive safe. [ engine revving ]
-You are driving over the speed… [ Music ]
[Narrator] Under the Hood is brought to you by Hot Shot's Secret. [Frankie] There are fun cars. There are fast cars, and then there's this. An unapologetic lunatic on four wheels. Man, I was working. I hear engine noises. I come out and see you doing crazy rips. That was awesome. Nice to see you again, Brandon. [Brandon] Thank you. We're just here to have some fun man. Check out this. -You had all the fun in the parking lot. Dude this is killer. I love the wrap. Is that brand new? -It is actually brand new. -It looks fresh. So you're probably going to beat it up this weekend. -We thought we'd come here before we do anything reckless with it. So this is a 2011 E92 M3 BMW. I'm from Australia. A chassis like this was actually a flood damage car. So you cannot reuse this shell. Once they get flood damage it's basically scrap. It was about a two year build process. I basically built everything myself. -Two year build time. That's commitment. -So we actually always drifted Nissans. S-15s is what I always had. They call it an S-chassis. And basically we were trying to work with sponsors and at that time they're like, well, nobody really cares about you. A 1999 Datsun. I actually liked the shape of this car, and I ran a particular suspension, which is called Wisefab, and that's what allows us to get the angle. -How much do you actually have in this? How much can you rack it? -So we can go 70 degrees each direction? -That's a lot. -But if you're at 70 degrees you're basically a forklift and you're not going very fast. The only time, in my opinion, you would really use it if you basically messed up. -That's the oh crap. -And you go woop, we made it. Usually you would run it, if you're normal drifting, 50 degrees is kinda normal-ish. I mean we obviously did some 360s and stuff out there, which do use some angle. But suspension is very important. A lot of people gonna get the misconception that we want to be like slow and spin the wheels a lot, but you actually want to be fast. It's a cross between a drag car and a circle track car. -So you're actually looking for maximum grip on these. -So we put as much mechanical grip in as we possibly can. So I run a big front bar in this car. I mean you can se there's like literally almost no suspension travel in the front end. So we have the front end tied down and we're basically trying to transfer as much weight to the rear of the car. So I actually run, Silvers is the brand, two way coil over. So we've basically got compression and rebound. With a single way you're compromising. You're either going like hard and that's hard compression and hard rebound or soft. So with the two way we can kind of tie the front end down and make the rear end work how we want. -Especially for different tracks. -Yeah, even like a banked track to a flat track cause it's a completely different set up in the car. 20 years ago we would cut and modify the knuckle and get some extra angle, but you can basically buy most parts these days that just work. -And probably are a little bit better. -Maybe 20 years ago I wasn't the best welder. Sometimes things break. -Well we'll get to the engine because you know I'm going to ask you about that. That's obviously very important, but we'll work our way around the car first. So carbon front end. Are the doors carbon too? -So basically at this level you want to build everything as light as you possibly can. There's not a lot of weight here. So we do sometimes hit walls. So basically from this whole foot from the back of the car to here, this foot is basically a consumable. This is all fiberglass on here. -Quick locks on. -I got the quick latch and then there's a little steel. This actually is kind of bendable. So all this will bend if you hit it. -So something we didn't cover yet. Wheels and tires and also brakes because those are obviously very important. -We have 24 wheels with us this weekend loaded with tires. -For one car? -For one car. And then we have a competition this weekend. So we're actually putting a lot softer tire on the car. You'll see in here we have two brake calipers. So I actually have one set up is the handbrake and the other one is my brake pedal. You can do an inline setup. There's a million different ways to do that brake setup, but on this particular car that's how I built it. So sometimes we will be like if you catch another car and you're sitting there I'll be quite heavy on the foot brake to hold the car from crashing into them. So I don't want my foot brake pedal interfering with the rear brake. So I kinda run a sh#^ pad on my foot brake. -So now this is the part, being an engine guy, this is near and dear to me. So gonna ask you what's under the hood? -Let's have a look at what's under the hood. [ Music ] -It's an engine but it's an LS in a BMW. -Correct. I mean, some people probably wouldn't be that stoked on it. Maybe some BMW enthusiast thinks like a million cams in the top of the engine is a cool thing but I'm old school. I like push rods and long camshafts. We got an LS in here. I built this car originally with the turbos. So if I broke my good motor I could basically go to a junkyard, swap it back. But for what we've done here. SamTech has actually built this motor. This is a SamTech motor. The school built that motor. It's a six liter block. So a cast six liter LS block. -Elephant kind of on top of the engine. To me that looks like a blower base with a manifold on top of it. Am I seeing that correctly? -That's exactly what you're seeing? There's a brick in there which is like. -The intercooler brick. - We do have our two injectors here. That's to help with cooling as well. So we're trying to take some temperature out of the air, and that would basically sum this package up. -This is awesome. I love it when the car becomes a dyno on the road because you have basically all the sensor data that we would want on a dyno you've got it right here on the engine and you can watch it on track. And this is awesome to see this stuffed into a BMW. -It's been pretty fun. -Next we tackle the worst part of any project, getting headers that fit. Will we get lucky or have to start from scratch?
[Pat] We have made some fantastic progress on our '56 gasser project. The engine is in where we think it needs to be and the next order of business is getting some exhaust on it. That means headers. We have a couple of different options that we can do. First off we can go full custom on this and build a set of headers. We've done it before and it's great but it takes an immense amount of time and that's something we want to avoid. So we have a second option, and that will be try to use the existing set of headers that we used to dyno the engine. This is a set of Hooker Super Comp ceramic coated headers with a one and 7/8ths inch primary. Now these are designed for a 1958 through early '60s cars and wagons. Oddly enough, not a lot of header options for a gasser with a W-series in it, but that doesn't mean that these might not work. We might have to modify a little bit on the car or the header to get them on there. And if they work that's going to save us a whole lot of time. So we're going to start over here on the passenger side and see how it goes. Because it goes around the frame rail it actually doesn't look too bad. [Frankie] Mine doesn't fit. -Yours doesn't fit? -Nope, but I think we can make it fit. -Right now I can get bolts in this one. -I got bolts in one and I'm just hitting the body now. -This one's going to do the same thing. [ Music ]
-I think we're good. I don't think there's any major issues because we got plenty of space there. -This saved us like two weeks. -At least a week. We could build a good set for it, but it would be a pain in the butt, and now we don't have to do that. -With the headers in place, we'll mark where they interfere with the front body mount and then we will gently remove our coated headers. We'll raise the car back up and then use our Forney 40-amp plasma cutter to notch the body mounts along our lines. The only way to really cut this out right is you have to use a plasma cutter. -Okay, after several rounds of grinding and cutting and checking we have gotten both sides with both of our body mounts cut, and we've got them cut in the front and rear. They're a little bit different but that's really not a big deal. On this side we took a big chunk out of the front and rear, and we're not just going to leave it like that because it takes a lot of the structure out of the mount. So what we're going to do is sleeve it with this piece of pipe. So this is a four and a half inch OD quarter inch wall piece of tubing that we keep in the shop basically just for stuff like this, and this is going to fit right up in there. We're just going to trace around the body mount and have that half piece that goes in there for our pipe to run under. So get a silver Sharpie. We'll get it marked up and then we can get it cut over by the table. [ Music ] [ plasma torch hissing ] -We use our Forney plasma again, and even on this thick material it blasts through it with no problem. [ Music ]
After cleaning up the edges, we can hold each side in place and then hold them into position and use our 220 multipurpose MiG welder to tack them in place. -With the headers all sorted the last thing we need to do to get all this in for real is have a hole for our shifter. So while the engine and transmission is set exactly where it's going to be we're going to go ahead and mark it out on the bottom. That will give us a template to put holes through the floor and then cut it all out. -We'll use a silver marker to trace out the shifter boss on the tunnel, and then we will pull the engine and transmission out to get access. [ Music ] We will use a quarter inch drill bit to put small holes that will mark out the location. And then from the inside of the car we can use a piece of four inch exhaust tube as a template to plasma torch the floor to cut out a circle in the floor pan. [ Music ]
-All right, that's pretty cool. We have our W-series mounted, transmission mounted. Everything has clearance for these. So we've made huge progress today but that is where we're going to stop. -Yeah we've smooth ran out of time. We have a lot to do. We're building a whole car. So this is going to stick around a while. So keep watching Engine Power for more on this because we're gonna have a gasser. -It won't start. -Not yet.
Engine Power Featured Projects
Engine Power Builds




Want more content like this?
Join the PowerNation Email NewsletterParts Used In This Episode

American Powertrain Systems
Billet Steel Flywheel
American Powertrain Systems
Hydramax Hydraulic Clutch System
American Powertrain Systems
Tremec TKX Transmission
ARP
Flywheel Bolts
ARP
Ultra-Torque Fastener Assembly Lubricant
CHECKERED RACING
Crossmember
Forney Industries
Forney 220 AC/DC Tig Welder
Forney Industries
Forney 40 P Plasma Cutter
Hooker Headers
Hooker Headers