In This Episode
- 0:01 Introduction to the project
- 0:43 Discussion on the engine and project goals
- 2:49 Overview of LS engine aftermarket parts
- 3:13 Detailed discussion on engine components
- 5:06 Painting process for engine components
- 8:57 Assembly and installation of engine components
- 14:01 Installation of EFI system and sensors
- 15:31 Engine testing and tuning
Video Transcript
[Pat] You're watching Powernation.
[Pat] Today on Engine Power we were about to start a new junkyard project. [Frankie] But we ended up switching gears to work on a sweet and simple side project for the guys in Dirt and Trails. [ engine revving ] [ Music ]
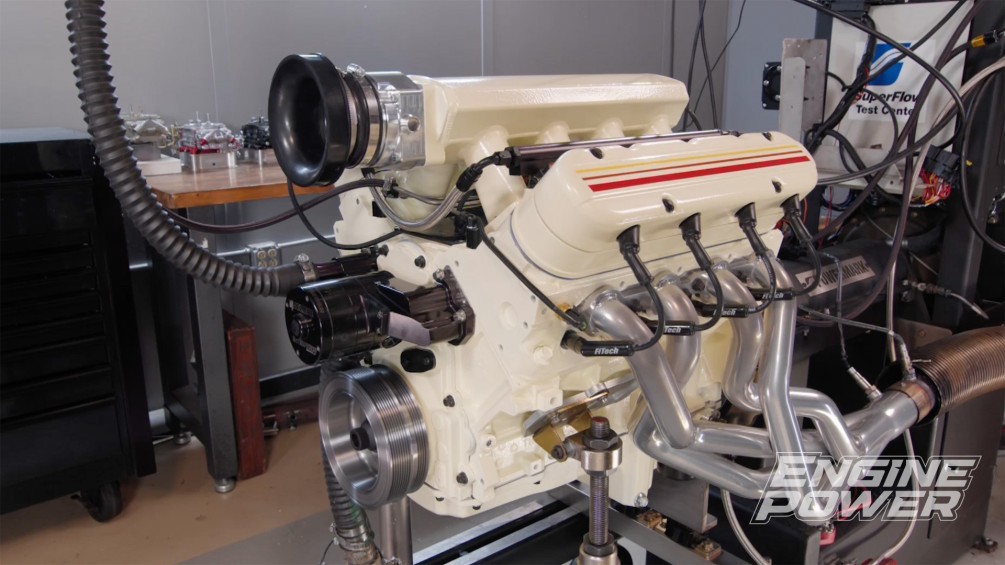
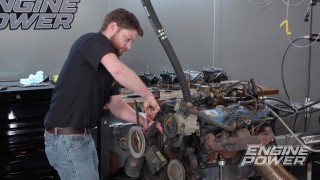
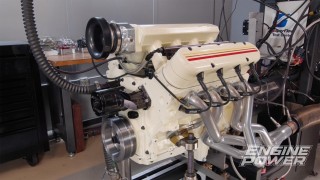
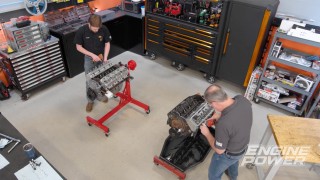
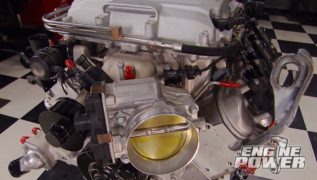
-Do we know if this thing actually even turns over? -No, but I hope so. [Eric] Hey, y'all. -Hello, what is that? -Oh, you're more interested in this than that now? -We were looking at this but that's pretty clean. What is it? -This is for our next project that we've got coming up here. It is a six liter LQ4 from ATK. So, long block. It's already got some of the hard work done. So I figure if you guys are willing to finish it for us it should save you a little bit of time. -Project, I love it. -Like wrap it up and I assume dyno tune it. -Yep, we're not going for anything ridiculous, right? No specific power number. Nothing crazy. We need it to be reliable. Obviously that's number one priority because this one our goal is a dual purpose daily driver and off road resto mod. So it's got to have power. It's got to have style, and it's got to be reliable. And it's got to be able to do all three of those things anywhere that we feel like taking it. -Well power and reliability. You're already three steps ahead because LS based. So six liter, right? -This is a really, really solid foundation. ATK makes a great product. Going from here I think we have a lot of this stuff probably in-house. We might have to order a few things, but we have a lot of stuff. We can finish this out and have something that's a rock and roller. -So carbureted or fuel injected? [Brandon] Fuel injected. -With what we're doing, just for the fact that we're trying to make this something that anybody could get in and enjoy, I think fuel injection is going to be the way. -Hit the key and go. Swap pan, timing cover stuff is easy. I guess the last question is color. -The truck itself is kind of a tan? Like a light tan. So maybe like a Cummins beige might look good. -I was thinking maybe we could do something with the livery or the vinyl scheme that's on it. Maybe on the valve covers. -Yeah, there's that retro stripe package on there. You think you guys might be able to color match some stripes on the valve cover? -Absolutely, we have a very talented art department in this building. Actually, it's in this shop. -Is it you? -I mean it can be. -We'll do a nice, smooth valve cover so you can really have it laid out in there. We'll jump right on it. We can kind of put this on hold and we'll get right after this thing. -Sounds like a fun one. -We got tons of work to do to. So I think we go our separate ways and we'll see you guys when this thing's done. -We'll let you know when we have it on the dyno and it's ready to go. See you guys. I think we have everything we need to start on this six liter LS for Dirt and Trails. The cool thing about LS' is that even in the last couple of years the amount of aftermarket parts to dress these things up and finish them out has grown, and Summit Racing Equipment has done a great job of creating an entire LS line to help fill out these engines. We have a fair bit of stuff laid out here for our build. So what we're starting out with is a six quart swap oil pan. This is a replacement for the stock pans because it has a lower profile here in the front for cross members and things like that. It also clears up to a 4.25 inch stroke. So if you're doing a 410 or something like that you have no problems with clearance. This comes as a kit. So it has the gasket. Everything you need to get it in. It comes with the pickup, and all that kind of stuff. We got a matching braided dipstick to go with it because we want to make sure we can accurately set our oil level, and this also looks way better than the stock ones. We have a timing cover for the front that actually works on the Gen-3 or Gen-4 LS, depending on what you're doing. It has a cam sensor hole in the front that comes with a block off plate if you are using it on a Gen-3 engine, which we are. We got a nice SFI approved damper. These are really cool because you can get them in different configurations depending on if you're working on an F-body, Corvette, or whatever. When you start putting more power and a little bit more RPM to those stock dampers we have seen them come apart in two. So we will have no issues with this thing on that. They even make really cool trick parts like this hard line kit, which is a steam vent line. We have a valley cover which is for our Gen-3 LS. And then the piece that's going to be topping it off is pretty tricky. It is one of their fabricated intake manifolds for the LS. So this is their taller fabricated sheet metal one. And we are going to be painting this, but it looks beautiful right out of the box. It comes with a 102 millimeter throttle body flange on the front. It has relatively long runners with velocity stacks inside so it has a smooth transition into the port. It comes with a nice GM style MAP sensor port on the back and underneath they have multiple NPT ports. So if you want to run like your brake booster or something like that you can run the lines cleanly and hide them underneath the intake manifold. To go with this we also got one of their fuel rail kits which is specific to this manifold. So it's going to fit perfectly. And this is cool because it comes the fittings, comes with the brackets, comes with a crossover line and everything. So you can have everything you need to put this thing together and get it running. So at this point usually you would think we're going to start putting parts on this thing. But actually what we're going to do first is paint it that custom color the guys are looking for. So we're gonna get everything taped off and prepped so we can start laying it down. Stay tuned because up next we get this thing prepped and taped for some custom color in our pop up paint booth.
[Frankie] It's time for our Summit Racing Tech tip and today we're going to talk about how to accurately calculate your compression ratio in under a minute. [ Music ] The static compression ratio of an engine is how much the volume inside the cylinder changes when the piston goes from BDC to TDC. We need five different volumes to be able to calculate that. The first one is the sweat volume, which is the volume that the piston displaces when it moves from BDC to TDC. So we need to know our stroke and our bore size to calculate that. We take our sweat volume. We add it to the volume of the top of the piston, whether it's domed or dished. The third one is the difference between the top of the piston and the deck surface. We add that to our head gasket volume based off its bore and compressed thickness. And then finally we add in our chamber volume from our cylinder head. Then we're going to divide that by all of these volumes minus the sweat volume and that will give us our static compression ratio. If you have any questions about what compression ratio is right for your build in your application you can talk to the experts at Summit Racing Equipment. And if you need help figuring out your static compression ratio you can use their online calculator. [ Music ]
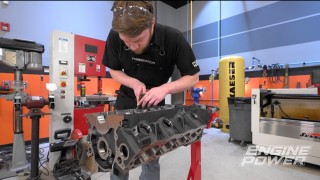
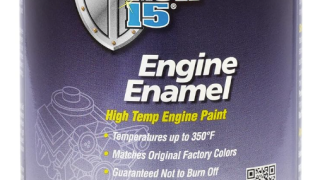
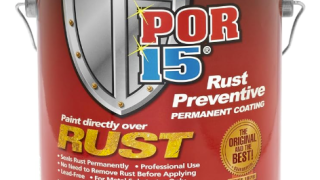
We have all of our LQ4 parts prepped, taped off, and ready for paint. We're going to be doing that inside of our Mobile Environmental Solutions paint booth down here by the big door. It is a beautiful day outside. So we got this thing opened up. This is a portable paint booth that you can set up inside your garage, outside of your garage, wherever. It gives you a nice, stable environment to be able to spray parts or cars no matter what you want to do. So this is a 24 by 15 by 10. So plenty big to fit cars, old long cars, or even pickup trucks. We have plenty of space to work around all our parts and get everything covered. [Pat] The great thing about these is you can get them in any size. Literally large enough to paint an entire semi in, or one that will fit in your home shop. These are made in the USA and a great solution if you need to paint something dust free and debris free. So it looks like he's got it handled. I'm leaving. -Time to load it up in the gun and start spraying. First up, we're going to be coating everything with POR-15 gray rust preventative. This only needs to be slightly thinned to be used in an HVLP gun, and we will lay down one light coat followed by a few medium coats to get the proper finish. Getting full coverage can be a bit tricky on some of the parts, but a little bit of planning and patience ensures everything is protected from corrosion. Okay, time to mix up some color for our LS. Like Brandon and Eric said, they want a color that matches the outside of their Land Cruiser. So we're going to have to make a custom color to try and see if we can match that tan. I think that's pretty close. Time to go check on the truck. That's pretty close. Maybe a little more white. I think we're pretty much ready to go. -Because it's a warm, humid day our POR-15 engine enamel is thinned at 10 percent and follows a similar process, starting with a light adhesion coating. The rust preventative takes about an hour to tack up before this step and ensures we have a consistent color across all the parts. Once the first coat has flashed off it will be followed by two heavy coats for proper coverage and a thick, durable coating. This also gives us a very smooth, glossy finish that looks show quality. -We know this looks like something you would spread on a piece of toast but trust us. Once the accessories and some custom stripes are put on it's going to look great. Now that everything is cured and untaped we can jump into assembly with installing the oil pump. This is a standard volume unit and once the three 15 ten thousandths feeler gauges are used to center the housing it can be torque down to 22 pound feet. [ Music ] Is there a squirrel in there? -I was just looking. You never know. -The factory windage tray drops over the main fasteners and all the washers and nuts but one are installed with orange thread locker and they are torqued to 18 pound feet. [ Music ] -The remaining stud gets a spacing washer, and then the pickup tube that came with our Summit Racing oil pan can be gently slid into place. The associated hardware is installed with the oil pump bolts being torqued to 140 pound inches and the bracket nut torqued to 18 pound feet. Coming up next, we get this long block sealed up and test out a new advanced EFI system.
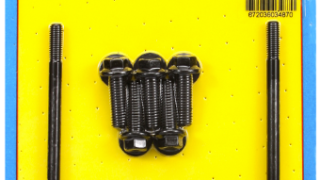
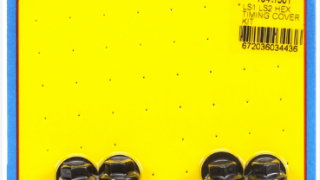
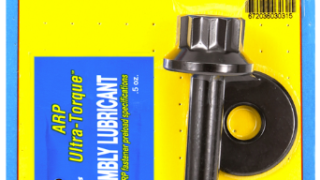
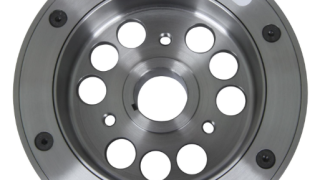
[Frankie] We are to the point of getting some of our beautifully painted parts onto our LS, and to hold them down we want something that's going to match. So we're actually going to be outfitting the entire engine with ARP black oxide fasteners. So we have an oil pan kit, timing cover kit, damper bolt. We have a couple others as well, and these are made of 87-40 chromoly, which is already way stronger than something you can get at a hardware store. It has about 180,000 psi of tensile strength. They have precision rolled threads. They have a rolled under head radius for improved strength as well. ARP makes accessory kits either individually or for your entire engine that you can get. They come in black oxide, stainless, 6-point, 12-point. They either have a kit or they can create one if you have a specific application that they haven't done yet. So what we're going to do is get these prepped with their Ultra Torque lube and get our timing cover on. With a new gasket installed and the front cam sensor hole blocked off all the bolts are started, and then this Summit cover alignment tool is added to ensure it's centered before we tighten the bolts. [ Music ]
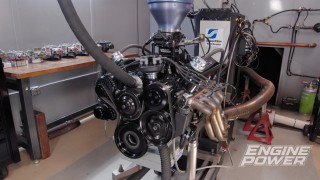
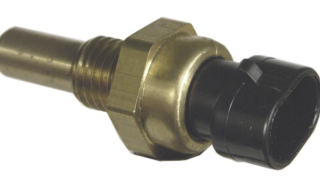
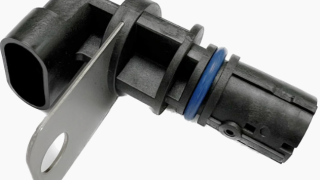
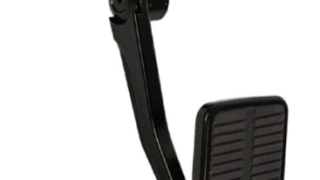
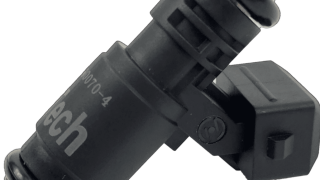
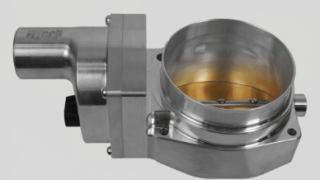
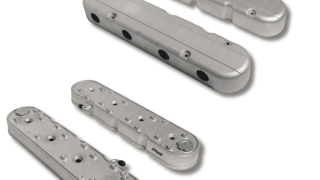
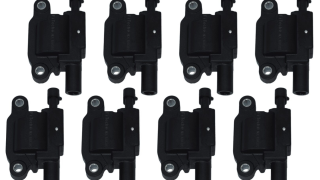
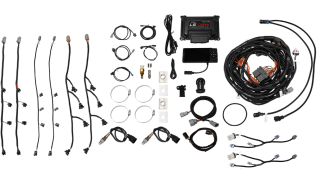
[Pat] Our oil pan already has the baffle installed and dropped on as well. We'll get all of the ARP bolts started and then align the rear of the oil pan with the bell housing flange to ensure it is flush whenever the bell housing is bolted on. Then all the bolts can be tightened from the inside out to seal up the bottom end. We won't be using the factory knock sensors. So this billet Gen-3 valley cover can be laid down and the countersunk bolts can be tightened. -Our steam vent kit from Summit Racing uses these O-ring adapters at each corner, and then has dash three stainless hard lines that connect them together for a nice, clean look. Our fabricated intake with new O-rings is laid into place next, and the black oxide six millimeter bolts are snugged down evenly and torqued to 160 pound inches. -The FiTech valve covers are a two piece design with this lower half that seals the engine and holds the coils, which are covered by the other half later on. As an upgrade over a factory damper we are using this SFI Summit Racing one with Corvette spacing that is put on with an installation tool. Just for dyno purposes we are using this electric water pump with some new gaskets to keep the engine cool. -With our LQ4 pretty much sealed up it's time to start outfitting it with some of the electronics. And we got a FiTech brand new LS drive by wire standalone EFI system. A lot of people wonder what are the benefits? Why should you switch to a drive by wire setup? Well the big one is the ease of installation because when you're trying to swap an engine into a place it wasn't supposed to be there can be a lot of challenges with length of cables, ends on cables, getting the right amount of pedal travel and throw on the throttle, and all that kind of stuff. You also get a lot of control over the throttle itself. This kit comes as a complete wiring kit. So you can plug and play with any LS that you're running with it. So we have starting out our LS drive by wire ECU. It comes with a full very high quality wiring harness. It comes with two oxygen sensor. So you have dual AFR control. It comes with any extensions that you need. It comes with a three bar map sensor. So if you want to run it in boosted applications you can. It comes with a handheld that you can do all the initial programing and set up and all that kind of stuff. It also has coil harnesses and multiple injector harnesses depending on the injectors that you're trying to run with it. And then outside of the standalone kit we got a few components to go with it. We have one of their 102 millimeter billet drive by wire throttle bodies. Their billet pedal assembly. So this is really cool, not only because it looks good, but also they have an integrated mount that comes with it that is clockable. So to make this really easy to mount under your dash you can set this however you need. I know it seems like a lot, but if you follow the instructions it's actually very easy. And we're going to start with getting our injectors in. These 55 pound per hour injectors are lightly lubricated and installed with these Summit Racing fuel rails. The fuel crossover line can be put on next. And then with the O-ring already in place, the drive by wire throttle body can be bolted on. The three bar map sensor follows and is a perfect fit for the port on the back of the intake. -We are also using a set of FiTech's LS3 style LED coils, which look really cool when the engine is running and are almost a shame to cover up. With the sub harnesses installed and the custom stripes painted on our valve covers, this LS can head to the dyno. We'll start getting everything hooked up and finally get closer to making some power. -Basically all we need to do left on our six liter is prime it and get some sensors in it. Because this is a brand new engine we don't have a core engine that we can strip sensors off of. And even if we could those things are over 20 years old at this point. So we're just going to get all brand new ones from Duralast. Now the reason we're using Duralast sensors is because they specifically designed these to meet the OE specifications for fit, form, and function. What that means is that if you are pulling an old sensor out you're going to be able to take your new sensor, put it in. It's going to fit properly, work properly. Starting out we have the correct crank sensor for our 24 tooth crank reluctor wheel. We have a cam sensor for the rear cam sensor position because this is a Gen-3 LS. We have an oil pressure sensor, which is the correct OE design with the correct plug in and everything. And then we have a coolant temp sensor for our LS head, and then we can do our first start up. Still to come, we'll see if this engine lives up to Dirt and Trails' expectations. [Eric] That torque figure being so flat and starting out as high as it does, as low as it does. That's exactly what we're looking for.
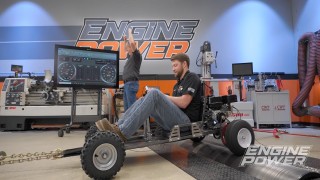
[Pat] We're all programed in. Everything's looking good. We got the guys down here from Dirt and Trails. [Eric] I see a whole bunch of numbers, and I'm assuming they're all good because I hear and see that thing running. -This is like the space shuttle man. -How much power is it going to make? [Frankie] Well that's what we're going to find out because we're going to do a couple different runs. We're going to tune on it a little bit. We got this thing all custom painted for you guys to try and match the Land Cruiser. So hopefully, I think the stripes are pretty close. -The paint job came out great. I'm really excited to see how those stripes look up against the truck. -You're all ready to go? Programed in? -Yep, first off we're going to do a short run. So we're going to go from 2,000 to 5,500, 300 a second. -We're starting at relatively safe 12.8 to 1 air/fuel ratio for a target and 26 degrees timing. That's going to be pretty close. We'll tweak on it from there. -Here we go. [ engine revving ] -Loads in nice at 2,000. -Right to 2,000, yep. [ engine revving ]
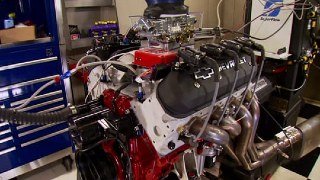
Fueling was dead on, you see? -Yeah, I was watching both sides. That's like perfect. So we got 445.9 pound feet, 446 basically, and 464.9 for power, shutting it down at 5,500. Because I'm sitting on this side. -What do we have down here at 2,000? -Load in 368 pound feet at 2,000 rpm. -That's a really nice torque curve. That's real flat. -This manifold is a little bit shorter than what you would find on like a stock truck manifold. Plus it just looks way better than a stock manifold. Stock manifolds are very well designed. They don't look very good under the hood. -But I want to say the 2-F was factory rated at like 135 horsepower. So we're above that ever so slightly. -So what I've done now is we're going to bump up the RPM range of what this thing's going to run. So what we're going to do is turn it to 6,800 and we'll go from there. Glassy smooth. [ engine revving ]
-It's like it's made for it. -Absolutely beautiful. -So we got 447 pound feet and 495.8 horsepower. Looks like right at 6,400. That is a really nice curve, looks great. -This is going to be pretty close. We'll just do our normal tuning. Stick a little bit of timing in. -Fuel's not far off. -We're going to leave that alone for right now. We'll jam some timing in it and see if we can make a little more here. -I'm going to go put two in it and I'll be right back. -Hurry up. -Oh man, that sounds even better with the door open. [ Music ]
-We'll see what that does. -Nice, nice. [ engine revving ]
-There we go! -500, look at that. -We're up to 449.7 and 500.1. [Brandon] Just cracked it. -That's pretty solid. -Torque looks really nice. Keep in mind this is at operating temp. This is at 175 degrees. -Honestly I'd like to pull some fuel out of it because looking at the BSFCs I think it's still pretty safe. -Go make, like, a little change on that. [ Music ]
-I much prefer doing my tuning with a screwdriver. -You can probably punch the keypad with a screwdriver if you want to. -We're at 12-8. Nice two-tenth jump to 13.0. -You're Captain Conservative, I like that. -I don't think it's going to take too much but we'll see what it does. We can always go more. -What do you think? -I think it's gonna be good. -A man of few words but we like it. Here we go. [ engine revving ]
-I mean at this temperature. -It didn't really care. 499.2. -It made within six tenths of a horsepower. -And 449.6 for torque. So it's not a bad thing per se. -We can jam timing in it and lean it out all day long but that puts the tune very close to a range where if you get any bad gas in this thing it's a really bad thing. -Yeah that's not what we're trying to do here. This is not a high performance rig. This is something we want someone to be able to hop in to, drive down the highway, and then hit a trail afterwards. This engine looks great. It sounds great. Obviously, the numbers are great. I am super excited to get it off of here. Get it down to our shop. So whatever you guys got to do to get it ready we'll be waiting for you. -We've got a few final checks basically and then we'll get it off and get it down. -We want to see this thing in the vehicle as soon as possible. -Don't worry, so do we. Thanks guys. -Thank you guys. -While you're here I'm just gonna make another run. [ engine revving ]
Show Full Transcript
[Pat] Today on Engine Power we were about to start a new junkyard project. [Frankie] But we ended up switching gears to work on a sweet and simple side project for the guys in Dirt and Trails. [ engine revving ] [ Music ]
-Do we know if this thing actually even turns over? -No, but I hope so. [Eric] Hey, y'all. -Hello, what is that? -Oh, you're more interested in this than that now? -We were looking at this but that's pretty clean. What is it? -This is for our next project that we've got coming up here. It is a six liter LQ4 from ATK. So, long block. It's already got some of the hard work done. So I figure if you guys are willing to finish it for us it should save you a little bit of time. -Project, I love it. -Like wrap it up and I assume dyno tune it. -Yep, we're not going for anything ridiculous, right? No specific power number. Nothing crazy. We need it to be reliable. Obviously that's number one priority because this one our goal is a dual purpose daily driver and off road resto mod. So it's got to have power. It's got to have style, and it's got to be reliable. And it's got to be able to do all three of those things anywhere that we feel like taking it. -Well power and reliability. You're already three steps ahead because LS based. So six liter, right? -This is a really, really solid foundation. ATK makes a great product. Going from here I think we have a lot of this stuff probably in-house. We might have to order a few things, but we have a lot of stuff. We can finish this out and have something that's a rock and roller. -So carbureted or fuel injected? [Brandon] Fuel injected. -With what we're doing, just for the fact that we're trying to make this something that anybody could get in and enjoy, I think fuel injection is going to be the way. -Hit the key and go. Swap pan, timing cover stuff is easy. I guess the last question is color. -The truck itself is kind of a tan? Like a light tan. So maybe like a Cummins beige might look good. -I was thinking maybe we could do something with the livery or the vinyl scheme that's on it. Maybe on the valve covers. -Yeah, there's that retro stripe package on there. You think you guys might be able to color match some stripes on the valve cover? -Absolutely, we have a very talented art department in this building. Actually, it's in this shop. -Is it you? -I mean it can be. -We'll do a nice, smooth valve cover so you can really have it laid out in there. We'll jump right on it. We can kind of put this on hold and we'll get right after this thing. -Sounds like a fun one. -We got tons of work to do to. So I think we go our separate ways and we'll see you guys when this thing's done. -We'll let you know when we have it on the dyno and it's ready to go. See you guys. I think we have everything we need to start on this six liter LS for Dirt and Trails. The cool thing about LS' is that even in the last couple of years the amount of aftermarket parts to dress these things up and finish them out has grown, and Summit Racing Equipment has done a great job of creating an entire LS line to help fill out these engines. We have a fair bit of stuff laid out here for our build. So what we're starting out with is a six quart swap oil pan. This is a replacement for the stock pans because it has a lower profile here in the front for cross members and things like that. It also clears up to a 4.25 inch stroke. So if you're doing a 410 or something like that you have no problems with clearance. This comes as a kit. So it has the gasket. Everything you need to get it in. It comes with the pickup, and all that kind of stuff. We got a matching braided dipstick to go with it because we want to make sure we can accurately set our oil level, and this also looks way better than the stock ones. We have a timing cover for the front that actually works on the Gen-3 or Gen-4 LS, depending on what you're doing. It has a cam sensor hole in the front that comes with a block off plate if you are using it on a Gen-3 engine, which we are. We got a nice SFI approved damper. These are really cool because you can get them in different configurations depending on if you're working on an F-body, Corvette, or whatever. When you start putting more power and a little bit more RPM to those stock dampers we have seen them come apart in two. So we will have no issues with this thing on that. They even make really cool trick parts like this hard line kit, which is a steam vent line. We have a valley cover which is for our Gen-3 LS. And then the piece that's going to be topping it off is pretty tricky. It is one of their fabricated intake manifolds for the LS. So this is their taller fabricated sheet metal one. And we are going to be painting this, but it looks beautiful right out of the box. It comes with a 102 millimeter throttle body flange on the front. It has relatively long runners with velocity stacks inside so it has a smooth transition into the port. It comes with a nice GM style MAP sensor port on the back and underneath they have multiple NPT ports. So if you want to run like your brake booster or something like that you can run the lines cleanly and hide them underneath the intake manifold. To go with this we also got one of their fuel rail kits which is specific to this manifold. So it's going to fit perfectly. And this is cool because it comes the fittings, comes with the brackets, comes with a crossover line and everything. So you can have everything you need to put this thing together and get it running. So at this point usually you would think we're going to start putting parts on this thing. But actually what we're going to do first is paint it that custom color the guys are looking for. So we're gonna get everything taped off and prepped so we can start laying it down. Stay tuned because up next we get this thing prepped and taped for some custom color in our pop up paint booth.
[Frankie] It's time for our Summit Racing Tech tip and today we're going to talk about how to accurately calculate your compression ratio in under a minute. [ Music ] The static compression ratio of an engine is how much the volume inside the cylinder changes when the piston goes from BDC to TDC. We need five different volumes to be able to calculate that. The first one is the sweat volume, which is the volume that the piston displaces when it moves from BDC to TDC. So we need to know our stroke and our bore size to calculate that. We take our sweat volume. We add it to the volume of the top of the piston, whether it's domed or dished. The third one is the difference between the top of the piston and the deck surface. We add that to our head gasket volume based off its bore and compressed thickness. And then finally we add in our chamber volume from our cylinder head. Then we're going to divide that by all of these volumes minus the sweat volume and that will give us our static compression ratio. If you have any questions about what compression ratio is right for your build in your application you can talk to the experts at Summit Racing Equipment. And if you need help figuring out your static compression ratio you can use their online calculator. [ Music ]
We have all of our LQ4 parts prepped, taped off, and ready for paint. We're going to be doing that inside of our Mobile Environmental Solutions paint booth down here by the big door. It is a beautiful day outside. So we got this thing opened up. This is a portable paint booth that you can set up inside your garage, outside of your garage, wherever. It gives you a nice, stable environment to be able to spray parts or cars no matter what you want to do. So this is a 24 by 15 by 10. So plenty big to fit cars, old long cars, or even pickup trucks. We have plenty of space to work around all our parts and get everything covered. [Pat] The great thing about these is you can get them in any size. Literally large enough to paint an entire semi in, or one that will fit in your home shop. These are made in the USA and a great solution if you need to paint something dust free and debris free. So it looks like he's got it handled. I'm leaving. -Time to load it up in the gun and start spraying. First up, we're going to be coating everything with POR-15 gray rust preventative. This only needs to be slightly thinned to be used in an HVLP gun, and we will lay down one light coat followed by a few medium coats to get the proper finish. Getting full coverage can be a bit tricky on some of the parts, but a little bit of planning and patience ensures everything is protected from corrosion. Okay, time to mix up some color for our LS. Like Brandon and Eric said, they want a color that matches the outside of their Land Cruiser. So we're going to have to make a custom color to try and see if we can match that tan. I think that's pretty close. Time to go check on the truck. That's pretty close. Maybe a little more white. I think we're pretty much ready to go. -Because it's a warm, humid day our POR-15 engine enamel is thinned at 10 percent and follows a similar process, starting with a light adhesion coating. The rust preventative takes about an hour to tack up before this step and ensures we have a consistent color across all the parts. Once the first coat has flashed off it will be followed by two heavy coats for proper coverage and a thick, durable coating. This also gives us a very smooth, glossy finish that looks show quality. -We know this looks like something you would spread on a piece of toast but trust us. Once the accessories and some custom stripes are put on it's going to look great. Now that everything is cured and untaped we can jump into assembly with installing the oil pump. This is a standard volume unit and once the three 15 ten thousandths feeler gauges are used to center the housing it can be torque down to 22 pound feet. [ Music ] Is there a squirrel in there? -I was just looking. You never know. -The factory windage tray drops over the main fasteners and all the washers and nuts but one are installed with orange thread locker and they are torqued to 18 pound feet. [ Music ] -The remaining stud gets a spacing washer, and then the pickup tube that came with our Summit Racing oil pan can be gently slid into place. The associated hardware is installed with the oil pump bolts being torqued to 140 pound inches and the bracket nut torqued to 18 pound feet. Coming up next, we get this long block sealed up and test out a new advanced EFI system.
[Frankie] We are to the point of getting some of our beautifully painted parts onto our LS, and to hold them down we want something that's going to match. So we're actually going to be outfitting the entire engine with ARP black oxide fasteners. So we have an oil pan kit, timing cover kit, damper bolt. We have a couple others as well, and these are made of 87-40 chromoly, which is already way stronger than something you can get at a hardware store. It has about 180,000 psi of tensile strength. They have precision rolled threads. They have a rolled under head radius for improved strength as well. ARP makes accessory kits either individually or for your entire engine that you can get. They come in black oxide, stainless, 6-point, 12-point. They either have a kit or they can create one if you have a specific application that they haven't done yet. So what we're going to do is get these prepped with their Ultra Torque lube and get our timing cover on. With a new gasket installed and the front cam sensor hole blocked off all the bolts are started, and then this Summit cover alignment tool is added to ensure it's centered before we tighten the bolts. [ Music ]
[Pat] Our oil pan already has the baffle installed and dropped on as well. We'll get all of the ARP bolts started and then align the rear of the oil pan with the bell housing flange to ensure it is flush whenever the bell housing is bolted on. Then all the bolts can be tightened from the inside out to seal up the bottom end. We won't be using the factory knock sensors. So this billet Gen-3 valley cover can be laid down and the countersunk bolts can be tightened. -Our steam vent kit from Summit Racing uses these O-ring adapters at each corner, and then has dash three stainless hard lines that connect them together for a nice, clean look. Our fabricated intake with new O-rings is laid into place next, and the black oxide six millimeter bolts are snugged down evenly and torqued to 160 pound inches. -The FiTech valve covers are a two piece design with this lower half that seals the engine and holds the coils, which are covered by the other half later on. As an upgrade over a factory damper we are using this SFI Summit Racing one with Corvette spacing that is put on with an installation tool. Just for dyno purposes we are using this electric water pump with some new gaskets to keep the engine cool. -With our LQ4 pretty much sealed up it's time to start outfitting it with some of the electronics. And we got a FiTech brand new LS drive by wire standalone EFI system. A lot of people wonder what are the benefits? Why should you switch to a drive by wire setup? Well the big one is the ease of installation because when you're trying to swap an engine into a place it wasn't supposed to be there can be a lot of challenges with length of cables, ends on cables, getting the right amount of pedal travel and throw on the throttle, and all that kind of stuff. You also get a lot of control over the throttle itself. This kit comes as a complete wiring kit. So you can plug and play with any LS that you're running with it. So we have starting out our LS drive by wire ECU. It comes with a full very high quality wiring harness. It comes with two oxygen sensor. So you have dual AFR control. It comes with any extensions that you need. It comes with a three bar map sensor. So if you want to run it in boosted applications you can. It comes with a handheld that you can do all the initial programing and set up and all that kind of stuff. It also has coil harnesses and multiple injector harnesses depending on the injectors that you're trying to run with it. And then outside of the standalone kit we got a few components to go with it. We have one of their 102 millimeter billet drive by wire throttle bodies. Their billet pedal assembly. So this is really cool, not only because it looks good, but also they have an integrated mount that comes with it that is clockable. So to make this really easy to mount under your dash you can set this however you need. I know it seems like a lot, but if you follow the instructions it's actually very easy. And we're going to start with getting our injectors in. These 55 pound per hour injectors are lightly lubricated and installed with these Summit Racing fuel rails. The fuel crossover line can be put on next. And then with the O-ring already in place, the drive by wire throttle body can be bolted on. The three bar map sensor follows and is a perfect fit for the port on the back of the intake. -We are also using a set of FiTech's LS3 style LED coils, which look really cool when the engine is running and are almost a shame to cover up. With the sub harnesses installed and the custom stripes painted on our valve covers, this LS can head to the dyno. We'll start getting everything hooked up and finally get closer to making some power. -Basically all we need to do left on our six liter is prime it and get some sensors in it. Because this is a brand new engine we don't have a core engine that we can strip sensors off of. And even if we could those things are over 20 years old at this point. So we're just going to get all brand new ones from Duralast. Now the reason we're using Duralast sensors is because they specifically designed these to meet the OE specifications for fit, form, and function. What that means is that if you are pulling an old sensor out you're going to be able to take your new sensor, put it in. It's going to fit properly, work properly. Starting out we have the correct crank sensor for our 24 tooth crank reluctor wheel. We have a cam sensor for the rear cam sensor position because this is a Gen-3 LS. We have an oil pressure sensor, which is the correct OE design with the correct plug in and everything. And then we have a coolant temp sensor for our LS head, and then we can do our first start up. Still to come, we'll see if this engine lives up to Dirt and Trails' expectations. [Eric] That torque figure being so flat and starting out as high as it does, as low as it does. That's exactly what we're looking for.
[Pat] We're all programed in. Everything's looking good. We got the guys down here from Dirt and Trails. [Eric] I see a whole bunch of numbers, and I'm assuming they're all good because I hear and see that thing running. -This is like the space shuttle man. -How much power is it going to make? [Frankie] Well that's what we're going to find out because we're going to do a couple different runs. We're going to tune on it a little bit. We got this thing all custom painted for you guys to try and match the Land Cruiser. So hopefully, I think the stripes are pretty close. -The paint job came out great. I'm really excited to see how those stripes look up against the truck. -You're all ready to go? Programed in? -Yep, first off we're going to do a short run. So we're going to go from 2,000 to 5,500, 300 a second. -We're starting at relatively safe 12.8 to 1 air/fuel ratio for a target and 26 degrees timing. That's going to be pretty close. We'll tweak on it from there. -Here we go. [ engine revving ] -Loads in nice at 2,000. -Right to 2,000, yep. [ engine revving ]
Fueling was dead on, you see? -Yeah, I was watching both sides. That's like perfect. So we got 445.9 pound feet, 446 basically, and 464.9 for power, shutting it down at 5,500. Because I'm sitting on this side. -What do we have down here at 2,000? -Load in 368 pound feet at 2,000 rpm. -That's a really nice torque curve. That's real flat. -This manifold is a little bit shorter than what you would find on like a stock truck manifold. Plus it just looks way better than a stock manifold. Stock manifolds are very well designed. They don't look very good under the hood. -But I want to say the 2-F was factory rated at like 135 horsepower. So we're above that ever so slightly. -So what I've done now is we're going to bump up the RPM range of what this thing's going to run. So what we're going to do is turn it to 6,800 and we'll go from there. Glassy smooth. [ engine revving ]
-It's like it's made for it. -Absolutely beautiful. -So we got 447 pound feet and 495.8 horsepower. Looks like right at 6,400. That is a really nice curve, looks great. -This is going to be pretty close. We'll just do our normal tuning. Stick a little bit of timing in. -Fuel's not far off. -We're going to leave that alone for right now. We'll jam some timing in it and see if we can make a little more here. -I'm going to go put two in it and I'll be right back. -Hurry up. -Oh man, that sounds even better with the door open. [ Music ]
-We'll see what that does. -Nice, nice. [ engine revving ]
-There we go! -500, look at that. -We're up to 449.7 and 500.1. [Brandon] Just cracked it. -That's pretty solid. -Torque looks really nice. Keep in mind this is at operating temp. This is at 175 degrees. -Honestly I'd like to pull some fuel out of it because looking at the BSFCs I think it's still pretty safe. -Go make, like, a little change on that. [ Music ]
-I much prefer doing my tuning with a screwdriver. -You can probably punch the keypad with a screwdriver if you want to. -We're at 12-8. Nice two-tenth jump to 13.0. -You're Captain Conservative, I like that. -I don't think it's going to take too much but we'll see what it does. We can always go more. -What do you think? -I think it's gonna be good. -A man of few words but we like it. Here we go. [ engine revving ]
-I mean at this temperature. -It didn't really care. 499.2. -It made within six tenths of a horsepower. -And 449.6 for torque. So it's not a bad thing per se. -We can jam timing in it and lean it out all day long but that puts the tune very close to a range where if you get any bad gas in this thing it's a really bad thing. -Yeah that's not what we're trying to do here. This is not a high performance rig. This is something we want someone to be able to hop in to, drive down the highway, and then hit a trail afterwards. This engine looks great. It sounds great. Obviously, the numbers are great. I am super excited to get it off of here. Get it down to our shop. So whatever you guys got to do to get it ready we'll be waiting for you. -We've got a few final checks basically and then we'll get it off and get it down. -We want to see this thing in the vehicle as soon as possible. -Don't worry, so do we. Thanks guys. -Thank you guys. -While you're here I'm just gonna make another run. [ engine revving ]
Engine Power Featured Projects
Engine Power Builds

Want more content like this?
Join the PowerNation Email NewsletterParts Used In This Episode

Mobile Environmental Solutions
Mobile Inflatable Paint Booth
Summit Racing
Summit Racing Chevy LS1, LS2, LS6 Fabricated Cathedral Port 102mm Intake Manifold
ATK Performance Engines
ATK HP109 Chevy LQ4 6.0L Base Engine