Video Transcript
[Frankie] You're watching Powernation.
[Pat} On this episode of Engine Power we'll kick off a fresh season with a 534 cubic inch big block Chevy built from scratch. Yeah! [ Music ]
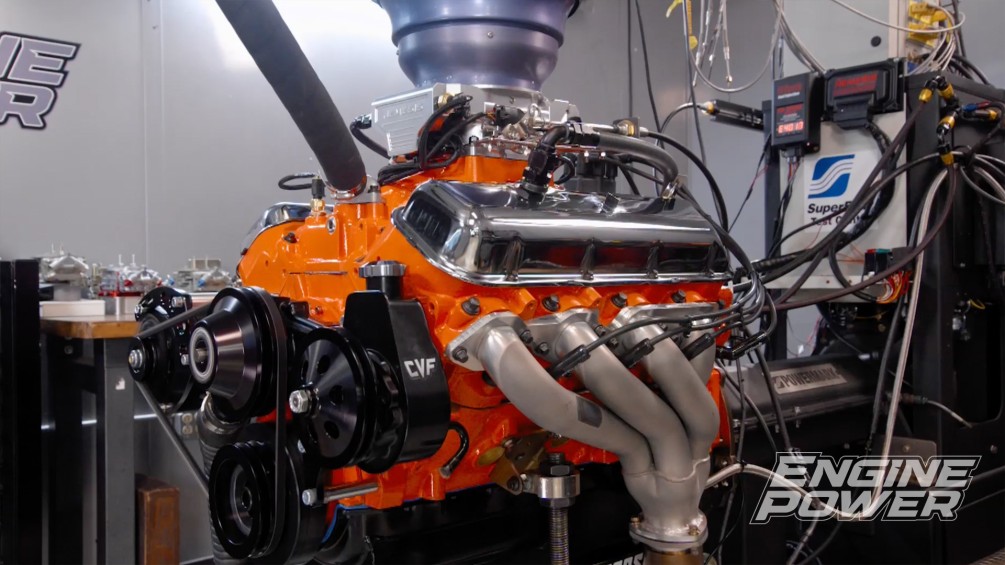
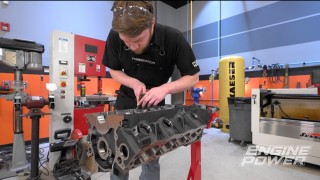
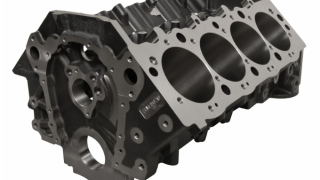
[Frankie] Today we are going to be building a big inch big block Chevy that is set up for the street. This is what all you guys always request. Big torque, big power at low RPM and it starts with this. [Pat] It's going to be on pump gas as well. Now we're going to use some components that we already have plus ones that are new. Newest one being this Summit Racing's SPC block. This is a very trick piece that's part of Summit's SPC line of engine blocks. Big and small block Chevy, LS, small block Ford, and they do a great job. This is a new casting that was made over in Germany and finished machined here in the U.S. This particular one starts out as a 4-600 bore. This has already been honed. We went ahead and honed it to four, six, ten for our piston. We'll get into that later. This has nodular iron caps. It is set up to run all the Mark Four accessories as concerned with oil pan, front timing cover, and the lot. It can take various types of cam, whether it be a stock cam or a hydraulic roller from a factory setup, or conventional hydraulic roller, or solid roller with tie bars. So another great feature of this block. It has provisions for the extra bolt holes in the bottom of the cylinder head for big horsepower applications. It is also set up for priority main oiling, and it has provisions for a Gen-6 style oil cooler setup. This block is all finished machined, but that doesn't mean it is ready to assemble. We still have a lot of deburring and some oil port tuning to do. I say we meaning Frankie. [Frankie] I like doing it. So we're going to get started. We use a variety of air powered carbide burrs to knock off any sharp edges on the block. This is a relatively easy process but can take a little bit of time and attention to detail. Not only does it make the block nicer to work with but also reduces the chance of stress risers forming in the cracks. [Pat] We'll also use a chamfer bit to chamfer the tops of any bolt holes or drilled passageways. Finally, we'll spend some time rounding off any sharp edges in the oiling system before throwing the block in our jet washer for a final cleaning. The idea of this project is to have a vintage sleeper look while still making big power. We'll give them a solid protective base coat with some POR-15 rust preventive coating. That's followed by a glossy coverage of their Chevy Orange engine enamel out of an HVLP spray gun. The object is to disguise this 534 to make it look like an old school L-78 396. [ Music ]
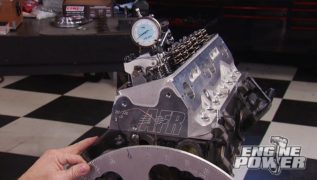
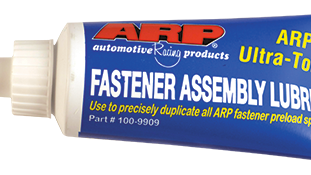
[Frankie] Okay, all the parts for our 534 are fully cured. So what we're going to do next is start measuring our oil clearances before we get into assembly. We'll start by installing the upper bearing half for the rear two mains to fit our dial bore gauge into the block. They're followed by the main caps, which can be gently tapped into the registers before the bolts are installed with light engine oil. [ Music ] Just like during final assembly, they are torqued to 110 pound feet. Our SPI 2 to 3 inch micrometer is set to the main journal size and then is used to zero out our dial bore gauge. We can then use that to take a direct oil clearance measurement inside the bearings. [ Music ] This process is repeated for all five mains and they all fall between 28 and 31 ten thousandths of an inch. [Pat] Just like the mains, the connecting rods and bearings are wiped with solvent on a towel and then prepped to check their vertical oil clearance. After the bearings are installed the ARP 2,000 rod bolts are threaded in with some Ultra Torque Lube, and then the digital bolt stretch gauge can be zeroed out. Each bolt is then torqued to 86 pound feet and then rechecked for length to make sure they achieve the proper stretch, which is between 55 and 62 ten thousandths. [Frankie] And now we can measure our oil clearance by setting our micrometer to each rod journal size, using that to zero out our dial bore gauge, and then taking a direct clearance measurement on the corresponding rod. They are all set between 24 and 27 ten thousandths of an inch. With everything looking good we're ready to move on to the assembly. Coming after this, now that we have our bearings on this project we can kick off the assembly process on our brand new big block.
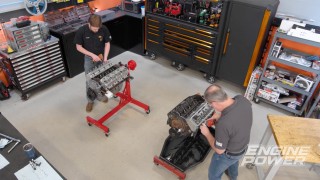
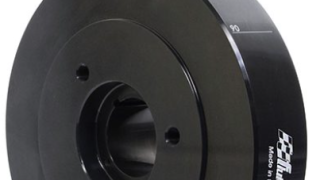
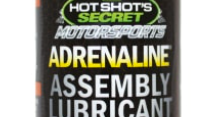
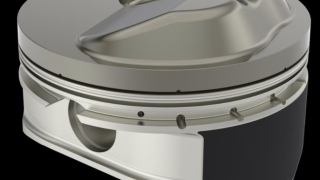
[Pat] We are kicking off the assembly of our 534 cubic inch big block with a new set of King main bearings coated in Hot Shot's Secret assembly lube. That makes way for our fully balanced four inch stroked forged crankshaft from Summit Racing Equipment. More lube goes on the lower bearings and the four bolt main caps are gently installed, including the other half of our two piece rear main seal. All of the half inch main bolts are then torqued to 110 pound feet with oil from the inside out. [Frankie] The camshaft is an off the shelf piece from the Summit Racing Catalog as part of their Pro Big Block Chevy hydraulic roller line. It has durations of 50 thousandths lift, of 236 on the intake and 248 on the exhaust. The lobe separation angle is 111 degrees, and the valve lift with our rocker ratio is 660 thousandths on both. [Pat] Next we're going to go to our billet timing set and it is a nine position adjustable on the crank gear. So we can put this cam pretty much wherever we want forward or backward. [ Music ] [Frankie] To degree the cam will install a fully assembled rod and piston in the number one cylinder. [ Music ] And then once our degree wheel is all set up we'll end up using the two degree retarded position to get the cam's intake centerline to 107.25 degrees. With our cam set basically right where we want it. Now we can put the other seven piston rod assemblies but we are going to put them together first. So what we're using, our Summit 6-535 long forged H-beam rods and these are pairing with a set of Icon Elite Series pistons. So these are one of their more racier options. They are made from a 26-18 alloy. These are really trick. They have a line to line abradable skirt coating on the skirt. It has a hard anodizing on the top of the piston, and that carries through the first ring groove as well. The top ring groove is laterally gas ported. We're going to put some Hot Shot's Secret assembly lube on everything, and then we'll slip it together. [Pat] The single spiral locks that retain the wrist pin can be easily worked in by hand with a little patience. The oil control ring uses a support rail and has a 3/16ths thickness with standard tension. The second ring is 1/16th of an inch thick and has a Napier design and a gap that is set to 28 thousandths. The top ring is 0-43 thick and has a slightly tighter gap at 25 thousandths. We use Total Seal ring assembly lube to make sure they are properly protected. With every assembly prepped and lubed we can start punching them into the block with our biggest adjustable ring compressor and a piston installation dead blow. You can snug down the rod caps during this process and then go back once they are all installed and final port them. We measure every rod bolt for stretch. So we loosen each bolt, zero out our stretch gauge, and then torque it to 86 pound feet before rechecking the stretch making sure they fall between 55 and 62 ten thousandths of an inch. [Frankie] A new timing cover gasket and this color matched aluminum cover seal up the front end, while also bolts on our Moroso seven and a quarter inch timing pointer, which we will set later. For oiling we have an M-77 high volume oil pump. We did actually go through this and basically blueprint the pump. We checked our gear to housing clearance. We checked our gear to cover clearance. Put about 80 thousandths worth of shim underneath the relief spring. So we're going to increase our relief pressure. We have a pickup that matches our pan which is a bolt on one. We got that in and we also went ahead and put a little stitch weld on both sides just for added insurance. That way there's no way this thing's coming out. The ARP stud that holds it is torqued to 65 pound feet. We like to put small beads of RTV underneath the corners of our one piece oil pan gaskets to prevent leaks, and that is followed by a Moroso six quart steel oil pan. It features a nice windage tray and full length kick-out. For good oil control it's held down with an ARP bolt kit. [Pat] Our harmonic damper is from Fluidampr and it is pressed on with an installation tool. Then we can set up our degree wheel and use it to indicate and verify true TDC. We are using a set of Summit Racing link bar hydraulic roller lifters, and they can be slipped into the lifter board. [Frankie] So for this engine we're going to be using a set of Trick Flow Powerport 365 cylinder heads. This is basically the top of Trick Flow's big block catalog. And these heads are slightly used, and that's because we've actually dyno tested these on another combination. A few specs on them. They have a 365cc intake runner. They have a 2-350 intake valve. They have a 1-880 exhaust valve, and those are housed in a fully CNC 119cc combustion chamber. Because we're running a hydraulic roller, we actually converted them over. So this is set up for our application at 155 pounds of seat pressure, 440 pounds of open pressure. For flow numbers, they flow for 411 CFM at 700 thousandths inch lift. We have our head gaskets on. We'll get these on and start cinching them down. These heads feature 300 thousandths inch raised exhaust ports and require a special head bolt kit from ARP. This block has blind head bolt holes. SO only Ultra Torque lubricant is used and the bolts are torque in three stages to 70 pound feet. [Pat] Up next, we button up our valve train, induction, and front drive to get ready for some power on the dyno.
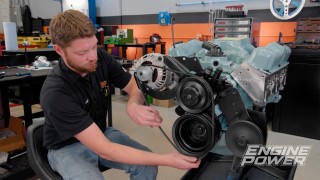
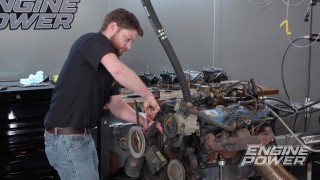
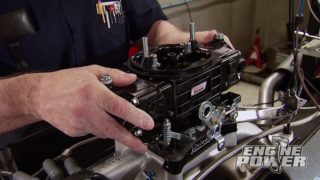
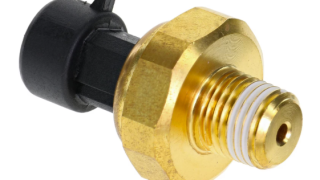
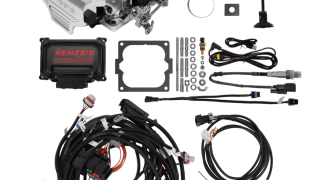
[Pat] To seal our intake manifold we're using a set of Mr. Gasket intake gaskets and a neat bead of silicone on the China walls of our block. This color matched beauty is an Edelbrock Super Victor with a 4,500 flange and a short 6.2 inch height. After lining up the intake ports, it is tightened down with a set of ARP bolts. [Frankie] We wanted a relatively simple front drive. So what we have is a CVF V-belt drive, and this is actually way better than stock. Not only does it look way nicer, but it also comes like a modern one wire alternator. Then we also have a GM style power steering pump. So this is going to have all the right alignment and everything like that. The idea is that this is going to be able to be swapped into basically almost any vehicle. We have it set up where it can run a mechanical fan if you want it to. Cars, trucks, buses, RV, whatever. This thing will be perfect for going between the frame rails and burning tires. Our Trick Flow cylinder head uses an adjustable guide plate to control the rocker arm alignment. So it can be installed next with our 7/16ths inch rocker studs. Some of the studs intrude into the intake ports. So they all receive thread sealer for a consistent clamp load when they are torqued to 55 pound feet. Our push rods were chosen for proper valvetrain geometry and are a 3/8ths designed with the intakes being 8-150 long and the exhaust being 8-950 long. -These steel roller rockers are set off Comp Pro Magnums with a 1.8 ratio. On a hydraulic roller you want to install them in pairs on each cylinder at TDC compression stroke and set the lifter preload at one half turn past zero lash. Pre-lubing the top end with some valve train assembly spray is critical to protect the components on first start up, and then you can cover them up for good. Now the question is is that cut out for the power brake booster gonna clear that back set of rockers. -This is kind of the moment of truth. I'm just going to turn it over and see if it hits it. -No clicking! -That's pretty cool. A set of stock replacement stamped steel valve covers that fit over steel rocker arms. That's cool. [ Music ] -I like it. This is very sleeper-ish. -I know, I'm really excited about that. I mean it's not like full on, like original resto. -No, it has a big giant single plane. -It very much fits the vibe, you know, which is gonna be cool. It's going to have good induction, everything, but it's going to run great, have modern performance and all that kind of good stuff but still has that old school look. I like that. -Me too. After putting the 534 on a dyno cart, we can roll it into the test cell for a few final touches. -Because this is basically a perfect swap engine and it's going to be a street engine we know we want EFI, but a 41-50 system is going to be a little bit too small. So we're going to step up to something much bigger and I mean really big. So this is Fi-Tech's brand new 4500 flange EFI system. They call it the Nemesis because this thing is big and bad. It has four, two inch 300 thousandths throttle blades. It has eight injectors with enough fuel for up to 1,600 horsepower. It has a 1 to 1 throttle linkage. It has a 4500 flange with dual i-acs. That way if you have like a big engine, like a 632 or even bigger, it's going to be able to control the idle really well on the street. It's going to have that drivability that we're looking for. So this is going to go right on top of our 4,500 intake, and then we can get closer to running. This unit also has a single three bar map on the side. If you wanted to do like a blow through application. And the fuel inlets are switchable from side to side. So there's a little fuel rail in there depending on your configuration. So the Nemesis ECU is actually separate. So it has its own harness and everything. So you can mount it outside your engine bay or away from the engine itself. Keep it away from heat and vibration and stuff like that. We are pairing the Nemesis with one of their dual sync distributors for complete timing control. All the connections on the FiTech harness are clearly labeled. So the install goes relatively quickly. -With our injection unit all bolted down and looking good it's time to get it running. But like we've said before and you'll probably hear us say it again, sensors are the most important thing for an EFI to make sure it runs right so it gets the right information. So we need some sensors for this. So we went down to our local AutoZone and picked up some Duralast stuff. This particular one we are going to be using to check some pressure. It has the right connection for what we're using and it has a quarter inch NPT. The most important part this has the right reference voltage, 0 to 5. So our Fitech we can program in a channel and we can read it on our ECU. Duralast does a great job at re-engineering sensors for fit, form and function. And this will give us another great data point for our records. -Still to come, the culmination of great parts and strong attention to detail result in excellent power on the down.
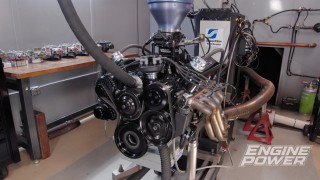
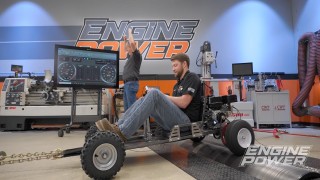
-Our favorite time of the build is the dyno, right? 534 cubic inches of pump gas Big block Chevy. This is pretty interesting because, you know, we have a very, very sophisticated, Nemesis on there. Runs really well. Started up nice, learn very well. Everything is broke-in. Nothing leaks. We have no runs, drips or errors. So now we're just going to start doing power pulls. -So we've basically been let this thing learn for a little bit. You get them up the temp. You run it for a while. Got it set at a target wide open air fuel of 12.9 to 1. And our timing is set relatively conservatively at 34 degrees. Because remember this is on 93 octane pump gas literally from our local gas station. And this is set up to be a street swap engines. These headers are set up for a second gen F-body. But there are big primary. There are two inch primary three inch collector. We have a short manifold for hood clearance. So we've tried to make this thing as easily packaged as possible. Could we make more if you put a taller manifold on it. Yes. Could it make more if you put a big set of headers? Yes. This is basically what we think is going to be comparable for most people putting this in a car or truck. -What the deal is, is, you know, we're not going to build a comp eliminator engine to run the street. Yeah, we're going to build a regular engine for normal operating range. We're going to make it so it is friendly. This thing with the injection unit on it and this hydraulic roller, this is very low maintenance, street friendly street pump gas, stuff. And we think it's going to be really cool. -We get requests. Like we said at the beginning, we get requests a lot for low RPM, relatively higher torque engines. So that's what this is going to be. It could go in a car, could go in a truck, could go on a bus. It's going to burn tires, haul trailers, whatever you need to do. So what we're going to do is we're going to turn it from 2,500 to 6,200, wide rpm range. We're going to take a big sample of data, and look at it, and then go from there. [ engine revving ] Well, that's pretty good. -625 for torque and it made 654.9 for powers. -Okay, that's pretty good honestly. I mean right off the hit, relatively safe tune up on 93 octane pump gas. -The tune up is very safe. And first thing people say is, why isn't the tune up in the 13s? Well, we don't want it in the 13's, right? - We want it safe. -This thing, because it has a decent amount of compression and a short cam in it. We don't want to turn this thing into a detonation machine. -Let's put two in it and see what it picks up. -We're not getting it very close to destruction. We can quickly make the timing adjustments using FiTech handheld, bumping up the total timing from 34 to 36. You see me crank on the distributor? -Hopefully not. -I did it on my keypad. I'm all embracing the technology. -Let's see what it does.
[ engine revving ]
Definitely picked up. -I think the torqueywent up. -We got 625.4. And then I'm gonna switch to the other view to actually see, 659.8. That's pretty good. -That's almost 660. Everything that we do is a compromise. A lot of times on packaging we don't have a space or underneath it because of packaging, right? -I mean hood clearances. We're trying to keep it so that this still has good hood clearance. If not just a cowl hood, you know. -But what would be the case if maybe you put this in like a Vette with side pipes, right? -That'd be something cool to try actually. We have a set of big pipe headers that are for a Corvette that we could put on there and just see. This works great. These are for F-bodies. What if you had a truck or a Corvette where you could get a big header for it? We could try that. -If you have the opportunity to put a better header on it, we'll see what it does. Shut it down. Let it cool off, and I'll go grab the headers. [ Music ]
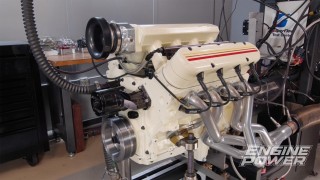
-Switch to two and an eighth inch primaries and four inch collectors. -Now this is one extreme to the other right. We went from a little short, baby header to a header that's exceedingly long because it's a side pipe header. -We're going to see what it does. It should pick up. -Typically it should but you don't know how much. This is why we have a dyno. This is like the lie detector. The header makes it sound like a real engine. -Sounds way better, I will say that. [ engine revving ]
-I don't even have to look at that. -Did you notice how it was a little happier up top too? -638 pound feet of torque. And oh, look at that power number. 72. -672 and it is just starting to crest over there at 6,200. I mean on that pull 550 pound feet at 2,500. That's what everybody wants right? They want big torque, low rpm, stab the gas on this thing in any gear. It's going to burn the tires off. -If anybody thinks that 550 pound feet at 2,500 is low or mid they need to get off the internet. -Running the accessory drive and everything we're dynoing it at temp. I'm actually super pleased with that Nemesis. We've been wanting to run one for a year or two. That thing runs awesome. So I count this a total success. -Looks good, runs good. Great success.
Show Full Transcript
[Pat} On this episode of Engine Power we'll kick off a fresh season with a 534 cubic inch big block Chevy built from scratch. Yeah! [ Music ]
[Frankie] Today we are going to be building a big inch big block Chevy that is set up for the street. This is what all you guys always request. Big torque, big power at low RPM and it starts with this. [Pat] It's going to be on pump gas as well. Now we're going to use some components that we already have plus ones that are new. Newest one being this Summit Racing's SPC block. This is a very trick piece that's part of Summit's SPC line of engine blocks. Big and small block Chevy, LS, small block Ford, and they do a great job. This is a new casting that was made over in Germany and finished machined here in the U.S. This particular one starts out as a 4-600 bore. This has already been honed. We went ahead and honed it to four, six, ten for our piston. We'll get into that later. This has nodular iron caps. It is set up to run all the Mark Four accessories as concerned with oil pan, front timing cover, and the lot. It can take various types of cam, whether it be a stock cam or a hydraulic roller from a factory setup, or conventional hydraulic roller, or solid roller with tie bars. So another great feature of this block. It has provisions for the extra bolt holes in the bottom of the cylinder head for big horsepower applications. It is also set up for priority main oiling, and it has provisions for a Gen-6 style oil cooler setup. This block is all finished machined, but that doesn't mean it is ready to assemble. We still have a lot of deburring and some oil port tuning to do. I say we meaning Frankie. [Frankie] I like doing it. So we're going to get started. We use a variety of air powered carbide burrs to knock off any sharp edges on the block. This is a relatively easy process but can take a little bit of time and attention to detail. Not only does it make the block nicer to work with but also reduces the chance of stress risers forming in the cracks. [Pat] We'll also use a chamfer bit to chamfer the tops of any bolt holes or drilled passageways. Finally, we'll spend some time rounding off any sharp edges in the oiling system before throwing the block in our jet washer for a final cleaning. The idea of this project is to have a vintage sleeper look while still making big power. We'll give them a solid protective base coat with some POR-15 rust preventive coating. That's followed by a glossy coverage of their Chevy Orange engine enamel out of an HVLP spray gun. The object is to disguise this 534 to make it look like an old school L-78 396. [ Music ]
[Frankie] Okay, all the parts for our 534 are fully cured. So what we're going to do next is start measuring our oil clearances before we get into assembly. We'll start by installing the upper bearing half for the rear two mains to fit our dial bore gauge into the block. They're followed by the main caps, which can be gently tapped into the registers before the bolts are installed with light engine oil. [ Music ] Just like during final assembly, they are torqued to 110 pound feet. Our SPI 2 to 3 inch micrometer is set to the main journal size and then is used to zero out our dial bore gauge. We can then use that to take a direct oil clearance measurement inside the bearings. [ Music ] This process is repeated for all five mains and they all fall between 28 and 31 ten thousandths of an inch. [Pat] Just like the mains, the connecting rods and bearings are wiped with solvent on a towel and then prepped to check their vertical oil clearance. After the bearings are installed the ARP 2,000 rod bolts are threaded in with some Ultra Torque Lube, and then the digital bolt stretch gauge can be zeroed out. Each bolt is then torqued to 86 pound feet and then rechecked for length to make sure they achieve the proper stretch, which is between 55 and 62 ten thousandths. [Frankie] And now we can measure our oil clearance by setting our micrometer to each rod journal size, using that to zero out our dial bore gauge, and then taking a direct clearance measurement on the corresponding rod. They are all set between 24 and 27 ten thousandths of an inch. With everything looking good we're ready to move on to the assembly. Coming after this, now that we have our bearings on this project we can kick off the assembly process on our brand new big block.
[Pat] We are kicking off the assembly of our 534 cubic inch big block with a new set of King main bearings coated in Hot Shot's Secret assembly lube. That makes way for our fully balanced four inch stroked forged crankshaft from Summit Racing Equipment. More lube goes on the lower bearings and the four bolt main caps are gently installed, including the other half of our two piece rear main seal. All of the half inch main bolts are then torqued to 110 pound feet with oil from the inside out. [Frankie] The camshaft is an off the shelf piece from the Summit Racing Catalog as part of their Pro Big Block Chevy hydraulic roller line. It has durations of 50 thousandths lift, of 236 on the intake and 248 on the exhaust. The lobe separation angle is 111 degrees, and the valve lift with our rocker ratio is 660 thousandths on both. [Pat] Next we're going to go to our billet timing set and it is a nine position adjustable on the crank gear. So we can put this cam pretty much wherever we want forward or backward. [ Music ] [Frankie] To degree the cam will install a fully assembled rod and piston in the number one cylinder. [ Music ] And then once our degree wheel is all set up we'll end up using the two degree retarded position to get the cam's intake centerline to 107.25 degrees. With our cam set basically right where we want it. Now we can put the other seven piston rod assemblies but we are going to put them together first. So what we're using, our Summit 6-535 long forged H-beam rods and these are pairing with a set of Icon Elite Series pistons. So these are one of their more racier options. They are made from a 26-18 alloy. These are really trick. They have a line to line abradable skirt coating on the skirt. It has a hard anodizing on the top of the piston, and that carries through the first ring groove as well. The top ring groove is laterally gas ported. We're going to put some Hot Shot's Secret assembly lube on everything, and then we'll slip it together. [Pat] The single spiral locks that retain the wrist pin can be easily worked in by hand with a little patience. The oil control ring uses a support rail and has a 3/16ths thickness with standard tension. The second ring is 1/16th of an inch thick and has a Napier design and a gap that is set to 28 thousandths. The top ring is 0-43 thick and has a slightly tighter gap at 25 thousandths. We use Total Seal ring assembly lube to make sure they are properly protected. With every assembly prepped and lubed we can start punching them into the block with our biggest adjustable ring compressor and a piston installation dead blow. You can snug down the rod caps during this process and then go back once they are all installed and final port them. We measure every rod bolt for stretch. So we loosen each bolt, zero out our stretch gauge, and then torque it to 86 pound feet before rechecking the stretch making sure they fall between 55 and 62 ten thousandths of an inch. [Frankie] A new timing cover gasket and this color matched aluminum cover seal up the front end, while also bolts on our Moroso seven and a quarter inch timing pointer, which we will set later. For oiling we have an M-77 high volume oil pump. We did actually go through this and basically blueprint the pump. We checked our gear to housing clearance. We checked our gear to cover clearance. Put about 80 thousandths worth of shim underneath the relief spring. So we're going to increase our relief pressure. We have a pickup that matches our pan which is a bolt on one. We got that in and we also went ahead and put a little stitch weld on both sides just for added insurance. That way there's no way this thing's coming out. The ARP stud that holds it is torqued to 65 pound feet. We like to put small beads of RTV underneath the corners of our one piece oil pan gaskets to prevent leaks, and that is followed by a Moroso six quart steel oil pan. It features a nice windage tray and full length kick-out. For good oil control it's held down with an ARP bolt kit. [Pat] Our harmonic damper is from Fluidampr and it is pressed on with an installation tool. Then we can set up our degree wheel and use it to indicate and verify true TDC. We are using a set of Summit Racing link bar hydraulic roller lifters, and they can be slipped into the lifter board. [Frankie] So for this engine we're going to be using a set of Trick Flow Powerport 365 cylinder heads. This is basically the top of Trick Flow's big block catalog. And these heads are slightly used, and that's because we've actually dyno tested these on another combination. A few specs on them. They have a 365cc intake runner. They have a 2-350 intake valve. They have a 1-880 exhaust valve, and those are housed in a fully CNC 119cc combustion chamber. Because we're running a hydraulic roller, we actually converted them over. So this is set up for our application at 155 pounds of seat pressure, 440 pounds of open pressure. For flow numbers, they flow for 411 CFM at 700 thousandths inch lift. We have our head gaskets on. We'll get these on and start cinching them down. These heads feature 300 thousandths inch raised exhaust ports and require a special head bolt kit from ARP. This block has blind head bolt holes. SO only Ultra Torque lubricant is used and the bolts are torque in three stages to 70 pound feet. [Pat] Up next, we button up our valve train, induction, and front drive to get ready for some power on the dyno.
[Pat] To seal our intake manifold we're using a set of Mr. Gasket intake gaskets and a neat bead of silicone on the China walls of our block. This color matched beauty is an Edelbrock Super Victor with a 4,500 flange and a short 6.2 inch height. After lining up the intake ports, it is tightened down with a set of ARP bolts. [Frankie] We wanted a relatively simple front drive. So what we have is a CVF V-belt drive, and this is actually way better than stock. Not only does it look way nicer, but it also comes like a modern one wire alternator. Then we also have a GM style power steering pump. So this is going to have all the right alignment and everything like that. The idea is that this is going to be able to be swapped into basically almost any vehicle. We have it set up where it can run a mechanical fan if you want it to. Cars, trucks, buses, RV, whatever. This thing will be perfect for going between the frame rails and burning tires. Our Trick Flow cylinder head uses an adjustable guide plate to control the rocker arm alignment. So it can be installed next with our 7/16ths inch rocker studs. Some of the studs intrude into the intake ports. So they all receive thread sealer for a consistent clamp load when they are torqued to 55 pound feet. Our push rods were chosen for proper valvetrain geometry and are a 3/8ths designed with the intakes being 8-150 long and the exhaust being 8-950 long. -These steel roller rockers are set off Comp Pro Magnums with a 1.8 ratio. On a hydraulic roller you want to install them in pairs on each cylinder at TDC compression stroke and set the lifter preload at one half turn past zero lash. Pre-lubing the top end with some valve train assembly spray is critical to protect the components on first start up, and then you can cover them up for good. Now the question is is that cut out for the power brake booster gonna clear that back set of rockers. -This is kind of the moment of truth. I'm just going to turn it over and see if it hits it. -No clicking! -That's pretty cool. A set of stock replacement stamped steel valve covers that fit over steel rocker arms. That's cool. [ Music ] -I like it. This is very sleeper-ish. -I know, I'm really excited about that. I mean it's not like full on, like original resto. -No, it has a big giant single plane. -It very much fits the vibe, you know, which is gonna be cool. It's going to have good induction, everything, but it's going to run great, have modern performance and all that kind of good stuff but still has that old school look. I like that. -Me too. After putting the 534 on a dyno cart, we can roll it into the test cell for a few final touches. -Because this is basically a perfect swap engine and it's going to be a street engine we know we want EFI, but a 41-50 system is going to be a little bit too small. So we're going to step up to something much bigger and I mean really big. So this is Fi-Tech's brand new 4500 flange EFI system. They call it the Nemesis because this thing is big and bad. It has four, two inch 300 thousandths throttle blades. It has eight injectors with enough fuel for up to 1,600 horsepower. It has a 1 to 1 throttle linkage. It has a 4500 flange with dual i-acs. That way if you have like a big engine, like a 632 or even bigger, it's going to be able to control the idle really well on the street. It's going to have that drivability that we're looking for. So this is going to go right on top of our 4,500 intake, and then we can get closer to running. This unit also has a single three bar map on the side. If you wanted to do like a blow through application. And the fuel inlets are switchable from side to side. So there's a little fuel rail in there depending on your configuration. So the Nemesis ECU is actually separate. So it has its own harness and everything. So you can mount it outside your engine bay or away from the engine itself. Keep it away from heat and vibration and stuff like that. We are pairing the Nemesis with one of their dual sync distributors for complete timing control. All the connections on the FiTech harness are clearly labeled. So the install goes relatively quickly. -With our injection unit all bolted down and looking good it's time to get it running. But like we've said before and you'll probably hear us say it again, sensors are the most important thing for an EFI to make sure it runs right so it gets the right information. So we need some sensors for this. So we went down to our local AutoZone and picked up some Duralast stuff. This particular one we are going to be using to check some pressure. It has the right connection for what we're using and it has a quarter inch NPT. The most important part this has the right reference voltage, 0 to 5. So our Fitech we can program in a channel and we can read it on our ECU. Duralast does a great job at re-engineering sensors for fit, form and function. And this will give us another great data point for our records. -Still to come, the culmination of great parts and strong attention to detail result in excellent power on the down.
-Our favorite time of the build is the dyno, right? 534 cubic inches of pump gas Big block Chevy. This is pretty interesting because, you know, we have a very, very sophisticated, Nemesis on there. Runs really well. Started up nice, learn very well. Everything is broke-in. Nothing leaks. We have no runs, drips or errors. So now we're just going to start doing power pulls. -So we've basically been let this thing learn for a little bit. You get them up the temp. You run it for a while. Got it set at a target wide open air fuel of 12.9 to 1. And our timing is set relatively conservatively at 34 degrees. Because remember this is on 93 octane pump gas literally from our local gas station. And this is set up to be a street swap engines. These headers are set up for a second gen F-body. But there are big primary. There are two inch primary three inch collector. We have a short manifold for hood clearance. So we've tried to make this thing as easily packaged as possible. Could we make more if you put a taller manifold on it. Yes. Could it make more if you put a big set of headers? Yes. This is basically what we think is going to be comparable for most people putting this in a car or truck. -What the deal is, is, you know, we're not going to build a comp eliminator engine to run the street. Yeah, we're going to build a regular engine for normal operating range. We're going to make it so it is friendly. This thing with the injection unit on it and this hydraulic roller, this is very low maintenance, street friendly street pump gas, stuff. And we think it's going to be really cool. -We get requests. Like we said at the beginning, we get requests a lot for low RPM, relatively higher torque engines. So that's what this is going to be. It could go in a car, could go in a truck, could go on a bus. It's going to burn tires, haul trailers, whatever you need to do. So what we're going to do is we're going to turn it from 2,500 to 6,200, wide rpm range. We're going to take a big sample of data, and look at it, and then go from there. [ engine revving ] Well, that's pretty good. -625 for torque and it made 654.9 for powers. -Okay, that's pretty good honestly. I mean right off the hit, relatively safe tune up on 93 octane pump gas. -The tune up is very safe. And first thing people say is, why isn't the tune up in the 13s? Well, we don't want it in the 13's, right? - We want it safe. -This thing, because it has a decent amount of compression and a short cam in it. We don't want to turn this thing into a detonation machine. -Let's put two in it and see what it picks up. -We're not getting it very close to destruction. We can quickly make the timing adjustments using FiTech handheld, bumping up the total timing from 34 to 36. You see me crank on the distributor? -Hopefully not. -I did it on my keypad. I'm all embracing the technology. -Let's see what it does.
[ engine revving ]
Definitely picked up. -I think the torqueywent up. -We got 625.4. And then I'm gonna switch to the other view to actually see, 659.8. That's pretty good. -That's almost 660. Everything that we do is a compromise. A lot of times on packaging we don't have a space or underneath it because of packaging, right? -I mean hood clearances. We're trying to keep it so that this still has good hood clearance. If not just a cowl hood, you know. -But what would be the case if maybe you put this in like a Vette with side pipes, right? -That'd be something cool to try actually. We have a set of big pipe headers that are for a Corvette that we could put on there and just see. This works great. These are for F-bodies. What if you had a truck or a Corvette where you could get a big header for it? We could try that. -If you have the opportunity to put a better header on it, we'll see what it does. Shut it down. Let it cool off, and I'll go grab the headers. [ Music ]
-Switch to two and an eighth inch primaries and four inch collectors. -Now this is one extreme to the other right. We went from a little short, baby header to a header that's exceedingly long because it's a side pipe header. -We're going to see what it does. It should pick up. -Typically it should but you don't know how much. This is why we have a dyno. This is like the lie detector. The header makes it sound like a real engine. -Sounds way better, I will say that. [ engine revving ]
-I don't even have to look at that. -Did you notice how it was a little happier up top too? -638 pound feet of torque. And oh, look at that power number. 72. -672 and it is just starting to crest over there at 6,200. I mean on that pull 550 pound feet at 2,500. That's what everybody wants right? They want big torque, low rpm, stab the gas on this thing in any gear. It's going to burn the tires off. -If anybody thinks that 550 pound feet at 2,500 is low or mid they need to get off the internet. -Running the accessory drive and everything we're dynoing it at temp. I'm actually super pleased with that Nemesis. We've been wanting to run one for a year or two. That thing runs awesome. So I count this a total success. -Looks good, runs good. Great success.
Engine Power Featured Projects
Engine Power Builds



Want more content like this?
Join the PowerNation Email NewsletterParts Used In This Episode
Summit Racing
Summit Racing Billet Steel TIming Chain & Gear Set for 7.4L BBC
Summit Racing
Summit Racing Pro BBC 4-7 Swap Hydraulic Roller Camshaft
Summit Racing
Trick Flow PowerPort 365 Cylinder Heads for Big Block Chevrolet
ARP
Head Bolt Kit Chevrolet Big Block
ARP
Intake Manifold Bolt Kit Chevrolet Big Block
ARP
Oil Pan Bolt Kit Chevrolet Big Block
ARP
Oil Pump Stud Kit Chevy
Brothers Truck Parts
Brothers Trucks Cab Floor - High Hump
CVF Racing
Stealth Black Big Block Chevy V-Belt System
Duralast
Melling Oil Pump M-77HV
P.O.R. Products
POR15 Engine Enamel
P.O.R. Products
POR15 Rust Preventive Permanent Coating
PB FAB
Drop Members: Front & Back
Total Seal
Total Seal Assembly Lube