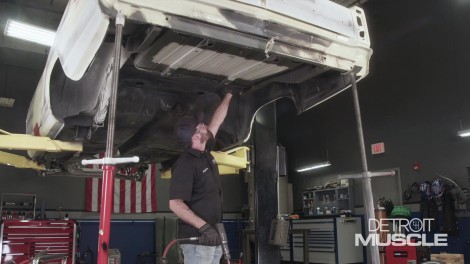
Detroit Muscle Featured Projects

Detroit Muscle Builds

Episode Transcript

(Tommy)>> You're watching Powernation!

(Tommy)>> Today's one of those kinda days. Our Chevy Nova's frame rails keep sending us a world of surprises, but we have the fix today on Detroit Muscle. [ Music ] [ engines revving ] [ Music ]

(Tommy)>> Hey guys, welcome to Detroit Muscle. We have our piece of Americana up on the lift for some reconstructive surgery. Now from where you're sitting you're probably thinking that it looks pretty good, but believe me, some serious sparks are gonna fly to fix this thing.

(Peyton)>> This repair is not for the faint of heart. We're basically cutting the entire foundation out of this hot rod in efforts to save her. We're really hoping that the scrap bin isn't overflowing by the end of this cut and stitch operation. These floor pans, they won't be getting the boot but they are an eyesore from underneath. People weld them from the top side and then forget about them. Overhead welding sucks, I get it, but a little time spent with a hammer, dolly, and a mig we can make this something we're proud of. Now to our transmission tunnel. It's been hacked up several times with a variety of cuts and patches, but we're gonna fix all that when we install our new five speed from American Powertrain.

(Tommy)>> To have an old car with some sheet metal that's been replaced, that's pretty much what you're gonna have. You have to think about it. These things are 50, 60, 70 years old. What alarmed us is our frame rails are scary. With some closer inspection we realized that these frame rails have been patched up. Now a little small patch wouldn't be that big of a deal. These have been patched from one end to the other, and the work that has been done is relatively poor. We also noticed that it's got body filler that's been spread on here. That's usually a no-no because what oftentimes happens is people try to bury those bad decision, or there's rust holes in here and they pack them full. We grabbed a magnet, started sticking it to the rails, and it stays in some places and others it falls right off. That usually tells you that it's relatively thick. I want to grind this stuff off just to see how bad it is, but regardless we're cutting that whole rail out and it's gonna be replaced. [ grinder buzzing ] [ Music ]

(Tommy)>> I don't know if it's really worth grinding much more. This is so bad. With our optical illusion swept up into a pile we're gonna move over here to the passenger's side frame rail. Now it too has some issues but someone didn't put in that extra effort to cover it all up. We've got some rust over here, and even a stress crack. With frame rails what can happen is they will rust from the inside out, and that's where you'll run into issues with the frame itself being relatively thin. My curiosity is a bit peaked. So I'm gonna take a hammer, peck around on here, and see if we find anything. Ah yeah, she's a peach. This is dumb. Luckily for us you can buy replacement frame rails. Otherwise you'd have only a few other options. One of them is you're gonna have to find a pair of these that are n-o-s. That's probably not gonna happen. Two, it's labor intensive. Buy another car and cut an old set out from under it and hope that they're good. Or three, scrap or sell the project and let somebody else fool with it. Now if you'll notice with a frame rail the material that they're made out of is considerably thicker than what you would think of as a quarter panel or door. That's because these are the structural component of the car. To install these is no easy task and isn't for the faint of heart. A lot of folks would walk away from a vehicle or project like this, but actually it's pretty common. Novas aren't the only car out there with this uni-body construction. You've got Mustangs, Camaros, and all of your Mopar muscle. You've got to think of this as a house. You need to remove the foundation, or replace it, but you can't disturb the house. See, make you nervous. The piece of metal that we're about to remove from under this Nova is nearly seven feet long. It's got two flaps on each side of it where it's spot welded to the floor pan. Now if you do the math with those spot welds being about an inch apart that's 150 plus of them. Sounds like a lot of fun to get this thing out. My suggestion to you if you're gonna be doing this type of task is to cut this thing out in sections. This will allow you to strategically remove it, and helps prevent from doing more damage than good. Before you go to slicing and dicing on your project remember that this thing is structural and it's holding things in place. If you made an incision the next thing you'll notice is the gaps are gonna change or your trunk lid may not open and close. Now if this is something that you have done only thing it's really cost you is some more labor and you can fix it. You're gonna have to now pull and push on those panels to get everything dialed in, and then build some kind of structure to hold everything in place. For us and what we're gonna do we'll run a brace from the bottom of the trunk to the floor, and then we can move on. There's a pretty good chance that when you get started on your project you'll end up finding a couple more things that you'll want to make some improvements on. For us it's this monstrosity right here. We're gonna cut that out and make that a whole lot better than it is. A few words of advice for you is to not go in here and amputate everything that's ugly all at once. Every now and then you need something like this for a reference point. Just stay focused and conquer one thing at a time.

(Peyton)>> Coming up, we get to drilling and slinging sparks as we slice and dice on this old bowtie.

(Tommy)>> Hey guys, welcome back where we're pretty much ready to start poking some holes in our Chevy Two. Peyton's finishing up ensuring that the car is sitting level for us to move forward. Now to do that you want to make sure that you use some common points of reference. In the back of the car we're using the locations of where the hangers for the leaf springs would go. In the front some of the holes that are in the sub-rails.

(Peyton)>> Before I start cutting on this car it's important that I take a few measurements. That way I have a good basis for when we go to put our new rails in. So this measurement at the rear of the car is gonna be the most important because there's nothing to locate the end of the frame rails. So I'll just throw my tape measure up here, we'll get a center line, and then we'll jot our numbers down on the note pad and move to the front. In the front section measurements are quite as important cause we have a few things for our rail to butt up against. We have our factory shock mount and our leaf spring mounts, but since we're here we're gonna go ahead and get these measurements and save ourselves a possible headache down the road.

(Tommy)>> We're about to get into a whole mess of labor. So to help improve efficiency we've got an assortment of tools. Now we're gonna be drilling out a bunch of spot welds, and there's two tools that are common to do this. One is just a regular old drill bit that you would basically drill all the way through everything. The next thing is a spot weld cutter. This is kinda like a small hole saw if you will. What's great about this thing is it gives you the chance to drill through each layer of sheet metal instead of plunging through everything. It does have a little locator pin here in the top, and to use an eighth inch drill bit on each one of those spot welds will help locate that thing and prevent it from walking around. Now once you drill all those holes it'd be time to separate the panel, and to use a panel knife, this can make that job a lot easier. You'll just slip this in between it, and then take a hammer and strike the back, and that'll separate everything. Now we're working with a piece of metal that's nearly seven feet long, and we had talked about cutting it up into pieces. To do that we're gonna use a standard old cutoff wheel, which you guys probably have, but the problem with them is sometimes in those nooks and crannies they can make things a little bit complicated. Having an air saw can sure save you a lot of work and headache. Heaving one of these in your tool chest will be able to give you a chance to not put so much sweat on your brow. Some people prefer to use an air hammer to do this type of work as well and yes, it will save you some time. However if you're not familiar with one of these things these little knives and punches will punch holes and make a mess of a panel real quick. So if you're not that familiar with it you may want to refrain from using one of those.

(Peyton)>> Like we said before, different tools work better in different places. Up here the air hammer will work a little bit better because we have the same thicknesses of steel. So we don't have a risk of fowling one up versus the other. In some other places our bordering metal is a little bit thinner. So the body knife will be a better option. I'll use the body saw and remove some of this extra material so I can get my drill in here and drill out these spot welds without burning up my chuck against the rail. We still have this plate from the previous suspension setup that's gonna make it a little tricky to get to some of these spot welds. So we'll go ahead and knock it out and get on with it. This may look like a lot of work, and it is, I get it. Take your time, don't let it frustrate you, and you can have something to be proud of. [ saw buzzing ]

(Peyton)>> Piece by piece I'm whittling away on the subframe. [ Music ] [ air saw buzzing ]

(Peyton)>> Until the big sections start to fall. So as I was cutting out this subframe I noticed some more bad spots in the body, and we're not gonna leave those when we install our new rails. So we're gonna take and cut part of this floor pan section out along with this shock mount, and we're gonna replace it further down the road, but for now we'll just get it cut out and get our new rails in. When cutting out rust it's important to cut back to solid material to provide a weldable surface. [ Music ]

[ Music ] So I've got the remnants of our old subframe taken out and our new one up on the jack. All that's left is knock it in place, check our measurements, and burn it in. [ Music ]

For me watching sparks fly from the welder makes it all worth it. [ welder crackling ] [ Music ]

(Peyton)>> Up next, we take a look at a piece of muscle car history. If you're into fabled Fords you're gonna like this.

(Peyton)>> Well guys I've got a little bit more to tackle under here. While I finish that up take a look at another hot rod from the '60s era. In the history books of the muscle car era there are ground breakers and those that just didn't quite make it off the ground. Victims of poor design, wimpy motors, and sometimes just flat out bad timing like the '64 Falcon Sprint. [ Music ]

(Tommy)>> The story begins in 1959 when Ford released its first compact car, the Falcon, and it sold like hot cakes. In the first year alone it sold nearly a half million units. With the dawn of the muscle car era in the '60s Ford decided to spice up its popular compact and drop in a small V-8. They added a sporty option package and called it the Sprint.

(Peyton)>> The engine was a 260 inch Challenger, and it put out a whopping 164 horsepower. That may not sound like a lot of muscle but it nearly doubled the power of the original motors, and it only cost $238 dollars, which was a real bargain at the time. It also came with a chrome dress up kit and a big Ford 390 police interceptor air cleaner, which gave the engine a way more powerful sound. [ engine revving ]

(Peyton)>> Underneath the suspension and brakes were beefed up and a throaty muffler was added.

(Tommy)>> Plus you had sporty features like bucket seats, a console, deep dish steering wheel, that 6,000 r-p-m tach mounted on the dash, and a three speed on the floor, but you'll notice that this Sprint was upgraded to the optional Borg Werner T-10 four speed. Throw in some wheel covers, chrome badges, and a ragtop option and this ho-hum Falcon was transformed into a sweet little ride.

(Peyton)>> It could do zero to 60 in 11 seconds, top out at 105. Not bad for just under $3,000. All '64 Falcons received a total redesign with a squared off body, mean looking grille, and a distinctive aero side coat that gave it some extra zip.

(Tommy)>> Unfortunately none of this was enough to stop the stampede heading its way. This was '64 and Ford was releasing another compact sports car that borrowed heavily from the Falcon. You might have heard of it, the Mustang.

(Peyton)>> The pony car trampled the Sprint just as it was getting out of the starting gate. Ford tried to revive it by dropping in a 200 horse 289 in late '64, but nothing could compete with the Mustang frenzy that was sweeping the nation. Especially when you could get a fully loaded Stang for just a couple hundred bucks more than the Sprint.

(Tommy)>> Ford retired the Sprint in '65, and the Ford Falcon returned to its roots as an economy car. Hot rodded versions have been a fixture on the drag strip ever since.

(Peyton)>> Today people still love that crisp, clean, space age look, and it's a favorite among custom car makers.

(Tommy)>> The '64 Falcon Sprint may have never obtained true muscle car status, but it certainly got our respect. It's time to burn a little wire for the right reasons. Here's a few tips to help you with your project. That's really what you're looking for.

(Tommy)>> A car's body is oftentimes assembled using a welding process referred to as spot welds. We've showed you how to remove those, but now we're at a point with our project that it's time to start bonding those panels together, and we're ready to throw some sparks. So I thought I'd give you guys a 101 on this whole setup. I don't want to scare you off and make you think that this is big and elaborate. It's really not. However, if you do it incorrectly it can cause you some serious troubles. First thing let's get into is some of the basic tools that you're gonna be needing. Obviously you're gonna need a welder, and I prefer to use one of the smaller machines like this 110 we have here in the shop for a couple of reasons. One is with the smaller machines you have a smaller nozzle, or wand, and this gives you the ability to get into some of those tighter nooks and crannies. With spot welds you're gonna hit that issue. Another thing is I like to run the smaller gauge wire, like .024 or .025. Think about it. The larger the gauge of this wire it takes more heat to melt it. Whenever you're doing spot welds you want that lower temperature. Next you're gonna have to prep out your metal. So you're gonna have to clean it, make some holes, and you're gonna have to hold it in place. Having one of these small sanders can grind off that black coating that normally comes on those new panels that you're gonna be buying. Or it'll brighten up raw steel if that's what you're working with. Next, to make some holes a panel tool can sure speed things up. It'll make a nice little hole but it has to be on some flat surfaces. If the panel you've got has got a bunch of nooks, and crannies, and curves in it you're probably gonna have to resort to some drill bits. Next, to hold everything in place you need to keep that panel nice and tight against the other one. Using some panel clamps will get the job done. Next let's talk about your material. Just like any other welding process you want to ensure that the metal you're working with is nice and clean and there isn't any rust or contaminants on the surface. If it is you need to remove them. If you're working with hot rolled steel like this dark blue material you need to remove the mill scale to ensure proper penetration. Also if you're working with different gauge metal, thin and thick stuff, the thicker stuff needs to be the parent metal, or what you're welding onto. The thinner material needs to have the hole in it. [ Music ] [ air punch hissing ] [ Music ] [ grinder buzzing ] [ Music ]

[ Music ]

(Tommy)>> Well we're pretty much ready to start burning some wire. If you'll notice, where we clamped our two panels together they're nice and tight, and there's no big gaps. That's what you're looking for. Now with your wire you want to start here in the center of your hole. Create a puddle, and then go around it in a circular form. What you'll notice is that puddle will bring all that weld out to the edge and it'll be nice and flush, hopefully. [ Music ] [ welder crackling ] [ Music ] [ welder crackling ]

(Tommy)>> Some of these are in pretty good shape. Some of them need some grinding, and one or two of them wouldn't pass. Let's talk about the one that wouldn't pass. If you'll notice right here on the top there's a pin hole. That's where whenever I was welding I basically didn't bring the wire over to it for it to fill up. Over here on the end where we first got started you'll notice that it's got a rather large dome on it. That's a little bit excessive. You could grind this down, but if you can dial in your welder it'll help prevent all that extra work. Over here on my last one if you'll notice it's nice and flat. That's really what you're looking for, but to make sure that we've got plenty enough penetration we need to flip it over. What you're looking for here is a small amount of a dome for it to have presence of the penetration. If the dome is relatively excessive your heat may be too hot, and you want to dial back your welder. There's one last thing that I want to do, and that is test the integrity of my weld. I think I'm in pretty good shape, but there's nothing wrong with checking it. If you're doing this at home and trying your hand at this type of thing it's probably a pretty good procedure for it. All we're gonna do is use a cold chisel, set it in between these two pieces of metal, and strike it with a hammer a few times and see if we can split it. If that pops open that tells us that it was a weak fuse. If it stays there and just mushrooms the metal we're in good shape. [ hammer tapping ]

(Tommy)>> Well our welds are in pretty good shape. As I drove that cold chisel through there it actually stretched the metal away from the spot welds and they held. That's what you're looking for. We made some pretty good progress for the day. We've still got quite a bit of metal work to do and a bunch of wire to burn, and a whole lot of ugly to take care of. Old Peyton must have run off and took him a break. That's where I'm heading. See y'all next time.
Show Full Transcript