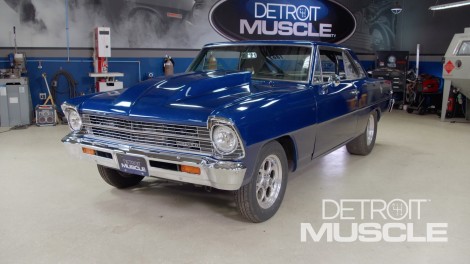
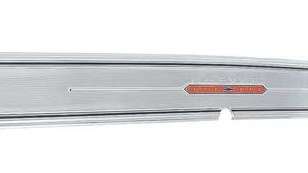
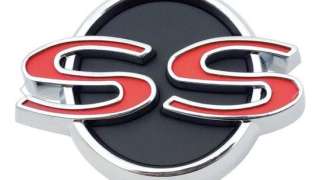
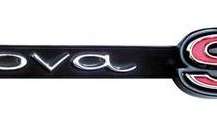
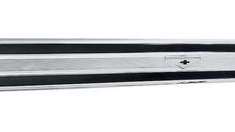
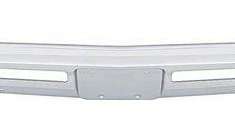
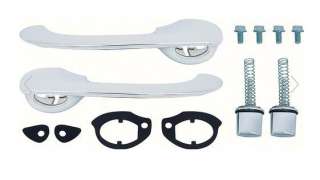
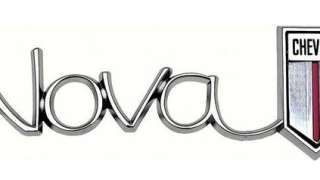
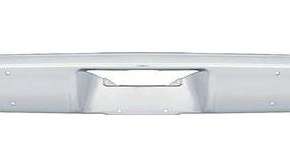
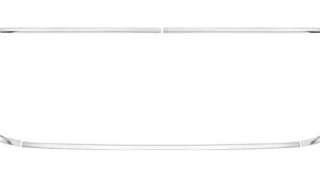
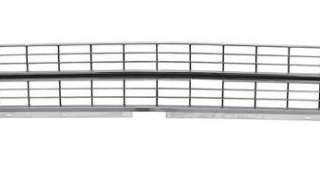
Detroit Muscle Featured Projects

Detroit Muscle Builds

Parts Used In This Episode

Summit Racing
Stroud Safety Fire Supression System
Summit Racing
Summit Racing Suits

Episode Transcript

(Tommy)>> You're watching Powernation!

(Joel)>> Today on Detroit Muscle we shop some shinny stuff and take a drag car from go fast to first class.

(Tommy)>> We also have some tips on how to stay cool when things heat up. [ Music ] [ engines revving ] [ Music ] [ engine rumbling ]

(Tommy)>> Hey guys, welcome to Detroit Muscle. Today we have a guest in the shop, this old '67 Chevy Two, and we're gonna be tinkering on a race car.

(Joel)>> That's right, but it's not necessarily all about performance. What we've got up our sleeve today is gonna help you go fast and look good doing, and when things start to heat up we've got a few tips that'll help cool you back down, but first let's talk about what we're working with. We got our hands on a 1967 Chevy Nova. This iconic piece of Detroit Muscle has been modified to run an eighth mile in seven seconds will all the go-fast goodies you'd need including a roll bar, racing slicks, and a rough exterior to match.

(Tommy)>> With a quick stroll around this thing it's easy to see that the primary goal was to go fast. When it comes to aesthetics it's kind of lacking in that department. There have been a few upgrades to help move it in the right direction, but there's still quite a bit of work to be done.

(Joel)>> That's right, and we're gonna start right here in the front. Now the headlight bezels have already been swapped out at one time, but it does look like the grille and the bumper are almost original to the car. The grille's got some rock chips, and it's kinda losing its luster on the finish. Well the front bumper, it's got a little bit of caddy wompus thing going on, but luckily swapping this out is super easy and it's gonna look awesome when we're done.

(Tommy)>> Not gonna lie, this looks like this is the easiest bumper removal I've ever done in my entire life.

(Joel)>> This one's already loose. We know why it was sagging now. [ Music ]

(Tommy)>> Don't scratch it! I kinda like working on race cars. You know why? Cause a lot of times people don't put all the bolts and screws back in it. That's an option, shoot, we don't have to do that.

(Joel)>> You've got to factor in weight reduction too.

(Tommy)>> Right, purposeful!

(Joel)>> One more on this side. [ Music ]

(Tommy)>> What are you doing wrong! [ Music ]

(Joel)>> Woo wee! Look at that!

(Tommy)>> Holy cow, that does look a lot better.

(Joel)>> It's fine!

(Tommy)>> It's only scratched some places. [ Music ] Hold on, back up just a little. [ Music ]

(Joel)>> If yours is the same way.

(Tommy)>> Mine the clip was all over the place. [ Music ] [ paper crackling ]

(Tommy)>> Everybody likes for their chrome to be all shiny and pretty. Swapping out your front bumper or rear bumper is one of the most easy upgrades you can do, like we're going here with that bumper that we got from Classic Industries. Now if you look at the front end of the car the exposure of the front is basically 50 percent of that new bumper. I bet this thing is gonna look way better when we're done. I'm saving this old license plate because this other bumper is heading to the scrap bin, and I may end up swapping this thing out for something a bit more familiar. [ Music ]

[ ratchet clicking ]

(Joel)>> It's not in a difficult spot.

(Tommy)>> Nobody move, nobody gets hurt! I'm glad this bumper's not like 90 pounds. [ ratchets clanging ]

(Joel)>> That one of Fat Stack's gonna be real fun. Up next, Bogart thinks we do need some stinking badges.

(Tommy)>> There's just something satisfying about pulling a new emblem out of the wrapper. I'm gonna call this stuff automotive jewelry. Elevating your build like this can really do a lot of good. It's simple, easy, and it doesn't cost a whole lot of money. [ Music ] That looks nice.

(Joel)>> Our little blue race car back there is what as known as a Chevy Two model, not an SS, and for right now the owner kinda intends to keep it that way. However if you guys are restoring an SS at home or maybe want to build a clone Classic Industries has a solution for both. They have several items available ranging from your smaller pieces like your grille and quarter panel emblems to your much more prestigious components like these tail panel moldings. For the longest time these pieces were very sought after but very hard to come by, but lately Classic Industries has been knocking it out of the park making these more readily available to you enthusiasts at home.

(Tommy)>> One thing that's really nice about working on an old Chevy Two like this car is they make a tremendous amount of restoration components to fix them back up. With Classic Industries we went ahead and got a set of window trim cause this on this car is in really bad shape. Some of it looks like they did the body work right across the top of it. What's also great about this situation is you can snap this stuff on, snap it off, it's that easy of an upgrade.

(Joel)>> Now we've kinda shown you guys this process before. You're gonna need this little specialty tool to get behind these clips and snap off this window trim but the key is to really take your time, go nice and easy. It's a marathon, not a sprint. [ metal click ]

(Tommy)>> You either fixed it or broke it!

(Joel)>> Either way it's coming off.

(Tommy)>> Good news is we've got new trim. Bad news is it's in the trunk.

(Joel)>> Now's a good time to check all your clips and make sure none of them are missing, or broken, or any of that stuff. Most of these have a little bit of excess blue paint on them but other than that they look pretty good. So we're just gonna snap on our bright work and call this thing done. [ Music ]

(Tommy)>> That does look a lot better. [ Music ] One of the last components that we're gonna be installing onto our old Chevy Two here is in a highly visible area. Now often times people judge the quality of your build by those type of things, kinda like the hood. This is where normally people look at whenever they're checking out your paint job. You've seen this I'm sure. What we're gonna be installing is actually the door handle, and how this is relevant you think about it. You always look down and grab that when you're getting in and out of the car. Or somebody says, can I check this thing out? Sure, the door's open. If this thing looks bad it can give you the perception that the rest of the car is kinda in the same way. Now to swap out this part it's a bit more involved than just snapping on some trim. You actually kinda can't get there from here. You have to go somewhere else, meaning you've got to pull the door panel off, and to get that off you've got to pull the arm rest and the window cranks. And then once you get all that out you've probably got a little bity hole in the side and you've got to put your big forearm through it, and then yet you're praying that the window glass isn't in the way. How do we know that? I don't know. We've just got to get this stuff apart and see where we're at. The first thing I'm gonna do is remove this little bezel or knob for this unique lock feature that this thing has. Then we're gonna remove the door handles. They make a fancy tool to do this, which is this little fork thing that slides in there. There is a little C-shaped clip that's on the inside that keeps it attached to the splined shaft. I've showed you guys this tip before. You basically just pull this thing in there, let that rag wad up around that little finger, and that'll pull it right off. So if you're wanting to use this tool what you'd do is slide it into here, and then those two fingers at the top catch the top of that clip, and then depress it out. And if you'll notice here on the inside of the bore where the little clips actually attach around the gear of the shaft it removes those. That would allow you to slide it off the splined shaft. Now the next thing that we need to do is take off our armrest. Now this isn't all that big of a deal. There's usually just two big wood screw looking things that go in this way. Removal is a cinch. Back together, that's a little bit more of a challenge. See what I mean? That's a pretty hefty little screw. With those you don't want to overtighten them whenever you go back together either. Oftentimes that's what guys do, and then once you strip them things out that's a bear to fix. I like that armrest pad. That's kinda classy! Simple, clean, chromy! Coming up, we take a look back at a Nova that is considered the cream of the crop.

(Joel)>> You know guys, it's quite a privilege to have an old Nova hanging out in the shop, and there are plenty of reasons why those are one of the most sought after muscle cars of all time. '66 is when they really came into their own. The first gens were a little bit more conservative and practical because they weren't performance based, but when the second gen started to roll out that little Chevy pony car began blazing its own trail towards becoming one mythical piece of Detroit muscle. The Chevy Nova is considered today as one of the hottest mini muscle cars. Being born out of the compact wars of the late '50s and early '60s, the Nova started out life as a much different car.

(Tommy)>> Ford's Falcon was crushing the Plymouth Valiant and Chevy's rear engine Corvair. GM fought back by unleashing the Chevy Two in '62 with the Nova as a top of the line model. It never overtook the Falcon in the compact arena, but the Nova would become a force to be reckoned with on the streets and the strip.

(Joel)>> The first Novas were strictly economy cars. A little pizazz was added in '63 with the new SS package, but that was merely for the looks. Then in '64 it got its first V-8, a 283 making 195 horsepower.

(Tommy)>> The car's light weight made it a serious street contender, but the real muscle came in '66 when Chevy dropped in the 327, which came in two flavors. One made about 275 horses while the other cranked it up to 350, which was what's powering this mean machine.

(Joel)>> This is a numbers matching L-79 motor. They only made it into about 3,500 of the Nova SuperSports. It features chrome valve covers and a dual snorkel breather. A close ratio four speed was thrown in at no extra costs along with dual exhaust and a 12-bolt rear end.

(Tommy)>> Novas weighed in at just under 3,000 pounds, 400 less than a Chevelle. So this setup got your ratio of one horsepower to every eight and a half pounds. Compare that to the Hypo Mustang, which had a one to ten ratio.

(Joel)>> Novas could hit 60 in seven seconds, and shoot through the quarter mile in 15, beating out the pony car that year. The '66 also got a more macho look with razor sharp body lines, bold new grille, and a tapered fastback like roof, all inspired by the '64 Super Nova concept car.

(Tommy)>> SuperSports only came in a hard top and they had wider rocker panels and bright work in the rear deck. You also got strato-bucket seats, a console, and plenty of super badges.

(Joel)>> One thing that stands out about the '66 models is this was the only year that the SS didn't carry any Nova badging. Another cool feature on this ride is air conditioning. You don't see that on too many muscle cars. It's also sporting a one year only color, Aztec Bronze. It's estimated that less than a dozen were sold in this combo, making this one unique car.

(Tommy)>> The Chevy Nova SS was a hit with buyers, doubling their sales to 21,000. In '67 it was overshadowed by Chevy's answer to the Mustang, the Camaro. Novas would get a complete facelift in '68. That's a story for another flashback.

(Joel)>> Up next, we handle the heat and stay in the kitchen.

(Tommy)>> Now we need to remove our door panel. This is where I'm gonna urge you to take your time and actually use a tool. At the first look of this thing it looks really original, and it very possibly could be. Now if you just go to pull in here on the side what you're gonna run the risk of is actually pulling the clips through that panel inside of there. Normally the backing on this is either fiberboard or a cardboard, and using that tool can help ensure that you don't damage things. So with this door panel it has an upper trough if you will and a lower trough. It's kinda like this little panel, and it looks like you have to bow this thing, unhook it from the top and the bottom to get it out. Be real easy with it. Let's check this back out. You can see on this one that the hole's actually larger than this one. That's usually a sign that the clips are torn out. If you'll notice this one actually has some water damage here on the end of it. You know why that's caused? Because originally from the factory these holes are covered by either a tar paper or a piece of plastic, and they usually call those water sheds or water shields. Without putting those in there moisture comes in from the glass at the top side and rains down and comes through these holes. Now we've got to crank this window up, and hopefully with this door handle being low in the car it'll have plenty of clearance. We're just gonna put our window crank back into place, roll this dude up, and see what we got. That one's not too big of a deal. Also what's handy here is this giant hole. Normally you don't get this lucky with a car. It'll have just one of these or almost a much smaller hole right in this section. It almost allows you to play peek-a-boo with the bolts and the hardware that's in there. The only thing that holds this door handle into this car is two small bolts. Now we can remove them and that door handle will come right back out. One thing I did notice. The keeper that holds the door lock into this car is just about ready to fall out. We can choose to fix that or maybe not. We probably should try. Now the kit that we ordered comes with everything to install door handles on both sides. Chrome handles, your button, springs, gaskets, bolts, and so on. We're gonna put our gaskets on this thing, a couple of bolts, and this upgrade is that easy. Whenever you go to snug these things down that's all you're really trying to do. You don't want to crank down on them because if you do you'll distort the panel right here on the top and the bottom of where the bolts are. Yes sir, that even feels smoother. [ Music ] You know guys we're all about going fast and having a good time, but accidents can happen. When they do you want to be as prepared as possible. So if you participate in motorsports you know there's a lot of sanctioning bodies that put forth effort to protect you and help keep you safe. One of the most basic things you can do is wear a suit. One of the things that people say the most about wearing things is man that thing's hot. However if things get a little heated sitting inside that car you'll probably be thankful you had this on. If you wanted to take things a step further what you could do is install a fire suppression system like this one we got from Summit Racing. This kit includes everything you need to mount it in the car and have it up and running. Now obviously you'll have a tank that has all the fire suppression contents in it. You've got a cable, some lines, bracket, clamps to hold everything into place, and then a few fittings and your valve. We're gonna set up a little demonstration here on the table to show you how the system works. First thing we're gonna cover is mounting your bottle. Ideally you want to mount the tank low in the vehicle and cross ways in the chassis. Now let's talk about your lines and fittings. The tubing here is what you'd find in many automotive applications. You just kinda bend it around obstacles and put it exactly where you want it. Now when it comes to fittings they give you several different ones here. You've got a six port and then you have a two port, or a couple of those actually. Now with the six port this is the one that you want to mount inside the car. With the two port you want those ideally pointed towards the heat source. Oftentimes it's your headers. Next you have your valve. This has to be mounted on the bottle, and then you connect your little cable so that whenever you pull on the "T" it extinguishes the fire. We got everything laid out and I'm ready to go. I've ran a couple of lines. I've got my nozzles down here on this "T", and that's what I would simulate as far as the engine bay. Here this six port one is what would be on the inside of the car. Now with your system you've got two hairpins. One here at the valve and the other one on the "T" handle. Both of these have to be removed to arm the system. It's a good idea to have those in there so you don't accidentally set this thing off. Now this is one of those situations that you hope you never ever have to pull this thing, but having a system like this it's a good idea just in case you do need it. [ spray hissing ]

(Tommy)>> As you can see, this suppression system spits out quite a bit. This setup is designed to protect you, not your vehicle. Make sure you take advantage of those extra seconds this thing buys you. [ spray hissing ] With our little Chevy Two we sure have made some vast improvements with just a little bit of effort. A few key components here and there sure did increase the curb appeal when you get up close and personal. [ Music ] No matter what direction you choose to go with building one of these they're always gonna look good.

(Joel)>> The aftermarket support is pretty strong on these old girls. You could do a street machine, rat rod, hot rod, gasser. The possibilities are endless my friend.

(Tommy)>> I think we may need to build one of these.

(Joel)>> You know a guy?

(Tommy)>> I know I'm gonna have to build one.
Show Full Transcript