In This Episode
- 0:01 Introduction to the Engine Build
- 1:01 Recap of the Build Process
- 1:59 Camshaft Installation
- 3:19 Painting the Engine
- 5:00 Oiling System and Induction Installation
- 6:31 Sealing the Engine
- 7:00 Cylinder Head Installation
- 10:09 Valvetrain and Rocker Arm Installation
- 11:54 EFI System Installation
- 14:44 Filling the Engine with Oil
- 16:26 Starting and Testing the Engine
- 18:56 Tuning the Engine
- 20:04 Adding a Spacer and Final Testing
Video Transcript
[Pat] You're
watching Powernation.
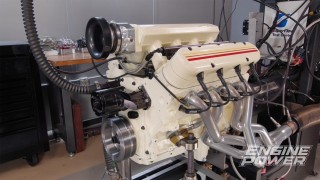
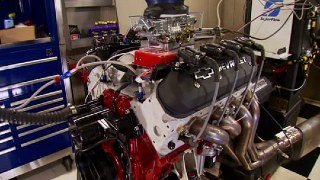
[Pat] Today in Engine Power we are bleeding Chevy orange as we wrap up our 427 cubic inch LS street powerplant with a classic paint job, swap ready accessories, and an efi system for bulletproof street action. [ engine revving ]
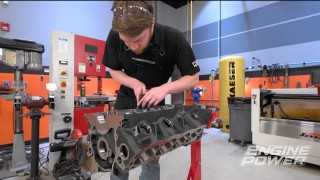
[Frankie] Welcome to another day in Engine Power, which means another engine build. Today we are getting prepped to finish up our 427 cubic inch Pro LS build. We're gonna get this thing ready for the street and the dyno to see what it makes. [Pat] And to get it in the dyno to make some of that horsepower we still have a few things we have to finish up. We have to install the camshaft and the rest of the valvetrain. All of the oiling system, the cylinder heads and the induction. Even have a trick efi system for it. Plus we're gonna give it a traditional yet really slick paint job. But if you are not familiar with this project just joining us and to get it to this status how did we do that? Have a look at this. This build started off with Summit Racing's new Pro LS block, which is a brand new high grade six bolt casting that comes fully machined except for the bores. We spent a little time deburring the block and porting the oil passageways before loading it into our Sunnen SV-15 cylinder hone and setting the proper piston to wall clearance and surface profile for our application. [Frankie] After balancing the Pro LS four inch stroke crank on our CWT balancer and checking all of our bearing clearances we jumped into assembly. The forged crank was laid in and then the Summit forged H-beam and 4-125 bore Pro LS pistons were assembled with Total Seal TFX rings. Once the rod and piston assemblies were installed the ARP 2,000 rod bolts were torqued to the proper stretch to round out the assembly. [Pat] Now that you're all caught up we can move on and install the camshaft. For this build we are trying out one of Summit Racing's big gun hydraulic roller LS camshafts. It has durations at 50 thousandths lift of 242 on the intake and 251 on the exhaust with a 116 degree lobe separation angle for that creamy smooth idle. Lift at the valve is 626 thousandths on the intake and 604 thousandths on the exhaust. [ Music ]
[Frankie] After applying some assembly grease this LSX specific cam thrust retainer is installed to control cam shaft end play and tightened with orange thread locker on the threads. [ Music ] A three bolt four tooth double roller Summit timing set follows. [ Music ]
And uses an ARP cam bolt to get that torqued in place. [ Music ]
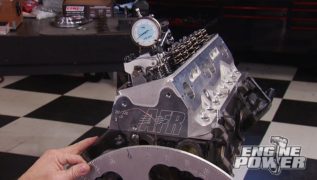
To measure the camshaft's position relative to the crankshaft we'll set up our degree wheel and check the intake lobe's centerline before setting it right where we want, 105.75 degrees, which is 10 and a quarter degrees advanced for this mild street application. [Pat] Before we go any further it's time to carefully tape off the block and paint almost all the parts to give this engine a beautiful look. Making sure all the critical areas and ports are plugged we can move everything into the paint booth and get started. [ Music ]
[Frankie] It's time to dress this sucker up. So we have everything that we're going to be painting here in our paint booth. It's been cleaned, taped off, and ready to go. We're gonna hit everything with a POR-15 gray rust preventative coating and then we'll move on to color. The rust preventive coating not only inhibits corrosion but also gives everything a solid base coat for a uniform finished color. We're letting our rust preventive set up on all our parts and we're getting ready with our color of choice for this build. It called for traditional Chevy orange. So everything is getting Chevy orange except for a few key pieces. So it's really gonna pop and it will have the cool old school look under the hood. [Pat] We, meaning Frankie, thinned the engine enamel around 10 percent so it can be sprayed through a paint gun and our first coat is a medium coat to make sure we get proper coverage in all the nooks and crannies. After that we can follow it up with a heavier coat that will allow the enamel to self-level and give us an extremely smooth and glossy finish. [ Music ]
[Frankie] Up next, this LS gets the oiling system wrapped up and trick induction installed.
[Frankie] Okay, everything is out of the paint booth four 427 LS. We've got everything fully cured and untaped and it looks amazing. So what we're gonna do next is start putting this thing together. We're gonna get the bottom end sealed up and keep moving forward. [Pat] Providing lubrication to our 427 is a brand new Melling oil pump with the spacer plate so it clears the timing set. Three one and half thousandths thick shims are placed between the drive hub and the inner gear to properly center the pump before the 10 millimeter bolts are torqued to 35 pound feet. The pick up is a FiTech unit that is installed with a black O-ring and two six millimeter ARP bolts that are torqued to 140 pound inches. The pick up brace is attached to one of the outer main studs and is torqued to 34 pound feet with thread locker making sure to clean up the excess. [Frankie] The color matched Summit Racing timing cover is loosely bolted on before a centering tool is slid into the seal. The ends are squared to the pan rail and then the stainless bolts are hand tightened. In the rear a billet oil bar bell is slid into the main oil passageway where it is covered up by a billet rear cover which is also squared to the oil pan rail before being tightened down. [ Music ]
We can finally seal this engine up. If you've noticed we're obviously trying to make this thing look as beautiful as we can. We got a great paint job and we've been suing ARP's stainless steel bolts throughout the engine. The reason we love using these is because not only do they look good. ARP polishes everything single stainless fastener that comes out of their factory for that brilliant finish. And the best part about being stainless is it's not going to rust. But also these are extremely strong. They're not just for looks. These are better than a Grade-8 fastener. These have a tensile strength around 190,000 psi. What that means is if you're relying on the fastener, like a lot of times you are in an engine. You want the best fastener you can use. If you use these you have something that is immediately way better than you can get at a hardware store and it looks beautiful. So if you have an engine that you spent all this time prepping and painting you're gonna want some stainless fasteners. The great part is ARP makes kits of stainless fasteners for a bunch of different engines for different parts of the engine. So they make oil pan bolt kits, intake bolt kits, timing cover bolts kit, for a bunch of different applications. And if you can't find the one for your specific engine they can make it for you. It's not that big of a deal. You can call up ARP with the dimensions of the fastener you need and they can special make it for you. So we're gonna get all of these in and then get this thing sealed up and flipped over. [Pat] Once all the bolts are in a straight edge is used to make sure the rear face is flush with the bell housing flange for proper transmission mounting before tightening the oil pan. We are using a set of Summit Racing hydraulic roller lifters, which have been sitting in fresh engine oil for a bit to ensure proper lubrication. Because of the six bolt deck design a conventional lifter tray will not work. Instead we have to use these LSX style retainers that are torqued in place with six millimeter ARP bolts. [ Music ]
We also have to use a six bolt Cometic MLS head gasket and these have a 4-165 bore and a 27 thousandths compressed thickness. For an engine to make big horsepower it needs big cylinder head flow, and we are gonna be utilizing Trick Flow's newest offering, their Gen-X 280 for an LS3. We chose these specifically for our power level because they flow the right amount of air for what we're trying to do. They have a 2-165 stainless intake, a 1-600 Inconel exhaust. Inconel is important when you're building a lot of power, a lot of especially in boosted applications. We also have a fully cnc'ed 67cc combustion chamber. The intakes are 280cc. They are fully cnc'ed. They flow 370s in the cfm department at 600 lift but if you want to crank your lift up to over 700 they flow 393 cfm. Also we have a really nicely sized exhaust that flows in the 250 range, 252 cfm. Now also we have a 1-300 spring that is set up for our valvetrain. We have our hydraulic roller cam. So they setup for 150 pounds of seat pressure and 450 pounds of open. They have a titanium retainer and a machined block. These are a six bolt configuration. In addition to the four main bolts we have two other bolts that help seal up all that combustion pressure. We are going to have to install some studs before it goes on the block. So we're gonna get that done. [Frankie] Four of the eight millimeter studs thread into each of the cylinder heads, and they can carefully be slid onto the decks. [ Music ] The remaining 11 and 8 millimeter studs can drop in and then the ARP nuts are torqued with Ultra Torque Lube to 80 pound feet and 28 pound feet respectively. [Pat] Coming up, valvetrain goes in, induction stacks up, and this engine gets ready to get down.
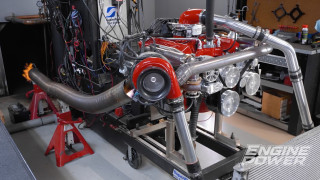
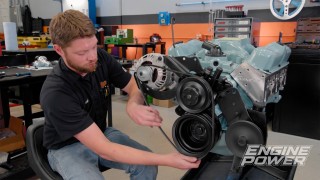
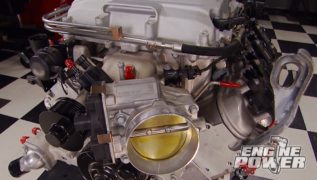
[Frankie] For this build, like every other build, we've measured for our specific push rod length. I've got a set of Trick Flow 7-800 long five-sixteenths chromoly push rods with an 80 thousandths wall thickness. High pressure lube on both ends. [Pat] These Trick Flow 280s have clearance for up to a three-eighths inch push rod, but for our application these are more than capable of handling the hydraulic roller valvetrain. A set of eight millimeter rocker studs thread in hand tight next followed by the rocker stands that came with the heads. An LS3 style rocker arm set is required because of the offset intake rocker. But instead of finding and upgrading a stock set we opted to get a completely new set from Summit Racing that have a roller bearing trunnion, upgraded oiling, and increased webbing for strength. They are installed at tdc compression stroke in pairs on each cylinder following the LS firing order and are torqued to 28 pound feet. [Frankie] A Gen-4 valley cover that follows the orange theme is quickly tightened down with ARP stainless bolts and then can be topped with new paper gaskets and our efi intake manifold. This is a Trick Flow LS3 RSeries that has a 41-50 flange, includes dash-8 fuel rails, and is sized to match these cylinder heads. After pre-lubing the valvetrain we'll seal up the engine with a set of FiTech valve covers and send it to the test cell. [ Music ] Our 427 is on a dyno cart and here in the dyno cell. We have got this thing fully dressed up so it's ready to go. We have our dyno headers on it with a one and seven-eighths primary, three inch collector. We also as you can see got this beautiful black front drive on it. This is from Summit Racing Equipment. It's an Eddie Motorsports front drive and it has all the accessories that this thing would need. SD-7 a/c compressor, one wire 170-amp alternator, power steering. This thing is set up and ready to go. So we are one step closer to dynoing this thing. [Pat] The final thing to get our 427 running is the injection system and we picked up this FiTech Ultimate LS system. This is a standalone system. It'll work on either Gen-3 or Gen-4 LS. It doesn't matter which reluctor wheel, 24 or 58. It doesn't matter which cam. This can do it all. This ecu also can control the transmission. Any four series electronic transmission you can set it up and it will run the transmission as well. It comes with everything you need from the ecu, a complete wiring harness. It is a self-learning system. It contains two 0-2 sensors, a touch screen so it is easy to get setup no matter what your skill level is. It also has a 3 bar map sensor in case you want to run some boost up to 30 psi. Because we have that conventional 41-50 style intake manifold we have a 41-50 style air valve for the top. Now this looks just like an old style carburetor. So it's gonna work for what it's going in. We also picked up a set of coils for these. Now these are really cool because they have a blue LED indicator light that tells you the coil is working. So if you have a problem and you don't know if the coil is firing the blue light will tell you. Along with that we also picked up some 55 pound injectors that'll be perfect for what our power level will be. This is a very user friendly system. So it's easy to plug and play. So we're gonna get it on the engine. [Frankie] This system is designed to be easy to install and set up. So it is a perfect standalone efi system for LS swaps. Not only can adjustments be made to fueling and spark targets but the system has features like individual fuel trim controls for each bank, tuning adjustments for the electronic automatic transmission, dual fan outputs, and a laptop tuning software if you want to get more involved. [ Music ]
Once all the components are bolted in place we only have to plug in the sensor connectors, which are clearly labeled, hook up the ecu, and then we can load the calibration and fire it up. [ Music ] Stay tuned because up next the orange monster gets its first taste of horsepower.
[Frankie] With our 427 all wired up for our efi there's one last thing we need to do which is the same for every engine and that is fill it with a high quality oil for not only our initial start but also the dyno session we're about to put this thing through. So we are filling it with Schaeffer's Supreme 7000 series 10W-30 oil. The reason we're using this is it's considered a racing oil but it's perfect for our 427 because it has been formulated to have an extreme amount of protection for those high performance applications like circle track racing, drag racing, things like that. It has a really good host of friction modifiers. So it has improved sheer strength and wear resistance, which his gonna help to keep our metal parts from touching on that initial break-in, initial start, and during those wide open throttle runs. It also has great resistance to oxidation and thermal breakdown, which makes it awesome for the street as well because in a street engine you can get extremely high oil temps. You get stuck in traffic or something like that, oil temps started climbing, it's really hard to get them back down and we want an oil that's gonna continue to provide protection for our engine and not break down and start letting parts wear. It also does have extra zinc added, which is perfect if you're running a flat tappet cam. It can help with the break-in process and make sure you have proper protection for that, but it also works great in a roller engine like this one. We need six quarts of this. We're gonna get it in our pressurizer tank and get this thing primed. [ Music ] [ engine starting ] [Frankie] Okay, our 427 is on the dyno and it's running beautifully. It started right up. We got the FiTech up to temperature. Started to get it learning. Basically it's gonna populate the VE table, make corrections as it gets up to temperature and figures out what the engine wants. We have relatively safe targets set up right now. So we have a target of 26 or 27 degrees total timing. [Pat] That sounds right! [Frankie] And air/fuel is relatively safe at 12.8. [Pat] This coffee's hot. [Frankie] What else is hot is this engine. Here we go!
[ engine revving up ] [Pat] Super smooth load in. [Frankie] Good oil pressure. [ engine revving ]
[Pat] Smooth sailing. [Frankie] That's the great thing about these fuel injection systems. You can go full throttle at 2,500 and it just floats right in. [Pat] We are at 490.5 pound feet. Looks like it's 5,100, and 519.8 horse pressures at 6,100. [Frankie] Maybe I need glasses cause you can read that. [Pat] Here's the important part. We got the cam way forward. Notice how even on a gigantic really good cylinder head we're trending off at 6,500. That is by design though. [Frankie] That's a killer starting point. Let's start tuning on it. What do you want to do first? [Pat] Well we always do timing. If this was our carb-a-hooted thing we would time for torque and jet for horsepower. We're not gonna do any jetting. Electronical jetting, but the timing is still the same. Nice thing about this, no distributor to turn. Go out there and hit the keypad very, very good. So I'm gonna do that myself. [ engine revving ]
[ engine revving ] [Pat] Alright, we've been pounding on this thing for a while. It does everything it's supposed to. Oil pressure is great. Everything's been going well. With timing and fuel adjustments we got it up to 29 degrees of timing. Good chambers you don't usually eclipse 30 on something like this. Give her a go and see where we're at. Nice job SuperFlow on that servo control. [ engine revving ]
[Frankie] That run right there was at 508.5 pound feet and I see 537.8 at the top. So that's just fuel and timing adjustments. Getting this thing a little bit happier to where it wants to be. What we could do is throw a spacer on it. [Pat] I'm all for a spacer! [Frankie] We've added a four and a half inch four hole tapered spacer. We're gonna see what that does. [Pat] It'll do one of three things. It'll do nothing, do something, or it'll stay the same. [ engine revving ]
[Pat] Oh yeah baby! Now we're talking! We are at 541 horse pressures and 514.7 pound feet, at the same peaks too. [Frankie] That's a noticeable gain here on the dyno. [Pat] Keep in mind we're under 10 to 1. Is that bad, no? Is it pump gas friendly? If you put some 87 rot gut in this thing it will not care. [Frankie] I view this engine as a Swiss army knife of engines. It is a great n/a street pump gas combo. It's got great parts in it. It's never gonna hurt itself. You want to put 15 psi to it, it will absolutely take it. Make over 1,000 horsepower and do it all day long. No leaks, looks great, runs great. What more do you want? [Pat] This thing is so nice because it literally bolts together off the shelf. Not a custom piston, not a custom rod, not a custom anything. Like I always say, great success! [ engine revving ]
Show Full Transcript
[Pat] Today in Engine Power we are bleeding Chevy orange as we wrap up our 427 cubic inch LS street powerplant with a classic paint job, swap ready accessories, and an efi system for bulletproof street action. [ engine revving ]
[Frankie] Welcome to another day in Engine Power, which means another engine build. Today we are getting prepped to finish up our 427 cubic inch Pro LS build. We're gonna get this thing ready for the street and the dyno to see what it makes. [Pat] And to get it in the dyno to make some of that horsepower we still have a few things we have to finish up. We have to install the camshaft and the rest of the valvetrain. All of the oiling system, the cylinder heads and the induction. Even have a trick efi system for it. Plus we're gonna give it a traditional yet really slick paint job. But if you are not familiar with this project just joining us and to get it to this status how did we do that? Have a look at this. This build started off with Summit Racing's new Pro LS block, which is a brand new high grade six bolt casting that comes fully machined except for the bores. We spent a little time deburring the block and porting the oil passageways before loading it into our Sunnen SV-15 cylinder hone and setting the proper piston to wall clearance and surface profile for our application. [Frankie] After balancing the Pro LS four inch stroke crank on our CWT balancer and checking all of our bearing clearances we jumped into assembly. The forged crank was laid in and then the Summit forged H-beam and 4-125 bore Pro LS pistons were assembled with Total Seal TFX rings. Once the rod and piston assemblies were installed the ARP 2,000 rod bolts were torqued to the proper stretch to round out the assembly. [Pat] Now that you're all caught up we can move on and install the camshaft. For this build we are trying out one of Summit Racing's big gun hydraulic roller LS camshafts. It has durations at 50 thousandths lift of 242 on the intake and 251 on the exhaust with a 116 degree lobe separation angle for that creamy smooth idle. Lift at the valve is 626 thousandths on the intake and 604 thousandths on the exhaust. [ Music ]
[Frankie] After applying some assembly grease this LSX specific cam thrust retainer is installed to control cam shaft end play and tightened with orange thread locker on the threads. [ Music ] A three bolt four tooth double roller Summit timing set follows. [ Music ]
And uses an ARP cam bolt to get that torqued in place. [ Music ]
To measure the camshaft's position relative to the crankshaft we'll set up our degree wheel and check the intake lobe's centerline before setting it right where we want, 105.75 degrees, which is 10 and a quarter degrees advanced for this mild street application. [Pat] Before we go any further it's time to carefully tape off the block and paint almost all the parts to give this engine a beautiful look. Making sure all the critical areas and ports are plugged we can move everything into the paint booth and get started. [ Music ]
[Frankie] It's time to dress this sucker up. So we have everything that we're going to be painting here in our paint booth. It's been cleaned, taped off, and ready to go. We're gonna hit everything with a POR-15 gray rust preventative coating and then we'll move on to color. The rust preventive coating not only inhibits corrosion but also gives everything a solid base coat for a uniform finished color. We're letting our rust preventive set up on all our parts and we're getting ready with our color of choice for this build. It called for traditional Chevy orange. So everything is getting Chevy orange except for a few key pieces. So it's really gonna pop and it will have the cool old school look under the hood. [Pat] We, meaning Frankie, thinned the engine enamel around 10 percent so it can be sprayed through a paint gun and our first coat is a medium coat to make sure we get proper coverage in all the nooks and crannies. After that we can follow it up with a heavier coat that will allow the enamel to self-level and give us an extremely smooth and glossy finish. [ Music ]
[Frankie] Up next, this LS gets the oiling system wrapped up and trick induction installed.
[Frankie] Okay, everything is out of the paint booth four 427 LS. We've got everything fully cured and untaped and it looks amazing. So what we're gonna do next is start putting this thing together. We're gonna get the bottom end sealed up and keep moving forward. [Pat] Providing lubrication to our 427 is a brand new Melling oil pump with the spacer plate so it clears the timing set. Three one and half thousandths thick shims are placed between the drive hub and the inner gear to properly center the pump before the 10 millimeter bolts are torqued to 35 pound feet. The pick up is a FiTech unit that is installed with a black O-ring and two six millimeter ARP bolts that are torqued to 140 pound inches. The pick up brace is attached to one of the outer main studs and is torqued to 34 pound feet with thread locker making sure to clean up the excess. [Frankie] The color matched Summit Racing timing cover is loosely bolted on before a centering tool is slid into the seal. The ends are squared to the pan rail and then the stainless bolts are hand tightened. In the rear a billet oil bar bell is slid into the main oil passageway where it is covered up by a billet rear cover which is also squared to the oil pan rail before being tightened down. [ Music ]
We can finally seal this engine up. If you've noticed we're obviously trying to make this thing look as beautiful as we can. We got a great paint job and we've been suing ARP's stainless steel bolts throughout the engine. The reason we love using these is because not only do they look good. ARP polishes everything single stainless fastener that comes out of their factory for that brilliant finish. And the best part about being stainless is it's not going to rust. But also these are extremely strong. They're not just for looks. These are better than a Grade-8 fastener. These have a tensile strength around 190,000 psi. What that means is if you're relying on the fastener, like a lot of times you are in an engine. You want the best fastener you can use. If you use these you have something that is immediately way better than you can get at a hardware store and it looks beautiful. So if you have an engine that you spent all this time prepping and painting you're gonna want some stainless fasteners. The great part is ARP makes kits of stainless fasteners for a bunch of different engines for different parts of the engine. So they make oil pan bolt kits, intake bolt kits, timing cover bolts kit, for a bunch of different applications. And if you can't find the one for your specific engine they can make it for you. It's not that big of a deal. You can call up ARP with the dimensions of the fastener you need and they can special make it for you. So we're gonna get all of these in and then get this thing sealed up and flipped over. [Pat] Once all the bolts are in a straight edge is used to make sure the rear face is flush with the bell housing flange for proper transmission mounting before tightening the oil pan. We are using a set of Summit Racing hydraulic roller lifters, which have been sitting in fresh engine oil for a bit to ensure proper lubrication. Because of the six bolt deck design a conventional lifter tray will not work. Instead we have to use these LSX style retainers that are torqued in place with six millimeter ARP bolts. [ Music ]
We also have to use a six bolt Cometic MLS head gasket and these have a 4-165 bore and a 27 thousandths compressed thickness. For an engine to make big horsepower it needs big cylinder head flow, and we are gonna be utilizing Trick Flow's newest offering, their Gen-X 280 for an LS3. We chose these specifically for our power level because they flow the right amount of air for what we're trying to do. They have a 2-165 stainless intake, a 1-600 Inconel exhaust. Inconel is important when you're building a lot of power, a lot of especially in boosted applications. We also have a fully cnc'ed 67cc combustion chamber. The intakes are 280cc. They are fully cnc'ed. They flow 370s in the cfm department at 600 lift but if you want to crank your lift up to over 700 they flow 393 cfm. Also we have a really nicely sized exhaust that flows in the 250 range, 252 cfm. Now also we have a 1-300 spring that is set up for our valvetrain. We have our hydraulic roller cam. So they setup for 150 pounds of seat pressure and 450 pounds of open. They have a titanium retainer and a machined block. These are a six bolt configuration. In addition to the four main bolts we have two other bolts that help seal up all that combustion pressure. We are going to have to install some studs before it goes on the block. So we're gonna get that done. [Frankie] Four of the eight millimeter studs thread into each of the cylinder heads, and they can carefully be slid onto the decks. [ Music ] The remaining 11 and 8 millimeter studs can drop in and then the ARP nuts are torqued with Ultra Torque Lube to 80 pound feet and 28 pound feet respectively. [Pat] Coming up, valvetrain goes in, induction stacks up, and this engine gets ready to get down.
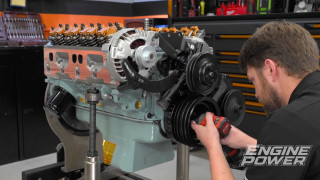
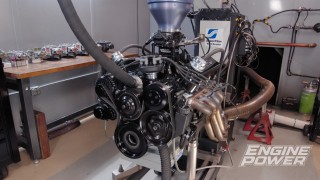
[Frankie] For this build, like every other build, we've measured for our specific push rod length. I've got a set of Trick Flow 7-800 long five-sixteenths chromoly push rods with an 80 thousandths wall thickness. High pressure lube on both ends. [Pat] These Trick Flow 280s have clearance for up to a three-eighths inch push rod, but for our application these are more than capable of handling the hydraulic roller valvetrain. A set of eight millimeter rocker studs thread in hand tight next followed by the rocker stands that came with the heads. An LS3 style rocker arm set is required because of the offset intake rocker. But instead of finding and upgrading a stock set we opted to get a completely new set from Summit Racing that have a roller bearing trunnion, upgraded oiling, and increased webbing for strength. They are installed at tdc compression stroke in pairs on each cylinder following the LS firing order and are torqued to 28 pound feet. [Frankie] A Gen-4 valley cover that follows the orange theme is quickly tightened down with ARP stainless bolts and then can be topped with new paper gaskets and our efi intake manifold. This is a Trick Flow LS3 RSeries that has a 41-50 flange, includes dash-8 fuel rails, and is sized to match these cylinder heads. After pre-lubing the valvetrain we'll seal up the engine with a set of FiTech valve covers and send it to the test cell. [ Music ] Our 427 is on a dyno cart and here in the dyno cell. We have got this thing fully dressed up so it's ready to go. We have our dyno headers on it with a one and seven-eighths primary, three inch collector. We also as you can see got this beautiful black front drive on it. This is from Summit Racing Equipment. It's an Eddie Motorsports front drive and it has all the accessories that this thing would need. SD-7 a/c compressor, one wire 170-amp alternator, power steering. This thing is set up and ready to go. So we are one step closer to dynoing this thing. [Pat] The final thing to get our 427 running is the injection system and we picked up this FiTech Ultimate LS system. This is a standalone system. It'll work on either Gen-3 or Gen-4 LS. It doesn't matter which reluctor wheel, 24 or 58. It doesn't matter which cam. This can do it all. This ecu also can control the transmission. Any four series electronic transmission you can set it up and it will run the transmission as well. It comes with everything you need from the ecu, a complete wiring harness. It is a self-learning system. It contains two 0-2 sensors, a touch screen so it is easy to get setup no matter what your skill level is. It also has a 3 bar map sensor in case you want to run some boost up to 30 psi. Because we have that conventional 41-50 style intake manifold we have a 41-50 style air valve for the top. Now this looks just like an old style carburetor. So it's gonna work for what it's going in. We also picked up a set of coils for these. Now these are really cool because they have a blue LED indicator light that tells you the coil is working. So if you have a problem and you don't know if the coil is firing the blue light will tell you. Along with that we also picked up some 55 pound injectors that'll be perfect for what our power level will be. This is a very user friendly system. So it's easy to plug and play. So we're gonna get it on the engine. [Frankie] This system is designed to be easy to install and set up. So it is a perfect standalone efi system for LS swaps. Not only can adjustments be made to fueling and spark targets but the system has features like individual fuel trim controls for each bank, tuning adjustments for the electronic automatic transmission, dual fan outputs, and a laptop tuning software if you want to get more involved. [ Music ]
Once all the components are bolted in place we only have to plug in the sensor connectors, which are clearly labeled, hook up the ecu, and then we can load the calibration and fire it up. [ Music ] Stay tuned because up next the orange monster gets its first taste of horsepower.
[Frankie] With our 427 all wired up for our efi there's one last thing we need to do which is the same for every engine and that is fill it with a high quality oil for not only our initial start but also the dyno session we're about to put this thing through. So we are filling it with Schaeffer's Supreme 7000 series 10W-30 oil. The reason we're using this is it's considered a racing oil but it's perfect for our 427 because it has been formulated to have an extreme amount of protection for those high performance applications like circle track racing, drag racing, things like that. It has a really good host of friction modifiers. So it has improved sheer strength and wear resistance, which his gonna help to keep our metal parts from touching on that initial break-in, initial start, and during those wide open throttle runs. It also has great resistance to oxidation and thermal breakdown, which makes it awesome for the street as well because in a street engine you can get extremely high oil temps. You get stuck in traffic or something like that, oil temps started climbing, it's really hard to get them back down and we want an oil that's gonna continue to provide protection for our engine and not break down and start letting parts wear. It also does have extra zinc added, which is perfect if you're running a flat tappet cam. It can help with the break-in process and make sure you have proper protection for that, but it also works great in a roller engine like this one. We need six quarts of this. We're gonna get it in our pressurizer tank and get this thing primed. [ Music ] [ engine starting ] [Frankie] Okay, our 427 is on the dyno and it's running beautifully. It started right up. We got the FiTech up to temperature. Started to get it learning. Basically it's gonna populate the VE table, make corrections as it gets up to temperature and figures out what the engine wants. We have relatively safe targets set up right now. So we have a target of 26 or 27 degrees total timing. [Pat] That sounds right! [Frankie] And air/fuel is relatively safe at 12.8. [Pat] This coffee's hot. [Frankie] What else is hot is this engine. Here we go!
[ engine revving up ] [Pat] Super smooth load in. [Frankie] Good oil pressure. [ engine revving ]
[Pat] Smooth sailing. [Frankie] That's the great thing about these fuel injection systems. You can go full throttle at 2,500 and it just floats right in. [Pat] We are at 490.5 pound feet. Looks like it's 5,100, and 519.8 horse pressures at 6,100. [Frankie] Maybe I need glasses cause you can read that. [Pat] Here's the important part. We got the cam way forward. Notice how even on a gigantic really good cylinder head we're trending off at 6,500. That is by design though. [Frankie] That's a killer starting point. Let's start tuning on it. What do you want to do first? [Pat] Well we always do timing. If this was our carb-a-hooted thing we would time for torque and jet for horsepower. We're not gonna do any jetting. Electronical jetting, but the timing is still the same. Nice thing about this, no distributor to turn. Go out there and hit the keypad very, very good. So I'm gonna do that myself. [ engine revving ]
[ engine revving ] [Pat] Alright, we've been pounding on this thing for a while. It does everything it's supposed to. Oil pressure is great. Everything's been going well. With timing and fuel adjustments we got it up to 29 degrees of timing. Good chambers you don't usually eclipse 30 on something like this. Give her a go and see where we're at. Nice job SuperFlow on that servo control. [ engine revving ]
[Frankie] That run right there was at 508.5 pound feet and I see 537.8 at the top. So that's just fuel and timing adjustments. Getting this thing a little bit happier to where it wants to be. What we could do is throw a spacer on it. [Pat] I'm all for a spacer! [Frankie] We've added a four and a half inch four hole tapered spacer. We're gonna see what that does. [Pat] It'll do one of three things. It'll do nothing, do something, or it'll stay the same. [ engine revving ]
[Pat] Oh yeah baby! Now we're talking! We are at 541 horse pressures and 514.7 pound feet, at the same peaks too. [Frankie] That's a noticeable gain here on the dyno. [Pat] Keep in mind we're under 10 to 1. Is that bad, no? Is it pump gas friendly? If you put some 87 rot gut in this thing it will not care. [Frankie] I view this engine as a Swiss army knife of engines. It is a great n/a street pump gas combo. It's got great parts in it. It's never gonna hurt itself. You want to put 15 psi to it, it will absolutely take it. Make over 1,000 horsepower and do it all day long. No leaks, looks great, runs great. What more do you want? [Pat] This thing is so nice because it literally bolts together off the shelf. Not a custom piston, not a custom rod, not a custom anything. Like I always say, great success! [ engine revving ]
Engine Power Featured Projects
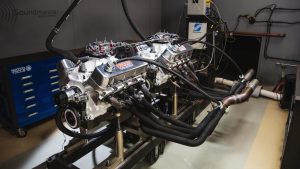
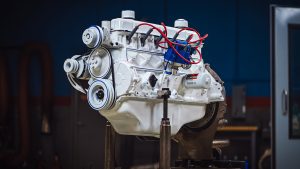
Engine Power Builds





Want more content like this?
Join the PowerNation Email NewsletterParts Used In This Episode


Schaeffer Specialized Lubricants
Supreme 7000 Synthetic Plus Racing Oil 10W-30


Summit Racing
Eddie Motorsports Raven Series LS Chevy S-Drive Serpentine Pulley Drive System
Sunnen Products Company
Sunnen SV-15 Honing Machine