In This Episode
- 0:01 Introduction to Engine Power and the Mopar Project
- 2:04 Disassembly of the Mopar Engine
- 5:27 Preparation and Painting of Engine Components
- 7:43 Balancing the Crankshaft
- 10:41 Reassembly of the Mopar Engine
- 16:44 Installation of Induction Package and Final Assembly
- 18:15 Dyno Testing and Performance Tuning
Video Transcript
[Frankie] You're watching Powernation!
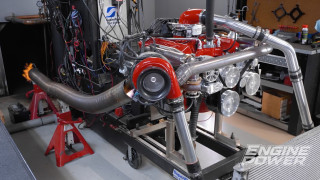
[Pat] In today's episode of Engine Power we bring back this big inch monster Mopar for some big changes and some big gains in the power department. [Frankie] We're gonna give this power plant a significant bump in compression, a new but classic look, and an induction package fit for 505 cubic inches before we test it all out in the dyno cell. [ engine revving ] [ Music ]
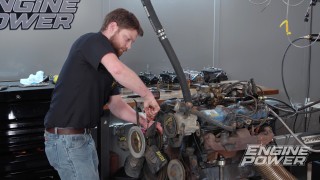
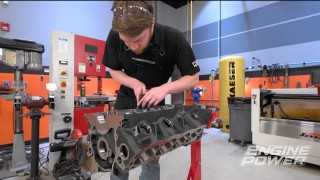
[Pat] Hey everyone, welcome to Engine Power. Today is gonna be another fun build because it is another engine we have pulled out of the rafters to revamp for a current project in the building. We love building Chevys and Fords but we also love building the Mopar variety, and this one we are particularly fond of because when we built it first it made great power. It just needed a home. Well today is its lucky day. [Frankie] This is one of our favorite Mopars. It is a 505 cubic inch big block. So it is a 440 RV base with a fully forged stroker rotating assembly, Trick Flow induction, and a big solid roller valvetrain. This thing made some serious pump gas horsepower the last time we had it on the dyno and we're gonna be making some upgrades today. Before we get to that here's a quick look at everything that's already inside this power plant. This engine was originally sourced from a parts car out of Alabama, and after disassembly and machining it was fitted with a 4.250 stroke crankshaft from the 440 source. That along with 7-100 inch long H-beam rods and 4-350 bore forged pistons increased the displacement to that 505 cubic inch number. [Pat] It was fitted with a custom ground Comp Cams solid roller cam shaft and Sportsman lifters and topped off with Trick Flow 270cc Power Port cylinder heads. Trent push rods and a Harlan Sharp shaft rocker system round out the valvetrain and it is topped off with a Trick Flow Track Heat single plane 41-50 intake manifold. With a QFT Black Diamond carb this engine made 664 horsepower and 646 pound feet on 93 octane pump gas. [Frankie] So a great combination that made great power, and today we are going to refresh it, revamp it, and restyle it for the guys in Detroit Muscle. [Pat] Now we're gonna get it apart and see what it looks like on the inside but we're gonna make a few improvements. Namely we're gonna update the piston and we're also gonna update the intake manifold. We're gonna go with a Dominator flange. It's gonna give us a little air flow, a little bit more power. Plus we are going to style it for looks. We are going to repaint it the proper Mopar orange and we're gonna put on some nostalgic looking valve covers. It's gonna be perfect for the project. So let's get his thing apart and see what it looks like. [Frankie] Starting at the top we can unbolt and remove the distributor before loosening the four intake bolts and pulling the manifold with little effort. Once the valve covers are removed the shafter rocker arms come next. So the engine can be rolled over to a point where one side of the engine has valves that are mostly closed and none at full lift. This reduces the spring pressure being applied to the shaft and the fasteners as we loosen each ARP bolt incrementally to keep the pressure even across the assembly. Once all the bolts are loose the entire assembly can be removed. [Pat] All of the push rods are removed, inspected for abnormal wear, and kept in order in this handy Summit Racing organizing tray. The heads have to be removed before the lifter valley tray. So all the ARP head studs are loosened from the outside in. The nuts and washers are removed and the studs unthreaded from the block to keep aluminum from graded into the threads and make it easier to lift the heads off. Look at that! Like an engine should look! [Frankie] Pretty good! The lifter cover is bolted down and sealed with r-t-v. So a bit of cutting and prying is required to get it off and get access to the lifters. The solid roller units are slid out, checked for wear, and kept in order with the rest of the valvetrain. Moving to the front of the engine we can unbolt the electric water pump and remove the oil pump housing that bolts to the front driver's side of the block. Before we forget we'll drain the oil from the pan. [Pat] Then we can remove the bolts and drop the pan, or so we thought. See, I used ninjitsu on that. Did you see that? [Frankie] The windage tray being sealed to the pan took a little work to get it off. Finally! [Pat] Pat finally got to use his iron palm technique on it. The Summit Racing harmonic damper is removed with a puller and then the timing pointer and timing cover can be unbolted to reveal the timing set. After removing the cam gear bolts and timing set the big solid roller bumper stick can be slid out. It has specs of 260/272 for duration at 50 thousandths lift, a 112 lobe separation angle, and valve lifts of 670 thousandths on the intake and 678 thousandths on the exhaust. The oil pump pickup threads into the block and was installed with thread retaining compound. So after a bit of reefing on it, it can be screwed out. [Frankie] The ARP 87-40 rod bolts are loosened for each crank throw. The caps are broken loose with a rubber mallet, and then the rod and piston assemblies can be carefully pushed out of the bores. With all eight removed the main studs are loosened, nuts and studs unthreaded, and the caps wiggled out of the block before gently lifting the 4-250 inch stroke crank from its bearings. [Pat] Very lightweight crankshaft. [Frankie] With our 505 torn down up next we'll give it a traditional makeover and show you how a simple change can make a big difference in the balance of your engine.
[Frankie] The first thing we're gonna do to our 505 Mopar is give it a face lift with a new color. So we have all the parts we're gonna be painting here in our prep booth, including our new intake manifold, new valve covers, and the oil pump because it bolts to the side of the block. Everything has been cleaned, taped off, and hit with a base gray coat. The color that Detroit Muscle choose for this project is Chrysler Hemi Orange, and we also are going to be painting the block. Before we got this ready we gave it a quick ball hone job because the cylinders were arrow straight. They were in good condition but we wanted to give it a fresh surfaced finish for our new pistons and rings to help them seal. Then we got it fully cleaned, prepped, taped off, and hit with the same base gray coat. So all we have to do now is turn everything orange. [Pat] This color pays a bit of homage to the high performance 440 Mopars of the '60s, which were painted Hemi Orange instead of the blue found on the milder engines. The paint is POR-15s engine enamel, which can be brushed or sprayed, and lays out in a nice smooth and glossy finish. Under the hood this engine will look as good as it runs. [Frankie] So with our block and parts fully painted we're gonna let them sit and cure fully before we touch them and that will give us time to balance our crankshaft and get the rest of our engine ready for assembly. The only part that we're really changing in the rotating assembly is the piston but we still need to balance the crankshaft because using a different piston is gonna weigh a bit different. Our old piston is a great design. It worked awesome for the application. It has a mild dish to it, which is perfect for the street application it was intended. Made of 26-18 and comes in at 817.5 grams, which is pretty usual for this size and application. Our new piston is a little bit more of a racy design. It is made of 40-32 but it has more of a flat top design and is a little bit lighter coming in at 699 grams. So 118.5 gram difference. Which when you're talking about the balance of a crankshaft is relatively significant. That's why we need to put it on the machine, check the imbalance, and bring it within our tolerance. What we're gonna do is do our first spin, see what we're dealing with, and then we'll figure out how we're gonna correct it. [Pat] The bob weight for our new setup comes in at 2,149.6 grams, and with CWT Industries' calibrated bob weights installed with that matric we can see our starting point. [Frankie] That's actually pretty good and to be expected. So we can see that the imbalance on each plane is really close to 180 degrees out, which means that it was correctly balanced before. We're just changing the piston. So the weight is changing. We are at 47 grams on the rear and 71.9 on the front. So we have quite a bit to take off. The best way to do that since this crankshaft's already been balanced once is we're gonna put it in the lathe. We're gonna turn the counterweights down a little bit, get our imbalance down to a more manageable level and then we can come back with the drill and fine tune it in. We can turn the inch and a quarter wide front and rear counterweights down doing it in stages while checking our work a couple of times since it's always easier to remove material than it is to add it back. In total we took 160 thousandths off the front counterweight and 100 thousandths off the rear in the lathe. With just turning the counterweights and not drilling any holes we've already got it down to below 16 grams on both the front and the rear. So we're much closer to our goal. Now we can come back with the drill and get it dialed in. Even though we have taken a large chunk out and the imbalances are around 180 degrees apart from each other that 15 grams will create almost 150 pounds of force at 6,500 r-p-m. So we were able to use the existing holes in the crankshaft, the CWT drill head, a variety of drill bits, and some Deep Creep to quickly bring our imbalance under our tolerance of .150 ounce inch for this heavier forged crank. Alright, that is very good. Probably better than it needs to be actually. .051 ounce inch on the left, .079 ounce inch on the right. Well within our tolerance 190 degrees apart. Forces on the center of the crank minimized down to .030 ounce inch. So very good. We'll save that as our last spin. We can look on the forces on the crank from before and after. So on the front of the crank just at 6,000 r-p-m before we balanced it there was gonna 588 pounds of force on the front of the crank and now at 6,000 we've minimized that down to just five pounds. So literally more than 10 times better. And again that is every time we show you this why it is so important to have your assembly balanced even if you're making just a little change like the piston. So very happy with that. We'll get this off and get it polished up, cleaned up, get everything ready for assembly, and the next time you see this it'll be going in that engine. [Pat] You heard him! Up next, we thrash to get this big block Mopar reassembled to see how much power we gain in the dyno.
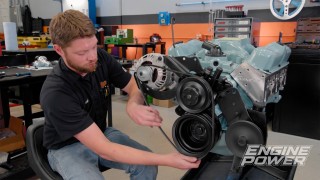
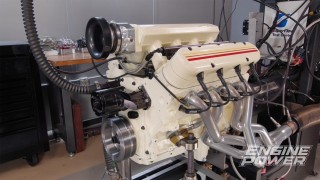
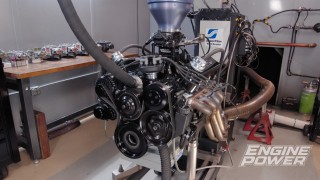
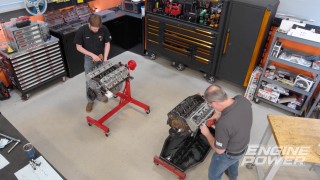
[Pat] We have our stroker big block Mopar block looking good. We went ahead and checked all of the bearing clearances beforehand. The mains have come in at 27 to 32 ten thousandths of clearance. For a high performance application we like to use a clearance level of one thousandths per inch of shaft diameter. So at a 2-750 main we are right in the ballpark. [Frankie] We also went ahead and did the rods as well. With new bearings those all come in between 27 and 29 ten thousandths. We also checked rod bolt stretch while we're at it. We are pretty much ready to go and click this thing together. [Pat] Firstly, all the main bearings receive some Hot Shot's Secret Assembly Lube. Then the rear main seal is installed and lubed, followed by the freshly polished 4-250 stroke crankshaft. Each main cap is slid over the studs in the correct orientation and tapped down gently with a soft mallet. After pre-loading the crank to the forward position the ARP main studs are torqued in three stages to 110 pound feet from the inside out. [Frankie] The rear main seal uses a separate aluminum housing and rather use the original square cut seal that's prone to leaking we have added a bead of silicone between the block and seal housing since this is the most effective and long lasting solution. This is a custom ground solid roller from Comp and has specs of 260/272 at 50 for duration, a 112 degree lobe separation angle, and valve lifts of 670 thousandths on the intake and 678 thousandths on the exhaust with our 1.6 ratio rocker and our 20 thousandths hot lash. The double roller timing set slides on in the two degree retarded position and the thrust button is installed behind the cam gear bolt. [Pat] All of the rod and piston assemblies have already been assembled and rings installed and lubricated. So we can install just the number one piston for now to degree the cam shaft. Since we inspect the larger intake manifold to raise our peak horsepower r-p-m we'll install the cam three degrees advanced at 109 degrees. The other seven rod and piston assemblies can be punched into the block and then the engine can be flipped over and the rod bolts torqued to 85 pound feet to achieve the proper bolt stretch of between five and five and a half thousandths. [Frankie] We repainted the timing cover to give it a fresh look and it goes on with ARP hardware and the stock timing pointer. The Summit Racing damper can be reused and pressed on with the proper installation tool. The oil pump pickup threads into the block on these engines and some orange thread retainer will ensure it can't vibrate loose. After checking our oil pump pickup to pan clearance and it's three-eighths of an inch we can seal the pan baffle to the engine with a steel shim gasket that has a thin spread of silicone on both sides and some more on the mating surfaces of the block to guarantee no oil leaks. A Summit Racing one piece oil pan gasket seals the freshly cleaned seven quarter Milodon center sump oil pan that is designed for A-body Mopars. [Pat] The engine can now remain right side up and a new Meling high volume oil pump we painted can be gently slid into the block. On the top side the oil pump and distributor driveshaft can be slid in and the bronze gear meshed with the camshaft. The lifters come next and are dunked in engine oil for lubrication before sliding into the lifter bores they came out of. They are covered up by this very trick Trick Flow valley cover that eliminates the stock belly pan and is sealed on with r-t-v and tightened with the six button head screws. [Frankie] We are ready for the induction on our 505 Mopar, and like we said one of the big changes we're gonna be making is moving from Trick Flow's Track Heat 41-50 manifold to their 4500 manifold. This not only allows us to run a Dominator style carburetor. It also has a larger plenum volume and a larger runner cross sectional area to better match our cylinder heads. These are Trick Flow's Power Port 270 for the big block Mopar. These have a 270cc intake runner, a 2-190 intake valve, a 1-760 exhaust valve that's housed in a 78cc combustion chamber. These flow 352 c-f-m at seven hundred thousandths inch of lift. So they are pretty much the go-to for making big power with big inch Mopars. Ours are outfitted with the solid roller dual spring. We are good to go. So we'll get these on and then we can start wrapping up this engine. [Pat] The mating surface between the heads and the valley cover must be sealed up. So a decent bead of r-t-v is laid down. With our new 8.1cc valve relief piston and a 4-350 by 27 thousandths thick gasket our static compression ratio is now up nine tenths of a point to 11.64 to one. The cylinder heads can be gently dropped on with one stud installed to help with alignment. Then the remaining studs can be screwed in hand tight to prevent aluminum galling into the threads. With ARP Ultra Torque Lube between the washers and the nuts the heads are torqued down in three even stages ending at 80 pound feet. [Frankie] Our color matched 4500 flange intake can go on next and is held down with stainless ARP intake bolts with thread sealer applied to prevent oil seepage. This larger manifold's ports line up perfectly with these heads and we are expecting some big gains with this new setup. We will put high pressure lube on the new 9-400 long Trent push rods and slide them into the engine making sure they land in the lifter bucket. To install the rocker arms we will roll the engine over so one side at a time has all the cam lobes on the base circle or just off the base circle. Then slowly and evenly tighten the Harlan Sharp shaft rockers down before torquing them to 35 pound feet. We will set cold lash on this setup to 14 thousandths. Once we get the engine heated up on the dyno hot lash will be set at 20 thousandths. [Pat] These vintage looking valve covers can be tightened down with stainless steel studs to seal the engine up. The final addition to this engine is a spartan but beautiful v-drive from CVF Racing with a mechanical water pump and one wire alternator. Being all black it ties with the engine nicely and gives it the perfect blend of an updated and modern look for this big inch Mopar. [Frankie] Coming up, we hit the key on our stroker Mopar and tune it up for a big power increase with our new combination.
[Pat] Our favorite time has arrived. We have our 505 inch big block Mopar on the dyno and ready to rock. Something we do to this engine and every other engine is gap the spark plugs, and that is gonna be the subject of today's Summit Tech Tip. [ Music ] Consistent spark plug gap is important for any application and setting it to the right size is extremely important, but with these things we have on the table relatively easy. First we have wire gauge style, and these fit in between the ground strap and the electrode. If it's too big you can bend them with the bender that's included on there. You don't have to bash it on the table and potentially hurt the plug. Also a slider type where if you slide it in that's where the gap is. If it needs to be a little bit bigger you just wiggle it out until you get the right size. Or for a more high tech way to do it we have this apparatus from Summit Racing Equipment. You take your proper gap that you get on a feeler gauge, you stick in between the ground strap and the electrode and actually squeeze it here on the handle. When it comes out it's a consistent gap every time. Keep in mind the higher the horsepower, the higher the cylinder pressure, the tighter the gap has to be. If you have a question on what plug you should run for heat range or what gap you should run for the application you can contact the experts at Summit Racing Equipment. [ engine revving ] [Frankie] Okay the 505's on the dyno. It is running, up to temp. Checked the lash, changed the oil. We're getting our values programmed in and we are gonna be making hits here very soon. [Pat] I'm very excited about this one. We've got a point of compression. We actually have a bigger header on it. The big thing is that bigger cross sectional manifold and that big giant carburetor and a big spacer. Just all around I think this is gonna be very, very good as far as the power. [Frankie] Shallow on timing right now. It's only got 30 degrees in it. So we're gonna make a hit, see what it does, look at everything, and then we'll go from there. [Pat] Let her buck! [ engine revving ]
[Pat] That was evil right there! [Frankie] Let's see here. [Pat] So at 735.1 that's at 6,300. 665.7 at 5,000. [Frankie] Fuel looks great on this. This is a dyno carb. So we've ran this before. It's verified, tuned in and everything. Low fours for v-s-f-c's. Air/fuels look good. [Pat] I don't know who tuned that last. [Frankie] It wasn't me but it was someone in this room. [Pat] I used a typewriter on it. [Frankie] With a vacuum line to it. Let's do some tune. I want to see what we can get out of it. [Pat] We're gonna jack with some timing and see what we can squeeze out of her. Timing loop! [Frankie] We will make several runs incrementally increasing the timing by one degree until the engine stops gaining horsepower, which landed us at 35 degrees total. [Pat] That's the final timing. I think that's all it's gonna take. By the way the plug looks and what the gas looks like in it it's not gonna take any more than 35. It's gonna level off right there. This is gonna be the grand finale right here. I think it's going to be impressive. [ engine revving ]
[Pat] 760.8. [Frankie] 677.5 pound feet! That's a big gain. Here's our gains just from timing. That's big. Up top what is that, 30? Big thing obviously that's like 95 horse over the last one. [Pat] It sounds like a lot but look what we've changed right? What we've changed is doing what it should. It's printing the right numbers. [Frankie] You can see manifold vacuum wise right now we're at point five and before this thing was a one point seven. That's killer! [Pat] I kinda feel like a Mopar guy now. We're engine guys but the Mopar fans are gonna like this one. [Frankie] If this is a Mopar I'm a Mopar guy. For more information on this build or any of the other cool builds we do here in Engine Power check out Powernation.
Show Full Transcript
[Pat] In today's episode of Engine Power we bring back this big inch monster Mopar for some big changes and some big gains in the power department. [Frankie] We're gonna give this power plant a significant bump in compression, a new but classic look, and an induction package fit for 505 cubic inches before we test it all out in the dyno cell. [ engine revving ] [ Music ]
[Pat] Hey everyone, welcome to Engine Power. Today is gonna be another fun build because it is another engine we have pulled out of the rafters to revamp for a current project in the building. We love building Chevys and Fords but we also love building the Mopar variety, and this one we are particularly fond of because when we built it first it made great power. It just needed a home. Well today is its lucky day. [Frankie] This is one of our favorite Mopars. It is a 505 cubic inch big block. So it is a 440 RV base with a fully forged stroker rotating assembly, Trick Flow induction, and a big solid roller valvetrain. This thing made some serious pump gas horsepower the last time we had it on the dyno and we're gonna be making some upgrades today. Before we get to that here's a quick look at everything that's already inside this power plant. This engine was originally sourced from a parts car out of Alabama, and after disassembly and machining it was fitted with a 4.250 stroke crankshaft from the 440 source. That along with 7-100 inch long H-beam rods and 4-350 bore forged pistons increased the displacement to that 505 cubic inch number. [Pat] It was fitted with a custom ground Comp Cams solid roller cam shaft and Sportsman lifters and topped off with Trick Flow 270cc Power Port cylinder heads. Trent push rods and a Harlan Sharp shaft rocker system round out the valvetrain and it is topped off with a Trick Flow Track Heat single plane 41-50 intake manifold. With a QFT Black Diamond carb this engine made 664 horsepower and 646 pound feet on 93 octane pump gas. [Frankie] So a great combination that made great power, and today we are going to refresh it, revamp it, and restyle it for the guys in Detroit Muscle. [Pat] Now we're gonna get it apart and see what it looks like on the inside but we're gonna make a few improvements. Namely we're gonna update the piston and we're also gonna update the intake manifold. We're gonna go with a Dominator flange. It's gonna give us a little air flow, a little bit more power. Plus we are going to style it for looks. We are going to repaint it the proper Mopar orange and we're gonna put on some nostalgic looking valve covers. It's gonna be perfect for the project. So let's get his thing apart and see what it looks like. [Frankie] Starting at the top we can unbolt and remove the distributor before loosening the four intake bolts and pulling the manifold with little effort. Once the valve covers are removed the shafter rocker arms come next. So the engine can be rolled over to a point where one side of the engine has valves that are mostly closed and none at full lift. This reduces the spring pressure being applied to the shaft and the fasteners as we loosen each ARP bolt incrementally to keep the pressure even across the assembly. Once all the bolts are loose the entire assembly can be removed. [Pat] All of the push rods are removed, inspected for abnormal wear, and kept in order in this handy Summit Racing organizing tray. The heads have to be removed before the lifter valley tray. So all the ARP head studs are loosened from the outside in. The nuts and washers are removed and the studs unthreaded from the block to keep aluminum from graded into the threads and make it easier to lift the heads off. Look at that! Like an engine should look! [Frankie] Pretty good! The lifter cover is bolted down and sealed with r-t-v. So a bit of cutting and prying is required to get it off and get access to the lifters. The solid roller units are slid out, checked for wear, and kept in order with the rest of the valvetrain. Moving to the front of the engine we can unbolt the electric water pump and remove the oil pump housing that bolts to the front driver's side of the block. Before we forget we'll drain the oil from the pan. [Pat] Then we can remove the bolts and drop the pan, or so we thought. See, I used ninjitsu on that. Did you see that? [Frankie] The windage tray being sealed to the pan took a little work to get it off. Finally! [Pat] Pat finally got to use his iron palm technique on it. The Summit Racing harmonic damper is removed with a puller and then the timing pointer and timing cover can be unbolted to reveal the timing set. After removing the cam gear bolts and timing set the big solid roller bumper stick can be slid out. It has specs of 260/272 for duration at 50 thousandths lift, a 112 lobe separation angle, and valve lifts of 670 thousandths on the intake and 678 thousandths on the exhaust. The oil pump pickup threads into the block and was installed with thread retaining compound. So after a bit of reefing on it, it can be screwed out. [Frankie] The ARP 87-40 rod bolts are loosened for each crank throw. The caps are broken loose with a rubber mallet, and then the rod and piston assemblies can be carefully pushed out of the bores. With all eight removed the main studs are loosened, nuts and studs unthreaded, and the caps wiggled out of the block before gently lifting the 4-250 inch stroke crank from its bearings. [Pat] Very lightweight crankshaft. [Frankie] With our 505 torn down up next we'll give it a traditional makeover and show you how a simple change can make a big difference in the balance of your engine.
[Frankie] The first thing we're gonna do to our 505 Mopar is give it a face lift with a new color. So we have all the parts we're gonna be painting here in our prep booth, including our new intake manifold, new valve covers, and the oil pump because it bolts to the side of the block. Everything has been cleaned, taped off, and hit with a base gray coat. The color that Detroit Muscle choose for this project is Chrysler Hemi Orange, and we also are going to be painting the block. Before we got this ready we gave it a quick ball hone job because the cylinders were arrow straight. They were in good condition but we wanted to give it a fresh surfaced finish for our new pistons and rings to help them seal. Then we got it fully cleaned, prepped, taped off, and hit with the same base gray coat. So all we have to do now is turn everything orange. [Pat] This color pays a bit of homage to the high performance 440 Mopars of the '60s, which were painted Hemi Orange instead of the blue found on the milder engines. The paint is POR-15s engine enamel, which can be brushed or sprayed, and lays out in a nice smooth and glossy finish. Under the hood this engine will look as good as it runs. [Frankie] So with our block and parts fully painted we're gonna let them sit and cure fully before we touch them and that will give us time to balance our crankshaft and get the rest of our engine ready for assembly. The only part that we're really changing in the rotating assembly is the piston but we still need to balance the crankshaft because using a different piston is gonna weigh a bit different. Our old piston is a great design. It worked awesome for the application. It has a mild dish to it, which is perfect for the street application it was intended. Made of 26-18 and comes in at 817.5 grams, which is pretty usual for this size and application. Our new piston is a little bit more of a racy design. It is made of 40-32 but it has more of a flat top design and is a little bit lighter coming in at 699 grams. So 118.5 gram difference. Which when you're talking about the balance of a crankshaft is relatively significant. That's why we need to put it on the machine, check the imbalance, and bring it within our tolerance. What we're gonna do is do our first spin, see what we're dealing with, and then we'll figure out how we're gonna correct it. [Pat] The bob weight for our new setup comes in at 2,149.6 grams, and with CWT Industries' calibrated bob weights installed with that matric we can see our starting point. [Frankie] That's actually pretty good and to be expected. So we can see that the imbalance on each plane is really close to 180 degrees out, which means that it was correctly balanced before. We're just changing the piston. So the weight is changing. We are at 47 grams on the rear and 71.9 on the front. So we have quite a bit to take off. The best way to do that since this crankshaft's already been balanced once is we're gonna put it in the lathe. We're gonna turn the counterweights down a little bit, get our imbalance down to a more manageable level and then we can come back with the drill and fine tune it in. We can turn the inch and a quarter wide front and rear counterweights down doing it in stages while checking our work a couple of times since it's always easier to remove material than it is to add it back. In total we took 160 thousandths off the front counterweight and 100 thousandths off the rear in the lathe. With just turning the counterweights and not drilling any holes we've already got it down to below 16 grams on both the front and the rear. So we're much closer to our goal. Now we can come back with the drill and get it dialed in. Even though we have taken a large chunk out and the imbalances are around 180 degrees apart from each other that 15 grams will create almost 150 pounds of force at 6,500 r-p-m. So we were able to use the existing holes in the crankshaft, the CWT drill head, a variety of drill bits, and some Deep Creep to quickly bring our imbalance under our tolerance of .150 ounce inch for this heavier forged crank. Alright, that is very good. Probably better than it needs to be actually. .051 ounce inch on the left, .079 ounce inch on the right. Well within our tolerance 190 degrees apart. Forces on the center of the crank minimized down to .030 ounce inch. So very good. We'll save that as our last spin. We can look on the forces on the crank from before and after. So on the front of the crank just at 6,000 r-p-m before we balanced it there was gonna 588 pounds of force on the front of the crank and now at 6,000 we've minimized that down to just five pounds. So literally more than 10 times better. And again that is every time we show you this why it is so important to have your assembly balanced even if you're making just a little change like the piston. So very happy with that. We'll get this off and get it polished up, cleaned up, get everything ready for assembly, and the next time you see this it'll be going in that engine. [Pat] You heard him! Up next, we thrash to get this big block Mopar reassembled to see how much power we gain in the dyno.
[Pat] We have our stroker big block Mopar block looking good. We went ahead and checked all of the bearing clearances beforehand. The mains have come in at 27 to 32 ten thousandths of clearance. For a high performance application we like to use a clearance level of one thousandths per inch of shaft diameter. So at a 2-750 main we are right in the ballpark. [Frankie] We also went ahead and did the rods as well. With new bearings those all come in between 27 and 29 ten thousandths. We also checked rod bolt stretch while we're at it. We are pretty much ready to go and click this thing together. [Pat] Firstly, all the main bearings receive some Hot Shot's Secret Assembly Lube. Then the rear main seal is installed and lubed, followed by the freshly polished 4-250 stroke crankshaft. Each main cap is slid over the studs in the correct orientation and tapped down gently with a soft mallet. After pre-loading the crank to the forward position the ARP main studs are torqued in three stages to 110 pound feet from the inside out. [Frankie] The rear main seal uses a separate aluminum housing and rather use the original square cut seal that's prone to leaking we have added a bead of silicone between the block and seal housing since this is the most effective and long lasting solution. This is a custom ground solid roller from Comp and has specs of 260/272 at 50 for duration, a 112 degree lobe separation angle, and valve lifts of 670 thousandths on the intake and 678 thousandths on the exhaust with our 1.6 ratio rocker and our 20 thousandths hot lash. The double roller timing set slides on in the two degree retarded position and the thrust button is installed behind the cam gear bolt. [Pat] All of the rod and piston assemblies have already been assembled and rings installed and lubricated. So we can install just the number one piston for now to degree the cam shaft. Since we inspect the larger intake manifold to raise our peak horsepower r-p-m we'll install the cam three degrees advanced at 109 degrees. The other seven rod and piston assemblies can be punched into the block and then the engine can be flipped over and the rod bolts torqued to 85 pound feet to achieve the proper bolt stretch of between five and five and a half thousandths. [Frankie] We repainted the timing cover to give it a fresh look and it goes on with ARP hardware and the stock timing pointer. The Summit Racing damper can be reused and pressed on with the proper installation tool. The oil pump pickup threads into the block on these engines and some orange thread retainer will ensure it can't vibrate loose. After checking our oil pump pickup to pan clearance and it's three-eighths of an inch we can seal the pan baffle to the engine with a steel shim gasket that has a thin spread of silicone on both sides and some more on the mating surfaces of the block to guarantee no oil leaks. A Summit Racing one piece oil pan gasket seals the freshly cleaned seven quarter Milodon center sump oil pan that is designed for A-body Mopars. [Pat] The engine can now remain right side up and a new Meling high volume oil pump we painted can be gently slid into the block. On the top side the oil pump and distributor driveshaft can be slid in and the bronze gear meshed with the camshaft. The lifters come next and are dunked in engine oil for lubrication before sliding into the lifter bores they came out of. They are covered up by this very trick Trick Flow valley cover that eliminates the stock belly pan and is sealed on with r-t-v and tightened with the six button head screws. [Frankie] We are ready for the induction on our 505 Mopar, and like we said one of the big changes we're gonna be making is moving from Trick Flow's Track Heat 41-50 manifold to their 4500 manifold. This not only allows us to run a Dominator style carburetor. It also has a larger plenum volume and a larger runner cross sectional area to better match our cylinder heads. These are Trick Flow's Power Port 270 for the big block Mopar. These have a 270cc intake runner, a 2-190 intake valve, a 1-760 exhaust valve that's housed in a 78cc combustion chamber. These flow 352 c-f-m at seven hundred thousandths inch of lift. So they are pretty much the go-to for making big power with big inch Mopars. Ours are outfitted with the solid roller dual spring. We are good to go. So we'll get these on and then we can start wrapping up this engine. [Pat] The mating surface between the heads and the valley cover must be sealed up. So a decent bead of r-t-v is laid down. With our new 8.1cc valve relief piston and a 4-350 by 27 thousandths thick gasket our static compression ratio is now up nine tenths of a point to 11.64 to one. The cylinder heads can be gently dropped on with one stud installed to help with alignment. Then the remaining studs can be screwed in hand tight to prevent aluminum galling into the threads. With ARP Ultra Torque Lube between the washers and the nuts the heads are torqued down in three even stages ending at 80 pound feet. [Frankie] Our color matched 4500 flange intake can go on next and is held down with stainless ARP intake bolts with thread sealer applied to prevent oil seepage. This larger manifold's ports line up perfectly with these heads and we are expecting some big gains with this new setup. We will put high pressure lube on the new 9-400 long Trent push rods and slide them into the engine making sure they land in the lifter bucket. To install the rocker arms we will roll the engine over so one side at a time has all the cam lobes on the base circle or just off the base circle. Then slowly and evenly tighten the Harlan Sharp shaft rockers down before torquing them to 35 pound feet. We will set cold lash on this setup to 14 thousandths. Once we get the engine heated up on the dyno hot lash will be set at 20 thousandths. [Pat] These vintage looking valve covers can be tightened down with stainless steel studs to seal the engine up. The final addition to this engine is a spartan but beautiful v-drive from CVF Racing with a mechanical water pump and one wire alternator. Being all black it ties with the engine nicely and gives it the perfect blend of an updated and modern look for this big inch Mopar. [Frankie] Coming up, we hit the key on our stroker Mopar and tune it up for a big power increase with our new combination.
[Pat] Our favorite time has arrived. We have our 505 inch big block Mopar on the dyno and ready to rock. Something we do to this engine and every other engine is gap the spark plugs, and that is gonna be the subject of today's Summit Tech Tip. [ Music ] Consistent spark plug gap is important for any application and setting it to the right size is extremely important, but with these things we have on the table relatively easy. First we have wire gauge style, and these fit in between the ground strap and the electrode. If it's too big you can bend them with the bender that's included on there. You don't have to bash it on the table and potentially hurt the plug. Also a slider type where if you slide it in that's where the gap is. If it needs to be a little bit bigger you just wiggle it out until you get the right size. Or for a more high tech way to do it we have this apparatus from Summit Racing Equipment. You take your proper gap that you get on a feeler gauge, you stick in between the ground strap and the electrode and actually squeeze it here on the handle. When it comes out it's a consistent gap every time. Keep in mind the higher the horsepower, the higher the cylinder pressure, the tighter the gap has to be. If you have a question on what plug you should run for heat range or what gap you should run for the application you can contact the experts at Summit Racing Equipment. [ engine revving ] [Frankie] Okay the 505's on the dyno. It is running, up to temp. Checked the lash, changed the oil. We're getting our values programmed in and we are gonna be making hits here very soon. [Pat] I'm very excited about this one. We've got a point of compression. We actually have a bigger header on it. The big thing is that bigger cross sectional manifold and that big giant carburetor and a big spacer. Just all around I think this is gonna be very, very good as far as the power. [Frankie] Shallow on timing right now. It's only got 30 degrees in it. So we're gonna make a hit, see what it does, look at everything, and then we'll go from there. [Pat] Let her buck! [ engine revving ]
[Pat] That was evil right there! [Frankie] Let's see here. [Pat] So at 735.1 that's at 6,300. 665.7 at 5,000. [Frankie] Fuel looks great on this. This is a dyno carb. So we've ran this before. It's verified, tuned in and everything. Low fours for v-s-f-c's. Air/fuels look good. [Pat] I don't know who tuned that last. [Frankie] It wasn't me but it was someone in this room. [Pat] I used a typewriter on it. [Frankie] With a vacuum line to it. Let's do some tune. I want to see what we can get out of it. [Pat] We're gonna jack with some timing and see what we can squeeze out of her. Timing loop! [Frankie] We will make several runs incrementally increasing the timing by one degree until the engine stops gaining horsepower, which landed us at 35 degrees total. [Pat] That's the final timing. I think that's all it's gonna take. By the way the plug looks and what the gas looks like in it it's not gonna take any more than 35. It's gonna level off right there. This is gonna be the grand finale right here. I think it's going to be impressive. [ engine revving ]
[Pat] 760.8. [Frankie] 677.5 pound feet! That's a big gain. Here's our gains just from timing. That's big. Up top what is that, 30? Big thing obviously that's like 95 horse over the last one. [Pat] It sounds like a lot but look what we've changed right? What we've changed is doing what it should. It's printing the right numbers. [Frankie] You can see manifold vacuum wise right now we're at point five and before this thing was a one point seven. That's killer! [Pat] I kinda feel like a Mopar guy now. We're engine guys but the Mopar fans are gonna like this one. [Frankie] If this is a Mopar I'm a Mopar guy. For more information on this build or any of the other cool builds we do here in Engine Power check out Powernation.
Engine Power Featured Projects
Engine Power Builds







Want more content like this?
Join the PowerNation Email NewsletterParts Used In This Episode


ARP
ARP Ultra-Torque Fastener Assembly Lubricant
ARP
Bolts & Fasteners
Comp Cams
COMP Cams Camshaft
CVF Racing
Black Chrysler 1 Wire Alternator, 100 AMP, SIngle Groove V-Belt Pulley
CVF Racing
Black Chrysler 383-440-Crate Hemi Aluminum Water Pump
CWT Industries
Multi-Bal 5500
Duralast
Melling HIgh-Volume Oil Pump