
More Unbreakable Suburban Episodes
Music City Trucks Featured Projects


Music City Trucks Builds


Want more content like this?
Join the PowerNation Email NewsletterParts Used In This Episode

Matco Tools
MATCO Tools are the Official Tool Supplier to PowerNation
The Industrial Depot
Tools, Hardware, Shop Supplies
Episode Transcript
(Marc)>> You're watching Powernation!
(Marc)>> Today on Music City Trucks the guys from Carcass help kick off our fab work.
(Brandon)>> And as always we're having a blast.
(Jeremy)>> Woo, hoo, hoo, hoo!
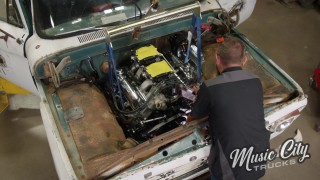
(Marc)>> Get you? Then while Brandon continues the fab I'll tear down this Dana 60 front axle and build it into a worthy addition to Project Unbreakable. [ MUSIC ] [ engine revving ] [ MUSIC ]
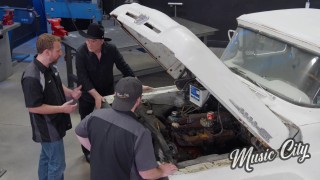
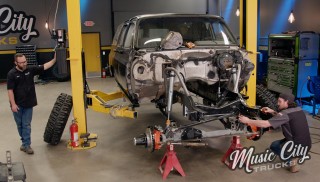
(Marc)>> Hey welcome to Music City Trucks. We've got our 1991 Suburban in here. We're making some pretty good headway on it. We've got a really fun day planned today. We've got a couple of guys in here to help us out, some buddies of ours, Jimmy and Jeremy from our sister show Carcass. Guys thanks for coming in.
(Jimmy)>> Thanks for having us. We're all about efficiency in our shop. So anything we can do to help we're at your disposal.
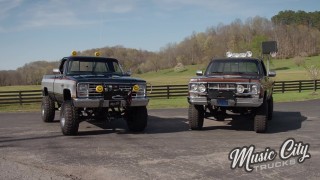
(Jeremy)>> And we both love square bodies. So this should be a fun little project.
(Marc)>> So the last time you saw this thing we got it stripped down to the bare frame, which wasn't on our list of things to do but that's okay, and got the frame painted up real nice, and Brandon even installed some pretty cool rock sliders.
(Brandon)>> So we're calling this project Unbreakable, and to achieve that we're doing one tons, four link coil over, and a bunch of fab work, which is what we're gonna be doing today, and the front bumper's kinda my baby. So Jimmy with your c-n-c plasma skills I think we can knock that front one out real quick.
(Jimmy)>> Let's do it!
(Marc)>> And Jeremy that means you and I are on the rear. Let me show you what we've got going on over here.
(Jeremy)>> Let's take a peek here.
(Marc)>> So this is just a sample of the two by four tubing we're gonna use. This is the same stuff Brandon used for the rock sliders, but we want to make the bumpers out of these. So we want to keep it a little bit of gap there between the bar doors so we have some clearance.
(Jeremy)>> You're gonna tuck it then?
(Marc)>> Maybe come off about the thickness of the tubing or maybe at least an inch, but we want to keep it pretty tight.
(Jeremy)>> So I think the easiest way to go about doing this is just cut the chassis, square it up, and put a piece of tube on there and see what it looks like.
(Marc)>> Let's grab some tools! [ saw buzzing ] [ welder crackling ]
(Jeremy)>> Woo, hoo, hoo!
(Marc)>> Get you?
(Jeremy)>> Just a little bit.
(Marc)>> Wow, I like it. Alright so we just need to figure out what we're gonna do with these forward bars. I think we'll just lop these off later.
(Jeremy)>> Well then let's go forward from here and see what it looks like. Alright Marc what do you think of that angle?
(Marc)>> That looks good.
(Jeremy)>> It's about five degrees.
(Marc)>> So my idea with that is to, if we have a little bit of an angle here that actually helps with our departure. If it lands on a rock it acts as a rock slider and a bumper. [ metal clanging ] [ saw buzzing ] [ welder crackling ]
(Marc)>> That's not going anywhere.
(Jeremy)>> No, that's fine right there.
(Marc)>> I like that.
(Jeremy)>> It looks pretty good.
(Marc)>> And it lines up with the rocker too.
(Jeremy)>> And you're gonna come in and cut this anyways and you're gonna cap that end off.
(Marc)>> We'll get to all that. I guess I could start cutting the other side out.
(Jeremy)>> Yeah cause you've got a wheel well to deal with now, and while you're doing that I'm gonna get started on the spare tire carrier. I brought some tools down that's gonna make our lives a whole lot easier. For the spare tire carrier we're gonna be using some pretty simple stuff. We're gonna use a swing away kit, some rectangular tubing, some round tubing, and we're gonna be using a wheel adapter. That way the boys can swing the tire away to get in the back of the Suburban. First step is to drill a couple of holes. [ drill buzzing ]
(Brandon)>> One thing on the front bumper is I want to make it removable. That way if we get any damage or whatever I can fix it. I think we need to take this bracket off. So that means cut these four rivets. That way we have a flat surface for the tube to sit on.
(Jimmy)>> Something too is if we actually tack the tube in here we can actually use these holes as a drill guide. That way we get our bolts and everything to line up perfect. [ air chisel buzzing & vibrating ] [ saw buzzing ] [ grinder buzzing ]
(Jimmy)>> If we just set these kinda at zero degrees relative to the body we'll just use the three bottom holes and the two holes from the body mount. [ welder crackling ] [ drill humming ] [ grinder buzzing ] [ welder crackling ]
(Brandon)>> Maybe 30 degrees? That looks pretty good!
(Jimmy)>> And we'll cut it at 15 and do a minor cut on this one so the edges match. [ saw buzzing ] [ MUSIC ]
(Brandon)>> Something like that. [ MUSIC ] Yeah!
(Jimmy)>> Zero?
(Brandon)>> It was. [ welder crackling ]
(Jimmy)>> It's looking like something.
(Marc)>> Well we got the extensions installed. So the main part of our bumper is finished, but we've got the frame hanging down here where the original bumper was. So we either need to cut that off or make an extension. I think making an extension with this would be great because that's multi-purpose. We can mount a skid plate to it. We can put a hitch in there. Pretty much whatever we want. [ welder crackling ]
(Marc)>> While I'm working on the bumper Jeremy is gonna whip us up a spare tire carrier. [ mechanical humming ] [ MUSIC ] [ saw buzzing ]
(Jeremy)>> Looks like yours done and so did I.
(Marc)>> Oh that looks awesome. [ welder crackling ]
(Jeremy)>> Alright ready? Ha, swinging!
(Marc)>> Nice!
(Brandon)>> I figure next step is just lob the fenders off, figure out that angle. [ MUSIC ] [ saw buzzing ]
(Brandon)>> Oh yeah! The fairlead needs to be probably right there.
(Jimmy)>> Alright so we've got all of our measurements we need for stuff to cut on the plasma. So we should head down to the Carcass shop and start cutting.
(Brandon)>> Yeah, thank you! [ MUSIC ]
(Jimmy)>> This is looking pretty good. Just got to get it over to the plasma table and we'll cut it out. [ torch hissing ] [ MUSIC ]
(Jimmy)>> Alright first of many pieces.
(Brandon)>> Diamond plate.
(Jimmy)>> This'll be perfect for some steps.
(Brandon)>> This is why we don't throw old metal away, cause you just might be able to find a use for it someday, like this diamond plate I'm putting on the front bumper. [ saw buzzing ] [ welder crackling ]
(Brandon)>> Done, well not really.
(Jeremy)>> Brandon I heard you say you were done. What'd you guys get accomplished here?
(Brandon)>> Half way done. We got the structure and all the bones put together. Brush guard and the fairlead cage is still in my head.
(Jeremy)>> It looks really good though.
(Jimmy)>> It's a good start.
(Marc)>> And I noticed under here there are sticking down.
(Brandon)>> Yeah we're gonna lob those off and then make a skit plate that goes to the axle.
(Marc)>> I like the way it's going. You want to see what we did out back?
(Brandon)>> Yes! Look I've got to get the whole view.
(Jimmy)>> Very nice guys.
(Brandon)>> It follows the contour? The tailgate!
(Marc)>> Thank you guys so much for all of your help. This was huge, and for the use of the tools and all that. Can you leave this stuff?
(Jeremy)>> Keep the tools, bring them back when you're done.
(Marc)>> Thanks! Coming up next.
(Brandon)>> Now that we've got a great start with the Carcass guys Marc and I take the fab work to another level.
(Brandon)>> Well we lost our help on these bumpers but I've still got a lot of stuff to do, and I've got to build a brush guard. So I'm gonna go bend some tubing.
(Marc)>> And I'm gonna cypher what we're gonna do about the wheel openings. Definitely have to get the trim out of the way and get our excess cut off, but then we might as well open them up a bit. We're expanding the wheel openings because they're designed for the stock tire height, but since we're going with big tires and lots of suspension travel we need all the room we can get. [ saw buzzing ] [ MUSIC ]
(Brandon)>> Alright we're gonna bend it to 90. We're gonna be using inch and five-eighths tubing for the main hoop on our brush guard. [ metal clanging ]
(Brandon)>> The theme is unbreakable and the last thing we want is the inconvenience of a broken headlight or a punctured radiator. [ welder crackling ]
(Brandon)>> For our headlight hoops I bent up some inch and a half tubing and notched it to fit the contours of our main hoop. You can see I've already measured and marked where the tube's gonna land. Now I tack it in first to make sure all the angles are right. Once I like where everything sits it's time for finish welding but I'll get to that later. [ welder crackling ] [ MUSIC ] [ welder crackling ] [ MUSIC ] [ welder crackling ]
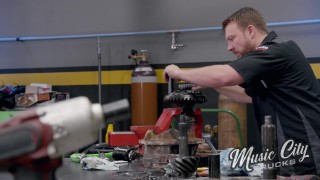
(Brandon)>> Now that we're pretty much done cutting and tacking everything in on this project I want to talk about the machine we've been using. It's a Forney 220 MP, which is a multi-process unit. It does mig, stick, and even tig. You can also plug this thing into a 110 or a 220 and it recognizes the volts that you put into. So all you have to do is plug it in, grab the wand, and literally just start welding. Now this thing welds up to half inch plate, which is more than perfect for our project because we've been using 11 gauge and quarter inch plate. I have a lot of welding to do. So let's start burning it in.
(Marc)>> Up next, while Brandon continues with the fab work I'm stripping down this Dana 60.
(Marc)>> We are rocking and rolling on our '91 Suburban project that we're calling Unbreakable. We've got a lot of fab work done today already with the help of the guys down in Carcass but there's still quite a bit left to do. A bunch of the finish welding and stuff like that. So Brandon's focusing on that and while he's doing that I'm gonna tackle the axle builds, specifically the front axle. This is a Dana 60. We do have a 14 bolt rear but I'm not really gonna focus on that because the axle build's a little more complicated, and besides Dana 60's kinda carry across the board. This does have a kingpin style setup, which is really highly sought after but it does require some specific components, but other than that everything Dana 60 is pretty much Dana 60, whether you're talking about Ford, Dodge, or GM. That being said there's a ton of aftermarket components available, no put intended. Everything from the axles to the diff, spindles, bearings, seals, gaskets. I mean it's all there and we're gonna replace it all all the way down to the wheel studs and even the brakes. We've even got a truss there we're gonna install, although we may not get to that today because I want to focus on the tech of the axle build itself cause it can be a little complicated. Now since we do have all those new components everything here has to go pretty much except the housing. So now I've just got to get dirty and make some noise. The fluid in this axle looked really good but we're not really concerned with that because everything in here is gonna get replaced anyway. However if you wanted to run a Dana 60 in your rig you could keep it completely stock and it would provide you with plenty of strength and longevity. After draining the oil we'll start disassembly by removing the locking hubs. [ MUSIC ] Which will allow us to access the hub nuts. [ MUSIC ] Then the hub and spindle can be removed, followed by the axle shaft. The caps can be removed next, which frees up the diff. Then out comes the pinion. Now it's time for some kingpin fun.
(Brandon)>> Woo, hoo, hoo!
(Marc)>> Now we told you before how popular these kingpin Dana 60's are for off roaders but when it comes time to rebuild them sometimes it can take a little bit of, gotta bring the heat. [ air drill buzzing & vibrating ]
(Marc)>> Persuasion. Hot! [ MUSIC ] [ torch hissing ]
(Marc)>> Up next, isn't setting up diffs so much fun? Time to build our front axle.
(Marc)>> Well I've made some pretty good headway on the Dana 60 front end build for our '91 Suburban, Project Unbreakable. Probably saw all the things on the table here earlier but I want to dig in a little bit deeper. We got everything here from Summit Racing, and let's start with the diff. 35 spline locker, all of the axles to accommodate that including these massive joints to connect the inners and outers, and we've got some upgraded knuckles here. This is a big upgrade from the factory, and then everything else we need to get it assembled. Kingpin rebuild kits, bearings, seals, shims, hubs, spindles, and even this cast iron diff cover, which is a really nice upgrade. As for the housing itself you saw earlier I was cutting some of the brackets off. I got all of the spring perches, the shock mounts, and even the steering stabilizer bracket off there. I got it all ground down smooth, cleaned it up real good, and you can see I got some paint on it. That's just a weld through primer because we still need to install all of our four link, but that's gonna be later on. We even have the truss back there that's got to get welded on. For now I want to focus on getting the internals build, and I got it all cleaned out in there. So it's ready for assembly. The first thing I'm gonna put on though is the ring gear onto the diff. [ MUSIC ] With the ring gear drawn onto the carrier I put some red thread locker on the bolts and torque them to 110 foot pounds. [ metal clanging ]
(Marc)>> The outer pinion bearing race can be installed along with the axle seals. I think we're there. Well this is the point in the process where we need to figure out pinion depth, and we start with the inner pinion bearing. Now what I would normally do is take this inner bearing race, drive it into the housing, and then use a setup bearing on the pinion here to figure out how many shims need to go between the gear and the bearing, but this axle's a little bit different. Actually some Dana 60's are like this, some are not. The shims actually go behind the race in the housing. So what we need to do is have a setup race, and I just took the one that came out of here and ground it down so it'll slip in and out, and I took the shims that came out of here for a starting point. So we're gonna put those in, then the race, then the pinion, and that's where we'll start. We're gonna temporarily install the outer bearing and yoke in order to check and adjust our setup. We're using some washers here so the lock nut doesn't fully engage. We'll drop the center section in, install the shims, and snug down the caps. We're using a dial indicator on the ring gear to measure the backlash. We've got about 12 thousandths, which is a good starting point. It's a little bit out of spec but close enough to go ahead and check the pattern, and this one looks pretty good. Time for final assembly, which will start with driving in the inner pinion bearing race that I mentioned earlier. We'll press on the carrier bearings and the inner pinion bearing. [ MUSIC ] With the pinion in the housing the outer shims can be installed, followed by the outer pinion bearing which needs to be driven on, followed by the pinion seal, the yoke, and the nut, which gets tightened. Now's the time to check pinion pre-load. Ours is good. So we can move on to installing the diff, carrier shims, and caps. The caps need to be torqued to 80 pound feet, and now it's time to get our final measurements starting with backlash, which is 10 thousandths, just within spec. We'll run another pattern and I'll take it. [ MUSIC ] [ metal clanging ] [ MUSIC ] [ drill buzzing ]
(Marc)>> With the hard part done it's time to move on to the knuckles. [ torque wrench clicking ] [ MUSIC ]
(Marc)>> And bring this Dana 60 into the 21st century and make it worthy of Project Unbreakable. While we're freshening and strengthening this axle where we can there are some components we need to reuse, like the caliper bracket, dust shields, and hub housings. We cleaned them up and gave them a coat of black paint to keep them looking new. [ drill buzzing ] [ MUSIC ]
(Marc)>> With the new bearings in place we can install the hub nuts followed by the locking hubs, and now we're heading to the finish line. Oh yeah! We're using Yukon Gear's hardcore locking hub set. You'll notice the assembly is a little different than the o-e style locking hubs but these are stronger, and that's just what we want for Unbreakable. [ MUSIC ] Well I know these wheels and tires aren't gonna get us anywhere but I've got to see what they look like under here, and it's gonna give you a better idea of what this rig's gonna look like when we're all done, and that's probably about where ride height's gonna be. So I'm really excited about it, but I feel like we got a lot done today. I mean I'm exhausted.
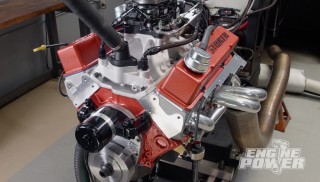
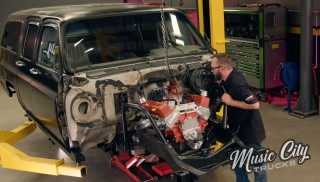
(Brandon)>> Pretty much all the fabrication's done besides the suspension, and speaking of suspension our front 14 inch coil overs on the ground along with Pat's 383 stroker that he built us.
(Marc)>> Yeah that thing's awesome. We'll dig in more about that next time along with all the other supporting components, transmission, transfer cases, those axles. I've got the Dana 60 all done finally but I do have to get that 14 bolt built and I'll work on that later. We'll get all that under the truck, and you're gonna paint the truck too. So if you think we got a lot accomplished today make sure you come back and see where we take Unbreakable.
Show Full Transcript
(Marc)>> Today on Music City Trucks the guys from Carcass help kick off our fab work.
(Brandon)>> And as always we're having a blast.
(Jeremy)>> Woo, hoo, hoo, hoo!
(Marc)>> Get you? Then while Brandon continues the fab I'll tear down this Dana 60 front axle and build it into a worthy addition to Project Unbreakable. [ MUSIC ] [ engine revving ] [ MUSIC ]
(Marc)>> Hey welcome to Music City Trucks. We've got our 1991 Suburban in here. We're making some pretty good headway on it. We've got a really fun day planned today. We've got a couple of guys in here to help us out, some buddies of ours, Jimmy and Jeremy from our sister show Carcass. Guys thanks for coming in.
(Jimmy)>> Thanks for having us. We're all about efficiency in our shop. So anything we can do to help we're at your disposal.
(Jeremy)>> And we both love square bodies. So this should be a fun little project.
(Marc)>> So the last time you saw this thing we got it stripped down to the bare frame, which wasn't on our list of things to do but that's okay, and got the frame painted up real nice, and Brandon even installed some pretty cool rock sliders.
(Brandon)>> So we're calling this project Unbreakable, and to achieve that we're doing one tons, four link coil over, and a bunch of fab work, which is what we're gonna be doing today, and the front bumper's kinda my baby. So Jimmy with your c-n-c plasma skills I think we can knock that front one out real quick.
(Jimmy)>> Let's do it!
(Marc)>> And Jeremy that means you and I are on the rear. Let me show you what we've got going on over here.
(Jeremy)>> Let's take a peek here.
(Marc)>> So this is just a sample of the two by four tubing we're gonna use. This is the same stuff Brandon used for the rock sliders, but we want to make the bumpers out of these. So we want to keep it a little bit of gap there between the bar doors so we have some clearance.
(Jeremy)>> You're gonna tuck it then?
(Marc)>> Maybe come off about the thickness of the tubing or maybe at least an inch, but we want to keep it pretty tight.
(Jeremy)>> So I think the easiest way to go about doing this is just cut the chassis, square it up, and put a piece of tube on there and see what it looks like.
(Marc)>> Let's grab some tools! [ saw buzzing ] [ welder crackling ]
(Jeremy)>> Woo, hoo, hoo!
(Marc)>> Get you?
(Jeremy)>> Just a little bit.
(Marc)>> Wow, I like it. Alright so we just need to figure out what we're gonna do with these forward bars. I think we'll just lop these off later.
(Jeremy)>> Well then let's go forward from here and see what it looks like. Alright Marc what do you think of that angle?
(Marc)>> That looks good.
(Jeremy)>> It's about five degrees.
(Marc)>> So my idea with that is to, if we have a little bit of an angle here that actually helps with our departure. If it lands on a rock it acts as a rock slider and a bumper. [ metal clanging ] [ saw buzzing ] [ welder crackling ]
(Marc)>> That's not going anywhere.
(Jeremy)>> No, that's fine right there.
(Marc)>> I like that.
(Jeremy)>> It looks pretty good.
(Marc)>> And it lines up with the rocker too.
(Jeremy)>> And you're gonna come in and cut this anyways and you're gonna cap that end off.
(Marc)>> We'll get to all that. I guess I could start cutting the other side out.
(Jeremy)>> Yeah cause you've got a wheel well to deal with now, and while you're doing that I'm gonna get started on the spare tire carrier. I brought some tools down that's gonna make our lives a whole lot easier. For the spare tire carrier we're gonna be using some pretty simple stuff. We're gonna use a swing away kit, some rectangular tubing, some round tubing, and we're gonna be using a wheel adapter. That way the boys can swing the tire away to get in the back of the Suburban. First step is to drill a couple of holes. [ drill buzzing ]
(Brandon)>> One thing on the front bumper is I want to make it removable. That way if we get any damage or whatever I can fix it. I think we need to take this bracket off. So that means cut these four rivets. That way we have a flat surface for the tube to sit on.
(Jimmy)>> Something too is if we actually tack the tube in here we can actually use these holes as a drill guide. That way we get our bolts and everything to line up perfect. [ air chisel buzzing & vibrating ] [ saw buzzing ] [ grinder buzzing ]
(Jimmy)>> If we just set these kinda at zero degrees relative to the body we'll just use the three bottom holes and the two holes from the body mount. [ welder crackling ] [ drill humming ] [ grinder buzzing ] [ welder crackling ]
(Brandon)>> Maybe 30 degrees? That looks pretty good!
(Jimmy)>> And we'll cut it at 15 and do a minor cut on this one so the edges match. [ saw buzzing ] [ MUSIC ]
(Brandon)>> Something like that. [ MUSIC ] Yeah!
(Jimmy)>> Zero?
(Brandon)>> It was. [ welder crackling ]
(Jimmy)>> It's looking like something.
(Marc)>> Well we got the extensions installed. So the main part of our bumper is finished, but we've got the frame hanging down here where the original bumper was. So we either need to cut that off or make an extension. I think making an extension with this would be great because that's multi-purpose. We can mount a skid plate to it. We can put a hitch in there. Pretty much whatever we want. [ welder crackling ]
(Marc)>> While I'm working on the bumper Jeremy is gonna whip us up a spare tire carrier. [ mechanical humming ] [ MUSIC ] [ saw buzzing ]
(Jeremy)>> Looks like yours done and so did I.
(Marc)>> Oh that looks awesome. [ welder crackling ]
(Jeremy)>> Alright ready? Ha, swinging!
(Marc)>> Nice!
(Brandon)>> I figure next step is just lob the fenders off, figure out that angle. [ MUSIC ] [ saw buzzing ]
(Brandon)>> Oh yeah! The fairlead needs to be probably right there.
(Jimmy)>> Alright so we've got all of our measurements we need for stuff to cut on the plasma. So we should head down to the Carcass shop and start cutting.
(Brandon)>> Yeah, thank you! [ MUSIC ]
(Jimmy)>> This is looking pretty good. Just got to get it over to the plasma table and we'll cut it out. [ torch hissing ] [ MUSIC ]
(Jimmy)>> Alright first of many pieces.
(Brandon)>> Diamond plate.
(Jimmy)>> This'll be perfect for some steps.
(Brandon)>> This is why we don't throw old metal away, cause you just might be able to find a use for it someday, like this diamond plate I'm putting on the front bumper. [ saw buzzing ] [ welder crackling ]
(Brandon)>> Done, well not really.
(Jeremy)>> Brandon I heard you say you were done. What'd you guys get accomplished here?
(Brandon)>> Half way done. We got the structure and all the bones put together. Brush guard and the fairlead cage is still in my head.
(Jeremy)>> It looks really good though.
(Jimmy)>> It's a good start.
(Marc)>> And I noticed under here there are sticking down.
(Brandon)>> Yeah we're gonna lob those off and then make a skit plate that goes to the axle.
(Marc)>> I like the way it's going. You want to see what we did out back?
(Brandon)>> Yes! Look I've got to get the whole view.
(Jimmy)>> Very nice guys.
(Brandon)>> It follows the contour? The tailgate!
(Marc)>> Thank you guys so much for all of your help. This was huge, and for the use of the tools and all that. Can you leave this stuff?
(Jeremy)>> Keep the tools, bring them back when you're done.
(Marc)>> Thanks! Coming up next.
(Brandon)>> Now that we've got a great start with the Carcass guys Marc and I take the fab work to another level.
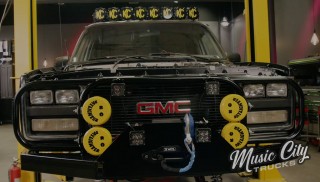
(Brandon)>> Well we lost our help on these bumpers but I've still got a lot of stuff to do, and I've got to build a brush guard. So I'm gonna go bend some tubing.
(Marc)>> And I'm gonna cypher what we're gonna do about the wheel openings. Definitely have to get the trim out of the way and get our excess cut off, but then we might as well open them up a bit. We're expanding the wheel openings because they're designed for the stock tire height, but since we're going with big tires and lots of suspension travel we need all the room we can get. [ saw buzzing ] [ MUSIC ]
(Brandon)>> Alright we're gonna bend it to 90. We're gonna be using inch and five-eighths tubing for the main hoop on our brush guard. [ metal clanging ]
(Brandon)>> The theme is unbreakable and the last thing we want is the inconvenience of a broken headlight or a punctured radiator. [ welder crackling ]
(Brandon)>> For our headlight hoops I bent up some inch and a half tubing and notched it to fit the contours of our main hoop. You can see I've already measured and marked where the tube's gonna land. Now I tack it in first to make sure all the angles are right. Once I like where everything sits it's time for finish welding but I'll get to that later. [ welder crackling ] [ MUSIC ] [ welder crackling ] [ MUSIC ] [ welder crackling ]
(Brandon)>> Now that we're pretty much done cutting and tacking everything in on this project I want to talk about the machine we've been using. It's a Forney 220 MP, which is a multi-process unit. It does mig, stick, and even tig. You can also plug this thing into a 110 or a 220 and it recognizes the volts that you put into. So all you have to do is plug it in, grab the wand, and literally just start welding. Now this thing welds up to half inch plate, which is more than perfect for our project because we've been using 11 gauge and quarter inch plate. I have a lot of welding to do. So let's start burning it in.
(Marc)>> Up next, while Brandon continues with the fab work I'm stripping down this Dana 60.
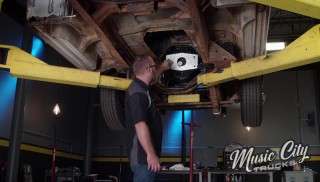
(Marc)>> We are rocking and rolling on our '91 Suburban project that we're calling Unbreakable. We've got a lot of fab work done today already with the help of the guys down in Carcass but there's still quite a bit left to do. A bunch of the finish welding and stuff like that. So Brandon's focusing on that and while he's doing that I'm gonna tackle the axle builds, specifically the front axle. This is a Dana 60. We do have a 14 bolt rear but I'm not really gonna focus on that because the axle build's a little more complicated, and besides Dana 60's kinda carry across the board. This does have a kingpin style setup, which is really highly sought after but it does require some specific components, but other than that everything Dana 60 is pretty much Dana 60, whether you're talking about Ford, Dodge, or GM. That being said there's a ton of aftermarket components available, no put intended. Everything from the axles to the diff, spindles, bearings, seals, gaskets. I mean it's all there and we're gonna replace it all all the way down to the wheel studs and even the brakes. We've even got a truss there we're gonna install, although we may not get to that today because I want to focus on the tech of the axle build itself cause it can be a little complicated. Now since we do have all those new components everything here has to go pretty much except the housing. So now I've just got to get dirty and make some noise. The fluid in this axle looked really good but we're not really concerned with that because everything in here is gonna get replaced anyway. However if you wanted to run a Dana 60 in your rig you could keep it completely stock and it would provide you with plenty of strength and longevity. After draining the oil we'll start disassembly by removing the locking hubs. [ MUSIC ] Which will allow us to access the hub nuts. [ MUSIC ] Then the hub and spindle can be removed, followed by the axle shaft. The caps can be removed next, which frees up the diff. Then out comes the pinion. Now it's time for some kingpin fun.
(Brandon)>> Woo, hoo, hoo!
(Marc)>> Now we told you before how popular these kingpin Dana 60's are for off roaders but when it comes time to rebuild them sometimes it can take a little bit of, gotta bring the heat. [ air drill buzzing & vibrating ]
(Marc)>> Persuasion. Hot! [ MUSIC ] [ torch hissing ]
(Marc)>> Up next, isn't setting up diffs so much fun? Time to build our front axle.
(Marc)>> Well I've made some pretty good headway on the Dana 60 front end build for our '91 Suburban, Project Unbreakable. Probably saw all the things on the table here earlier but I want to dig in a little bit deeper. We got everything here from Summit Racing, and let's start with the diff. 35 spline locker, all of the axles to accommodate that including these massive joints to connect the inners and outers, and we've got some upgraded knuckles here. This is a big upgrade from the factory, and then everything else we need to get it assembled. Kingpin rebuild kits, bearings, seals, shims, hubs, spindles, and even this cast iron diff cover, which is a really nice upgrade. As for the housing itself you saw earlier I was cutting some of the brackets off. I got all of the spring perches, the shock mounts, and even the steering stabilizer bracket off there. I got it all ground down smooth, cleaned it up real good, and you can see I got some paint on it. That's just a weld through primer because we still need to install all of our four link, but that's gonna be later on. We even have the truss back there that's got to get welded on. For now I want to focus on getting the internals build, and I got it all cleaned out in there. So it's ready for assembly. The first thing I'm gonna put on though is the ring gear onto the diff. [ MUSIC ] With the ring gear drawn onto the carrier I put some red thread locker on the bolts and torque them to 110 foot pounds. [ metal clanging ]
(Marc)>> The outer pinion bearing race can be installed along with the axle seals. I think we're there. Well this is the point in the process where we need to figure out pinion depth, and we start with the inner pinion bearing. Now what I would normally do is take this inner bearing race, drive it into the housing, and then use a setup bearing on the pinion here to figure out how many shims need to go between the gear and the bearing, but this axle's a little bit different. Actually some Dana 60's are like this, some are not. The shims actually go behind the race in the housing. So what we need to do is have a setup race, and I just took the one that came out of here and ground it down so it'll slip in and out, and I took the shims that came out of here for a starting point. So we're gonna put those in, then the race, then the pinion, and that's where we'll start. We're gonna temporarily install the outer bearing and yoke in order to check and adjust our setup. We're using some washers here so the lock nut doesn't fully engage. We'll drop the center section in, install the shims, and snug down the caps. We're using a dial indicator on the ring gear to measure the backlash. We've got about 12 thousandths, which is a good starting point. It's a little bit out of spec but close enough to go ahead and check the pattern, and this one looks pretty good. Time for final assembly, which will start with driving in the inner pinion bearing race that I mentioned earlier. We'll press on the carrier bearings and the inner pinion bearing. [ MUSIC ] With the pinion in the housing the outer shims can be installed, followed by the outer pinion bearing which needs to be driven on, followed by the pinion seal, the yoke, and the nut, which gets tightened. Now's the time to check pinion pre-load. Ours is good. So we can move on to installing the diff, carrier shims, and caps. The caps need to be torqued to 80 pound feet, and now it's time to get our final measurements starting with backlash, which is 10 thousandths, just within spec. We'll run another pattern and I'll take it. [ MUSIC ] [ metal clanging ] [ MUSIC ] [ drill buzzing ]
(Marc)>> With the hard part done it's time to move on to the knuckles. [ torque wrench clicking ] [ MUSIC ]
(Marc)>> And bring this Dana 60 into the 21st century and make it worthy of Project Unbreakable. While we're freshening and strengthening this axle where we can there are some components we need to reuse, like the caliper bracket, dust shields, and hub housings. We cleaned them up and gave them a coat of black paint to keep them looking new. [ drill buzzing ] [ MUSIC ]
(Marc)>> With the new bearings in place we can install the hub nuts followed by the locking hubs, and now we're heading to the finish line. Oh yeah! We're using Yukon Gear's hardcore locking hub set. You'll notice the assembly is a little different than the o-e style locking hubs but these are stronger, and that's just what we want for Unbreakable. [ MUSIC ] Well I know these wheels and tires aren't gonna get us anywhere but I've got to see what they look like under here, and it's gonna give you a better idea of what this rig's gonna look like when we're all done, and that's probably about where ride height's gonna be. So I'm really excited about it, but I feel like we got a lot done today. I mean I'm exhausted.
(Brandon)>> Pretty much all the fabrication's done besides the suspension, and speaking of suspension our front 14 inch coil overs on the ground along with Pat's 383 stroker that he built us.
(Marc)>> Yeah that thing's awesome. We'll dig in more about that next time along with all the other supporting components, transmission, transfer cases, those axles. I've got the Dana 60 all done finally but I do have to get that 14 bolt built and I'll work on that later. We'll get all that under the truck, and you're gonna paint the truck too. So if you think we got a lot accomplished today make sure you come back and see where we take Unbreakable.