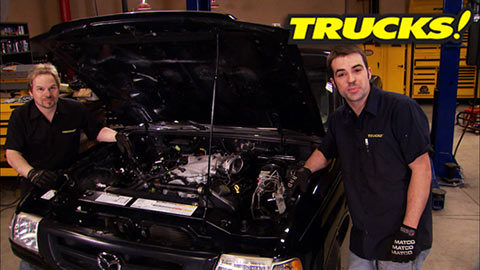
More '01 Mazda B2500/Ford Ranger "Rolling Thunder" Episodes

More Rolling Thunder Episodes

Trucks! Builds

Parts Used In This Episode

Borgeson
3/4" Rod End Bearing"
Borgeson
Custom Double U-Joint 3/4" DD to 3/4" 'V'
Borgeson
Polished Stainless Steel DD Shaft 36"
Borgeson
U-Joint 3/4" DD to 3/4" DD"
Dupli-Color
High Heat Black Paint with Ceramic
Koul Tools
Hose Assembly Tools
Percy's High Performance,Inc.
Hyperfiber Roll; Pre-preg, 12"x10' non-wired 16 oz. twill weave with film
Percy's High Performance,Inc.
Hyperfiber Roll;Pre-preg,12"x 5' wired 16 oz. twill weave with film
Borgeson
Firewall Flange Bearing
Huth Benders
Huth's HB-10 Complete Bender Package.
Maximum Motorsports
Severe Duty Oil Filter Relocation Kit fits 03-04 Cobra
Percy's High Performance,Inc.
UV Curing Light for Hyper Fiber Material
Percy's High Performance,Inc.
UV Safety Glasses

Video Transcript

Today. Now that our 4.6 L V8 fits between the frame rails of project rolling thunder, we've got to move a few things around to make sure we can close the hood. We're even going to make our very own custom dual exhaust for this mini lightning.

It's all today here on trucks.

Hey, welcome to trucks.

Well, today's show is all about solving problems. And the first big problem that we had was that the Anemic four cylinder engine in this Mazda B 2500 truck, it wouldn't even get out of its own way. So we solved that problem about finding a junkyard mercury Marauder double overhead cam 4.6 lead to 300 horsepower automatic transmission drive train that will now in fact, guarantee that this thing will get out of its own way.

And the installation actually turned out to be the easy part because what we've got left is all the typical issues that pop up when doing almost any engine swap in almost any vehicle. We've got the steering to modify and relocate. We've got to finish up the exhaust system

and we've got some work to do to the heater box that we modified for clearance.

We've all

still got to do something about this giant brake booster that's trying to occupy the same real estate. It's that giant valve cover. So today we're going to walk you through modifying some of the vehicle systems that Ryan listed off and hopefully pass on some tips and tricks that you can bring home and use on your project. Even if it isn't a 300 horsepower Ford Ranger.

Now, we needed to buy about an extra half inch of room to make a brake booster work with our new four valve super wide cam covers. We even thought about maybe going to a hydro boost system on this truck since it is rack and pinion with power and a lot of later model Mustangs live happily with that system because it's narrower. But the more we started looking and measuring the easier this project got.

Now, this is the break and clutch pedal assembly. This is a pretty simple device. It basically sandwiches the firewall between the booster

and the bracket itself and it's bolted into the top of the cow from the inside. Now, what we did by slotting this is effectively create our half inch of space so we can drag the whole assembly towards the outer apron. But slotting, this is only half the story.

Now, we modified the firewall, that same measurement. Kevin modified the bracket about a half an inch because we just didn't have a half inch of clearance to gain by slotting this hole outward. Plus what would make this aluminum bracket really weak. And this area has got to be really strong. It goes through thousands and thousands of pedal cycles over the truck's lifetime.

Now, for a little extra insurance, we also ground down our coil covers just to make sure this thing will fit.

Now

time to see if it does

and we even got clearance for a screwdriver about a quarter inch all the way around.

We're good change.

Now, on the other side of the engine, if you remember, we completely removed the entire heating and air conditioning system just to free up the space and see what would fit and what wouldn't. Well, as it turns out about half of the heater box doesn't even fit

this half that house, the air conditioning part of it. So we just completely eliminated it.

We don't need air conditioning because we got the 260 air, which is both windows rolled down 60 miles out. You know the drill. Anyway, what we had to do

cut half of the heater box off. Now we have a hole to patch. Now, this is an easy fix because it's not like this box is pressurized. All we have to do is block the airflow off. So it redirects it back inside the cabin. So we have defrost and a little bit of ventilation.

This

happen with a simple patch which starts with a template. Now, usually you can transfer the template onto something like fiberglass or even another piece of plastic and just glue it in place. But we've got something way cool to show you.

This is a product called Hyper fiber from Percy's high performance.

It's lightweight, strong with a twill weave and it's easy to work with.

It comes either with the wire made into it to hold the form a little bit better or flexible. Without the wire,

they have a resin and a filler that are both UV curable just like the hyper fiber.

But here's the deal. It's not fiberglass, there's no resin to mix in. There's no window of time before it kicks and gets hard and there's no risk of over mixing because everything you need is already in here.

It stays flexible just like this until you expose it to UV light, which is outside, you set it outside. Everybody's got access to that. But if you're in a box like us with no windows, well, it's going to stay form until you hit it with the UV light source like this light that they also provide and sell on their website.

Step one is simply trimming the hyper fiber to fit your workpiece. And we're using the hyper fiber resin to avian adhesion.

Once you're satisfied with the basic shape, peel one side of the plastic coating off and fit your patch to your panel. Now, unlike fiberglass, there's no hardener you have all the time in the world to fit your piece.

A little bit of tape will help you lock things in until you expose it to UV light.

Now, you don't need a curing light to cure the hyper fiber. You could just set it outside and expose it to natural sunlight. Our light is available from Percy

but any ultraviolet light source will work.

There you go

hard in a frozen hot dog. And all we got to do is clean up the edge a little bit and throw a coat of paint on it. But remember these glasses I'm wearing, they're part of the equipment. It's not a fashion statement. They're UV, protective glasses. And if you get a cure light, don't even look at it. You can damage your eyes but

pay attention to a few basic rules. This is a wonderful new product.

All right, with a couple of our engine swap problems solved, we need to move on to the steering because obviously the factory setup is not going to work

with that giant hunk of aluminum in the way. Now, what I've done is drilled a small hole in the firewall, slid in this piece of brake tubing so we could line everything up with the base of the steering column, get everything mocked up that way we can pull the cab off, get the steering problem solved.

Now, to get the job done, we picked up a few parts from Borgeson Now, obviously, the Ford steering shaft had a fairly straight shot down to the rack. But since we've got a pretty hard angle with the steering snaking around the exhaust manifold in the frame. Well, we picked up one of these, this is a double universal joint with the Ford factory V style attachment at one end

and the standard double D input at the other. Now, since we're going to be running multiple U joints, we also picked up a three quarter inch rod end for some support and this cool firewall bearing flange

now to connect everything. Well, we're obviously going to have to run some three quarter inch fully polished double D shaft. Now, since the universal joints are needle bearing equipped, well, it's not only going to be precise, it's going to be factory smooth.

This double jointed piece really helps us get down to the original Ford steering rack in between the exhaust manifold and the frame.

And this short section of double D that attaches to the longer section that goes up to the column needs to be supported with a rod end to keep it from flopping around under steering input

up. Next, we'll get our oil filter relocated and pick out a muffler and later we'll show you how exhaust tubing is bent. Stay tuned.

Hey, guys, welcome back to the shop. Well, we've had a chance to make a mount for our steering shaft support rod end and here's what we've done.

We used a piece of inch and a quarter dom

and a three quarter inch grade eight nut that we basically turned down. So half of it would fit inside the tube, basically made our own tube insert. Then we added a couple of plug welds and some tig welds all the way around the circumference. This thing should be plenty strong.

Now, just because the engine fits the hole doesn't necessarily mean that the extra wee items like air filters and oil filters are going to fit as well, especially with an engine swap. Now fixing this steering linkage introduces us to another problem that we've got to solve, which is the oil filter and on that particular engine with its location, it just doesn't work for us. Sometimes you can get by with using a shorty filter like this guy. But in our case, no, it just doesn't work with the frame rail suspension location and all that kind of stuff. So what we did is give maximum motor sports a call and they sent us one of their high end oil filter relocation kits.

The filter mount and block adapter are billet aluminum and black anodized for a cool look. All the brackets and hardware are included

and a high performance oil filter comes with a kit

dash 10 A and fittings are also included

as well as zip ties, even some thread sealant for the threaded ants.

They also throw in enough braided line to put this pretty much anywhere you want and some spiral wrap to protect any of the soft items that the braided line may come in contact with.

So with this filter relocation kit from maximum motor sports, we're certainly not compromising on any quality and

we don't have to build our truck around this.

The kit comes with everything you need to relocate your filter and detailed instructions.

Now, one of the hassles with a and fittings and braided steel lines is completely eliminated with a cool tools fixture which simply mounts the device and you do a quarter turn, press with your braided line

instantly, placing it into the gay and fitting. Now, the adapter mounts on the block just like a filter with an O ring seal. So what we're going to do is mount the lines in loosely and then figure out the location of the filter when we get the cab back on.

Now, some of you guys may have noticed the exhaust manifolds bolted to our 46 while they're not the mercury Marauder manifolds that came on it.

That's because we've ditched them in favor of some that will flow and fit a little bit better.

And here's what we swapped them for. These are 03 Mustang Cobra manifolds on loan to us for stage one and they actually give us about a quarter inch of clearance between it and the control arm mounting bracket.

Now, for the rest of the exhaust system here's what we have in mind.

Now, we're definitely going to be using a pair of magna flow, heavy metal catalytic converters in the high flow variety. But as far as mufflers go, well, it's really hard to tell how loud a truck's going to be by looking at a picture in a catalog because we want this thing to be loud but not obnoxious. After all, it is named Project Rolling Thunder. So we ordered up a few muffler choices. Now,

our first option is this four inch round race Muffler. Now, I'm guessing that puppy is going to be pretty loud. Our next option is the five inch round race muffler and the third is the more traditionally shaped four by nine muffler. Now, all of these are stainless steel, have a flow through design and have 2.5 inch inlets and outlets so we can interchange them and pick the sound we like best.

Now each cat is going to get installed in between the transmission and the frame rail close to the exhaust manifold because the sooner these things get hot, the sooner they start working.

Now, as far as mufflers go, well, they're going to get installed in between the drive shaft and the frame rail as low and as far back in the chassis as possible to help with weight distribution, then we'll just add some turnouts in front of this right rear wheel NASCAR style

and we're going to fab most of that up right here in the shop using this stick around

up next. It's a dual exhaust set up that exits out the side, NASCAR

style, stick around.

Hey,

welcome back to trucks. Well, today we're solving problems primarily created by putting this stupid big engine into this really small truck. But we're actually doing pretty good. So far, we've got our oil filter safely relocated our steering shaft. We've got a clear plan for that and our heater box is patched. So now we can move on to the exhaust system on the passenger side. It's a pretty clear shot from the manifold straight into the cat at a 45 degree angle, then back into some 2.5 inch straight pipe into the muffler and a quick 90 out the side. Now, if we were doing a symmetrical dual exhaust system, it would be a no brainer, but check it out. We have

the fuel tank so we physically can do it. We got a snake around a bunch of other stuff. So obviously the driver's side. Well, it's a whole other story.

Yeah, because we've got a couple of 90 degree bends to make one to go from the driver's side converter down the cross member and another one to send the tubing down the frame rail to the rear of the truck to meet up with the muffler. Now, to do that, we're going to use this piece of equipment right here. Now, we know, you guys probably don't have access to a tool like this. But if you send your car off to a muffler shop for a custom exhaust system installation, this is probably really similar to the piece of gear they're going to use.

Now by using the interchangeable dyes, this machine is capable of bending tubing ranging from an inch and three quarter all the way up to three inches.

And by using a variety of fixtures, tools and attachments, you can use the ra m at the other end of the machine to do a traditional flared flange, a flat flange or even a ball and socket type flange. Heck you can even expand the piece of tubing you're working on for a slip fit connection making, doing custom exhaust work, a piece of cake.

Now, just like the hydraulic tubing bender we use for roll cages. Well, this exhaust tubing bender is a piece of cake to operate.

No giant manual levers here. It's all push button control.

Now, we know this non mandrel

bent 90 degree angle isn't the ultimate in flow. But for our 300 horsepower application with a 2.5 inch tubing will help get us by

and it should be plenty for stage one of this build.

And when putting more than one bend in a piece of tubing, we need to make sure it stays on the same plane.

That's as simple as using a level.

Now to make the down pipes that connect the exhaust manifolds to the catalytic converters. But we're simply using the tig wire as a template.

And since our factory manifolds have a flared fitting,

well, that's what we need to add to the down pipes, then they'll bolt right up.

Now, our driver's side exhaust tube with the s be

actually turned out pretty nicely.

And it kind of mimics the second gen Lightning's factory style exhaust system.

And I'm guessing these twin four inch mufflers

are going to sound pretty nasty,

cool trim to fit later.

You're watching trucks for a DVD copy of this episode, just go to power block tv.com and order your copy for just 595 plus shipping and handling. Start your own trucks collection delivered right to your door from the power block.

Hey guys, welcome back to the shop. Well, we've had a chance to deal with almost all the problems related to our engine swap. Like we told you earlier, we had issues with the steering brakes, oil filter location, the heater housing and the exhaust. Now for the brakes, what we showed you earlier how we relocated the booster by slitting the bracket. We've now hooked up the master cylinder, the pedals are inside hanging where they need to be and the coil cover. Well, we had to grind it down for booster clearance. We made it look like new again with the help of some sandpaper and some duplicate

color semi gloss. Black paint

as far as the steering shaft goes. Well, we know exactly what to do to connect it to the column. We just kind of ran out of time today but the heater box, well, the Hyper Fiber fix works great. We've got tons of clearance between the box and the cam cover. And now we have the ventilation that we need for defrost and for heat.

The other thing you saw us do was to mount the engine part of the oil filter relocation kit that we got from maximum motor sports. Well, now with the cab down on the chassis, we've got the perfect spot for the filter mount, check it out.

We've got the filter tucked safely behind the front bumper for protection up against the frame rail for further protection to where it's not going to come into contact with any road debris, but that's not all. Look at this.

Now, the down pipes from the manifolds were definitely a tight fit, but our converters are snugged up in the frame rails pretty nicely. Now, we'll have to do heat shields for things like brake lines and fuel lines and we'll do that before we get the truck up and running.

Now. So far, everything's just clamped in place because we don't know how loud these mufflers are going to be and we may have to swap them around for the larger versions, tail pipes kick out the side. Now, we've gotten quite a few engine swap details taken care of today. But there is one topic we've kind of been avoiding and it's not everybody's favorite, but we've got a pretty slick solution for it.

A wiring harness. We've also got a pretty clean solution for the non

return style fuel system. So the next time we have this truck in the shop, we're going to get those things taken care of. Hopefully turn the key and fire this bad boy up. Now, if you got any questions about any of the products we use on today's show, go to Power Block tv.com and check out the truck's website guys. Thanks for watching trucks. See you next week.
Show Full Transcript