


More '98 Jeep Grand Cherokee Episodes
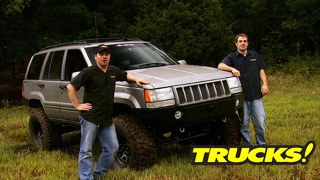
Trucks! Builds


Want more content like this?
Join the PowerNation Email NewsletterParts Used In This Episode
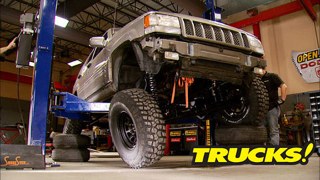
BF Goodrich
315/75R16 BFGoodrich Mud-Terrain KM2.
Bilstein
Fixed reservoir 5150 shocks.
Classic Parts of America
For all you Classic Chevy Truck owners you are probably familiar with the original 1955-59 Gauge Cluster. Well, Classic Parts of America now offers a new spin on the Gauge Assembly for your 1955-59 Task Force Chevy Truck. This New, Upgraded assembly is a complete retrofit unit, incorporating a tachometer and LED lighting, while still retaining the original look. The Tach-Force features a dual layer design, 12-volt electronic movements, and push button calibration. The unit is available in Bl
Classic Parts of America
Specializing in Chevy Parts and Accessories for 1947-1998 Chevrolet and GMC Pickup Trucks.
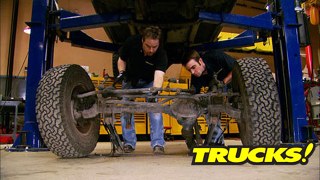
Currie Enterprises
Front axle assembly, ARB air locker, 4.56 gears.
Currie Enterprises
Rear axle assembly, ARB airlocker, 4.56 gears, explorer disc brake set, cables and yoke.
EMS Offroad,LLC
D.I.Y. Complete spare tire kit.
Norton Automotive Refinishing Products
SpeedGrip Structural Adhesive.
Rusty's Off Road
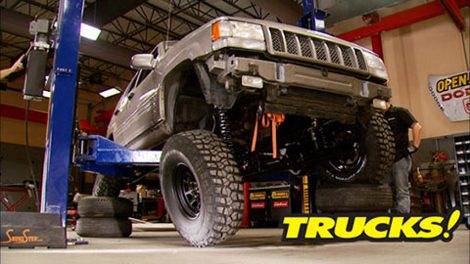
Suspension lift kit, 5.5" Long arm system, transfer case skid plate, fuel tank skid plate, tie rod end and drag link.
The Eastwood Company
2K Ceramic Chassis Black, Spray Max 2K urethane aerosol high-gloss clearcoat, Spra-Tool paint sprayer.
Tom Wood's Custom Drive Shafts
Our drive shafts are built on a reputation for quality workmanship, product knowledge, warranty and customer service. Tom Wood's Custom Drive Shafts Inc. will continue to build the absolute best quality drive shafts available anywhere at an affordable price. Because of the variables from stock to the endless variety of custom modifications on today's vehicles, we manufacture each drive shaft one at a time to suit your needs, not ours. We have developed a unique ordering system that makes orderin
Torchmate CNC Cutting Systems
Torchmate 2, 4ft. x 4ft. Light industrial table, Thermal Dynamics Cutmaster 101.


