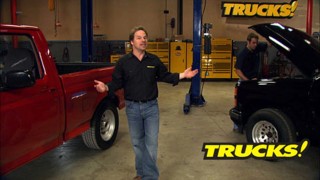
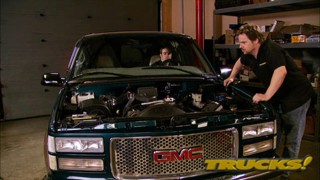
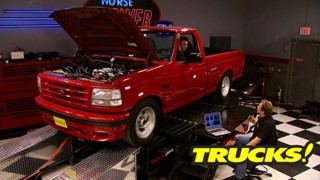
More "MuscleTrux Wars" - '90 Chevy 454 SS vs. '94 Ford Lightning Episodes

Trucks! Builds

Parts Used In This Episode

[none]
Max-Tuff assembly lube, synthetic motor oils.
ARP
Head bolts, intake bolts, header bolts, oil pump driveshaft.
B&M Racing
B&M Shift Improver kit for Turbo 400, synthetic "Trick Shift" fluids.
Crane Cams
Crane Energizer aluminum rocker arm set.
E3 Spark Plugs
E3 Diamond Fire spark plugs.
Edelbrock
Pro-Flo EFI setup with manifold and calibration chip, hydraulic roller lifters, hydraulic roller camshaft, exhaust headers, gasket kit set, timing set, head bolts, intake bolts, heat treated pushrods, aluminum cylinder heads.
Federal-Mogul Corporation
One piece oil pan gasket.
LMC Truck
Special Edition chrome grille for 1973-1980 Chevy and GMC truck. Polished billet bowtie emblem.
Mallory Performance
Series 61 distributor for aftermarket fuel injection.
O'Reilly Auto Parts
Dupli-Color engine enamel semi-gloss black.
O'Reilly Auto Parts
Stock replacement oil pump and pickup tube.
Summit Racing
Accel Extreme 9000 spiral core wire set.
Summit Racing
GM Performance tall aluminum valve covers.

Video Transcript

Today, Ryan's got big plans for using big displacement to make big power for his entry in our first muscle truck series match up his 454 Ss gets new heads, a new valve train and a new throttle body to wake his big block. It's all today here on trucks.

Hey, welcome to trucks. Today, we're back in the shop working on muscle truck wars. Now, last time we found out what each of our factory sport trucks is capable of. So now it's time to dig into their awesome potential and finish what the factory started.

Now, Kevin's 94 Lightning has 88,000 miles on it. My 90 ss almost 100 and 40,000. So it's fair to say that both of these trucks are well used, maybe even a little abused, but it's pretty typical of what's available on the market.

Now, in case you miss it, we're gonna take a look back and see where we got these trucks in the first place and what we've done with them so far. Check it out.

We started out with two stock average condition sport trucks we bought just like you guys would from an internet auction.

The 454 was missing its stock chrome steel wheels. It was now sporting aluminum rims and Co op tires, but the main ingredient was there. The big block, well, a factory restricted big block, but there's plenty of untapped potential there.

Now, the lightning still had its distinctive wheels but it had been altered in other ways and there were signs of neglect under the hood as well, but it was still a lightning. So we gave both trucks a quick tune up and headed over to Horsepower's

dyno

with some respectable numbers of the rear wheels. We took them out for a test drive to see how they did on the street and they did not disappoint us, but we knew there was still great potential for improvement in both trucks.

So we're gonna get started with my truck and Tommy and I have a pretty solid plan on what to do with this big block. Now, we know we can really wake this thing up without going overboard just by eliminating a few of the factory weak points.

And now these guys are keeping secrets and they're not even gonna tell me what they plan on doing with that boat anchor. So I'm gonna take our junk Cherokee,

bring it out into the warehouse,

make a few measurements, see where we stand on our frame damage.

I got it

that Cherokee ought to keep Kevin busy for a while. So Tommy and I are gonna get started on the engine

and the work we're gonna do to it. Well, you could do it with the block sitting in the truck, but like we showed you before the rear main seals leak and it's all greasy and nasty. So we're gonna make sure it's right before we go back in with it

and since we're gonna pull the engine transmission out as a unit, we're gonna remove the dog house just to make it a little easier.

This is a way to save yourself some time by removing the front end, almost completely assembled.

Once the hood's off and the fluids are drained,

the front bumper and grill come off to give you access to the bolts that hold the radiator support to the frame

with the fenders unbolted from the cab and a little gentle persuasion

the doghouse gets lifted off, still connected to the cooling

the drive shaft,

exhaust

and harnesses get unplugged so that the engine and trance can be easily removed and separated.

Wow.

Now, like we told you before, we know we can make this lackluster big block really come alive with just a few key modifications.

These throttle body injected 450 fours came from the factory with a rather low 7.8 to 1 compression ratio cylinder heads that could use some help and a fuel injection set up that is definitely not high performance.

So to address our poor cylinder heads and to bump up our compression ratio, we're gonna kill two birds with one stone by installing Edelbrock performer high compression 454 cylinder heads. They feature 219 intake valves, 188 exhaust valves and a 100 cc combustion chamber. That when combined with our factory dish pistons will give us a respectable 8.8 to 1 compression ratio

to get the valves opening. We ordered up an ed

rock rolling thunder hydraulic cam kit comes with new roller lifters and push rods. And when matched with our stock ratio, 1.7 crane energizer roller rocker arms will give us valve lift numbers of 625 on the intake and 639 on the exhaust side.

Now, I know we might give up a little bit of torque with our C

selection but hey, I could barely get the rear tires to hook up at stock power levels. So I'd rather have a few extra ponies on the top end.

Now to bring our big block into the modern world of ef I, we're using the pro flow multi point injection set up. And if you remember, we used a similar injection system on the small block 350 we put in our YJ project with great results. Now, this system comes complete and lets you fine tune your combination without requiring the use of a laptop by letting you control the engine's parameters with their calibration module. Now, this

that is a much more efficient way of giving the engine the fuel it needs than any other carb or TV. I set up

now to get rid of the exhaust gasses, we'll ditch the restrictive factory manifolds in favor of some high float Tes headers with ceramic coating.

That certainly doesn't hurt our eyes and brings a little flash to the otherwise dark engine bay.

And since it's a durable coating, these should stay looking good for a while.

The heavy cast intake is crusted in place from years of neglect and comes off first followed by the even heavier iron heads.

And since we're gonna be replacing all our fasteners, we don't have to keep up with anything. Just get it out of the way.

The good news is that the valley looks fairly clean and there was no signs of any unusual wear or damage inside the block.

The Ring ridge looks to be mostly carbon

cylinder walls aren't scored up.

Those look

over there. Yeah, mine's in the same shape.

Cool. We don't have to rebuild the short block less work really

up next with a good bottom end to start with Ryan and Tommy, rebuild the top end of the big block and later the turbo 400 gets a shift kick to help. Put all that newfound power to the pavement. Stick around.

Oh, hey, welcome back. Well, right into

him. You're still in there working on that 454 and they still won't let me in to see what they're doing. So I'm gonna go find another cup of coffee, find something to do out here.

Yeah, he's gonna stay out there for a while too. Meanwhile, over the break we've got this thing torn down, cleaned up and we're hitting it with a fresh coat of paint. And after a closer inspection, we can tell somebody been in here before there's stamp marks on the connecting rods and the pickup tubes been welded to the oil pump, which is a pretty good indicator. This thing's been freshened up before and probably not too long ago.

So it's safe to say we can throw a top end kit on this thing and not have any problems. But first, we need to get a rear main seal in this thing to keep the oil inside the engine,

using a small screwdriver gently tap one side of the upper half of the two piece seal. Being careful not to score the machine parts.

Once you've got enough of the seal exposed, para pliers is all we need to remove it.

The top groove is machined into the rear main cap. We're offsetting our seal by about a quarter inch for a little extra insurance against an oil leak.

The lower half of the seal goes in place, easily followed by a dab of R TV to seal the two halves together

all with our seal installed

our cat back on and torque to spec at 100 and 10 ft pounds. Now, we can start putting on the good stuff.

The biggest reason for choosing this roller cam is to free up a little more high RPM horsepower and this stick should help take care of that.

Now, in order for us to get our timing gear on the crank shaft without beating it to death, we're going to heat it up a little bit. Let the metal expand that way. We don't risk ruining the crank shaft.

The heat will expand the timing gear, loosening it up to slip over the cam a lot more easily. Just don't get carried away

there. She is

slid right on

the retainer, eliminates end play in the can

and a little lock tight on the bolts, keep them from backing out.

Follow that with the timing chain,

paying careful attention to the alignment mark.

Another performance advantage of aluminum heads is the obvious weight reduction over heavy iron castings.

You can eliminate about 100 pounds just by changing the heads and intake manifolds.

The hydraulic roller lifters are a direct replacement for the flat tap at originals and get dipped in engine oil before installation.

Then we can drop the new push rods in place.

Now there's a flat spot on one side of the Trion bearing, make sure that side faces up

the full roller machined aluminum rockers reduce friction and free up power in some cases up to 30 horsepower Overstock.

Now you ask 10 different guys how to adjust valves and you'll probably get 10 different answers. But basically, what you want to do is make sure the C

lobe is on base circle and go ahead and spin the push rod with your fingers and tighten down the adjuster until you feel resistance. That means you're at zero lash. Then go an additional three quarters of a turn

and tighten down your set screw,

a 38 bead of R TV. And an extra dab at each corner is what I prefer to use as end gaskets for our new intake manifold.

Our new A RP fasteners are dropped in place, then tightened down in sequence.

And finally, tort Depen

these great looking aluminum valve covers we got from GM performance, give us the choice where to add ventilation.

So we've just reused the stock location

and marked and drilled a hole with a step drill. Now we've got a place to add oil.

We also drew out the other valve cover so we could add the P CV valve.

Our new oil pump is an OE replacement from o'reilly auto parts.

Then some R TV in the corners followed by the one piece oil pan gasket seals up the bottom end.

All right, I'll finish stalking these pan bolts to 10 ft pounds and it'll be ready for Tommy to bolt on the balancer headers distributor and the rest of the accessories to get this thing ready to go back in the truck. But before we can do that.

I got some work to do on that transmission over there,

man. I don't have to fix that. Do. No, I got this one recovered. Don't worry about it.

Hey, welcome back to trucks. Well, they're still not letting me in the studio so I still can't see what they're doing. I can't even work on my lightning. So I've been messing around with this Cherokee that we pulled out of the weeds. And, uh, despite the fact that the bumper and the frame rail behind it are wadded up into the tire, it's not as bad as it looks. And later on this season, we're gonna show you guys how to think your way through a collision repair like this and get your rig back up and running,

man. That thing's really messed up.

It's not as bad as it looks and everybody's a critic.

All right with Kevin preoccupied out there in the shop. Well, that gives us a little more time to get this truck put back together. Now, we've already beefed up our 454 with an Edelbrock cam shaft cylinder heads pro flow ef I set up and a set of headers and it's just about ready to go back in the truck, but we're not gonna reinstall the stock transmission. We need to beef this thing up as well and to do that, we're gonna install this B and M shift improver kit.

It's no surprise that G M's heavy duty turbo 400 ended up behind our 454.

Even still. It's designed for smoother more comfortable shifting

and accomplishes that by slipping a little bit from one gear to the next.

Our B and M improver kit minimizes slippage, making the transmission more efficient, helping to reduce heat,

which is the number one killer of every automatic transmission.

The first step is to remove the E

cip and the accumulator, then remove and discard the spring underneath it, then reinstall the accumulator.

Now using the 5 30 seconds drill bit supplied in the kit, you need to drill out one of the fluid passages in the separator plate.

Just make sure you're drilling the right one.

Now, putting it all back together, starts with the gaskets and separator plate. The reassembly really shouldn't give you any trouble.

The valve body goes next

and gets torque to spec reusing the factory bolts,

followed by a new filter gasket and finally the pans.

All right, with our transmission just about ready to be bolted to the engine. Well, there's a couple of small things we wanted to take care of. We went ahead and install the new modulator valve. And since it's a lot easier to do here on the bench top, we're gonna install a new front seal.

Even if your front seal doesn't look like it's leaking, go ahead and replace it. Now,

it's only a couple of bucks and the peace of mind is definitely worth it,

the stock torque converter gets a bath since it's gonna get reused,

it stalls at a fairly low RPM, which is where the 454 starts waking up. Anyway,

there's no need to look for power where it doesn't exist and these just aren't high revving engines.

It may look like a new case but Tommy just cleaned it, scuffed it up and threw a coat of paint on it just because we care.

Stabbing the engine and transmission back in is a breeze with the doghouse out of the way

and it all looks like a million bucks with a fresh coat of paint and new valve covers.

Now, you may never see that detail again,

but it's cool to know that it's clean as a whistle underneath the hood.

When we come back, Kevin almost finds out what he's up against. Where do you think you're gonna sit? Power wise?

Probably

400 or

400.

Yeah,

good

to know.

Hey, welcome back. Well, I found my shop key and let myself in. So now I'm finally gonna get to check out what these guys have done to the big block,

man. This looks good

compliment from the Ford guy.

Now, after we stripped it down to a short block gave it a thorough inspection, looked like somebody had been in there before. So we knew we were in good shape. First thing we did was slide in a performer RPM roller cam then to bump up our compression ratio a little bit. We installed Edelbrock aluminum performer cylinder heads with the 100 cc chambers and for exhaust, we installed their Tes ceramic coated headers. Now to get fuel in this thing, we're ditching the heavy cast iron intake and under performing TB I set up and replacing it with something we know that works the performer RPM pro flow ef I and to cover up our crane roller rockers, we're thrown on a good looking set of GM valve cover,

all this lightweight aluminum stuff. It looks good. Even if it's still gonna be slow, you're hoping.

And for ignition, we already dropped in a new mallory distributor, throwing a set of Excel extreme 9000 plug wires and finish it off with some E three diamond fire spark plugs with all this stuff. We're letting it breathe on top. Please tell me you're not gonna go back into the stock exhaust. No, we're not gonna use any of this crimped mess. But since it's getting a visual as well as a tailpipe inspection,

we're stuck with the oe configuration, which means we've got to use a single converter, but it's gonna be a three inch high flow converter feeding into a stainless steel Magna Flow performance muffler for a nice healthy rumble.

Now, I'm busting your chops about this thing being slow, but obviously these parts are really gonna wake it up. Where do you think you're gonna sit power wise? Uh Probably around 400 horsepower, 400. Yeah, good to know.

Now if you've got a 73 through 80 GMC or Chevy pickup, check out L MC truck's new special edition grill that features a blend of OE styling with a cool custom design.

Two years in development and precision machine tooled. This rugged plastic, all chrome grill is injection molded. So unlike traditional aluminum billet grills, there's no bent or warped bars

and no finish that you constantly have to polish to keep shiny. It mounts right into the factory locations and comes with all the hardware you need to put it in.

So now you can go from sock to style in minutes. They even have a custom billet emblem for Chevrolet and GMZ trucks to finish off the look L MC trucks, custom special edition grills cost about 200 bucks. The emblems run you about 50.

Now, earlier today you saw us use Royal Purple max stuff assembly loop. When we installed our new valve train, we did that to eliminate friction on first start up, thereby reducing wear on our new parts. And if you're doing internal engine work, this stuff is good cheap insurance

and Royal Purple's full synthetic engine oil will make sure we get maximum horsepower

and torque out of our big block here. This will also reduce emissions and help save us fuel and you can pick up Royal Purple, full line of products at just about any major auto parts store Now, if you want information on this or any other product we use today on the show, check us out at Power Block tv.com. Thanks for watching trucks. See you guys next week.
Show Full Transcript