MuscleCar Builds
Want more content like this?
Join the PowerNation Email NewsletterParts Used In This Episode
Afco Racing Products
J-BEND 6" and 12" LEG 1.75
Denny's Driveshaft
3" ALUMINUM DRIVESHAFT
Dr Gas
Oval tubing and transition tubing to round.
Flowmaster
Outlaw race muffler 3 inch.
Hedman Hedders
1 3/4" SQUARE PORT FLANGES WITH STUBS
Hedman Hedders
1 3/4" TO 3" COLLECTOR
Innovative Safety Products
Custom made aluminum racing seats, covers, and head restraint.
Safe Craft
5 LB. System with pull cable and three nozzles.
Stage 8 Locking Fasteners
.650 Body quick fastener and brackets.
Video Transcript
We're on the backside of this project. In fact, it's about 80% ready to be blown apart for painting and reassembly. Now, before we can do that, every piece of steel and every mounting hole needs to be done
like the tabs for the fire system.
This entire Mustang was built for the N ASA outlaw class following the SCCA guidelines for safety
from the chassis,
the roll cage,
the fuel system,
even the weight of the car is regulated.
So are the requirements for an onboard fire extinguisher system? You must have at least two nozzles, but we're gonna put in 31 in the engine compartment, one in the driver's area and one in the fuel cell area. Everything will get a shot of
halon.
These bottles need to be mounted horizontally
and the gauge must be visible to the tech inspector on race day
behind the passenger seat will fill both of these requirements.
Safe
craft makes these kits for races.
N ASA approved with steel tubing and aluminum nozzles.
The cockpit nozzle should come behind the driver
little plumbing needed here.
A
small tube bender will avoid kinks in the line
drill into the chassis to mount them,
but I won't drill into the roll cage. Even the smallest holes can weaken it.
The nozzles are specific to their location.
The engine compartment gets a high volume one
and another high volume one for the fuel cell location.
While the cockpit nozzle puts out less than others
and the cable release needs to be within reach of the driver.
This system went in pretty quick for something that's so important.
These systems are supposed to be used in an emergency only and they're not designed to be tested,
but the temptation is just too great.
Ah, ok. Hold it. Do not try this at home.
Lou is a professionally trained
in
the, uh
times four.
That bottle puts out over 200 P si
and the blast with the three heads last almost 30 seconds.
The cockpit gets less because too much halon
can kill you.
It eliminates the oxygen, starving the flame
and saving your butt.
Now, I don't know what it costs to refill one of those bottles, but it was worth every penny of it
next on our agenda. Flooring and seats, but we can't do anything until we get our exhaust run because that could change all of our plans.
We put the front together to make the radiator mount and fender braces
and we're done with them for now,
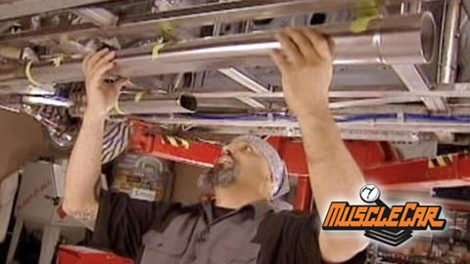
our headers are gonna have to be custom made. But in order to do that, we need to know exactly where our collectors are gonna sit, we got our from Headman Hustler and this oval three inch exhaust tubing
we got from dr
gas. It's perfect for knocking the antennas off of those ants
behind all that. A set of flow master outlaw race mufflers. They don't claim to be neighborhood friendly.
Now, one amount that's a little bit higher than this. So this is one of the changes that we had talked about.
We'll probably make a new cross member after the whole system is in just in case
since we angle the mufflers up
three inch tubing will finish it off.
SCCA requires the exhaust to exit outside the car.
Friend
obviously has something in mind.
Mhm.
I went ahead and install my aluminum drive shaft from Denny's drive shaft service. This will allow me to start doing my flooring and repair that cross member
half an inch higher doesn't seem like much, but we went through a lot of trouble keeping the ground clearance at four inches
and that includes the exhaust
Brent doesn't say much, but his words screams at us.
Why didn't Shelby think of this?
We got a lot of rod to burn. But after the break, we're gonna mount a pump, we're gonna create a hump and
we're gonna measure my rump. So you may not want to miss that.
Uh huh.
That comment about my rump. Really piqued your interest. You bunch of sickos. Our exhaust is all welded up and we're quite pleased with it. Now, custom headers are in the works.
It all starts with these phalanges from Headman hustler. These head parts are square but these stubs turn it around
since my ride height is so low, my space is limited. So I'm going to take these first two tubes and run them down as far as I can and run them back. The second two will have a straighter shot to the collector because I'll have more room. At least that's the plan.
A box load of U bends will become your headers.
I'm starting with engine three quarter tubing,
stepping up to engine 78.
Hence the name step headers.
There's been several claims by reputable builders that this actually increases Utah.
Ok. It's worth a shot.
Everything is tacked up for now.
We'll finish him up on the table later.
No doubt, this takes time and it's a one man job. So Brent's moving on
says everything under the chassis in,
we can start the flooring 22 gauge is standard, but we're using 18 because we can afford the weight
and yes speed rolls do add strength
with the chassis pattern marked on the panel. We can drill some holes for the rosette wells that will hold it in
some well through primer will protect the raw metal.
It takes some fine tuning to set your welder low enough not to burn away the tin
four hours later. And this side is finally pieced together and as you can see by all the curves, it's never as easy as it looks.
I mark them up very well so I can weld them up for good one tube at a time.
Ti
takes longer, but it leaves a cleaner finish. Even a race car can still look good.
This is where I step them up in size.
Since the exhaust flows from small to big. There's no turbulence created
and don't try this without the collector on it.
Brent moved ahead on the flooring with both sides done. It's time for that hump. We talked about
another template,
some rolling
landing and patience.
This section is permanent
up here over the tranny. We'll make it removable for those fast transmission swaps at the track.
We'll get to that later in the show along with showing you how to measure and ordering a seat
and where to place it.
Now, I've got a long way to go on these headers. You could have someone make them for you, but they're going to need your car for at least a week. And not to mention when you get it back, you're gonna be nailed with a $1500 invoice. At least. I'll see it back in a bit
this week's muscle car flashback. The 68.5 Mercury Cougar
one great pony car deserves another. At least that was a thinking in 64 when the first Mustang debuted
the first day on the show
roof floor, over 21,000 found a new home.
A year later, Ford dealers were grinning from ear to ear with over 400,000 sales of the popular new ponies.
However, Lincoln Mercury dealers felt left out in the cold without a hit car of their own Ford Motor company listened and in 1966 that the Mercury Cougar added a bag. The captain
is out of the bag.
Media kits complete with Cougar burgers and animal crackers were sent to media outlets around the country
announcing the release of Mercury's first pony car.
A
mix of European elegance and American muscle. The Cougar was meant to be a sports car packed with class
Earl Donegan's Cougar is just as classy as the day it rolled off the assembly line.
This all original unrestored Merck has less than 20,000 original miles on it.
Yeah,
that's right. It's basically a brand new Cougar. It's not only fresh but rare.
A
lot of you guys may remember the Mercury Cyclone CJ. It came standard with a nasty 428 Co
Jet, but this is a Cougar Xr seven
and the 428 Cobra Jet was a mid year option in 68 that only 66 buyers of this luxury model shelled out an extra $420.
As a matter of fact, when broke down in the paint scheme and interior options,
this is a one of one car
and to top it all off the Xr seven badging was put on crooked at the factory.
Needless to say
Earl isn't fixing it
for question 40. This car is in great condition.
Uh, the car drives like it's new and it has plenty of power drives, good drive good on a highway.
Uh
Cougars ride better than
Mustangs do.
Mercury didn't skimp out on any details when they put these classics together, toggle switches,
check out these stylish controls, leather interior stereo, courtesy lights all over and a viewer friendly console that makes the interior just as the ad said,
a man's car,
check out this original gold paint complete with pinstripes.
The black satin markings and hood scoop are the only warning that one mean cobra is lurking under the hood,
hideaway, front headlights and sequential turn signals out back, light up this car real nice. Earl still has the factory wheels and check out the detail. He still has the original spare holding down the trunk.
The Cougar was meant to be a car for someone to purchase on their way up to a thunderbird.
But for the power performance and luxury,
this was a steal at its $4500 original sticker price
as you probably guessed it's worth a little bit more than that. Now, for all you mathematicians out there, the appreciation on this Merk is right around 1300%
but don't ask her for a price quote because this beauty is his wife's car and her 428. Ain't for sale.
If you ever pull up to a Cougar with a black satin stripe and scoop on the hood. Consider yourself warm.
This is one cat you won't wanna fool around with.
We're back so far today we installed a three headed halon
fire system,
played with it,
created the exhaust
and let Brett get hunger.
I haven't finished the headers yet because I wanted to play with these. Would you believe that my butt fits in here and I'll prove it to you later after we get the tranny tunnel made.
Remember we want it to be removable.
The main section will be three pieces, a flat top and two sides leaving plenty of room to work the gas pedal.
The passenger side is a little bit more confining
with some lightweight channels in place on both sides.
We can check the fit
and mark for the fastening
moroso sent us some of their quick fasteners,
a few holes and some rivets is all it takes
while Brett finishes covering a tranny, it's time for me to measure my fanny. No doubt, the best way to get custom racing seats that fit perfect is to have the maker measure your form. That's what we did for these innovative safety products will literally form this seat to your portly physique. And what you'll end up with is an aluminum work of art. The whole point of this is to keep your body from moving around so your butt, your
rib cage and your shoulders don't take a pounding under all those g forces. It also places the restraints at the right height.
So you don't compress your back. Now, if you can't fly across the country for a fitting,
there's some measurements that you can send in. Instead your height, your width, your weight
and girth, not to mention some more detailed ones is P's website will show you how to do that.
Sit on a flat surface with your feet dangling.
Take two objects, put one on each side, snuggling
that measurements for your hips.
Then you raise your right arm up, measure from the seat to the middle of your armpit.
That's your rib location.
Now stay put and measure from your trapezius muscle down in the seat again and that for your shoulder harness
next, stay with your arms out at about 30 degrees. Measure side to side about an inch and a half below your armpits.
That's
for your upper back.
Finally,
when you're back against the wall, measure from the edge of your chest
back to the wall,
that's for your man breast.
Now, once you get your seats where you put them in the car is very important. Our pedals can still go up and down or be repositioned forwards or backwards, same with our steering column. But the one thing we can't move
the dash,
they're gonna be strapped in this seat pretty tight and you have to be able to reach all your controls from here. I don't want to put it on my tranny tunnel because it's removable. I really don't want to do the halo because it's gonna be a mirror there. So my best option is still my dash. But look at my feet,
the engine is so far back, they're gonna be poking through the firewall.
The plan extend a portion of the dash back for all the controls.
So I'm moving the seat back just far enough. So my wrist lays on the wheel this way when I'm turning, I'm not reaching for it. Everything else is adjustable. This is where I need it to be.
The seat has to be secured in three places that way it won't move. If you come to a
sudden stop
first, we'll bolt it directly to the frame rail,
grade five bolts. Of course,
then we'll make a bracket tying the front all the way across again, bolting into the frame rails.
There's a bracket that mounts to the roll cage that also holds the headrest. Its location depends on how high the Hans device is,
but I need to be sitting there to do that and that would give us our third mounting point.
The tranny tunnel takes care of the hump. The seat satisfies my rump. The fire system's cool and just fun to play with. We're just a few short shows away from this roller skate being done next week. We're cutting up the lemons till then later.
Show Full Transcript
like the tabs for the fire system.
This entire Mustang was built for the N ASA outlaw class following the SCCA guidelines for safety
from the chassis,
the roll cage,
the fuel system,
even the weight of the car is regulated.
So are the requirements for an onboard fire extinguisher system? You must have at least two nozzles, but we're gonna put in 31 in the engine compartment, one in the driver's area and one in the fuel cell area. Everything will get a shot of
halon.
These bottles need to be mounted horizontally
and the gauge must be visible to the tech inspector on race day
behind the passenger seat will fill both of these requirements.
Safe
craft makes these kits for races.
N ASA approved with steel tubing and aluminum nozzles.
The cockpit nozzle should come behind the driver
little plumbing needed here.
A
small tube bender will avoid kinks in the line
drill into the chassis to mount them,
but I won't drill into the roll cage. Even the smallest holes can weaken it.
The nozzles are specific to their location.
The engine compartment gets a high volume one
and another high volume one for the fuel cell location.
While the cockpit nozzle puts out less than others
and the cable release needs to be within reach of the driver.
This system went in pretty quick for something that's so important.
These systems are supposed to be used in an emergency only and they're not designed to be tested,
but the temptation is just too great.
Ah, ok. Hold it. Do not try this at home.
Lou is a professionally trained
in
the, uh
times four.
That bottle puts out over 200 P si
and the blast with the three heads last almost 30 seconds.
The cockpit gets less because too much halon
can kill you.
It eliminates the oxygen, starving the flame
and saving your butt.
Now, I don't know what it costs to refill one of those bottles, but it was worth every penny of it
next on our agenda. Flooring and seats, but we can't do anything until we get our exhaust run because that could change all of our plans.
We put the front together to make the radiator mount and fender braces
and we're done with them for now,
our headers are gonna have to be custom made. But in order to do that, we need to know exactly where our collectors are gonna sit, we got our from Headman Hustler and this oval three inch exhaust tubing
we got from dr
gas. It's perfect for knocking the antennas off of those ants
behind all that. A set of flow master outlaw race mufflers. They don't claim to be neighborhood friendly.
Now, one amount that's a little bit higher than this. So this is one of the changes that we had talked about.
We'll probably make a new cross member after the whole system is in just in case
since we angle the mufflers up
three inch tubing will finish it off.
SCCA requires the exhaust to exit outside the car.
Friend
obviously has something in mind.
Mhm.
I went ahead and install my aluminum drive shaft from Denny's drive shaft service. This will allow me to start doing my flooring and repair that cross member
half an inch higher doesn't seem like much, but we went through a lot of trouble keeping the ground clearance at four inches
and that includes the exhaust
Brent doesn't say much, but his words screams at us.
Why didn't Shelby think of this?
We got a lot of rod to burn. But after the break, we're gonna mount a pump, we're gonna create a hump and
we're gonna measure my rump. So you may not want to miss that.
Uh huh.
That comment about my rump. Really piqued your interest. You bunch of sickos. Our exhaust is all welded up and we're quite pleased with it. Now, custom headers are in the works.
It all starts with these phalanges from Headman hustler. These head parts are square but these stubs turn it around
since my ride height is so low, my space is limited. So I'm going to take these first two tubes and run them down as far as I can and run them back. The second two will have a straighter shot to the collector because I'll have more room. At least that's the plan.
A box load of U bends will become your headers.
I'm starting with engine three quarter tubing,
stepping up to engine 78.
Hence the name step headers.
There's been several claims by reputable builders that this actually increases Utah.
Ok. It's worth a shot.
Everything is tacked up for now.
We'll finish him up on the table later.
No doubt, this takes time and it's a one man job. So Brent's moving on
says everything under the chassis in,
we can start the flooring 22 gauge is standard, but we're using 18 because we can afford the weight
and yes speed rolls do add strength
with the chassis pattern marked on the panel. We can drill some holes for the rosette wells that will hold it in
some well through primer will protect the raw metal.
It takes some fine tuning to set your welder low enough not to burn away the tin
four hours later. And this side is finally pieced together and as you can see by all the curves, it's never as easy as it looks.
I mark them up very well so I can weld them up for good one tube at a time.
Ti
takes longer, but it leaves a cleaner finish. Even a race car can still look good.
This is where I step them up in size.
Since the exhaust flows from small to big. There's no turbulence created
and don't try this without the collector on it.
Brent moved ahead on the flooring with both sides done. It's time for that hump. We talked about
another template,
some rolling
landing and patience.
This section is permanent
up here over the tranny. We'll make it removable for those fast transmission swaps at the track.
We'll get to that later in the show along with showing you how to measure and ordering a seat
and where to place it.
Now, I've got a long way to go on these headers. You could have someone make them for you, but they're going to need your car for at least a week. And not to mention when you get it back, you're gonna be nailed with a $1500 invoice. At least. I'll see it back in a bit
this week's muscle car flashback. The 68.5 Mercury Cougar
one great pony car deserves another. At least that was a thinking in 64 when the first Mustang debuted
the first day on the show
roof floor, over 21,000 found a new home.
A year later, Ford dealers were grinning from ear to ear with over 400,000 sales of the popular new ponies.
However, Lincoln Mercury dealers felt left out in the cold without a hit car of their own Ford Motor company listened and in 1966 that the Mercury Cougar added a bag. The captain
is out of the bag.
Media kits complete with Cougar burgers and animal crackers were sent to media outlets around the country
announcing the release of Mercury's first pony car.
A
mix of European elegance and American muscle. The Cougar was meant to be a sports car packed with class
Earl Donegan's Cougar is just as classy as the day it rolled off the assembly line.
This all original unrestored Merck has less than 20,000 original miles on it.
Yeah,
that's right. It's basically a brand new Cougar. It's not only fresh but rare.
A
lot of you guys may remember the Mercury Cyclone CJ. It came standard with a nasty 428 Co
Jet, but this is a Cougar Xr seven
and the 428 Cobra Jet was a mid year option in 68 that only 66 buyers of this luxury model shelled out an extra $420.
As a matter of fact, when broke down in the paint scheme and interior options,
this is a one of one car
and to top it all off the Xr seven badging was put on crooked at the factory.
Needless to say
Earl isn't fixing it
for question 40. This car is in great condition.
Uh, the car drives like it's new and it has plenty of power drives, good drive good on a highway.
Uh
Cougars ride better than
Mustangs do.
Mercury didn't skimp out on any details when they put these classics together, toggle switches,
check out these stylish controls, leather interior stereo, courtesy lights all over and a viewer friendly console that makes the interior just as the ad said,
a man's car,
check out this original gold paint complete with pinstripes.
The black satin markings and hood scoop are the only warning that one mean cobra is lurking under the hood,
hideaway, front headlights and sequential turn signals out back, light up this car real nice. Earl still has the factory wheels and check out the detail. He still has the original spare holding down the trunk.
The Cougar was meant to be a car for someone to purchase on their way up to a thunderbird.
But for the power performance and luxury,
this was a steal at its $4500 original sticker price
as you probably guessed it's worth a little bit more than that. Now, for all you mathematicians out there, the appreciation on this Merk is right around 1300%
but don't ask her for a price quote because this beauty is his wife's car and her 428. Ain't for sale.
If you ever pull up to a Cougar with a black satin stripe and scoop on the hood. Consider yourself warm.
This is one cat you won't wanna fool around with.
We're back so far today we installed a three headed halon
fire system,
played with it,
created the exhaust
and let Brett get hunger.
I haven't finished the headers yet because I wanted to play with these. Would you believe that my butt fits in here and I'll prove it to you later after we get the tranny tunnel made.
Remember we want it to be removable.
The main section will be three pieces, a flat top and two sides leaving plenty of room to work the gas pedal.
The passenger side is a little bit more confining
with some lightweight channels in place on both sides.
We can check the fit
and mark for the fastening
moroso sent us some of their quick fasteners,
a few holes and some rivets is all it takes
while Brett finishes covering a tranny, it's time for me to measure my fanny. No doubt, the best way to get custom racing seats that fit perfect is to have the maker measure your form. That's what we did for these innovative safety products will literally form this seat to your portly physique. And what you'll end up with is an aluminum work of art. The whole point of this is to keep your body from moving around so your butt, your
rib cage and your shoulders don't take a pounding under all those g forces. It also places the restraints at the right height.
So you don't compress your back. Now, if you can't fly across the country for a fitting,
there's some measurements that you can send in. Instead your height, your width, your weight
and girth, not to mention some more detailed ones is P's website will show you how to do that.
Sit on a flat surface with your feet dangling.
Take two objects, put one on each side, snuggling
that measurements for your hips.
Then you raise your right arm up, measure from the seat to the middle of your armpit.
That's your rib location.
Now stay put and measure from your trapezius muscle down in the seat again and that for your shoulder harness
next, stay with your arms out at about 30 degrees. Measure side to side about an inch and a half below your armpits.
That's
for your upper back.
Finally,
when you're back against the wall, measure from the edge of your chest
back to the wall,
that's for your man breast.
Now, once you get your seats where you put them in the car is very important. Our pedals can still go up and down or be repositioned forwards or backwards, same with our steering column. But the one thing we can't move
the dash,
they're gonna be strapped in this seat pretty tight and you have to be able to reach all your controls from here. I don't want to put it on my tranny tunnel because it's removable. I really don't want to do the halo because it's gonna be a mirror there. So my best option is still my dash. But look at my feet,
the engine is so far back, they're gonna be poking through the firewall.
The plan extend a portion of the dash back for all the controls.
So I'm moving the seat back just far enough. So my wrist lays on the wheel this way when I'm turning, I'm not reaching for it. Everything else is adjustable. This is where I need it to be.
The seat has to be secured in three places that way it won't move. If you come to a
sudden stop
first, we'll bolt it directly to the frame rail,
grade five bolts. Of course,
then we'll make a bracket tying the front all the way across again, bolting into the frame rails.
There's a bracket that mounts to the roll cage that also holds the headrest. Its location depends on how high the Hans device is,
but I need to be sitting there to do that and that would give us our third mounting point.
The tranny tunnel takes care of the hump. The seat satisfies my rump. The fire system's cool and just fun to play with. We're just a few short shows away from this roller skate being done next week. We're cutting up the lemons till then later.