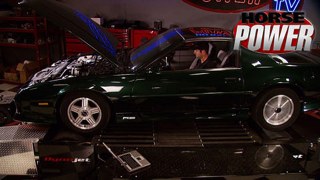
More '92 Chevy Camaro "Lean Green" Episodes

HorsePower Builds

Parts Used In This Episode

[none]
Royal Purple 10W-30 Break-in oil, Max-Tuff assembly lube.
[none]
Royal Purple Purple Ice coolant additive.
[none]
Royal Purple synthetic gear oil, Max-ATF, 5W-30 Synthetic motor oil.
Accel
Cap and rotor kit, external HEI coil, ignition module, spark plug wire set.
Actron
Sunpro vaccuum guage.
Airaid
AIRAID Intake System, Cool Air Dam System Type Fits: CHRYSLER 300 2005-2008 V8 5.7L, V8 6.1L, DODGE CHALLENGER 2008-2008 V8 6.1L, DODGE CHARGER 2006-2008 V8 5.7L, V8 6.1L, DODGE MAGNUM 2005-2008 V8 5.7L, V8 6.1L
B&M Racing
B&M Shift Improver Kit and Torque convertor lock-up switch for 700R4.
Blast-It-All
Media blaster equipment.
Denso
Denso Iridium tip spark plugs.
Edelbrock
Performer Plus hydraulic roller camshaft, hydraulic roller lifters, timing set, valve springs, lifter installation kit, pushrod set.
Edelbrock
PERFORMER T.B.I. (idle-5500 rpm) Designed for 1987-95 305/350 c.i.d. (5.0/5.7L) Chevy throttle body injected (T.B.I.) engines. #3704 is a stock replacement/street legal part for 305/350 V8s with factory T.B.I.; 1987-95.
Federal-Mogul Corporation
Sealed Power pistons and rings, A-series engine bearings, oil pump, pickup and driveshaft. Fel-Pro engine gaskets and seals.
Heartthrob Exhaust,Inc.
3" single/2-1/2" dual tail pipes w/transverse welded HVS muffler.
Hedman Hedders
HTC coated shorty style emissions legal headers.
Huntsville Engine and Performance
Bore and hone engine block, balance rotating assembly.
Hypertech
Thermo-Master computer chip, Thermostat, Cool fan switch.
Loctite
Threadlocking compound.
Meziere Enterprises,Inc.
Electric high flow water pump with idler pulley, wiring installation kit.
O'Reilly Auto Parts
Replacement fuel injectors for TBI.
Pattons Inc.
Patton's Inc. Nitrogen Generator System.
Spectre Performance
Carb hat, one standard, one low profile, 2- 90 degree, 2- 60 degree, 2- 45 degree, 2-straight, couplers, foam inserts, Quik-Fab universal kit.
Summit Racing
Comp Cams self aligning roller tip rocker arms.
Summit Racing
Milodon crankshaft scraper.
Summit Racing
Pioneer harmonic balancer.
Summit Racing
Summit electric 14" low profile electric fan.
Summit Racing
Yokohama Avid Touring 225/60R16.

Video Transcript

Ok.

Ok. Our 92 305 is on the hook and we're on the job with phase three of our lean Green Street machine project.

A few weeks ago, we challenged ourselves to pump up the power in this Camaro we bought for 4.5 grand and at the same time, make it even more fuel efficient.

In phase one, we reprogrammed the computer

changed all the fluids to synthetic,

gave it new plugs, wires and distributor components

and installed a cold air kit.

A week later in phase two, we upgraded the trans when the shift kit

added a converter lockup controller

plus installed headers and a larger cat back exhaust system.

Also, we upgraded the electric fan and water pump

with those two stages combined. We gained 20 horsepower and 40 ft pounds of torque.

At the same time, we improved mileage from 20 to 22 miles a gallon.

Now it's time to get a little more aggressive with our small block. See, we've got a few tricks up our sleeve that are going to make this thing run a lot more efficient, lose a little bit of weight and even make more horsepower

first, remove the valve covers and lift off the intake manifold

next to rockers

and then the push Ross can go

then with a pry bar loosen and remove the cylinder heads.

Now use a magnet to remove the lifters

then to lift the retainers.

Next, pull off the lower pulley and a harmonic balancer.

After that roll the motor over to drain out the coolant.

After removing the oil pan, the timing second come off

and we're ready to remove the cam and remain sealed

at this point. The oil pump and pick up can also go.

Now we need to turn the crank so we can stamp the rods for reference,

then remove the rod and piston assemblies,

the main caps

and finally the crane

is that fast enough.

Now, the guys at Huntsville engine and performance will do the three

valve job born hone the block and balance rotating assembly.

But first, I'm gonna put a contour edge on the crank chef's counterweights. As soon as I give it a bath.

This is something you wanna do before machining just in case you Nick. One of the journals

racing, the edges of the counter waste will reduce drag on the crank as it spins to the oil.

Also by smoothing this side only

it keeps oil away from the spinning mass of the rods.

Now it's ready to go to the machine shop along with the block and heads and that's where they'll turn down the mains and the rods to get it with inspect and then they'll go ahead and balance it.

They added some weight to compensate for what I took off the six counterweights before they balanced it.

Then they polish the journals

and while that was going on the machinist was boring the cylinder,

then he bolted up a torque plate to home the cylinders for cross hatch finish.

They also cut the valve seats for a three angle valve job

and always do your homework before you hire a machine shop to work on your block. Ask around and see who's got a good reputation.

The guys at Huntsville engine and performance, they great job as usual. So once we get everything loaded up, we'll head back to our shop and start putting it all together. So we'll see you after the break.

It's time to put our lean green Camaro's motor back together after a trip to the machine shop in

addition to the block and crank shaft. Those guys also resize our connecting rods. Now, here's where they took weight off the balancing tabs and they added new hardware. So these guys look good to go.

All right, we just got finished installing bearings in our block and this time we're gonna try something new from federal mogul. It's their new a series bearings that actually have silicone mixed in with the aluminum and tin. Now the silicone is there for wear resistance and believe it or not, the tough surface can actually polish the journals of the crank shaft.

Now, we can lube up the bearings and drop in the crank shaft

before we put our main caps on. I'm gonna show you all how to check your clearances without all those expensive tools. This one's called plastic gauge and you can pick it up at any auto parts store for about a buck

lube up the journal and place about one inch of string on it,

then drop on the cap and tor

it down,

then remove the cap and placed the paper gauge next to the flattened string.

It should be between two thousands, which is the green bar

and three thousands, which is the white bar.

We're in the ballpark.

Now, if your plastic gauge is crushed too much, we don't have enough clearance and we'd end up with a bearing failure. Now, to fix that, we would have to take the crank shaft back to the machine shop so they could polish it for more clearances.

Now, if it wasn't crushed enough, we have too much clearance would end up with low oil pressure.

If that was the case, we would use a set of X bearings which are thicker

with the main caps in place and oil on the bolts,

we can torque him to 70 ft pounds.

The camshaft were sliding in this block as a performer, plus from Edelbrock. Now it's a good choice for a daily driver motor because of its smooth idling and low to mid range torque. The duration at 50,000 is 212 on the intake 222 on the exhaust.

And with the camshaft in place, we can install the factory cam plate and fasteners using some lock tight.

Now it goes without saying any time you swap out a camshaft, it's smart to go ahead and replace the timing set. Now, this one's a double roller that we got from Metal Brock and we're gonna install it straight up.

There's no need to splurge for new timing cover since the old ones just fine. As long as you use new gaskets to keep everything sealed up.

All right, to finish the rotating assembly, we fitted our resized rods with a set of federal mogul bearings and the lighter flat top pistons came from Speed Pro. Now these things are gonna fit a little tighter than normal and that's because of a special aluminum alloy they use, it doesn't let the piston expand as much as others. Now, they come with rib skirts and that's for better oil retention. And as soon as we install the rings, we can drop them into the block.

Remember to oil, the piston pins,

the cylinder walls,

the pistons and rings themselves

and put a family lube on the rod bearings.

Now we install a gasket with some silicone onto the rear main housing that we clean with our blast. It all machine.

We opted for a low budget upgrade for the Camaro oiling system. A basic oe style pup pick up and drive

again from federal mogul

before final installation. However, we're gonna check for clearance with the oil pan in place.

Then we can weld the pick up to the pump.

Well, next he ain't pretty, but he still works well. I'm not talking about buddy or Mike. I'm talking about the stock oil pan, which we're gonna reuse after a little modification. Now, this is one of the cheapest ways to free up horsepower. It's an oil crank scraper. It removes oil from the crank and rides and frees up a little extra horsepower. Here's how it goes on. First little silicone.

Then we put in place and

it should be fitted about 45 thousands from the rods and

35 thousands from the counterweights. Now, a new gasket goes in place. Thanks, buddy. And by the way, I think you're pretty

g thanks.

We're also gonna reuse the stock GM heads that we painted up a little bit along with new gaskets and hardware. Plus, since it's always good to use matching components, we're gonna swap springs for these Edelbrock. Sure seats to get the most out of that cam we install.

Now, it might be a lot easier to do all that work right here on the bench. But tell you what, we're gonna do it with the heads on the block just like you do it at home. That is after we get these things bolted up and take a short break.

Tell you what I like the way these fell pro boats come with threads

that already own them. Yeah. It makes life a lot simpler. Yeah, it's quicker too.

Now, as promised, we're gonna show you how to swap springs in your heads with them bolted to the block and,

hey, to make things fair

heads, I show them tails. You show them. Ok.

You ready? Yep. All right.

Oops,

kind of looks like tails from here.

First. Make sure you cover the valley with a rag

and the intake porch with tape to prevent valve blocks from falling into the block. Next to keep the valves in the head.

You need to run air into each cylinder using a compression gauge hose and your air compressor hose. Then install this handheld spring compressor and with the spring fully compressed,

you can remove the locks and the old spring

finally

use the compressor to install the new spring along with the locks,

give the valves a light tap to make sure the locks are in place.

After that,

we can install our new Edelbrock hydraulic roller lifters.

Then the lifter retainers,

uh,

the valley pan

with lube in place. We can install the push rods

and the roller rockers that we ordered from summit.

These are 1.52

that will give us a little more lift than our stock. 1.5.

With that finish

a little black Pupa color paint.

We'll dress things up a bit before we move on.

All right, we could get away with reusing the stock intake manifold, but there's a little bit of a downfall. The intake runners actually split off to two cylinders. So we're gonna use this Edelbrock performer that's a little taller for more volume and check out these runners. They go to individual cylinders. So that's gonna give us more horsepower and torque.

If the motor you're rebuilding has a carburetor on it, you want to take it apart, clean it and replace a few of the components. Same thing applies with our TB I unit, it got a good bath and we're going to replace the injectors. Now, we got our stock replacements from the o'reilly parts store down the road and it comes with all the gaskets and seals that we might need.

So first we remove the cover

and pull out the old injectors.

See the little pin,

the new injector pen slides into that relief.

After applying lube to the new O rings, the injector can go in place.

Then with the new gaskets in place,

we can put the cover back on

and with the spacer in place, we can bolt the TB I onto our new intake manifold.

There's one final component for this engine. This rubber ring between the stock balancer halves gets brittle over time and

with this outer ring could actually come loose. So this lighter, smaller replacement from pioneer could be pretty cheap insurance against engine damage.

Well, now comes the least exciting part of this rebuild, uh reinstalling the factory accessories

distributor then dropping the motor in making all the connections,

checking everything

you got time for all that. Of course not.

You wanna move on to the fun stuff like firing this thing up and seeing how much power we made right? We can do that after I finish filling up the motor with this breaking oil from Royal Purple and buddy installs those Denz

iridium plus plugs. Oh, and

tires.

Yeah, we got tires wider. Tires are better for handling. But since we're going leaning green, these Yokohama Advent Touring, we got from some that are gonna work better for us. See they're narrower. So there's less of a contact patch on the road which translates to better fuel economy. Now we're gonna use our patents, nitrogen tank to fill these things up. Now, nitrogen doesn't expand or contract as much as air due to temperature changes. So that's gonna be good for up to 3% better fuel economy and a lot better treadwear.

All right, we just got done driving the car about 400 miles to break in the new engine. And we've also installed the sun pro vacuum gauge on the A pillar. Now, what that's gonna do is let us know when the engines under a load and it's using the most fuel. Now we're gonna drive it around with all the new components to see how they do on fuel mileage. So, let's fill it up.

Hey, gally, I think we've got a reason to celebrate not only better fuel economy, but on our final run, 100 78 horsepower 259 ft pounds of torque. Now, let's see where we've come since day one of this project

from a baseline of 100 and 44 horsepower, 224 ft pounds of torque and 20.3 miles a gallon

to this,

an improvement of 34 horses, 35 ft pounds of torque and almost three miles a gallon.

Well, it's so long to the lean green street machine,

but we'll be right back.

Hey, buddy, will you bring me that cam card? Ok.

All right. The cam shaft is often considered the brains of any engine. So you don't wanna cause it or yourself any headaches when it comes to excessive wear on the cam lobes. Now, it all starts by getting the proper valve

fight and spring pressures. Now, it's not all that hard to do and it won't cost you much of anything but time.

First, let's get acquainted with the card that comes with your cam shaft. Now, it has the sp

for the spring requirements in this box. This first number is for the springs recommended for this cam shaft. These numbers are the open and closed spring rates and they're measured in pounds. This number here is the installed spring heights and they're measured in inches.

All right. To show you how to measure valve and spring heights. We're going to remove one spring and a valve stem seal from this Edel Brock aluminum head

using a spring compressor compress the spring,

remove the lox,

then the spring.

Ok. Now you install your height mic

over the valve

store, your retainer.

Yeah.

And your locks

pull up on the retainer, hold in the height mic

and unscrew it to expand it.

Yeah,

make it tight.

And that's what we come up with 1.845. And that's our install height.

If you don't have a height mic, a veneer caliber will work just as well. It will get you in the ballpark, just basically put it on the head, bring it to the bottom of the retainer

and we got 1.847.

Here's a little tip, put some tape on the ruler so you can reference it a lot quicker because you got 16 valves you gotta check.

So we'll put our spring in here,

pull it on down to our reference mark.

As you can see, we only got 100 pounds and we should have 100 and 30.

This is where the shims come in handy. They come in three different sizes. You got a 15, a

30

a 60,000 is thick.

So we'll put a 60 in there

and see what kind of pressure we get,

bring you back down to the mark again.

We've got 120.

What we're shooting for is 130.

That's it. It takes 2 60,000 shims. So they go under the spring and then assemble the head.

There is a certain way shims go,

the serrations go down

or where it says this side up

on the black ones. It doesn't matter which side goes down,

put on your

chems,

put on your seal

spring

retainer

and the locks

and then you want to give it a little bit of a tap

and make sure these locks don't come flying off

and done.

This procedure will take you a little bit of time to do, but it not only saves you money, but it also saves your c

from excessive wear and keeps your valves from floating at high RPM s

what's hotter than a 5.7 L hemi

under your Mo Pars hood. Well, how about one that's equipped with an air, a quick fit system? Now, this thing features a cool air dam that seals to the underside of your hood to keep out that unwanted engine heat.

It also comes with a reusable high flow air filter and this modular intake tube that resists heat better than steel or aluminum. Now, these kits are available for 6.1 L

hemi NV sixes as well as far as the price, they start out about 100 and 70 bucks next week. We're gonna get started on a project that's been a long time coming. A couple keywords, Mustang, and Turbo.

I know you won't want to miss it. So make sure you join us for another awesome episode of Horsepower.
Show Full Transcript